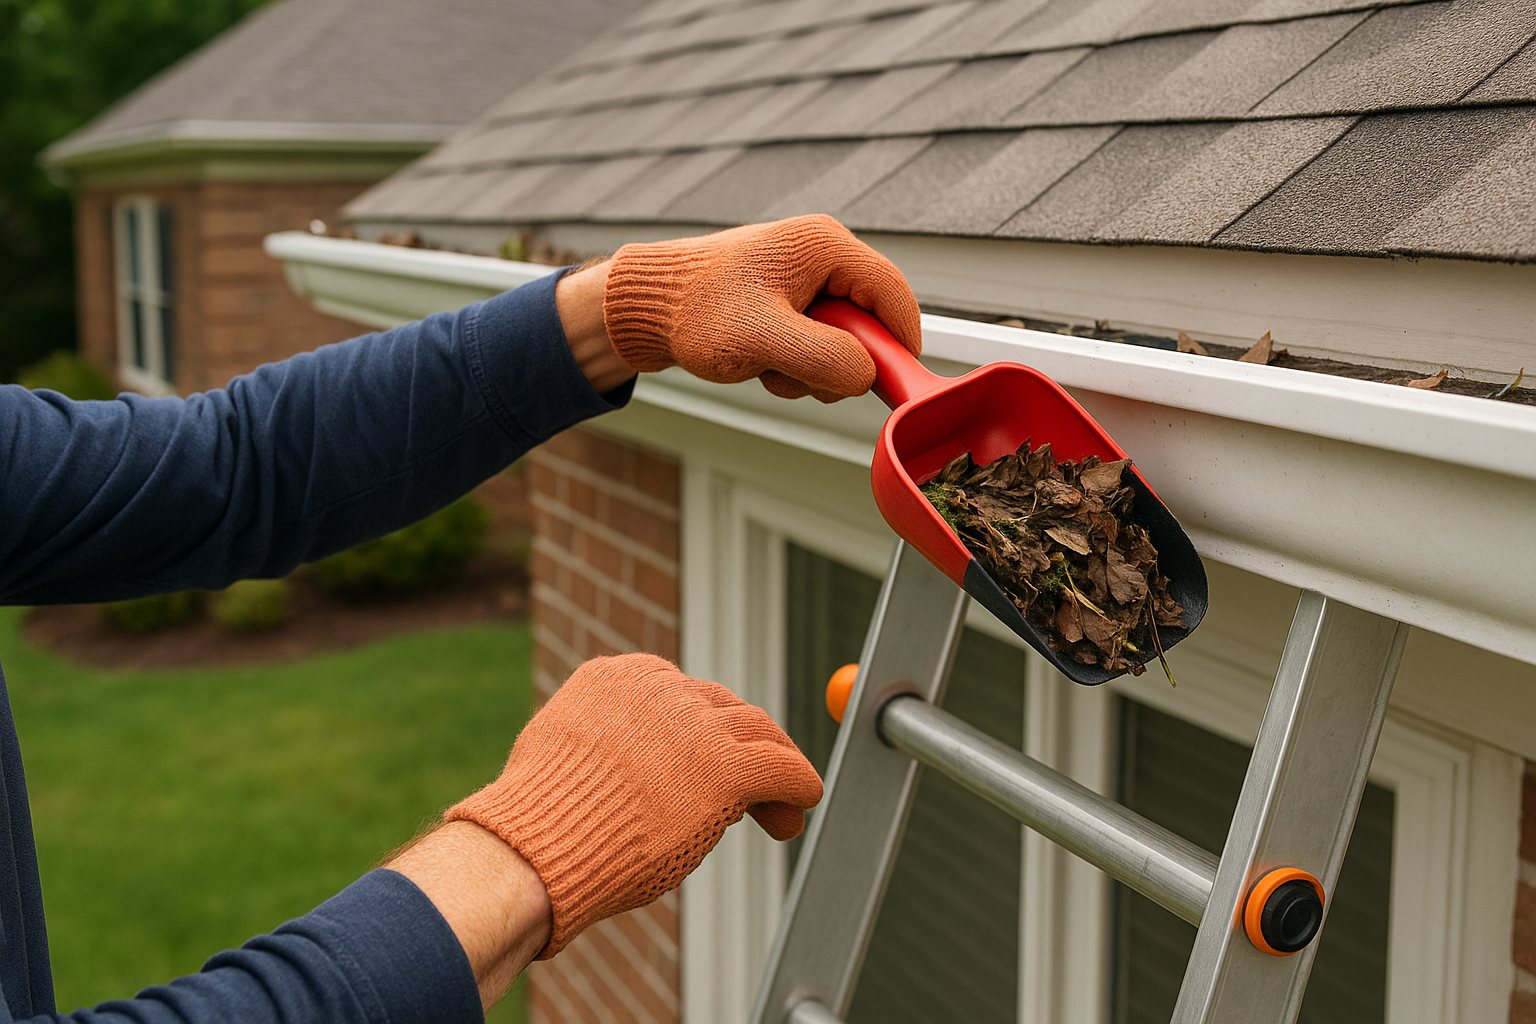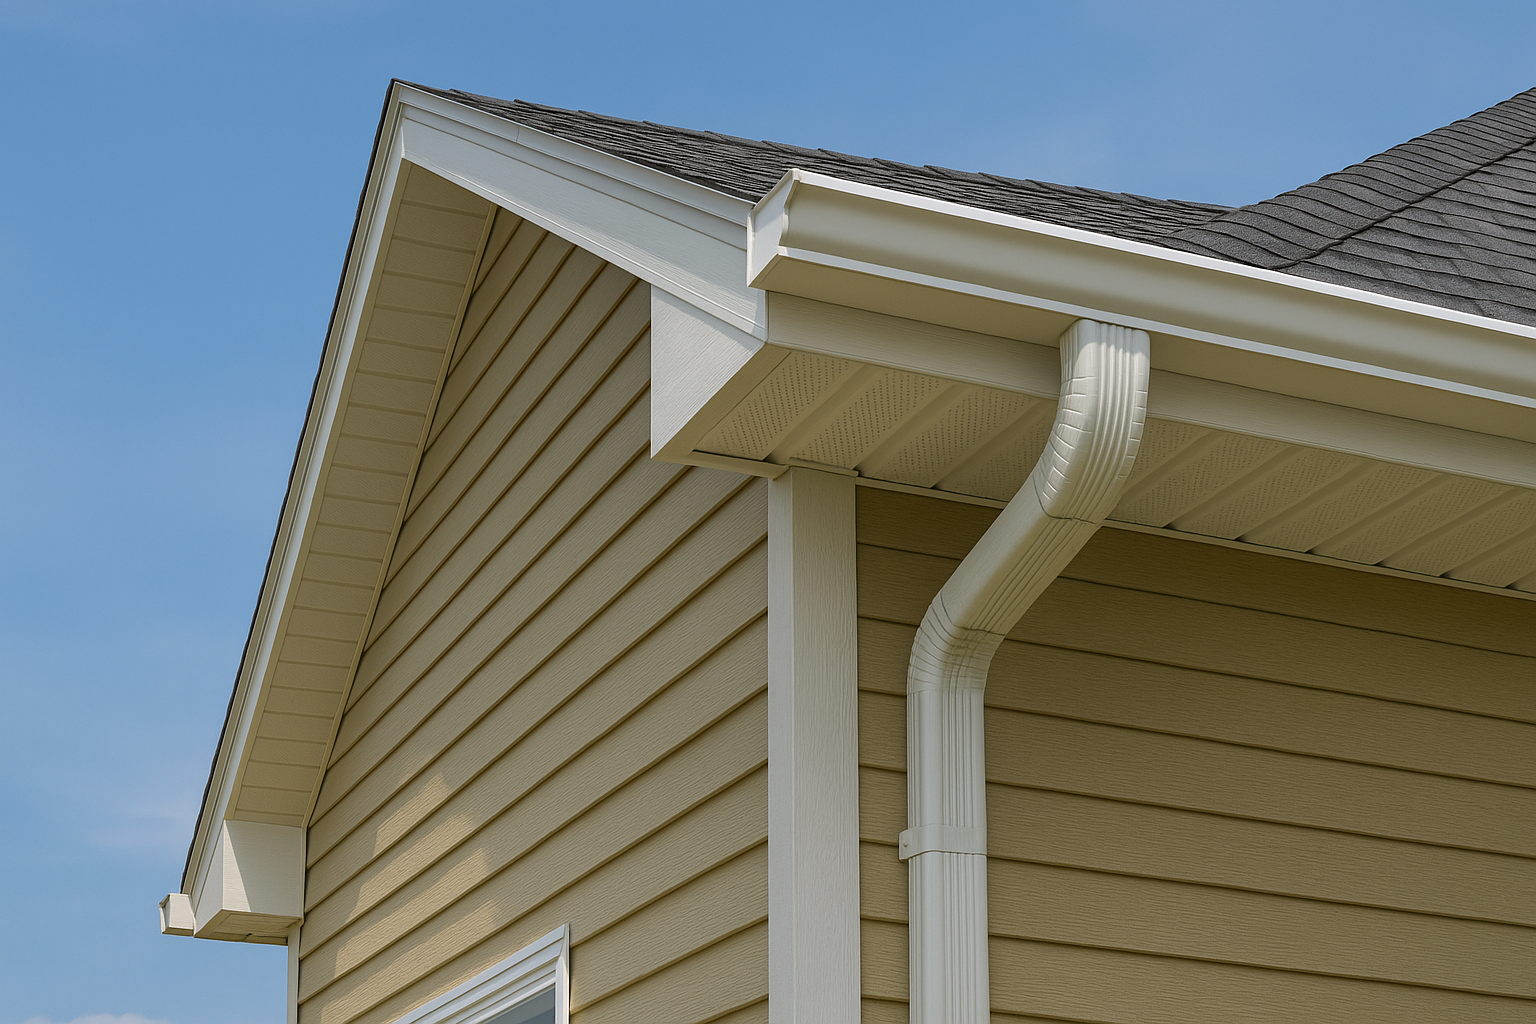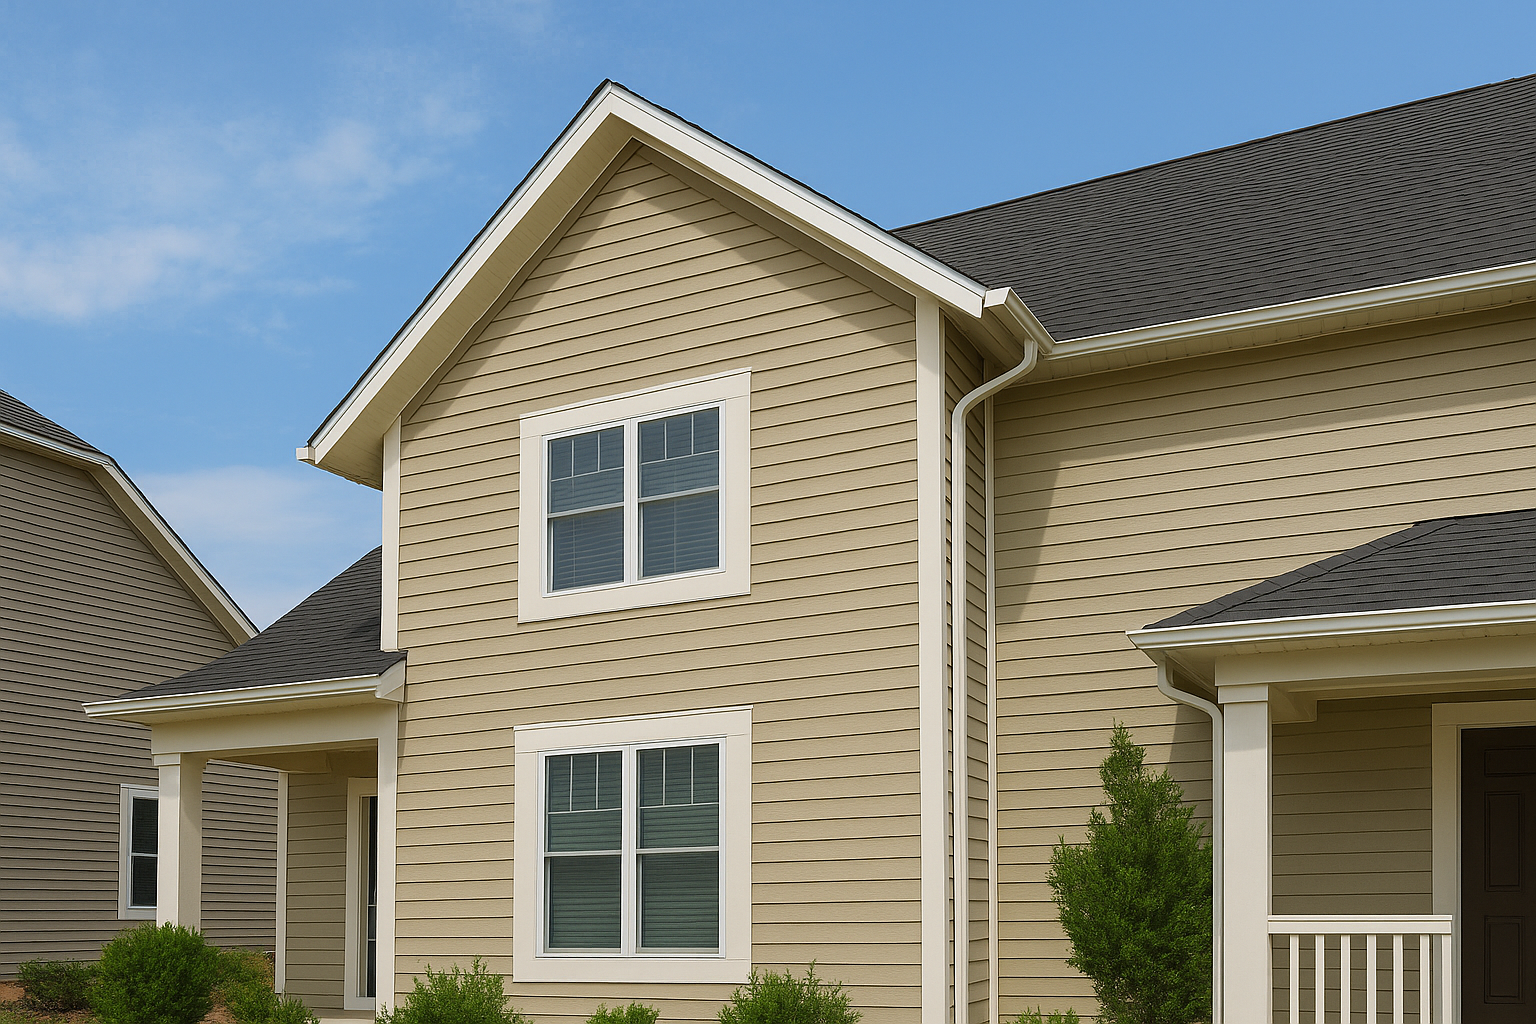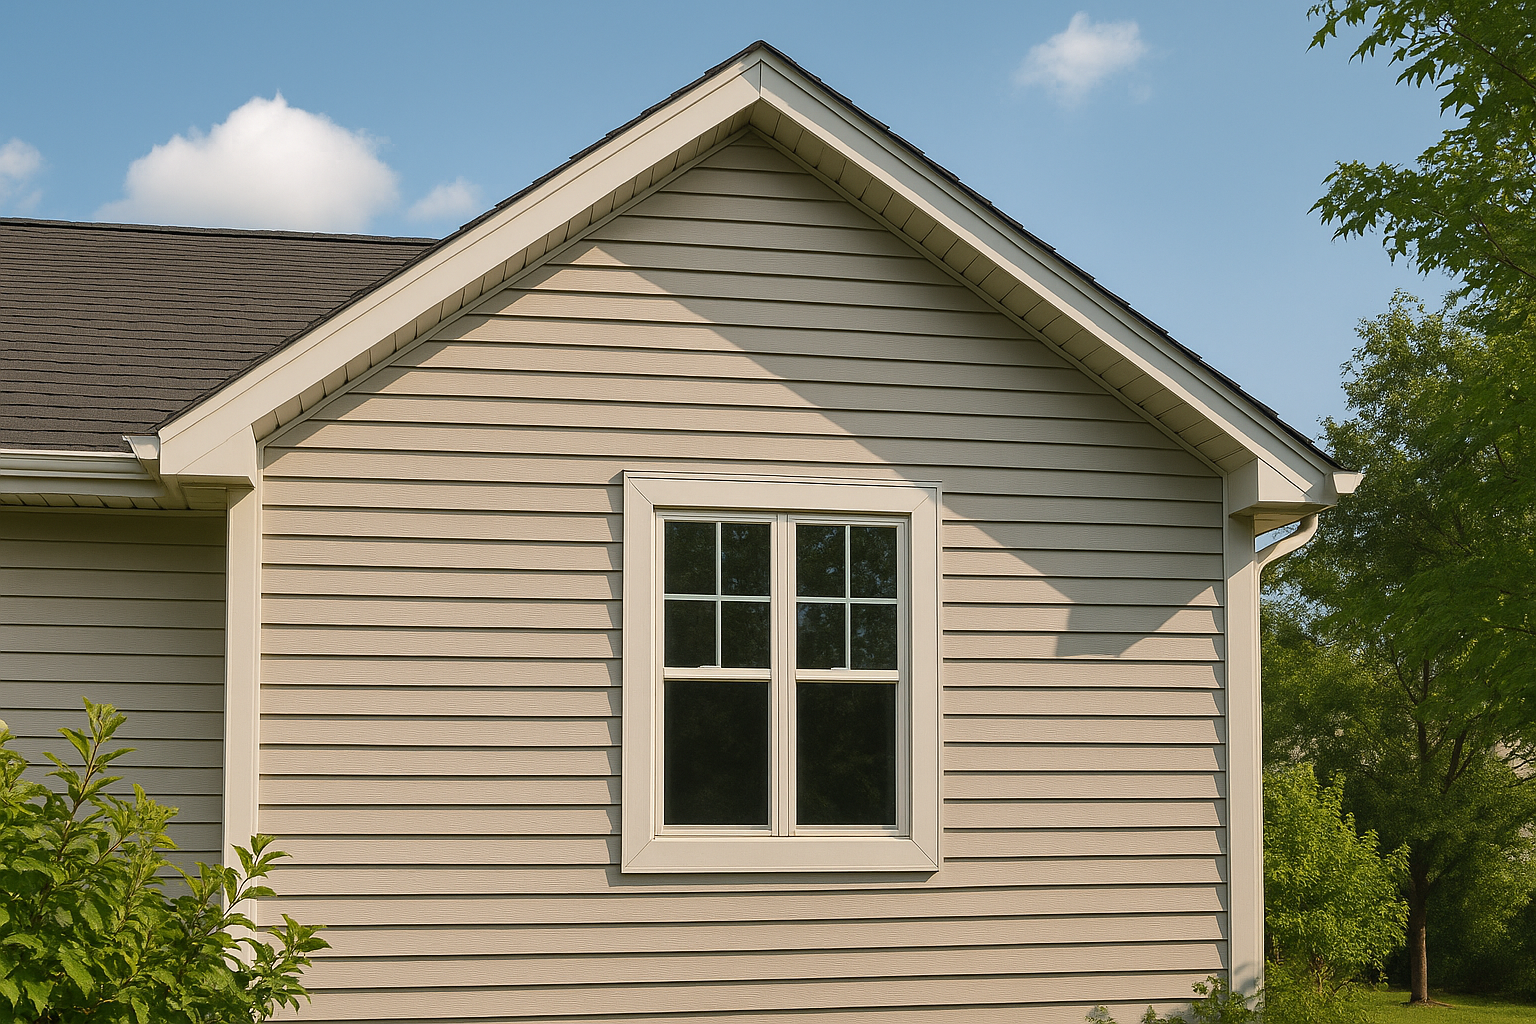
Welcome to the Referred Restoration blog, your source for Minnesota exterior restoration tips covering roofing, siding, gutters, and windows. Whether you own a home in Rogers, Cottage Grove, or anywhere along the Rogers-to-St. Francis corridor, our local team shares practical advice to help you protect your investment through every Minnesota season.

From understanding storm damage signs to choosing the right siding for freeze-thaw cycles, each article is written with the Minnesota homeowner in mind. Browse our latest posts below, or visit our roofing, siding, gutter, and window service pages for detailed information on every exterior system that protects your home.

Schedule a Free Inspection to get personalized recommendations from Referred Restoration's experienced team.

Minnesota Exterior Restoration Tips | Referred Restoration Blog

Blog

  • Roof Insulation 101: What Homeowners Should Know

    Roof Insulation 101: What Homeowners Should Know

    You wouldn’t head out into a Minnesota blizzard without a proper winter coat, and your house shouldn’t either. Think of roof insulation as the ultimate, all-season jacket for your home. In the winter, it traps precious warmth inside, keeping your family cozy and your furnace from working overtime. In the summer, it reflects the sun’s intense heat, preventing your upper floors from overheating. But not all coats are created equal. This article will help you choose the right fit for your home, explaining the different materials and why a professional installation is key to year-round comfort.

    Key Takeaways

    • Think beyond winter warmth: Effective roof insulation works just as hard during the summer to block heat from your attic. This dual-purpose function leads to more consistent indoor temperatures and better energy efficiency throughout the year, not just during cold months.
    • Choose the right material for the job: There is no one-size-fits-all solution for insulation. The best choice, whether it’s spray foam, fiberglass, or another option, depends on your home’s structure and your goals. It’s also crucial to select the correct R-value for Minnesota’s climate, generally between R-38 and R-49 for attics, to ensure proper performance.
    • Prioritize a professional installation: The effectiveness of your insulation is determined by the quality of the installation, not just the material itself. Crucial steps like sealing air leaks before insulating and ensuring proper attic ventilation are what make the system work. Partnering with a professional ensures these details are not overlooked, maximizing your home’s comfort and efficiency.

    What Is Roof Insulation and Why Is It Important?

    Think of roof insulation as your home’s secret weapon for comfort and efficiency. It’s a material installed in your attic or roof structure that slows down the movement of heat. In the summer, it works to keep the sun’s scorching heat out of your living spaces. During our chilly Minnesota winters, it does the opposite, keeping your precious warm air inside where it belongs. Without it, you’re essentially letting all that conditioned air escape right through the top of your house.

    Proper insulation is a critical component of a high-performing roofing system. When your roof is well-insulated, your HVAC system doesn’t have to work nearly as hard to maintain a comfortable temperature. This translates directly to lower energy bills and a more consistent, pleasant environment throughout your home, no matter the season. Beyond just comfort, good insulation also protects your home’s structure by helping to prevent moisture buildup and the formation of ice dams, which can cause serious damage over time. It’s one of the most effective ways to make your home more energy-efficient and comfortable for your family year-round.

    How Does Roof Insulation Work?

    Insulation works by creating a thermal barrier that resists the flow of heat. It’s made of materials that trap air in tiny pockets, which makes it difficult for heat to pass through. Think of it like the thermos that keeps your coffee hot for hours; the same principle applies to your home.

    The effectiveness of insulation is measured by its R-value. A higher R-value indicates better resistance to heat flow, meaning the material is a more effective insulator. Different materials have different R-values, and the climate you live in helps determine what R-value you need for optimal performance. For us here in Minnesota, a higher R-value is essential for keeping our homes cozy through the winter.

    Signs Your Home Needs an Insulation Upgrade

    Not sure if your insulation is doing its job? Your home might be giving you clues. One of the most obvious signs is a sudden or steady spike in your energy bills. If your furnace or air conditioner seems to be running constantly, poor insulation could be the culprit.

    Other telltale signs include rooms that are difficult to keep warm in the winter or cool in the summer, and temperature differences between your home’s upper and lower levels. You might also notice moisture in your attic or the formation of ice dams on your roof during the winter. These issues often point to inadequate or improperly installed insulation. There are several types of roof insulation, and an expert can help you determine if an upgrade is right for you.

    Your Roof Insulation Options

    Walking through the insulation aisle can feel overwhelming, but it doesn’t have to be. Understanding the main types of roof insulation is the first step toward making a smart choice for your home. Each option has its own strengths, and the best one for you depends on your attic’s design, your home-improvement goals, and your budget. Let’s look at the most common materials you’ll encounter.

    Fiberglass Batts

    You’ve probably seen this type of insulation before; it’s the familiar pink or yellow fluffy material that comes in large rolls. Fiberglass batts are one of the most common and affordable choices for a reason. They are designed to fit snugly between the joists in your attic floor, making installation straightforward in many homes. While they don’t create a perfect air seal on their own, they offer a great balance of thermal resistance and value. For many homeowners, fiberglass is a reliable and effective starting point for improving their home’s energy efficiency and is a key part of a healthy roofing system.

    Rigid Foam Boards

    Rigid foam boards are dense, strong sheets of insulation that offer a high R-value without taking up a lot of space. Unlike fiberglass batts, these boards can form a continuous thermal barrier, covering joists and studs to stop heat from finding sneaky ways to escape. This makes them an excellent choice for various roof assemblies, especially in spaces with limited height. Because they are so effective at stopping heat transfer, they can significantly improve your home’s overall energy performance. You can learn more about the technical specifications of these continuous thermal barriers from building material manufacturers.

    Spray Foam Insulation

    If you want the ultimate seal, spray foam insulation is the top contender. Applied as a liquid, it expands to fill every single crack and crevice, creating a powerful air and moisture barrier. This is particularly useful for creating what’s known as a “hot roof” or an unvented, conditioned attic space. By completely sealing the attic from the outside, spray foam prevents air leaks better than any other material. This superior performance makes it a premium choice, but for attics with complex shapes or for homeowners wanting maximum efficiency, it’s often the best solution. The science behind spray foam shows just how effective it is at creating an airtight seal.

    Radiant Barriers

    Radiant barriers work a bit differently from traditional insulation. Instead of slowing down heat transfer, they reflect it. Imagine a giant piece of aluminum foil installed under your roof deck. During the summer, it reflects the sun’s intense radiant heat away from your attic, keeping it from seeping into your living space. This can make a huge difference in your home’s comfort and can help lower your cooling bills. While they are most effective in warmer climates, they can still provide a noticeable benefit during Minnesota’s hot and humid summers, working alongside your other energy-efficient home features.

    Cellulose Insulation

    For the eco-conscious homeowner, cellulose is an attractive option. This insulation is made primarily from recycled paper products, like newspaper, which is then treated with fire retardants. It’s a loose-fill material that is blown into the attic, allowing it to settle in and around pipes, wiring, and other obstructions for a seamless fit. Beyond its green credentials, cellulose offers excellent thermal performance and has the added benefit of being a great soundproofer. It’s a sustainable choice that doesn’t compromise on keeping your home comfortable. Many homeowners appreciate it as a sustainable choice for its performance and recycled content.

    Decoding R-Value: What It Is and Why It Matters

    When you start looking at insulation, you’ll see the term “R-value” everywhere. So, what is it? Simply put, R-value is a grade that tells you how well an insulation material can resist heat flow. Think of it like the tog rating on a duvet; a higher number means it’s better at keeping you warm. A higher R-value means the insulation is more effective at stopping heat from moving, which is exactly what you want. It keeps your warm, conditioned air inside during our chilly Minnesota winters and keeps the sweltering summer heat out.

    Understanding R-value is the first step to making a smart choice for your home. The right insulation helps maintain a comfortable temperature year-round and can make a real difference in your energy bills. It’s not just about piling on the thickest material you can find. It’s about choosing the right material with the right R-value for the right part of your home. A professional can help you figure out the perfect balance for your attic and roofing system, ensuring you get the performance you need for your home’s unique setup.

    R-Values for Different Insulation Types

    Not all insulation is created equal, and different materials offer different R-values. For example, spray foam insulation is a powerhouse, with an R-value between 3.6 and 5.7 per inch. Rigid foam boards are also top performers, coming in at an R-value of 5 to 5.6. The more common fiberglass batt insulation typically provides an R-value of 3.14 to 4.3 per inch. The amount of insulation your home needs depends heavily on where you live. As you can imagine, homes in colder climates require much higher R-values to stay comfortable and efficient.

    Recommended R-Values for Minnesota Homes

    For us here in Minnesota, having the right R-value isn’t just a suggestion; it’s essential for getting through the seasons comfortably. Building codes and energy experts provide clear guidelines to help. For ceilings and attics in our area, the recommended R-value is typically between R-38 and R-49. In the colder, northern parts of the state, that recommendation can go as high as R-60 to handle the frigid temperatures. Getting this right ensures your home is properly equipped to handle everything from a polar vortex to a summer heatwave, keeping your indoor space consistently comfortable.

    Weighing the Pros and Cons of Insulation Materials

    Choosing the right insulation for your roof feels a lot like picking a new appliance. You have to balance performance, your budget, and what makes the most sense for your home’s specific layout. Each material comes with its own set of strengths and weaknesses, and what works perfectly for one attic might not be the best fit for another.

    Understanding these differences is the first step toward making a smart decision for your home’s comfort and energy efficiency. Let’s walk through the most common options so you can see how they stack up. From the familiar pink fiberglass batts to modern spray foam, here’s a straightforward look at what each type of insulation brings to the table.

    Fiberglass Batts: The Go-To for Affordability

    If you’ve ever peeked into an attic, you’ve probably seen fiberglass batts. These fluffy pink or yellow blankets are one of the most common insulation materials for a reason: they are an affordable and straightforward way to insulate standard spaces like wall cavities and attic floors. Because they are so widely used, installation is typically quick and simple for a professional.

    The main drawback is that batts don’t handle irregularities well. In areas with lots of wiring, pipes, or non-standard framing, it’s difficult to cut them for a perfect fit, which can leave gaps for air to leak through. While they are a solid budget-friendly choice for many homes, they are less effective at creating a complete air seal compared to other materials.

    Rigid Foam Boards: The High-Performance Option

    Think of rigid foam boards as the next level up in insulation performance. These firm panels offer exceptional thermal resistance for their thickness, making them a fantastic choice for creating a continuous insulation barrier. You’ll often see them used on exterior walls under new siding or on low-slope roofs. They are excellent at stopping thermal bridging, which is when heat transfers through the wooden studs in your walls.

    This high performance does come with a higher initial investment than fiberglass. However, the long-term energy savings can make them a worthwhile upgrade, especially in a climate like Minnesota’s. An expert can help you determine if commercial-grade insulation options like these are the right fit for your home’s specific needs.

    Spray Foam: The Superior Sealant

    When it comes to creating an airtight seal, spray foam insulation is in a class of its own. This liquid foam is sprayed into cavities, where it expands to fill every single crack and crevice before hardening. This process creates a seamless barrier that is incredibly effective at stopping air leaks, which is a major source of energy loss in many homes.

    Because it offers such a superior seal, spray foam is an ideal choice for complex spaces, rim joists, and unvented attics. While it is a premium option, its outstanding performance in both insulating and air sealing can significantly improve home comfort and reduce utility bills. This makes it a top-tier choice for homeowners looking for maximum efficiency.

    Radiant Barriers: Your Defense Against Summer Heat

    Unlike other insulation types that slow heat transfer, a radiant barrier works by reflecting heat away. It’s essentially a layer of reflective material, like aluminum foil, that gets installed under your roof deck. In the summer, it bounces the sun’s radiant heat back outside before it can warm up your attic and the rest of your house.

    A radiant barrier is most effective in sunnier climates but can still help reduce cooling demands during Minnesota’s humid summers. It’s important to know that it doesn’t provide an R-value on its own, so it’s not a replacement for traditional roof insulation. Instead, it’s a great teammate, working alongside other materials to keep your home comfortable year-round.

    Cellulose: The Eco-Conscious Choice

    For homeowners who prioritize sustainability, cellulose is an excellent option. Made primarily from recycled paper products and treated with a fire retardant, this material gives new life to old newspapers and cardboard. It’s typically blown into place, allowing it to fill in around pipes and wiring more effectively than batts. It also provides great soundproofing qualities, which can be a nice bonus.

    One thing to keep in mind is that if it’s not installed correctly, cellulose can settle over time, creating gaps at the top of wall cavities and reducing its effectiveness. That’s why a professional installation is so important. When done right, it’s a fantastic, eco-friendly way to keep your home cozy.

    The Big Wins of a Well-Insulated Roof

    Investing in proper roof insulation pays off in more ways than one. It’s a crucial part of your home’s overall health, comfort, and efficiency. Think of it as a protective blanket for your house, working year-round to keep things stable and secure. From lower energy bills to a longer-lasting roof, the advantages are clear. Let’s look at the biggest benefits you can expect when your home is properly insulated.

    Improve Energy Efficiency

    One of the most significant perks of good insulation is how it affects your energy consumption. Proper roof insulation acts as a thermal barrier, slowing down heat transfer. In the winter, it keeps the warm air your furnace produces from escaping through the attic. In the summer, it blocks the sun’s intense heat from baking your upper floors. This means your HVAC system doesn’t have to work nearly as hard to maintain a comfortable temperature, which you’ll notice in your monthly utility statements. It’s a smart way to make your home more energy-efficient and sustainable.

    Enjoy Year-Round Home Comfort

    Do you find your upstairs rooms are always a few degrees warmer than the rest of the house in July? Or that certain rooms feel drafty in January? Proper insulation helps solve these issues by creating consistent temperatures throughout your home. By preventing heat from moving where it shouldn’t, you can finally enjoy every room in your house, all year long. A well-insulated attic is a key component of a complete roofing system that delivers true, reliable comfort, making your home the cozy retreat it’s meant to be.

    Control Moisture and Improve Air Quality

    Insulation does more than just manage temperatures; it also plays a role in controlling moisture. When warm, humid air hits a cold surface (like your roof deck in the winter), condensation can form. This moisture can lead to mold, mildew, and even rot in your attic’s structure, compromising your home’s air quality. By keeping the surface temperatures in your attic more stable, insulation reduces the risk of condensation. This helps protect your family from airborne allergens and preserves the structural integrity of your home for years to come.

    Extend the Life of Your Roof

    Your roof is constantly exposed to the elements, from freezing Minnesota winters to hot, humid summers. These big temperature swings cause roofing materials to expand and contract, which can lead to premature wear, cracks, and leaks. Insulation helps protect your roof from these extremes by moderating the temperature of the roof deck. This reduces stress on your shingles and other components, helping your entire roofing system last longer. It’s a proactive step that can help you avoid unexpected repairs and get the full lifespan out of your roof.

    Choosing the Right Insulation for Minnesota’s Climate

    Living in Minnesota means dealing with some serious weather extremes. From frigid, snowy winters to surprisingly hot and humid summers, our homes have to work hard to keep us comfortable. The right roof insulation is your first line of defense, acting as a crucial barrier between your living space and the elements. Choosing the correct type and amount of insulation isn’t just about following guidelines; it’s about creating a more comfortable, efficient, and durable home specifically for our unique climate. Let’s look at what that means for your roof.

    Preparing for Harsh Winters and Humid Summers

    Good roof insulation is a year-round workhorse. In the winter, it keeps precious heat inside your home, preventing it from escaping through the attic. During our hot summers, it does the opposite, blocking the sun’s heat from penetrating your roof and turning your upper floors into a sauna. This thermal resistance keeps the temperature throughout your home more stable and comfortable. A properly insulated roofing system means your furnace and air conditioner don’t have to run constantly, which helps manage your energy consumption and keeps your home feeling pleasant no matter the season.

    How to Manage Ice Dams and Moisture

    If you’ve lived here long, you’re familiar with ice dams. These thick ridges of ice build up on the eaves, causing meltwater to back up under your shingles and leak into your home. Proper insulation helps prevent them by keeping your attic cool and your roof surface cold, so snow melts evenly instead of refreezing at the edges. Just as important is managing moisture. As warm, moist air from your home rises, it can condense on cold surfaces in the attic, leading to mold or rot. A professionally installed vapor barrier works with your insulation to stop this moisture transfer, protecting your home’s structure and air quality.

    Why Ventilation and Insulation Work Together

    Insulation and ventilation are a team; you can’t have one work effectively without the other. While insulation slows the transfer of heat, ventilation allows air to circulate through the attic, removing excess heat and moisture that gets trapped. In a standard Minnesota home, the most effective ventilation setup uses a combination of continuous ridge vents at the roof peak and soffit vents under the eaves. This design creates a natural convection cycle: cooler outside air enters through the soffit vents, pushes warm, moisture-laden air upward, and exhausts it through the ridge vent. This constant airflow keeps the underside of the roof deck close to the outside temperature, which is critical during Minnesota’s freeze-thaw cycles when attic moisture can condense and contribute to ice dam formation.

    The type of insulation you choose affects how ventilation should be configured. With fiberglass batt insulation, maintaining an unobstructed airflow pathway from soffit to ridge is essential — baffles should be installed at the eaves to prevent the batts from blocking the vents. With spray foam insulation (either open-cell or closed-cell), the attic is often conditioned as part of the home’s thermal envelope, which changes the ventilation requirements entirely. In a spray-foam-sealed attic, the insulation and air barrier are one and the same, so ridge-and-soffit ventilation may be reduced or rerouted. A professional inspection can determine which configuration your home needs.

    A quick way to check whether your attic ventilation is working properly is to look for signs of imbalance: frost or moisture on the underside of the roof deck in winter, excessive heat buildup in the attic on a summer afternoon, or musty odors that suggest trapped humidity. Any of these signs point to a ventilation-insulation mismatch that a qualified contractor can assess during a free roof inspection.

    Don’t Fall for These Roof Insulation Myths

    When it comes to home improvement, a little misinformation can go a long way, and roof insulation is no exception. There are plenty of myths floating around that can lead homeowners to make choices that are ineffective or even damaging. Let’s clear up some of the most common misconceptions so you can feel confident about the decisions you make for your home’s comfort and efficiency. Understanding the facts helps you protect your investment and ensure your roofing system performs at its best for years to come.

    Myth: Insulation Is Only for Keeping a Home Warm

    It’s easy to think of insulation as a cozy blanket for your house, only useful during our chilly Minnesota winters. But that’s only half the story. Proper insulation is a two-way street; it works just as hard during hot and humid summers. In the winter, it slows the escape of heat from your living spaces. In the summer, it does the opposite by preventing the sun’s intense heat from penetrating your attic and warming up your home. This year-round performance means your HVAC system doesn’t have to work as hard, keeping you comfortable no matter the season.

    Myth: The More Insulation, the Better

    You might assume that if some insulation is good, then packing your attic with as much as possible must be great. In reality, there’s a sweet spot. While adequate insulation is crucial, more isn’t always better. Over-insulating can compress the material, reducing its effectiveness. More importantly, it can block essential airflow from your soffit vents, which can lead to moisture buildup in the attic. This trapped moisture can cause mold, rot, and other serious issues. The goal is to achieve the recommended R-value for our climate, not to exceed it without a proper plan for attic ventilation.

    Myth: All Insulation Materials Are Created Equal

    Walking down the insulation aisle can be overwhelming, and it’s tempting to think all those pink, yellow, and white rolls do the same thing. But insulation materials are not one-size-fits-all. Different types like fiberglass batts, spray foam, and cellulose have unique properties and R-values. For example, spray foam creates an excellent air seal, while radiant barriers are designed specifically to reflect heat. The right material for your home depends on your climate, your home’s structure, and your specific goals. Choosing the correct type is a key part of a successful roofing project.

    Best Practices for Installing Roof Insulation

    Getting your roof insulation right is about more than just picking a material. How it’s installed makes all the difference in its performance and longevity. When you focus on a quality installation, you’re setting your home up for better energy efficiency and comfort for years to come. Think of it like baking a cake; even with the best ingredients, you still need to follow the recipe. Here are the essential steps that professionals take to ensure your insulation does its job correctly from day one, creating a system that protects your home and everything in it.

    Seal Gaps and Air Leaks First

    Before any insulation goes in, the first order of business is to seal up any air leaks or gaps in your attic and roof deck. This is a step you absolutely can’t skip. Think of all the tiny cracks around pipes, vents, and light fixtures. Each one is a potential escape route for your heated or cooled air. Sealing them ensures that the air you’re paying to condition stays inside your home, making your insulation much more effective. It’s a foundational part of creating a complete thermal boundary for your house and getting the most out of your investment.

    Install a Proper Vapor Barrier

    Next up is installing a vapor barrier. This might sound technical, but its job is simple: it stops moisture from getting into your insulation. When moisture seeps in, it can lead to mold, mildew, and a significant drop in your insulation’s effectiveness. A professional will install this thin sheet of material on the warm side of the insulation (the side facing your living space) to block water vapor from passing through. This simple layer is a powerful defense against moisture-related problems that can compromise your home’s air quality and the structure of your roof.

    Layer Insulation to Achieve a Higher R-Value

    Sometimes, one type of insulation isn’t enough to get the job done, especially in a climate like ours. A great way to achieve a higher R-value and better overall performance is by layering different materials. For example, a professional might install fiberglass batts and then add a layer of rigid foam board on top. This combination approach can cover thermal bridges (spots where heat can easily escape) and create a more robust barrier against the elements. It’s a smart strategy for maximizing your home’s thermal resistance without adding excessive bulk.

    Ensure Correct Attic Ventilation

    Finally, insulation and ventilation need to work as a team. Proper attic ventilation is essential for your insulation to perform at its best, as it helps manage the temperature and moisture levels in your attic year-round. In the winter, it prevents warm, moist air from causing condensation and ice dams on your roof. During our humid summers, it allows hot air to escape, which keeps your home cooler and reduces the strain on your AC. Without good airflow, even the best insulation can’t fully protect your home from the weather outside.

    Common Insulation Mistakes Homeowners Make

    Getting your roof insulation right can make a huge difference in your home’s comfort and energy bills. But a few common missteps can undo all that good work. Let’s walk through some frequent mistakes so you can make sure your project is a success from the start.

    Choosing the Wrong R-Value for Minnesota

    One of the biggest slip-ups is picking the wrong R-value. Think of R-value as the insulation’s superpower for resisting heat flow. Here in Minnesota, with our chilly winters and warm summers, getting this number right is non-negotiable. Different areas of your home have different needs; for example, attics often require an R-value between R-30 and R-49. Choosing an R-value that’s too low for our climate means your heating and cooling systems will work overtime, and you’ll feel it in your home’s comfort. It’s important to understand what R-value you need to ensure your home is properly protected year-round.

    Installing New Insulation Over Old Problems

    It can be tempting to simply lay new insulation over what’s already there. While this is sometimes possible, it can also be a recipe for trouble. If the existing material is damp, moldy, or has been a home for pests, covering it up will only trap those problems. This can lead to poor air quality and moisture damage inside your attic and roof structure. Before adding anything new, it’s critical to inspect the old insulation. In many cases, you can install new fiberglass over the old, but only if the existing material is completely dry and clean. A thorough check ensures your new insulation has a healthy foundation to work from.

    Skipping a Professional Installation

    With so many DIY tutorials out there, it’s easy to think you can tackle any project, including insulation. While the ambition is admirable, installing roof insulation correctly is a detailed job. Gaps, compression, and improper placement can seriously reduce its effectiveness, leaving you with the same drafts and high energy bills you were trying to fix. Hiring a professional ensures the job is done right the first time. An expert can offer personalized advice on the best materials for your home and make sure every nook and cranny is sealed. A professional installation not only saves you time and frustration but also guarantees your insulation performs as it should for years to come.

    How to Choose the Right Roof Insulation

    Picking the right insulation can feel like a big decision, but it doesn’t have to be complicated. When you know what to look for, you can confidently choose a material that keeps your home comfortable and your energy bills in check. It really comes down to understanding your home’s specific needs, local requirements, and when to call for backup.

    Key Factors to Consider

    Before you settle on an insulation type, take a moment to think about your home’s unique situation. Your climate, the type of roof you have, and where you plan to install the insulation all play a part. For example, insulating an attic floor is different from insulating the underside of the roof deck. You should also consider how much heat resistance (R-value) you need, if you require a moisture barrier, and how much sound you want to block. Thinking through these points will help you narrow down your options and find the perfect fit for your space.

    Following Minnesota’s Building Codes

    Your insulation choice isn’t just about personal preference; it also needs to meet local building standards. The R-value you need depends on where you live and which part of your home you’re insulating. For Minnesota, ceilings and attics often require an R-value of R-30, R-38, or even R-49 to handle our cold winters and warm summers effectively. Following these guidelines ensures your home is energy-efficient and compliant with state codes, which is important for your home’s safety and future resale value. A professional can confirm the exact requirements for your specific area.

    When to Partner with a Roofing Professional

    While some homeowners might feel up for a DIY insulation project, there are real advantages to hiring a professional. An expert ensures the material is installed correctly, which is critical for its performance. They can also provide personalized advice on what’s best for your home. More importantly, a professional can identify underlying issues, like a hidden leak that could cause water damage and render your new insulation useless. Working with an experienced roofing team guarantees your insulation and roof work together as a complete system to protect your home.

    Related Articles

    Frequently Asked Questions

    How can I tell if my home needs more insulation? Your home often gives you clues when its insulation isn’t performing well. The most obvious sign is inconsistent temperatures, like an upstairs that’s always hot in the summer or certain rooms that feel drafty and cold in the winter. You might also notice your heating or cooling system running constantly, which can lead to higher than usual energy bills. Another major red flag for us in Minnesota is the formation of ice dams along your roofline during the winter, which suggests heat is escaping through your attic and melting snow unevenly.

    What does R-value mean, and what number should I aim for in Minnesota? Think of R-value as a grade for how well insulation can stop heat from moving. A higher number means better performance, which is exactly what we need for our climate’s dramatic temperature swings. For attics in Minnesota, the general recommendation is to aim for an R-value between R-38 and R-49. In the colder northern parts of the state, that can even go up to R-60. Getting this right is key to keeping your home comfortable and your energy use in check all year.

    Can I just put new insulation over the old material in my attic? While it might seem like an easy fix, adding new insulation on top of old material is not always a good idea. You should only do this if the existing insulation is completely dry, clean, and free of any mold or pest infestations. If you cover up damp or compressed insulation, you are trapping moisture and creating a perfect environment for mold and rot. A professional should always inspect the current conditions first to determine if the old material needs to be removed before new insulation is installed.

    How does insulation help prevent ice dams? Ice dams form when heat escapes from your living space into the attic, warming the underside of your roof. This melts the snow on your roof, and the water runs down until it hits the cold eaves, where it refreezes into a dam. Proper insulation, combined with good attic ventilation, keeps your attic cool and the roof surface at a consistent temperature. This allows snow to melt more evenly, preventing the cycle of melting and refreezing that causes damaging ice dams to form in the first place.

    With so many options, how do I choose the right insulation for my home? Choosing the right material depends on your home’s structure, your goals, and your budget. Fiberglass batts are a reliable and affordable choice for standard attic floors. If you want to create a superior air seal, especially in an attic with lots of nooks and crannies, spray foam is an excellent option. For homeowners focused on sustainability, cellulose is a great eco-friendly choice. The best approach is to consider your specific needs and consult with a professional who can assess your attic and recommend the ideal solution for long-term performance.


  • How to Install Metal Roofing: A DIY Guide

    How to Install Metal Roofing: A DIY Guide

    Here in Minnesota, our homes need to be ready for anything, from heavy snow loads to high winds and summer storms. A metal roof is an excellent choice for this climate, offering unmatched durability and protection. However, its performance is entirely dependent on the quality of the installation. To truly stand up to our weather, every seam must be sealed and every panel perfectly aligned. This guide is written with our local conditions in mind. We’ll show you the specific techniques and materials you need to correctly install metal roofing, creating a weather-tight shield that will keep your home safe and secure through every season.

    Key Takeaways

    • Prioritize Proper Prep Work: Your new roof is only as good as the foundation beneath it, so take time to inspect the roof deck for damage, understand local building codes, and install a quality underlayment before laying a single panel.
    • Master the Details for a Watertight Finish: A leak-proof roof comes from getting the small things right, like perfectly aligning your first panel, using the correct fastener tension to allow for metal expansion, and applying sealant at every seam.
    • Know When to Call a Professional: A metal roof installation is a complex project with serious safety risks, so honestly assess your roof’s complexity and your comfort working at heights; trusting an expert is the smartest move if you have any hesitation.

    Why Choose a Metal Roof?

    When you think about a new roof, you’re likely weighing durability, appearance, and long-term value. Metal roofing checks all these boxes, making it an increasingly popular choice for homeowners. It’s a significant departure from traditional asphalt shingles, offering a unique combination of strength, efficiency, and style. If you’re wondering whether it’s the right fit for your home, here are a few key advantages to consider.

    Durability and Longevity

    One of the biggest draws of a metal roof is its incredible lifespan. While traditional asphalt shingles typically need replacing every 15 to 20 years, a properly installed metal roof can last 50 to 70 years. It could very well be the last roof you ever need to install on your home. This longevity comes from its exceptional durability. Metal stands up to extreme weather conditions, including the heavy snow and high winds we see here in Minnesota. A quality roofing installation ensures your home is protected for decades, not just years. It won’t crack, warp, or rot, giving you peace of mind through every season.

    Energy Efficiency and Potential Savings

    A metal roof does more than just protect your home; it can also help make it more energy-efficient. Many metal roofing materials are finished with special coatings that reflect solar heat. During hot summer months, this means your roof absorbs less heat, which can help keep your house cooler without your air conditioner working overtime. This reduction in energy consumption isn’t just good for your utility bills; it also contributes to a smaller carbon footprint. By choosing an energy-efficient material, you’re making a smart, environmentally friendly decision for your property.

    Modern Styles and Curb Appeal

    Forget the old image of corrugated tin on a barn. Today’s metal roofing comes in a stunning variety of styles, colors, and finishes that can complement any home’s architecture. You can find panels that mimic the look of traditional shingles, slate, or even wood shake, allowing you to get a classic look with modern performance. Its clean lines and sleek appearance can dramatically enhance your home’s curb appeal, making it a standout in the neighborhood. Pairing a new metal roof with updated siding can completely transform your home’s exterior, creating a cohesive and polished look that you’ll love for years to come.

    What You’ll Need for Your Metal Roof Installation

    Before you climb that ladder, let’s talk about preparation. A successful roofing project is all about having the right gear on hand from the start. It saves you trips to the hardware store and helps you work safely and efficiently. Think of it as setting up your workshop right on your lawn. We’ll walk through the tools, materials, and panel choices you’ll need to consider to get the job done right. Getting everything organized first makes the entire process smoother and less stressful, whether you’re doing a small patch or a full replacement.

    Your Essential Tool Checklist

    Getting your tools in order is the first step. You don’t need a massive workshop, but a few key items are non-negotiable for working with metal. You’ll want your basic carpentry tools ready, along with a good drill/driver for fasteners. For cutting the panels, a pair of aviation snips and metal shears will give you clean, precise lines. A hand seamer is also great for bending edges neatly. Most importantly, please don’t forget your fall protection gear. Working on a roof is serious business, and your safety should always be the top priority. Having the right equipment makes all the difference in achieving a professional-looking roof repair.

    Your Materials Checklist

    Now for the fun part: the materials that will make up your new roof. Your main purchase will be the metal roofing panels themselves, but the supporting cast is just as important. You’ll need an ice and water shield to create a waterproof barrier, which is crucial for preventing leaks. To finish the job, grab eave and gable trim for the edges, a ridge cap for the peak, and sidewall flashing for where the roof meets a wall. You’ll also need self-tapping roofing screws, metal roofing sealant, and butyl tape to create watertight seals. Finally, foam closure strips and roofing vent boots will help seal any gaps, keeping water and pests out. These details ensure your roof works seamlessly with your home’s gutters and siding.

    How to Choose the Right Panels for Your Climate

    Not all metal panels are created equal, and the right choice depends on more than just color. Here in Minnesota, our roofs have to stand up to heavy snow, ice, and fluctuating temperatures, so functionality is key. Different panel styles offer different levels of durability and performance in harsh weather. You’ll want to select a panel that not only matches your home’s aesthetic but is also designed for our specific climate. Taking the time to choose the right materials ensures your new roof will be both beautiful and long-lasting. It’s a decision that balances your personal style with practical, year-round protection for your home.

    How to Prep Your Roof for Installation

    A successful metal roof installation starts long before the first panel is laid. Proper preparation is the most important part of the project, ensuring your new roof is secure, weatherproof, and long-lasting. Taking the time to get your roof ready will save you from headaches and costly repairs down the road. Think of it as building a strong foundation. A little extra effort here makes the entire installation process smoother and guarantees a professional-quality result that protects your home for decades.

    Inspect and Repair the Roof Deck

    Before you can put on a new roof, you need to make sure the structure underneath is in great shape. The roof deck, which is the wooden sheathing that covers your rafters, is the foundation for your new metal panels. If you’re removing an old roof, this is the perfect time to inspect the deck for any signs of damage. Look for soft spots, rot, or water stains, as these are red flags that indicate a problem. Any damaged sections must be repaired or replaced. Putting a beautiful new metal roof over a weak deck is like building a house on sand; it simply won’t last. A solid, clean, and dry deck is essential for a secure installation.

    Check Local Building Codes

    Every construction project, including a roof replacement, must follow local building codes. These rules aren’t just suggestions; they are legal requirements designed to ensure your home is safe and structurally sound. Your local municipality in Rogers or Cottage Grove will have specific regulations about roofing materials, underlayment requirements, and whether you can install a new roof over an existing one. A quick call or visit to your local building department’s website can provide you with the necessary information. Understanding these building codes ahead of time ensures your project is compliant from the start, preventing any potential issues with inspections or future home sales.

    Measure Your Roof Accurately

    Guessing your roof’s measurements can lead to frustrating and expensive problems. Ordering too little material will cause delays, while ordering too much is a waste of money. To get an accurate measurement, you’ll need to calculate the total square footage of your roof. Measure the length and width of each roof plane and multiply them to find the area. Be sure to account for any hips, valleys, or dormers. It’s a good practice to add about 10% to your final number to cover any waste from cuts or mistakes. Taking precise measurements helps you create an accurate materials list and ensures you have exactly what you need to complete the job efficiently.

    Install Underlayment and Proper Ventilation

    Underlayment is a water-resistant barrier that is installed directly onto the roof deck. It acts as a critical second line of defense against moisture, protecting the wooden structure of your home from wind-driven rain and ice dams. For metal roofs, a high-quality synthetic underlayment is often the best choice because it can withstand high temperatures and won’t tear easily. While you’re at it, check your attic’s ventilation. Proper ventilation allows air to circulate, preventing moisture buildup that can lead to mold and rot. It also helps regulate your home’s temperature. You can seal the roof deck effectively while ensuring your ventilation system, including soffit and ridge vents, is working correctly.

    A Step-by-Step Guide to Installing Your Metal Roof

    Alright, you’ve done your prep work, and now it’s time for the main event. Installing a metal roof is a significant undertaking that requires patience and a sharp eye for detail. This guide breaks down the core steps of the process. While it’s a fantastic project for a seasoned DIYer, remember that a flawless installation is key to a long-lasting, leak-free roof. If you ever feel out of your depth, our team of professional roofers is always here to help ensure the job is done right.

    Step 1: Install the Eave Trim

    First things first, you’ll install the eave trim, also known as a drip edge. This piece of metal gets fastened along the lower edge of your roof (the fascia) and its main job is to direct water away from the wood and into your gutters. In a place like Minnesota, it’s smart to install the trim over your underlayment. This simple placement trick can be a big help in preventing ice dams from forming during our tough winters. Secure the trim tightly with roofing nails for a solid start.

    Step 2: Lay and Fasten the First Panel

    This next step is a make-or-break moment for your entire project. The first metal panel sets the alignment for all the others, so it has to be perfect. Carefully position the first panel so it lines up with the drip edge, allowing for a slight overhang of about one inch. Before you fasten it down, double-check that the panel is perfectly square with the eave of the roof. Once you’re confident it’s straight, you can fasten the panel according to the manufacturer’s instructions. Take your time here; a little extra care now will save you major headaches later.

    Step 3: Continue Installing Panels

    Now you can get into a rhythm. Place the next panel so it overlaps the first one correctly. Before you lay it down, you’ll want to place foam closure strips along the edge. These strips are shaped to fit the profile of your panels and are essential for keeping water, debris, and pests out from underneath. For an extra layer of protection, apply a bead of butyl tape or sealant along the seam where the panels overlap. This process is similar to how quality siding is installed to create a weather-tight barrier for your home.

    Step 4: Add Flashing Around Vents and Chimneys

    Anywhere something pokes through your roof, like a vent pipe, chimney, or skylight, is a potential spot for leaks. That’s where flashing comes in. Flashing is custom-bent metal that fits around these objects and is installed with the panels to create a waterproof seal. It works by channeling water down and around the penetration, keeping it on top of the roof where it belongs. This is one of the most detailed parts of the job, and it’s crucial to get it right to ensure a watertight seal. Much like your gutters, flashing is all about effective water management.

    Step 5: Finish with Ridge Caps and Closures

    You’re on the home stretch! The final step is to seal the peak of the roof where the two sides meet. This is done with a ridge cap. Before you place the cap, you’ll apply another set of closure strips (these are called outside closures) along the top of the panels on both sides of the peak. Add a line of sealant for good measure, then fit the ridge cap over the peak. Secure it by driving 2-inch screws through the cap and into the high ribs of the panels below. This creates a tight, secure finish that will protect your home’s peak from the elements for years to come.

    Common DIY Mistakes to Avoid

    Taking on a metal roof installation is a huge accomplishment, but a few common slip-ups can undermine all your hard work. Even the most careful DIYer can make a mistake that leads to leaks, damage, or a roof that just doesn’t look right. Knowing what to watch out for ahead of time is the best way to ensure your new roof is strong, secure, and looks fantastic for decades.

    Think of this as your friendly guide to sidestepping the most frequent installation headaches. From how you fasten the panels to the safety gear you wear, every detail matters. Getting these things right is the difference between a weekend project you’re proud of and a costly repair job down the line. We’ll walk through the mistakes we see most often so you can avoid them from the start. Remember, the goal is a roof that not only looks great but also provides decades of protection. If you’re ever in doubt, remember that a professional roofing company has the experience to handle these challenges with ease, ensuring a perfect finish every time.

    Improper Fastening and Expansion Gaps

    Metal naturally expands and contracts as the temperature changes. This is a critical detail to remember when you’re fastening your panels. If you drive the screws in too tightly, you can restrict this movement, causing the panels to warp, buckle, or even pull the fasteners loose over time. On the other hand, fasteners that are too loose won’t create a secure, weatherproof seal. Your manufacturer’s guide is your best friend here; it will specify the correct screw placement and torque. Following these instructions helps you install a strong, good-looking metal roof that can handle Minnesota’s weather swings.

    Misaligned Panels

    Your first panel sets the standard for the entire roof. If it’s even slightly off-kilter, that small error will become more and more obvious with each panel you add, resulting in uneven lines and gaps. To prevent this, you need to make sure each new panel overlaps the one before it correctly. Take the time to establish a straight reference line and measure frequently as you work your way across the roof. A little extra patience here goes a long way in preventing leaks and achieving that clean, professional look you’re after.

    Skipping Sealant and Closure Strips

    It’s tempting to rush through the finishing touches, but skipping sealant and closure strips is a mistake you’ll regret. Butyl tape and other sealants are essential for creating watertight seals around flashing, vents, and panel overlaps. Closure strips are foam pieces that fill the corrugated gaps at the eave and ridge cap, keeping out rain, wind, and pests. Just as your gutters protect your foundation by directing water away, these small components protect your roof deck from moisture damage. They are absolutely vital for a complete, long-lasting roofing system.

    Forgetting About Insulation and Noise

    One of the most common questions about metal roofs is, “Are they loud in the rain?” The answer is: they don’t have to be. Metal roofs can be loud when it rains or when acorns and branches fall on them, but only if they aren’t installed with proper insulation or underlayment. Adding a layer of rigid foam insulation or a quality underlayment beneath the panels will significantly dampen the sound. Plus, it adds another layer of thermal resistance, which helps keep your home comfortable and your energy bills in check.

    Overlooking Basic Safety

    This is the most important point of all: your safety is not negotiable. Working on a roof is inherently dangerous, and a fall can have serious consequences. Always use the right fall protection, including a safety harness secured to a proper anchor point. Wear sturdy, high-traction footwear, and never work on a wet or windy day. Keep your work area clean to avoid tripping hazards. If you feel uneasy about the height or the complexity of the job, that’s a good sign it’s time to call in a professional. No DIY project is worth risking your well-being.

    Should You DIY or Call a Pro?

    Taking on a big home project yourself can be incredibly rewarding. But when it comes to installing a new roof, the stakes are high. A metal roof is a significant upgrade for your home, and a flawless installation is key to getting all the benefits you’re paying for. Before you start pulling out ladders and ordering panels, it’s important to have an honest conversation with yourself about whether this is a job for a weekend warrior or a seasoned professional.

    Consider Your Skill Level and Safety

    Let’s be direct: installing a metal roof is an advanced project. It’s a task that often takes multiple days and requires a specific set of skills. If you’re new to major home renovations, this might be a challenging place to start. You’ll be working at heights, handling large, sharp metal sheets, and operating power tools in an environment where one misstep can lead to serious injury. Ask yourself if you have the right safety gear and, more importantly, if you’re comfortable and confident working on a sloped surface for hours. Your safety is the top priority, and it’s not something to compromise on.

    Factor in Your Roof’s Complexity

    Not all roofs are created equal. A simple, low-pitched gable roof is far less complicated than one with steep angles, dormers, valleys, and multiple chimneys. Every one of these features requires precise cuts, custom flashing, and perfect sealing to prevent leaks. Good planning is essential, but even the best plans can go awry when you discover an issue with the underlying roof deck. A complex roofline dramatically increases the difficulty and the time required for the job. Take a good look at your roof’s architecture; the more angles and interruptions you see, the more you should lean toward calling in an expert.

    When to Trust a Professional Roofer

    If you have any hesitation after considering the safety and complexity, that’s your sign to call a pro. There’s no shame in it; in fact, it’s a smart decision. A professional roofing contractor does more than just install panels. We evaluate your home’s specific needs, identify potential issues you might miss, and ensure the entire roofing system, from underlayment to ventilation, is set up correctly. Hiring an expert provides peace of mind, a warranty for the workmanship, and the confidence that your investment is protected for decades. It ensures you get the full value and longevity that a metal roof promises.

    Frequently Asked Questions

    Is a metal roof going to be loud every time it rains? This is a very common question, and the short answer is no, not if it’s installed correctly. The loud, tinny sound people imagine comes from rain hitting unsupported metal. A professional installation includes a solid roof deck and a layer of underlayment or insulation between the deck and the metal panels. This combination absorbs the sound, making a metal roof just as quiet as any other roofing material.

    Can I just install a new metal roof over my old shingles? While it’s sometimes possible, it’s not always the best idea. Covering old shingles can trap moisture, and it prevents you from inspecting the roof deck for rot or damage. Many local building codes also have rules about how many layers of roofing are allowed. The safest approach is to remove the old roof, repair the deck, and start with a clean, solid foundation for your new metal panels.

    How long will a metal roof actually last compared to traditional shingles? A properly installed metal roof can last 50 to 70 years, which is two or even three times longer than a typical asphalt shingle roof. For many people, it’s the last roof they will ever need to put on their home. Its durability against wind, snow, and ice means you spend less time worrying about repairs and more time enjoying the peace of mind that comes with a long-term solution.

    Will a metal roof make my house hotter in the summer? It’s actually the opposite. Many modern metal roofs are finished with special coatings that reflect solar heat away from your home. Unlike dark asphalt shingles that absorb and hold heat, a reflective metal roof can help keep your attic and home cooler. This means your air conditioner doesn’t have to work as hard, which can lead to lower energy bills during hot months.

    What happens if I don’t get the panels perfectly straight? Getting the first panel perfectly square is one of the most critical steps. If it’s even slightly off, that small error will get bigger with every panel you add, creating a crooked, uneven appearance across the entire roof. More importantly, misaligned panels can lead to gaps and improper overlaps, which create entry points for water and can cause significant leaks down the road.

  • The Best Asphalt Shingles for Minnesota Weather

    The Best Asphalt Shingles for Minnesota Weather

    Homeowners often ask me what’s more important: the quality of the shingle or the quality of the installation. The answer is that you can’t have one without the other. You can choose the most advanced, durable shingle on the market, but if it’s installed incorrectly, it simply won’t protect your home. A great installation is the key that unlocks a shingle’s true potential. This guide will show you what to look for in both materials and craftsmanship. We’ll explain how to pair a top-tier product with a professional installation, ensuring you get the best asphalt shingles for Minnesota weather and a roof that lasts.

    Key Takeaways

    • Choose Features That Fight Minnesota Weather: Don’t just pick a color; select shingles with specific defenses. Key features for our climate include Class 4 impact resistance against hail, a high wind rating for storms, and cold-weather flexibility to prevent cracking.
    • Vet Your Installer as Much as the Materials: A premium shingle is only as good as its installation. Ensure your contractor is certified by the manufacturer and provides a clear workmanship warranty to protect you from installation errors.
    • A Great Roof Is a Complete System: A durable roof is more than just shingles. Make sure your project includes the right shingle type (like architectural), a clear warranty, and essential underlayers like an ice and water shield for complete protection.

    Why Is Minnesota Weather So Tough on Roofs?

    If you live in Minnesota, you know our weather is anything but predictable. From sweltering summer days to bone-chilling winter nights, our homes endure a lot. Your roof, as your home’s first line of defense, takes the brunt of this punishment. The constant swings between extremes can wear down roofing materials faster than in more temperate climates, making the right choice of shingle absolutely critical for protecting your investment.

    Understanding exactly what your roof is up against each season is the first step to making a smart decision. The primary challenges boil down to three major culprits: the relentless freeze-thaw cycle that pries materials apart, the violent force of hail and wind during severe storms, and the crushing weight of snow that can lead to destructive ice dams. Each of these elements tests your roof in a unique way, and preparing for them is key to a long-lasting, secure home. A well-chosen roofing system isn’t just about shingles; it’s about creating a defense that can handle everything Minnesota throws at it.

    The Freeze-Thaw Cycle

    The freeze-thaw cycle is one of the most subtle yet destructive forces your roof faces. It happens when moisture from rain or melting snow seeps into tiny, almost invisible cracks in your shingles. As temperatures drop below freezing, that water expands into ice, widening the cracks. When it thaws, the water settles deeper into the newly enlarged space, and the cycle repeats. Over a single winter, this process can happen dozens of times, gradually prying your shingles apart, causing them to curl, and stripping away their protective granules. This constant expansion and contraction doesn’t just damage the shingles; it weakens the entire roofing structure over time, leaving your home vulnerable.

    Hail, Wind, and Severe Storms

    When a Minnesota storm rolls in, your roof is on the front line. Hail can act like thousands of tiny hammers, striking your shingles with enough force to create bruises, cracks, and punctures. This damage might not be obvious from the ground, but it compromises the shingle’s ability to shed water, leading to future leaks. At the same time, high winds can get underneath the edges of your shingles, lifting them and breaking their seals. A strong gust can tear shingles off entirely, exposing the underlayment to driving rain. This combination of hail and wind means that a single severe storm can seriously damage not just your roof, but also your siding and windows.

    Heavy Snow and Damaging Ice Dams

    Winter brings its own set of challenges, primarily from heavy snow and ice dams. The sheer weight of accumulated snow can put immense stress on your roof’s structure. But the bigger threat is often the ice dam. This occurs when heat escaping from your attic melts the snow on the upper part of your roof. The meltwater runs down to the cold eaves and refreezes, forming a “dam” of ice. Water then pools behind this dam, backing up under the shingles and seeping into your home, causing damage to your ceilings, walls, and insulation. Properly functioning gutters and adequate attic ventilation are crucial defenses against this damaging winter problem.

    A Guide to Asphalt Shingle Types

    When you start exploring your options for a new roof, you’ll quickly find that “asphalt shingle” is a broad category. Understanding the main differences between the types of shingles is the first step toward making a confident decision for your home. Each style offers a different level of durability, weather resistance, and visual appeal. For Minnesota homeowners, choosing the right shingles means looking past the surface and focusing on performance against our tough weather. From the basic 3-tab to specialized impact-resistant options, let’s break down what each type brings to the table so you can find the perfect match for your home’s protection and style.

    3-Tab Shingles

    Think of 3-tab shingles as the most basic option available. They are made from a single layer of asphalt and have a flat, uniform appearance. While they are an economical choice, their simple construction makes them the least durable type of shingle. They typically have a wind resistance rating of around 60 mph, which is often not enough to handle the severe storms we can get in Minnesota. Because they are thinner and more susceptible to wind uplift and damage, we generally don’t recommend 3-tab shingles for homeowners in our area who are looking for reliable, long-term protection.

    Architectural (Dimensional) Shingles

    Architectural shingles, also called dimensional shingles, are a significant step up and the most popular choice for Minnesota homes. They are constructed with two or more layers of shingle material bonded together. This creates a thicker, more durable shingle with a varied, textured look that adds dimension and curb appeal to your roof. More importantly, this layered construction gives them superior wind resistance, often rated for 110-130 mph. Architectural shingles provide an excellent balance of performance, longevity, and visual appeal, making them a dependable solution for weathering Minnesota’s challenging climate.

    Luxury Shingles

    For homeowners who want top-tier performance and a standout look, luxury shingles are the premium choice. These are the heaviest and most durable asphalt shingles on the market, designed with multiple layers to replicate the appearance of high-end materials like natural slate or cedar shakes. Their intricate design and substantial weight provide exceptional durability and the highest level of wind resistance, often exceeding 130 mph. Luxury shingles offer unmatched protection against the elements while creating a striking, high-end aesthetic, making them a worthwhile investment for those seeking the best in both beauty and strength.

    Impact-Resistant Shingles

    Impact-resistant shingles are the champions of severe weather protection. Specifically engineered to withstand hail and flying debris, these shingles are made with a more flexible, rubberized type of asphalt. This allows them to absorb the force of an impact rather than cracking or breaking. They earn a Class 4 impact rating, which is the highest score a shingle can receive in testing. For homes in Minnesota, especially in areas prone to hailstorms, installing impact-resistant shingles provides incredible peace of mind. They are a smart, proactive choice to defend your home against some of our state’s most damaging weather events.

    Must-Have Shingle Features for a Minnesota Climate

    When you’re choosing shingles for a Minnesota home, you’re not just picking a color. You’re selecting your home’s first line of defense against some seriously tough weather. From hailstorms to brutal cold snaps, our climate demands more from a roof. To make sure your investment lasts, look for shingles that come with a few key features built for durability. These are the non-negotiables that separate a standard roof from one that’s truly Minnesota-ready.

    Class 4 Impact Resistance

    Think of impact resistance as a shingle’s ability to take a punch. A Class 4 rating is the highest score a shingle can get for resisting damage from hail and flying debris. These shingles are often made with a rubberized asphalt formula, which allows them to be more flexible. So, when a hailstone hits, a Class 4 shingle is more likely to bend and absorb the impact rather than crack or break. Choosing shingles with this top-tier rating is one of the smartest ways to protect your roofing system from the sudden, intense storms we see in Minnesota, giving you peace of mind when the weather turns.

    High Wind Resistance

    A strong gust of wind shouldn’t leave you wondering if your shingles are still on your roof. High wind resistance is essential for keeping your roof intact during severe thunderstorms or straight-line winds. While basic shingles might only handle winds up to 60 mph, architectural shingles are designed to withstand gusts of 110 mph or even higher. This added security comes from their heavier construction and improved sealant, which helps them stay put when it matters most. A roof with a high wind rating is a must for any homeowner who wants to avoid finding shingles scattered across their yard after a storm.

    Cold-Weather Flexibility

    Minnesota’s freezing temperatures can make standard asphalt shingles brittle and prone to cracking. That’s where cold-weather flexibility comes in. Shingles engineered for cold climates, like those made with rubberized asphalt, maintain their flexibility even when the temperature plummets. This allows them to expand and contract without breaking, which is crucial during our constant freeze-thaw cycles. Brands like Malarkey are known for this technology, ensuring their shingles resist cracking and stay sealed, providing durable protection through the harshest winters. This feature is key to a long-lasting roof in our northern climate.

    Algae Resistance

    Have you ever noticed ugly black streaks staining a roof? That’s not dirt; it’s a type of algae called Gloeocapsa magma. It thrives in humid conditions and can diminish your home’s curb appeal. To combat this, many modern shingles are manufactured with algae-resistant technology. They typically have copper granules mixed in with the surface granules. Copper is toxic to algae, so it naturally prevents those unsightly streaks from forming. This feature keeps your roof looking clean and new for years, protecting both its appearance and its long-term health.

    Ice and Water Shield Protection

    This isn’t a feature of the shingle itself, but it’s a critical component of any Minnesota roofing system. An ice and water shield is a waterproof membrane installed under the shingles in your roof’s most vulnerable areas, like the eaves, valleys, and around chimneys. Its job is to stop water from leaking into your home if ice dams form along your roofline. When snow melts and refreezes at the edge of your roof, it can create a dam that forces water up under your shingles. This shield provides a final, waterproof barrier to keep your home dry and prevent costly water damage. Properly functioning gutters also play a huge role in preventing ice dams.

    Which Shingle Brands Stand Up to Minnesota Weather?

    When you start looking at shingles, you’ll quickly see a lot of brand names. While many offer similar styles, their performance can vary dramatically, especially here in Minnesota. The combination of heavy snow, high winds, and freeze-thaw cycles means you need a shingle that’s built to last. Choosing a brand with a solid reputation for durability in northern climates is one of the most important decisions you’ll make for your roofing project. We’ve worked with countless homeowners and have seen firsthand which brands hold up season after season. Let’s look at a few of the top contenders that Minnesota roofers and homeowners often discuss.

    Malarkey

    Malarkey is a name that consistently comes up when roofers talk about top-tier performance. These shingles are engineered for resilience, especially against the stormy weather we see in Minnesota. They feature advanced technologies, like polymer modified asphalt, which gives them extra flexibility in the cold and superior granule adhesion during hail. While they can represent a larger upfront investment, homeowners often find the long-term durability and peace of mind are well worth it. As a certified installer of Malarkey roofing products, we trust them to protect our clients’ homes because we’ve seen how they perform under pressure.

    Owens Corning

    Owens Corning is another major player in the roofing industry, known for its reliability and strong brand recognition. Many roofing professionals stand by their products, noting that they hold up well against Minnesota’s severe weather. They offer a wide range of shingle lines that balance performance and aesthetics, making them a popular choice for homeowners across the state. Their warranty programs are also frequently mentioned as a key benefit, giving you an extra layer of confidence in your investment. When you’re looking for a dependable shingle from a well-established company, Owens Corning is definitely a brand to consider.

    CertainTeed

    CertainTeed often sparks a bit of debate among roofing professionals. On one hand, many contractors have used their shingles for decades with great success, praising their sealing technology and long-lasting performance. Some homeowners have had their CertainTeed roofs for years without a single issue. On the other hand, some have reported issues with brittleness or challenges with warranty claims. This variability highlights just how critical a proper installation is. A great shingle can fail if installed incorrectly, and an experienced contractor will know how to handle the specific requirements of any brand they work with, ensuring you get the best possible outcome.

    Are Impact-Resistant Shingles a Smart Choice for Your Home?

    When a Minnesota hailstorm rolls in, it’s hard not to worry about what those chunks of ice are doing to your roof. For many homeowners, impact-resistant shingles offer serious peace of mind. While they represent a more significant investment upfront, their advanced durability and long-term benefits make them a compelling choice for protecting your home against our state’s wild weather. But what makes them so special, and are they really worth it for your property? Let’s break down what you need to know.

    What “Class 4 Impact Resistance” Really Means

    You’ll often hear the term “Class 4” when discussing these shingles, and it’s a big deal. This is the highest rating a shingle can achieve for impact resistance. To earn it, shingles undergo a standardized test where steel balls are dropped on them to simulate hail. A Class 4 shingle can withstand the impact without cracking. This resilience comes from their unique construction, often using rubberized asphalt that allows the shingle to flex and absorb the blow. For Minnesota homeowners, this means your roof is far better equipped to handle the hail and flying debris that come with severe storms, reducing the likelihood of damage.

    How They Can Affect Your Homeowner’s Insurance

    Beyond superior protection, one of the most attractive benefits of installing Class 4 shingles is the potential for a discount on your homeowner’s insurance premiums. Because these shingles are proven to reduce the risk of storm damage, many insurance companies reward homeowners for choosing them. A roof that holds up better against hail means you’re less likely to file a claim, which is a win for both you and your insurer. Before you commit, it’s a great idea to call your insurance agent and ask if they offer a specific discount for Class 4 rated roofing materials. This simple step can help you understand the long-term financial picture.

    Decoding Asphalt Shingle Warranties

    A shingle warranty can feel like a safety net for your new roof, but the details in the fine print are what truly matter. Understanding your warranty is one of the most important steps in protecting your home, especially with Minnesota’s demanding weather. It’s not just about having a warranty; it’s about having the right warranty. Let’s break down what that piece of paper actually means for you and your home.

    A comprehensive warranty is a sign that a manufacturer stands behind its product. It’s also a key indicator of the quality you can expect. When you’re looking at different shingle options, the warranty tells a story about how well that product is expected to perform over time. We’ll look at what a good warranty should include, what terms like “lifetime” really mean, and the crucial difference between the manufacturer’s promise and your contractor’s guarantee.

    What a Good Warranty Actually Covers

    When you get a new roof, you expect it to last. A solid warranty ensures it does, but what is it actually promising? A good asphalt shingle warranty typically covers three key areas: manufacturing defects, wind damage, and algae resistance. If a shingle is faulty right out of the box, the warranty should cover its replacement. This is the most basic protection you can get.

    Beyond defects, look for specific coverage that matters for our climate. Wind speed coverage is a big one. The warranty will specify the maximum wind speeds the shingles are rated to withstand. For Minnesota, you want a high wind rating. Algae resistance is another important feature. Those dark streaks you see on older roofs are often algae growth. A good warranty will include protection against this, keeping your roof looking its best for years. Understanding these components helps you choose a warranty that offers real protection.

    Lifetime vs. Limited Warranties

    The term “lifetime warranty” sounds fantastic, but it often doesn’t mean what you think. Most manufacturers offer what’s called a limited lifetime warranty. This generally covers the shingles for as long as you, the original owner, live in the home. However, the “limited” part is key. This often means the coverage amount changes over time.

    For the first several years, you might have non-prorated coverage, which covers the full value of replacing failed shingles. After that initial period, the coverage often becomes prorated, meaning the manufacturer will only cover a decreasing percentage of the value as the shingles age. It’s important to ask about the non-prorated period, as this is your most valuable window of protection. For example, some of the best shingle brands offer wind coverage for up to 15 years and algae resistance for 25 years.

    Transferable vs. Workmanship Warranties

    It’s essential to know that you actually have two different warranties protecting your roof: one from the shingle manufacturer and one from your installer. The manufacturer’s warranty covers defects in the product itself. If the shingles fail because they weren’t made correctly, this warranty kicks in. Some of these are even transferable to the next homeowner, which can be a great selling point if you decide to move.

    The second, and arguably more important, guarantee is the workmanship warranty. This is your contractor’s promise that your new roof was installed correctly. Even the highest-quality shingles will fail if they aren’t installed properly. A reputable contractor will always provide a workmanship warranty to stand behind their installation, protecting you from leaks and other issues caused by errors during the roofing process.

    Brand vs. Installation: What Matters More?

    This is a question I hear all the time from homeowners, and it’s a great one. You can spend weeks researching the perfect shingle brand, but what happens next is just as important. The truth is, while high-quality materials are a huge piece of the puzzle, they can’t protect your home on their own. The real hero of your roofing project is the installation. Think of it this way: you can have the most advanced, weather-resistant shingle on the market, but if it’s not installed correctly, it simply won’t perform as promised. A poor installation can lead to leaks, blow-offs during a storm, and a drastically shorter lifespan for your entire roof.

    On the flip side, a highly skilled installation can make even a standard shingle perform exceptionally well. The roofer’s expertise is what turns a pallet of shingles into a seamless, watertight system that protects your family and your investment. So, while you’re comparing brands, remember to give equal, if not more, weight to finding a contractor who is committed to exceptional roofing craftsmanship. The best combination, of course, is a top-tier shingle installed by a true professional. That’s how you get a roof that lasts for decades.

    Why a Great Installation Is Key

    It’s easy to get caught up in the features and warranties of different shingle brands, but none of that matters without a flawless installation. As roofing professionals often say, “Even the best shingle can fail if not installed correctly.” This isn’t an exaggeration. Improper nailing, poor flashing work around chimneys and vents, or incorrect starter strip placement can create weak points all over your roof. These small mistakes can lead to big problems like water infiltration, which can cause rot, mold, and structural damage inside your home. A great installation ensures every component, from the underlayment to the ridge cap, works together as a complete system to keep Minnesota’s harsh weather out.

    How to Find a Qualified Minnesota Roofer

    Finding a roofer you can trust is the most important step in your project. Start by looking for contractors who have strong relationships with the manufacturers they use. A great roofer is often certified by the brands they install, which means they’ve completed specific training on the manufacturer’s products and installation methods. You can also look into the manufacturer’s training programs and see how they support their contractors. When you talk to potential roofers, ask them about their certifications and what brands they recommend. A contractor who is proud of their partnerships and can explain why they choose certain materials is a good sign you’re in capable hands.

    Red Flags to Avoid When Hiring a Contractor

    Knowing what to avoid is just as important as knowing what to look for. Be cautious of any contractor who uses high-pressure sales tactics or can’t provide proof of licensing and insurance. Another red flag is a vague or incomplete quote; your estimate should detail the specific materials being used, the scope of work, and the warranty information. It’s also wise to ask how a manufacturer handles warranty claims and supports its contractors, as this reflects on the contractor’s reliability. If you’re seeing clear signs of roof failure, like missing or broken shingles or water stains on your ceilings, and a contractor dismisses your concerns, it’s best to walk away and find someone who will listen.

    Your Final Checklist for Choosing the Right Shingles

    You’ve learned about shingle types, features, and brands. Now it’s time to put it all together. Making the final decision can feel a little overwhelming, but breaking it down into a few key steps makes it much more manageable. This final checklist will help you pull together everything you’ve learned and choose the perfect shingles for your Minnesota home with confidence.

    Match the Shingle to Your Home’s Needs

    Choosing the right shingle can mean the difference between a temporary patch and a long-lasting roofing solution. Think about your home’s unique characteristics. Does your roof have steep pitches or low slopes? Is one side constantly baked by the sun? Are there overhanging trees that could lead to algae growth? The answers will point you toward certain shingle features. Beyond protection, consider your home’s style. The right color and texture can dramatically improve your home’s curb appeal, making it a choice that protects your investment and makes you proud to pull into the driveway.

    Consider Brands with Proven Local Performance

    A shingle that works well in Arizona might not be the best fit for a Minnesota winter. That’s why it’s so important to choose a brand with a track record of success right here in the Midwest. Local roofers know which brands hold up to our intense storms and freeze-thaw cycles. Brands like Malarkey are engineered with our climate in mind, using durable materials and innovative features. Other brands also have a strong reputation; for example, some roofers find that Owens Corning shingles perform exceptionally well in high winds and are backed by solid company support.

    Key Questions to Ask Your Roofing Contractor

    Your contractor is your best resource, so don’t be shy about asking questions. Warranties are a big deal, and how a manufacturer handles claims is just as important as the shingle itself. Before you commit, make sure you understand the warranty details. A good starting point is to ask about the three main areas of coverage: manufacturing defects, wind speed, and algae resistance. You can ask things like, “What wind speed is this shingle rated for?” or “What does the algae resistance warranty cover and for how long?” Understanding these warranty specifics will ensure there are no surprises down the road.

    Related Articles

    Frequently Asked Questions

    Are architectural shingles really necessary for a Minnesota home? While basic 3-tab shingles are available, we generally find they don’t offer enough protection for Minnesota’s weather. Their single-layer design and lower wind resistance make them vulnerable during our intense storms. Architectural shingles, with their durable, multi-layer construction, are the standard for a reason. They provide the strength and resilience needed to stand up to high winds and temperature extremes, making them a much more reliable choice for protecting your home long-term.

    My neighbor’s roof was damaged by hail. Should I get impact-resistant shingles? That’s a great question, and it’s smart to think proactively. Impact-resistant shingles, which have a Class 4 rating, are engineered with a flexible, rubberized asphalt that absorbs the force of hail instead of cracking. This makes them incredibly durable. Choosing them can give you significant peace of mind during a storm. As a bonus, many insurance companies offer a discount for homes with Class 4 shingles, so it’s always a good idea to check with your agent.

    What’s the deal with ice dams, and can new shingles really prevent them? Ice dams are a serious threat, but shingles alone aren’t the whole solution. An ice dam forms when melting snow refreezes at your roof’s edge, causing water to pool and seep underneath your shingles. The best defense is a complete roofing system. This includes installing a special waterproof membrane, called an ice and water shield, along the eaves and valleys of your roof. This shield acts as a final barrier, keeping that backed-up water from getting into your home.

    What’s the difference between the shingle warranty and the contractor’s warranty? This is a crucial distinction. The manufacturer’s warranty covers the physical shingles against defects in how they were made. The workmanship warranty is your contractor’s promise that they installed everything correctly. Since most roofing problems are caused by installation errors rather than product failure, a strong workmanship warranty from a trusted, certified installer is one of the most important protections you can have for your investment.

    I’m overwhelmed by all the shingle brands. How do I even start to choose? It’s easy to get lost in the details, but you don’t have to become a shingle expert. The best first step is to find a qualified, local contractor you trust. An experienced roofer will have firsthand knowledge of which brands, like Malarkey, perform best in our specific climate. They can explain why they recommend certain products and guide you to a choice that balances durability, appearance, and your home’s specific needs, ensuring the final result is a roof you can depend on.

  • How to Keep Your Gutters Clean from Debris

    How to Keep Your Gutters Clean from Debris

    Gutters are a crucial part of your home’s drainage system. They channel rainwater away from your roof and foundation, helping to prevent leaks, erosion, and structural damage. But if your gutters are clogged with leaves, twigs, and dirt, they can’t do their job. Keeping your gutters clean is an essential task that protects your home and saves you money in the long run.

    The first step to clean gutters is to establish a regular schedule. At a minimum, you should clean your gutters twice a year—once in the spring and again in the fall. If your home is surrounded by trees, you may need to do it more often. Leaves, pine needles, and other debris can quickly pile up and block the flow of water.

    One of the most effective ways to keep your gutters clear is by installing gutter guards. These protective covers come in several styles, including mesh screens and reverse curve systems. Gutter guards help block out debris while still allowing water to pass through. With guards in place, you’ll reduce how often you need to clean the gutters and extend their lifespan.

    Another simple but powerful step is trimming nearby trees. Branches that hang over your roof are a direct source of leaves and debris that end up in your gutters. Keeping trees pruned back by several feet can make a big difference. It also reduces the chance of branches breaking off during storms and causing damage to your roof or siding.

    When it’s time to clean your gutters, use gloves and a small scoop to remove the debris. Place it into a bucket or tarp for easy disposal. After the debris is cleared out, use a hose to flush the gutters and downspouts. This will help remove smaller particles and ensure the water is flowing freely. If the water doesn’t drain properly, check for clogs in the downspout.

    For safety, always use a sturdy ladder and avoid working alone. If your gutters are especially high or difficult to access, consider hiring a professional. They have the tools and experience to get the job done quickly and safely.

    Keeping your gutters clean from debris may seem like a small task, but it makes a big impact. It helps prevent roof leaks, mold growth, and foundation issues, while also improving the lifespan of your entire gutter system. With a little effort and attention, you can keep your home safe, dry, and in great shape all year long.

  • The Benefits of Seamless Gutters

    The Benefits of Seamless Gutters

    When it comes to protecting your home from water damage, your gutters play a crucial role. They guide rainwater off the roof and away from the foundation, helping prevent costly repairs. But not all gutters are created equal. If you’re looking to upgrade, seamless gutters offer a smart and effective solution with benefits that go beyond basic water control.

    Say Goodbye to Leaks

    One of the biggest advantages of seamless gutters is in the name—they have no seams. Traditional gutters are pieced together in sections, and each seam is a potential spot for leaks. Over time, these joints can weaken or separate, leading to drips or even breaks. Seamless gutters are made from one continuous piece of material, usually custom-cut to fit your home. This design drastically reduces the chance of leaks and keeps water flowing smoothly where it’s supposed to go.

    Built for Durability

    Seamless gutters are typically made from aluminum, copper, or steel, which are known for their strength and resistance to weather. Because there are fewer weak points, seamless gutters are less likely to sag, warp, or pull away from the house. This means they can better withstand heavy rain, snow, and wind without failing. You get long-lasting performance with fewer worries about future damage.

    Low Maintenance, High Convenience

    Debris like leaves, twigs, and pine needles often gets stuck in the seams of traditional gutters, causing clogs that lead to overflows. With seamless gutters, there are no crevices for debris to collect. Water moves more efficiently, and cleaning becomes much easier. Many homeowners also choose to add gutter guards for even more protection, further cutting down on the need for regular maintenance.

    Custom Fit and Clean Appearance

    Seamless gutters are made on-site to the exact measurements of your home. This means a perfect fit and a polished, custom look. Without visible joints, your gutters will look sleek and clean, complementing the rest of your home’s exterior. You can choose from a variety of colors and finishes to match your siding or trim, adding to your curb appeal.

    Increased Property Value

    Potential buyers appreciate smart upgrades, and seamless gutters can increase the overall value of your home. They show that you’ve invested in long-term protection and maintenance, and that’s appealing to anyone considering your home. Plus, the improved appearance is a bonus when it comes to first impressions.

    A Worthwhile Upgrade

    Whether you’re building a new home or upgrading your current one, seamless gutters offer a blend of function and style. They’re stronger, easier to maintain, and better at protecting your home from the elements. With less time spent on upkeep and fewer worries about leaks, seamless gutters are a smart choice for any homeowner looking to improve their property.

  • The Benefits of New Siding

    The Benefits of New Siding

    Your home is more than just a building. It’s your comfort zone, your retreat, and your biggest investment. If the outside of your house is starting to show signs of age, replacing the siding might be one of the smartest moves you can make. New siding doesn’t just improve how your home looks—it brings a wide range of benefits that can save you money, protect your property, and even increase its value.

    Boost Your Curb Appeal Instantly

    First impressions matter. The exterior of your home is the first thing people see. New siding gives your house a clean, updated, and polished appearance. Whether you choose classic vinyl, modern fiber cement, or a natural wood look, updated siding can make your home stand out. This boost in curb appeal can be especially important if you’re thinking about selling your home in the future.

    Enhance Energy Efficiency

    Did you know that siding plays a big role in how well your home retains heat or cool air? If your current siding is cracked, warped, or missing in spots, it can let in drafts and moisture. New siding, especially when combined with added insulation, helps keep your home’s temperature more consistent. That means your heating and cooling systems won’t have to work as hard, which can lower your utility bills all year round.

    Guard Against the Elements

    Rain, snow, wind, and sun can all wear down your home’s exterior over time. Quality siding acts like a shield, protecting the structure underneath from moisture and weather damage. It keeps pests out and helps prevent problems like rot, mold, and mildew. Some siding materials are even resistant to fire and fading, giving you extra peace of mind.

    Spend Less Time on Maintenance

    Older siding often requires repainting, repairs, and lots of upkeep. Newer siding materials are designed to be low-maintenance. Many are fade-resistant, weatherproof, and easy to clean with just a garden hose. This means you’ll spend less time doing chores and more time enjoying your home. And because it holds up better over time, you won’t be spending as much on repairs or touch-ups.

    Increase Your Home’s Value

    Upgrading your siding is a smart investment. It can increase your home’s resale value and make it more attractive to buyers. People love the idea of a move-in-ready home that won’t need big exterior repairs anytime soon. Plus, energy-efficient upgrades are often a top priority for today’s homebuyers, which gives you an extra edge in the market.

    A Smart Choice for Any Homeowner

    Whether you’re planning to stay in your home for years or thinking about selling, new siding is a worthwhile upgrade. It improves your home’s look, protects it from damage, cuts down on energy use, and boosts its overall value. If your siding has seen better days, now might be the perfect time to make the change and enjoy all the benefits that come with it.

  • How New Siding Will Help Improve Your Home’s Efficiency

    How New Siding Will Help Improve Your Home’s Efficiency

    When you think about improving your home’s energy efficiency, insulation and windows might come to mind. But there’s one upgrade that’s just as important—and often overlooked: your siding. Replacing old or damaged siding doesn’t just give your home a fresh look. It plays a major role in keeping your home comfortable, lowering energy bills, and protecting what matters most.

    Let’s break down how new siding can make a big difference in your home’s efficiency.

    Better Insulation, Less Energy Waste

    Older siding tends to wear down over time. Cracks, gaps, or warping can let outside air in and indoor air out. This means your heating and cooling system has to work harder just to maintain a comfortable temperature. New siding, especially when paired with foam insulation or a weather-resistant barrier, adds an extra layer of protection. This helps regulate indoor temperatures year-round, reducing the load on your HVAC system and keeping your energy bills in check.

    Moisture Protection That Matters

    Moisture is a silent enemy of home efficiency. When water seeps through old or damaged siding, it can lead to mold, mildew, and even rot. These problems don’t just affect your home’s structure—they also hurt your indoor air quality. New siding forms a strong seal that keeps moisture out, helping your home stay dry and healthy. This prevents costly damage and improves the overall efficiency of your home by reducing the risk of insulation breakdown.

    Reflective Options That Keep You Cool

    Some newer siding materials come with reflective technology designed to bounce the sun’s rays away from your home. This feature is especially useful during hot summer months. By keeping heat from penetrating your walls, your air conditioner doesn’t have to work as hard. As a result, you stay cooler without using more electricity. It’s a smart way to lower your cooling costs while keeping your home comfortable.

    Lower Maintenance, Long-Term Savings

    Energy efficiency isn’t just about immediate cost savings—it’s about long-term value. New siding options like fiber cement, insulated vinyl, or engineered wood are designed to last for decades. They require less upkeep, resist weather damage, and won’t need frequent repainting. This means less money spent on repairs and more time enjoying your home. Plus, they often come with warranties that add peace of mind and additional savings.

    Increased Home Value

    Improving your home’s efficiency with new siding doesn’t just benefit your utility bills—it also boosts your property value. Energy-efficient upgrades are a strong selling point for potential buyers. They see a well-cared-for home that won’t cost a fortune to heat or cool. It’s a win-win for you whether you’re staying put or planning to sell in the future.

    Conclusion

    New siding is more than just an aesthetic update. It’s a smart investment in your home’s comfort, efficiency, and value. If your siding is outdated or damaged, upgrading it can make a noticeable difference in how your home feels and what you pay each month. Ready to start your siding transformation? Let us guide you to a more energy-efficient home.