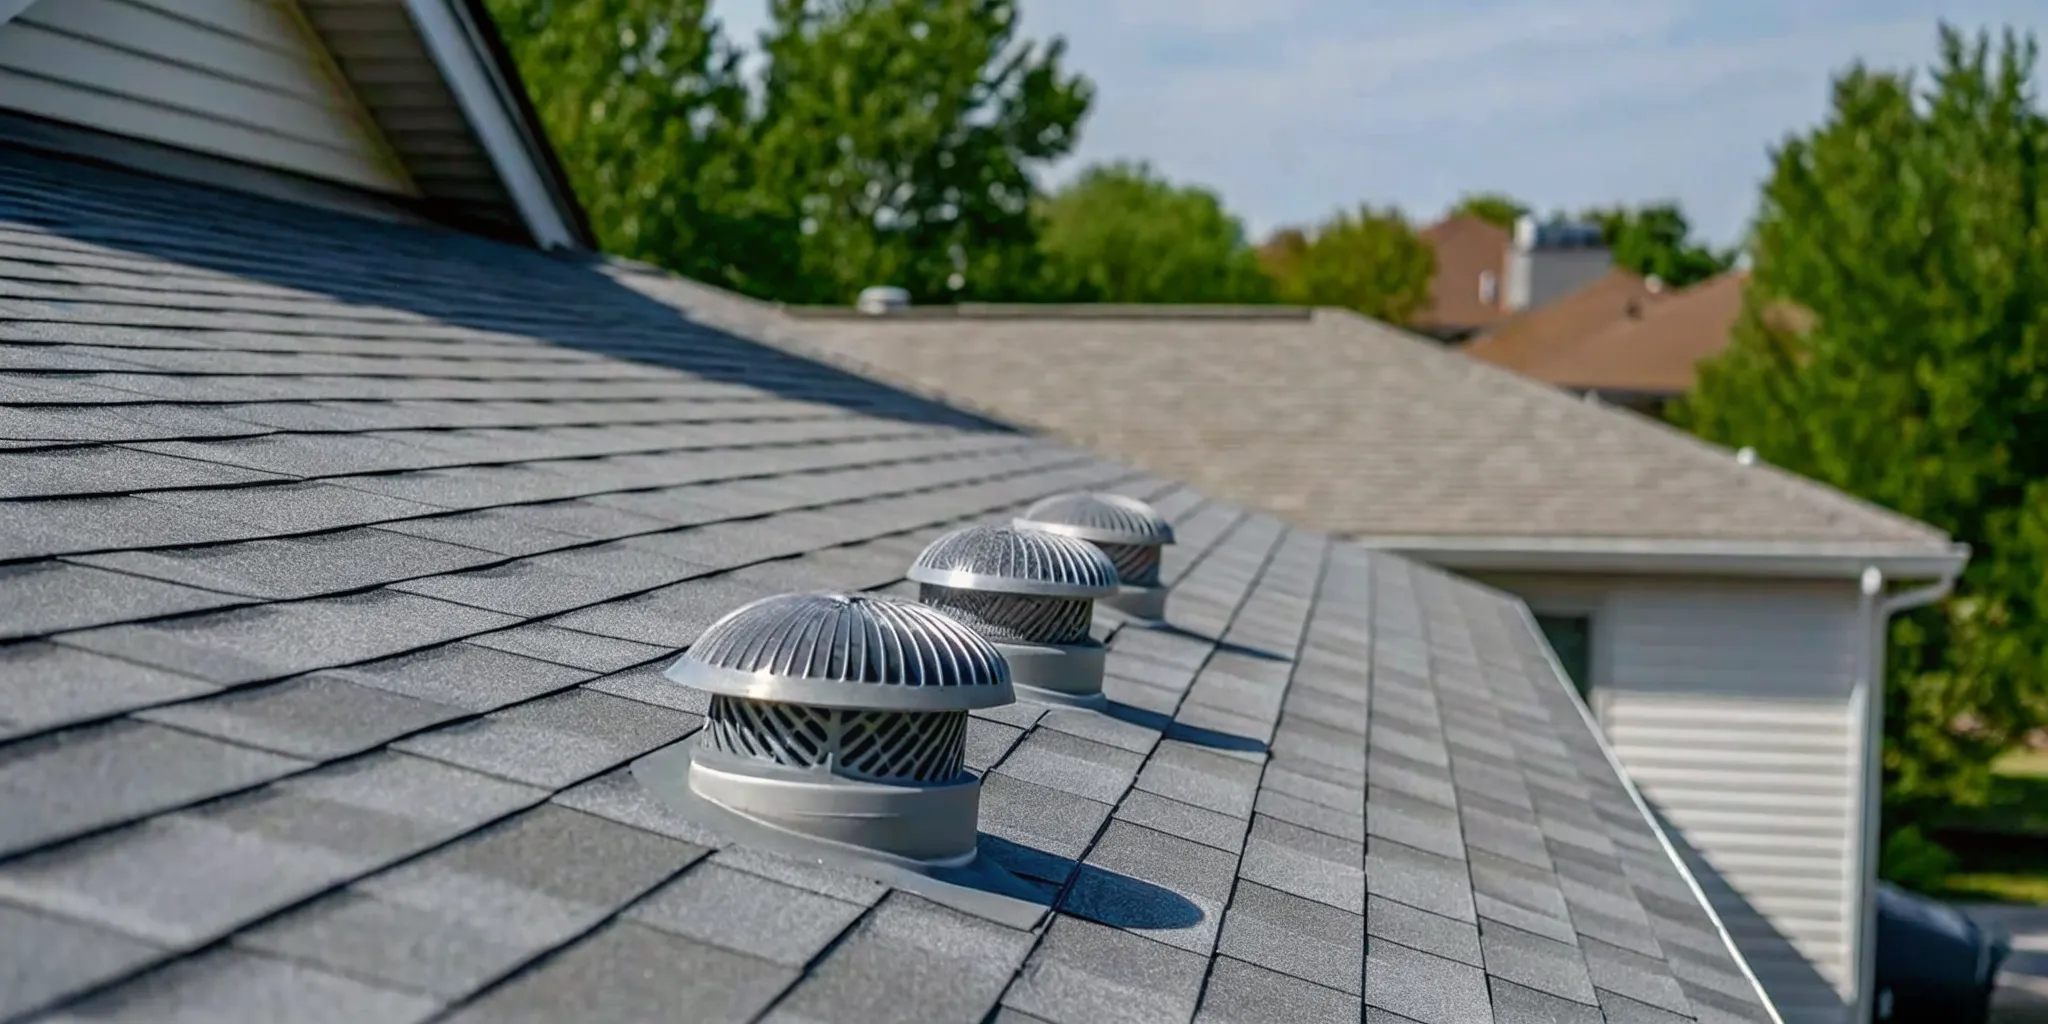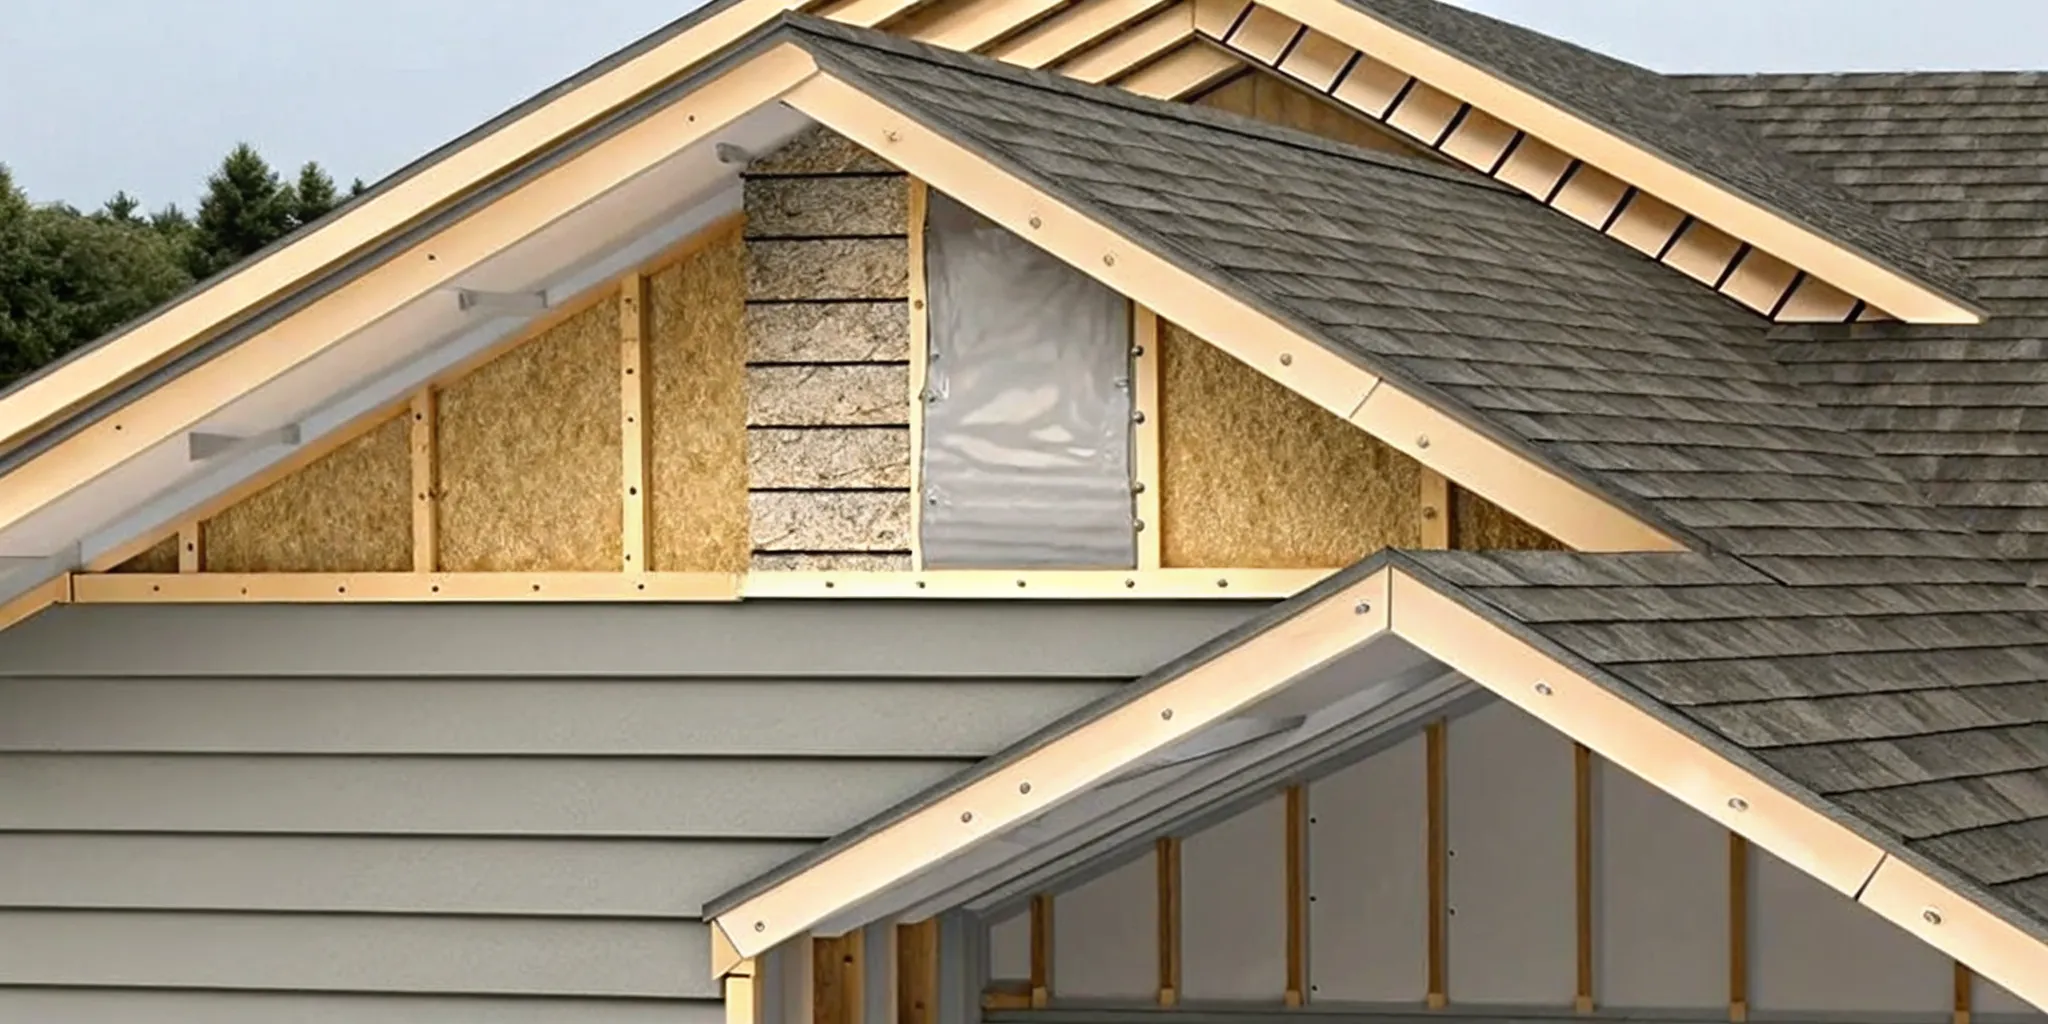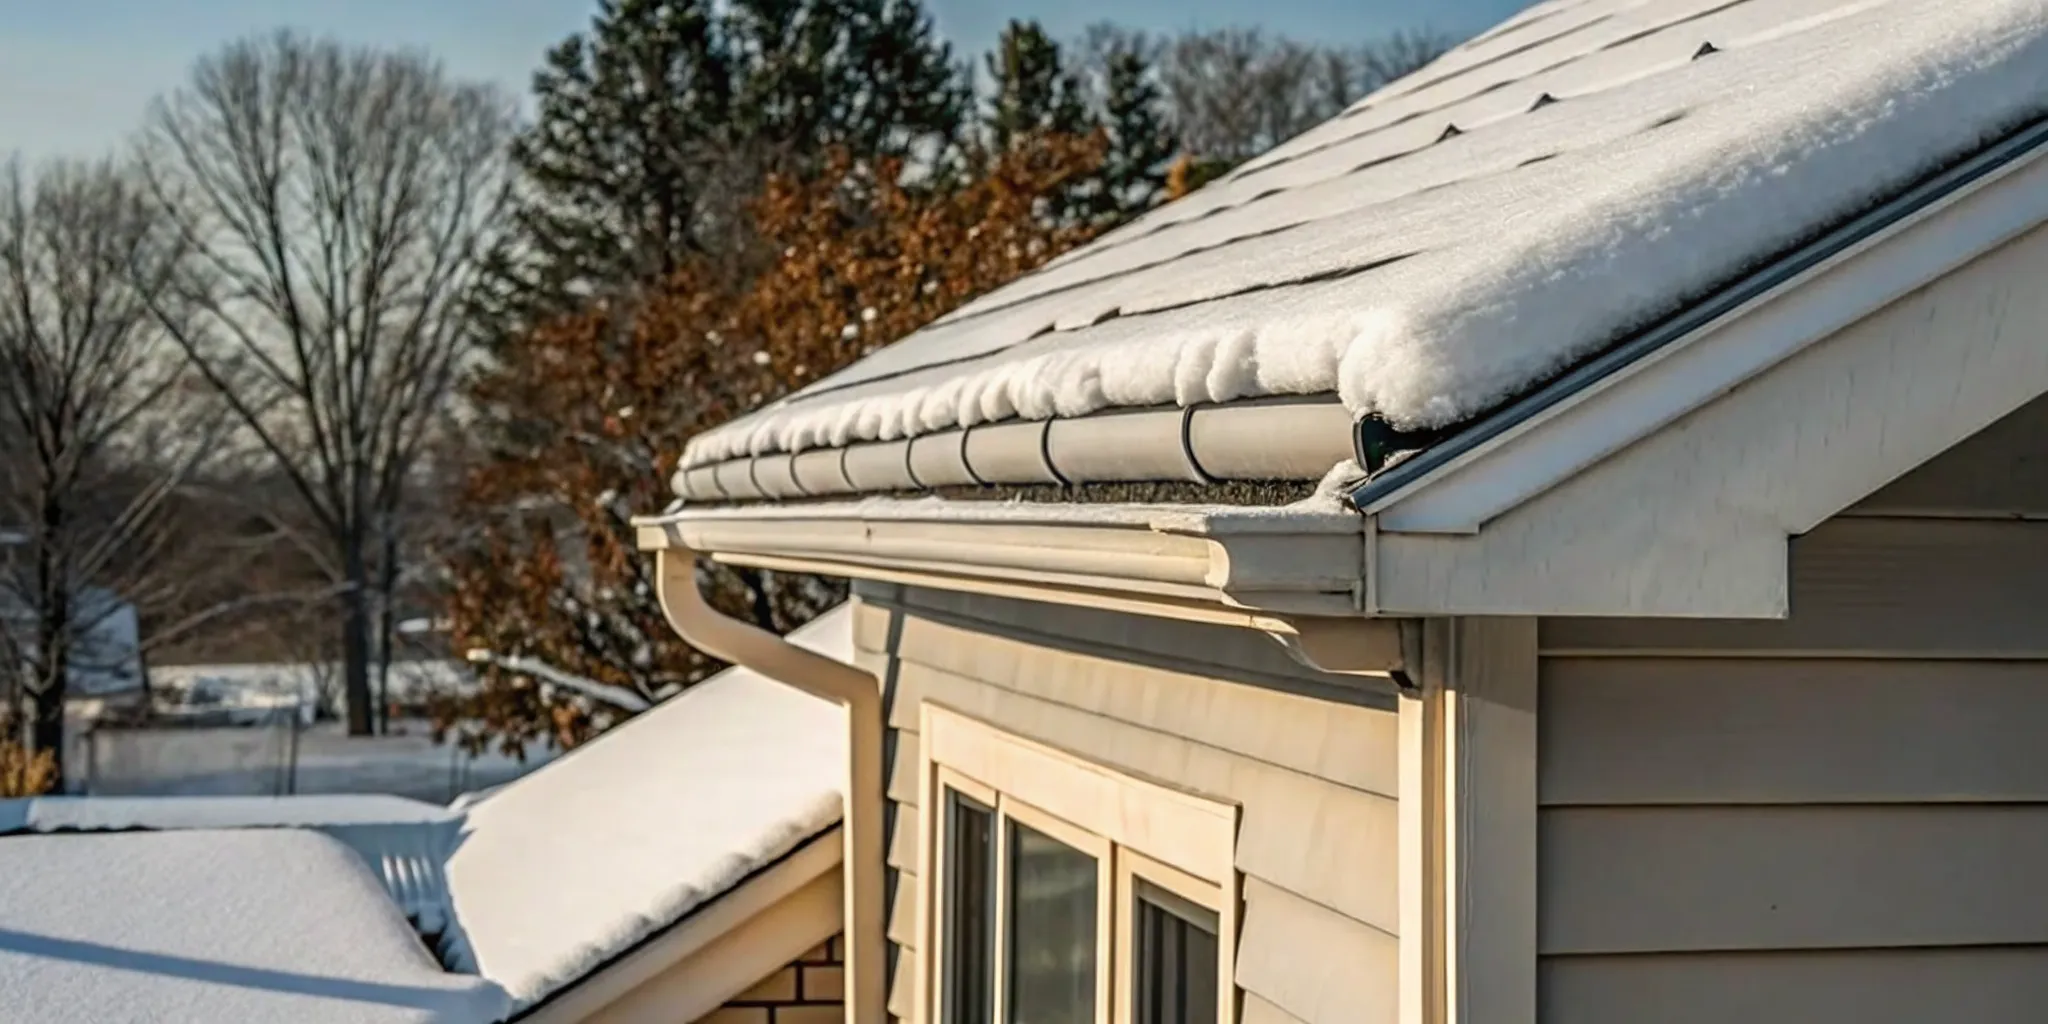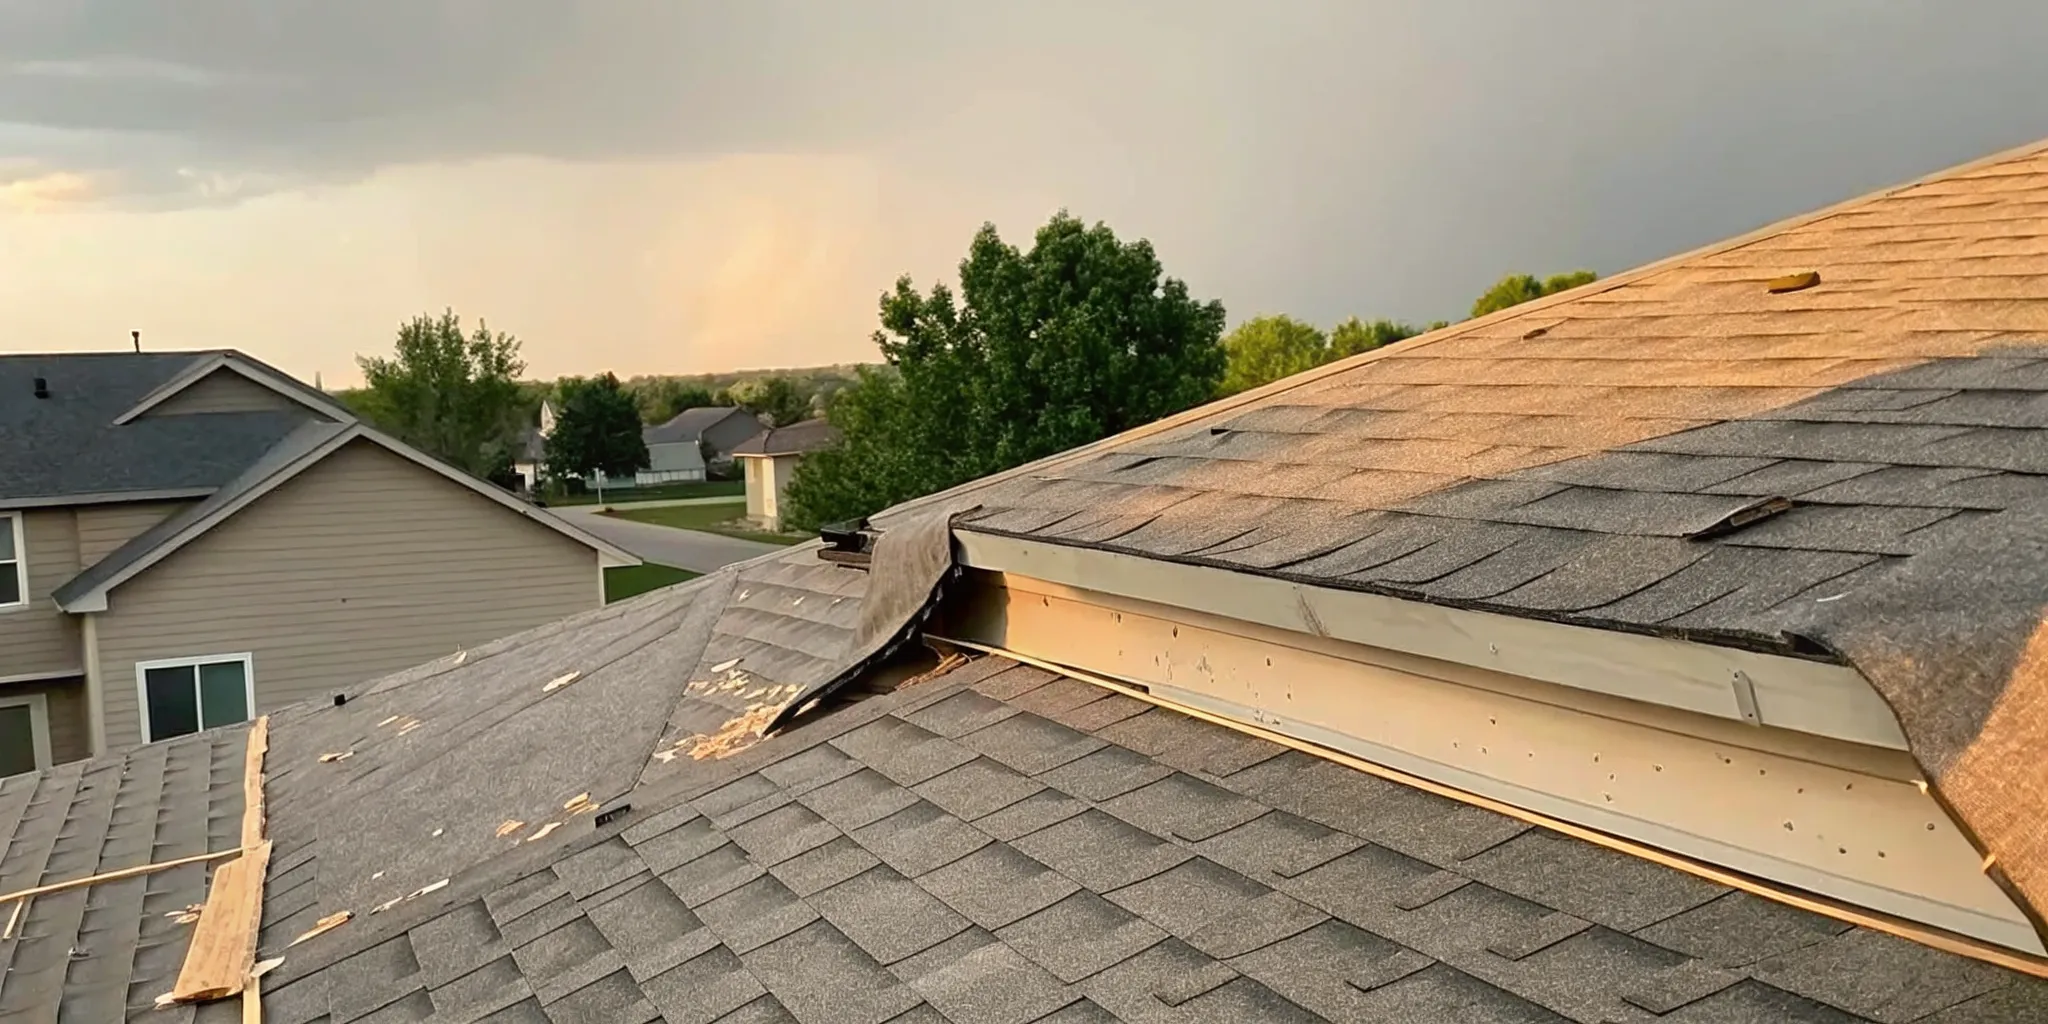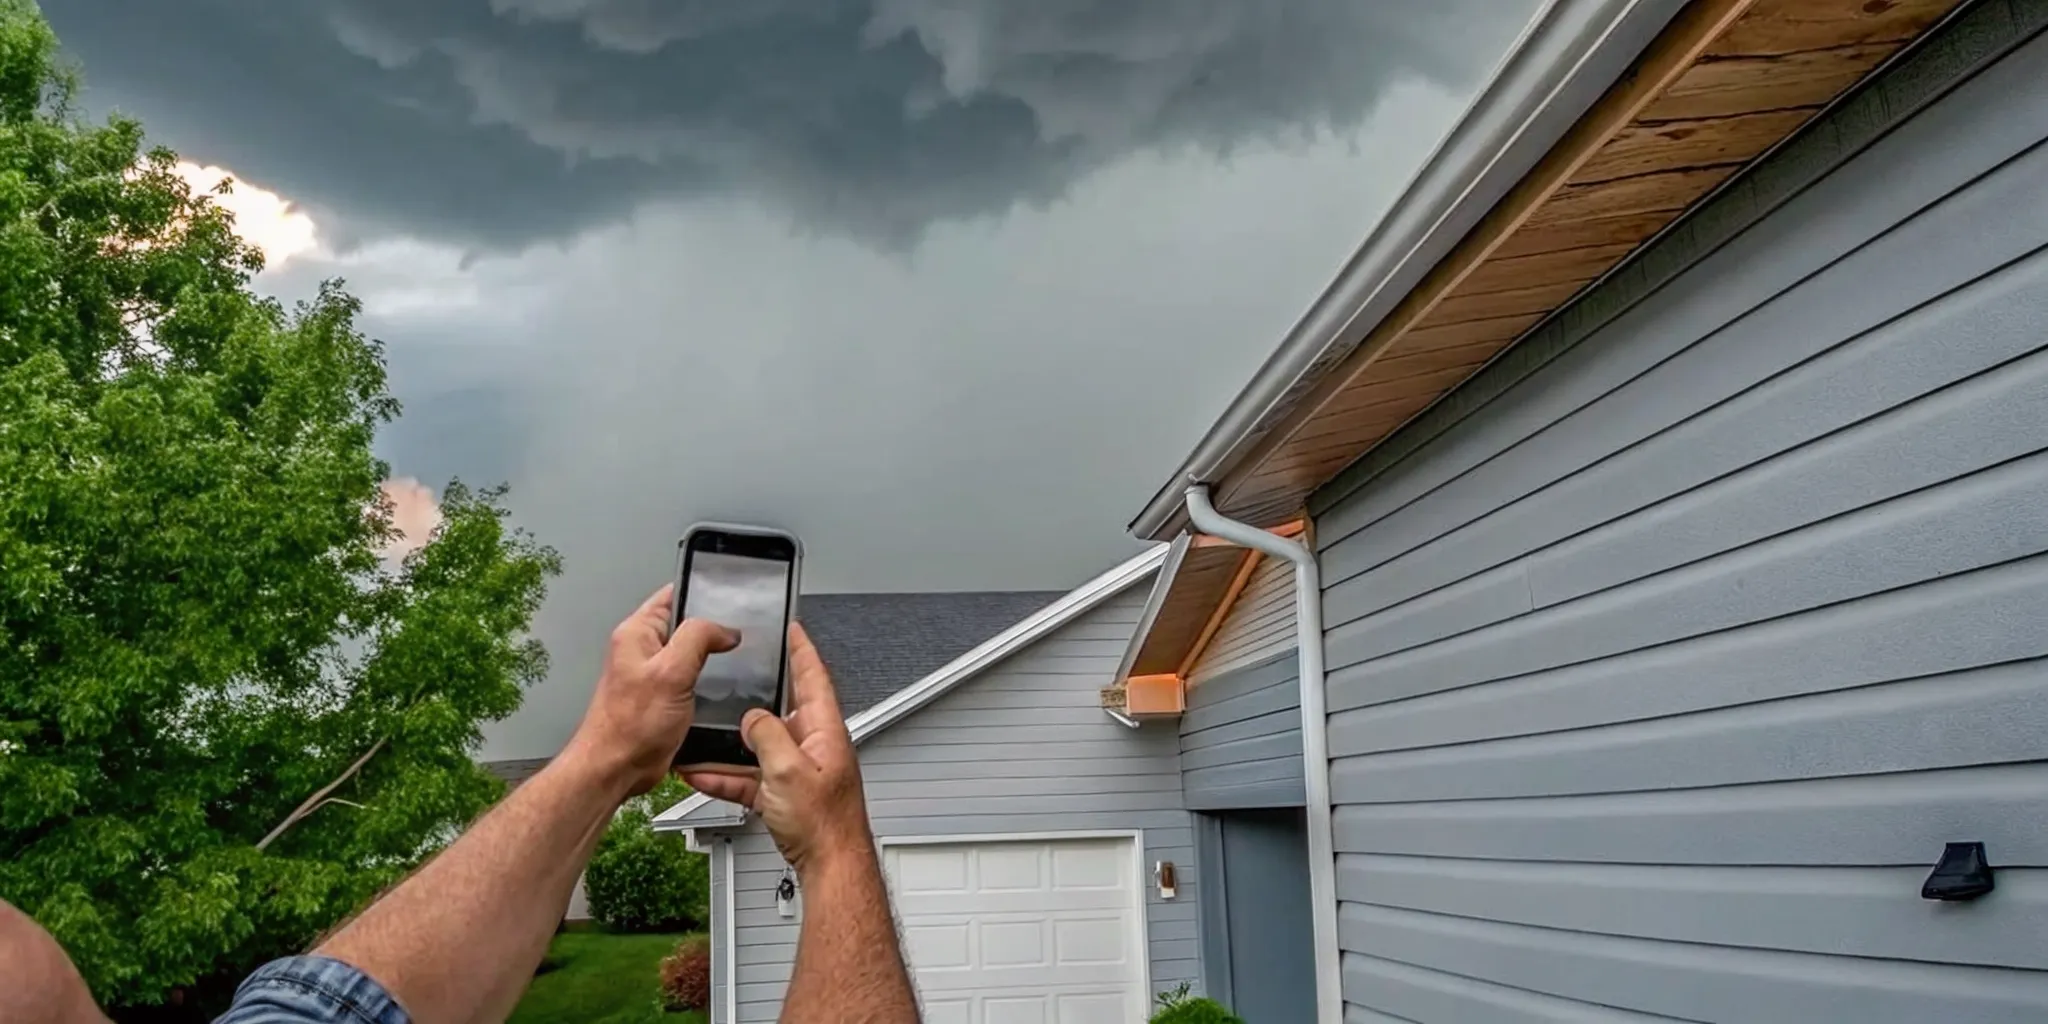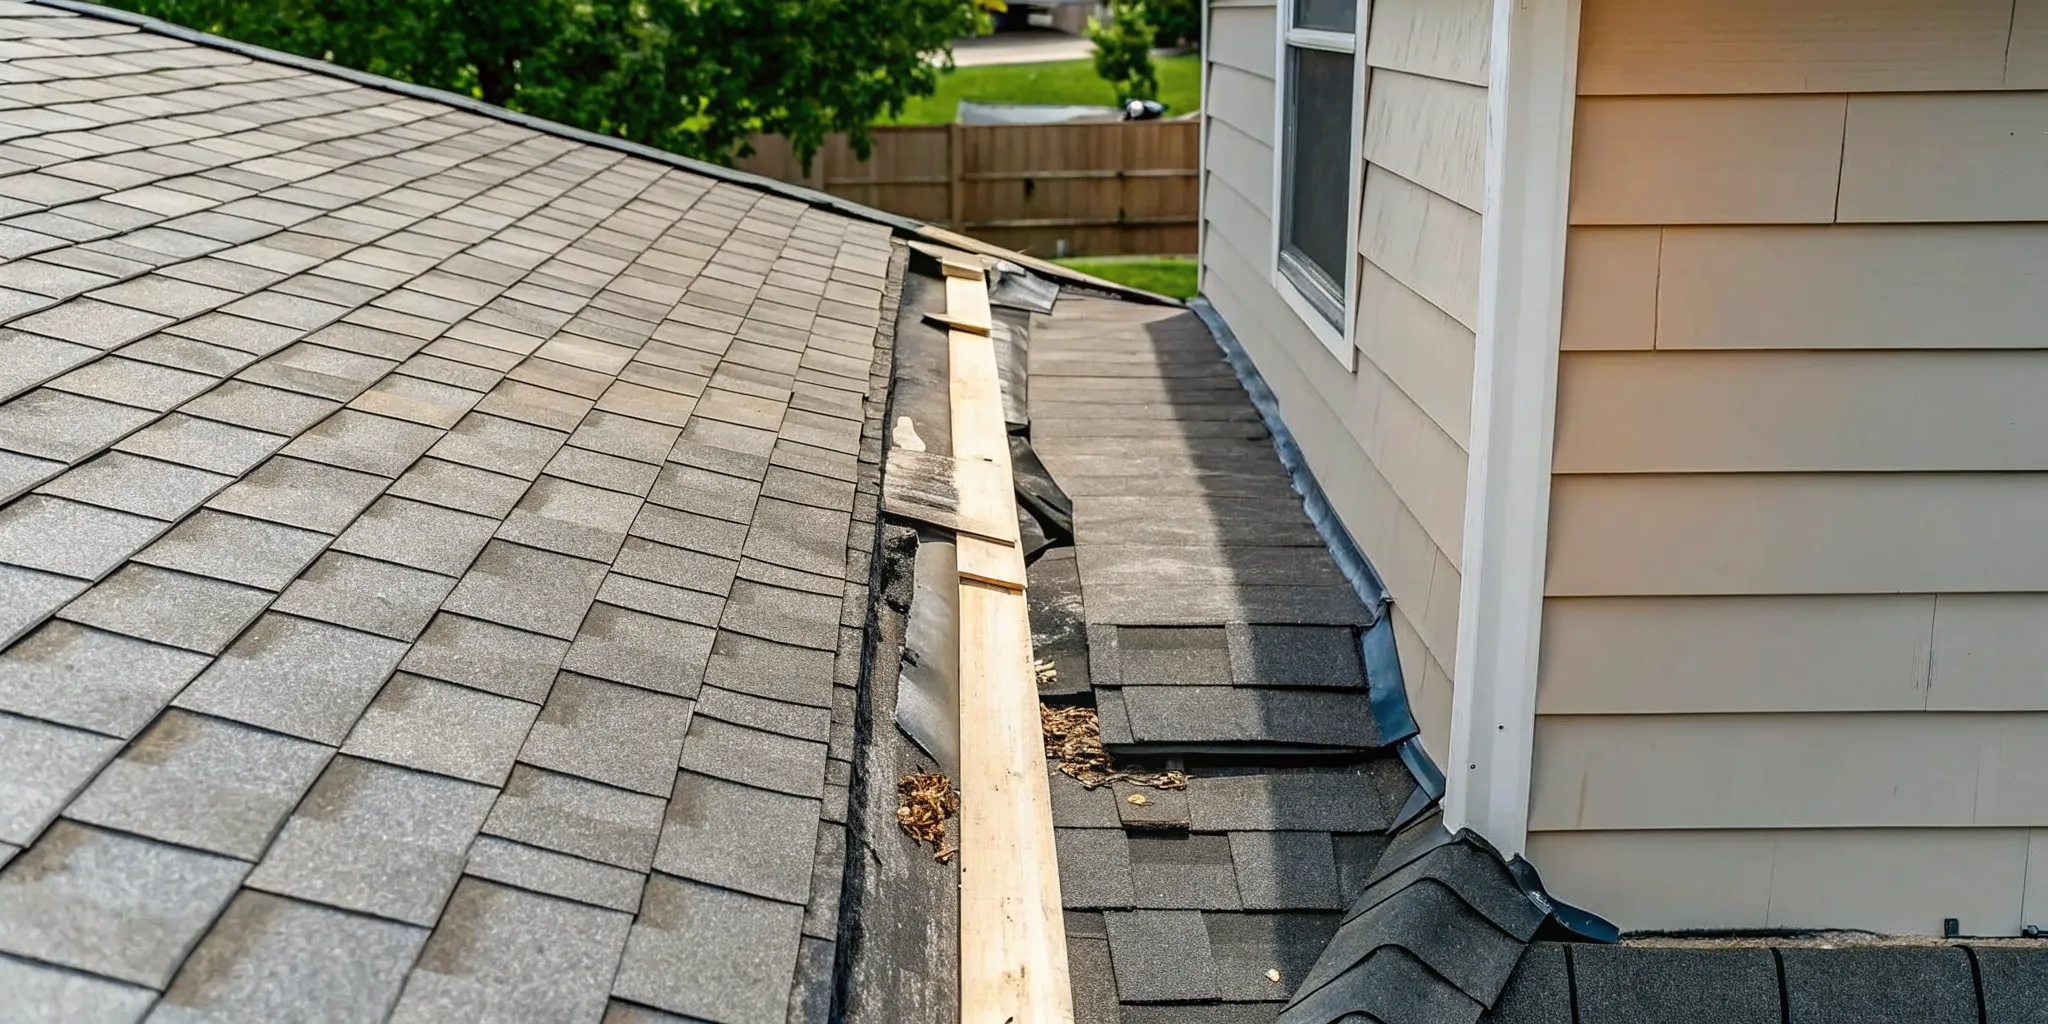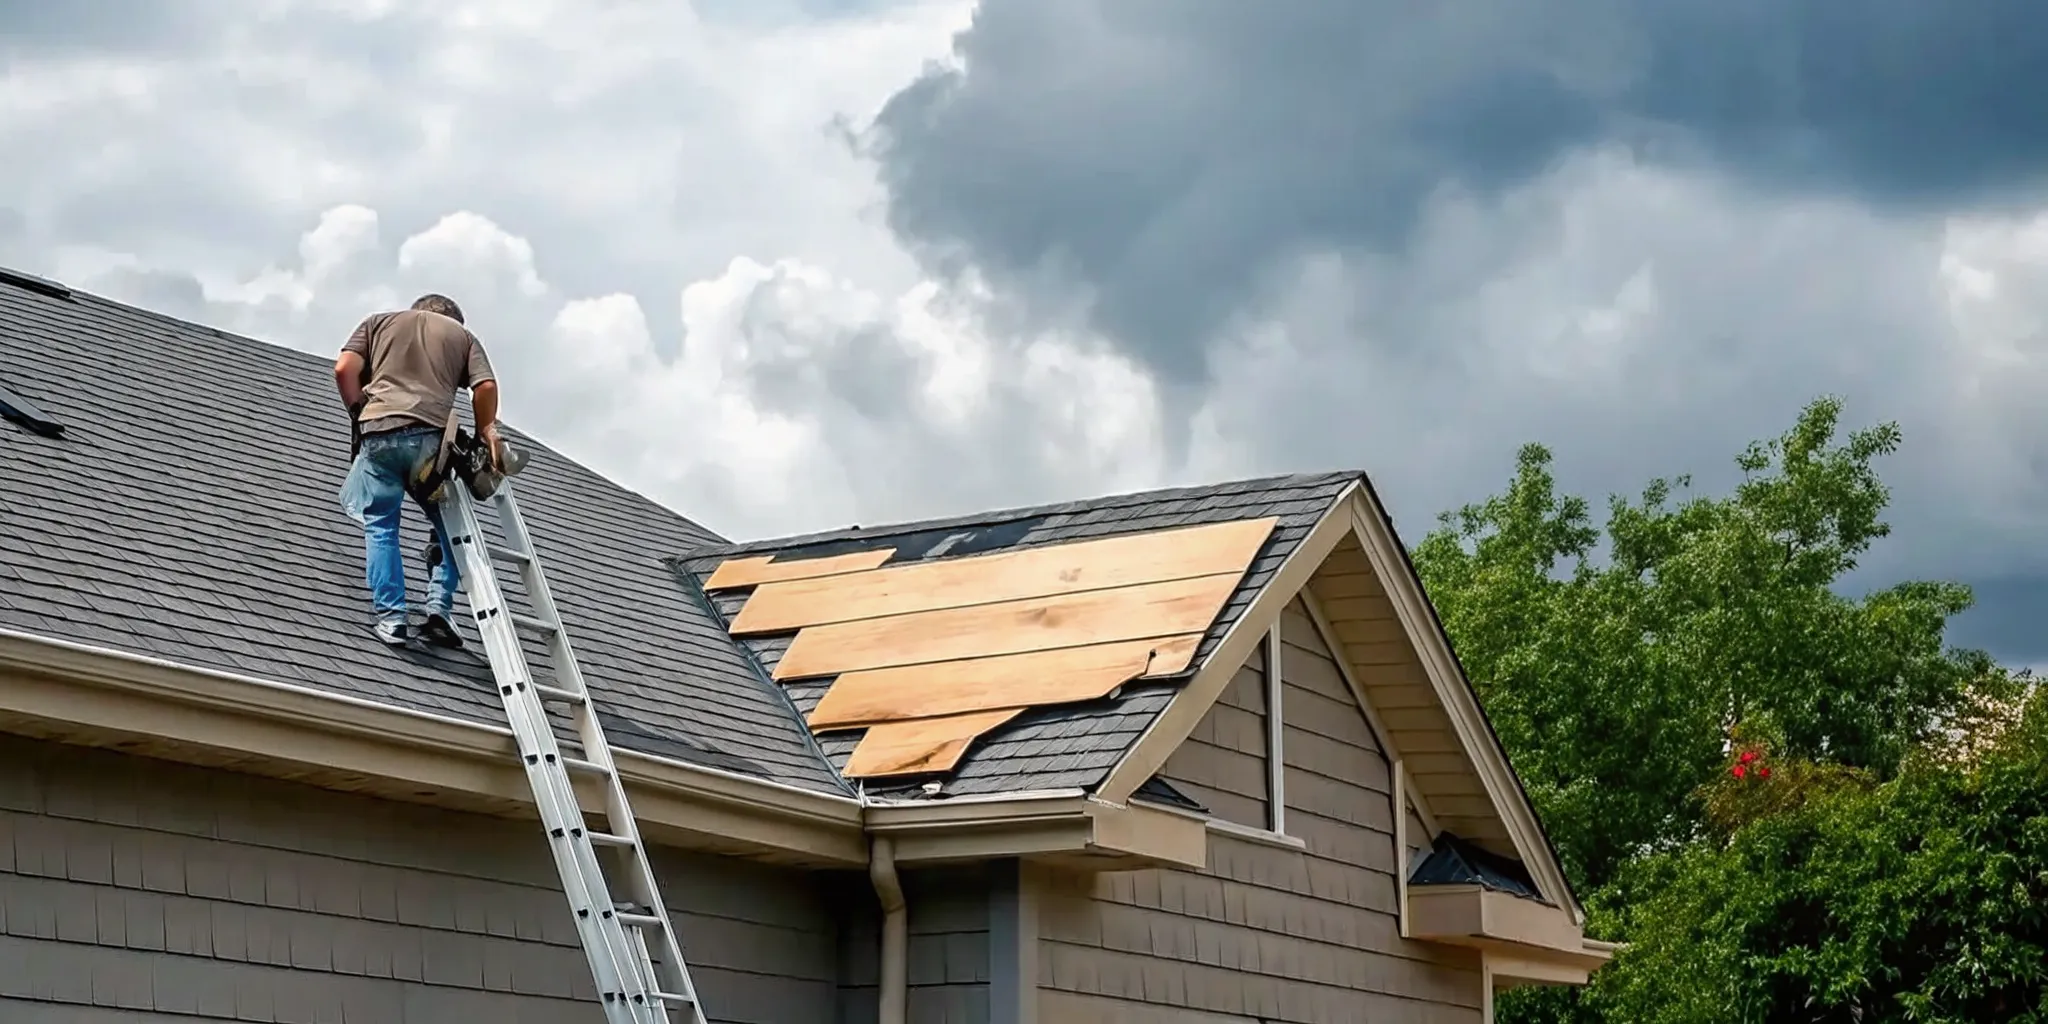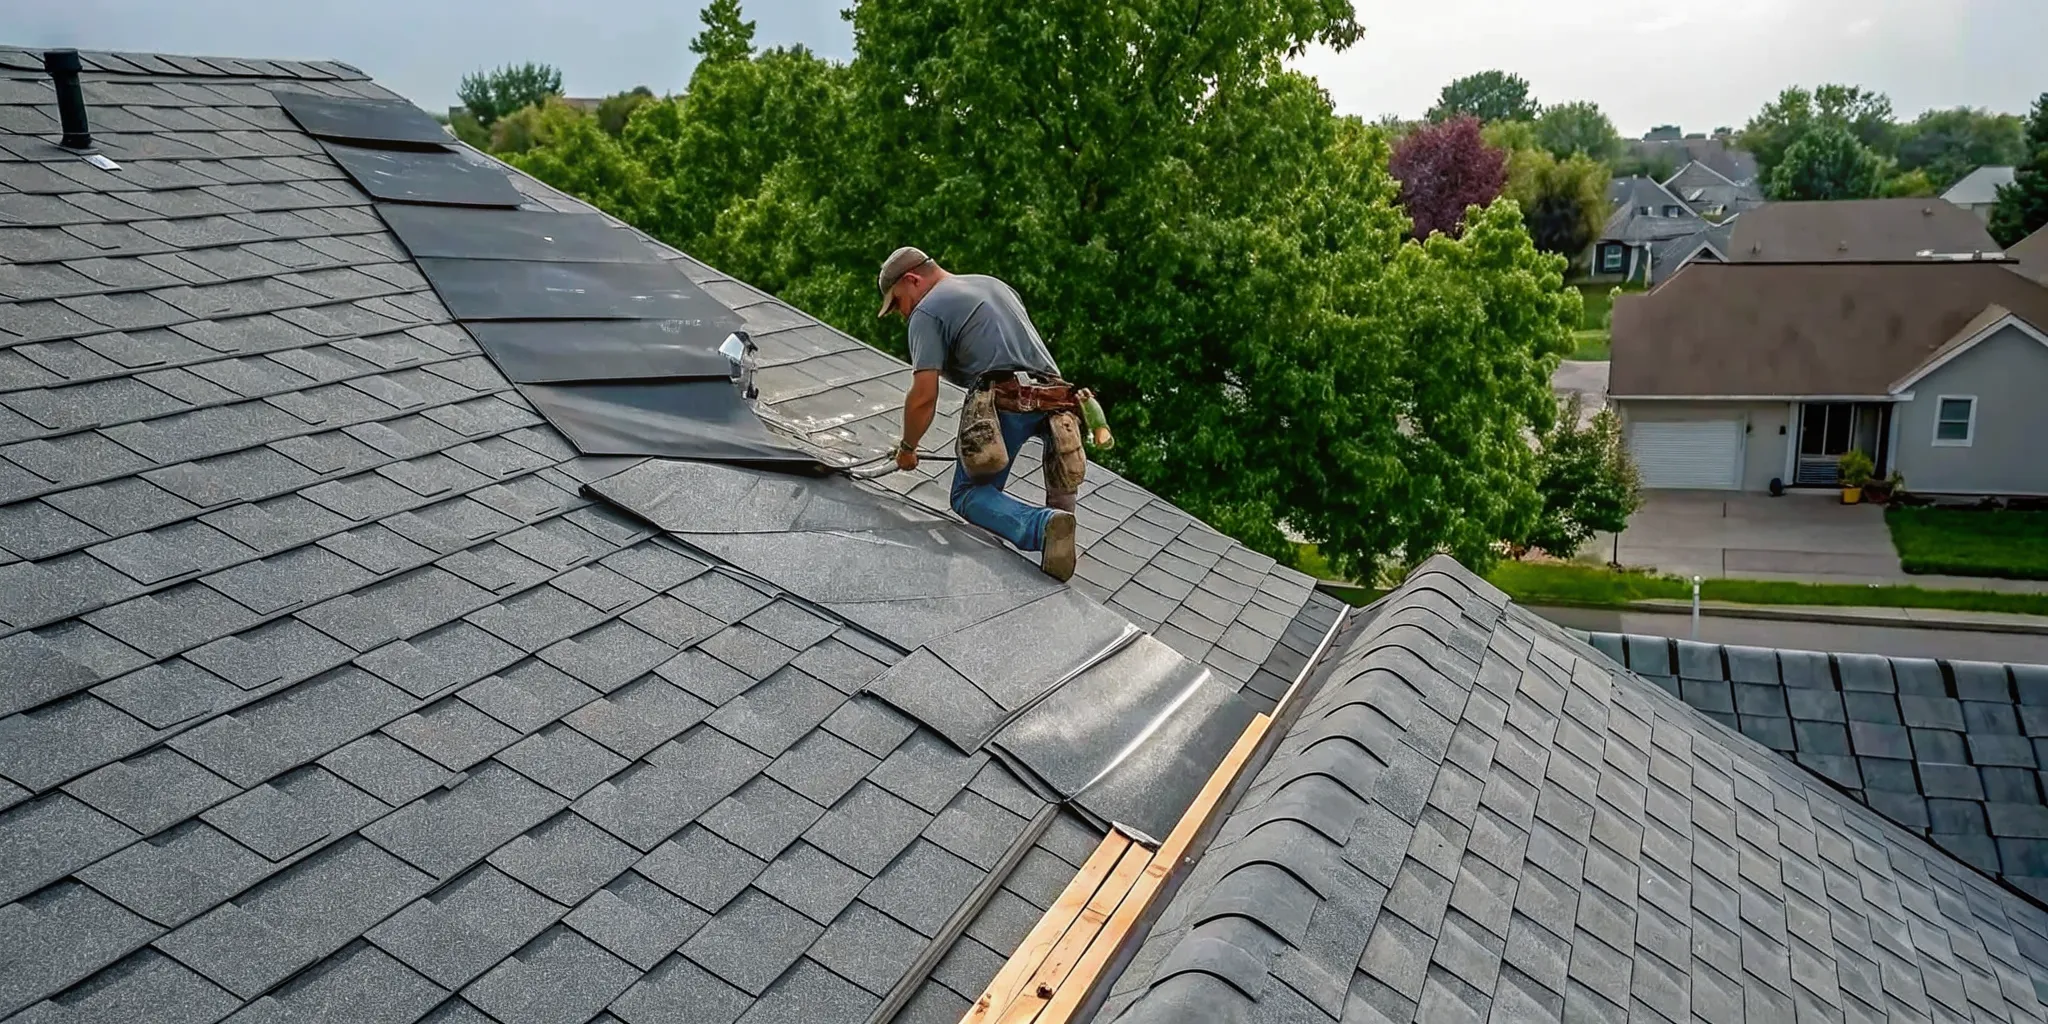
Welcome to the Referred Restoration blog, your source for Minnesota exterior restoration tips covering roofing, siding, gutters, and windows. Whether you own a home in Rogers, Cottage Grove, or anywhere along the Rogers-to-St. Francis corridor, our local team shares practical advice to help you protect your investment through every Minnesota season.

From understanding storm damage signs to choosing the right siding for freeze-thaw cycles, each article is written with the Minnesota homeowner in mind. Browse our latest posts below, or visit our roofing, siding, gutter, and window service pages for detailed information on every exterior system that protects your home.

Schedule a Free Inspection to get personalized recommendations from Referred Restoration's experienced team.

Minnesota Exterior Restoration Tips | Referred Restoration Blog

Blog

  • Roof Leak Repair: Minnesota Flashing Problems

    Roof Leak Repair: Minnesota Flashing Problems

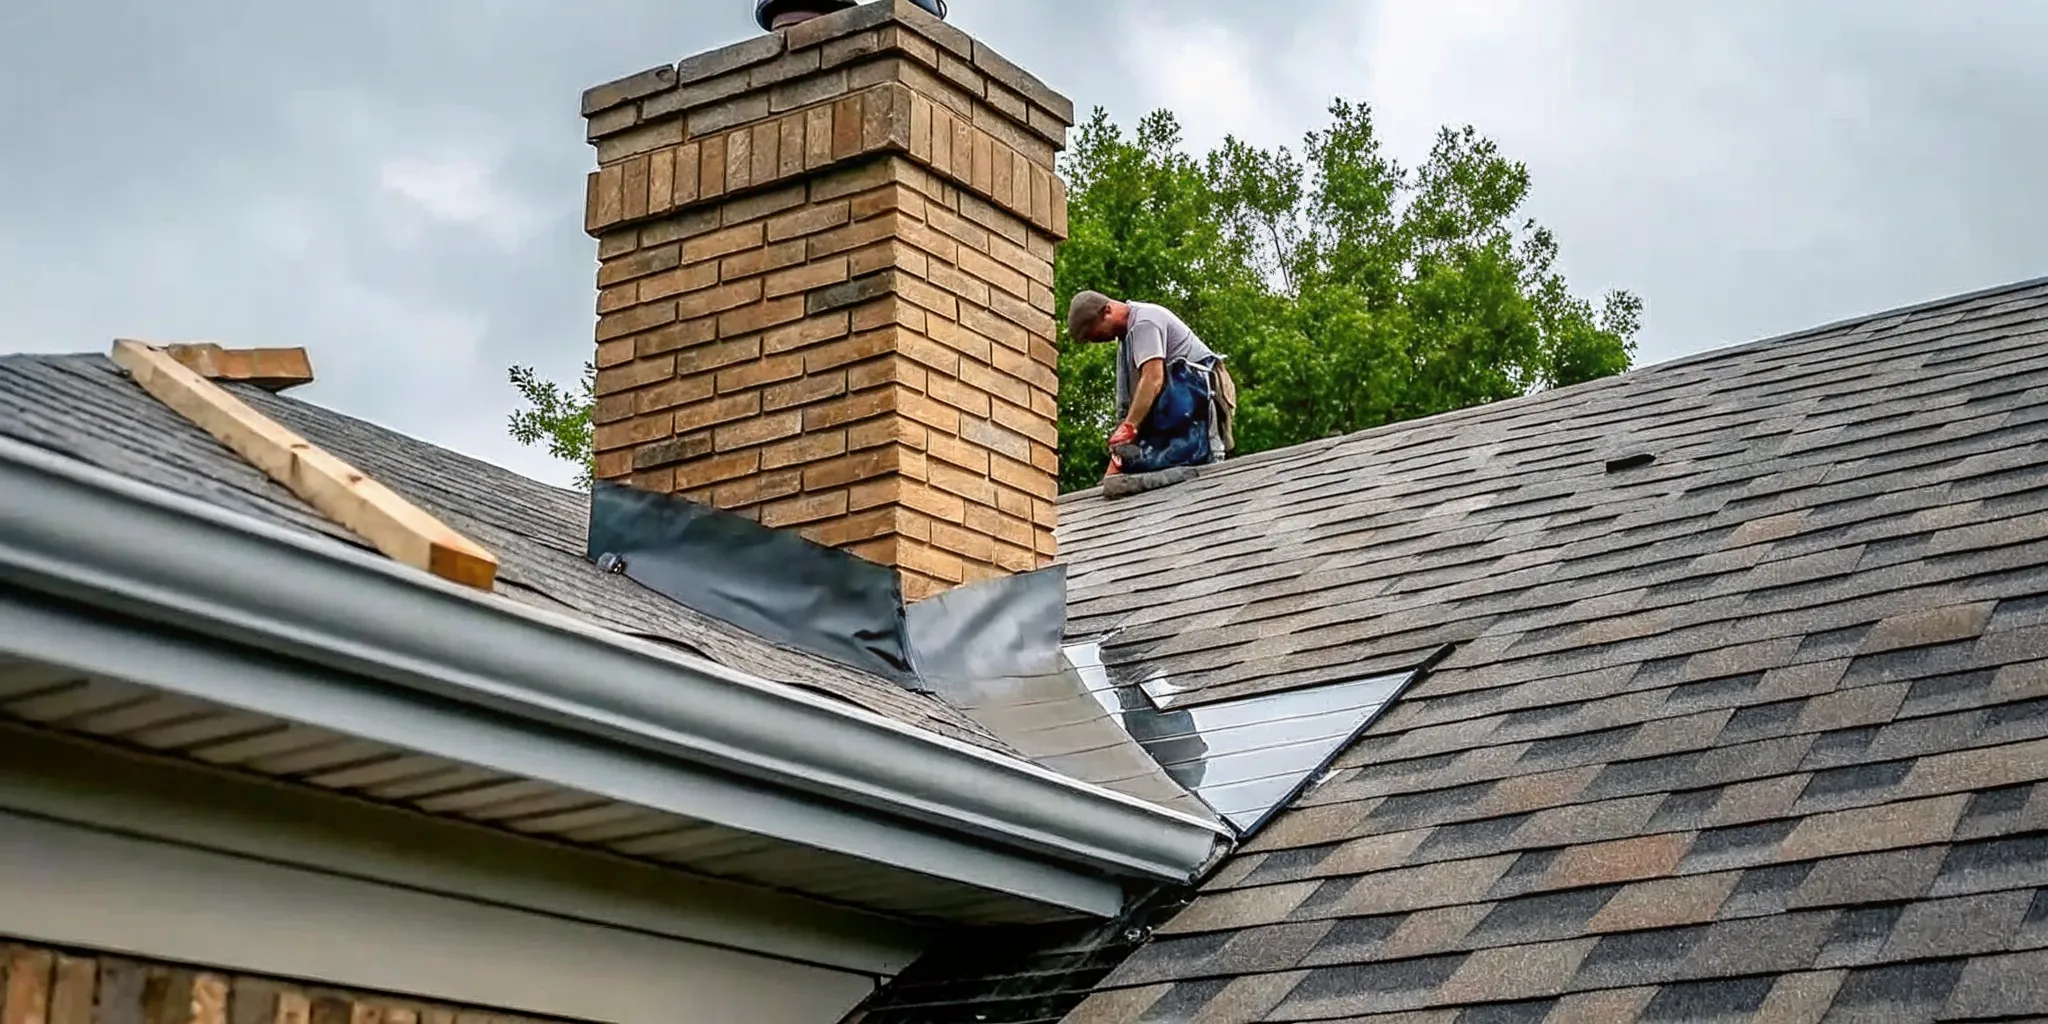
    Broken roof flashing allows water to slip past shingles during every Minnesota rainstorm. Fixing these metal parts is the best way to prevent moisture from rotting your home.

    Roof leak repair in Minnesota often means fixing metal flashing around chimneys, vents, and valleys to stop water from entering through gaps pulled loose by ice. When flashing fails, water enters your attic and causes wood rot, but expert checks find these hidden entry points before they become major and serious problems. Our team at Referred Restoration provides honest checks and uses top tools like Malarkey shingles and durable metal to keep your local home dry and safe. By choosing to Schedule a Free Inspection, you get reliable work from a trusted neighbor who treats your local property with care. We help you protect your home with honest advice and expert roofing work made for the Rogers area.

    Finding a leak in your home is only the first step in fixing the problem. Roof leak repair starts with finding the real source because water often travels a long way from the first entry point. You need a clear way to look at every part of your roof. The path begins with

    Roof leak repair starts with finding the real source

    Water is tricky. It does not always fall straight down. When you see a wet spot on your ceiling, you might think the hole is right above it. But water can enter in one spot and travel far before it drips. This is why roof leak repair must start with a deep look at the whole system. Finding the true entry point is the only way to fix the issue for good.

    Most leaks follow a path along the roof deck or the wood frame. Water is lazy and takes the easiest route down. It might run along a rafter for many feet before it hits a low spot and starts to soak your drywall. Because of this, the stain in your living room could be far from the real gap in your shingles.

    Why stains are rarely where the leak begins

    The roof on your house is built in layers. When water gets past the top shingles, it hits the base layer or the wood deck. Once it is under the shingles, the water will flow down the slope of the roof until it finds a seam in the wood. This means the wet spot you see on your ceiling is just the place where the water at last pooled and soaked through.

    In many cases, the water enters through a small crack near a vent or a chimney. It then runs down a beam and drips onto the top of your attic floor. From there, it may move along a pipe or a wire until it hits the drywall of a wall or ceiling. This moving effect is what makes finding the source so hard.

    How pros trace the path of water

    When you call a pro for help, they do not just look at the stain. They start by going into the attic. They look for water marks or damp wood on the bottom of the roof deck. A pro will follow these marks up the slope of the roof. Even if the wood is dry now, old leaks leave a dark stain that shows where water once flowed.

    Checking flashing and roof joints first

    Most leaks do not start in the middle of a flat row of shingles. Instead, they start at the joints. These are the spots where the roof meets a wall, a chimney, or a vent. To keep water out of these spots, pros use metal strips called flashing. Flashing is meant to bridge the gap and direct water back onto the shingles. But over time, the seal around the flashing can fail.

    In Minnesota, the weather is hard on these metal parts. Heat and cold make the metal grow and shrink. This change can pull the flashing away from the brick or wood. Also, heavy snow and ice can push against the metal and bend it. If your flashing is loose or rusted, it will let water right into the seams of your roof.

    Where flashing problems commonly cause roof leaks

    Roof flashing is a thin layer of metal that keeps water out of your home. It sits in spots where the roof meets a wall or where something pokes through the shingles. Flashing helps move water away from these gaps and down toward your gutters. Without good flashing, water can slip under your shingles and start to rot the wood below. Many people need a roof leak repair because their flashing has gaps or rust.

    Water does not always fall straight down once it gets inside. It can run along a board or a beam before it shows up as a stain on your ceiling. This makes it hard to find the real source of the leak without help. In Minnesota, the freeze-thaw cycles often pull flashing away from the roof. This leaves your home open to wind, rain, and melting snow throughout the year.

    Cracks in chimney flashing

    The chimney is one of the most common spots for a roof leak. It needs a full set of metal pieces to stay dry. One part sits flat on the roof, and another part tucks into the brick. These pieces must overlap well to shed water. If the caulk around these pieces dries out or cracks, water will find a way in. You might see water stains on the walls near your chimney when this happens.

    Brick and mortar can also soak up water during a big storm. When the water inside the brick freezes, it can push the flashing out of place. This creates a large gap where rain can pour inside. It is best to check your chimney every year to catch these small cracks before they turn into big bills. A quick fix now can save you from a big storm damage project later.

    Leaky roof vents and skylights

    Roof vents and skylights are also prone to leaks. Vents use a rubber or metal seal to keep water from getting into the attic. Over time, the sun can bake these seals until they crack or shrink. When it rains, water drips down the vent pipe and into your home. You might not notice it until you see a wet spot on your ceiling or smell mold in the attic. The CDC warns that mold can grow fast when moisture stays in your home for too long.

    Skylights are even more tricky because they sit at an angle. They rely on thick flashing to keep the edges tight against the roof. If the seals around the glass fail, water will seep into the frame. This can ruin the walls around the skylight and damage your paint. Finding these leaks early is a key part of any smart home care plan. If you see water on the glass or the frame, you should call for a pro check right away.

    Valleys and wall spots

    A roof valley is where two slopes meet and form a V shape. This area carries a lot of water when it rains or snow melts. Because so much water flows here, any small gap in the flashing will lead to a leak. Valleys often collect leaves and dirt, which can trap water against the roof. You should look for these signs of trouble in your roof valleys:

    • Piles of leaves or twigs that stay wet for days.
    • Metal flashing that looks rusted or has holes.
    • Loose shingles along the edges of the V shape.
    • Water stains on the ceiling in the middle of a room.

    Wall spots are where the roof meets a side wall of the house. This area uses step flashing, which looks like small metal steps tucked under each shingle. If these steps are not nailed in right, they can slide out. This lets water run behind the siding and into your wall. This kind of leak is hard to spot from the outside but can cause a lot of damage to your home’s frame. Often checking helps find these loose pieces so you can get the right roof leak repair done fast.

    If you think you have a leak, do not wait for the next storm to act. Getting a free inspection is the best way to find out what is wrong. A pro can look at your flashing and shingles to find the real entry point. They have the tools to see things you might miss from the ground. Taking care of these small spots now will keep your Rogers home safe and dry for years to come.

    How Minnesota weather turns small gaps into leaks

    Minnesota weather is hard on homes and can cause hidden damage. Our state has some of the harshest weather in the country. From heavy snow in the winter to high winds in the spring, your roof must stand up to a lot of stress.

    Small gaps that seem minor in the summer can quickly turn into major paths for water when the seasons change. Knowing how these shifts happen can help you stay ahead of damage. It is often the small, hidden spots that cause the most trouble during a storm.

    The impact of freeze-thaw cycles

    One of the biggest issues for Rogers homeowners is the fast freeze-thaw cycle. In the late fall and early spring, the air often jumps above and below freezing in a single day. When water gets into small cracks or under shingles, it can freeze and expand. This strong force can slowly pull apart your roof layers.

    Over time, these cycles can loosen the metal parts called flashings. These flashings are needed because they direct water away from seams and joints. When they shift even a tiny bit, they leave a clear path for water to seep inside. This often leads to the need for roof leak repair to seal the home back up. If the metal is bent or cracked, it is often better to replace it than to patch it. This choice helps keep your roof dry for a long time.

    As the National Institutes of Health notes, small gaps that let in moisture can cause building parts to rot. This can also lead to health issues like mold.

    Why ice dams are a major threat

    In the winter months, ice dams are a top cause of leaks in our area. An ice dam is a thick ridge of ice that forms at the edge of your roof. This happens when heat from inside your home leaks into the attic and warms the roof surface. This heat melts the snow on top of the roof.

    As that meltwater flows down to the cold eave, it freezes again. This ice ridge blocks water from draining off the roof as it should. The water then pools behind the dam and stays on the roof. Because the water has nowhere to go, it can back up under the shingles and into the house.

    The University of Minnesota Extension explains that ice dams need snow and a roof with uneven heat to form. When water gets past the shingles, it can ruin your insulation and stain your ceilings.

    Best times for a roof check

    It is not just ice and snow that cause problems. High winds during spring storms can lift shingles and drive rain into the smallest openings. Your roof works as a system of layers known as a drainage plane. If the top layer fails, the layers below it must be strong enough to keep the house dry.

    But when high winds hit, rain can move sideways and get under the edge of the shingles. This is why timing is a huge part of roof care. You should check your roof at least twice a year to look for small signs of wear.

    The best times are in the spring, after the snow melts, and in the fall, before the first freeze. After a long winter, look for loose metal, missing shingles, or granules in the gutters. Catching a small gap now can save you from a much larger job later. Taking this step helps you find hidden gaps before they turn into major water leaks during the next big storm.

    What should you do when the roof starts leaking?

    Finding water inside your home during a storm can be scary. You need to act fast to stop the water from hurting your floors and walls. A quick response helps you manage the situation until you can get a professional roof leak repair. In Minnesota, rain or melting snow can find small gaps in your shingles or flashing. Once water gets in, it can move along the wood inside your attic. This means the drip you see might not be right under the entry point.

    Keep your family safe indoors

    Safety is the most important thing when you deal with a leak. Water and electricity are a dangerous mix. If you see water near lights or wall plugs, do not touch them. The Red Cross says you should turn off the power at the main breaker if you see sparks or frayed wires. If you have to stand in water to reach the panel, call an expert. Never go out on your roof while it is raining, windy, or icy. A wet roof is very slick and can lead to a bad fall.

    Manage the water and protect your home

    You can limit the damage by catching the water as it falls. Move your furniture, rugs, and electronics away from the drip. If you cannot move something, cover it with a heavy plastic sheet. Use a bucket or a bin to catch the water. If the water is pooling in your ceiling, it might bow or sag. You can poke a small hole in the middle of the sag with a nail to let the water drain into a bucket. This keeps the ceiling from getting too heavy and falling down.

    1. Clear the area by moving your items and covering large furniture with plastic.
    2. Put a bucket or large bin under the drip to catch the water and keep it off the floor.
    3. Place a towel inside the bucket to stop water from splashing out onto the floor.
    4. Check the attic to see if you can find where the water is entering the house.
    5. Document the leak by taking photos and videos of the water and any damage you see.
    6. Call a local expert to schedule a free inspection of your roof.

    Why professional help matters

    Small leaks can lead to big problems like mold or rot. The EPA notes that mold can start to grow on wet surfaces in just 24 to 48 hours. A skilled team knows how to find the real source of the leak. They will check the flashing around your chimney and vents. In Rogers and Cottage Grove, our teams see many leaks caused by local weather cycles. Getting a pro to look at your roof ensures the fix is done right the first time. This protects your home for years to come.

    Does a leaking roof need a patch or a larger repair?

    Finding the source of the leak

    Finding where water gets into your home can be hard. Water often moves along the roof frame before it drips onto your ceiling. This means the stain you see might not be right under the leak. You need to check your attic to find the real path of the water. Look for damp spots, mold, or light coming through the roof boards.

    During a storm, you must act fast to stop the water from doing more damage. Use a bucket to catch drips and move your things to a dry spot. Do not try to go out on the roof while it is wet or icy. Wait for a dry day and call for a free check to find the real spot that needs work. A pro can find leaks that you might miss from the ground.

    When to choose a targeted patch

    But a patch only works if the rest of the roof is in good shape. If the shingles around the leak are old or dry, a patch will not last long. The new seal may not stick to the old surface as it should. In these cases, fixing one spot may just lead to another leak nearby. You should think about how old your roof is before you choose to patch it.

    Repair Type Primary Goal When to Use It
    Short Fix Stop water fast During a storm or before a pro arrives
    Targeted Flashing Repair Fix specific leak point When metal around a vent or wall fails
    Full Roof Restoration Renew the entire system When shingles are old or damage is widespread

    The role of metal flashing

    Metal flashing is a key part of your roof. It sits in spots where the roof meets a wall or a vent. Its job is to guide water away from these seams and joints. In Minnesota, ice and snow can push against these metal parts. This can bend them or pull them away from the roof over time.

    When flashing fails, water can get into the house very fast. A pro can often fix this by putting in new metal and sealing it well. This is a common type of roof leak repair that can help your home. If you see water near your chimney or a vent, the flashing is likely the cause. Catching this early can stop a lot of water from getting into your attic.

    Signs of a larger roof problem

    Sometimes, a leak is a sign that your whole roof is at the end of its life. If you see many leaks at once, a patch will not help much. Look for shingles that are curling or missing many granules. These signs show that the roof can no longer shed water. In this case, a full roof restoration is often the best path.

    If your roof is more than 20 years old, it may be time for a change. Shingles get brittle as they age and lose their power to flex. In Minnesota, the cold winters make this problem worse. When the shingles can no longer grow and shrink, they crack. These cracks let water in across large areas of the roof. A patch cannot fix a roof that has reached this stage of wear.

    Water that gets into your walls can cause big problems like rot. As the National Institutes of Health states, moisture in buildings can lead to rot and health risks. Fixing the roof fast helps keep your home dry and safe. If you wait too long, the wood under the shingles may need to be replaced. This can turn a small fix into a much larger project. It is better to deal with the issue now than to wait for more leaks to show up.

    What happens during a professional roof leak inspection?

    A professional check for a roof leak repair is more than just a quick look at your shingles. Experts from Referred Restoration follow a set path to find the exact spot where water gets in. This work starts inside your home and moves up to the attic before anyone steps onto the roof. Our team looks for wet spots, wood rot, and damp insulation that show where the leak began.

    Indoor and attic review

    The search starts with signs like brown stains on your ceiling or walls. Because water can travel along roof framing, the leak source is often far from the stain you see. We check the attic to trace water trails back to the roof deck. This step is vital because it finds leaks that shingles might hide from the outside. The Federal Emergency Management Agency notes that attic checks help find wet wood and mold risks early.

    In the attic, our team looks at the roof deck for dark streaks or rust on nails. We also check the insulation to see if it is damp or holds moisture. These signs tell us how long the leak has been active and if it has caused hidden damage. We want to be sure we find every weak point before we start any work on the outside of your home.

    Exterior roof surface check

    Once the indoor check is done, we move to the roof surface to find the entry point. We look at shingles for signs of wear like cracks, missing grit, or curling edges. These issues often happen because of Minnesota freeze-thaw cycles and heavy snow. We pay close attention to flashing, which is the metal that guards spots like chimneys, vents, and valleys. Flashing leads water away from roof breaks, but it can fail over time.

    We also check the gutters to make sure water flows away from your home. Clogged gutters can back up and force water under the shingles. This lead to a need for gutter service or roof fixes. Our experts use their knowledge of local weather to find spots that wind or ice dams might harm. This full review helps us give you a clear plan to fix the leak and keep your home dry.

    Tailored fix plan

    After the full check, we give you a clear plan for your roof. We do not use a one-size-fits-all path because every home in Rogers has its own needs. Our team explains what we found and what steps will fix the leak for good. If the leak came from a recent storm, we can also help with storm damage restoration tasks. We focus on honest talk so you know exactly what your home needs to stay safe.

    You can Schedule a Free Inspection with our team to start this process. We treat every home as if it were our own and aim for work that lasts. Our goal is to give you peace of mind with a roof that can stand up to the tough Minnesota weather. Contact us today to get a professional look at your roof and stop leaks before they grow.

    Frequently Asked Questions

    Can I fix a roof leak from the inside of my house?

    You can stop water from doing more damage from the inside, but a real fix must happen on the outside. While inside, you can clear a path for the water and catch it in a bucket. But to stop the leak for good, a pro must seal the hole or fix the metal parts on the roof surface. Putting a patch on the inside will only trap water in your wood frame, which can lead to rot over time.

    How long does a professional roof leak repair take?

    Most small repairs take about two to four hours once a pro is on your roof. This time allows them to find the entry point, remove old shingles, and put in new metal flashing or sealants. If the leak has caused more damage to the wood deck below, the work may take a full day. A pro can give you a better idea of the time needed after a free inspection of your Rogers home.

    Will my homeowners insurance cover roof leak repair?

    Your insurance often covers a repair if a sudden event like hail, wind, or a fallen tree caused the leak. However, most plans will not pay for leaks caused by old age or poor care. It is wise to check your policy or talk to your agent after a storm. If you have storm damage, listing the issues early is a key step when you need to file a claim.

    When should I worry about a water stain on my ceiling?

    You should take any water stain on your ceiling seriously, even if it is small or dry. A stain shows that water has already made its way past your roof and through your insulation. If you wait to act, the water can cause mold to grow or rot your wood frame. It is best to get a roof leak repair check to find the source before the next storm hits.

    Ready to stop your roof flashing leaks and protect your home?

    Small gaps in your roof flashing can let water soak into your home and cause wood rot or mold growth that stays hidden for months. If you fix these small leaks now, you can avoid a much larger repair bill or a full new roof after the next storm. Catching these issues early helps you keep your Rogers home safe and dry while stopping the stress of a sudden leak during a heavy rain.


  • 5 Steps to Flawless Fiber Cement Siding Installation

    5 Steps to Flawless Fiber Cement Siding Installation

    The thought of tackling a home improvement project yourself can be empowering. For many homeowners, the decision often comes down to DIY versus hiring a professional. When it comes to siding, the stakes are particularly high. While you might be tempted to handle the job yourself, a fiber cement siding installation is a complex process with little room for error. This material is heavier and requires more specialized techniques than vinyl or wood. Making a mistake can lead to costly water damage or even void your warranty. This guide will help you understand exactly what the job entails so you can make an informed decision that’s right for your skill level, budget, and home.

    Key Takeaways

    • Fiber cement delivers unmatched durability and style: It’s engineered to withstand Minnesota’s harsh weather, resisting rot, pests, and moisture damage. You get the beautiful appearance of wood without the constant upkeep, making it a smart, long-term choice for your home.
    • Proper installation is non-negotiable: The performance of your siding depends on getting the details right. This means using a moisture barrier, leaving correct expansion gaps, and using the right fasteners to prevent buckling, cracking, and water damage down the road.
    • A professional installation provides peace of mind: Given the specialized tools and techniques required, hiring an expert is the safest bet for most homeowners. A pro ensures the job meets manufacturer standards, protects your warranty, and guarantees your home is properly shielded from the elements.

    Fiber Cement Siding 101: What It Is and Why You’ll Love It

    If you’re looking for a siding material that can handle Minnesota’s toughest weather while keeping your home looking beautiful, it’s time to get familiar with fiber cement. This powerhouse material has become a go-to for homeowners who want the best of all worlds: incredible strength, minimal upkeep, and versatile style. Unlike vinyl that can crack in the cold or wood that requires constant maintenance, fiber cement offers a modern solution that’s built to last.

    Before you start a project, it’s helpful to understand what makes this material so special and why it’s a smart investment for your home’s exterior. Let’s break down what it’s made of, its key advantages, and how it performs when the Minnesota seasons throw their worst your way.

    What’s it made of?

    At its core, fiber cement siding is a composite material made from a simple but powerful blend of cement, sand, water, and cellulose fibers. Think of it as a specially engineered recipe for durability. The cement and sand provide toughness and impact resistance, while the cellulose fibers add flexibility to prevent cracking. This combination creates a dense, heavy-duty panel that feels substantial and holds up exceptionally well over time. It’s a durable, long-lasting, and low-maintenance material that’s perfect for residential homes, giving you peace of mind that your exterior is protected by something truly solid.

    Its key benefits: durability, weather resistance, and style

    Fiber cement siding gives homeowners an unbeatable combination of durability, low maintenance, and aesthetic flexibility. First, it’s incredibly tough. It resists rotting, warping, and pests like termites, which means you won’t be dealing with the constant repairs that wood siding often requires. It’s also non-combustible, adding a layer of safety to your home. Beyond its strength, fiber cement enhances your home’s appearance with a variety of design options. It can be manufactured to mimic the look of wood lap siding, shingles, or even stucco, allowing you to achieve your desired aesthetic without the drawbacks of those other materials.

    How it stands up to Minnesota weather

    For Minnesota homeowners, this is where fiber cement truly shines. Our state’s climate is no joke, with freezing winters, humid summers, and the occasional hailstorm. Fiber cement is engineered to handle these extremes. Because the material is waterproof, it won’t swell or buckle from moisture, protecting the structure of your home from water damage and mold. It also stands strong against high winds and resists the impact of hail far better than vinyl or aluminum. The freeze-thaw cycles that cause other materials to crack and split have little effect on fiber cement, ensuring your home remains beautiful and protected for years to come.

    Your Project Checklist: Tools, Materials, and Safety Gear

    Before you even think about pulling a panel out of the box, let’s talk prep. A successful siding project is all about having the right gear on hand from the start. It saves you from making frantic trips to the hardware store and, more importantly, helps you do the job safely and correctly. Think of it as your recipe for success; you wouldn’t start baking without all your ingredients measured out, right? Let’s get your checklist sorted so you can begin with confidence.

    The right tools for cutting and fastening

    Working with fiber cement siding requires a few specific tools to get clean cuts and a secure fit. You’ll need a circular saw, but make sure it’s fitted with a fiber cement blade or specialized shears. This is key because it minimizes the amount of dust created during cutting. You’ll also want a reliable measuring tape, a nail gun for efficient fastening, a caulk gun for sealing, and the proper flashing to protect vulnerable areas. Having these items ready will make the entire installation process go much smoother.

    Don’t skip this safety gear

    This part is non-negotiable. Fiber cement contains silica, and cutting it creates dust that you absolutely do not want to breathe in. Always wear a high-quality dust mask designed for this type of work. On top of that, have a sturdy pair of safety glasses to protect your eyes from debris and work gloves to keep your hands safe. It might feel like a hassle to gear up, but taking these simple precautions is the most important step in any DIY project. Your health and safety always come first.

    Your complete materials checklist

    Beyond the tools, let’s line up your materials. Start with a good weather-resistant barrier, like house wrap, to cover your walls completely. Make sure to overlap the pieces correctly to create a seamless shield against moisture. When you’re ready for the siding, remember to leave a tiny gap (about 1/8 inch) where two panels meet to allow for natural expansion and contraction. Finally, use only stainless steel or hot-dipped galvanized nails. These won’t rust over time, ensuring your beautiful new siding stays securely in place for years to come.

    Your Step-by-Step Guide to Installing Fiber Cement Siding

    Installing new siding is a major undertaking, but it’s also one of the most transformative projects for your home’s curb appeal and protection. While the process requires precision and patience, understanding the core steps can help you appreciate the craftsmanship involved, whether you’re tackling the project yourself or hiring professionals. A flawless installation ensures your fiber cement siding will look great and perform beautifully for decades, standing strong against Minnesota’s toughest weather.

    Think of this guide as your roadmap to a successful installation. We’ll walk through the entire process, from prepping your walls to applying the final coat of paint. Each step builds on the last, so getting the details right from the start is key to a durable, professional-looking finish. A proper installation is the best way to get the full benefits of this incredible material. If you’re looking for a team that has this process down to a science, our experts at Referred Restoration specialize in beautiful and resilient siding installations. We treat every home like our own, ensuring every plank is perfectly placed.

    Step 1: Prepare your walls and add a moisture barrier

    Before any siding goes up, your home’s walls need to be ready. Start by making sure the wall sheathing is clean, dry, and structurally sound. Any existing issues must be addressed first. The most critical part of this step is installing a weather-resistant barrier. This material, often called house wrap, is your home’s main defense against moisture getting trapped behind the siding, which can lead to rot and mold. It should be installed according to the manufacturer’s instructions, with all seams properly overlapped and taped. Flashing is also installed around all windows, doors, and other openings to direct water away from these vulnerable areas.

    Step 2: Put up the starter strip and flashing

    With your walls protected, the next step is to establish a perfectly level base for your first course of siding. This is done with a “starter strip,” a small piece of material installed along the bottom of the wall. This strip kicks the bottom edge of the first siding plank out slightly, creating the correct angle so that all subsequent rows overlap properly. Getting this piece perfectly level is non-negotiable. Many installers snap a chalk line across the entire length of the wall as a guide to ensure the starter strip, and therefore all the siding, is perfectly straight.

    Step 3: Cut and place your siding panels

    Cutting fiber cement requires specific tools and techniques to get clean edges and manage dust. Because the material contains crystalline silica, it’s essential to wear a high-quality dust mask or respirator. For the cleanest cuts, many professionals use a circular saw equipped with a special polycrystalline diamond (PCD) blade. A helpful tip is to cut the boards with the finished side down to minimize chipping on the visible surface. Always follow safe cutting practices to protect yourself and ensure the best results for your project. Once cut, the panels are ready to be placed.

    Step 4: Secure the panels to wall studs

    How you fasten the siding is just as important as how you cut it. Fiber cement panels must be nailed directly into the wall studs, which are the vertical wood frames inside your walls. Nailing only to the sheathing won’t provide enough holding power. Use corrosion-resistant siding nails, and make sure to place them correctly, typically about 3/4 to 1 inch from the top edge of the plank. This technique, known as blind nailing, hides the nail heads with the next course of siding for a clean finish. Be careful not to drive the nails too deep, as this can crack the board.

    Step 5: Apply the finishing touches: caulk, seal, and paint

    The final step is what makes your siding installation truly weatherproof and polished. High-quality, paintable caulk should be applied to all vertical joints where siding planks meet trim boards or corners. This seals out moisture and creates a seamless look. Don’t caulk the horizontal joints between the siding planks themselves, as these are designed to allow for natural expansion and contraction. Once the caulk has cured, you’re ready for paint. Applying a quality acrylic exterior paint not only gives you the color you want but also provides the final layer of protection against the elements.

    Avoid These Common Fiber Cement Siding Mistakes

    Fiber cement is an incredibly resilient and beautiful material, but its strength depends entirely on proper installation. Even a small mistake can lead to bigger problems down the road, like moisture damage or a voided warranty. Getting the details right from the start is the key to ensuring your new siding looks great and protects your home for decades. Think of it like baking a cake from a complex recipe; if you skip a step or use the wrong ingredient, the final result just won’t be the same, no matter how good the ingredients were to begin with.

    When you invest in a high-quality material for your home’s exterior, you want to get the most out of it. That’s why our team at Referred Restoration focuses on meticulous craftsmanship with every single panel we install. We’ve seen firsthand how cutting corners can undermine an otherwise excellent project, turning a great investment into a future headache. Knowing what to watch for is the first step toward a successful installation, whether you’re hiring a pro or just want to understand the process better. Here are some of the most common installation errors we see and how to avoid them, so you can be confident in your home’s new exterior and enjoy its benefits for years to come.

    Using the wrong nails (or nailing too hard)

    Choosing the right fastener is more important than you might think. Fiber cement siding requires corrosion-resistant nails, like stainless steel or hot-dipped galvanized, to prevent rust streaks from staining your siding over time. Using the wrong type can lead to unsightly blemishes and weaken the connection. Just as important is how you nail. Driving the nails in too hard, or “over-driving,” can fracture the siding. These tiny cracks might not be obvious at first, but they create weak points that can expand and compromise the panel’s integrity, often voiding the manufacturer’s warranty.

    Forgetting expansion gaps and moisture control

    Like most building materials, fiber cement siding expands and contracts with changes in temperature and humidity. To account for this natural movement, small gaps (usually about 1/8 of an inch) must be left where the siding planks meet. Forgetting these expansion gaps can cause the siding to buckle, warp, or crack under pressure. This is especially critical in a place like Minnesota, where we see significant temperature swings between seasons. Proper moisture control, including a high-quality weather-resistive barrier and correct flashing around windows and doors, works with these gaps to create a complete, protective siding system.

    Creating uneven lines and poor alignment

    One of the best things about fiber cement is its clean, sharp appearance. But that sharp look depends on perfect alignment. The amount of siding visible in each row is called the “exposure,” and it needs to be consistent across the entire wall. Unlike more flexible materials that can hide minor imperfections, fiber cement’s rigidity makes any unevenness stand out. Wavy lines or inconsistent spacing can make an otherwise beautiful project look sloppy. Taking the time to measure carefully and use a level for each course ensures the final result is straight, professional, and visually appealing from every angle.

    Damaging panels with poor cutting techniques

    Cutting fiber cement siding isn’t like cutting wood. The material contains crystalline silica, and cutting it with the wrong tools creates a large amount of fine dust. Inhaling this dust can cause serious health issues. Professionals use specialized tools like fiber cement shears or saws equipped with dust collection systems to minimize this risk. Beyond the safety concerns, improper cutting can also damage the siding itself. Using the wrong blade can easily chip or crack the edges of the panels, resulting in a messy finish and creating entry points for moisture. Clean, precise cuts are essential for both safety and a flawless look.

    Overlooking manufacturer and building code rules

    Every brand of fiber cement siding comes with its own set of specific installation instructions. These guidelines cover everything from the type of fasteners to use to the required clearance from roofs and walkways. Following these manufacturer requirements is not optional; it’s essential for ensuring the siding performs as designed and, crucially, for keeping your warranty valid. Additionally, all installation work must comply with local building codes, which are in place to ensure the safety and structural integrity of your home. A professional installer will be well-versed in both sets of rules, ensuring your project is done right.

    DIY vs. Pro Installation: What’s Right for You?

    Deciding whether to install fiber cement siding yourself or hire a professional is a major fork in the road for any home project. On one hand, the satisfaction of a DIY job well done is hard to beat. On the other, siding is your home’s first line of defense against the elements, and getting it right is critical. This isn’t just about aesthetics; it’s about protecting your investment for years to come. Choosing the right path depends on your experience, your timeline, and your comfort level with the risks involved. Let’s walk through what to consider so you can make a confident decision for your home.

    When to consider a DIY installation

    If you have a background in construction or have successfully tackled large-scale home renovations before, a DIY fiber cement installation might be on your radar. The process shares some similarities with installing wood siding, but the material has unique requirements that demand precision. You’ll need specialized tools for cutting fiber cement without creating excess dust, a solid understanding of moisture barriers, and the patience to get every measurement and cut just right. This is a project for the seasoned DIYer who is meticulous, prepared for a challenge, and already has a well-stocked workshop.

    The risks of a botched DIY job

    Even the most durable siding can fail if it isn’t installed correctly. Small mistakes can lead to big problems, especially here in Minnesota. When seams aren’t properly sealed or nails are driven in too deep, you create openings for moisture to seep in, which can lead to rot and water damage inside your walls. An improperly installed moisture barrier can trap water instead of keeping it out. These issues not only compromise your home’s protection against wind and rain but can also void your siding’s warranty. A botched job often means you’ll have to pay for expensive repairs down the line, completely wiping out any initial savings.

    Signs it’s time to call a professional

    If you read the previous section and felt a knot in your stomach, that’s a good sign it’s time to call a professional. Installing fiber cement siding is a demanding job that requires specific skills and tools to get right. If you’re unsure about local building codes, don’t want to invest in specialized equipment, or simply want the assurance of a job done right the first time, hiring an expert is the best choice. A certified siding contractor ensures the installation is flawless, your home is protected, and your manufacturer’s warranty remains intact, giving you complete peace of mind.

    Related Articles

    Frequently Asked Questions

    How much maintenance does fiber cement siding actually need? It’s one of the most low-maintenance options available. Unlike wood, you won’t have to worry about rot, termites, or woodpeckers. Your main task will be to wash it every so often with a simple soap and water solution to keep it looking fresh. The finish is incredibly durable, so you won’t be spending your weekends doing constant touch-ups or repainting.

    Can I change the color of my fiber cement siding later on? Yes, and that’s one of its best features. While many fiber cement products come with beautiful, long-lasting factory-applied color, the material is fully paintable. If you decide you want a fresh look for your home years down the road, you can have it painted. For the best results, you’ll want to use a high-quality, 100% acrylic exterior paint to ensure a durable and beautiful finish.

    What makes fiber cement a better choice for Minnesota weather compared to something like vinyl? It really comes down to stability and impact resistance. Vinyl siding can become brittle in our freezing winters, which makes it more likely to crack or shatter from hail or even a stray ball. Fiber cement is a much denser, stronger material that resists impact far better, even in the cold. It also doesn’t warp in the summer heat and stands up incredibly well to the constant freeze-thaw cycles that can wear down other materials over time.

    You mentioned expansion gaps. Will I see gaps between my siding boards? This is a great question that shows you’re thinking about the details. While tiny gaps are intentionally left where the siding planks meet trim boards or corners, a professional installer doesn’t leave them exposed. These specific vertical joints are sealed with a high-quality, flexible caulk before painting. This creates a seamless, weatherproof seal that protects your home while still giving the siding the room it needs to expand and contract naturally.

    Why is the installation so much more complicated than other types of siding? The complexity is due to the material’s unique characteristics. Fiber cement is significantly heavier and more rigid than vinyl, so it requires careful handling and precise fastening directly into your home’s wall studs to be secure. Cutting it also demands special blades and safety gear to manage dust safely and create clean edges. These specific requirements are why professional installation is so important to ensure the siding performs correctly and your warranty remains valid.

  • Window Sash Replacement: A Step-by-Step Guide

    Window Sash Replacement: A Step-by-Step Guide

    That persistent draft you feel every time you walk past the living room window isn’t just in your head. It’s a clear signal that something is wrong. While it’s easy to assume the entire window is failing, the issue often comes down to a single, crucial component: the sash. This is the part of the window that holds the glass and moves up and down. When its seals break or the material warps, your home’s comfort and energy efficiency suffer. The good news is you might not need a full, disruptive tear-out. A targeted window sash replacement can solve the problem, restoring your window’s performance and saving you from those chilly drafts.

    Key Takeaways

    • Know the signs of a failing sash: Pay attention to drafts, moisture between panes, or windows that are difficult to open and close. Catching these issues early is key to protecting your home and keeping it comfortable.
    • Let the frame guide your decision: A solid, healthy window frame means you can likely get away with a sash-only replacement. If you find significant rot or damage on the frame itself, a full window replacement is the smarter, more durable solution.
    • Prioritize a precise installation: Whether you do it yourself or hire a pro, a perfect fit is non-negotiable. Correct measurements and a proper seal are what prevent future drafts and leaks, so getting the installation right is just as important as choosing the right sash.

    What Exactly Is a Window Sash?

    When you look at a window, you probably notice the glass and the frame, but there’s a critical component sitting right in between: the sash. So, what is it? Simply put, a window sash is the part of the window that holds the glass and fits inside the main window frame. Think of it as a picture frame for your windowpane. In many window styles, the sash is also the part that moves, allowing you to open and close the window for fresh air.

    The sash is more than just a border for the glass. It plays a huge role in your window’s overall performance, from its structural integrity to its energy efficiency. A well-built, properly sealed sash keeps drafts out and helps maintain a comfortable temperature inside your home. When a sash starts to fail, whether from age, damage, or rot, it can lead to problems like air leaks, moisture intrusion, and difficulty operating the window. Understanding what a sash is and what it does is the first step in knowing how to care for your home’s windows. It’s the key to spotting issues early and deciding when an update is needed.

    The Key Components of a Sash

    A window sash might seem like a single piece, but it’s actually made of several components working together. The outer structure consists of stiles (the vertical side pieces) and rails (the horizontal top and bottom pieces). These parts join together to create the frame that holds the glass, which is also known as the glazing. Modern sashes are engineered to do more than just hold glass; they are designed to improve the window’s overall performance.

    These components are crucial for creating a tight seal against the elements. High-quality sashes often include features like weatherstripping and advanced glazing systems to prevent air and water from getting in. The way these parts are constructed and assembled contributes directly to the window’s durability and energy efficiency, making the sash a small but mighty part of your home’s exterior.

    Exploring Common Sash Styles

    Not all window sashes are the same. The style of the sash determines how the window operates and contributes to your home’s overall aesthetic. You’ll find several common sash styles in homes today, each with its own unique function. For example, in a double-hung window, both the upper and lower sashes can move up and down, offering flexible ventilation. A single-hung window is similar, but only the bottom sash moves.

    Other popular styles include casement windows, which are hinged on one side and swing outward like a door, and sliding windows, where the sashes glide horizontally on a track. Each style offers different benefits for airflow, ease of cleaning, and visual appeal. When considering a window replacement, the sash style is one of the most important choices you’ll make.

    Telltale Signs Your Window Sash Needs an Update

    Your windows are great communicators. When something is wrong, they’ll give you clear signals, from subtle drafts to obvious cracks. The key is knowing what to look for. A failing window sash doesn’t just look bad; it can compromise your home’s energy efficiency, comfort, and security. If you’ve noticed your windows aren’t performing like they used to, it might be time for an update. Paying attention to these signs can help you address small issues before they turn into major headaches. Let’s walk through the three most common red flags that tell you your window sash needs attention.

    Spotting Visible Damage, Warping, or Rot

    Start with a simple walk-around. A close look at your window sashes can reveal a lot about their health. Do you see cracked, peeling, or bubbling paint? This is often the first sign that moisture is getting into the wood or material underneath. You should also look for splintering, warping, or any soft spots, which are clear indicators of rot. These aren’t just surface-level blemishes. Damage like this means the structural integrity of the sash is compromised, which can lead to bigger problems down the road. When you need a professional opinion on what you’re seeing, our team can help you assess the damage and find the right solution for your window repair.

    Feeling Drafts or Finding Unwanted Moisture

    Some window problems are felt more than they are seen. If you feel a noticeable draft when you stand near a closed window, the seal around your sash has likely failed. Your home’s conditioned air is escaping, and outside air is getting in, which can make your rooms feel uncomfortable and drive up your energy bills. Another major red flag is moisture. This can show up as condensation between the glass panes of a double-pane window (a sign of a broken seal) or as water leaking in around the frame during a storm. Unchecked moisture can cause sashes to warp and rot, and it can even damage your home’s walls and promote mold growth, which is why functional gutters are also crucial for directing water away from your home’s exterior.

    Struggling to Open or Close Your Windows

    A window that doesn’t work properly is more than just an inconvenience; it can be a safety hazard. If you have to wrestle with your window to get it open or if it slams shut unexpectedly, the sash is likely the culprit. Over time, sashes can warp from humidity or the house settling, causing them to bind against the window frame. Sometimes, the internal balance system that helps the sash move smoothly can break. While it might be tempting to just live with a stubborn window, it’s important to remember that you need to be able to open it easily in an emergency. A professional can determine if the issue is a simple fix or if a full window replacement is the safer, more reliable option.

    Sash Repair or Full Window Replacement: How to Decide

    Figuring out whether you need a simple sash fix or a complete window overhaul can feel a bit overwhelming. You want to address the problem without creating a huge project, but you also don’t want to put a temporary patch on an issue that needs a more permanent solution. The good news is that the decision usually comes down to one key thing: the health of your window frame. Think of it like this: the frame is the foundation, and the sash is the moving part within it. A wobbly foundation can’t support a new door, and a rotten window frame can’t support a new sash.

    If the foundation is solid, secure, and in good shape, you can often get away with just updating the sash. This is a great way to handle isolated issues without disturbing the surrounding wall or trim. However, if the frame itself is showing signs of serious wear, rot, or damage, a full replacement is often the smarter long-term move. A new sash can’t perform well if the structure holding it is failing. Understanding the difference will help you plan your project and ensure your home stays protected and comfortable for years to come. Let’s break down when each approach makes the most sense for your home.

    When a Sash-Only Replacement Is the Answer

    A sash-only replacement is an excellent fix when the main window frame is still perfectly sturdy, but the sash itself has issues. This is your go-to solution for problems like a single cracked pane of glass, wood rot confined to the sash, or failed seals that are causing fogging between the panes. By replacing just the sash, you can keep your original interior trim and exterior siding intact, which makes for a less disruptive and more focused project. It’s a practical way to restore your window’s function and appearance without the scope of a full tear-out, especially if the rest of the window unit is in great condition.

    When a Full Window Replacement Makes More Sense

    Sometimes, a sash replacement is like putting a bandage on a deeper issue. A full window replacement becomes necessary when the window frame itself is compromised. If you see significant rot, warping, or physical damage on the main frame that holds the sash, a complete replacement is the only way to ensure a lasting solution. This is also the best path forward if your windows are very old and inefficient. Upgrading the entire unit allows you to improve your home’s energy performance, reduce drafts, and get a modern window that operates smoothly. Simply put, if the core structure is failing, it’s time for a fresh start.

    Choosing the Perfect Replacement Sash

    Picking out a new window sash is one of the more rewarding parts of a home update. It’s your chance to improve your home’s comfort, enhance its style, and even lower your energy bills. But with so many options available, it’s easy to feel a little overwhelmed. The key is to focus on three main areas: the material it’s made from, how it matches your home’s look, and its energy efficiency. Getting these right will ensure your new sashes are a perfect fit for your home and your lifestyle for years to come. Let’s walk through what you need to know to make a confident choice.

    Comparing Material Options: Wood, Vinyl, and More

    The material of your window sash plays a huge role in its appearance, durability, and maintenance needs. Wood sashes offer a classic, traditional look that many homeowners love, but they do require regular upkeep to prevent rot and warping. Vinyl is a popular, low-maintenance alternative that holds up well against the elements without needing to be painted or stained. Then you have fiberglass, which is known for its exceptional strength and energy efficiency; it can be painted and won’t expand or contract with temperature changes. Thinking about the climate in Minnesota and the amount of maintenance you’re willing to do will help you find the right fit for your home’s window needs.

    Matching the Size and Style to Your Home

    Your new sashes should feel like a natural part of your home’s design. If you live in a historic home, you might want to stick with a traditional divided-light style to preserve its character. For a more modern house, a simple, clean sash with a large pane of glass might be the perfect complement. A great way to get ideas is to look at what the best window brands offer, as they often have extensive collections for every architectural style. A professional can also help you sort through the options to find a look that seamlessly blends with your home’s existing features, ensuring the final result is beautiful and cohesive.

    What to Look for in an Energy-Efficient Sash

    An energy-efficient sash is a smart investment that makes your home more comfortable while helping you manage utility bills. Look for windows with the ENERGY STAR label, which means they meet strict government standards for energy performance. These sashes often feature double or triple-pane glass, low-emissivity (Low-E) coatings that reflect heat, and gas fills between the panes for extra insulation. Just as important is the warranty. A strong warranty, backed by a trusted contractor, gives you confidence that your new windows are built to last. Professional installation ensures these features perform as they should, giving you complete peace of mind.

    A Step-by-Step Guide to Replacing a Window Sash

    Ready to tackle that drafty or damaged window sash? With the right preparation and a bit of patience, this is a project many homeowners can handle. Following a clear process is key to getting a great result that looks good and improves your home’s energy efficiency. While DIY repairs can be satisfying, they can also go sideways if you’re not careful, so it’s smart to have a plan. This guide will walk you through each stage, from taking that first measurement to sealing up your brand-new sash. If you follow these steps, you’ll be on your way to a successful window update. However, if you uncover significant rot or frame damage along the way, it might be time to call in experts for a professional window repair. A pro can assess the full extent of the damage and ensure your home remains properly protected from the elements.

    Gather Your Tools and Materials

    Before you even think about prying anything open, let’s get your workspace set up. Having everything you need within arm’s reach makes the entire process smoother and safer. You’ll want a quality tape measure, a pry bar, a utility knife, a caulk gun with exterior-grade sealant, and of course, safety glasses and gloves. The star of the show is your new sash, which you’ll order after taking precise measurements. A good sash repair kit will come with detailed instructions specific to the product, so be sure to read those thoroughly before you begin. Laying out your tools and reading the manual first will save you from frustrating interruptions later.

    Step 1: Measure Twice, Order Once

    This is the most critical step in the entire process, so take your time. An incorrect measurement can lead to ordering a sash that doesn’t fit, wasting both time and money. To get it right, you’ll need to follow the manufacturer’s instructions for the sash replacement kit you plan to buy. Generally, their parts teams will require the exact measurements of the visible glass area, along with the outer edge-to-edge width and height of the sash frame itself. Don’t round your numbers. Measure each dimension at least twice to confirm your figures before placing your order. Accuracy here is the foundation for a successful installation and a window that operates smoothly for years to come.

    Step 2: Carefully Remove the Old Sash

    With your new sash on hand, it’s time to remove the old one. Depending on your window type, this may involve cutting through old paint lines with a utility knife, prying off the interior stops (the thin strips of wood holding the sash in place), or disengaging tilt latches. Work slowly and gently to avoid damaging the surrounding window frame. When you remove your old window, you will leave behind an opening that needs attention before the new sash goes in. This is a normal part of the process and sets you up for the next important step: cleaning and inspecting the frame for any hidden issues.

    Step 3: Clean and Inspect the Window Frame

    Don’t rush to install the new sash just yet. A clean and solid frame is essential for a lasting repair. Scrape away any old paint, dried caulk, or debris from the frame and jambs. Once it’s clean, it’s time to play detective. You need to inspect for water damage or rot, especially around the sill. Gently press the wood with a screwdriver; if it feels soft or spongy, you have a problem that needs to be addressed. Minor issues can be fixed with wood filler, but extensive rot might mean the entire window frame needs professional attention. This inspection ensures your new sash will be installed on a sound structure.

    Step 4: Fit and Install the New Sash

    This is the moment of truth. Carefully lift your new sash and fit it into the window frame according to the manufacturer’s instructions. If you measured correctly, it should slide into place snugly. For tilt-in windows, you’ll typically angle the sash into the jamb tracks and then pivot it into its upright position. For other types, you may need to slide it into place before reattaching the stops. This single step is a great reminder of why you chose this project. After all, replacing a sash is much more economical than replacing the entire window, and seeing it fit perfectly is incredibly rewarding.

    Step 5: Seal, Secure, and Test Your Work

    You’re almost done! With the sash in place, re-install any stops or hardware you removed earlier. Next, apply a bead of high-quality exterior caulk around the outside of the window to create a weatherproof seal. Now for the final test. Open and close the window several times to ensure it moves smoothly. Check that the locking mechanisms engage fully and create a tight seal when closed. A properly installed sash shouldn’t rattle or feel loose. Once you’ve confirmed everything is working perfectly, you can step back and admire your handiwork and enjoy a draft-free, beautiful new window.

    Common Pitfalls to Avoid During Your Sash Replacement

    Replacing a window sash can feel like a manageable weekend project, but even simple tasks have potential slip-ups that can cause bigger problems. Knowing what to watch out for is the best way to ensure your project goes smoothly and you end up with a beautiful, functional window. With a little preparation, you can approach your project with confidence. Let’s walk through a few key mistakes to avoid so your hard work pays off.

    The Peril of Incorrect Measurements

    This might sound obvious, but you’d be surprised how often tiny measurement errors cause major headaches. When you take out the old sash, you’re often left with an opening that needs to be cleaned and prepped. If your new sash doesn’t fit perfectly, you can end up with leaky gaps that let in drafts and moisture. An ill-fitting sash won’t operate smoothly and can compromise your home’s energy efficiency. Always follow the classic rule: measure twice, order once. Be precise down to the sixteenth of an inch to ensure your new sash slides into place perfectly.

    Why You Shouldn’t Skip the Frame Inspection

    Once the old sash is out, it’s tempting to jump right into installing the new one. Please resist this urge. Take a moment to thoroughly inspect the window frame itself. You’re looking for any signs of water damage, rot, or cracks. The frame is the foundation for your new sash, and installing a pristine sash into a compromised frame is a recipe for failure. You should also check the surrounding area and repair damaged drywall or plaster before moving forward. If you find significant issues, it might be time to call in a professional for a more thorough window repair.

    The Importance of a Proper Seal

    A new window sash is only as good as its seal. If the sash doesn’t close tightly against the frame, you’ll still have the same drafts and energy loss you were trying to fix. As you install the new sash, check that the weatherstripping is intact and creating a firm barrier. Once installed, make sure the locking mechanisms engage fully to pull the sash tight and create a tight seal. A proper seal is what keeps the elements out and the comfortable air in, so don’t treat this final step as an afterthought.

    Resisting the Urge to Rush the Job

    Home improvement projects are exciting, and it’s natural to want to see the finished result as quickly as possible. However, rushing through a sash replacement is one of the biggest mistakes you can make. Each step, from measuring and cleaning to sealing and securing, is critical for a lasting, high-quality result. Taking your time to get educated upfront and sidestep the blunders will save you from frustrating rework later. Remember, the goal isn’t just to get it done; it’s to get it done right so you can enjoy your new window for years to come.

    DIY vs. Hiring a Pro: Making the Right Call

    Deciding whether to tackle a window sash replacement yourself or call in a professional is a big part of the process. While there’s a certain satisfaction that comes with a successful DIY project, it’s also a job where small mistakes can lead to bigger problems like drafts, leaks, or even damage to your home. Replacing your home’s windows is a significant update that can improve energy efficiency and enhance curb appeal, so you want it done right. This decision really comes down to your skills, the complexity of the job, and your comfort level. Let’s walk through the key things to think about so you can make the best choice for your home and your sanity.

    Key Factors to Consider Before You Start

    Before you even think about picking up a pry bar, take a moment to honestly assess the project. Is this a straightforward sash swap on a standard window, or are you dealing with an older, custom-sized frame that might have hidden issues like rot? Your own experience matters, too. If you’re a seasoned DIYer with a full workshop, you might feel ready. But if this is your first major home repair, it could be a challenge. If you don’t measure correctly or damage the window opening, the process can leave you with leaky gaps that are difficult to repair. When in doubt, it’s always best to call in an expert to make sure you’re ordering the perfect window for your home.

    The Appeal of a DIY Project

    There’s no denying the sense of accomplishment that comes from completing a home improvement project with your own two hands. DIY repairs can be satisfying, but they can also go sideways if you’re not careful. For many homeowners, the main draw is the potential to save on labor. If you have the right tools, a good amount of patience, and a knack for detail-oriented work, replacing a window sash can be a manageable weekend project. It gives you complete control over the timeline and the process. Just remember to do your homework and understand how to sidestep common blunders so you can head into the project with confidence.

    The Benefits of Professional Installation

    Hiring a professional turns a potentially stressful project into a seamless one. An experienced team brings expertise that’s hard to replicate. They know how to handle unexpected challenges, ensure a perfect fit, and guarantee the window is sealed correctly for maximum energy efficiency. Choosing an inexperienced installer or making a DIY mistake can lead to long-term issues. With a pro, you get the peace of mind that comes from reliable craftsmanship and the use of top-quality materials. A professional window replacement service handles everything from precise measurements to the final cleanup, ensuring your new sash not only looks great but performs flawlessly for years to come.

    Understanding Your Window Sash Investment

    Deciding to replace your window sashes is a smart move for your home’s health and comfort. The overall investment for this project depends on a few key things, from the materials you choose to whether you tackle it yourself or bring in a professional. Thinking through these elements ahead of time will help you plan a smooth and successful update, ensuring your new windows look great and perform beautifully for years to come. Let’s walk through the main considerations so you can feel confident about your decisions.

    Factors That Influence the Project Scope

    The great thing about a sash-only replacement is that it’s often less disruptive than a full window overhaul. If your main window frame is still in good shape, you can replace just the sash, leaving your home’s interior trim and exterior siding untouched. This is the perfect solution for issues like broken glass, a bit of rot on the sash itself, or failed seals that are causing fogginess.

    The scope of your project will naturally depend on the window’s size and style, as well as how many sashes you plan to update. A single, standard-sized sash will be a much quicker project than replacing every sash on the front of your house.

    Comparing Sash Kits vs. Professional Service

    Once you’ve decided to move forward, you have two main paths: the DIY route with a sash kit or hiring a professional service. Sash replacement kits are designed to fit specific window types and often come with all the necessary components. This can be a rewarding project if you’re handy and have the right tools.

    On the other hand, bringing in a professional ensures the job is done efficiently and correctly. The typical financial outlay for a professional sash replacement includes the new sash and the labor to install it, giving you peace of mind that everything is fitted perfectly. For many homeowners, the convenience and guaranteed result make professional installation the preferred choice.

    Local Permit and Code Considerations

    This is one area where a little foresight goes a long way. Incorrectly measuring or installing a sash can lead to bigger issues, like leaky gaps that damage your wall and frame. These are some of the common mistakes that can turn a simple project into a complicated repair.

    Furthermore, your local area has specific building codes that may apply to window work. A professional is familiar with these requirements and ensures your project is fully compliant. When you’re dealing with the protective layer of your home, calling in an expert from a company like Referred Restoration is always a solid decision to make sure the job is done right the first time.

    Ready for a Flawless Window Update?

    Deciding to replace your window sashes is a great step toward making your home more comfortable and beautiful. One of the biggest advantages of this project is the ability to fix problems like broken seals, drafts, or rotting wood without needing a full frame replacement. This means you can often keep your home’s original interior trim and exterior siding, making it a less disruptive yet highly effective upgrade. It’s a focused solution that delivers a big impact on both your home’s efficiency and its curb appeal.

    As you get ready to begin, the main choice you’ll face is whether to tackle the installation yourself or bring in a professional. While a DIY approach can be rewarding, it requires absolute precision. Even a small mistake in measuring can lead to gaps around your window, creating new leaks that are difficult to fix. You also risk damaging the window opening during the removal and installation process, which can turn a straightforward project into a complicated repair job.

    This is where leaning on an expert can provide real peace of mind. When you work with a professional team, you get the assurance of flawless measurements, careful handling, and a perfect seal. A skilled contractor ensures your new sashes fit seamlessly, operate smoothly, and provide the energy efficiency you expect. For a project that protects your home from the elements, having a professional handle your window repair guarantees the job is done right the first time, saving you from potential headaches down the road.

    Related Articles

    Frequently Asked Questions

    My window is foggy between the panes. Does this mean I have to replace the entire window? Not necessarily. That fog you’re seeing is condensation, and it means the seal on your insulated glass unit has failed. The good news is that if the rest of your window frame is solid and in good condition, you can often solve this problem by replacing just the sash. This is a great way to restore your window’s clear view and insulating properties without the disruption of a full window replacement.

    Can I just replace the broken glass instead of the whole sash? In most modern windows, the glass panes are manufactured as a sealed unit that is integrated directly into the sash. This design is what creates the insulating air gap that improves energy efficiency. Because of this construction, replacing just a single pane of broken glass isn’t usually a practical option. The most effective and reliable solution is to replace the entire sash unit.

    My window is difficult to open, but it doesn’t look damaged. What could be the cause? A stubborn window can be caused by a few different issues that aren’t always visible. The sash itself might have swollen or warped slightly from humidity, causing it to bind against the frame. Another common culprit is a broken balance system, which is the hidden mechanism inside the window jamb that helps you lift the sash smoothly. A professional can quickly diagnose the specific problem to determine if it’s a simple adjustment or if a new sash is the best fix.

    How can I tell if my window frame is too damaged for just a sash replacement? A great way to check your frame’s health is to perform a close visual and physical inspection. Look for any splintering wood, cracked paint, or discoloration, especially on the sill where water tends to collect. Then, gently press the tip of a screwdriver into the wood in a few different spots. If the wood feels soft, spongy, or crumbles easily, you are likely dealing with rot. Widespread rot in the frame is a clear sign that a full window replacement is the smarter long-term solution.

    Will a new, energy-efficient sash really make a difference in my home’s comfort? Absolutely. A new sash built with modern features like double-pane glass, gas fills, and Low-E coatings makes a noticeable difference. It helps eliminate drafts, which keeps your rooms at a more consistent and comfortable temperature all year. By preventing your home’s heated or cooled air from escaping, you’re not just improving your comfort; you’re also helping your heating and cooling system work more efficiently.

  • How to Use a Window Screen Repair Kit for a Flawless Fix

    How to Use a Window Screen Repair Kit for a Flawless Fix

    A torn screen might seem like a job for a professional, but it doesn’t have to be. The process is much more approachable once you understand the components involved. A window screen repair kit is designed to take the guesswork out of the project by bundling all the necessary parts together. Inside, you’ll find the screen mesh, the rubber spline that holds it in place, and the special tool needed to press it all together. This guide will demystify the process, helping you choose the right kit and use it effectively for a tight, durable, and professional-looking finish.

    Key Takeaways

    • Know When a Repair Kit Is Enough: Kits are perfect for small tears and holes, but a bent frame, foggy glass, or widespread damage are clear signs you need a professional to ensure a proper, lasting fix.
    • Select Your Materials Wisely: For an easier DIY experience, choose a kit with flexible fiberglass mesh. You should also confirm the spline size matches your old one to guarantee a tight, secure fit in the frame.
    • Master the Installation Technique: The secret to a sag-free screen is keeping the mesh taut as you work. Always wait until the spline is fully seated before trimming the excess material to get a clean, durable edge.

    What Is a Window Screen Repair Kit?

    A torn or sagging window screen is one of those small home issues that can be a real nuisance. It lets in bugs, obstructs your view, and can make your home look a little neglected. The good news is that you don’t always need to call in a professional for a minor screen problem. A window screen repair kit is a convenient, all-in-one package designed to help you fix or completely replace the damaged mesh in your screen frames. These kits are perfect for tackling common issues like small rips, punctures from pets, or general wear and tear that happens over time.

    By bundling all the necessary components together, these kits make the repair process much more approachable for the average homeowner. It’s a satisfying project that allows you to restore your screen’s function and appearance on your own schedule. Instead of letting a damaged screen bother you, you can use a repair kit to get a clean, tight, and professional-looking result. This simple fix can make a big difference in your home’s comfort and curb appeal, all while giving you the confidence that comes with a successful DIY project. Learning this skill means you’ll be prepared to handle any future screen mishaps quickly and efficiently. It’s a practical way to maintain your home’s exterior and keep everything in top shape.

    What’s Inside a Standard Kit

    Opening a window screen replacement kit for the first time can feel empowering because everything you need is right there. A standard kit typically includes a roll of screen material, which is the mesh itself. You’ll also find a long coil of spline, the flexible rubber cord that holds the screen tightly in the frame’s channel. To help you press the spline into place, kits come with a small rolling tool, which is essential for getting a secure fit. Some larger kits may even include plastic corner pieces for repairing the frame itself. Having all these items together ensures you can complete the job from start to finish without making extra trips to the hardware store.

    Fiberglass vs. Aluminum: Choosing Your Screen Material

    When you pick out a kit, you’ll notice the screen mesh comes in different materials, usually fiberglass or aluminum. Fiberglass is the most common choice for DIY kits because it’s flexible and very forgiving. If you make a mistake while installing it, you can simply pull out the spline and start over, as fiberglass doesn’t hold a crease. This makes it a great option if you’re new to screen repair.

    On the other hand, aluminum screening is stronger and more durable, which is why it’s often used for larger areas like screen porches. However, it’s less forgiving. Once you crimp or dent aluminum mesh, that mark is permanent. If you make a mistake during installation, you’ll likely need to start over with a fresh piece of screen.

    Why Should You Fix Your Window Screen?

    A torn or damaged window screen is more than just a cosmetic issue. It’s an open invitation for insects, leaves, and other debris to enter your home, disrupting your comfort and peace. A fully intact screen is your first line of defense, allowing you to enjoy fresh air without worrying about pests getting inside. Think about those perfect spring and fall days when you want to let a breeze flow through the house; a solid screen makes that possible without sharing your space with mosquitoes or flies.

    Fixing a damaged screen promptly also helps maintain your home’s curb appeal. Clean, well-maintained screens contribute to a polished exterior look, showing that you care for your property. More importantly, ignoring a tear can lead to bigger problems. A loose screen can flap in the wind, putting stress on the spline and the frame itself. Over time, this can warp the frame or cause it to pull away from the window. What starts as a simple mesh repair could turn into a more involved and complicated fix. Whether you decide to tackle it yourself or call in an expert, addressing a broken screen is a small project that makes a big difference in your daily life and the upkeep of your home.

    The Perks of a Quick DIY Fix

    If you enjoy a good weekend project, repairing a window screen is a satisfying and straightforward task. For a small tear or a single screen replacement, the DIY route can be very rewarding. You handle the labor yourself, so you just need to get the materials. A complete window screen repair kit comes with everything you need, from the mesh to the spline and rolling tool. Even if you’re a total beginner, you can expect to finish your first screen in about an hour. It’s a simple way to restore your window’s function and feel a sense of accomplishment.

    Knowing When to Call a Professional

    While a DIY fix is great for minor issues, some situations are better left to the experts. If your screen has large holes, significant rips, or a bent frame, a simple patch or mesh replacement won’t be enough. These issues often require a full replacement and specialized tools to ensure a perfect, lasting fit. Furthermore, if the damage extends beyond the screen to the window itself, it’s a clear sign to get professional help. For complex repairs or when you want a guaranteed flawless finish, calling a team for window repair services ensures the job is done right, protecting your home and giving you peace of mind.

    How to Choose the Right Window Screen Repair Kit

    Walking into the hardware store or browsing online for a window screen repair kit can feel a bit overwhelming. With so many options, how do you know which one will give you a professional-looking result that actually lasts? Choosing the right kit is your first and most important step toward a successful DIY fix. A good kit simplifies the process, while a bad one can lead to a saggy, uneven screen and a lot of frustration.

    The key is to know what to look for before you buy. You’ll want to pay attention to the screen material, the size of the spline (that rubbery cord), the type of installation tool included, and whether the kit has everything you need to finish the job. Getting these details right will make the entire project go much more smoothly. While a torn screen is a perfect DIY project, if you notice deeper issues like a warped frame or foggy glass, it might be time to call in a professional for a full window inspection. But for a simple screen swap, picking the right kit will set you up for success.

    Screen Mesh Quality and Material

    The heart of your repair is the screen mesh itself, and the material matters. Most kits you’ll find contain charcoal fiberglass mesh, and for good reason. It’s flexible, forgiving, and doesn’t crease or dent easily, which makes it a great choice if this is your first time repairing a screen. The charcoal color also helps it blend in, making the screen less visible from both inside and out. While aluminum mesh is an option for its durability, it can be tougher to work with and will hold a dent if you mishandle it. For a straightforward DIY project, fiberglass is almost always the way to go for a clean, tight finish.

    Spline Size and Flexibility

    The spline is the thin cord that you press into the frame’s channel to hold the screen mesh securely in place. Getting the size right is critical. Most kits include a standard size, but it’s smart to double-check what your frame needs. The easiest way to do this is to pull out a small section of your old spline and take it with you to the store. Using the same spline size as the original ensures a perfect fit. If the spline is too thin, your screen will be loose and saggy. If it’s too thick, you’ll struggle to press it into the channel and might even damage the frame.

    The Design of the Rolling Tool

    Your kit should come with a small, handled tool called a spline roller. This little gadget makes a huge difference in how easy the installation is. A good spline roller will have two different wheels: a convex wheel (rounded outward) and a concave wheel (curved inward). You’ll use the convex wheel first to gently press the mesh into the frame’s groove. Then, you’ll follow with the concave wheel to push the spline in snugly over the mesh. A well-designed tool feels sturdy in your hand and rolls smoothly, allowing you to apply even pressure without tearing your new screen.

    Kit Completeness and Sizing Options

    Before you head to the checkout, do a quick check to see what’s included in the kit. A complete package should provide everything you need for the job. At a minimum, look for a roll of screen material, a generous length of spline, and a spline roller tool. Some more comprehensive window screen kits might also include replacement corners for the frame or a small utility knife. Also, be sure to measure your screen frame before you buy. Kits come in various sizes, so you’ll want to choose one that provides enough mesh to cover your frame with a few inches of overhang on all sides.

    Brand Reputation and Reviews

    You don’t need to be a brand loyalist, but it’s wise to see what other people are saying about a kit before you buy it. A quick scan of online reviews can save you a major headache. Look for comments about the quality of the materials and the ease of use. Products with consistently high ratings or labels like “Amazon’s Choice” are often a safe bet. For example, a well-regarded product will have positive feedback on everything from the durability of the mesh to the sturdiness of the included tool. This little bit of research helps ensure you’re getting a kit that’s worth your time and effort.

    Gather Your Tools: What You’ll Need Besides the Kit

    Your repair kit is the star of the show, but every star needs a great supporting cast. Before you start, gathering a few extra household tools will make the entire process go much more smoothly. Having everything within arm’s reach means you can stay focused on the task at hand instead of running around looking for a screwdriver. This simple prep work is the key to a frustration-free repair that looks clean and professional.

    Think of it as setting up your workspace for success. You’ll need a few things for cutting, a couple of tools for prying and pulling, and a good, stable surface to work on. While a small tear in a screen is a manageable DIY project, remember that more significant issues like a bent frame or broken glass might need a professional touch. If you find the damage is more than screen-deep, our team is always here to help with expert window repair. Getting your tools in order is the first step toward a flawless fix, so let’s get everything laid out.

    Cutting and Measuring Tools

    To get that perfect, snug fit, you’ll need a few tools for measuring and cutting. Grab a sharp utility knife, a sturdy pair of scissors, and a tape measure. A clean cut is the difference between a professional-looking finish and a frayed, messy one. The utility knife will be your go-to for trimming the excess screen material at the end, while the scissors can be helpful for making the initial rough cut. Before you cut anything, use your tape measure to get the exact dimensions of the frame. A good rule of thumb is to measure twice and cut once, giving yourself a clean slate to work with.

    Pliers and a Screwdriver

    Next up are your trusty helpers for removing the old, damaged screen. You’ll want a flat-head screwdriver and a pair of pliers, preferably needle-nose if you have them. The screwdriver is perfect for gently prying up a corner of the old rubber spline, which is the cord that holds the screen material in the frame’s channel. Once you have a small section lifted, the pliers come in handy for gripping the spline and pulling it out completely. They are also great for yanking out any stubborn, stuck-on bits of the old screen mesh, ensuring the frame’s channel is totally clear for the new material.

    A Clean, Flat Work Surface

    This might sound obvious, but don’t underestimate the importance of a good workspace. Find a large, flat, and clean surface where you can lay the entire window screen down. A workbench, a large dining table (with a protective cover, of course), or even a clean patch of the garage floor will do the trick. Working on a stable surface prevents the screen frame from bending or warping while you work. It also makes it much easier to keep the new screen mesh taut and straight as you press it into the frame, which is essential for a tight, ripple-free result. A steady surface is the foundation for quality work, whether you’re replacing a screen or installing new siding.

    Your Step-by-Step Guide to Using a Screen Repair Kit

    Alright, you’ve got your kit, and you’re ready to tackle that torn screen. Taking on a DIY project like this is a great way to keep your home in top shape, and honestly, it’s easier than you might think. With a little patience and a clear workspace, you can get a professional-looking result that keeps the bugs out and the fresh air flowing. This guide breaks the entire process down into six simple steps, from removing the old screen to popping in your freshly repaired one.

    Before you begin, make sure you have a large, flat surface to work on, like a garage floor or a big table. This will make managing the frame and screen material much easier. While this guide covers screen replacement, remember that sometimes the issue is bigger than just the mesh. If you notice your window frame is warped, cracked, or difficult to operate, it might be a sign that you need more comprehensive window repair services. For now, let’s focus on giving that screen a fresh start.

    Step 1: Remove the Damaged Screen and Clean the Frame

    First things first, you need to get the screen frame out of the window. Once it’s out, lay it on your flat work surface. You’ll see a thin rubber cord, called a spline, tucked into a groove around the frame’s perimeter; this is what holds the screen mesh in place. Use a flathead screwdriver or a pick to carefully pry up one end of the spline and pull it out from all four sides. With the spline removed, the old, damaged mesh will lift right off. Now is the perfect time to give the frame a good cleaning. Wipe down the frame and pay special attention to the spline groove, clearing out any dirt or debris that’s built up over time. A clean channel makes installing the new screen much smoother.

    Step 2: Measure and Cut Your New Mesh

    Next, unroll your new screen mesh and lay it over the frame. You want to make sure it completely covers the opening with some extra material to work with. A good rule of thumb is to have about one inch of overlap on all four sides. This extra margin gives you something to hold onto and ensures the screen will be secure once the spline is in. Once you have it positioned, use a sharp utility knife and a straight edge to cut the mesh to size. Take your time with this step to get a straight, even cut. It doesn’t have to be perfect, since you’ll be trimming the final excess later, but a neat starting point makes the next steps easier.

    Step 3: Lay the Mesh and Keep It Taut

    Position your freshly cut piece of mesh over the frame, making sure it lies flat and smooth. The key to a professional-looking repair is ensuring the screen is taut, but not overstretched. A screen that’s too loose will sag and wrinkle, while one that’s pulled too tight can bend or warp the frame. To keep it in place, you can use clamps to secure the mesh to your work surface on one side of the frame. If you don’t have clamps, placing a few small weights on the end of the mesh after you’ve secured the first side works just as well. A friend can also be a big help here by holding the screen steady for you.

    Step 4: Press the Spline into the Frame

    Now it’s time to lock the new screen in place with the spline. Your kit’s spline roller tool likely has two wheels: a convex (outward-curving) wheel and a concave (inward-curving) one. Start by using the convex wheel to gently press the screen mesh into the frame’s groove on one side. Then, lay the new spline over the groove and use the concave wheel to firmly press the spline down into the channel, securing the mesh. Work your way around the entire frame, starting in a corner. When you get to the other corners, you can use your screwdriver to help push the spline snugly into place. Don’t pull or stretch the spline as you go; just guide it into the groove.

    Step 5: Trim Away the Excess Mesh

    With the spline securely in place, you’re on the home stretch. All that’s left to do is trim the extra screen material hanging over the edges. Grab your utility knife with a sharp blade for this part. Carefully run the knife along the outside edge of the spline, using the groove as your guide. For the cleanest cut, angle the blade away from the spline so you don’t accidentally slice your new screen or the spline itself. Go slowly and deliberately to create a clean, polished edge. This final trim is what really gives your repair that neat, professional finish, so it’s worth taking an extra minute to get it right.

    Step 6: Reinstall the Finished Screen

    That’s it, you did it! The final step is to simply pop your newly repaired screen back into the window. It should fit just as it did before, but now it will look brand new and function perfectly. Stand back and admire your handiwork. You’ve not only fixed a pesky problem but also extended the life of your window screen. If you found that the frame itself was bent or broken during this process, it might be time to consider a full window replacement to ensure your home is properly sealed and protected. Otherwise, enjoy the clear view and fresh, bug-free breeze.

    Common Screen Repair Mistakes to Avoid

    Using a window screen repair kit can be a satisfying DIY project, but a few common slip-ups can lead to a less-than-perfect result. Knowing what to watch out for is the secret to getting that clean, professional finish on your first try. While these tips will help you handle most screen tears, remember that if the frame itself is bent or the damage extends to the window, it’s best to call in the experts for a full window repair. By avoiding these simple mistakes, you can ensure your repair looks great and lasts for years.

    Rushing the Final Trim

    It’s tempting to want to trim away the excess mesh as soon as you start getting the spline in place, but patience is key here. If you cut the mesh before the spline is completely and securely pressed into its groove, you risk pulling the screen. Even a small tug can cause the mesh to come loose from the channel, creating gaps or a slack spot that ruins the taut finish you’re working toward. For a flawless result, wait until the spline is fully seated around the entire frame. Take a moment to inspect your work, ensuring the spline is pushed down evenly. Only then should you grab your utility knife and carefully trim the excess for a clean, professional-looking edge.

    Letting the Mesh Go Slack

    The goal of a screen repair is a tight, smooth surface, but achieving that requires consistent tension. If you let the mesh go slack while you’re installing the spline, you’ll end up with frustrating wrinkles and sags that you can’t fix later. As you work your way around the frame, use your free hand to gently pull the material and keep the material taut. This steady pressure ensures the screen lays flat against the frame, giving you that crisp, drum-tight appearance of a brand-new screen. Don’t worry about perfection on the first pass; just focus on maintaining gentle, even tension.

    Reusing an Old or Damaged Spline

    While it might seem resourceful to reuse the old spline, it’s almost always a bad idea. Over time, vinyl or rubber spline becomes brittle, cracked, and loses its flexibility from sun exposure. Trying to force a dry, stiff spline back into the groove is not only difficult, but it also won’t hold your new screen securely. A compromised spline can pop out of the channel easily, undoing all your hard work. Since nearly every screen repair kit comes with a fresh roll of spline, do yourself a favor and use the new material. It’s designed to be flexible and create a tight, lasting fit.

    Overstretching the Screen Mesh

    On the flip side of letting the mesh go slack is pulling it too tight. While you want to avoid wrinkles, overstretching the screen can cause its own set of problems. Applying too much tension can actually bow or warp the screen frame, especially if it’s a lighter aluminum model. A warped frame won’t sit flush in your window opening, making it difficult or even impossible to reinstall. The key is to find a happy medium: the mesh should be taut enough to be perfectly flat but not so tight that it distorts the frame’s shape.

    Skipping the Frame Cleaning

    Before you even think about laying down the new mesh, take a moment to clean the frame, particularly the spline groove. This channel collects a surprising amount of dirt, grime, and fragments of the old, brittle spline. If you don’t clean it out, this debris will prevent the new spline from seating properly, leading to bumps, an uneven finish, or a spline that won’t stay put. A quick pass with a stiff brush, a flathead screwdriver, or even a can of compressed air is all it takes to clear the channel for a smooth installation. This simple prep step makes it much easier to patch a window screen correctly.

    How to Keep Your Repaired Screens in Great Shape

    You’ve put in the work and your window screen looks fantastic. Now, let’s make sure it stays that way. A little bit of upkeep goes a long way in extending the life of your repair and keeping your screens in top-notch condition. Consistent care prevents the kind of buildup and wear that leads to more rips and tears down the road. By following a few simple maintenance steps, you can protect your handiwork and keep your home looking its best for years to come.

    Create a Simple Cleaning Routine

    Your screens act as a filter for everything floating around outside, so they’re bound to get dirty. A simple cleaning routine keeps them looking clear and prevents grime from weakening the mesh. Once a month, use your vacuum’s soft brush attachment to gently clean both sides. For a deeper clean a couple of times a year, use a soft cloth with mild soap and water, then rinse thoroughly and let it dry. While you’re giving your screens some attention, it’s a great opportunity to inspect your entire window assembly. One thing to always avoid with screens is a pressure washer; the intense spray is far too strong and can easily damage the delicate mesh.

    Perform Annual Inspections

    Think of this as a quick annual check-up for your screens. Catching small issues early is the key to preventing another full-blown repair project. Once a year, perhaps during your spring cleaning, take a few minutes to carefully inspect each screen. Look for any new tiny holes, frays, or signs that the mesh is pulling away from the frame. Check if the screen feels loose or if the frame itself has become bent. An annual inspection of your home’s exterior, including your screens and gutters, helps keep everything in good working order and protects your home from pests and the elements.

    Check for Frame and Spline Wear

    The screen mesh gets all the attention, but the frame and spline are the foundation of a sturdy screen. Over time, the rubber spline that holds the mesh in place can become brittle and crack, causing the screen to sag or pull out. The frame itself can also get bent or warped from impact or pressure. When you do your annual inspection, gently press on the spline to see if it feels pliable or hard. If the frame is damaged, the screen won’t sit properly, creating gaps. If you notice significant wear on the frame, it might be a sign of a bigger issue with your windows that needs a professional look.

    Is Your Window Damage More Than a Simple Screen Fix?

    A window screen repair kit is a fantastic tool for handling small rips and tears, and there’s a lot of satisfaction in a quick DIY fix. But it’s also smart to know when a problem goes beyond what a simple patch can handle. Sometimes, what appears to be a minor screen issue is actually a sign of a deeper problem with the window itself. Catching these clues early can save you from dealing with bigger issues later, like drafts, water damage, or poor energy efficiency. Think of it as knowing when to apply a bandage versus when you need to see a doctor.

    Take a good look at the window frame that holds the screen. If it’s bent, cracked, or warped, a new screen won’t fit correctly, leaving gaps for pests to sneak through. This kind of damage compromises the entire window’s structure. Another major red flag is condensation or fog between the panes of a double-pane window. This means the seal has failed and the window is no longer insulating your home properly. When you spot issues like a damaged frame or a broken seal, it’s a clear sign you need a professional window repair to protect your home’s integrity and comfort.

    You should also assess the condition of the screen material. If the mesh feels brittle, crumbles to the touch, or has several large tears, a full replacement is a much better solution than a small patch. While you can certainly tackle a full screen replacement yourself, getting the mesh perfectly taut without causing it to warp or pull can be challenging. If the damage is widespread or you’re not confident about getting a flawless finish, calling a professional ensures the job is done right. This gives you a durable, perfectly fitted screen without the potential frustration of a tricky DIY project.

    Related Articles

    Frequently Asked Questions

    For a standard window, is fiberglass or aluminum mesh the better choice? For most DIY window repairs, fiberglass mesh is the clear winner. It is flexible and doesn’t hold a crease, which means if you make a mistake while installing it, you can simply pull the spline out and start over. Aluminum is more durable, but it’s also unforgiving. Once you dent or crimp aluminum mesh, the mark is there to stay, so it requires a more experienced hand for a perfect finish.

    I followed all the steps, but my new screen is saggy. What went wrong? A saggy screen is almost always caused by a lack of tension during installation. To get that perfectly flat, drum-tight finish, you need to keep the mesh pulled taut as you press the spline into the frame’s groove. Use your free hand to apply gentle, even pressure across the screen, pulling it away from the side you are working on. This prevents wrinkles and ensures the final result is smooth and professional.

    I can’t find my old spline to check the size. What should I do? If you’ve lost the original spline, your best option is to take the empty screen frame to the hardware store. You can test different spline diameters in the frame’s channel to find the one that provides a snug fit. It should be tight enough to hold the screen securely but not so thick that you have to use excessive force, which could damage the frame.

    Can I use a repair kit for a sliding screen door, or is it just for windows? You can absolutely use a kit for a screen door, but you’ll need to buy one specifically designed for that purpose. Screen doors require a much larger piece of mesh and a longer spline than windows do. The repair process is identical, but managing a larger frame can be awkward, so having a big, flat workspace and even a second person to help is a good idea.

    The tear in my screen is huge, but the frame seems fine. Is a kit still the right solution? Yes, a kit is the perfect solution for a large tear as long as the frame is in good shape. Since you’ll be replacing the entire piece of mesh anyway, the size of the original damage doesn’t matter. The process is the same whether you’re fixing a small puncture or a long rip. Just make sure the frame itself isn’t bent or cracked before you begin.

  • Roof Vent Types: A Minnesota Homeowner Guide

    Roof Vent Types: A Minnesota Homeowner Guide

    Roof vents protect a Minnesota home by moving warm, moisture-laden air out of the attic while allowing cooler outdoor air to enter. The right system can help limit winter frost, reduce the conditions that contribute to ice dams, and release intense summer heat. The best roof vent types for your house depend on its roof shape, attic layout, insulation, air sealing, and existing intake openings.

    Schedule a Free Inspection

    What Is the Best Roof Vent Type for a Minnesota Home?

    For many Minnesota homes with a traditional pitched roof, a continuous ridge vent paired with clear soffit vents provides dependable passive airflow. Cool air enters at the eaves, moves beneath the roof deck, and exits along the ridge. That simple low-to-high path works without a motor and ventilates the roof more evenly than a few isolated openings.

    That does not make ridge and soffit vents the right answer for every house. Short ridges, intersecting rooflines, cathedral ceilings, additions, and homes without soffits may require another layout. Box vents can serve separate attic sections. A roof-mounted intake vent may help when eaves cannot supply air. Mechanical exhaust may be considered in limited situations, but it must not overpower the available intake or pull conditioned air from the living space.

    A vent is only one part of the solution. Warm indoor air that leaks through attic hatches, wiring penetrations, bath fans, and ceiling fixtures can carry moisture into the attic faster than vents can remove it. Insulation can also block soffit openings. A useful assessment therefore looks at the whole attic, not just the visible vents on the shingles. If you are comparing broader roofing needs, this guide to roof repair or replacement in Minnesota explains other factors worth reviewing.

    How Balanced Attic Ventilation Works

    A balanced system has intake near the lowest part of the roof and exhaust near the highest part. As warmer attic air rises and leaves through the exhaust, fresh outdoor air enters through the intake. Wind can strengthen that movement, but a well-planned passive system also uses the natural rise of warm air.

    Intake vents feed the system

    Soffit vents are the most common form of intake. They may be continuous strips or individual panels beneath the eaves. Their openings must remain clear from outside debris, paint, and attic insulation. Baffles or air chutes installed above the soffits preserve a channel between the intake and the attic. Without enough intake, even an excellent ridge vent cannot perform as intended.

    Exhaust vents release heat and moisture

    Ridge vents, box vents, turbines, and powered vents are exhaust options. They belong high on the roof because heat and moisture collect there. Exhaust openings need compatible weather protection so wind-driven rain and blowing snow stay outside. The goal is not simply to add openings. It is to establish a controlled route through the attic.

    Balance matters more than vent count

    Homeowners often assume that more exhaust means better ventilation. In practice, excessive exhaust with limited intake can pull air through gaps in the ceiling or through another exhaust opening. That wastes conditioned air and leaves portions of the attic stagnant. Net free ventilating area, or NFVA, is the open area available for airflow after screens and louvers are considered. A roofer uses that rating, attic area, and the vent manufacturer’s instructions to plan balanced intake and exhaust.

    Balanced soffit and ridge roof vent types moving air through a Minnesota attic
    Balanced intake and exhaust help move moisture and heat out of the attic.

    Common Roof Vent Types Compared

    Each vent type has strengths and limitations. A good choice fits the architecture and supports one continuous airflow pattern. The comparison below can help you understand what a contractor may recommend after inspecting your attic and roof.

    Vent type Primary role Good fit Important consideration
    Soffit vent Intake Homes with open eaves Insulation and debris must not block the opening
    Ridge vent Exhaust Long, unobstructed roof ridges Needs enough balanced intake below
    Box or static vent Exhaust Separate attic areas or short ridges Several units may be needed for even coverage
    Roof-mounted intake vent Intake Homes without usable soffits Must sit below the exhaust path
    Gable vent Intake or exhaust, depending on conditions Older steep-gable designs Can disrupt a planned soffit-to-ridge path
    Turbine vent Exhaust Open sites with reliable wind Performance varies with wind and placement
    Powered attic vent Active exhaust Selected complex attic situations Needs adequate intake and careful controls

    Ridge and soffit vents

    This pairing is popular because it can move air across much of the underside of a simple roof deck. A ridge vent sits discreetly beneath ridge cap shingles, while the soffit intake is usually difficult to see from the yard. Correct installation is essential. A ridge opening that is too narrow, covered, or disconnected from part of the attic will not provide even exhaust.

    Box, gable, and specialty vents

    Box vents are useful when a roof has several distinct sections or too little ridge length. Gable vents may still serve some older homes, but they should not automatically be combined with ridge exhaust. Turbines depend partly on wind, and powered fans add controls and maintenance needs. If shingles also show curling, cracking, or granule loss, review how asphalt shingles perform in Minnesota before deciding whether the concern stops at ventilation.

    Low-slope roofs and finished attic spaces need especially careful planning. Their narrow cavities may not provide an open attic where air can move freely from eave to peak. Installing a visible vent without confirming the channel behind it may accomplish very little. A contractor should determine whether each rafter bay has a clear route, whether the ceiling assembly was designed to be vented, and whether hidden framing interrupts airflow. This protects the home from an attractive but ineffective installation.

    Material compatibility also matters. Vent flashing must integrate correctly with the roofing surface, and ridge cap shingles must cover a ridge vent without restricting its designed opening. Screens should resist pests while preserving the manufacturer’s rated airflow. Ask how the vents handle wind-driven rain and fine blowing snow, particularly on roof slopes that face the prevailing weather.

    Why Minnesota Weather Changes the Decision

    Minnesota roofs operate through deep cold, heavy snow, spring rain, humidity, hail, and strong summer sun. Ventilation supports roof performance through those changes, but it works best alongside air sealing, insulation, sound flashing, and a healthy roof covering.

    Winter frost and ice dams

    Warm, damp household air can escape into the attic during winter. When it touches a cold roof deck, moisture may condense or freeze. After temperatures rise, that frost can melt and wet the insulation or wood. Meanwhile, uneven roof temperatures can melt snow higher on the slope. Water that reaches a colder eave may refreeze and contribute to an ice dam.

    Ventilation helps keep the underside of the roof cooler and carries moisture away, but it cannot correct every source of attic heat. Air leaks around ceiling penetrations and thin insulation can continue warming the roof deck. A thorough inspection distinguishes a ventilation issue from a larger building-envelope problem. Homeowners who notice winter warning signs can use this overview of when to request a free roof inspection to plan the next step.

    Snow, wind, and summer heat

    Drifting snow can cover or enter poorly placed vents, so products and placement must suit the roof’s exposure. In summer, dark shingles absorb solar heat and attic temperatures climb. Balanced airflow releases some of that heat and reduces stress on the roof assembly. It is not a substitute for insulation or air conditioning, but it can help the entire system work as designed.

    Local experience matters because the same vent layout can behave differently on an exposed rural home and a sheltered neighborhood property. A trusted Rogers roofing company can evaluate the roof pitch, prevailing wind exposure, snow patterns, and attic configuration together.

    How to Choose the Right Ventilation System

    Homeowners do not need to select vents from the ground. They do benefit from knowing what a complete recommendation should address. A contractor should explain the current airflow path, identify any barriers, and show how the proposed intake and exhaust will work together.

    1. Inspect the roof and attic. Identify all current vents, separate attic sections, moisture marks, damaged wood, wet insulation, and visible air leaks.
    2. Measure the ventilated space. Determine the attic area and whether cathedral ceilings or additions create enclosed sections that need their own airflow path.
    3. Calculate usable vent area. Use each product’s NFVA rating and applicable building requirements rather than judging by the number of vents.
    4. Confirm the intake route. Check that soffits or alternate intake vents are open and connected to the attic through clear baffles.
    5. Select one compatible exhaust strategy. Choose a ridge, box, or other exhaust layout that fits the roof without creating competing airflow paths.
    6. Address related causes. Correct disconnected bath fans, ceiling air leaks, insulation blockage, and roof damage that ventilation alone cannot solve.
    7. Verify after installation. Confirm vents remain clear, flashings are secure, and the attic shows no continuing signs of trapped moisture.

    Ask the contractor to explain why the proposed design fits your house and how intake balances exhaust. Clear answers are more valuable than a recommendation based only on what is already installed. Referred Restoration can assess the full assembly during a free inspection for your Minnesota home.

    Signs Your Roof Ventilation Needs Attention

    Ventilation trouble often appears inside the attic before it is obvious from the yard. Some warning signs can also indicate a leak, insulation problem, or indoor humidity issue, so avoid assuming that vents are the sole cause. A professional assessment should trace the moisture or heat to its source.

    Warning signs inside the attic

    • Frost or water droplets on roof nails and sheathing
    • Dark staining, musty odors, or visible organic growth
    • Wet, compressed, or discolored insulation
    • Rust on fasteners or metal components
    • Blocked soffit channels or missing baffles
    • Bath or kitchen exhaust ducts ending in the attic

    Warning signs outside and indoors

    • Repeated ice buildup along eaves
    • Uneven snowmelt patterns across the roof
    • Curling or prematurely aged shingles
    • Upstairs rooms that remain unusually warm in summer
    • Ceiling stains or peeling finishes after freeze-thaw cycles

    One symptom does not prove the ventilation design is failing. For example, a ceiling stain could come from flashing damage, while ice dams can involve both attic heat loss and exterior conditions. The most reliable next step is an attic and roof evaluation. Learn more about roof inspection warning signs, or contact Referred Restoration for an honest assessment.

    Ventilation Mistakes and Maintenance Tips

    A well-designed system can underperform when vents are blocked, damaged, or combined incorrectly. A quick visual check each season and after severe weather can reveal changes before trapped moisture damages the roof deck.

    Avoid competing exhaust vents

    Mixing a powered fan with a nearby ridge vent can cause the fan to pull outdoor air through the ridge instead of drawing it from the soffits. Similar short-circuiting can happen when box vents and ridge vents serve the same open attic. More openings do not guarantee better results. Keep one intentional low-to-high path unless a qualified contractor has designed separate zones.

    Keep intake paths open

    Inspect soffits from outside for paint, dust, insect nests, and debris. Inside the attic, confirm insulation has not shifted over the eaves. Baffles should stay securely in place and provide a clear channel above the insulation. Never enter an attic if access is unsafe, temperatures are extreme, or framing is concealed.

    Roof vent inspection on a snow-covered Minnesota home
    A winter roof inspection can reveal blocked vents, uneven snowmelt, and other airflow concerns.

    Pay attention to changes rather than waiting for obvious damage. New staining near a vent, a soffit panel that stays damp, or one roof area that melts snow sooner than the rest can justify a closer look. From indoors, monitor bathroom fans and indoor humidity during cold weather. Exhaust ducts should discharge outdoors through a proper termination, never into the attic where they add moisture directly beneath the roof.

    Check the whole roof after storms

    Hail, branches, and wind can damage vent caps, flashing, ridge shingles, and the surrounding roof. A vent may look intact from the yard while its flashing has lifted. After major weather, professional inspection is safer and more complete than climbing onto the roof. Your roofer can also check whether the selected products remain appropriate when shingles are replaced. Referred Restoration’s guide to the best asphalt shingles for Minnesota homes can help you understand that broader decision.

    When ventilation is planned as part of the entire roof, homeowners get a clearer recommendation and fewer surprises. If you need local guidance, work with a roofing contractor serving Rogers that understands Minnesota weather and can explain its findings plainly.

    Frequently Asked Questions About Roof Vent Types

    What is the most effective roof vent type?

    No single vent is most effective for every house. For many pitched roofs, continuous soffit intake paired with ridge exhaust provides even passive airflow. Roof shape, attic sections, available intake, insulation, and air sealing determine whether that pairing or another design is appropriate.

    Can a roof have too many vents?

    Yes. Excess exhaust, insufficient intake, or competing exhaust types can disrupt airflow and pull conditioned air from the home. Vent area should be calculated using the attic size, product NFVA ratings, applicable requirements, and a balanced intake-to-exhaust plan.

    Do roof vents prevent ice dams?

    Balanced ventilation can help keep the roof deck cooler and reduce moisture, which may limit conditions that contribute to ice dams. It does not guarantee prevention. Air sealing, insulation, snow conditions, roof geometry, and outdoor temperatures also affect ice-dam formation.

    How often should roof vents be inspected?

    Homeowners should visually review vents seasonally and after major storms, while avoiding unsafe roof or attic access. A professional inspection is wise when you see frost, blocked intake, uneven snowmelt, damaged vent flashing, wet insulation, or recurring ice buildup.

  • Hail Damage Roof Repair: What to Do Next

    Hail Damage Roof Repair: What to Do Next

    A Minnesota hailstorm can leave a roof looking normal from the yard while bruised shingles, loosened granules, and damaged flashing allow water to enter later. Prompt hail damage roof repair starts with a safe ground-level check, clear documentation, and a professional inspection that identifies both visible and hidden damage.

    Schedule a Free Inspection to get an honest assessment of your roof after a hailstorm.

    Use the steps below to protect your home, prepare for an insurance conversation, and make an informed decision about repair or replacement. Referred Restoration serves Rogers and surrounding Minnesota communities with roofing, siding, gutter, window, and storm restoration services.

    Hail damage roof repair: immediate steps

    After hail stops, confirm everyone is safe, document visible damage from the ground, check the attic for moisture, and arrange a professional inspection. Do not climb onto a wet or damaged roof. Fast, careful action creates a useful record and helps prevent a small opening from becoming a larger leak.

    Wait until conditions are safe

    Stay indoors until the storm has fully passed. Watch for downed power lines, broken glass, fallen branches, and standing water before walking around the property. Wear sturdy shoes and gloves if you need to move through debris. Leave major cleanup and any work at height to trained professionals.

    Complete a ground-level check

    Walk around the home without using a ladder. Look for shingle pieces in the yard, dents in gutters or downspouts, damaged siding, torn window screens, and marks on metal roof vents. These clues do not prove the full extent of roof damage, but they help show where hail struck.

    Check the attic and upper-floor ceilings for damp insulation, active drips, or new water stains. Place a container under an active drip and protect belongings, but do not disturb wet electrical fixtures. If water is entering quickly, ask a qualified contractor about appropriate emergency roof tarping services for temporary protection.

    Document what you can see

    Build a useful storm record without climbing onto the roof:

    1. Take wide photos of every side of the home.
    2. Capture closer photos of visible dents, debris, and exterior damage.
    3. Photograph a hailstone beside a coin or ruler if stones remain.
    4. Record the storm date and approximate time.
    5. Save the files together for your contractor and insurer.
    Minnesota homeowner documenting possible hail damage from the ground
    Photograph visible storm damage from the ground instead of climbing onto the roof.

    How can you recognize hail damage on a roof?

    Common hail damage signs include dark shingle bruises, missing granules, exposed asphalt, cracked shingles, and dents in soft metal components. A homeowner may notice related damage on gutters, siding, or screens, but a trained inspector is better equipped to determine whether the roof system was compromised.

    Bruised or exposed shingles

    Asphalt shingles have a protective granule layer. A hail impact can knock away granules and expose the asphalt below. Fresh impact spots may appear dark, shiny, or soft. Over time, exposed areas face additional stress from sunlight, rain, snow, and Minnesota freeze-thaw cycles.

    Granules also collect naturally as shingles age, so finding a few in a gutter does not automatically mean the roof has storm damage. A professional can compare the pattern, location, and condition of marks to distinguish recent impact damage from normal wear.

    Dented metal and damaged exterior surfaces

    Soft metal often provides clear evidence of a hail path. Inspectors examine roof vents, flashing, gutters, and downspouts for dents. Damage to siding, window wraps, screens, outdoor lights, or deck surfaces can also indicate that hail was forceful enough to affect the roof.

    A storm can affect several exterior systems at once. Referred Restoration provides a single point of contact for roofing and related exterior restoration, including gutter inspections and restoration.

    Indoor signs that need quick attention

    New ceiling stains, damp attic insulation, musty odors, or visible drips can signal that the roof envelope has been breached. Water may travel along rafters before appearing indoors, so the stain may not sit directly below the damaged area. Arrange an inspection promptly if you notice any of these signs.

    Close view of asphalt shingles with hail impact damage
    Hail impacts can dislodge granules and expose the asphalt beneath a shingle.

    Why a professional roof inspection matters

    A professional inspection finds damage that may be difficult to see safely from the ground and creates a clear record of the roof’s condition. The inspector can evaluate shingles, flashing, vents, gutters, and the attic, then explain whether the roof needs monitoring, targeted repair, or broader restoration.

    Roof access requires training and equipment

    Storm-damaged roofs can be slippery, unstable, or covered with loose debris. Walking on weakened shingles may also cause further damage. A roofing professional uses appropriate access equipment and knows how to inspect the system without putting a homeowner at risk.

    A complete inspection looks beyond shingles

    The roof works as a system. An inspector should evaluate the field shingles along with flashing, penetrations, vents, roof edges, gutters, and visible decking or attic conditions. That broader view helps identify water-entry points that a quick yard check could miss.

    Referred Restoration offers free roof inspections and honest recommendations for Minnesota homeowners. Learn more about the team’s roof inspections and storm restoration services in Rogers.

    Documenting damage and handling an insurance claim

    A strong storm-damage record includes dated photos, inspection findings, claim communications, and copies of all documents related to the event. Contact your insurer to understand your policy and required steps. A roofing contractor can explain observed damage and restoration needs, while the insurer determines coverage.

    Organize the storm record

    Create one folder for photos, videos, inspection notes, emails, and claim documents. Write down the names of people you speak with and the date of each conversation. Keep original files rather than editing them. A simple, complete timeline makes follow-up easier.

    Ask your insurer about the process

    Policies and claim procedures differ. Contact your insurer or agent promptly, ask what documentation is required, and confirm any deadlines that apply. Do not assume that every visible mark is covered or that every hail event requires replacement. The insurer makes coverage decisions under the terms of the policy.

    Use the contractor’s findings

    A contractor can provide photos and explain the observed condition of the roof and related exterior systems. Referred Restoration can help homeowners navigate the storm-damage claim process and communicate restoration needs. The goal is a clear scope based on the actual condition of the home.

    Get Your Free Inspection before hidden storm damage has more time to develop.

    Repair versus replacement after hail

    The right solution depends on the location and extent of damage, the condition of the existing roof, and whether the system can be restored reliably. A few isolated damaged shingles may support a targeted repair. Widespread bruising, cracking, or multiple compromised areas may call for replacement.

    Inspection finding Repair may fit Replacement may fit
    Damage pattern Limited to a small, isolated area Spread across multiple roof slopes
    Shingle condition Surrounding shingles remain serviceable Widespread cracking or exposed asphalt
    Water entry Single identifiable source Multiple vulnerable or leaking areas
    Related components Minor localized impact Broad damage to flashing, vents, or edges

    When a targeted repair may work

    Repair may be appropriate when damage is limited and compatible materials can restore the affected area. The contractor should also confirm that nearby shingles and flashing remain functional. Addressing a small issue promptly can help protect the roof deck and interior.

    When replacement may be the stronger option

    Replacement may be recommended when impacts are widespread, shingles are cracked across several slopes, or the existing roof cannot be restored reliably with isolated repairs. Referred Restoration installs asphalt shingle and metal roofing systems and can explain material options suited to Minnesota weather.

    Homeowners comparing materials can review this guide to asphalt shingles for Minnesota homes and the company’s metal roofing guide.

    Choosing a contractor after hail damage

    Choose a contractor that provides a thorough inspection, explains findings clearly, understands Minnesota weather, and recommends work based on the home’s actual condition. Avoid high-pressure decisions. A trustworthy contractor should answer questions, document observations, and provide a clear scope before restoration begins.

    Look for clear evidence and recommendations

    Ask the contractor to show photos and explain what each finding means. The recommendation should connect directly to the observed damage. You should understand which components need attention, what the proposed work will accomplish, and what happens next.

    Choose local exterior-restoration experience

    A local contractor understands the way hail, wind, snow, and freeze-thaw cycles affect Minnesota homes. Referred Restoration is locally owned, serves Rogers and surrounding communities, and provides roofing, siding, gutters, windows, and storm restoration through one team.

    Expect a straightforward process

    Referred Restoration follows a three-step process: a free inspection, a custom solution, and professional installation. The team uses premium, durable materials, including Malarkey roofing products, when they fit the project. Recommendations are tailored to the property after the inspection.

    What happens during the restoration process?

    A well-managed restoration moves from documented inspection findings to a tailored scope, careful scheduling, professional installation, and a final walkthrough. The contractor should explain each phase before work begins and keep the homeowner informed when weather, material availability, or newly discovered conditions affect the plan.

    Review the inspection findings

    The process begins with a conversation about what the inspection found. Ask to see photos of impacted shingles, flashing, vents, gutters, and any interior moisture. The contractor should explain which areas remain serviceable and which need attention. If an insurance claim is involved, keep the inspection record with the rest of your claim documents.

    Confirm the scope and prepare the property

    Once you understand the recommendation, review the proposed scope and ask questions about materials, scheduling, site protection, and cleanup. Before work begins, move vehicles away from the home, secure patio furniture, and keep children and pets clear of the work area. Contractors may also recommend protecting delicate landscaping near the roof edge.

    Installation and final walkthrough

    During restoration, the crew removes damaged materials as required, evaluates the exposed roof deck, and installs the approved system. The team should protect the property and collect debris throughout the work. At the end, walk through the completed project with the contractor, review the work performed, and ask how to monitor the roof after future storms.

    Referred Restoration develops a custom solution after the free inspection rather than applying the same answer to every home. That approach helps homeowners understand the actual condition of their exterior and move forward with a clear, practical plan.

    Frequently asked questions

    Can hail damage on a roof be repaired?

    Yes. Localized hail damage can often be repaired when the surrounding roof remains serviceable. Widespread bruising, cracked shingles, or damage across several slopes may require replacement. A professional inspection is the best way to determine which approach can restore the roof reliably.

    How soon should a roof be inspected after hail?

    Arrange an inspection promptly after conditions are safe, especially if you see missing shingles, dented metal, ceiling stains, or attic moisture. Some hail damage is difficult to see from the ground. Early documentation also gives you a clearer record of the storm’s effects.

    Should a homeowner climb onto the roof to inspect it?

    No. A roof can be slippery or unstable after a storm, and walking on damaged shingles may make matters worse. Document visible signs from the ground, check the attic only when it is safe, and let a trained roofing professional perform the roof-level inspection.

    Does Referred Restoration help with storm-damage claims?

    Yes. Referred Restoration helps homeowners navigate insurance claims for hail, wind, and other covered storm events. The team can document observed damage and explain restoration needs. Your insurer remains responsible for determining coverage under your policy.

    Schedule your free roof inspection

    A timely inspection gives you a clear understanding of your roof after a hailstorm and a practical plan for the next step. Referred Restoration combines local Minnesota weather knowledge, honest assessments, and customer-first service. The team treats every home as if it were its own.

    Schedule a Free Inspection with Referred Restoration to get clear guidance on hail damage roof repair for your home.

  • How to Hire the Best Vinyl Siding Contractors

    How to Hire the Best Vinyl Siding Contractors

    Hiring a contractor for a big project can feel like a gamble. You’ve probably heard stories from friends or neighbors about missed deadlines, surprise fees, or work that just didn’t hold up. These common mistakes can turn an exciting home update into a major headache. The best way to avoid them is to know what to look for from the very beginning. This guide is designed to help you make an informed decision with confidence. We’ll cover the red flags to watch out for and the key qualifications that separate the best vinyl siding contractors from the rest.

    Key Takeaways

    • Do Your Homework on Potential Contractors: Go beyond the sales pitch by confirming their license and insurance, checking online reviews, and asking to see a portfolio of their past work to find a true professional.
    • Get Everything in Writing: A detailed contract is your best protection. Before signing, make sure it clearly outlines the project scope, specific materials, timeline, and payment schedule.
    • Prioritize Quality Over the Lowest Quote: True value comes from expert craftsmanship, durable materials, and strong warranties. Investing in a reputable team ensures a better, longer-lasting result for your home.

    What Does a Siding Contractor Do?

    When you think of a siding contractor, you probably picture someone installing new panels on a house. While that’s a huge part of the job, their role is much broader. A professional siding contractor is an expert in your home’s exterior shell. They are responsible for everything from helping you choose the right materials to ensuring your home is protected from the elements for years to come. Their work involves precise installation, careful repairs, and proactive maintenance to keep your home safe, efficient, and looking its best. Think of them as a partner in protecting one of your biggest investments.

    Installing New Siding

    A contractor’s primary job is the expert installation of new siding. This process is much more than just attaching panels to your walls. It starts with preparing the exterior surface, which might include removing old siding and checking for any underlying damage. From there, they install a weather-resistant barrier to protect your home from moisture. A skilled contractor ensures every piece is cut precisely and installed correctly to create a seamless, durable shield. They also handle the details, like working around windows and doors, to give your home a polished look. Following local building codes is a critical part of their work, guaranteeing your new siding is not only beautiful but also completely compliant and safe.

    Repairing and Replacing Old Siding

    Over time, siding can take a beating from weather and wear. Siding contractors specialize in diagnosing and fixing issues like cracks, holes, warping, or panels that have come loose after a storm. A professional can assess the damage and determine if a targeted repair is enough or if a full replacement is the smarter move for your home’s long-term health. Addressing these problems quickly is key to preventing bigger issues, like water seeping into your walls and causing structural damage. Properly functioning gutters are also essential to direct water away from your siding, and a good contractor will check that your whole system is working together to protect your home.

    Inspecting and Maintaining Your Siding

    Beyond major projects, siding contractors also provide crucial inspection and maintenance services. Think of it as a check-up for your home’s exterior. During an inspection, a contractor will look for early signs of trouble you might miss, such as subtle warping, chalking, or gaps where moisture could get in. Catching these small issues early can prevent them from turning into large, complex problems. Regular maintenance can dramatically extend the life of your siding and help you put off a full replacement. This proactive approach is a hallmark of a true professional who cares about the longevity of your home’s exterior, from the roofing down to the foundation.

    Why Choose Vinyl Siding?

    When it’s time to update your home’s exterior, vinyl siding is one of the most popular and practical choices for homeowners, and for good reason. It strikes a fantastic balance between good looks, resilience, and simple upkeep. If you’re looking for an exterior solution that protects your home and enhances its curb appeal without demanding constant attention, vinyl is an excellent material to consider. It’s a versatile option that has evolved significantly over the years, offering benefits that go far beyond its surface.

    Enjoy Low-Maintenance Durability

    One of the biggest draws of vinyl siding is how little maintenance it requires. Life is busy enough without adding “paint the house” to your weekend to-do list every few years. Vinyl never needs to be painted, stained, or sealed, which saves you a lot of time and effort over the long run. When it does get a little dirty, cleaning is incredibly straightforward; a simple wash with mild soap and water is usually all it takes to make it look fresh again. This makes it a perfect choice for anyone who wants a beautiful, durable home exterior without the constant upkeep.

    Improve Energy Efficiency

    Beyond its good looks, the right siding can also make your home more comfortable and efficient. Many modern vinyl siding products are available with built-in insulation, which wraps your home in a protective layer. This added insulation helps reduce energy transfer, keeping your home warmer in the winter and cooler in the summer. By maintaining a more consistent indoor temperature, your heating and cooling systems don’t have to work as hard. This can lead to noticeable savings on your energy bills, making insulated vinyl siding a smart investment for your home.

    Explore a Variety of Styles and Colors

    Your home’s exterior is a reflection of your personal style, and vinyl siding gives you plenty of options to express it. Gone are the days of limited, basic choices. Today, vinyl siding comes in a huge variety of styles and colors, allowing you to find the perfect look to match your home’s architecture and your personal taste. Whether you prefer traditional lap siding, rustic-looking shakes, or vertical panels, you can find a vinyl product that mimics the appearance of wood, stone, and other materials. This versatility means you don’t have to compromise when designing the exterior you’ve always wanted for your home.

    How to Choose the Perfect Vinyl Siding

    Vinyl siding is one of the most popular choices for homeowners, and for good reason. It’s durable, low-maintenance, and comes in a huge array of options. But with so much to choose from, how do you land on the perfect fit for your home? The key is to focus on three main elements: the style of the siding, its color, and its ability to stand up to our Minnesota weather. Thinking through these factors will help you select a siding that you’ll love for years to come. Let’s walk through how to make the best choice for your home’s exterior.

    Find Your Style

    The first step is to find a siding style that complements your home’s unique character. As one expert puts it, you should “choose siding that looks good with your house’s design.” Take a moment to look at your home’s architecture. Is it a traditional two-story, a sprawling rambler, or a modern design? A classic clapboard style looks timeless on colonial homes, while vertical board and batten can give a modern farmhouse feel. If you have a rustic or craftsman-style home, you might consider profiles that mimic the look of cedar shakes. The goal is to create a cohesive look where the siding enhances your home’s best features, rather than competes with them.

    Pick the Right Color

    Color has a massive impact on your home’s overall look and feel. Because “vinyl siding comes in many colors,” selecting the right one is your best opportunity to “enhance your home’s curb appeal.” Start by considering the fixed elements of your exterior, like the color of your roof, any brick or stone accents, and your window trim. You’ll want a siding color that harmonizes with these features. It’s also a great idea to drive around your neighborhood for inspiration. Do you want to blend in or make a statement? Don’t be afraid to get samples and hold them up against your house at different times of the day to see how the light changes their appearance.

    Match Siding to Your Climate

    Here in Minnesota, our homes go through a lot, from humid summer days to deep winter freezes. That’s why it’s so important to “pick siding that can handle the changing temperatures, rain, and freezing.” Vinyl siding is a great material for our climate because it’s engineered to expand and contract without cracking or warping. For even better performance, consider a high-quality, insulated vinyl siding. As some professionals note, “thicker, insulated vinyl siding with UV protection works best” in demanding environments. This not only adds an extra layer of durability but can also improve your home’s energy efficiency, keeping you more comfortable all year round.

    How to Find a Great Siding Contractor

    Finding the right siding contractor is just as important as choosing the perfect siding for your home. You’re not just hiring someone to do a job; you’re looking for a reliable partner who will protect and beautify your home for years to come. A great contractor brings expertise, craftsmanship, and peace of mind to the project. Taking the time to research your options thoroughly is the best way to ensure a smooth process and results you’ll love. Start by looking for contractors with a strong local reputation, then dig a little deeper to verify their credentials and commitment to quality. This simple groundwork helps you find a professional you can trust with one of your most valuable assets.

    Ask for Referrals and Check Reviews

    Start by talking to people you trust. Ask friends, family, or neighbors in the Rogers area for their recommendations. A personal referral is often the most reliable way to find a contractor who does great work and treats their clients well. After gathering a few names, head online to check their reviews. Look at testimonials on their website and browse ratings on independent sites like Google. While a perfect record is rare, you’re looking for a consistent pattern of positive feedback about their communication, craftsmanship, and reliability. This initial research helps you build a shortlist of reputable siding contractors and saves you from potential headaches down the road.

    Consult Professional Associations

    A contractor’s involvement in professional organizations is a good sign of their commitment to their craft. Memberships in groups like the National Association of the Remodeling Industry (NARI) or maintaining a high rating with the Better Business Bureau show that a company is serious about upholding industry standards. These associations often have strict codes of ethics and require members to stay current on best practices and new technologies. While not a guarantee, it shows a level of professionalism and dedication that goes beyond simply getting the job done. It tells you they are invested in their business and their industry for the long haul, which is exactly the kind of partner you want for your home.

    Verify Their License and Insurance

    This step is not optional. Before you hire anyone, you must confirm they have the proper license and insurance. A valid contractor’s license proves they meet Minnesota’s requirements to perform the work legally. You can easily verify a contractor’s license online through the state’s official portal. Just as important is their insurance. The contractor should carry both liability insurance, which covers damage to your property, and workers’ compensation, which protects you if one of their employees gets injured on your property. Don’t just take their word for it; ask for a copy of their insurance certificates. This protects you from any financial responsibility for accidents or mistakes.

    What to Look for in a Contractor

    Once you have a short list of potential contractors, it’s time to dig a little deeper. Choosing the right partner for your siding project goes beyond just finding someone who can do the job. You’re looking for a professional who is trustworthy, skilled, and easy to work with. The best contractors are proud of their work and transparent in their process. Paying attention to a few key areas will help you distinguish a true professional from the rest and give you confidence in your final decision. Look for a combination of proven experience, proper credentials, and clear communication. These are the hallmarks of a contractor who will respect your home and deliver results you’ll love for years to come.

    A Strong Portfolio and Solid Warranties

    A reputable contractor will always be happy to show you their past work. Ask to see a portfolio of completed projects, and pay attention to online reviews and testimonials from previous clients in the Rogers area. This gives you a real-world look at their craftsmanship and customer service. Beyond seeing pictures, ask about the warranties they offer. A quality contractor provides solid warranties that cover both the materials used and the labor itself. This shows they stand behind their work and are committed to a lasting, high-quality installation. A strong track record and a good warranty are your best indicators of a contractor’s confidence in their own siding services.

    Knowledge of Local Building Codes

    Every city, including Rogers, has specific building codes and permit requirements that must be followed for any construction project. A professional contractor will be well-versed in these local regulations and will handle all the necessary permits for your siding installation. Verifying that your contractor is fully licensed and insured is non-negotiable. This protects you from liability in case of accidents on your property and ensures the work is compliant with legal standards. Don’t hesitate to ask for proof of their license and insurance. A legitimate contractor will have this information readily available and will understand why it’s important for your peace of mind.

    Clear Communication and a Detailed Contract

    From the very first conversation, pay attention to how a contractor communicates. Are they responsive, respectful, and willing to answer all your questions? Good communication is essential for a smooth project. This professionalism should extend to the contract. Never move forward with a contractor who won’t provide a detailed, written agreement. The contract should clearly outline the full scope of work, the specific materials to be used, a project timeline, and the total amount. This document prevents misunderstandings and ensures everyone is on the same page. If you’re also considering updating your gutters, make sure that work is detailed in the contract as well.

    Common Mistakes to Avoid When Hiring

    Finding the right contractor is a huge step, and you want to feel confident in your choice. Knowing what to watch out for can help you steer clear of potential headaches and ensure your project goes smoothly from start to finish. Let’s walk through some of the most common missteps homeowners make so you can avoid them and hire a team you can trust with your home’s siding. By being aware of these pitfalls, you can make a more informed decision and find a partner who will deliver quality results that last.

    Choosing Based on the Lowest Bid Alone

    It’s tempting to go with the lowest quote, but this is one of the most common mistakes homeowners make. A surprisingly low bid can be a red flag for corner-cutting, whether it’s with subpar materials or rushed workmanship. Instead of focusing only on the number, look at the overall value. A quality contractor provides a detailed proposal that explains exactly what you’re getting for your investment. They’ll also have solid reviews and references to back up their reputation. A slightly higher initial investment often means a better, longer-lasting result for your home.

    Skipping the Fine Print on Contracts and Warranties

    Your contract is your project’s roadmap and your protection. Never move forward with a contractor who is hesitant to put everything in writing, as this could be a sign they don’t intend to honor the agreement. A thorough contract should clearly outline the full scope of work, the materials to be used, a project timeline, and the payment schedule. It’s also crucial to understand the warranties offered for both the materials and the labor. Take your time to read every line. If something is unclear, ask for clarification before you sign. This simple step ensures everyone is on the same page and protects you from unexpected issues.

    Ignoring Red Flags Like High-Pressure Sales

    A professional contractor will respect your decision-making process. If you feel pressured to sign a contract on the spot with a “today only” deal, take a step back. High-pressure sales tactics are a major red flag and one of the key pitfalls to avoid. Reputable companies are confident in their work and will give you the time and information you need to make a choice that feels right for you. You should feel like you’re entering a partnership, not being pushed into a sale. Trust your gut; if a contractor’s approach makes you uncomfortable, it’s best to keep looking.

    Not Prioritizing Proper Installation

    The quality of your vinyl siding is only as good as its installation. Even the most durable, high-end siding can fail if it’s not installed correctly. A common mistake during vinyl siding installation is using the wrong fasteners or failing to account for the material’s natural expansion and contraction. This can lead to warping, buckling, and moisture problems. This is why it’s so important to hire a contractor with proven experience installing vinyl siding specifically. Ask about their installation process and the training their team has to ensure your siding performs as it should for years to come.

    Key Questions to Ask Before You Hire

    Once you have a shortlist of contractors, it’s time to start the interview process. Coming prepared with a list of questions helps you compare your options fairly and find a partner you can trust. A professional contractor will be happy to provide clear answers and detailed information. To make sure you cover all your bases, focus your questions on three key areas: the project details, the company’s credentials, and the possibility of bundling other exterior updates.

    About the Project, Materials, and Timeline

    Your conversation should start with the specifics of your project. Ask for a detailed contract that clearly outlines the scope of work, the materials to be used, and a project timeline. This document is your best tool for avoiding confusion down the road. You’ll also want to ask about the materials themselves. For example, with vinyl siding, the thickness and profile can influence the final look and durability. A good contractor can explain the options and help you choose what’s best for your home’s style and our Minnesota climate. Don’t forget to ask about their process for handling any unexpected issues that might pop up once the old siding comes off.

    About Their Credentials and Your Protections

    Next, you’ll want to confirm the contractor’s qualifications and ensure you’re protected. Always ask for proof of their license and insurance; this is non-negotiable for any legitimate business. You can confirm a contractor holds a valid state license to be certain they are qualified to work in your area. It’s also a great idea to ask for a portfolio of their recent work and to check online reviews from past clients. Finally, be sure to ask about the warranties they offer. You should receive separate warranties for both the siding materials and the contractor’s workmanship, giving you peace of mind for years to come.

    About Bundling Other Exterior Projects

    If your home needs more than just new siding, ask about bundling services. Many homeowners find that tackling multiple exterior projects at once is more efficient. For instance, if your gutters are old or your roof is showing signs of wear, it makes sense to address these issues while the team is already on-site. This can reduce overall disruption to your daily life and ensure all your home’s exterior components work together seamlessly. Ask if they offer other services and if there is an advantage to scheduling the work together. A comprehensive contractor can provide a single point of contact for your entire exterior renovation.

    Partner with Rogers’ Trusted Siding Experts

    Choosing the right team to work on your home is a big decision, and it’s easy to get caught up comparing estimates. While the bottom line is important, the true value of a project comes from quality craftsmanship and durable materials. A common mistake homeowners make is selecting a contractor based on the lowest quote alone, which can sometimes lead to subpar work or unexpected issues later on. To ensure your project is a success, it’s helpful to look beyond the numbers and focus on a contractor’s reputation, experience, and what other customers have to say.

    Before you commit, it’s smart to do a little homework. A trustworthy contractor will have a strong portfolio of past work and positive online reviews. It’s also essential to verify their credentials. Make sure any team you consider holds a valid state license and carries proper insurance to protect you and your property. This simple step confirms you’re working with a qualified professional who follows local regulations and industry standards for every siding installation.

    Clear communication is another key piece of the puzzle. From the initial consultation to the final walkthrough, you should feel heard and respected. A great contractor will provide a detailed, written contract that outlines the full scope of work, the materials to be used, and a clear timeline. Having everything in writing is a sign of a professional who stands by their word and is committed to avoiding any misunderstandings.

    At Referred Restoration, we’ve built our reputation in Rogers by putting our customers first. We combine reliable craftsmanship with top-quality materials to deliver results that not only look great but also last for years. Our team is dedicated to transparent communication and ensuring you feel confident and informed throughout the entire process. We’re here to help you make your home’s exterior exactly what you’ve envisioned.

    Related Articles

    Frequently Asked Questions

    What’s the most important thing to look for in a siding contractor? It’s less about one single thing and more about the complete picture. You want a contractor with a strong local reputation, proven experience (always ask to see their work), and the right credentials, like a valid license and full insurance. Just as important, however, is their communication style. A great contractor will answer your questions clearly and provide a detailed, written agreement, making you feel like a respected partner in the project.

    Why is a written contract so important? Think of a written contract as the official game plan for your project. It protects both you and the contractor by clearly defining the scope of work, the specific materials being used, the project timeline, and the payment schedule. Relying on verbal agreements can lead to confusion or disputes. A professional who is confident in their work will always put everything in writing to ensure you are both on the same page from start to finish.

    Should I just pick the contractor with the lowest estimate? It’s definitely tempting to go with the lowest number, but that can sometimes be a red flag. An unusually low bid might mean the contractor is using subpar materials or rushing the installation, which could lead to problems down the road. Instead, focus on the overall value. A quality contractor provides a detailed proposal, has excellent reviews, and offers solid warranties that protect your investment for years to come.

    How do I know what style of vinyl siding is right for my house? Start by looking at your home’s existing architecture and features. A classic clapboard style often suits traditional homes, while vertical board and batten can create a modern farmhouse look. You’ll want to choose a color that harmonizes with fixed elements like your roof, windows, and any brick or stone accents. A great tip is to get a few samples and see how they look against your house at different times of the day before making a final decision.

    Is it a good idea to replace my gutters at the same time as my siding? It’s often a very smart move. Your siding and gutters work together as a system to protect your home from water damage. Replacing them at the same time ensures they are installed to work together perfectly. It can also be more efficient, as the installation team is already on-site, which minimizes disruption to your daily life. If your gutters are old or damaged, bundling the projects is a great way to tackle your entire exterior at once.

  • What Is Clapboard Siding? A Homeowner’s Guide

    What Is Clapboard Siding? A Homeowner’s Guide

    Here in Minnesota, siding has to do more than just look good; it has to work hard. Our homes face everything from humid summers and heavy rains to freezing winters with blowing snow. Your siding is the protective shield that stands between your family and the elements. That’s why the time-tested design of clapboard siding remains such a smart choice. The simple yet brilliant overlapping of its planks creates a weather-tight barrier that has been effectively shedding moisture for centuries. Today, you can get that same reliable protection combined with modern material science. This article explores how the classic clapboard style, available in materials like durable fiber cement and engineered wood, offers an unbeatable combination of beauty and performance for your home.

    Key Takeaways

    • Find the right material for your lifestyle: Clapboard siding comes in several materials, including natural wood, vinyl, and fiber cement, so you can choose the perfect balance of authentic looks, durability, and required maintenance for your home.
    • Appreciate its form and function: The classic, overlapping design of clapboard siding isn’t just for looks; it creates a weather-tight seal that effectively directs rain and snow away from your home’s structure, combining timeless style with essential protection.
    • Prioritize professional installation and simple upkeep: To get the most out of your new siding, expert installation is key to preventing future issues. Once installed, a simple maintenance routine tailored to your material will keep your home looking beautiful and well-protected for decades.

    What Exactly Is Clapboard Siding?

    If you can picture a classic, charming American home, you’re likely imagining clapboard siding. It’s one of the most recognizable and enduring exterior styles, known for its clean, horizontal lines that create beautiful shadows and a sense of texture. At its core, clapboard is a type of lap siding, where long planks are installed to overlap one another, but its specific characteristics and rich history give it a unique identity. This style has been a staple for centuries, gracing everything from colonial farmhouses to modern suburban homes with its understated elegance.

    The beauty of clapboard lies in its versatility. It feels both historic and fresh, making it a perfect fit for a wide range of architectural styles. While the look is traditional, the materials used to create it have evolved significantly. Originally made from wood, you can now find the clapboard style in a variety of modern materials that offer different levels of durability and maintenance. Understanding what clapboard is, how it works, and its history can help you decide if this timeless look is the right fit for your home’s exterior refresh. As you explore your options, remember that the right siding not only defines your home’s curb appeal but also serves as its first line of defense against the elements, protecting your family and your investment.

    The Anatomy of a Clapboard Plank

    So, what gives clapboard its signature look? It all comes down to the shape of the planks and how they’re installed. Each board is essentially a long, thin wedge, meaning it’s thicker at the bottom edge and tapers to be thinner at the top. These planks are installed horizontally, with the thicker bottom edge of each board overlapping the thinner top edge of the board below it.

    This overlapping technique isn’t just for looks; it’s a highly functional design. The overlap creates a weather-tight seal that effectively sheds rainwater, directing it down and away from your home’s underlying structure. This simple yet brilliant design has been protecting homes for generations, preventing moisture from getting trapped and causing issues like rot or mold.

    Clapboard vs. Lap Siding: What’s the Difference?

    You’ll often hear the terms “clapboard” and “lap siding” used interchangeably, and while they are closely related, there’s a subtle distinction. “Lap siding” is a broad, general term for any type of horizontal siding that overlaps to shed water. This category includes many different materials and profiles.

    Clapboard, traditionally, refers specifically to wood siding cut in that classic wedge shape. Another similar term is “bevel siding,” which is also wedge-shaped but is milled by a machine for a perfectly uniform taper. Today, however, you can get the beautiful clapboard look from advanced materials like vinyl and fiber cement, which are technically types of lap siding designed to mimic the appearance of traditional wood clapboard.

    A Quick Look at Its History

    Clapboard siding isn’t just a style; it’s a piece of American architectural history. As one of the oldest forms of siding in North America, it has been a go-to choice for home exteriors for hundreds of years. Its popularity grew from its simple effectiveness and the wide availability of timber.

    Interestingly, even the installation methods have a history. Early builders would often drive nails through both the top and bottom boards at the overlap. However, as The Craftsman Blog explains, modern best practices involve nailing only through the top board. This allows the wood to expand and contract naturally with changes in temperature and humidity without cracking or warping, ensuring a longer-lasting finish.

    Exploring Common Clapboard Siding Materials

    Once you’ve decided on the clapboard style, the next step is choosing a material. This decision affects your home’s appearance, the level of maintenance required, and its long-term durability. Let’s look at the most common options so you can find the perfect fit for your home and lifestyle.

    Natural Wood (Like Cedar and Pine)

    There’s a reason wood has been a go-to for generations; its authentic, classic charm is hard to beat. Materials like cedar and pine give your home a warm, traditional look. Cedar, in particular, is a fantastic choice because it naturally resists rot and can last for decades when properly cared for. However, natural wood does ask for more commitment. To keep it looking its best and protect it from the elements, you’ll need to plan on regular painting or staining every few years. This upkeep is essential to prevent moisture damage and keep your home’s exterior in top shape. When expertly installed, wood siding offers timeless beauty that truly stands out.

    Low-Maintenance Vinyl

    If your ideal weekend doesn’t involve exterior home maintenance, vinyl siding might be your perfect match. As one of the most popular siding materials, vinyl offers a low-fuss solution that frees up your time. It doesn’t require painting or staining; a simple wash now and then is usually all it needs to look fresh. It’s a practical and accessible option for many homeowners. It is important to know that quality can vary, and lower-grade vinyl can sometimes buckle or warp in extreme temperature swings. Choosing a high-quality vinyl product and ensuring it’s installed correctly helps you get the best performance and a look you’ll love for years.

    Durable Fiber Cement

    Think of fiber cement as the strong, silent type in the siding world. It gives you the beautiful look of wood, but with a fraction of the maintenance. Made from a blend of cement, sand, and cellulose fibers, this material is built to last. It stands up incredibly well against rot, insects, and even fire, giving you serious peace of mind. One of its best features is how long it holds paint, meaning you won’t have to think about repainting for 15 years or more. Because fiber cement siding is heavier and requires special tools, professional installation is a must to ensure it performs as it should.

    Versatile Engineered Wood

    Engineered wood is a smart, modern take on traditional wood siding. It’s made by combining wood strands with resins and waxes under high pressure, creating a product that’s often stronger and more dimensionally stable than natural wood. This process gives it excellent resistance to moisture, rot, and pests. You get the warm, textured appearance of real wood but with enhanced durability and a lifespan that can reach 25 to 30 years. It’s a fantastic middle-ground option for homeowners who love the aesthetic of wood but want a bit more performance and predictability from their siding material.

    Comparing Your Siding Material Options

    Choosing the right siding is about balancing aesthetics, durability, and the level of maintenance you’re comfortable with. Each material offers a unique set of benefits and trade-offs, especially here in Minnesota where our homes face everything from humid summers to icy winters. Let’s break down the most common options so you can find the perfect fit for your home and lifestyle.

    Wood Siding: Pros and Cons

    There’s a reason wood siding remains a classic; it offers an authentic, timeless beauty that’s hard to replicate. Materials like cedar have natural resistance to rot and can look stunning for decades. If you love that traditional, rustic charm, wood is an incredible choice.

    However, that beauty comes with a commitment. Wood requires consistent upkeep to stay in top shape. You’ll need to plan on repainting or restaining it every five to seven years to protect it from moisture and prevent fading. It’s also important to regularly inspect for any signs of rot or pests. For homeowners who enjoy the process of maintaining their home’s classic look, wood is a deeply rewarding option.

    Vinyl Siding: Pros and Cons

    If your top priority is low maintenance, vinyl siding is likely on your radar. It’s one of the most popular siding choices for a reason: it never needs painting and can be cleaned easily with a simple wash. This makes it a practical, set-it-and-forget-it solution for busy homeowners.

    On the downside, vinyl can sometimes struggle with extreme temperature swings, which could lead to buckling or warping over time. If a panel gets cracked or damaged, you typically have to replace the entire piece rather than patching a small spot. While modern vinyl has come a long way, some lower-end options may not offer the same rich look as wood or fiber cement up close.

    Fiber Cement Siding: Pros and Cons

    Fiber cement is the ultimate hybrid, giving you the best of both worlds. It masterfully mimics the appearance of natural wood clapboard but delivers the low-maintenance durability of a composite material. Made from a blend of cement, sand, and cellulose fibers, it’s incredibly tough. It resists rot, won’t be bothered by insects, and is fire-resistant, giving you serious peace of mind. Plus, it holds paint exceptionally well, meaning you won’t have to think about repainting for 15 years or more.

    The only real drawback is that it’s a heavy material that requires a skilled hand for proper installation. If it isn’t installed correctly, moisture can get trapped behind the boards, leading to issues down the road. This is one material where hiring an expert siding contractor is non-negotiable.

    Engineered Wood Siding: Pros and Cons

    Engineered wood offers a smart alternative for those who love the look of wood but want something a bit more resilient. It’s made by binding wood fibers with resin and wax to create a material that’s stronger and more stable than traditional wood. This process makes it highly resistant to moisture, fungal decay, and pests.

    With an expected lifespan of 25 to 30 years, it’s a durable choice that provides a convincing wood-grain look without the intensive maintenance. While it’s more durable than natural wood, it’s still a wood product at its core, so it doesn’t have the fire or insect resistance of fiber cement or vinyl. It strikes a great balance between aesthetics and performance.

    How Do the Material Investments Compare?

    Choosing the right siding for your home involves balancing your budget with your long-term goals. The financial commitment for new siding can vary quite a bit, depending on the material you select, the size of your home, and the complexity of the installation. Think of it not just as an upfront expense, but as an investment in your home’s protection, curb appeal, and value for years to come. To help you get a clearer picture, let’s break down what you can generally expect for each of the popular clapboard siding materials.

    The Investment for Wood Siding

    Wood siding offers a timeless, authentic beauty that many homeowners love. The investment depends on the type of wood you choose. Pine is a more budget-friendly option, while cedar is a premium choice known for its natural resistance to rot and insects. Cedar can last up to 50 years with proper care, whereas pine typically has a lifespan of 20 to 30 years. Because it’s a natural material, remember to factor in the long-term commitment to staining or painting to keep it looking its best and protecting it from the elements.

    The Investment for Vinyl Siding

    Vinyl is often the most economical siding material, making it a popular choice for homeowners looking for a low-maintenance solution. It never needs painting and only requires occasional washing to stay fresh. The initial outlay for vinyl is typically lower than for wood or fiber cement. Its lifespan generally ranges from 20 to 40 years. While basic vinyl is very accessible, higher-quality vinyl options offer better durability and a more convincing wood-like appearance. Exploring different siding options with a professional can help you find a quality product that fits your home.

    The Investment for Fiber Cement Siding

    Fiber cement, like the products from James Hardie, strikes an excellent balance between beauty and brawn. It’s engineered to look like real wood but comes with superior durability. This material resists rot, fire, and pests, and it holds paint exceptionally well, often for 15 years or more. The upfront investment for fiber cement is higher than vinyl and comparable to some wood options, but its incredible longevity of 30 to 50 years and minimal upkeep make it a fantastic long-term value for your home.

    The Investment for Engineered Wood Siding

    Engineered wood provides the warm aesthetic of natural wood but is designed for greater durability and resistance to moisture and pests. It’s created by binding wood fibers with resins and waxes under high pressure. This process results in a stable and strong material that serves as a great middle-ground option between natural wood and other composites. With a typical lifespan of 25 to 30 years, engineered wood offers a durable and stylish siding solution that balances performance with a more moderate financial commitment.

    What Influences Your Total Installation Investment

    The material you choose is the biggest factor, but it’s not the only one. The final figure for your project also depends on the size and architectural complexity of your home, local labor rates, and whether your old siding needs to be removed. Tearing off and disposing of the existing material can add to the overall project scope. For example, on a typical home, the total for a basic vinyl installation will be significantly different from a premium cedar one. Getting a detailed quote from a trusted siding contractor is the best way to understand the full investment required for your specific home.

    Why Homeowners Love Clapboard Siding

    Clapboard siding has been a homeowner favorite for centuries, and it’s easy to see why. Its popularity isn’t just about its classic good looks; it’s a practical choice that delivers on performance, protection, and versatility. When you’re thinking about new siding, understanding what makes clapboard so appealing can help you decide if it’s the right fit for your home. From its charming appearance to its sturdy construction, this siding style offers a blend of benefits that resonate with homeowners who value both form and function. Let’s walk through the key reasons why clapboard continues to be a go-to option for home exteriors.

    Its Timeless Curb Appeal

    One of the biggest draws of clapboard siding is its timeless, elegant appearance. The long, narrow boards installed horizontally create clean, crisp lines that give a home a well-kept and traditional feel. This classic design is incredibly versatile, complementing a wide range of architectural styles, from historic Colonials and charming Cape Cods to modern farmhouses. Because its look is so foundational, it doesn’t fall in and out of fashion. Instead, it provides a beautiful, neutral backdrop that enhances your home’s other exterior features, like windows, trim, and landscaping. It’s a choice that adds lasting curb appeal and a sense of refined character to any property.

    Impressive Durability and Weather Protection

    Beyond its good looks, clapboard siding is a workhorse when it comes to protecting your home. The way the planks overlap creates a highly effective barrier that sheds water and keeps moisture from getting into your home’s structure. This is a huge advantage, especially in a place like Minnesota where we see everything from heavy rain to blowing snow. This sturdy construction also helps it stand up to strong winds. When installed correctly, clapboard provides a durable shield that protects your home from the elements year after year, making it a reliable and long-lasting choice for your exterior.

    A Look at Energy Efficiency

    While clapboard siding itself doesn’t offer a significant amount of insulation, it plays a key role in your home’s overall energy efficiency when installed as part of a complete system. The real magic happens when you pair it with continuous insulation underneath. A professional installation ensures there are no gaps where air can leak in or out, creating a tight thermal envelope. This combination helps keep your home warmer in the winter and cooler in the summer, which can make a noticeable difference in your energy bills and indoor comfort. Think of the siding as the protective outer shell and the insulation as the cozy layer that does the heavy lifting.

    Is It a Sustainable Choice?

    For homeowners who prioritize sustainability, clapboard siding offers some great options. Natural wood, especially cedar, is a popular and renewable choice. Cedar clapboard is not only beautiful but also naturally resistant to rot and insects, giving it a long lifespan. If you prefer a lower-maintenance material, modern alternatives like fiber cement and engineered wood are also designed for longevity. By choosing a durable material that won’t need to be replaced for decades, you reduce waste over the long term. A quality installation is key to maximizing that lifespan, ensuring your siding performs well for as long as possible.

    Which Siding Material Fits Your Home’s Style?

    Choosing the right siding is about more than just picking a color; it’s about finding a material that feels like a natural extension of your home’s architecture. Clapboard is incredibly versatile, but certain materials just sing when paired with specific home styles. The right siding works in harmony with your roof, trim, and windows to create a unified and beautiful result. Let’s look at which materials best suit some of the most popular architectural styles.

    For Colonial and Cape Cod Homes

    If you have a Colonial or Cape Cod home, you’re working with a true American classic. These styles are defined by their symmetry and traditional charm. Clapboard siding is practically a signature element for these homes, with its clean, horizontal lines emphasizing their stately structure. To honor this history, natural wood is the most authentic choice. For a similar aesthetic with less upkeep, engineered wood offers a fantastic alternative, mimicking the appearance of real wood while providing greater durability and resistance to the elements.

    For Craftsman and Traditional Homes

    Craftsman and traditional homes are celebrated for their solid construction and rich, natural textures. The horizontal lines of clapboard siding complement this aesthetic perfectly, adding another layer of texture that enhances the home’s sturdy character. Wider clapboard planks often work well here, matching the robust feel of the architecture. While natural wood is always a great fit, fiber cement is another excellent option. It’s incredibly durable and can be manufactured with a wood-grain texture that fits the style beautifully, holding paint well to match earthy, nature-inspired color palettes.

    For Modern and Contemporary Homes

    Modern homes are all about clean lines and simple forms, and clapboard can be a surprisingly effective choice. The secret is in the execution. Opt for smooth-faced clapboard siding, which eliminates the wood-grain texture for a sleeker, more uniform finish. Fiber cement is a standout material for modern applications, as its crisp, durable surface provides the flawless look that contemporary design demands. You can also use it to play with color, from stark whites and deep charcoals to bold, unexpected hues.

    How to Match Siding to Your Home’s Architecture

    Ultimately, creating a beautiful exterior comes down to harmony. The best siding choice is one that complements your home’s existing features, not one that competes with them. Take a moment to really look at your home, noticing the slope of the roof, the style of the windows, and the details in the trim. The material you choose is just as important as the color. By matching the siding to your home’s unique style, you ensure the final result is not only beautiful but also a true reflection of its character.

    How to Care for Your Clapboard Siding

    Keeping your clapboard siding in great shape is all about understanding what it’s made of. Each material has its own needs, but a little routine care goes a long way in protecting your home’s exterior and keeping its curb appeal for years to come. Here’s a simple breakdown of how to maintain the most common types of clapboard siding.

    Maintaining Wood Siding

    Authentic wood siding has a classic charm that’s hard to beat, but it does ask for a bit of attention to stay beautiful. To prevent the wood from drying out, cracking, or warping, you’ll want to plan on applying a fresh coat of paint or stain every three to seven years. Regular cleaning is also key to keeping dirt and mildew from settling in. A gentle wash once a year can make a huge difference. If you notice any soft spots or damage, it’s best to have a professional take a look to prevent moisture from getting behind the boards and causing bigger issues with your home’s structure.

    Maintaining Vinyl Siding

    If you love a low-maintenance lifestyle, vinyl siding is a fantastic choice. For the most part, it takes care of itself. All it really needs is an occasional wash with a garden hose or a soft cloth to rinse away the dust and grime that builds up over the year. While vinyl is incredibly durable, it can crack from a significant impact. Unlike wood, which can sometimes be patched, a cracked vinyl panel typically needs to be fully replaced. A professional can handle this replacement to ensure the new panel fits perfectly and protects your home from the elements.

    Maintaining Fiber Cement Siding

    Fiber cement offers a great balance of durability and aesthetics, with a maintenance routine that’s pretty manageable. You’ll need to repaint it to keep it looking fresh, but far less often than wood, usually only every 12 to 15 years. We recommend giving it a quick wash and a visual inspection once a year. Look for any chips or cracks and check the caulking around windows and trim. Catching these small things early is the best way to maintain your siding’s integrity and ensure it continues to protect your home effectively.

    Telltale Signs It’s Time for a Replacement

    Even the most well-maintained siding won’t last forever. It’s important to know what to look for so you can address issues before they affect your home’s structure. If you see widespread cracking, warping, or rotting boards, it’s a clear signal that your siding is failing. Other signs include paint that is bubbling or peeling, or color that has faded significantly. Sometimes, you might even notice your energy bills creeping up, which can happen when old siding no longer insulates properly. If you spot any of these issues, it’s time to consider a siding replacement to restore your home’s protection and appearance.

    Ready to Refresh Your Home’s Exterior?

    Choosing new siding is one of the most impactful updates you can make to your home. If you’re drawn to a classic, enduring look, clapboard siding is a fantastic choice. With its long, clean lines, it offers a traditional appeal that feels both familiar and fresh, giving your home an instant facelift. Whether you’re restoring an older house or building a new one, materials like cedar have been trusted for generations to provide a blend of style and durability that stands the test of time. It’s all about finding that perfect balance of beauty and long-lasting protection for your home’s exterior.

    Of course, the material you choose is only half the story. The quality of the installation is what truly ensures your new siding will look great and perform well for years to come. Proper installation techniques, like knowing exactly how to nail the boards to allow for movement, prevent issues down the road and protect your investment. This is where working with a team that values craftsmanship makes all the difference. A professional can guide you through selecting the right material for our Minnesota climate and ensure every detail is handled correctly.

    If you’re planning a siding replacement, it’s also the perfect opportunity to inspect your home’s other exterior components. Are your windows still efficient? Are your gutters prepared to handle the next big storm? Addressing these elements at the same time can create a cohesive, protected, and beautiful exterior. When you’re ready to explore the possibilities for your home, we’re here to help you make a choice you’ll love for decades.

    Frequently Asked Questions

    Is clapboard siding the same thing as lap siding? Think of “lap siding” as the general category for any siding installed in an overlapping, horizontal way. Clapboard is a specific, classic style within that category, traditionally referring to wedge-shaped wood planks. Today, you can get the beautiful clapboard look in modern materials like fiber cement and vinyl, which are technically types of lap siding designed to mimic that timeless style.

    Which clapboard material is best for Minnesota’s weather? That really depends on your priorities. Fiber cement is a fantastic all-around performer for our climate because it stands up incredibly well to moisture, temperature swings, and pests without demanding much upkeep. Engineered wood is another strong contender, offering great moisture resistance with a classic wood look. While natural wood like cedar is beautiful, it does require consistent maintenance to protect it from our humid summers and harsh winters.

    How much maintenance does clapboard siding really need? The upkeep depends entirely on the material. Natural wood is the most hands-on, needing fresh paint or stain every few years to stay protected. Fiber cement is much lower maintenance, typically only needing a new coat of paint every 15 years or so. Vinyl is the easiest of all, usually just requiring a simple wash to remove dirt and grime, with no painting needed.

    How long can I expect my new siding to last? A quality siding installation is a long-term investment in your home. Depending on the material, you can expect great performance for decades. Vinyl siding generally lasts 20 to 40 years, while engineered wood can last around 25 to 30 years. Premium materials like fiber cement and well-maintained cedar can protect your home for up to 50 years, making them a choice that truly stands the test of time.

    Why is professional installation so important for clapboard siding? Proper installation is what ensures your siding performs as it should for its entire lifespan. A professional knows how to create a weather-tight seal, manage moisture, and secure the planks correctly to allow for natural expansion and contraction. This prevents major issues like water damage, warping, and rot. For materials like fiber cement, expert installation isn’t just recommended; it’s essential for protecting your home and your investment.

  • Vinyl Gutters 101: A Complete Homeowner’s Guide

    Vinyl Gutters 101: A Complete Homeowner’s Guide

    Protecting your home’s exterior is essential, but it’s also important to find solutions that make financial sense. When you start researching options, you’ll quickly discover that vinyl gutters are one of the most economical choices available. Their low initial expense makes them a very tempting option for homeowners looking to replace an old system without a significant upfront investment. However, the true measure of a home improvement project is its long-term value. Do the upfront savings hold up over time? This article explores the full picture of vinyl gutters, weighing their affordability against their performance and durability, especially in a climate like ours. We’ll help you understand if they are a smart investment for your home’s future.

    Key Takeaways

    • Understand the Trade-Offs: Vinyl gutters are a straightforward, rust-proof, and low-maintenance choice that’s easy to handle for DIY projects, but this comes at the expense of a shorter lifespan and potential for fading compared to other materials.
    • Consider Your Climate Carefully: Vinyl’s performance in extreme weather is a key concern for Minnesota homes, since the material can crack in the cold and sag under heavy snow, making stronger options like aluminum a more durable choice for long-term protection.
    • Prioritize Proper Installation: While vinyl is known for its DIY-friendly setup, a successful gutter system relies on a precise installation; mistakes like incorrect slope can lead to water damage, making professional help a valuable way to ensure your home is properly protected.

    What Are Vinyl Gutters?

    Let’s start with the basics. Vinyl gutters are a type of rain gutter system made from PVC plastic. Think of them as the straightforward, no-fuss option for your home’s exterior. They are a popular choice for many homeowners because they are sturdy and low maintenance. Unlike metal alternatives, they won’t rust, dent, or crack. This makes them a durable choice for managing Minnesota’s wet seasons.

    One of the biggest draws is their simplicity. Vinyl gutters are designed for easy installation, and the pieces often snap together without needing special tools or sealants. This makes them a favorite for DIY projects. If you’re looking for a reliable and practical way to protect your home from water runoff, vinyl is a solid material to consider. It’s an accessible option that gets the job done without a lot of complexity, making it a go-to for many modern homes.

    How They Work

    At its core, a gutter system has one main job: to safely guide rainwater from your roof away from your home. Vinyl gutters are no exception. They catch the water that flows off your roofing and channel it through downspouts to a safe distance from your house. This simple process is crucial for protecting your home’s integrity. Without effective gutters, water can pool around your foundation, leading to cracks and significant structural damage.

    Properly functioning gutters also protect your siding from water stains and rot, prevent soil erosion in your garden beds, and keep your basement dry. Because vinyl gutters are designed to be easy for homeowners to install themselves, they offer an accessible way to get this essential protection. They are a key part of a system that helps protect your roof, walls, and house foundation from water damage.

    K-Style vs. Half-Round: What’s the Difference?

    When you start looking at vinyl gutters, you’ll quickly notice they come in two main styles: K-Style and Half-Round. The one you choose often comes down to aesthetics and performance. K-Style gutters are the most common choice for modern homes. They have a flat bottom and back, and the decorative front often resembles crown molding. This design isn’t just for looks; the shape allows K-style gutters to hold more water than half-round gutters of the same width.

    Half-Round gutters, as the name suggests, are semicircular in shape. This style offers a more traditional, classic look and is often used on historic or older homes to maintain their architectural character. While beautiful, they don’t carry as much water as K-style gutters and can be a bit more challenging to install. Your choice will depend on your home’s style and how much rainfall you need to manage with your gutter system.

    The Benefits of Vinyl Gutters

    When you start looking at gutter options, you’ll quickly see that vinyl is one of the most popular materials on the market, and for good reason. It offers a fantastic combination of function and value that works for many homes. If you’re looking for a practical, reliable way to manage rainwater and protect your home’s foundation, vinyl gutters present some compelling advantages. From their straightforward installation to their minimal upkeep, they solve many common homeowner headaches. Let’s walk through the key benefits you can expect when you choose vinyl for your home’s exterior.

    Easy to Handle and Install

    One of the biggest draws of vinyl gutters is how lightweight and manageable they are. Unlike heavy metal alternatives, vinyl is easy to transport and lift into place, which simplifies the entire installation process. The sections are designed to snap together securely, often without needing special sealants or complex tools. While this makes them a favorite for ambitious DIYers, it also means a quicker and more efficient job for professional installers. This ease of handling translates into a smooth and straightforward setup, getting your home protected from water damage without a lengthy or complicated project.

    Naturally Resists Rust and Corrosion

    Because vinyl gutters are made from a PVC plastic material, they are completely immune to rust and corrosion. This is a major advantage, especially in a climate like Minnesota’s where your home endures plenty of rain, snow, and ice. Metal gutters can eventually rust, leading to leaks and unsightly orange stains on your home’s exterior. With vinyl, you never have to worry about corrosion compromising your gutter system or ruining your home’s curb appeal. This inherent resistance helps ensure your siding and foundation stay protected from water damage year after year, without the threat of rust-related failure.

    An Affordable Choice

    For homeowners looking for a high-performing gutter system that is also budget-friendly, vinyl is an excellent choice. The material itself is one of the most economical options available, making it an accessible solution for many people. This lower initial investment allows you to install a brand-new, effective water management system without the significant expense associated with materials like copper or steel. If you want to protect your home with a reliable system that delivers great value, vinyl gutters are a smart and financially sound option that gets the job done well.

    Low-Maintenance Upkeep

    If you’d rather spend your weekends relaxing than doing home maintenance, you’ll appreciate how little attention vinyl gutters require. The color is mixed into the material itself, so it won’t chip, flake, or need repainting down the road. Scratches and dings are also much less noticeable since the color is consistent all the way through. While you’ll still need to clear out leaves and debris to prevent clogs, you can say goodbye to the tedious tasks of scraping rust and applying fresh coats of paint. This makes vinyl a great “set it and forget it” choice for busy homeowners who want their gutters to look good with minimal effort.

    The Drawbacks of Vinyl Gutters

    While vinyl gutters are a popular DIY-friendly option, they come with some significant trade-offs that are especially important to consider here in Minnesota. Their affordability can be tempting, but it’s essential to look at the bigger picture, including how they hold up against our dramatic seasons. Before you make a final decision, let’s walk through some of the common issues homeowners face with vinyl gutter systems. Understanding these potential problems will help you choose a material that not only fits your budget but also protects your home for years to come.

    Vulnerable to Cracking in Extreme Temperatures

    One of the biggest concerns with vinyl gutters is their performance in extreme weather. The material can become brittle and crack in the freezing cold of a Minnesota winter. On the flip side, the intense heat of summer can cause them to warp, bend, or sag. This constant expansion and contraction can weaken the entire system over time, leading to leaks and damage. For a climate like ours that swings from one extreme to the other, this vulnerability is a major factor to weigh. You need a gutter system that can stand strong through every season without failing.

    A Shorter Lifespan Than Other Materials

    The upfront savings on vinyl gutters can be appealing, but they often have a shorter lifespan compared to metal alternatives. While they are easy for a DIY installation, they may not last as long as aluminum gutters, which are stronger and can handle heavy rain more effectively. Because vinyl gutters come in sections, they have more seams that can clog or leak over time. If you’re looking for a long-term solution that you won’t have to worry about replacing in just a few years, you might find that more durable materials offer better value and are a key part of a healthy roofing system.

    Prone to Fading Over Time

    Your gutters are a visible part of your home’s exterior, and you want them to look good. Unfortunately, vinyl is known to fade and discolor after prolonged exposure to sunlight. What starts as a crisp white or a deep brown can turn into a chalky, faded version of its former self, which can detract from your home’s curb appeal. This fading can make your home look older and may require you to replace the gutters sooner than you’d like just for aesthetic reasons. When you invest in new siding, you want gutters that will hold their color and complement it for the long haul.

    Can Sag Under Heavy Snow and Rain

    Here in Minnesota, we’re no strangers to heavy snow and intense downpours. Vinyl gutters are more flexible than metal, which means they are more likely to sag under the weight of heavy, wet snow or a deluge of rain. When gutters sag, they can’t drain properly. Water can pool in the sagging sections, overflow, and potentially damage your fascia boards, foundation, and landscaping. This improper drainage defeats the entire purpose of having gutters in the first place. Choosing a sturdier material is often the best way to ensure your home is protected from water damage caused by our challenging weather.

    Vinyl vs. Aluminum Gutters: Which Is Right for You?

    Choosing the right material for your home’s gutter system is a big decision. While vinyl gutters are a popular budget-friendly option, it’s helpful to see how they stack up against other materials, like aluminum. Aluminum gutters are the most common choice for homes in the US, and for good reason. They offer a fantastic balance of durability, flexibility, and long-term value. Let’s break down the key differences between vinyl and aluminum so you can feel confident in your choice. Understanding these distinctions will help you select the best gutter system to protect your home for years to come.

    Comparing Durability and Weather Resistance

    When it comes to standing up to the elements, especially Minnesota’s harsh weather, durability is key. Aluminum gutters are generally stronger and more resilient than vinyl. They can handle heavy rain and snow loads without buckling or sagging. Because aluminum systems are often seamless, they have fewer joints that can get clogged with leaves and debris, ensuring water flows freely. While vinyl is designed to be affordable, it may not last as long. It can become brittle in extreme cold and may crack under the weight of heavy snow or impact from a ladder, making aluminum a more reliable choice for our local climate.

    How Installation Differs

    One of vinyl’s main selling points is its DIY-friendly installation. The sections are lightweight and often use simple slip-joint connectors, which can be easier for a homeowner to piece together than gluing or riveting aluminum. However, this ease comes with a trade-off. Sectional vinyl systems have many seams, which are potential points for leaks and clogs. Aluminum gutters, especially seamless ones, require professional installation with specialized equipment. This ensures a perfect fit, a watertight seal, and a sturdy system that’s securely attached to your home, giving you peace of mind that the job is done right.

    Style and Customization Options

    Your gutters are a functional part of your home’s exterior, but they also contribute to its curb appeal. This is one area where aluminum really shines. Aluminum gutters come in a wide variety of factory-applied colors, making it easy to find a shade that complements your siding and trim. They can also be painted for a truly custom look. Vinyl gutters, on the other hand, have more limited options. They typically only come in White and Brown, and they can’t be painted. Over time, the color can also fade from sun exposure.

    Long-Term Performance and Value

    When thinking about your home, it’s always wise to consider the long-term picture. While vinyl gutters have a lower initial material expense, they may not offer the best value over time. Because they are more susceptible to cracking, sagging, and fading, they often need to be repaired or replaced sooner than other materials. Choosing a less durable gutter system can end up costing you more money in the long run through repeated repairs and eventual replacement. Investing in a high-quality, professionally installed aluminum gutter system provides superior performance and durability, protecting your home and proving to be a smarter financial decision over its lifespan.

    How to Install Vinyl Gutters: A DIY Overview

    If you’re thinking about installing vinyl gutters yourself, it’s a project you can definitely tackle with the right preparation. The key is to be meticulous with your measurements and plan every step before you start cutting or drilling. While vinyl is lighter and easier to handle than metal, a proper installation is what ensures your home stays protected from water damage. This overview will walk you through the essential steps, from gathering your supplies to putting the final pieces in place. Think of it as your roadmap to a successful DIY gutter project.

    Gather Your Tools and Materials

    Before you even climb a ladder, let’s get everything you need in one place. Having all your tools and materials ready will make the entire process go much smoother. You don’t want to be halfway through hanging a section only to realize you’re missing a critical part.

    Here’s a basic checklist:

    • Tools: A sturdy ladder, 50-foot measuring tape, chalk line, hammer, power drill, and a hacksaw for cutting the vinyl sections.
    • Materials: Vinyl gutter sections, downspout outlets, gutter hangers, corner pieces, slip joints, end caps, and the downspouts themselves.

    Take a moment to lay everything out and double-check your list. This simple step can save you a lot of time and frustration later on.

    Measure and Plan Your Gutter Layout

    This is where your project really takes shape. Start by walking around your house and deciding where you want the water to go. You’ll need to pick spots for your downspouts that will direct water at least 10 feet away from your foundation to prevent any issues. As a rule of thumb, plan for one downspout for every 30 feet of gutter. Next, carefully measure each edge of your roof where the gutters will hang. It’s helpful to draw a simple sketch of your roofline and write down all the measurements. This visual plan will be your guide and help you purchase the right amount of materials for your gutters.

    Ensure the Correct Slope for Proper Drainage

    For your gutters to work correctly, they can’t be perfectly level. They need a slight downward slope, or pitch, to guide water toward the downspouts instead of letting it pool and overflow. If the pitch is off, you’ll end up with standing water that can attract pests, cause sagging, and eventually damage the fascia board. The standard guideline is to create a drop of about 1/4 to 1/2 inch for every 10 feet of gutter. You can mark this slope using a chalk line. Snap a line from the highest point of the gutter run to the lower point where the downspout will be. This line will act as your guide for placing the hangers.

    A Step-by-Step Guide to Installation

    With your layout planned and your slope line marked, you’re ready to start the installation. Take your time with each step to ensure a secure and leak-free fit.

    1. Begin by installing the downspout outlets at the low points you marked.
    2. Attach the gutter hangers along your chalk line, spacing them about two feet apart.
    3. Hang the gutter sections onto the hangers, starting with any corner pieces.
    4. Connect gutter sections using plastic slip joints to create a continuous channel.
    5. If a section is too long, carefully cut it to size with your hacksaw.
    6. Attach end caps to seal the ends of the gutter runs.
    7. Finally, install the downspouts, using brackets to secure them to the side of your house.

    Avoid These Common Installation Mistakes

    A few common missteps can turn a well-intentioned DIY project into a real headache. Knowing what to watch out for can help you get a professional-quality result. One of the biggest issues is improper pitch, which we’ve already covered. Another is placing hangers too far apart, which causes the gutters to sag under the weight of water or snow. They should be no more than two feet apart. Also, be sure you have enough downspouts for your roof size. Too few can cause the system to overflow during a heavy downpour, potentially leading to water damage along your roofing and foundation. Finally, using too many seams creates more opportunities for leaks, so plan your sections to minimize connections.

    How to Maintain Your Vinyl Gutters

    One of the best things about vinyl gutters is how little upkeep they require. But low-maintenance doesn’t mean no-maintenance. A little proactive care will go a long way in making sure your gutters last as long as possible and continue to protect your home from water damage. Think of it as a small investment of your time to prevent big headaches down the road. With a simple schedule and a keen eye, you can keep your vinyl gutter system in top shape for years.

    Create a Regular Cleaning Schedule

    To keep water flowing freely, you’ll want to clean out leaves, twigs, and other debris that accumulate over time. As a general rule, you should plan to clean your gutters at least twice a year, once in the late spring and again in the fall after most of the leaves have dropped. If your yard is filled with tall trees, you might find that cleaning them out quarterly is a better approach to prevent clogs. A clean gutter system is your home’s first line of defense against water seeping into your roof or fascia boards, so this simple task is well worth the effort.

    Inspect for Cracks, Warping, and Damage

    While you’re cleaning your gutters, take a few extra minutes to perform a quick visual inspection. Look closely for any signs of trouble, like small cracks, warping, or areas where the gutter sections might be sagging or pulling away from the house. Because vinyl can become brittle with age and exposure to Minnesota’s temperature swings, catching these issues early is key. A small crack can often be sealed, but widespread damage may signal that it’s time for a replacement. If you find anything concerning, our team can help with professional gutter services to get your system back in working order.

    Clear Downspouts to Protect Your Foundation

    Your gutters can be perfectly clean, but if the downspouts are clogged, water has nowhere to go except over the sides. This can cause it to pool directly against your foundation, leading to potential leaks, landscape erosion, and even structural damage over time. After you’ve cleared the horizontal channels, make sure each downspout is clear. You can usually flush out minor blockages with a garden hose. Ensuring your downspouts are clear is a critical part of any gutter maintenance routine that protects the integrity of your entire home, from the roof right down to the foundation.

    Signs It’s Time to Replace Your Vinyl Gutters

    Even the most durable vinyl gutters won’t last forever. Over time, exposure to the elements, heavy rain, and Minnesota’s freeze-thaw cycles can take a toll. Paying attention to your gutter system is a key part of home maintenance, as catching problems early can prevent costly water damage to your fascia, siding, and even your foundation. If you start noticing that your gutters aren’t performing like they used to, it might be more than a simple cleaning issue. Look for these clear indicators that your vinyl gutters are nearing the end of their life and it’s time for a replacement.

    Sagging and Pulling Away from the Roofline

    One of the most obvious signs of gutter failure is sagging. Take a step back from your house and look at the lines of your gutters. Do they appear straight and level, or are there noticeable dips and bows? This often happens when the hangers securing the gutters to your home are spaced too far apart, failing to support the weight of water. When it rains, water pools in these low spots. The added weight pulls the gutter down even more, causing it to pull away from the roofline. This is a serious issue that requires immediate attention, as it can lead to water running behind the gutter and rotting your fascia boards. If you see gaps between your gutters and your roof, it’s a strong signal that you need a professional gutter replacement.

    Visible Cracks, Splits, or Leaks

    Vinyl becomes brittle with age and exposure to UV rays. You might start to see small hairline cracks, which can quickly turn into larger splits, especially during a cold snap. Pay close attention to the seams where gutter sections connect, as these are natural weak points. While a single small leak can sometimes be patched, widespread cracking is a different story. It indicates that the vinyl itself is failing and has lost its flexibility. When water escapes through these cracks, it drips down your siding and pools around your foundation, which can lead to significant damage over time. Upgrading to a modern, seamless gutter system can greatly reduce the number of potential leak points, offering better protection for your home.

    Constant Clogging and Water Overflow

    If you find yourself on a ladder clearing out your gutters constantly, only to see them overflow in the next heavy rain, the problem might not be the leaves. It could be the gutters themselves. Gutters that are too narrow for your roof’s size and pitch simply can’t handle the volume of water during a downpour. This causes water to pour over the sides, eroding landscaping and saturating the soil around your foundation. The constant weight of water and trapped debris also contributes to sagging and pulling. If your gutters clog frequently and overflow despite regular cleaning, it’s a sign that your current system is inadequate for your home’s needs. A properly sized gutter system is essential for effective water management.

    Are Vinyl Gutters the Right Choice for Your Home?

    Deciding on the right gutter material comes down to balancing your budget, maintenance preferences, and, most importantly, your home’s specific needs. While vinyl gutters have some clear benefits, their drawbacks can be significant, especially depending on where you live. Before you make a final decision, it’s helpful to think about two key factors: your local weather and whether a DIY project is truly the best path forward. Answering these questions will help you determine if vinyl is a smart choice for your property or if another material might offer better long-term value and protection for your home.

    Considering Your Local Climate

    Here in Minnesota, our homes endure a lot, from heavy snowfall and ice dams in the winter to intense rainstorms in the summer. This is where vinyl gutters can fall short. The material is known to become brittle and crack in freezing temperatures, and it can sag under the weight of heavy snow or water. While vinyl is a popular DIY option, it may not be the most resilient choice for our region.

    In contrast, materials like aluminum are stronger and better equipped to handle heavy rain. Aluminum systems are less likely to bend or warp under pressure, providing more reliable protection season after season. For a home in the Rogers area, investing in a more durable material often means greater peace of mind and fewer repairs down the road.

    Know When to Call a Gutter Professional

    The DIY-friendly nature of vinyl gutters is one of their biggest selling points, but a faulty installation can cause more harm than good. Gutter systems require a precise slope to drain correctly, secure attachments to prevent sagging, and properly sealed seams to stop leaks. Unfortunately, there are many things that can go wrong during a DIY project, potentially leading to water damage to your roof, siding, and even your foundation.

    Hiring experienced professionals for your gutter installation ensures the job is done right the first time. A professional team can also introduce you to superior options like seamless gutters. Custom-fit to your home on-site, seamless gutters have no joints along their lengths, which drastically reduces the chance of leaks and debris buildup. This means less maintenance for you and a cleaner, more attractive look for your home.

    Your Partner for Gutter Services in Rogers, MN

    Choosing the right team to work on your home’s exterior is a big deal. Your gutters play a huge role in protecting your foundation and roof from water damage, so you need a partner you can trust. At Referred Restoration, we put homeowners first, combining reliable craftsmanship with top-quality materials to make sure your gutter system is built to last. Our team offers expert gutter services designed to handle Minnesota’s toughest weather.

    We know you have options, and being informed helps you make the best choice for your home. The Rogers area has several dedicated professionals who can help with your gutter needs. For example, WeatherTek Exteriors handles residential and commercial gutter projects, while Waterboy Gutters focuses on specialized installation and repair. For homeowners interested in a seamless look, The Gutter Guys offer seamless gutter installation. Another local name, ABC Seamless, provides steel and aluminum systems known for their strength.

    While these companies offer specific gutter solutions, protecting your home often involves more than just one component. A healthy gutter system works hand-in-hand with your roofing and siding. As a comprehensive exterior restoration company, we see the whole picture. We ensure your new gutters integrate perfectly with your entire home exterior, providing complete protection and peace of mind. When you’re ready for a partner who values your home as much as you do, we’re here to help.

    Frequently Asked Questions

    Are vinyl gutters really a bad choice for Minnesota weather? It’s less that they are a “bad” choice and more that they are a “vulnerable” one. Vinyl can struggle with our state’s dramatic temperature swings. The material can become brittle and crack in the deep cold of winter, and it can warp or sag under the intense summer sun. When you add the weight of heavy snow and ice, you’re asking a lot from a lightweight plastic. A material like aluminum is generally better equipped to handle those challenges without failing.

    How much longer do aluminum gutters last compared to vinyl? While there’s no exact expiration date for any gutter system, the difference in lifespan comes down to resilience. Aluminum is simply a stronger material that better withstands physical stress. It won’t become brittle and crack from cold, and it can support the weight of heavy rain or snow without sagging. Because of this durability, a professionally installed aluminum system will almost always outlast a sectional vinyl one, saving you the headache of premature repairs and replacement.

    Can I just repair a small crack in my vinyl gutter? You can certainly patch a single, small crack with a quality sealant as a temporary fix. However, you should see that crack as a warning sign. Widespread or multiple cracks usually indicate that the vinyl material itself has become brittle and is starting to fail. Patching one spot won’t stop new cracks from forming elsewhere. If you’re seeing this kind of damage, it’s often a sign that the entire system is nearing the end of its useful life.

    If I install vinyl gutters myself, what is the most critical mistake to avoid? The single most important detail to get right is the slope. Your gutters must have a slight, consistent downward pitch toward the downspouts. If they are installed perfectly level, water will just sit in them instead of draining away. This standing water is heavy, causes the gutters to sag, and can eventually overflow, damaging the wooden fascia boards on your house. Nailing the correct slope is the key to a system that actually protects your home.

    Why are seamless gutters considered a better option than sectional vinyl ones? The main advantage is right in the name: they are seamless. The vinyl gutter kits you buy at a hardware store come in short, 10-foot sections that you have to piece together. Every connection point is a potential spot for a leak to develop or for leaves and debris to get snagged, causing a clog. Seamless gutters are custom-formed on-site from one long, continuous piece of metal. This eliminates those weak points, resulting in a stronger, more reliable system that requires less maintenance.

  • Free Roof Inspection: Signs Your Minnesota Roof Needs One

    Free Roof Inspection: Signs Your Minnesota Roof Needs One

    A small roof concern can be easy to miss from the ground. A lifted shingle, loose piece of flashing, or faint ceiling stain may seem harmless until the next Minnesota storm puts it to the test. A free roof inspection gives you a safer, clearer way to understand what is happening without climbing onto the roof or guessing about its condition.

    The right time to request an inspection is after hail or high winds, when you notice an exterior or interior warning sign. Or whenever you are unsure whether the roof is still protecting your home as it should. A professional can look at the full roofing system, document visible concerns, and explain reasonable next steps. Just as important, an honest assessment may find that no immediate work is needed.

    This guide explains the signs Minnesota homeowners can safely watch for, what happens during a professional inspection. And how to choose a contractor who will give you clear information without pressure.

    When should you schedule a free roof inspection?

    You do not need to wait for water to drip from the ceiling before asking a roofing professional to take a look. Roof damage often begins quietly. It can affect one shingle, a small flashing detail, or a vulnerable roof edge before it causes an obvious indoor symptom. An inspection is most useful when it gives you time to understand a concern before another storm arrives.

    After hail, strong wind, or a severe storm

    Hail can leave marks that are hard to see from the yard. Strong wind can lift shingles, loosen edges, or disturb materials around vents and other roof openings. Even when the yard looks clean and the roofline appears normal, a close professional review may reveal subtle changes.

    After a storm, first look around your property from a safe place. Check for shingles or roofing debris on the ground, fresh dents on gutters or downspouts, and branches that may have struck the roof. Then arrange an inspection rather than trying to climb up yourself. If severe wind or hail has exposed the roof deck, arranging for professional emergency roof tarping can protect your attic from water damage while you wait. Wet, steep, or storm-damaged roofs can be unsafe.

    When your home shows a new warning sign

    A new ceiling mark, damp attic insulation, unusual gutter debris, or a changed section of shingles deserves attention. These signs do not always point to the same cause. For example, indoor moisture can relate to roofing, ventilation, plumbing, or condensation. A professional inspection helps narrow down the source instead of treating the visible symptom alone.

    When you simply need a clearer answer

    Sometimes there is no dramatic event. You may have moved into a home without much roof history, noticed gradual wear, or become unsure after several seasons of Minnesota weather. A free inspection can establish a current picture of the roof and help you know what to monitor. That information is useful even when the inspector finds no urgent concern.

    Roof warning signs you can spot from the ground

    You can learn a great deal without stepping onto the roof. Stand well back from the house and look from several angles in good daylight. Binoculars or a camera with zoom can help. Do not use a ladder during wet, icy, or windy conditions, and never walk onto a roof that may be damaged.

    Shingles that look different from their neighbors

    Look for shingles that appear missing, lifted, curled, cracked, or out of line. A changed patch may indicate that wind disturbed the area or that the material is no longer lying flat. Dark or light spots can also be worth documenting, though color variation alone does not confirm damage.

    Check the ground and gutters for pieces of roofing material. Some granules in a gutter can occur over time, but a sudden or concentrated amount after a storm is a good reason to ask for a closer review. A professional can determine whether the observation reflects ordinary shedding or a more specific concern.

    Changes around edges, vents, and roof openings

    Roof edges and penetrations are important because they connect different materials. From the ground, look for visibly bent metal, loose trim, displaced flashing, or an opening around a vent. Chimneys and roof-to-wall intersections also deserve attention because water must be directed carefully around them.

    Gutters can provide clues about roof drainage. A gutter that is pulling away, overflowing in one spot, or sitting unevenly may not move water as intended. Since Referred Restoration works with both roofing and gutter systems in Rogers, an inspection can consider how these connected exterior components are working together.

    A roofline that appears uneven

    Stand far enough away to see the roof plane and ridge. If a section looks newly wavy, dipped, or sagging, do not ignore it. Keep people away from the area and request professional guidance promptly. An uneven roofline can have several possible causes, and it needs an on-site assessment rather than a guess from a photo.

    What indoor signs can point to roof damage?

    Your home’s interior can reveal a roof concern before the exterior makes it obvious. Pay attention to new or changing symptoms, especially after heavy rain, wind, snow, or a rapid thaw. Take photos and note when the symptom appears. That record can help an inspector connect an indoor clue with conditions outside.

    Ceiling stains and peeling finishes

    A tan or brown ceiling mark, bubbling paint, peeling finish, or damp wall near the ceiling can signal unwanted moisture. A stain does not prove where the water entered. Water may travel along framing or other surfaces before it becomes visible, so the point you see indoors may be some distance from the source.

    Do not paint over a new stain before its cause is understood. Watch whether it changes after rain or thawing snow, and tell the inspector what you observed. If water is actively entering near electrical fixtures, keep clear of the area and seek appropriate professional help right away.

    Attic moisture, odors, or daylight

    If your attic is safely accessible, look from a stable walkway without disturbing insulation. Damp wood, compressed or wet insulation, musty odors, darkened areas, or frost buildup can all justify a closer evaluation. Daylight visible through an unexpected opening is another clear reason to call a professional.

    Not every attic concern begins with the roof covering. Ventilation and indoor moisture can create symptoms that resemble a leak. A thorough assessment considers the pattern, location, recent weather, and exterior conditions before recommending a response.

    Changes that appear only during certain weather

    Some symptoms show up only during wind-driven rain, melting snow, or a freeze-thaw cycle. Note the direction of the storm, when the mark appeared, and whether it dried afterward. These details can help the inspector focus on likely pathways while still reviewing the complete system.

    How Minnesota weather can hide roof damage

    Minnesota homes face changing conditions throughout the year. The same roof may experience summer hail, strong wind, deep cold, heavy snow, and a fast thaw. These shifts can expose weak points and make small defects more noticeable over time. They can also hide damage until a later weather event reveals it.

    Hail and wind may leave subtle changes

    A storm does not need to leave shingles scattered across the yard to affect a roof. Hail may alter the surface of roofing materials, while wind can stress edges or lift a shingle enough to weaken its seal. These changes may not create an immediate leak. That is why a timely inspection after a severe storm can be valuable even when the roof looks normal from below.

    When you request an inspection, share the date of the storm and anything you noticed around the home. A professional can examine likely impact areas and document visible conditions. Referred Restoration can also help homeowners understand the storm-damage insurance claim process when it is relevant, without promising an outcome.

    Freeze-thaw cycles test small openings

    Water can enter a small gap, freeze as temperatures fall, and then thaw when the weather changes. Repeated cycles may place added stress on vulnerable details. Flashing, sealant areas, and roof edges need careful attention because they help keep water moving in the intended direction.

    Snow and ice can make diagnosis harder

    Heavy snow can cover the surface and delay a complete exterior review. Ice at the roof edge may also affect drainage. Homeowners should avoid trying to chip ice or clear a steep roof without the proper training and equipment. A roofing professional can advise when conditions are safe for inspection and what areas deserve attention after the snow recedes.

    Local weather knowledge matters because timing and symptoms can differ by season. A contractor familiar with Rogers and surrounding Minnesota communities can connect what you are seeing with the conditions your home has recently faced.

    What happens during a professional roof inspection?

    A good inspection is more than a quick glance at the shingles. It considers the roof as a system and gives you information you can understand. The exact process depends on the home’s design, safe access, and current weather, but a thorough visit generally follows several clear steps.

    1. Discuss the reason for the visit. The inspector should ask what you noticed, when it began, and whether a recent storm affected the area. Share indoor photos, storm dates, and any known roof history.
    2. Review the property from the ground. This establishes a broad view of roof planes, edges, drainage, siding connections, and any visible debris or impact clues.
    3. Examine accessible roof components. When conditions allow safe access, the inspector can closely review shingles, flashing, vents, valleys, penetrations, and transitions between materials.
    4. Consider drainage and interior clues. Gutters, downspouts, and safely accessible attic areas may reveal patterns that help explain the concern.
    5. Document findings and explain next steps. A trustworthy professional should clearly describe what was observed, answer questions, and distinguish between an item to monitor and an item that needs attention.

    What the inspector is trying to learn

    The goal is to understand whether the roof is shedding water properly and whether materials and connections remain secure. The inspector looks for patterns, not just isolated marks. A ceiling stain, for example, becomes more meaningful when it aligns with a vulnerable exterior detail and recent weather.

    What you should receive afterward

    You should leave the conversation with a clearer understanding of the roof’s visible condition. Ask for photos of areas you cannot safely see yourself. Request plain explanations of any recommendations, including which concerns are most important and what can simply be monitored. If no work is currently needed, a trustworthy inspector should be comfortable saying so.

    For homeowners seeking a local roofing assessment, the Referred Restoration roofing team can inspect the roof and explain relevant options based on the home’s actual condition.

    How can you tell whether a free roof inspection is trustworthy?

    Homeowners often wonder whether an offer for a free inspection is legitimate, especially after a major storm. That concern is reasonable. A useful inspection should help you make an informed choice, not pressure you into an immediate decision. Take a few minutes to verify who is asking to inspect your home and what the visit includes.

    Ask clear questions before anyone climbs the roof

    Confirm the business name, local service area, and reason for the inspection. Ask what components will be reviewed, whether you will receive photos or a summary, and what happens if no damage is found. A professional should request permission before accessing your property and should be willing to explain the process in plain language.

    Be cautious when someone uses fear, vague statements, or extreme urgency before completing an assessment. You should have time to review findings, ask questions, and decide what makes sense for your home.

    Reassuring practice Reason to pause
    Clearly identifies the company and purpose of the visit Provides vague identity or avoids basic questions
    Requests permission and explains the inspection scope Pressures you to allow immediate access
    Documents visible findings with clear photos Makes broad claims without showing what was observed
    Explains options and allows time for questions Uses fear or demands an immediate commitment
    Is comfortable reporting that no immediate work is needed Assumes major work is needed before a complete review

    Focus on the quality of the assessment

    The word “free” should not change the standard of care. The inspector should still treat your home respectfully, use safe practices, and give you useful information. Choose a contractor whose approach centers on the condition of your home rather than a predetermined result.

    Referred Restoration emphasizes honest assessments and customer-first guidance. The goal of a free roof inspection is to help you understand what the roof needs, whether that is monitoring, focused attention, or a broader restoration plan.

    What should you do after the inspection?

    Once the inspection is complete, take time to review the findings and ask for clarification where needed. Your next step should match what the inspector actually observed. A clear report may show that the roof is performing as intended, identify an item to watch, or recommend action on a specific concern.

    If no immediate work is needed

    Keep the photos and notes as a reference. Ask whether there are areas you should monitor from the ground after future storms. Knowing the current condition makes it easier to notice meaningful changes later. You can also ask when another review would be sensible based on the materials and recent weather exposure.

    If the inspector identifies a concern

    Ask the inspector to show where the issue is located, explain why it matters, and describe the available response. Understand whether the concern is isolated or connected to other exterior components. Roofing, flashing, gutters, siding transitions, and windows can all influence how water moves around the home.

    If storm damage is involved, document the findings and ask what information may be useful when speaking with your insurer. Referred Restoration can help with the storm-damage claim process when relevant, but the insurer makes its own decisions. Clear photos and a careful assessment help keep the conversation grounded in what was observed.

    Choose the next step that fits the evidence

    A trustworthy contractor should explain recommendations without rushing you. Review the scope, ask who will answer questions, and make sure you understand the plan. Referred Restoration serves as a single source for roofing, siding, gutters, windows, and storm-damage restoration. Which can be helpful when an issue involves more than one part of the exterior.

    Frequently asked questions about free roof inspections

    Should I get a free roof inspection after every storm?

    Not every passing rain shower calls for an inspection. It is wise to request one after hail, strong winds, fallen branches, or a storm that creates visible exterior or interior changes. If you are unsure, a professional can help determine whether a closer review is appropriate.

    Is a free inspection from a contractor really free?

    A reputable contractor should clearly explain the scope before beginning and should not pressure you to approve work. Ask what will be inspected, what documentation you will receive, and what happens if no concern is found. Clear answers are a good sign.

    What does a roof inspector check?

    A professional may review shingles, flashing, vents, valleys, roof edges, penetrations, gutters, and relevant interior clues. The exact scope depends on safe access and the home’s design. The inspector should explain what was and was not reviewed.

    Can I inspect the roof myself?

    You can safely look for warning signs from the ground and inspect accessible indoor areas. Avoid climbing onto the roof, especially after a storm or during wet, snowy, or icy conditions. A trained professional has the equipment and experience to complete a closer assessment.

    Will an inspection tell me whether I need roof work?

    It should give you a clearer picture of visible conditions and reasonable next steps. The result may be that no immediate work is needed, that an area should be monitored, or that a specific concern deserves attention. Ask the inspector to explain the evidence behind any recommendation.

    Schedule a free roof inspection with Referred Restoration

    Waiting can give a small roof concern more time to affect nearby materials. A prompt inspection gives you clear information while there may still be time to address an issue in a focused way. Referred Restoration provides honest assessments for homeowners in Rogers and surrounding Minnesota communities.

    Ready to get a clear view of your roof’s condition? Schedule a Free Inspection with Referred Restoration today.

  • Roof Repair or Replacement for Minnesota Homes

    Roof Repair or Replacement for Minnesota Homes

    Finding a wet spot in your attic after a heavy Rogers snowstorm often points to a minor flashing issue. These specific leaks usually require only minor professional work to restore your home to a dry and safe state. Quick action helps prevent rot and keeps your existing roofing system functional for years.

    Schedule a free roof inspection to learn whether a focused roof repair or replacement is the right next step for your Minnesota home.

    Roof repair is a smart choice for small damage like cracked shingles or loose flashing that has not hurt the main roof frame. Homeowners should usually pick this path when the roof is still new and the problem stays in one small area on the surface. The Minnesota Department of Labor and Industry notes many leaks come from bad flashing and can often be fixed without a full new roof. This simple fix helps you save time while a professional check from a local team ensures you only pay for the work needed. Taking care of these issues early can help extend the life of your roof and prevent more damage from occurring inside your home.

    Deciding between a quick fix and a total overhaul requires a clear understanding of your home’s current condition. You must look for specific signs of wear that indicate when roof repair is the right move. The process of deciding begins by looking for these signs.

    When roof repair is the right move

    Most roofs do not need a full swap the moment a leak starts. Minor issues often respond well to a simple fix. If your roof is young and the trouble is small, a focused expert roof repair services call might be all you need. This path saves time and keeps your home dry. Early fixes stop small drips from rotting the wood deck or soaking padding. Choosing a fix now can help you avoid a much larger job for many years.

    As shown by the Minnesota Department of Labor and Industry, a well-installed asphalt roof can last 20 years or more if it stays free of damage. Fixing small problems early helps you reach that full service life. In our state, heavy snow and hail put stress on your shingles. Regular checks help you find spots that need a quick touch-up. This keeps the whole system strong against the next big storm.

    Spotting local roof damage

    You should look for signs that are limited to one area. Hail stones or high winds can sometimes knock off shingles or leave small dents. If most of the roof looks good but you see a few cracked or curled shingles, a repair is likely best. Small fixes like this are much faster than a full job. They allow you to keep up your home without a long wait. Catching these early stops a small leak from turning into a big mess.

    Fixing these spots prevents water from getting under the layers and into your home. You can check for these signs from the ground with glass binoculars. Look for missing mineral grains or small holes that show the felt underneath. If the damage is in one small spot, local roof repair expertise can make that area as good as new. It is a smart way to keep your roof in top shape.

    Check your attic and flashing

    Many leaks start where the roof meets a wall or a pipe. These spots use metal strips called flashing to keep water out. If a strip comes loose or the seal breaks, you will see water inside. You should spend time in your attic looking for water stains or damp wood. Replacing old flashing can add years to your roof’s life. It ensures the hardest spots stay dry. This focused work handles small issues quickly.

    Look closely at the wood around your chimney and vents. These are the most common spots for leaks to start. These metal parts can often be fixed or swapped without a full roof project. This type of fix is a smart way to stop a leak at the source. It keeps the rest of your roof in place while fixing the one weak link. This keeps your home dry and safe without the need for a full project.

    Safety and professional checks

    Climbing onto a roof is dangerous for most homeowners. You should never walk on your roof to find a leak. Instead, look for signs of trouble from the ground or inside your home. If you see signs of a leak, the best step is a professional check. We offer a free inspection to help you find the right fix. Our team has the tools to check your roof safely and find the exact source of any trouble.

    Our team can spot things you might miss, like soft spots or hidden storm damage. This expert view ensures you get a custom solution that fits your home perfectly. We look at the age of the roof and the state of all the layers. If the rest of the roof is strong, a targeted fix is the right choice. You get peace of mind and the assurance that your home is in good hands.

    When roof replacement deserves consideration

    Most homeowners prefer a simple fix to keep their homes safe. While expert roof repair services can often solve minor leaks, there comes a point where fixing a roof is no longer the best move. You should think about a full replacement when your roof can no longer stop water or stay strong. According to roofing industry groups, you should consider a new roof when repair bills get too high or leaks become hard to manage.

    Signs of heavy roof wear

    A roof that looks worn out across its entire surface likely needs more than a patch. You may see shingles that curl at the edges or cup in the middle. These signs show that the parts have reached the end of their useful life. You should also check for lost granules in your gutters. These small bits of stone protect the roof from sun and rain. When they wash away, the roof loses its way to shed water and stay cool.

    Cracks and holes are other major red flags for homeowners. If you see many cracked shingles, the roof system is failing. Large areas of missing shingles after a storm also signal a need for more than basic reliable roof repair. Fixing one spot will not help if the rest of the roof is brittle and ready to break.

    • Shingles that are curled, cupped, or brittle.
    • Large amounts of grit or granules in the gutters.
    • Bald spots where the mineral coating has worn off.
    • Widespread cracks or missing pieces across the roof.

    Recurring leaks and deck rot

    A single leak near a chimney or vent is often easy to fix with new flashing. However, leaks that keep coming back in different spots tell a different story. If you find yourself needing a new expert roof repair every few months, the frame may be at risk. Water that gets past the shingles can rot the wood deck underneath. This damage weakens the whole house and can lead to mold or sagging ceilings.

    You should also look for signs of rot from inside your attic. Check the wood boards for dark stains or soft spots. If the deck feels spongy when you walk on it, the wood has likely soaked up too much water. The Minnesota Department of Labor and Industry notes that many leaks come from bad flashing, but deep rot requires a full system change. A new roof ensures that the wood stays dry and your home stays sturdy.

    Storm damage and hail impacts

    Minnesota weather can be very harsh on a home. Heavy hail and high winds can strip away the protection your roof provides. If a storm hits most of your roof, a simple fix might not be enough. Deep hail dents can weaken shingles and lead to leaks within months. High winds can lift entire sections of the roof, which makes the remaining shingles loose and weak.

    In these cases, a full replacement is often the safest path. It allows a pro to check the entire system for hidden flaws. You can get a free inspection to see how much damage happened. This step helps you decide if you need a new roof to protect your family from the next big storm. Dealing with major issues now prevents more stress and bigger problems later on.

    Get your free inspection before deciding between a targeted repair and a full replacement.

    Roof repair vs. replacement at a glance

    Picking between a simple fix and a new roof depends on the health of your home. An expert Rogers roofing contractor can help you find the best path. Often, small leaks come from bad or poorly placed flashing rather than the shingles themselves. In these cases, a local roof repair can stop the water without a full tear-off.

    When to choose a repair

    If your roof is young and has only one or two leaks, a repair is often the smart move. Local fixes help you extend the life of your roof parts while keeping your home dry. You should check your attic for water stains after a storm. Stains near vents or chimneys often mean the flashing needs help.

    Fixing these spots quickly keeps the rest of your roof in good shape. You might also see loose or missing shingles after high winds. If the rest of the roof is flat and tight, you can just replace the missing pieces. This keeps your home safe from the rain while you wait for a full cycle.

    A well-kept asphalt roof can last 20 years or more if it stays healthy. Keeping the air flow in your attic also helps prevent early wear on the shingles. Good air flow stops heat and damp air from hurting the wood under the roof.

    Signals for a full replacement

    Sometimes, a patch is not enough to keep your home safe. If you see shingles that are curled or cupped, the parts may be at the end of their life. Large areas of worn rock coatings also show that a roof is getting weak. When many parts of the roof fail at once, a new setup is the best way to guard your home.

    Exposed nails or holes in the layer below the shingles are clear signs you need a fresh roof. Minnesota weather can be very hard on your house. Heavy snow and hail can cause deep damage that a simple fix cannot heal. You need a strong shield to face the cold winters and summer storms.

    If you have many leaks or if your roof is over 20 years old, it is time for a full change. This gives you a fresh start and a strong shield against the next big storm. Getting a full setup also ensures your home meets city rules and permit needs.

    Comparing your options

    The choice between a fix and a new roof involves a few things. You must look at the age of your roof and the scope of the damage. A clear view of these paths helps you make a wise choice for your home. Repairs are best for small storm hits or minor leaks.

    A full change is for old age or wide damage that affects the house frame. Think about how long you plan to stay in your home. A repair is a great short-term fix to keep things dry. But if you want a long-term fix, a new roof is the way to go.

    Use the table below to see how these two paths differ in terms of time and safety. Both paths start with a full check of your home to see what is needed. This helps you get the right fix for your home.

    Factor Roof Repair Roof Replacement
    Damage Scope Fixes small areas or leaks Addresses wide damage
    Disruption Takes a few hours to do Takes one or more full days
    Weather Readiness Fills in local weak spots Provides a full storm shield
    Decision Signal Loose tabs or bad flashing Curled shingles or old age
    Next Step Get a free inspection Schedule a full install

    How Minnesota weather changes the decision

    Minnesota homes face some of the harshest weather in the country. From heavy snow to high winds, local roofs take a beating throughout the year. These forces play a major role in whether you need a quick fix or a full update. Homeowners must understand how local weather affects the health of their home. Staying ahead of the storms can help you avoid big problems later on.

    Managing heavy snow and ice dams

    Snow is a steady part of life in Rogers and nearby towns. With a yearly average of about 43 inches of snow, roofs must hold a heavy load. This pressure can cause the roof deck to sag or weaken over time. If your roof is already old, this extra stress might mean a full replacement is the safest move to keep your family dry.

    Ice dams are another big risk during the long, cold winters. They form when heat from the house melts snow on the roof, which then freezes at the cold eaves. This ice traps water that can seep under the shingles and into your attic space. Finding this damage early with expert roof repair help can save your home from rot. If you see icicles forming along your gutters, it is time for a pro to take a look.

    Dealing with hail and wind stress

    Summer storms often bring large hail and strong winds to the state. Hail can knock off the small stones on asphalt shingles, which leaves the inner layer open to the sun. This wear makes the shingles brittle and prone to leaks. Wind can also pull up the edges of shingles or even tear them off the roof. These gaps let rain get in and cause water spots on your ceilings.

    If a storm hits your town, you need to act fast to protect your home. We offer emergency help to find and fix storm damage before it spreads. A quick check for exposed nails or holes can help you decide if a simple fix will work. We can also help with the insurance process if the damage is bad. Getting local roof repair skill is key when dealing with storm claims.

    The stress of freeze-thaw cycles

    The shift from cold to warm and back again is hard on roof parts. In Minnesota, the air can change from freezing to warm in a single day. This makes the wood and shingles grow and shrink. Over time, this steady change leads to cracks and curled shingles that allow moisture to get inside. It can also pull the metal flashing away from chimneys and vents.

    Prompt care is the best way to handle these local shifts. Fixing small leaks and bad flashing can add years to the life of your roof. If you wait too long, the moisture can cause wood rot that is hard to fix. A pro can tell you if a fix is enough or if the wear is too deep. Regular checks after a long winter will help you stay on top of these small issues.

    Roofing professional performing a roof repair inspection after Minnesota storm damage
    A professional inspection can identify damaged shingles, flashing, and other weak points without putting the homeowner at risk.

    What should you do after discovering roof damage?

    Finding damage on your roof can feel like a big stress, but taking quick steps can save your home from more harm. When you see signs of wear or storm damage, your focus should be on keeping the rooms dry and getting a clear plan for fixes. Quick action often means the difference between a simple fix and a large project.

    Check from the ground

    Start by looking at your roof from the safety of the ground. You can often spot signs of trouble like curled shingles, cracks, or loose nails without ever climbing a ladder. According to the Minnesota Department of Labor and Industry, these visual signs show that your roof system needs a pro to look at it. If you see debris or missing pieces, take photos from a few angles to show what you find.

    Protect your home interior

    If you have a leak, you must act to stop damage to your home and the things inside it. Move any items that could get wet and use buckets to catch dripping water. This fast step helps keep your home safe while you find expert roof repair services from a local team. Once the inside is dry, you can focus on the outside issues.

    1. Document the damage: Take clear photos of all issues you see from the ground. Note the date and time you found the damage, mainly after a storm.
    2. Call for a pro check: Set up a free inspection to get a full view of the roof’s health. A pro can see things you might miss from the ground, like tiny holes or thin spots.
    3. Protect your goods: Cover any open areas inside your attic or rooms with plastic sheets if water is coming in. This stops the spread of wet spots to your ceilings and walls.
    4. Look at your choice: After the check, look at the plan given to you. This plan will show if you need a simple roof repair or if a full new roof is the better path for long-term safety.
    5. Check your policy: If the damage came from a storm, look at your insurance. A local team can often help with the claim by giving you the facts and reports you need.

    Plan for the full fix

    A good repair plan does more than just patch a hole; it looks at the whole roof. This might include checking your gutters or siding to make sure your home is safe from Minnesota weather. Getting local roof repair expertise makes sure your plan meets all state rules and keeps your roof in top shape for years.

    What happens during a professional roof inspection?

    A professional check is the base of any good home project. At Referred Restoration, we use a three-step process that starts with a free inspection. This first visit lets us see the real state of your home before we offer any help. We look at more than just the surface to make sure we find every spot that might need roof repair. Our team serves Rogers, MN, and the nearby areas with a focus on trust and skill.

    Checking the roof surface and flashing

    The first part of the visit looks at the shingles and the parts that keep water out. A pro will look for signs of wear like cracked or curled shingles and exposed nails. These small signs often point to big leaks under the surface. If found early, these spots might only need a small fix to help your roof last longer. We check for worn mineral coatings and holes that could let water reach the wood deck.

    We also look closely at the metal parts around vents, walls, and chimneys. Many leaks start because of bad or old flashing that was not put on right. In fact, many roof problems can be fixed by mending these parts instead of replacing the whole roof. This careful check makes sure your home stays dry during heavy Minnesota rain and snow. We spend time looking for water stains that show where a leak began.

    Looking at the attic and exterior items

    A full check goes beyond the roof deck. We look at the airflow in your attic to see if it moves well. Good airflow helps stop heat and damp air from building up under the roof. Without it, your shingles could age much faster than they should. We also check the gutters to make sure they move water away from your home and base. Clogged or broken gutters can cause water to back up under the roof line.

    We do not stop at the roof. Our team looks at your siding and windows too. Storms in Minnesota often hit many parts of a home at once with hail and wind. We want to make sure your whole home is safe and sound. This full view helps us give you expert roof repair services that solve the real cause of any damage. We look at how storm patterns hit your house to find hidden issues.

    Honest advice and clear written steps

    The goal of our visit is to give you an honest look at your home. We do not use high-pressure sales tricks or make you feel rushed. Instead, we give you a clear plan based on what we find on your roof. This might include a simple patch or a full replacement if the damage is deep. We use high-quality parts like Malarkey roofing products when we do a fix. We treat your home like our own and give you the facts you need to make a good choice.

    If a storm caused the damage, we can help with that too. We have local roof repair expertise and can help with insurance claims. Our team walks you through the steps so you know what to expect from the start. You get a written plan that fits your home’s needs and keeps your family safe. We make sure you have the data to talk to your insurance company with ease.

    Frequently Asked Questions

    When should I repair or replace my roof?

    According to the NRCA, you should think about a new roof when fixes can no longer stop leaks. Most roofs in Minnesota last 20 to 30 years. If your home has big leaks or storm damage, a full new roof may be needed. Minor leaks or small spots of damage often only need a quick fix. A pro can help you pick the best path after a full check.

    What are the common signs I need roof repair?

    Homeowners should look for curled shingles, cracks, or bare spots where grains have worn off. The state labor department also says to check for exposed nails or old patches. Inside your home, look for water stains on the ceiling or in the attic. These signs show that water is getting past your shingles. Quick fixes can help you avoid more work later.

    Can I DIY my roof repair?

    You can fix small issues like a loose shingle, but most roof work is unsafe. Working on a high or steep roof carries a big risk of falls. In Minnesota, you also need a permit for most re-roofing work. Expert teams have the right tools and safety gear to do the job well. They also know how to find hidden damage that a homeowner might miss.

    Does Minnesota weather affect how often I need roof work?

    Yes, the state’s harsh weather can cause roofs to wear out fast. Local homes face about 43 inches of snow each year and frequent hail. This heavy snow and ice can strain your roof and lead to leaks. Regular checks help find issues caused by storm damage or ice dams. A free check is the best way to see how the local weather has hit your roof.

    Ready to decide between roof repair and replacement?

    Wait too long to fix a minor roof issue and you might face much larger repairs that damage your attic and walls later. Small leaks often grow into deep problems that can harm your home structure if you do not take action now. Starting the process today protects your home from harsh weather and keeps your family dry before the next snow falls. A timely review gives you peace of mind before the next big hail storm or heavy snow hits the area. Our local team will help you choose the best plan and you can view our expert roof repair services for help. Our staff treats every home like our own and we will work hard to make the right choice for your roof today.

    Ready to schedule a free inspection? Request your roof assessment today to talk to a local roofing pro.

  • A Homeowner’s Guide to Engineered Wood Siding

    A Homeowner’s Guide to Engineered Wood Siding

    If you’re researching new siding, you might feel like you’re drowning in options. Natural wood, fiber cement, vinyl—each has its own set of benefits. A top contender you’ll see everywhere is engineered wood siding, a material that promises the look of real wood with fewer vulnerabilities. But what does that actually mean for your home? We’re here to cut through the noise. This guide offers a straightforward look at how this siding is made, its true performance against moisture, and how it stacks up against other materials, helping you make a confident and informed decision.

    Key Takeaways

    • Get the look of wood without its typical weaknesses: Engineered wood siding provides that timeless, wood-grain aesthetic but is specially manufactured with resins and waxes to better resist common issues like fungal decay and pests.
    • Understand the material’s main vulnerability: While designed to be durable, engineered wood’s core can be damaged by moisture if the protective surface is compromised. Proper installation and periodic checks are essential for its long-term performance.
    • Your contractor’s skill is as important as the siding: Even the highest quality engineered wood can fail if it’s not installed correctly. Choosing a certified professional who knows how to handle the material is the most critical step to ensure a beautiful and lasting result.

    What Is Engineered Wood Siding?

    If you love the classic, warm look of wood but are exploring different options for your home’s exterior, you’ve likely come across engineered wood siding. Think of it as a high-tech cousin to natural wood. It’s a composite material designed to capture the beauty and texture of traditional wood, but with a different internal structure. This type of siding is made to be a durable and consistent alternative for homeowners.

    Engineered wood siding gives you that sought-after wood-grain appearance, from deep grooves to subtle textures, offering a polished and timeless curb appeal. Because it’s a manufactured product, each board is uniform, which can simplify the installation process and create a very clean, consistent look across your entire home. It’s a popular choice for those who want the aesthetic of wood combined with the benefits of modern building science.

    How Is It Made?

    The process of creating engineered wood siding is quite fascinating. It starts with wood strands or fibers that are broken down from actual wood. These fibers are then mixed with special resins and waxes, which act as bonding agents. A key ingredient, a borate compound, is often added to this mixture to help the final product resist fungal decay and insect damage.

    Once the blend is ready, it’s pressed together under extreme heat and pressure, forming dense, durable boards or panels. To finish, a protective overlay is applied to the surface. This layer is embossed with a realistic wood-grain texture and serves as a primer for painting, while also providing the first line of defense against moisture. This multi-step process results in a stable and strong siding material.

    Engineered vs. Natural Wood Siding

    While they may look similar from the curb, engineered and natural wood siding are quite different. The most obvious distinction is their composition: natural wood is solid lumber milled directly from trees, while engineered wood is a composite product. This difference in makeup means engineered wood is significantly lighter than its natural counterpart, which can be a factor during installation.

    Engineered wood is often a more accessible option for homeowners compared to many premium natural wood species. However, it’s important to remember that it comes with its own set of maintenance requirements to keep it in top shape. Unlike natural wood that can be sanded down to fix imperfections, engineered wood has a finite top layer. Both materials can give your home a beautiful finish, but your choice depends on your priorities for maintenance, material composition, and overall home protection.

    A Look at Top Engineered Wood Siding Brands

    When you start exploring engineered wood, you’ll find a few key players that consistently deliver on quality and performance. These brands have built a reputation for creating durable, beautiful products that homeowners trust. Understanding what makes each one unique can help you decide which is the best fit for your home’s style and the demands of Minnesota weather. Let’s look at some of the top names in the industry that we often recommend for siding projects.

    LP SmartSide

    LP SmartSide is a popular choice for a reason. It’s known for its impressive strength and ability to resist impacts, which is great for homes in active neighborhoods. Every piece is treated with their proprietary SmartGuard® process, which infuses the wood strands with waxes and zinc borate. This treatment protects against moisture, fungal decay, and termites from the inside out, not just on the surface. LP offers a wide variety of styles, including traditional lap siding, panels, and shakes, giving you plenty of options to achieve the exact look you want for your home.

    TruWood Siding

    If sustainability is a priority for you, TruWood Siding is a fantastic option. It’s an engineered wood product made from residual wood fibers, following sustainable practices certified by the Forest Stewardship Council®. This means you get a beautiful siding product that’s also environmentally conscious. TruWood is treated with a formula called EcoGuard® to protect against rot, mildew, and termites. It comes in many different textures and styles, including a convincing rough cedar finish, allowing you to add distinct character and curb appeal to your home while ensuring long-lasting protection.

    KWP

    Another excellent brand in the engineered wood siding market is KWP. Like its competitors, KWP siding is made by binding wood fibers and strands with resins and protective waxes. It’s specifically engineered to mimic the warm, natural look of real wood without the high maintenance. The inclusion of zinc borate in its composition makes it highly resistant to common issues like moisture damage, fungal growth, and termite infestations. KWP provides a durable and reliable siding solution that holds up well over time, making it a solid contender for any home renovation.

    The Real Pros and Cons of Engineered Wood Siding

    Engineered wood siding is a popular choice for homeowners, and for good reason. It offers the classic, beautiful look of wood with some modern advantages. However, like any building material, it has its own set of strengths and weaknesses. Understanding both sides of the coin is the key to deciding if it’s the right fit for your home and the Minnesota climate. Let’s walk through the key points you should consider.

    Durability and Weather-Readiness

    One of the biggest draws of engineered wood is its impressive durability. It’s made by combining wood strands with a resin binder, then compressing them under heat and pressure. The final product is treated with waxes and other protective agents that help it stand up to moisture and insects. This process creates a board that is strong, dense, and ready to handle a variety of weather conditions, from humid summer days to freezing winter nights. For homeowners looking for a tough exterior that holds its own, the built-in resilience of engineered wood is a major plus.

    The Look: Style and Versatility

    If you love the warm, timeless look of wood, engineered siding delivers. It’s designed to mimic the texture and grain of natural wood, giving you that classic curb appeal. Brands like TruWood® offer a wide range of styles, from a smooth, modern finish to a rustic rough-sawn cedar look. This versatility means you can achieve a custom appearance that perfectly matches your home’s architecture and your personal style. It’s a fantastic way to get the aesthetic of real wood in a more accessible and consistent material.

    Is It an Eco-Friendly Choice?

    For homeowners who prioritize sustainability, engineered wood siding can be a great option. Many brands manufacture their products using wood scraps, sawdust, and other recycled wood fibers that would otherwise end up in a landfill. This process makes efficient use of resources and reduces waste. Additionally, some manufacturers are committed to responsible forestry, ensuring the wood they source comes from sustainably managed forests. Choosing an eco-friendly siding is a simple way to make a positive impact with your home renovation project.

    Moisture Susceptibility: The Truth About Water Damage

    While engineered wood is treated to resist moisture, it’s not invincible. Its biggest vulnerability lies in its wood-based core. If the protective outer layer is punctured, cracked, or compromised by improper installation, water can seep inside. Once moisture gets in, the siding can swell, warp, or even rot over time. This is why the quality of the installation is just as important as the quality of the siding itself. Even a small gap can become a big problem down the road if it allows water to get trapped behind the boards.

    Maintenance Requirements You Need to Know

    Engineered wood siding requires a bit of attention to keep it looking and performing its best. You’ll need to inspect it periodically for any signs of damage, like cracks or chips in the finish, and address them quickly to prevent water intrusion. When it comes to cleaning, a gentle approach is best. Using a high-pressure washer or harsh chemicals can strip away the protective coating, leaving the siding vulnerable. Proper installation, including the correct use of flashing around windows and doors, is also critical for long-term performance and preventing moisture issues.

    Engineered Wood vs. Fiber Cement Siding

    When you’re choosing new siding, two popular options you’ll likely encounter are engineered wood and fiber cement. Both are fantastic alternatives to traditional wood, but they have distinct differences that can make one a better fit for your home than the other. Think of it as a friendly competition between two top contenders. Understanding how they stack up in key areas like durability, maintenance, and appearance will help you make a choice you’ll be happy with for years to come.

    We’ll break down the comparison point by point so you can see exactly what each material brings to the table. This way, you can feel confident about the investment you’re making in your home’s exterior.

    Comparing Durability and Moisture Protection

    Durability is always a top concern for Minnesota homeowners, and both materials perform well, just in different ways. Engineered wood is made from wood strands mixed with resin and treated with wax and other protectants. This process gives it a strong defense against moisture and insects.

    Fiber cement, on the other hand, is a composite of cement, sand, and cellulose fibers. It’s inherently resistant to rot, fire, and pests. Because its color is often baked on, it doesn’t peel or chip easily, giving it a long-lasting finish. While engineered wood is designed to resist moisture, fiber cement is fundamentally unaffected by it, which can provide extra peace of mind during those wet spring and fall seasons. Choosing the right siding is about balancing these material properties with your home’s specific needs.

    Maintenance: What to Expect

    You’ll often hear engineered wood described as “low maintenance,” and for the most part, it is. It doesn’t have the same tendency to peel or chip as natural wood. However, its maintenance level can depend on the finish. If the color isn’t applied at the factory, the paint may not adhere as well over time, potentially requiring more frequent touch-ups.

    Fiber cement siding is a champion of low maintenance. Once it’s installed, it holds its color for years and requires little more than an occasional wash. For both materials, proper installation is the key to preventing future headaches. A professional job ensures that flashing is correctly placed and seams are sealed, which is critical for preventing any moisture from getting trapped behind the siding.

    Appearance and Style Options

    If you love the classic look of wood, engineered wood siding is an amazing choice. It’s designed to mimic the real thing, featuring deep cedar-grain textures or smooth finishes that look incredibly authentic. Brands like TruWood and LP SmartSide offer a wide variety of styles, from rustic boards to sleek panels, giving you plenty of creative freedom to define your home’s character.

    Fiber cement can also be manufactured with a wood-grain texture, but many homeowners find that engineered wood offers a more convincing and deeper texture. Ultimately, the best look is a matter of personal preference. Both materials come in a huge range of pre-finished colors and styles, so you can achieve almost any aesthetic you have in mind for your home’s exterior.

    How Installation and Weight Compare

    On installation day, the differences between these two materials become very clear. Engineered wood is significantly lighter than fiber cement, which makes it easier and often faster for a crew to install. This lighter weight means less stress on your home’s structure and on the installers themselves. However, it does require a delicate touch; if too much force is used during nailing, the surface can crack.

    Fiber cement is heavy and more brittle, requiring specialized tools and a more methodical installation process. Its weight and composition demand a team with experience handling the material to avoid breakage. No matter which you choose, the quality of the installation is what will make or break your project. A skilled contractor ensures every board is perfectly placed, secured, and sealed for maximum performance and beauty.

    Is Engineered Wood Siding Right for Your Home?

    Deciding on the right siding for your home is a big deal. It defines your home’s curb appeal and acts as its first line of defense against Minnesota weather. Engineered wood is a fantastic option for many homeowners, but it’s important to look past the surface and understand what makes it work. It’s not just about picking a color you love; it’s about knowing the material’s strengths, finding a trustworthy installer, and ensuring the job is done right from the start.

    When you’re weighing your options, it helps to clear up some common confusion surrounding engineered wood. From there, you can focus on what truly matters: finding a skilled team to bring your vision to life. A successful siding project depends just as much on the quality of the installation as it does on the product itself. Let’s walk through what you need to know to make a confident choice for your home.

    Busting Common Siding Myths

    One of the biggest myths about engineered wood is that it’s just a flimsy version of real wood. That couldn’t be further from the truth. Engineered wood siding is made by pressing wood strands or fibers together with resin and treating them with waxes and other protective agents. This process creates a durable material that’s specifically designed to resist moisture and pests. It’s also lighter than solid wood, which can make installation a bit more straightforward. While it’s manufactured, it’s created to give you the beautiful, timeless look of natural wood without some of the vulnerabilities that come with it.

    What to Look for in a Siding Contractor

    The quality of your siding contractor is just as important as the siding itself. When you’re vetting professionals, look for a team with proven experience installing the specific brand you’re interested in. Top manufacturers, like LP, offer training and certification to ensure contractors know how to handle their products correctly. A great siding contractor will not only have the technical skill but will also guide you through the various style and color options available. They should be your partner in the process, helping you find the perfect fit for your home’s aesthetic and your family’s needs.

    Why Proper Installation Is Everything

    Even the best siding material will fail if it isn’t installed correctly. Engineered wood is a perfect example of this. Although it’s a durable product, its protective outer layer can be damaged if an installer uses the wrong techniques, like applying too much force during nailing. A crack in this surface might seem small, but it can create an opening for moisture to seep in, leading to swelling and deterioration over time. This is why finding certified contractors is so important. A professional who understands the material’s unique properties will ensure every board is placed and secured perfectly, protecting your investment for years to come.

    Frequently Asked Questions

    Is engineered wood siding a good choice for Minnesota’s climate? Yes, it’s a very strong contender for Minnesota homes. The manufacturing process makes it dense and stable, so it handles the expansion and contraction from our dramatic temperature swings quite well. It’s also treated to resist moisture, which is crucial. The key is that it must be installed correctly to ensure it can properly manage everything from heavy snow to spring rain.

    How much maintenance does engineered wood siding really need? It’s best to think of it as lower maintenance, not no maintenance. You won’t be dealing with the frequent scraping and painting that can come with some natural wood. Your main task will be to inspect it periodically, maybe once or twice a year, to check for any dings or cracks in the finish. Addressing these small spots quickly and keeping the siding clean with a gentle wash will keep it looking great for years.

    What happens if engineered wood siding gets wet? The surface of engineered wood is designed to shed water effectively. The real concern is when water finds a way into the core of the board, which usually happens because of a deep scratch or improper installation. If the core gets saturated, it can swell and lose its integrity. This is why professional installation is so critical; it ensures there are no gaps or unsealed edges where water can sneak in.

    Can I get the look of real wood without all the upkeep? That is precisely the goal of engineered wood siding. It’s made to capture the beautiful, deep grain and texture of natural wood, giving your home that classic, warm appearance. Because it’s a manufactured product with a durable, factory-applied finish, you get that sought-after style without the demanding cycle of staining or sealing that many natural wood sidings require.

    Why is the installation so important for this type of siding? Proper installation is everything because it ensures the siding functions as a complete protective system. A skilled contractor knows the specific requirements for engineered wood, like how to nail it without cracking the surface and how to correctly flash and seal around windows and doors. A small mistake can compromise the siding’s ability to resist moisture, so the quality of the installation directly impacts how well your siding will perform and how long it will last.