Minnesota weather puts every part of a home’s exterior to work. Freezing cycles, heavy snow, high winds, and strong summer sun can expose weak materials or rushed installation long before a homeowner expects problems. That is why the choice of siding is about far more than curb appeal. For homeowners in Rogers, St. Francis, Monticello, and Cottage Grove, the siding you select has to stand up to real temperature swings. Hold its color through glaring summer sun, and shed water and snow for decades.
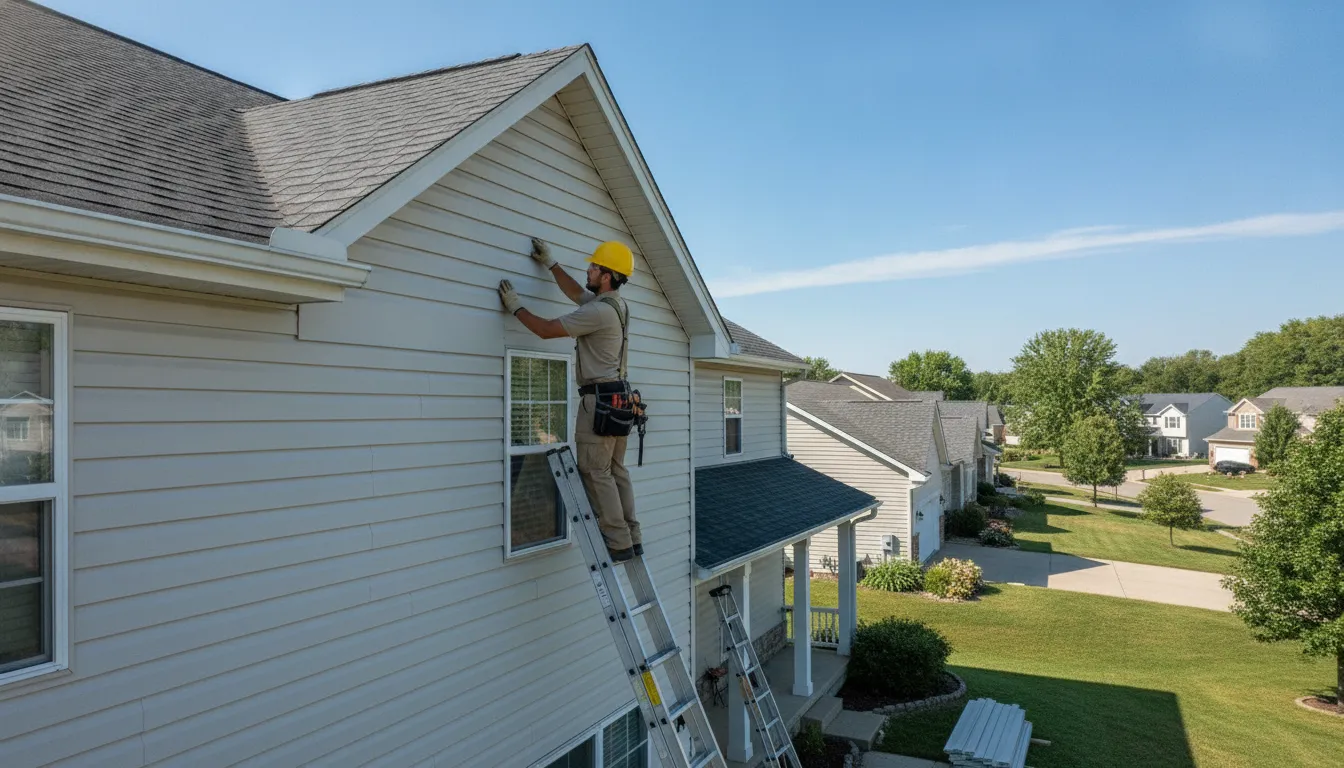
The best vinyl siding panels for a Minnesota home balance the right profile, thickness, color, and installation details for the property’s exposure. A durable panel still depends on a flat substrate, proper weather protection, and room to expand and contract as temperatures change. When those variables line up, vinyl siding delivers one of the most maintenance-friendly exteriors available for the region.
That decision looks different for a home in Rogers than it does for a property in Cottage Grove, St. Francis, or Monticello. Start by evaluating the home’s climate exposure, wall condition, insulation needs, and architectural style, then narrow the product choices with those factors in mind. This guide walks through the profile families, thickness standards, fade-resistant color options, and installation details that matter most. So you can choose with confidence and know what to expect from a professional install.
Contact Referred Restoration online to talk through your siding options and get a free consultation for your Minnesota home.
How to Choose Vinyl Siding Panels for a Minnesota Home
For homeowners in Rogers, St. Francis, Monticello, and Cottage Grove, choosing siding is about more than selecting a color. Vinyl siding panels form the home’s outer weather barrier, so the panel system should be suited to Minnesota’s snow, freezing temperatures, temperature swings, and wind. A good selection balances appearance with verified product quality, a suitable underlayment, and installation that follows the manufacturer’s requirements.
Start by looking beyond the sample on the display rack. Ask what standard the product meets, how the panel profile will complement the home, and what preparation the wall assembly needs. The right choice should look at home in the neighborhood while giving the installer a sound, level surface and enough room to account for seasonal movement.
Confirm the product meets recognized standards
Product labeling is an important first screen. Owatonna’s vinyl siding guidelines state that vinyl siding should be tested and labeled according to ASTM D3679. This standard helps distinguish a properly identified siding product from an unverified material. Federal regulations also reference ASTM D3679 for vinyl siding used in manufactured homes, providing another reason to ask about the product’s certification and labeling before installation. See the Owatonna vinyl siding guidelines and the federal ASTM D3679 requirements for the applicable references.
That documentation does not replace an on-site evaluation. An experienced contractor should inspect the existing siding, trim, wall surface, and areas around windows and doors before recommending a panel system. These details affect how the finished siding sheds water and how cleanly it fits around transitions.
Match the panel system to the wall and climate
Underlayment is another important part of the decision. When a home is being re-sided, rigid foam underlayment can improve the wall’s energy efficiency and provide a smoother surface for the siding. That can be especially useful on older homes in the Rogers and St. Francis area, where the existing wall may not be perfectly even. The local guidelines identify rigid foam underlayment as a way to support both efficiency and a smooth siding installation. The appropriate assembly depends on the home’s condition, existing layers, moisture management, and project requirements.
Finally, consider the supporting trim as part of the panel selection rather than as an afterthought. Corners, window surrounds, door trim, and roofline transitions must work with the panel profile and color. Our guide to vinyl siding panels explains how these pieces come together for a more finished exterior. Whether the home is in Monticello or Cottage Grove, a careful assessment and manufacturer-compliant installation are what turn a suitable product into a durable siding system.
Vinyl Siding Panel Profiles Explained
Profile is the shape and arrangement you see across the exterior wall. It affects how much shadow line the siding creates, how traditional or modern the home feels, and how the siding works with trim, windows, and rooflines. For Minnesota homes, the profile is a design decision, but it should also support a careful installation that accounts for snow, wind, and seasonal temperature changes.
Horizontal lap siding is often described as clapboard or Dutch lap. Clapboard has a relatively straightforward, clean horizontal appearance, while Dutch lap has a more pronounced curved or notched face that creates stronger shadow lines. Within this family, double-four (D4) and double-five (D5) describe the width of the board segments within one panel, not a promise of a particular performance level. The PNNL vinyl siding installation manual identifies horizontal lap, vertical, and shake as common profile groups. Review the installation manual for profile terminology and handling guidance.
| Panel Profile | Look | Typical Exposure | Best For |
|---|---|---|---|
| Double-4 or double-5 lap | Horizontal clapboard or Dutch lap courses with a familiar residential pattern | Repeated narrow or medium-width horizontal courses, depending on D4 or D5 selection | Traditional homes, ranches, and full-house installations that need a versatile exterior style |
| Board-and-batten or vertical | Long vertical panels with raised battens that draw the eye upward | Vertical lines and taller visual proportions rather than horizontal course lines | Gables, accent walls, porches, and homes where a farmhouse or contemporary detail fits |
| Shake or shake-and-shingle | Textured, irregular-looking units that add a more natural, handcrafted character | Shorter visual sections with varied texture and stronger surface detail | Gables, dormers, entry features, and carefully selected accent areas |
| Insulated panels | Lap-style siding paired with a backing layer that gives the wall a more substantial appearance | Usually a consistent horizontal exposure, coordinated with the selected lap profile | Homeowners prioritizing a smoother wall plane and added support for a Minnesota re-siding project |
Board-and-batten siding can add height to a low roofline. While shake-and-shingle details can help distinguish a gable or front entry without covering the entire home in a highly textured pattern. Lap profiles are usually the easiest visual match when an existing neighborhood has predominantly horizontal siding. The right choice depends on the home’s architecture, the surrounding streetscape, and how the profile will meet corners, soffits, windows, and other trim.
Whatever the profile, choose a product with clear manufacturer instructions and plan the installation around Minnesota’s movement between hot sun, deep cold, and freeze-thaw conditions. Vinyl expands and contracts as temperatures change, so panels must be fastened without restricting that movement. A thoughtful profile selection paired with correct detailing will look intentional and help the exterior perform through changing seasons.
Vinyl Siding Panel Thickness: What to Look For
When comparing vinyl siding panels for a Minnesota home, panel thickness is one useful indicator of how the material may perform through cold weather, wind, and seasonal movement. Standard residential panels commonly fall between 0.040 and 0.046 inches thick. Economy grades are often near the lower end of that range, while premium panels are commonly manufactured at approximately 0.046 inches.
Thickness is not the only measure of quality, but it affects rigidity. Thicker panel stock generally feels more substantial and is less likely to flex, buckle, or show waviness when properly installed. That added rigidity can be especially helpful during Minnesota winters, when freezing temperatures and impacts from snow, ice, or ordinary outdoor activity put stress on the exterior. It does not make a panel indestructible, and installation quality still matters, but it can provide a stronger starting point for a durable wall system.
What do D4 and D5 mean?
Terms such as double-4, or D4, and double-5, or D5, describe the width of the board segments within a siding panel. D4 presents narrower courses, while D5 presents wider courses. The choice is primarily visual, although the profile also affects how the siding fits the home’s scale and architectural style. A D4 profile can create a more detailed, traditional appearance. D5 often gives a broader, cleaner look.
Do not confuse profile width with panel thickness. A D5 panel is not automatically stronger than a D4 panel, and a wider course does not replace the need to review the product specifications. Ask to see the manufacturer’s stated thickness, profile, installation instructions, and warranty together.
Look for recognized product standards
Thickness should be considered alongside compliance and labeling. Minnesota installation guidance states that vinyl siding should be tested and labeled according to ASTM D3679. Federal requirements for vinyl siding used in manufactured homes also reference ASTM D3679 and certification or listing and labeling through 24 CFR 3280.309. These references help confirm that a product has been evaluated against a recognized standard, rather than selected on appearance alone.
For a home in Rogers, Cottage Grove, or another Minnesota community, a practical checklist is simple: compare the stated thickness. Confirm the ASTM D3679 documentation, choose a profile that suits the house, and use an installer who follows the manufacturer’s fastening and expansion requirements. A thicker panel can improve resistance to buckling and impact. But it performs best when the wall is flat and the siding is allowed to move naturally as temperatures change.
Choosing Colors That Last in Minnesota Sun and Snow
Color is one of the most visible decisions in a siding project, but it also affects how the exterior responds to seasonal exposure. A Minnesota home may face intense summer sunlight, sharp winter glare reflected from snow, freezing temperatures, and repeated changes between warm and cold conditions. The right color choice starts with the home itself, then considers the siding product’s formulation and warranty language.
Balance appearance with sun exposure
Light and medium siding colors generally absorb less solar heat than very dark colors. That can be useful on broad, south- or west-facing walls that receive strong afternoon sun. Darker colors can create a striking look and add visual weight to a larger home, but they may become warmer in direct sunlight. The actual performance depends on the product, color technology, installation, ventilation, and the home’s exposure, so color alone should not be treated as a guarantee of long-term behavior.
Modern manufacturing has improved the UV resistance of vinyl siding, helping colors remain vibrant longer in harsh sunlight. The PNNL vinyl siding installation manual identifies this improvement as an important reason contemporary colors are better equipped to resist fading than older products. Ask to see full-size samples outdoors, rather than choosing from a small indoor swatch. Look at them in direct sun and in shade, and compare them with the roof, window trim, entry door, stone, and other permanent features.
Read the fade-resistance warranty carefully
A siding warranty can provide useful guidance, but its color language deserves close attention. Review whether the warranty addresses fading, chalking, or color change, and check whether darker or saturated colors have different limitations. Also confirm what maintenance, installation, and product-registration requirements apply. A warranty is not a substitute for correct installation, but it can help you compare how manufacturers stand behind their color systems.
For homes in Rogers, Cottage Grove, St. Francis, or Monticello, a practical palette often combines a durable main color with trim that creates contrast without making the exterior feel busy. Warm grays, muted greens, soft blues, and natural earth tones can complement Minnesota landscapes, while carefully chosen darker accents can define gables, shutters, or the front entry. Consider how snow will frame the house in winter and how trees, lawns, and neighboring homes will affect the color in summer.
When comparing vinyl siding panels, bring your preferred samples to the property and evaluate each elevation separately. A local siding professional can help account for orientation, existing materials. And the home’s proportions before you commit to a color that should serve the exterior through many Minnesota seasons.
Installation Best Practices for Vinyl Siding Panels
A durable siding project depends as much on installation as on panel selection. Vinyl siding panels need room to move, a properly prepared wall, and a carefully planned drainage layer. The sequence below follows the principles that help an exterior perform through Minnesota’s hot summers, freezing winters, and repeated freeze-thaw cycles. Always follow the specific manufacturer’s instructions, which local installation guidance identifies as a requirement: vinyl siding shall be installed according to the manufacturer’s installation instructions.
How to Install Vinyl Siding Panels Correctly
- Inspect and level the substrate. Begin with a flat, even wall surface. Uneven sheathing, damaged framing, or existing bulges can telegraph through the finished siding and interfere with panel movement. Where the wall cannot be brought flat through normal repairs, use properly aligned furring strips to create a consistent plane. This is especially important on older Minnesota homes, where previous layers may have settled or concealed irregularities.
- Install the water-management layers first. Complete the required flashing at windows, doors, roof-to-wall transitions, corners, and other vulnerable joints before covering the wall. Install compliant weather-resistive sheathing paper or another approved weather-resistive barrier as part of the wall assembly. These layers work behind the siding to direct incidental moisture away from the structure. Vinyl panels are not a substitute for flashing or a weather-resistive barrier. Local guidance references flashing requirements under R703.4 and weather-resistive sheathing paper under R703.2: review the applicable vinyl siding guidelines.
- Establish straight starter and corner lines. Snap level reference lines before installing starter strips, inside corners, outside corners, and trim. A small error at the base can become obvious across the full wall, particularly with long horizontal runs. Check openings and transitions as you go so trim remains plumb and panels have the correct channel engagement.
- Fasten panels without restricting movement. Place fasteners in the center of the slotted nail hem and leave the manufacturer’s specified clearance beneath the fastener head. Do not nail too tightly. Vinyl moves as temperatures change, and the slots are designed to let the panels expand and contract. For horizontal siding, fastener spacing should not exceed stud spacing horizontally and 12 inches vertically, according to the referenced municipal guidance. Use corrosion-resistant fasteners suitable for the wall assembly and the manufacturer’s system.
- Keep panels relaxed and avoid stretching. Lock each panel fully into the course below, but do not pull it tight while fastening. Stretching can put the panel under tension and contribute to buckling when it expands. Let the panel rest naturally in the course, maintain the recommended clearances at trim, and avoid forcing a panel into a channel that is out of alignment.
- Overlap joints in the correct direction and amount. Stagger seams where the layout allows, and overlap adjoining panels according to the product instructions. Correct overlap helps create a moisture-shedding, weather-tight exterior while keeping the finished pattern consistent. Never guess at the overlap because profiles and panel systems can differ. A clean joint should engage securely without forcing the panel or closing off its movement.
- Inspect every course before moving upward. Check that panels remain level, seams are properly engaged, nail heads are not tight, and trim channels are not pinching the siding. Professional installation matters in Minnesota because incorrect fastening, flashing, or clearances can create visible distortion and moisture risks, and may complicate the manufacturer’s warranty requirements. For a closer comparison of installation approaches, see our guide to vinyl siding panels.
When the wall preparation and movement details are handled correctly, vinyl siding panels can provide a clean. Weather-ready exterior without relying on the siding itself to solve underlying wall problems. A qualified installer can confirm the substrate, drainage details, and product-specific requirements before the first course goes up.
How Vinyl Siding Panels Handle Minnesota’s Climate
In Cottage Grove and communities across Minnesota, exterior materials have to manage repeated freeze/thaw cycles, winter moisture, wind, and summer heat. Vinyl siding panels are designed with enough flexibility to move as temperatures change. That movement is not a defect. It is part of how the cladding accommodates seasonal conditions without transferring every temperature shift into the wall assembly.
Movement matters during freeze/thaw cycles
Vinyl expands in warmer weather and contracts as temperatures fall. The panels therefore use slotted nail hem holes that allow controlled movement along the wall. Fasteners should hold the siding in place without pinning it tightly, and the panels should not be pulled or stretched during installation. The Vinyl Siding Installation Manual explains that tight fastening or stretched panels can contribute to buckling when the siding expands. Properly hung panels are better prepared for the temperature swings that Cottage Grove homes experience from summer sun to winter cold.
Installation quality is especially important when a home faces strong wind or storm activity. Vinyl siding can provide a resilient exterior surface, but its performance depends on the complete system: a sound substrate. Correct fastening, properly overlapped courses, and the clearances required by the manufacturer. Vinyl can also be less vulnerable to certain everyday impacts than more brittle cladding materials, although no siding is immune to damage from severe hail or flying debris. A professional assessment can help determine whether the existing wall and chosen panel profile are appropriate for the property.
Insulation and moisture protection work together
Insulated panel products add rigid foam backing behind the visible vinyl profile. That backing can improve wall energy efficiency and provide a smoother surface for the panels, a useful combination for Minnesota remodeling projects. It does not replace sound air sealing, weather protection, or properly installed wall insulation, but it can support a more complete exterior envelope.
Behind the panels, the wall still needs appropriate moisture management. Flashing and a weather-resistive barrier help direct water away from the structure, while correct panel overlap creates a weather-shedding exterior. These details matter during snow, wind-driven rain, and spring melt, when small installation errors can become larger moisture concerns.
Simple maintenance throughout the year
Vinyl siding is also practical for homeowners who want a straightforward maintenance routine. Periodic cleaning with soap and water is typically enough to remove surface dirt and grime. Avoid abrasive methods or harsh cleaning practices that could damage the finish, and inspect the siding after major storms for loose, cracked, or displaced panels. For more ideas about working with durable vinyl siding panels, review the related guide before adding exterior accessories.
With climate-appropriate products and careful installation, vinyl siding can give a Minnesota home a durable, manageable exterior through changing seasons.
Choosing a Siding Installer for Your Area
The installer you choose matters as much as the vinyl siding panels themselves. A careful contractor will look beyond color and profile to evaluate the home. The existing wall assembly, local weather exposure, and the details that keep water out through Minnesota’s freeze-thaw cycles. That standard should apply whether your home is in Rogers, St. Francis, Monticello, or Cottage Grove.
Credentials and installation standards
Start by asking how the contractor verifies material quality and installation requirements. Vinyl siding panels should carry labeling that identifies compliance with ASTM D3679. And the installer should be prepared to follow the manufacturer’s instructions rather than relying on a generic process. Ask whether the crew has manufacturer-certified installation training for the product being proposed. Certification does not replace good judgment, but it shows that the installer understands details such as fastening, panel movement, flashing, and proper overlap.
It is also reasonable to ask for documentation before work begins. A reputable installer should explain the material warranty and workmanship warranty in clear language. Including what each warranty covers, how long it applies, and what maintenance or registration requirements may affect coverage. Be cautious of vague promises. A written scope should identify the siding system, trim, weather-resistive barriers, flashing, and ventilation or substrate work that may be needed.
Look for local craftsmanship
Local experience is valuable because homes in the Rogers area and throughout central and eastern Minnesota face demanding conditions. Wind, snow, ice, and repeated temperature changes can expose rushed preparation or poorly finished transitions. Look at completed projects, ask how the crew handles uneven walls and existing siding, and confirm who will supervise the work. The best conversation is specific: a contractor should be able to explain how the proposed system will be fitted to your home. Not simply recommend the same package to every property.
Referred Restoration is a Minnesota exterior restoration contractor serving Rogers, St. Francis, Monticello, Cottage Grove, and surrounding communities. The team approaches each project individually and treats every home as its own, with attention to honest recommendations and durable workmanship. Financing is also available through the trusted Green Sky partner, subject to lender qualification and program terms.
Contact Referred Restoration online to discuss your home’s siding needs, or call (763) 726-4245.
Frequently Asked Questions
What are the benefits of vinyl siding panels?
Vinyl siding panels provide a durable exterior finish with relatively simple upkeep. Routine cleaning with soap and water is typically enough to remove dirt and grime, and modern manufacturing has improved resistance to fading from sunlight. The right profile and color can also complement both traditional and contemporary Minnesota homes.
Are vinyl siding panels durable in cold climates?
They can perform well through Minnesota freeze-and-thaw cycles when the wall assembly and installation are handled correctly. Vinyl moves as temperatures change, so panels need room to expand and contract in their slotted nail holes. Installers should avoid pulling panels tight or fastening them too firmly, which can contribute to buckling. Source: PNNL vinyl siding installation guidance.
How thick should vinyl siding panels be?
Common residential panels are approximately 0.040 to 0.046 inches thick, but thickness is only one part of the selection. Look for panels that are properly tested and labeled for ASTM D3679, then consider the profile, fastening system, manufacturer instructions, and the exposure conditions around your home. Source: Owatonna vinyl siding guidelines.
Can vinyl siding panels be installed over existing siding?
Sometimes, but the existing surface must be evaluated first. The wall should be sound, flat, and suitable for the new siding, with appropriate flashing and a weather-resistive barrier. Uneven walls may need furring strips so the panels hang straight. Local requirements and the manufacturer’s installation instructions also need to be followed.
Does color affect the performance of vinyl siding panels?
Yes. Darker colors generally absorb more solar heat, while fade-resistant technologies can help colors remain attractive in strong sunlight. Ask about the product’s color limitations and warranty before choosing a darker shade, especially for a wall with substantial southern or western exposure.
Ready to Choose Vinyl Siding Panels for Your Home?
Choosing the right vinyl siding panels comes down to matching the profile, thickness, and color to your home and Minnesota’s weather, then having it installed to manufacturer standards. The team at Referred Restoration will walk you through the options for your property in Rogers, St. Francis, Monticello, or Cottage Grove and handle the installation details that keep your exterior sound through every freeze-and-thaw cycle.
Contact Referred Restoration online to schedule a free consultation about your siding project. You can also reach the team by calling (763) 726-4245.