
Cracked panels, loose trim, staining, or recurring peeling are more than appearance concerns. In Minnesota, freezing winters, heavy precipitation, and frequent hail can expose weak points in an exterior and make small maintenance issues harder to ignore. Looking closely at the cladding, seams, flashing, and nearby drainage can help you spot trouble before moisture reaches the wall system.
Contact Referred Restoration online to schedule a free siding inspection or discuss a custom solution. You can also call (763) 726-4245.
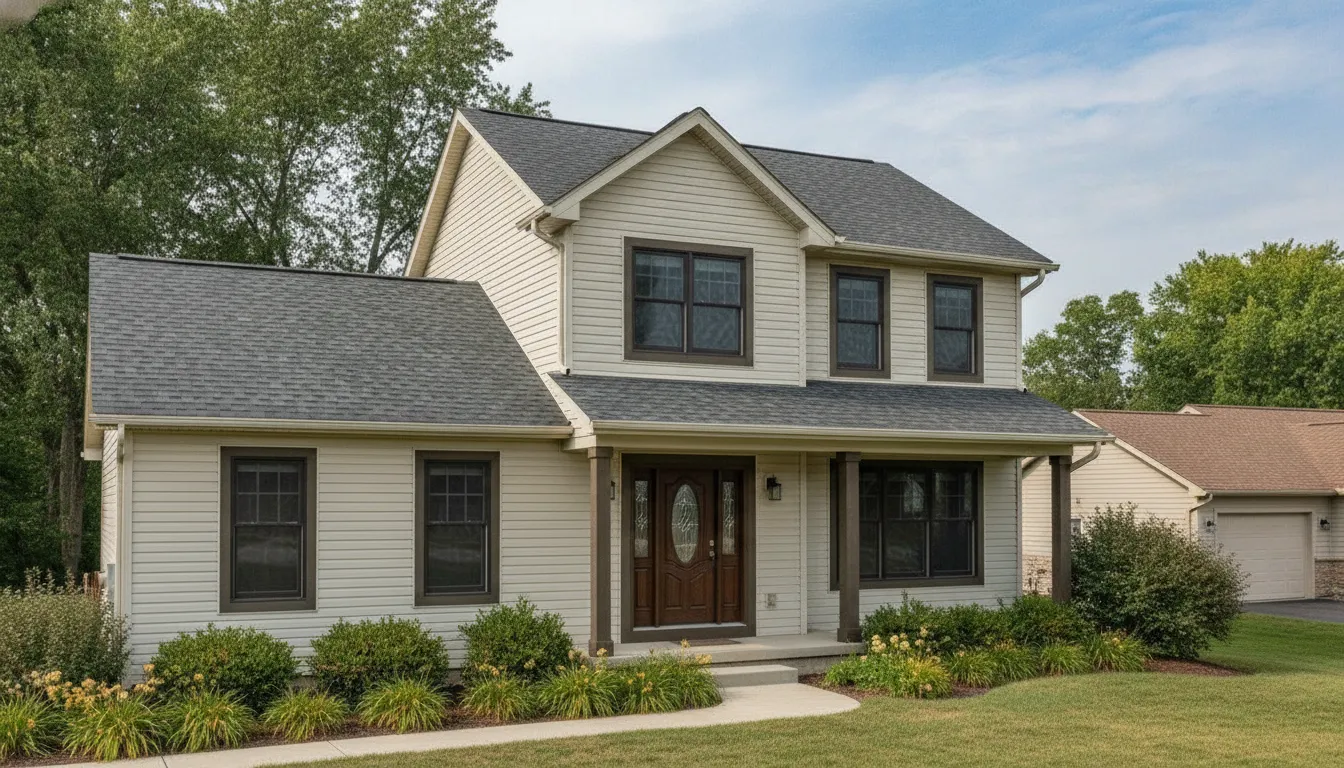
The right siding for a Minnesota home depends on the home’s exposure, moisture-management details, maintenance preferences, and desired appearance. Vinyl, fiber cement, LP SmartSide, and wood each offer different strengths, so the best choice should follow an inspection and a clear understanding of the home’s needs.
A sound decision starts with more than comparing colors or materials. It means considering how water moves around the exterior, how the surface will be maintained through the seasons, and whether isolated damage calls for repair or broader replacement planning. Those priorities provide a practical way to evaluate the protection your home needs.
What Should Minnesota Homeowners Look For in Siding?
Siding is more than an exterior finish. It is part of the home’s weather-resistance system, helping shield wall assemblies from rain, wind, snow, and everyday exposure. In Minnesota, that role deserves close attention. Freezing winters, heavy precipitation, frequent hail, approximately 43 inches of annual snowfall, and approximately 32 inches of annual precipitation can all test an exterior over time.
Start an inspection by looking for visible damage and changes in how the siding sits on the wall. Cracked, split, loose, warped, or missing sections can allow water to reach areas that should remain protected. Pay particular attention around windows, doors, corners, roof lines, and wall penetrations. These transitions have more joints and trim details, so they need careful installation and periodic observation. Staining, soft areas, rot, peeling finishes, or interior signs of dampness also warrant a closer assessment rather than a cosmetic patch alone.
Look beyond the siding surface
Water management behind the cladding is just as important as the visible material. Exterior wall systems can admit small amounts of water through joints, cracks, and gaps, especially when wind drives rain against the home. A properly designed drainage plane gives that water a controlled path down and away from the wall instead of allowing it to collect inside the assembly. The U.S. Department of Energy’s Building America Solution Center explains that a continuous drainage plane should be sealed and coordinated with flashing. This includes flashing around doors, windows, penetrations, and the bases or tops of walls. Learn more about drainage planes behind exterior cladding.
That makes flashing, trim, clearances, and visible sealant conditions important inspection priorities. Sealants can require periodic attention, and a new bead of caulk should not be used to conceal a larger drainage or substrate problem. If siding damage is concentrated near a gutter, downspout, or roof edge, inspect the water path as well. Leaks, clogs, and damaged gutters can redirect water onto the roof, siding, or foundation. Reviewing gutter and drainage protection can help homeowners consider the exterior as one connected system.
Hail and wind deserve a separate look after severe weather. Check for dents, fractures, displaced panels, and damaged trim from the ground, but avoid climbing or disturbing questionable areas. An inspection can help distinguish surface damage from conditions that affect the wall beneath it. Addressing cracked or damaged sections early may help restore protection from water intrusion, mold, energy loss, and appearance problems.
Once these exposure and water-management questions are clear, the right material choice becomes easier to evaluate. Vinyl, fiber cement, engineered wood, and wood each bring different maintenance, appearance, and performance considerations to the home.
Which Siding Material Fits Your Home?
There is no single siding material that suits every Minnesota home. The right choice depends on the appearance you want and how much maintenance you are comfortable with. It also depends on the condition of the exterior and the home’s exposure to freezing winters, heavy precipitation, and hail. A careful inspection helps connect those priorities to a practical recommendation.
Referred Restoration works with vinyl, fiber cement, LP SmartSide, and wood siding. Each option can be a good fit in the right situation, but the material is only one part of performance. Proper preparation, moisture management, flashing, and professional installation matter just as much.
| Material | Maintenance and appearance | Durability and moisture considerations | May fit homeowners who want |
|---|---|---|---|
| Vinyl | Low-maintenance siding available in a range of profiles, colors, textures, and finishes. | Resists routine upkeep, but cracked, loose, or displaced panels should be inspected so water does not reach vulnerable areas behind the cladding. | A practical exterior with less ongoing maintenance and broad style flexibility. |
| Fiber cement | Strong, durable material with a substantial appearance that can complement many home styles. | Its performance still depends on sound installation, protected joints, appropriate clearances, and attention to moisture at openings and transitions. | Durability and a more solid, traditional look. |
| LP SmartSide | Engineered wood siding designed to provide a natural wood look with a durable exterior option. | Like any wood-based siding, it should be kept properly detailed and maintained at joints, edges, and areas exposed to recurring moisture. | Wood-style character with an engineered-wood material choice. |
| Wood | Natural texture and character that can suit traditional, rustic, or custom architectural designs. | Requires closer attention to paint or finish condition, water exposure, trim, and signs of rot or surface damage. | A classic appearance and willingness to stay engaged with maintenance. |
Look beyond the sample color
Appearance is important, but evaluate how the material will work with your roof, windows, doors, trim, and surrounding landscape. Profiles and installation patterns can change the visual scale of a home. A low-maintenance choice may be more suitable for one homeowner, while another may place greater value on natural texture or a specific architectural style.
Moisture protection is part of the material decision
Siding is the visible outer layer, not a substitute for a complete wall-protection system. Water can enter through joints, cracks, and small gaps, so the assembly behind the siding needs appropriate drainage and flashing. Pay particular attention around windows, doors, wall bases, and roof-to-wall transitions. Gutters and downspouts also affect how much water reaches the siding. For a local evaluation of materials and installation needs, review the siding inspection and replacement services from Rogers siding contractors.
An inspection can identify damaged sections, rot, or inefficiencies before you commit to a material. That makes the decision more useful than choosing by color alone, and helps ensure the final siding system fits both your home and your maintenance expectations.
How Can You Prevent Moisture Problems Behind Siding?
Siding is the visible layer of your exterior, but it is not the only layer managing rain and melting snow. A well-built wall gives water a controlled path away from the home instead of allowing it to collect behind the siding. This matters in Minnesota, where freezing winters, heavy precipitation, and frequent hail can test every joint, seam, and transition.
Build in a drainage path
Behind the siding, a water-resistant barrier or drainage plane helps direct water down the wall and back outside. The U.S. Department of Energy’s Building America Solution Center explains that a continuous drainage plane helps keep water out of wall cavities and should be designed to channel water away from the building. In practical terms, the layers should work together rather than create pockets where moisture can sit.
House wrap, building paper, or another approved weather-resistant barrier must be installed and sealed according to the product and project requirements. Seams, overlaps, and transitions deserve particular attention. A barrier that is cut, loose, or poorly sealed may not perform as intended. You can review the technical guidance on drainage planes behind exterior wall cladding for more detail.
Pay attention to flashing and openings
Windows, doors, corners, roof lines, utility penetrations, and wall bases are common transition points. Flashing helps move water away from these vulnerable areas. The drainage-plane layer should lap over the flashing so water continues downward and outward. The exact materials and installation details vary with the wall assembly, siding product, and local requirements. A qualified contractor should follow applicable manufacturer instructions and building codes rather than rely on a one-size-fits-all detail.
Trim and penetrations also need a careful inspection. Look for cracked or missing sealant, gaps around pipes and vents, loose trim, or siding pulled away from the wall. Sealants can require periodic reapplication because they may wear before the surrounding cladding does. These observations do not prove hidden damage, but they are good reasons to arrange an inspection before a small opening becomes a larger moisture problem.
Keep roof water away from the wall
Moisture management does not stop at the siding. Gutters and downspouts should collect roof runoff and discharge it away from the exterior and foundation. Leaks, clogs, or damaged sections can send concentrated water down the siding, into trim joints, or against the base of the wall. Maintaining clear, properly directed drainage supports the work of the wall assembly. For help evaluating gutter and drainage protection, an inspection can identify where water is escaping and what needs attention.
When you see recurring staining, soft trim, rot, bubbling, or dampness indoors, do not assume replacing the visible siding alone will solve it. An inspection can trace the water path, assess the surrounding materials, and determine whether targeted repairs or broader work is appropriate.
What Maintenance Does Siding Need Through the Seasons?
Minnesota weather puts siding through freezing winters, heavy precipitation, snow, and hail. A simple seasonal check can help you notice small problems before water reaches the wall beneath the cladding. Walk the exterior from a safe position, use the checklist below, and leave repairs that require ladders, removal of panels, or work near electrical fixtures to a qualified professional.
- Look over the siding after winter. In spring, inspect for cracked, split, warped, or visibly displaced panels. Pay particular attention to corners, lower wall sections, and areas below windows where melting snow or runoff may collect. Damaged or cracked sections can reduce the exterior’s protection from water and should be assessed rather than covered up.
- Clean safely when the surface needs it. Remove ordinary dirt with a soft brush or a gentle garden-hose rinse, following the material manufacturer’s care guidance. Avoid abrasive tools, harsh chemicals, and directing high-pressure spray behind laps, seams, or trim. If algae, staining, or buildup does not come away with gentle cleaning, ask for advice instead of increasing the pressure.
- Check for loose panels and open joints. From the ground, look for siding that no longer sits evenly, panels that move, or gaps at seams and corners. Do not force a panel back into place. A loose section may have damage behind it or may need proper fastening to preserve the intended water-shedding design.
- Observe trim, caulk, and transitions. Inspect the visible sealant around windows, doors, corner posts, and other trim for cracking, separation, or missing sections. Sealants can need periodic reapplication because they may not last as long as the surrounding cladding. Avoid applying new caulk over wet, damaged, or deteriorated material without understanding the cause.
- Keep vegetation from rubbing the wall. Trim branches, vines, and dense growth so they do not scrape siding or hold moisture against it. Do not attach supports or hardware through siding without a plan for keeping the penetration watertight. Keep mulch and soil from being piled against the lower edge of the wall.
- Inspect gutters and downspouts with the siding. Clear leaves and other visible debris when conditions are safe, then check whether water flows away from the house. Look for leaks, clogs, sagging, or discharge that leaves splash marks on the wall. Proper gutter maintenance helps protect the roof, siding, and foundation. See our guide to gutter and drainage protection for related guidance.
- Schedule an inspection when warning signs persist. Seek professional help if you see recurring moisture marks, rot, mold, widespread cracking, storm damage, or damage that returns after cleaning. An inspection can assess the siding, trim, drainage, and areas behind visible defects so you can make an informed repair or replacement decision.
Freeze-thaw movement deserves attention at the transitions where siding meets trim, corners, windows, doors, and roof-to-wall details. Repeated expansion and contraction may open small gaps or loosen a connection without creating an obvious failure from the yard. Look for changes after winter and ask an inspector to assess any separation, cracking, or movement before sealing over it.
After snow or ice accumulation, check lower wall areas, sheltered corners, and locations below roof edges from a safe position. Melting snow can follow trim or collect where siding meets a deck, porch, or other projection. Keep gutters and downspouts clear and directed away from the wall so runoff does not repeatedly wet one section of cladding.
As spring thaw begins, look for staining, soft trim, bubbling, or dampness near openings and at the base of the wall. In summer and fall, inspect after strong wind or hail for dents, fractured panels, displaced pieces, and damaged flashing. Wind-driven rain can enter at a small opening, while hail can damage both the siding face and nearby trim. These observations may warrant further evaluation even when indoor signs are not present.
A practical seasonal routine is to compare the same elevations over time, keep dated photos, and note changes after severe weather. Do not remove panels or climb to inspect difficult areas unless the work is safe and appropriate. A qualified professional can assess the visible cladding, drainage path, and surrounding transitions together.
Keep a few dated photos after major storms and at the start of each season. They make changes easier to spot and give an inspector useful context about when a problem appeared.
Should You Repair Siding or Plan a Full Replacement?
Not every siding problem calls for a full replacement. A cracked panel, loose section, or small area of storm damage may be a practical repair when the surrounding siding remains secure, dry, and in good condition. The right decision depends on what is happening behind the visible surface as well as what you can see from the yard.
Start with an inspection rather than choosing a solution based only on appearance. A siding inspection can assess visible damage, rot, and areas where the exterior may be less efficient than it should be. It can also help determine whether water has moved beyond one damaged section. This inspection-first approach keeps an isolated issue from being overlooked while avoiding replacement work that the home does not need.
A useful decision framework is to compare the location, pattern, and cause of the damage rather than treating every defect alike. The following signs can help organize a conversation with an inspector:
- A focused repair may fit when damage is isolated, the surrounding panels and trim remain secure, and there is no evidence of continuing moisture.
- Matching-material repair deserves planning when replacement panels or trim can be matched and the underlying wall, flashing, and drainage details are sound.
- Broader replacement planning may be appropriate when warping, rot, staining, or moisture evidence appears across multiple elevations or transitions.
- A larger evaluation is warranted when the same failure returns, matching materials are unavailable, or repairs would leave weak connections and unresolved water paths.
This framework is not a substitute for a site assessment. An inspection can separate surface damage from problems in trim, flashing, sheathing, or the wall assembly and can help define a practical scope without assuming that the most extensive option is necessary.
When a siding repair may be enough
Repair is often worth considering when the damage is clearly localized. Examples include a few cracked panels after an impact, a loose section, or trim that has separated from an otherwise sound wall. Replacing the affected materials can restore the exterior’s appearance and help maintain protection from water intrusion, mold, and energy loss. The repair should also address the reason the damage occurred, such as impact, movement, or water directed toward the wall.
Matching the existing profile and color matters, but a visual match is not the only test. The surrounding siding should be checked for softness, staining, movement, and signs that water is collecting behind it. If the substrate and moisture-management details are sound, a targeted repair may provide the appropriate scope for the problem.
When replacement deserves closer consideration
Full replacement becomes more relevant when damage is widespread, moisture has affected multiple areas, or repairs keep recurring. Rot, persistent discoloration, soft wall areas, and repeated panel failures can indicate that the issue extends beyond one piece of siding. Replacement may also make sense when the existing exterior has broad appearance problems or no longer supports the home’s insulation and comfort goals. New siding can improve insulation, indoor temperature regulation, comfort, and energy efficiency, although the results depend on the home’s existing construction and the selected materials.
Replacement also provides an opportunity to review the entire exterior system. During planning, the team can consider material fit, exposure, trim, openings, and water management together instead of treating each symptom separately. Referred Restoration offers siding inspection and replacement services from Rogers siding contractors for homeowners evaluating those choices.
A sound process is straightforward: inspect the condition, identify the source of the damage, compare repair and replacement scopes, then select a custom solution. Whether the answer is a focused repair or professionally installed new siding, the goal is to restore a secure, well-managed exterior that fits the home’s needs.
What Should You Do After Wind or Hail Damages Siding?
Wind and hail can leave siding cracked, loosened, dented, or partly detached. After a storm, focus first on safety and documentation rather than climbing ladders or trying to make a quick repair. Minnesota weather can change quickly, and damage that looks cosmetic from the yard may still deserve a closer inspection.
When storm damage is visible on one elevation, compare nearby corners, openings, trim, gutters, and downspouts before deciding that only the marked panel needs attention. Wind and hail can affect connected details, and a displaced piece may point to a fastening or moisture issue that is not obvious from the ground.
If the siding is wet, loose, or open to the wall, keep the area protected and arrange an inspection rather than sealing it permanently. The inspection should consider the exterior surface, the drainage path, and any related transitions. That evidence helps distinguish a limited repair from a broader restoration plan.
Stay safe and document what you can see
Keep people away from loose panels, exposed fasteners, fallen branches, and any area where electrical lines may be down. Do not climb onto the roof or use a ladder to inspect upper siding unless you are trained and the conditions are clearly safe. From the ground or another secure location, take well-lit photos and video of each affected elevation. Capture close views of cracked or missing sections, along with wider images that show where the damage is located on the home.
Record the date of the storm and note other visible exterior damage, such as damaged gutters, windows, or roofing. Keep copies of your photos and any related communications. This information can help a contractor understand what happened and gives you organized records for a conversation with your insurance company.
Use temporary protection only when it is safe
If a small section is loose and can be secured safely from the ground, keep the area protected from people and further disturbance. Avoid forcing panels back into place, sealing over wet materials, or covering a large damaged area without understanding what is behind it. Improper temporary work can conceal moisture or create additional problems. If water is entering the home, use a safe interior container or other temporary measure while arranging professional help, and treat active leaks as a priority.
Arrange an inspection before deciding on repairs
A professional inspection can distinguish isolated siding damage from problems involving trim, flashing, sheathing, or moisture behind the exterior. It can also help determine whether damaged or cracked sections are suitable for repair or whether broader work should be considered. The right next step depends on the location, extent, and condition of the damage, not just how the siding looks from a distance.
Referred Restoration can also evaluate related exterior storm damage as part of an exterior inspection. Insurance coverage and claim outcomes depend on your policy, the cause of the damage, and the facts documented for the event. A contractor may assist with inspection and insurance coordination, but no one can promise that a claim will be covered. Review your policy and communicate directly with your insurer while you arrange an independent, detailed assessment.
What Happens During a Siding Replacement?
A siding replacement should begin with an assessment, not a material catalog. The inspection looks at visible damage, rot, moisture concerns, inefficient areas, trim, and conditions around windows, doors, and rooflines. In Minnesota, freezing winters, heavy precipitation, and hail can expose weaknesses that are easy to miss from the ground. A careful review helps determine whether the home needs isolated repairs or a broader replacement plan.
From there, the homeowner and contractor can discuss a custom solution. Referred Restoration offers vinyl, fiber cement, LP SmartSide, and wood siding options. The right choice depends on the home’s exposure, desired appearance, maintenance preferences, and the condition of the existing exterior. Styles and colors can be selected to complement the home rather than treating one material as the best fit for every project.
Preparing the home for installation
Before new siding goes up, the crew prepares the work area and removes the existing material where replacement is planned. This stage provides an opportunity to inspect the underlying wall for damage or areas that need attention. The team also works around windows, doors, corners, vents, and other transitions. Proper preparation matters because siding is part of a larger exterior system, and water management depends on how those components meet.
Homeowners can help by clearing objects near the walls, moving vehicles away from the work area, and identifying exterior features that need special care. If landscaping, outdoor furniture, or other items could interfere with access, discussing them before work begins can reduce delays.
Custom fitting and installation
Siding is custom-fitted to the home. Installers measure and cut panels or boards to follow the home’s dimensions, rooflines, openings, and architectural details. They install the selected material with the appropriate trim and finishing pieces, paying attention to alignment and clean transitions. This is also when the planned color, profile, and layout become visible across the exterior.
Installation generally takes a few days to a week, but that is only a typical range. The actual schedule depends on the home’s size, the materials selected, the scope of preparation, weather, and details such as gables, dormers, and multiple levels. A clear inspection and project plan provides a more useful expectation than a one-size-fits-all promise.
Cleanup and completion checks
After installation, the crew should clean the work area and review the finished exterior. Completion checks include looking for consistent lines, secure panels or boards, finished trim around openings, and details that could allow water to enter. The homeowner should walk the property with the project team, ask questions, and confirm that agreed-upon work has been addressed.
Homeowners in the area can learn more about exterior restoration in Cottage Grove or contact Referred Restoration online to discuss an inspection and next steps.
Contact Referred Restoration online to arrange a free siding inspection before choosing repair or replacement. You can also call (763) 726-4245.
Frequently Asked Questions
What type of siding is best for a Minnesota home?
There is no single best choice for every home. Vinyl can be a low-maintenance option, fiber cement is known for strength and durability, LP SmartSide offers an engineered-wood appearance, and wood provides a natural look. The right fit depends on your home’s exposure, moisture conditions, maintenance preferences, architectural style, and project goals. An inspection and material discussion can help narrow the options.
How can I prevent moisture problems behind siding?
Start by keeping water moving away from the walls. Make sure gutters and downspouts are clear and directing runoff away from the foundation. During an installation or repair, the contractor should also evaluate flashing, wall penetrations, trim, and the drainage layer behind the siding. These details help water that gets past the exterior move safely back outdoors instead of collecting in the wall.
How often should siding be inspected or maintained?
Check the exterior at least seasonally and after severe weather. Look for cracked or loose sections, damaged trim, failed caulk, staining, soft areas, and vegetation touching the wall. Clean siding using a method appropriate for its material, and avoid forcing water behind panels or openings. If you notice rot, recurring moisture, or damage you cannot safely assess, arrange a professional inspection before the problem spreads.
Should I repair damaged siding or replace it?
Repair may make sense when damage is limited to a few cracked or damaged sections and the surrounding siding remains sound. Replacement deserves consideration when moisture, rot, repeated storm damage, widespread deterioration, or insulation and comfort concerns affect larger areas. An inspection can identify the source of the problem and help determine whether a targeted repair or a coordinated replacement will better protect the home.
Ready to Plan the Right Siding Solution?
Every home has different exposure, moisture conditions, and maintenance needs. A professional inspection can help clarify whether a focused repair or broader replacement plan makes sense for your property.
Contact Referred Restoration online to schedule a free siding inspection or discuss a custom solution. You can also call (763) 726-4245.