Vertical vinyl siding can help define a gable, entry, or other section of a Minnesota home’s exterior without requiring the whole house to use one direction of siding. The right fit depends on the home’s shape, the details where materials meet, and how water will move around openings and trim. This guide explains where vertical vinyl siding belongs in an exterior plan and what to review before choosing it.
Schedule a free siding inspection
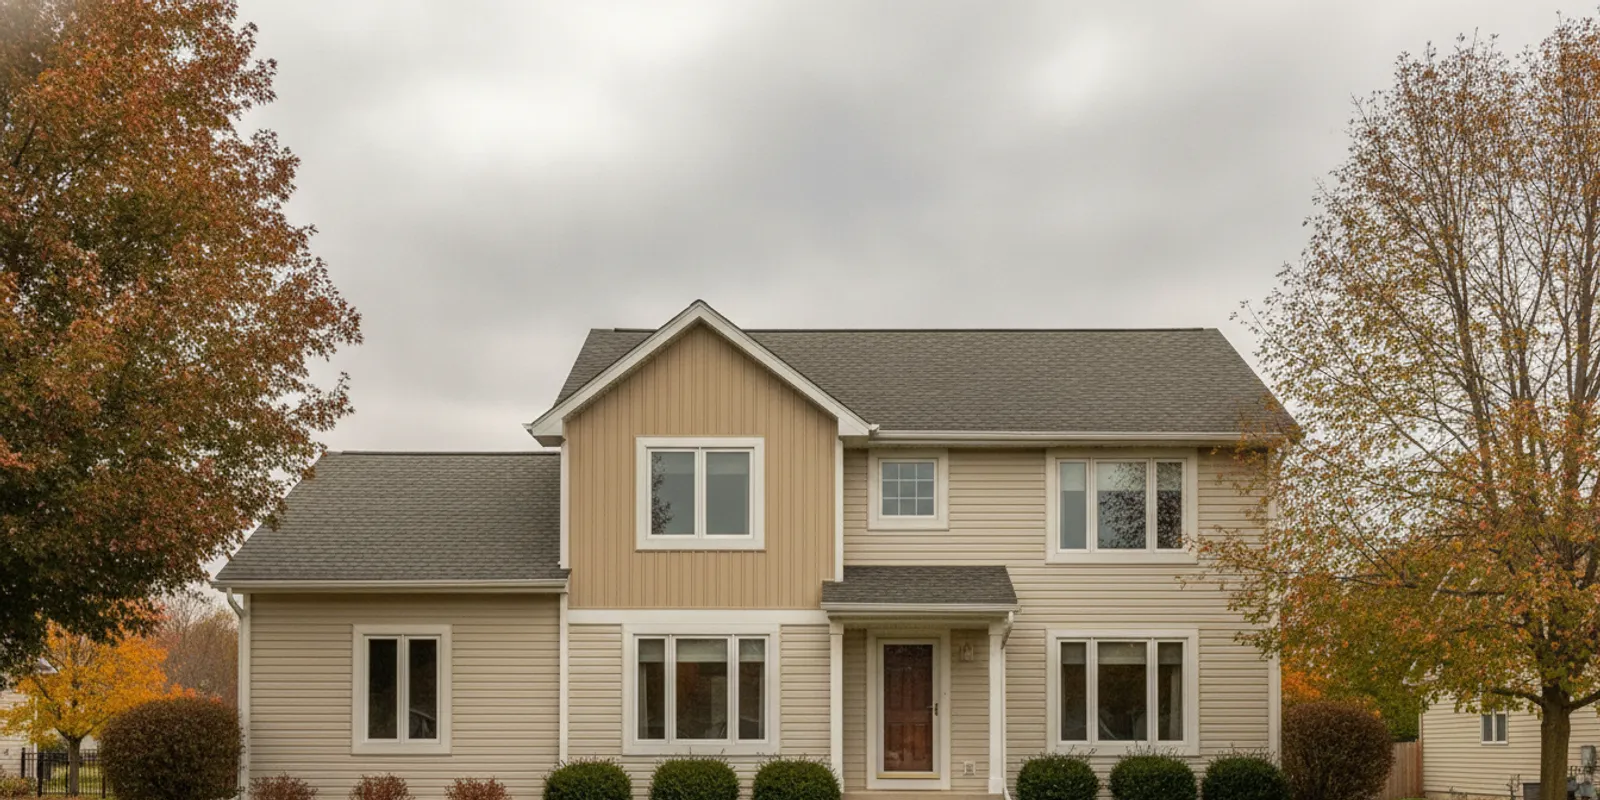
What role can vertical vinyl siding play?
Vertical vinyl siding is installed with its long visual lines running up and down the wall. That changes the way a wall reads: the eye follows the vertical lines, while horizontal siding draws attention across the elevation. Homeowners often consider vertical siding for a defined area rather than as an automatic choice for every wall.
Common locations include a front-facing gable, a recessed entry, a porch wall, or a smaller architectural section that needs a visual distinction. It can also be considered for a larger elevation when that direction suits the home’s overall design. The decision should start with the shape and layout of the house, not with a sample board alone.
On a mixed exterior, vertical siding can create contrast through direction and panel pattern while the color remains coordinated with adjacent cladding. For example, a homeowner might consider a vertical field on a gable above a main wall of horizontal siding. That is a design possibility, not a rule: proportions, windows, trim, rooflines, and neighboring surfaces all affect whether the result feels balanced.
To see how siding work fits into the company’s local service offering, visit Referred Restoration’s Rogers siding contractors page. A useful discussion begins with the specific wall or feature under consideration and the condition of the existing exterior.
Where does vertical vinyl siding fit on a Minnesota home?
Look at the exterior as a set of connected elevations. A siding choice that works on one wall still has to meet the roof edge, corners, windows, doors, foundation, and other cladding cleanly. Vertical siding tends to be easiest to assess when it has a clear boundary: a gable outline, a corner, or a change in wall plane can help make the transition look intentional.
- Gables: A vertical pattern can emphasize the triangular shape above a lower wall. Check how the siding ends along the sloped roofline and around any vents or windows.
- Entry areas: A recessed entry or porch wall may benefit from a distinct pattern. Consider how the material will meet the door trim, soffit, and adjacent wall.
- Architectural sections: A bump-out or other change in wall plane can provide a natural stopping point. Confirm that the transition detail can be completed neatly.
- Full elevations: A whole wall or larger area can be considered when the home has a consistent arrangement of openings and a design that supports the direction. Review the appearance from the street and from nearby sides before deciding.
Scale matters. A narrow accent can look crowded if it is interrupted by several openings or trim bands. A broad section may feel disconnected if it stops at an arbitrary line. It helps to view the proposed area from a distance and to compare its width and height with the gable, windows, and surrounding walls.
For homeowners comparing siding options in the Rogers area, the overview of new siding can provide broader context. The more focused decision here is how a vertical pattern fits the particular wall and its junctions with the rest of the exterior.
How should you compare vertical and horizontal layouts?
Both orientations can be considered for different parts of one home. The table below is a planning aid, not a universal design prescription. Actual appearance and installation details depend on the selected product, wall conditions, and project plan.
| Planning point | Vertical siding | Horizontal siding |
|---|---|---|
| Visual direction | Creates upward lines and can draw attention to height or a gable. | Creates lines across the wall and can emphasize the width of an elevation. |
| Typical design use | May define a gable, entry, wall section, or broader elevation when the composition supports it. | Often considered for broad wall areas and can provide continuity across elevations. |
| Transitions to plan | Review top and bottom edges, corners, openings, and boundaries with other cladding. | Review courses at corners and openings, plus transitions to other materials or wall sections. |
| Questions for a proposal | How will the panel layout, trim, and water-management details work at this wall? | How will courses align around openings and meet the adjoining exterior? |
| Best next step | Assess the exact area, its proportions, and the installation plan. | Assess the full elevation and how it relates to neighboring walls. |
Use the comparison to clarify what you want the exterior to accomplish. If the main goal is to highlight a gable, discuss the accent area and its edges. If the goal is a consistent appearance across several walls, review how the pattern will continue around corners and openings. Neither orientation is automatically the better fit for every home.
What installation details deserve attention?
With vertical siding, the visual layout and the concealed wall preparation both matter. Ask the installer to explain how the selected product is intended to be installed, what condition the substrate is in, and how the installation plan addresses the particular wall. Do not assume that vertical panels can simply be arranged like horizontal courses turned on end.
Confirm the wall preparation
Before installation, the project plan should account for the existing cladding and any areas that need repair or removal. The wall should be assessed for unevenness, damaged material, or signs that water has affected the assembly. Ask what will be corrected before new siding covers the area, and how the crew will handle any conditions discovered during the work.
Review panel layout and fastening
Ask how the pattern will be laid out so that edges, joints, and visible lines look deliberate. Also ask how the selected siding is fastened and how the installation allows for the product’s movement as outdoor temperatures change. Follow the manufacturer’s instructions for the exact product; installation details should not be guessed from another siding type or a generic diagram.
Discuss openings and edges
Windows, doors, vents, corners, and rooflines need coordinated trim and flashing details. Ask how those areas will be integrated with the siding and how water is directed away from vulnerable joints. A neat-looking edge is important, but appearance alone does not show whether the assembly has been planned to manage water.
Building requirements can depend on the project and location. For general Minnesota building-code information, homeowners can start with the Minnesota Department of Labor and Industry and confirm which requirements apply with the appropriate local building official. This general resource is not a substitute for project-specific code guidance or the siding manufacturer’s instructions.
How do drainage and Minnesota weather affect the plan?
Siding is part of an exterior wall assembly, not a waterproofing fix by itself. The installation needs to work with the layers and details behind it so that water reaching the wall can be managed and directed out. Ask the contractor to explain the water-management approach at windows, doors, penetrations, corners, and the lower edge of the wall.
In Minnesota, the exterior faces changing temperatures and seasonal exposure. Snow, rain, wind, and freeze-thaw conditions make it sensible to pay close attention to drainage paths and transitions. This does not mean a particular orientation guarantees better performance. It means the full assembly, product instructions, and workmanship details deserve review before the siding is installed.
Look closely at how the proposed area meets the roof and ground-facing parts of the wall. Roof edges should be considered with the adjoining trim and flashing. At the bottom, ask how the siding terminates and how water can move away rather than being trapped against the wall. Downspouts, roof runoff, and nearby hard surfaces also influence the surrounding conditions, so note any existing areas where water collects or splashes onto the exterior.
If you are already seeing loose panels, gaps, cracks, or moisture concerns, identify those before choosing a new layout. The guide to vinyl siding repair in Rogers covers repair-versus-replacement considerations. A change in orientation should not distract from diagnosing the condition behind the siding.
What should you consider around trim, color, and other materials?
A vertical section usually needs a clear transition to neighboring surfaces. Trim can outline the area and create a finished edge, but its color, width, and relationship to windows can change the overall effect. Review a drawing, product sample, or clearly marked photo of the home when possible. Look at the proposed combination from several viewing distances rather than judging a small sample in isolation.
Keep the number of visual changes manageable. Siding direction, color, trim, and other exterior materials all draw attention. If the home already has strong contrasts or several different wall treatments, adding another pattern may make the exterior feel busy. If the exterior is simple, a bounded vertical section may provide a distinct focal point. These are design questions to test against the home’s actual elevations, not fixed rules.
For a broader look at other cladding, compare the homeowner’s guide to wood siding and the fiber cement siding overview. Those materials have different product characteristics and installation requirements. Use the comparisons to frame questions, not to assume that products can share identical details.
What maintenance should you plan for?
Maintenance depends on the product instructions, exposure, and the condition of the whole wall. Ask for the manufacturer’s care guidance for the specific siding being considered. As a general homeowner habit, inspect the exterior periodically and after severe weather from a safe place. Look for panels that appear loose or displaced, damaged trim, open joints, and signs of water around openings or at the wall’s lower edge.
Keep plants and stored items from blocking access to the wall so that you can notice changes and keep the area clear. Clean the siding using methods allowed by the product manufacturer. Avoid assuming that a harsh cleaner or high-pressure spray is appropriate. If you find a damaged section or recurring moisture, have the cause assessed rather than covering it with a cosmetic repair.
Maintenance should also include watching nearby components. Gutters and downspouts that spill water against a wall, or roof drainage that repeatedly wets a siding transition, can affect the exterior around the cladding. Referred Restoration’s Rogers gutter service page is relevant if a homeowner is also reviewing gutter conditions as part of a broader exterior project.
How can you assess the wall before deciding?
A simple walk-around can help you make the consultation more useful. Do not climb onto the roof or remove siding yourself. From the ground, look at each elevation and note the places where you might want a different pattern. Take a few photographs from the street and from an angle that shows how the proposed section meets the adjoining wall. Write down questions while the features are in view.
For each possible accent area, check the following:
- Boundaries: Is there a natural stopping point at a corner, roofline, trim band, or change in wall depth? If not, ask how the edge would be finished.
- Openings: Count windows, doors, vents, and other interruptions. Consider whether the vertical lines will look orderly around them and whether the trim can be coordinated.
- Existing condition: Note loose or damaged siding, soft-looking trim, staining, or recurring wet areas. These observations are not a diagnosis, but they tell the contractor what to inspect.
- Nearby drainage: Notice where roof runoff lands, whether downspouts discharge near the wall, and whether soil or paving slopes toward the house. Share persistent water concerns during the inspection.
- Whole-house view: Step back and consider how the section relates to the front door, roof shape, neighboring walls, and other exterior materials.
Then describe the outcome you want in plain terms. You might want to make a gable stand out, give an entry a distinct finish, or maintain a consistent look across the entire elevation. Ask the installer to explain how the proposal answers that goal. If you are considering a limited accent, ask whether the product and trim can be integrated with the existing cladding and how the edge will be supported and protected.
For design review, compare the siding sample with the home’s permanent features, including roofing, window frames, masonry, and trim. Check it in daylight and at different distances if samples are available. A sample viewed by itself cannot show the effect of a full wall or reveal installation details, so treat it as one input rather than the final decision.
How can you compare proposals fairly?
When you talk with contractors, compare the scope and the written installation plan rather than looking only at a siding sample. A useful proposal should make it possible to understand what area is included, what preparation is planned, how edges and openings are addressed, and what happens if hidden conditions are found.
- Identify the exact walls or architectural sections included and the proposed siding orientation.
- Ask which product and accessories are specified, and request the manufacturer’s installation and care information.
- Review preparation, removal, and any repairs to the existing wall assembly.
- Ask how the layout handles corners, window and door trim, roof edges, and transitions to other siding.
- Clarify the plan for flashing, drainage, and the lower termination of the wall.
- Ask how the work area will be protected and how the finished work will be reviewed.
- Make sure any assumptions, exclusions, or unresolved conditions are described in writing.
If proposals describe different areas or different preparation, ask each contractor to clarify the scope before comparing them. For a project in Cottage Grove, the Cottage Grove exterior restoration page provides a local point of reference. Homeowners elsewhere in the service area can use the same questions to make the consultation more specific.
Frequently asked questions
Can vertical vinyl siding be used only on one part of a house?
Yes. It can be planned for a defined area such as a gable, entry, or other wall section, if the transition to adjoining materials is addressed. The home’s proportions and the selected product’s installation instructions should guide the plan.
Does vertical siding work on every Minnesota home?
No single siding layout suits every exterior. The wall shape, openings, existing conditions, product requirements, and water-management details all matter. Review the actual elevation and the installation plan before deciding.
Is vertical siding a substitute for fixing a leak?
No. New siding should not be treated as a solution to an unidentified leak or damaged wall. Find and address the source of water and any affected materials before the new exterior is installed.
What should I ask before choosing a vertical pattern?
Ask where the pattern begins and ends, how it meets windows and trim, what preparation the wall needs, how the assembly manages water, and which product instructions the installer will follow. Request clear written answers for the project area.
Talk with Referred Restoration about your siding project
What is a practical next step?
Start by identifying the wall or feature where vertical vinyl siding might fit, then note its boundaries, nearby openings, and any existing exterior concerns. A focused inspection and a clear written plan can help you decide whether a small accent or a broader application fits your Minnesota home.
Leave a Reply
You must be logged in to post a comment.