Planning siding installation Rogers MN homeowners can understand starts with more than selecting a color. The work should address the wall behind the cladding, water management at openings, careful panel installation, and a clear final review. Knowing the sequence helps you prepare your property, compare proposals, and ask useful questions without trying to supervise every construction detail.
Contact Referred Restoration online
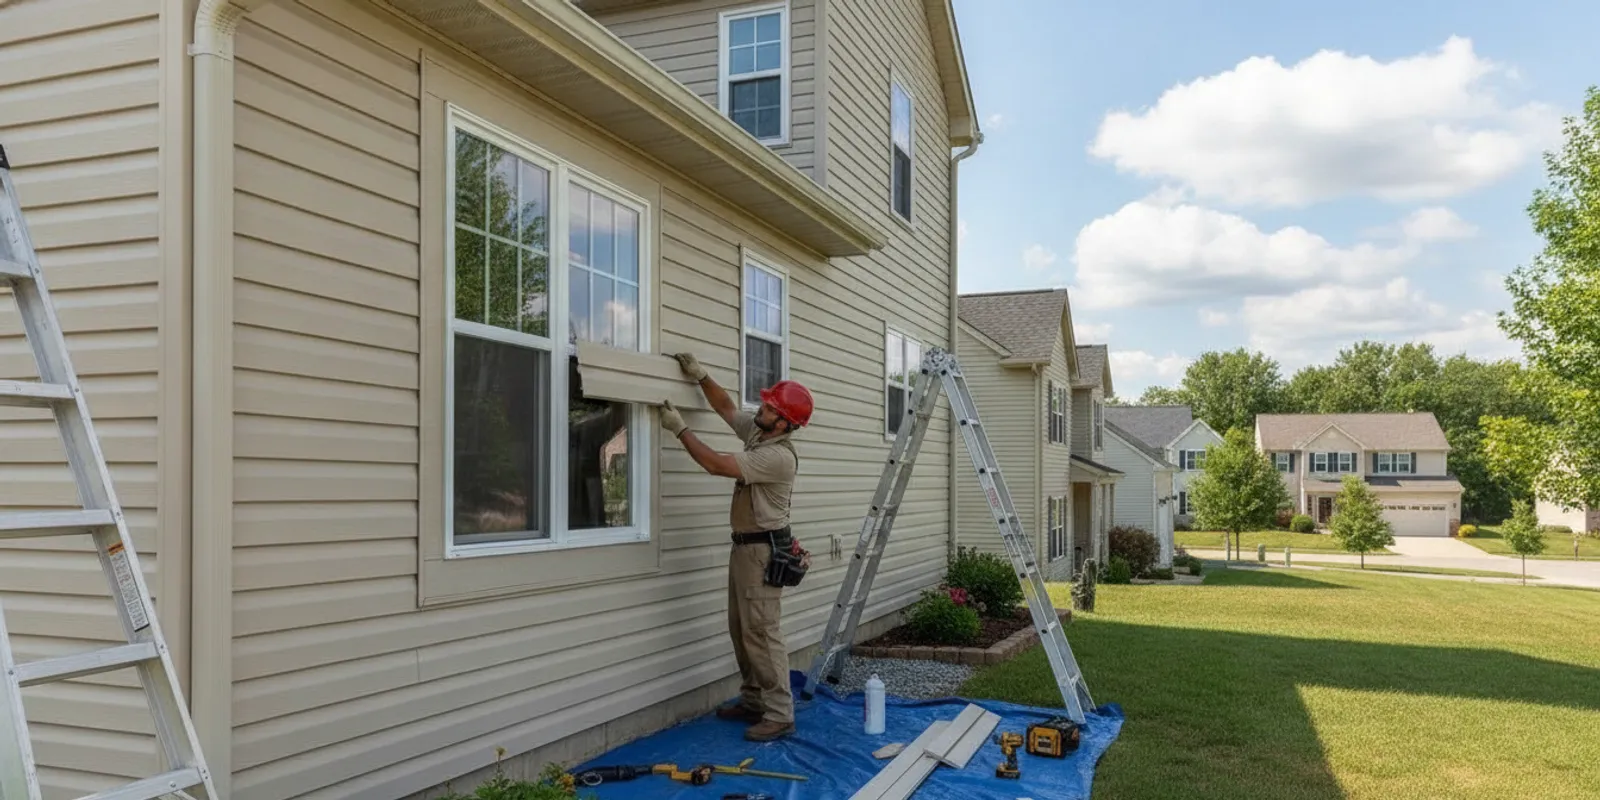
What should you clarify before siding installation begins?
Begin with a written scope that identifies the elevations and accessory areas included in the work. A front elevation may be obvious, but gable ends, dormers, porch walls, garage walls, and small sections beside a chimney can be overlooked when the plan is discussed only in general terms. Walk around the home with the project representative and mark the areas that will receive new siding.
The scope should also identify the siding product, profile, color, trim approach, removal and disposal of old materials, and expected preparation. Ask whether the proposal includes starter strips, corner pieces, utility trim, openings, and transitions to brick, stone, roofing, or another cladding. These details affect both the finished appearance and how the wall is protected.
Ask how the wall will be assessed after the existing siding is removed. Sheathing, framing, insulation, or areas around windows may look different once they are exposed. Agree in advance on how unexpected conditions will be photographed, explained, and documented before additional work proceeds. A clear process keeps a field discovery from becoming an unclear conversation.
It is also helpful to discuss the schedule and access plan. Confirm where materials may be delivered, how the crew will move around the home, how debris will be contained, and who will answer questions during the work. If other exterior work is planned, ask how the sequence will coordinate with roof replacement in Rogers or gutter installation. Roof edges and drainage paths should not be treated as unrelated details.
How can you prepare your home and yard?
Good preparation gives the crew a safer, clearer working area and helps protect your belongings. Start several days before the planned arrival if possible. Walk the perimeter and identify anything attached to the wall, resting against it, or positioned where ladders and equipment may need to go.
- Move grills, planters, toys, firewood, and patio furniture away from the exterior walls.
- Remove decorations, hanging baskets, and hardware attached to the existing siding.
- Keep vehicles away from delivery and work areas during active installation.
- Secure pets indoors and tell the crew about gates, irrigation lines, or low-voltage wiring.
- Trim back branches only where access requires it, rather than cutting more landscaping than necessary.
- Identify outdoor outlets, water sources, exterior lights, and alarm equipment that need protection.
- Close windows during dusty or noisy portions of the work.
Inside the house, vibration may affect pictures or fragile objects on walls shared with the work area. You do not need to remove everything from the home, but consider taking down delicate items near windows and exterior walls. Photograph existing conditions around landscaping, doors, windows, and decorative features. These images provide a useful reference when you review the finished project.
Ask where deliveries and waste containers will be placed. A plan may need to account for a narrow driveway, a shared walkway, a sprinkler zone, or a favorite planting bed. Discuss temporary protection before materials arrive. Also confirm whether the crew needs a person available for access or decisions during specific stages.
What happens when the old siding comes off?
Removal reveals the layers that the siding normally conceals. The installer can then examine the sheathing, wall edges, fastener areas, and portions around windows and doors. Visible staining, soft material, open joints, or damaged sections deserve attention before new cladding covers them.
Do not assume that new siding by itself resolves every underlying concern. The written scope should explain whether damaged sheathing or other exposed components are included, excluded, or handled through an agreed change. If the crew finds a concern, ask for a photograph, a plain-language explanation, and a description of what happens if it is left unaddressed. You can then make a decision based on the actual condition rather than a guess made before removal.
Removal can also reveal differences between elevations. One wall may have sound sheathing while another has more exposure to wind or moisture. An addition may use a different assembly from the original house. These variations do not automatically indicate a problem, but they do make a wall-by-wall review more useful than a broad statement about the entire exterior.
Ask how the crew will protect exposed walls if work pauses. Weather can change quickly in Minnesota. A temporary covering, a staged work area, and a plan for securing materials help keep an open wall from becoming a new source of concern.
Why do weather barriers and flashing matter?
Water management is one of the most important parts of siding installation. Siding sheds much of the rain that reaches the exterior, but wind-driven water can move behind cladding at joints, openings, and transitions. The wall assembly needs a way to limit entry and direct incidental moisture outward.
Local requirements should be confirmed for the specific property and project. The City of Apple Valley siding guidance notes that the State Building Code requires a weather-resistive barrier under siding. The applicable code details, product instructions, and existing wall condition should guide the installation conversation in Rogers.
Flashing helps manage vulnerable transitions around windows, doors, roof edges, wall intersections, and other changes in plane. Ask how the flashing will connect with the weather-resistive barrier and how water that reaches the drainage plane will move outward. A response such as “we will seal everything” is less useful than a description of the layers and transitions being used.
Windows and doors deserve special attention because their openings interrupt the wall. Discuss the condition of the existing trim, the sill area, head flashing, side details, and the way new trim will meet the opening. At a roof-to-wall intersection, ask how the siding detail will preserve drainage and avoid interfering with roofing components. At the bottom of the wall, confirm how the siding, starter detail, and clearance from grade will be handled.
Caulk can have a place at specified joints, but it should not be the only water-management plan. Sealants age and joints move. A durable assembly relies on correctly arranged layers, flashing, drainage, clearances, and installation that follows the selected product’s instructions.
How should panels, corners, and trim be handled?
Before broad panel runs begin, the crew should establish the layout. Starter strips, corners, openings, and prominent transitions influence where courses begin and end. A layout that is considered early can reduce awkward slivers of material and make visual lines more consistent across the elevation.
Panel fastening should follow the product instructions. Siding generally needs the correct fastener placement and enough allowance for movement. Fastening too tightly or placing fasteners incorrectly can affect alignment and the way the material responds to changing temperatures. Homeowners do not need to measure every fastener, but they can ask what installation instructions govern the work.
Trim has both visual and practical functions. Discuss outside corners, inside corners, window and door trim, utility penetrations, the bottom edge, and the meeting points with rooflines. If the siding meets brick, masonry, shingles, or another siding profile, ask how the transition will be finished while preserving drainage.
Confirm colors and profiles before materials are ordered. View samples outdoors in daylight and compare them with the roof, windows, masonry, and neighboring exterior features. A color can look different in direct sun, shade, and overcast conditions. Also ask how replacement pieces or future repairs would be matched if a small section is damaged later.
For a local starting point, review the Rogers siding service information and prepare a short list of questions specific to your home. A useful consultation should address the actual elevations and transitions rather than only showing product samples.
How do installation stages compare?
| Stage | What typically happens | What the homeowner can confirm |
|---|---|---|
| Scope and planning | Included walls, product, trim, access, and schedule are reviewed. | The written scope names the elevations, accessories, and decision process. |
| Protection and preparation | Landscaping, walkways, windows, and work areas are protected. | Delivery, debris, pets, gates, and sensitive features have a plan. |
| Removal and inspection | Existing siding comes off and exposed surfaces are examined. | Unexpected conditions are shown and discussed before they are covered. |
| Wall and opening work | Barrier, flashing, clearances, and opening details are prepared. | Water-management questions receive a specific answer for the assembly. |
| Panels and trim | Courses, corners, openings, transitions, and accessories are installed. | Lines look consistent and edges are complete without blocked drainage. |
| Cleanup and review | Debris is collected and the finished exterior is examined. | Open items, care information, and follow-up responsibilities are documented. |
This sequence is a planning framework, not a promise that every home will follow identical steps. Weather, wall condition, product requirements, and the size of the project can change the order. What matters is that the crew explains meaningful changes and keeps the scope understandable.
What should you expect during installation day?
On the first active day, confirm the work limits and any areas that need special protection. Materials may be staged near the home, and removal can be noisy. Keep children and pets away from the work zone, and use the agreed access route rather than walking through an active area to inspect progress.
It is reasonable to request progress updates at natural checkpoints: after removal, after wall preparation, and before the final cleanup. These pauses give you a chance to ask about exposed conditions without interrupting every task. If you see something that appears different from the agreed plan, note the location and ask the project contact about it.
Do not climb scaffolding, ladders, or the roof to inspect elevated work. A homeowner can review accessible areas from the ground and request photographs of upper walls, roof edges, and high openings. Safety is more important than getting a close view of one detail.
Weather may affect the daily plan. Wind, rain, freezing conditions, or an exposed wall can require a pause or a change in sequence. Ask how unfinished materials will be secured and how the next work period will begin. A short delay with a protected wall is preferable to rushing a detail that needs proper conditions.
How should you review the finished siding?
Schedule a final walkthrough with the project representative. Review every elevation from a safe position, including the front, rear, sides, garage, porch, and upper areas that can be seen from the ground. Look at the main visual lines first, then examine the details around openings and transitions.
- Check that panel courses appear straight and consistently aligned.
- Look for loose pieces, visible gaps, damaged edges, or unfinished sections.
- Review corners, starter areas, window trim, door trim, and utility penetrations.
- Check transitions to rooflines, masonry, decks, porches, and other cladding.
- Confirm that vents, lights, outlets, and exterior equipment remain usable and properly finished.
- Look at ground-level clearances and confirm that soil, mulch, or debris is not covering a required detail.
- Confirm that landscaping, walkways, driveways, and outdoor items are reasonably clear of construction debris.
Use your original photographs to compare areas that were difficult to see during construction. If something needs attention, identify the elevation and approximate location rather than describing it only as “the side.” Take a new photograph and ask that the item be recorded with the next step and responsible contact.
Request product and care information, the final written scope, and any documentation for changes made during the work. Keep these records with home maintenance documents. They can help explain what was installed if you later plan another exterior project.
What questions help you compare siding installation proposals?
Comparing proposals works best when each contractor is responding to the same questions. A short proposal may appear easier to read, but it can leave important assumptions unstated. Ask for enough detail to understand what is included without requiring technical jargon.
- Which areas are included? Ask whether gables, dormers, garages, porches, and small returns are part of the scope.
- What happens to existing siding? Confirm removal, disposal, and whether the plan changes if multiple layers are found.
- How will exposed walls be assessed? Ask how sheathing, framing, and water-damaged areas will be documented.
- What wall barrier and flashing details are planned? Request a project-specific explanation for windows, doors, roof edges, and wall intersections.
- Which trim and accessories are included? Look for corners, starter components, opening trim, utility details, and transitions.
- How are changes approved? Clarify who explains an unexpected condition and how your decision is recorded.
- How will the site be protected? Discuss landscaping, walkways, windows, deliveries, debris, and daily cleanup.
- How will the final review work? Confirm who walks the property with you and how remaining items are tracked.
Related exterior work can affect the order of operations. If a roof, gutters, windows, or storm-related repairs are also under consideration, review the relevant Rogers roofing information, storm damage restoration information, or Rogers window repair page and ask how the scopes interact. One coordinated plan can make transitions easier to evaluate.
When is repair a better conversation than full installation?
Not every siding concern means every wall needs new cladding. A localized impact, a loose piece, a small opening, or damage around one transition may lead to a repair discussion. Broader warping, widespread deterioration, repeated water entry, or material that no longer performs as intended may require a more extensive evaluation. The right next step depends on the material, location, age, wall condition, and extent of the concern.
Ask the evaluator to distinguish visible siding damage from possible damage behind it. A small exterior mark may be cosmetic, while a recurring opening near a window may point to a water-management detail that needs closer review. Conversely, a single damaged panel may not justify disturbing sound surrounding areas. A written explanation helps you understand the proposed scope.
For a separate issue, the company’s Rogers gutter service information can also help when overflow or discharge is affecting the wall below. Siding, roof edges, and drainage features should be assessed together when water appears to be part of the story.
Request a siding inspection online
Frequently asked questions
Does siding installation include a weather-resistive barrier?
A weather-resistive barrier is part of the wall assembly under siding, and applicable code requirements should be confirmed for the property. Ask what the written scope includes, whether an existing barrier will be evaluated, and how gaps or damaged areas will be addressed.
Should flashing be checked around windows and doors?
Yes. Openings interrupt the wall and are important water-management transitions. Ask how flashing will integrate with the barrier, sill, head, side details, and new trim for the selected assembly.
Can new siding cover damaged sheathing?
Do not assume it should. Once old siding is removed, visible damage should be photographed and reviewed. The scope should state whether the affected material will be repaired, replaced, or handled through a documented change.
How can I inspect upper siding safely?
Stay on the ground and ask the project representative to review elevated areas from a safe location or provide photographs. Do not climb ladders, scaffolding, or the roof to inspect the work yourself.
What should I keep after the project?
Keep the written scope, approved changes, product and care information, final walkthrough notes, and photographs. These records make future maintenance conversations clearer.
When the scope is clear, the wall assembly is reviewed carefully, and the final walkthrough is documented, siding installation becomes a more manageable process from preparation through completion.