A Minnesota roof has to handle hail, high winds, heavy snow, and fast weather changes. That makes the installation process just as important as the shingles or metal panels selected for the home.
For a broader overview, see the complete residential roofing systems guide.
Professional roofing installation includes a roof inspection, a solution designed for the home’s condition and Minnesota weather, careful installation of the complete roof system, and a final quality check. Homeowners should be able to ask what will be done, which materials will be used, and how the contractor will protect the property during the work.
Referred Restoration follows a straightforward process: inspection, custom solution, and professional installation. A typical replacement takes one to three days depending on the home’s size and the weather, but the visible timeline is only part of the story. The details beneath the finished surface often determine how well the roof performs.
Contact Referred Restoration online or call (763) 726-4245 to discuss your roof.
What Does Professional Roofing Installation Include?
Professional roofing installation is more than placing new shingles over an existing roof. It is a coordinated process that begins with understanding the home, the condition of the roof system, and the weather demands in the local area. For Minnesota homeowners, that preparation helps the finished roof address the problems that led to the project in the first place.
Referred Restoration follows a three-step process: a free inspection, a custom solution, and professional installation. The inspection gives the contractor an opportunity to assess visible damage, aging materials, roof surfaces, flashing, ventilation, and areas where water may be entering. It also helps distinguish between a repairable issue and a roof that needs more extensive work.
Planning the right solution
After the inspection, the plan should reflect the home’s layout, existing roof conditions, and the selected roofing system. A professional discussion should explain what work is recommended, which areas need attention, and how the installation will be organized. This is the point where homeowners can ask practical questions about material choices, ventilation, flashing, edge details, and how the crew will protect landscaping and other parts of the property.
A sound design matters because a roof is a system, not a single surface. The roof deck, underlayment, shingles or panels, flashing, ventilation, and drainage details all need to work together. If the underlying structure or supporting surfaces require attention, those conditions should be identified before the new exterior materials are installed.
Protecting the property during installation
Preparation should continue beyond the roof itself. Before work begins, the crew should establish a safe work area, protect nearby siding and landscaping, and plan how removed materials will be handled. During installation, careful staging and cleanup reduce the risk of loose debris affecting the driveway, yard, pets, or family members.
- Inspect the roof and identify damage, aging, and vulnerable details.
- Develop a solution that fits the home’s structure and weather exposure.
- Install the roofing system with attention to underlayment, flashing, ventilation, and edge conditions.
- Protect surrounding property and maintain an orderly work area.
- Complete a final cleanup and review the finished work with the homeowner.
That final review is an important part of the experience. Homeowners should know what was completed, what was observed during installation, and whether any follow-up recommendations remain. Clear communication at each stage makes it easier to understand the work and recognize a thorough, professionally managed installation.
What Are the Main Steps in Roofing Installation?
A dependable roof replacement is a sequence of connected decisions, not simply a matter of placing new shingles over an old surface. The crew must confirm that the roof is suitable for the planned system, protect the home during the work, and install each layer in the correct order. A sound design and structure are fundamental to a roofing system, as noted in the NRCS conservation standard for roofs and covers.
- Inspect the existing roof and plan the work. The process begins with an inspection of the shingles, flashing, vents, gutters, roof edges, and visible areas around the attic. The contractor also considers the roof’s slope, layout, existing layers, access points, and weather conditions. This information guides the material selection, scheduling, ventilation plan, and protection needed for landscaping and exterior surfaces. For storm-related damage, photographs and inspection notes can also help organize the next steps with the homeowner and insurance carrier.
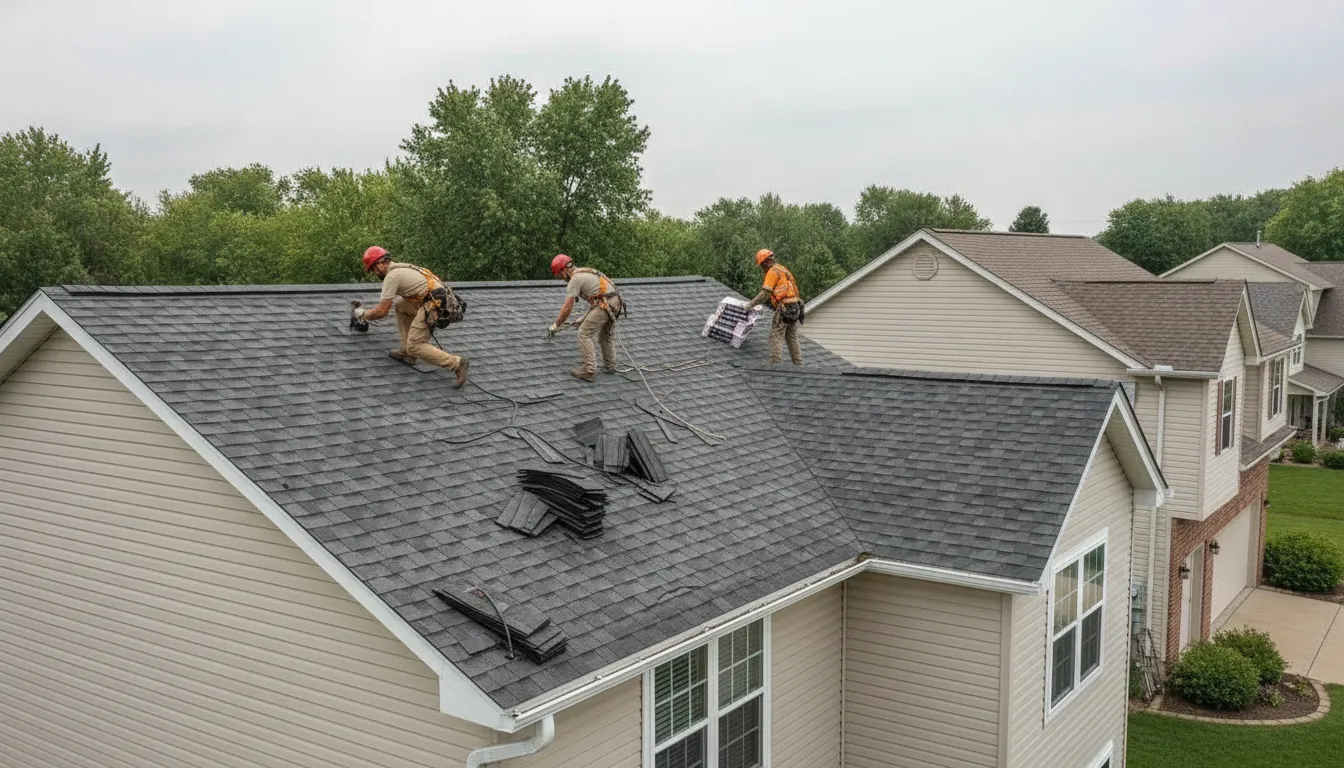
- Prepare the property and work area. Before tear-off begins, the crew protects doors, windows, siding, plants, walkways, and other areas near the roof. Materials, equipment, and debris containers are positioned so the crew can work safely and keep the site organized. Homeowners should receive clear information about access, noise, pets, vehicles, and any items that need to be moved away from the house.
- Remove the old roofing materials. The tear-off exposes the roof deck and reveals conditions that cannot always be evaluated from the surface. Workers remove shingles, underlayment, loose fasteners, and damaged flashing as specified in the project plan. They should control debris throughout this stage rather than allowing loose materials to collect around the property.
- Check and repair the roof deck. Once the old covering is removed, the exposed deck is examined for rot, water damage, weakened panels, gaps, and unsuitable fasteners. Any necessary repairs should be addressed before the new roof system is covered. Skipping this step can leave a structural problem beneath an attractive new surface. The deck must provide a stable base for the underlayment and shingles.
- Install underlayment and flashing. The crew installs the specified underlayment across the prepared deck, along with ice and water protection where the roof design and local conditions call for it. Flashing is placed or replaced around chimneys, walls, valleys, skylights, vents, and other transitions where water could collect or move beneath the shingles. Careful overlaps and secure fastening help these layers work as a system.
- Install the shingles or other roof covering. Shingles are laid in the manufacturer’s required pattern and fastened in the correct locations. Courses must remain aligned, and details at valleys, eaves, rakes, penetrations, and roof edges need special attention. The installation technique matters because research has found that roofing assembly performance is strongly influenced by design, installation methods, and environmental conditions. Material guidance should be followed rather than improvised in the field.
- Complete ventilation, ridge, and edge details. The crew finishes ridge caps, vents, drip edges, pipe boots, and other roof accessories. Ventilation should be coordinated with intake openings so the attic can exchange air appropriately without creating unintended paths for moisture. The EPA’s ventilation guidance connects effective ventilation with acceptable indoor air quality, while proper roof ventilation also supports the long-term condition of the roof structure.
- Inspect the finished work and clean the property. A final review checks exposed fasteners, flashing, alignment, roof penetrations, ridge details, gutters, and visible areas around the home. The crew should use magnetic tools or comparable methods to collect stray fasteners and remove roofing debris from the ground. Before the project is considered complete, the homeowner should receive an explanation of the finished system, maintenance considerations, and any items that require follow-up. A typical professional roof replacement takes one to three days, depending on the home’s size and prevailing weather conditions, according to Referred Restoration’s customer guidance: roof replacements typically take 1-3 days depending on size and weather.
Which Quality Details Matter Most in Minnesota?
Minnesota roofing has to handle snow, ice, wind, freeze-thaw cycles, and fast weather changes. A quality installation is not just a finished layer of shingles. It is a coordinated roof system in which the deck, underlayment, flashing, ventilation, and fastening all work together to move water away from the home and protect the structure below.
Start with the roof deck
Before new roofing materials go down, the installer should inspect the roof deck for rot, soft areas, moisture damage, or other conditions that could compromise the finished system. Shingles cannot correct a weak surface underneath them. The design should account for structural integrity and the way the entire roof system will perform, not simply cover visible damage. The NRCS guidance on roofs and covers emphasizes sound design as a fundamental part of a dependable roofing system.
Control water at vulnerable transitions
Underlayment provides an additional layer of protection beneath the shingles, while flashing helps direct water around valleys, roof edges, chimneys, vents, and wall intersections. These transition points deserve careful attention because water can enter where two surfaces meet, even when the larger field of shingles appears intact. Ask how the contractor will handle existing flashing and whether damaged materials will be replaced rather than covered. For more detail on how installation quality connects to leak prevention, read about proper roof installation techniques.
Balance ventilation and fastening
Attic ventilation helps manage moisture and heat within the roof assembly. It should be planned as part of the system, with intake and exhaust working together instead of relying on a single vent type. The EPA identifies ventilation as important for acceptable indoor air quality, and the roof assembly also benefits from thoughtful moisture management. You can review the EPA ventilation guidance for the broader principles behind effective ventilation.
Fastening is another detail homeowners can ask about. Correct nail placement, adequate penetration, and a pattern suited to the selected material help shingles remain secure during Minnesota wind. Research on roofing assemblies likewise finds that performance depends heavily on design, installation technique, and environmental conditions, rather than material choice alone. See the published research on roofing assembly performance for that technical context.
Plan around Minnesota weather
Weather planning matters before and during the work. A professional crew should account for precipitation, wind, temperature, and the need to keep the roof protected if conditions change. Ask how materials will be staged, how exposed areas will be covered at the end of each workday, and how cleanup will be handled. These practical details reveal whether the installation plan is built for Minnesota conditions instead of treated as a one-size-fits-all job.
How Do You Choose Roofing Materials for Minnesota Weather?
Minnesota roofing materials need to match more than a home’s appearance. Seasonal temperature swings, heavy snow, hail, wind, and summer sun all affect how a roof performs. During a roofing installation, the right choice depends on the roof’s slope, existing structure, ventilation, exposure, and the homeowner’s long-term plans. A material that works well on one Rogers home may not be the best fit for another.
Asphalt shingles remain a practical choice for many Minnesota homes. They offer a familiar appearance, broad color selection, and a proven installation process. According to Referred Restoration’s service guidance, asphalt shingles typically last 20 to 30 years when properly selected and installed. Explore this guide to professional roofing installation standards for more detail on what a quality shingle project should include.
Metal roofing is another option to discuss, especially when durability and a longer service life are priorities. Metal systems can remain functional for 40 years or longer, but the material still requires careful detailing around penetrations, edges, valleys, and flashing. A professional should evaluate how the system will handle snow shedding and water movement on the specific roof rather than treating metal as a universal solution.
| Material | Potential strengths | Questions to discuss |
|---|---|---|
| Asphalt shingles | Versatile appearance, established installation methods, and a typical service life of 20 to 30 years | Which shingle grade, ventilation plan, and flashing details suit the roof? |
| Metal roofing | Long service life, with many systems remaining functional for 40 years or longer | How will the design address snow, fasteners, transitions, and water drainage? |
| Cool-roof shingles | Designed to reflect more solar energy than some conventional roofing products | Will the product’s performance fit the home’s orientation, insulation, and ventilation? |
Cool-roof shingles can also be worth considering when summer heat management is part of the home’s goals. Learn more about quality roofing installation materials before choosing a product. For a direct comparison of the two most common approaches, review this resource on roofing installation expertise.
The best decision is usually the one supported by a roof-specific inspection and a clear explanation of tradeoffs. Ask how the material fits the structure, ventilation, weather exposure, and expected service life. That conversation helps keep roofing installation focused on sound performance rather than a product label alone.
What Should Homeowners Expect on Installation Day?
Installation day should feel organized, not mysterious. Before work begins, the crew should confirm the day’s plan, identify access points, and explain how materials, equipment, and debris will move around your property. Ask who your primary contact is if weather or an unexpected condition changes the schedule. A typical roof replacement takes one to three days, depending on the home’s size and prevailing weather conditions, so the crew should communicate whether the current forecast supports starting and how they will handle a delay.
Communication and protection come first
A professional crew protects more than the roof. Workers should use designated paths for carrying materials and take reasonable steps to protect landscaping, siding, windows, driveways, and nearby outdoor items. You may see tarps, ground protection, magnetic sweeps, and carefully placed staging areas. These measures do not eliminate every piece of debris during active work, but they show that the crew is managing the site rather than treating cleanup as an afterthought.
Material handling should also be deliberate. Shingles, underlayment, flashing, and other components need to arrive in good condition and be stored where they will not block entrances or damage the property. If the crew discovers damaged decking, inadequate ventilation, or another condition that affects the installation, the contractor should document it and explain the available next step before proceeding. A sound roofing system depends on sound design and structure, not just the visible roof covering.
Weather awareness matters in Minnesota
Roofing work is exposed to wind, rain, temperature changes, and rapidly shifting Minnesota conditions. The crew should monitor the forecast and keep vulnerable areas protected if work is interrupted. Homeowners should not feel pressured to continue simply because materials are already on site. A careful contractor explains what can be completed safely, what must wait, and how the home will be secured overnight when necessary.
Storm damage may add documentation and inspection steps to the process. Referred Restoration provides assistance with insurance claims related to weather damage, but homeowners should still review coverage decisions directly with their insurance company. For a broader look at coordinating repairs after a storm, see this guide to an expert roof installation contractor.
Cleanup should be part of the plan
At the end of each workday, the crew should remove loose materials, secure the site, and leave walkways reasonably clear. Final cleanup should include a ground inspection for nails and scraps, removal of protective coverings, and a walkthrough of the completed work. If you notice debris, damaged property, or an unanswered question, raise it before the crew leaves so it can be documented and addressed promptly.
How Can You Check a Finished Roofing Installation?
A final walkthrough should help you understand what was installed and how the roof was left. You do not need to climb onto the roof to evaluate the work. In fact, staying on the ground is safer. Ask the contractor to show you key details from a safe location and explain anything that is not visible from the yard.
Use this checklist during the review:
- Look at the roof lines from the ground. Shingle courses should appear straight and consistent. Uneven lines, lifted edges, or visibly damaged materials deserve a question before the crew leaves.
- Check visible flashing and penetrations. Areas around chimneys, plumbing vents, walls, and valleys should look finished and integrated with the roof covering. Ask what was replaced, repaired, or retained.
- Ask about ventilation. A roofing system needs appropriate airflow for the home and roof design. The contractor should be able to explain the ventilation approach without dismissing the question.
- Review the attic when it is safe to do so. Look for new dampness, daylight where it should not be visible, or signs that airflow was blocked. A professional can help distinguish an installation issue from an older condition.
- Walk the property for cleanup. Check garden beds, driveways, walkways, and areas below the eaves for loose debris or fasteners. Crews should use reasonable protection during the work and leave the site orderly.
- Collect the project information. Keep the material details, care guidance, inspection notes, and contact information together. Ask who to call if you notice a concern after the first rain or strong wind.
It is also reasonable to ask how the contractor handled unexpected conditions. If damaged decking, hidden moisture, or a flashing concern changed the plan, the explanation should be specific. Clear communication is part of a professional roofing installation because homeowners need to understand what changed and why.
Contact Referred Restoration online to discuss your roofing installation questions before the next weather event.
For local homeowners, Referred Restoration provides roofing services through a process built around inspection, a custom solution, and professional installation. The right next step depends on the roof’s condition, the home’s design, and the weather exposure. A conversation should clarify those factors rather than pressure you into a decision.
Frequently Asked Questions
What are the main steps in installing a roof?
A professional project typically starts with an inspection and plan, followed by preparation of the work area, removal of unsuitable materials, deck and structure checks, underlayment and flashing installation, and careful placement of the roofing material. The final stage includes ventilation details, cleanup, and a quality review.
How long does a roof replacement take?
Many residential roof replacements take one to three days, but the schedule depends on the home’s size and weather conditions. Rain, wind, concealed damage, complex roof sections, or additional ventilation work can extend the timeline. Your contractor should explain the expected sequence before work begins. (Source: Referred Restoration.)
What should I look for in a quality roofing installation?
Look for straight, consistent material placement, properly finished edges and penetrations, secure flashing around roof openings, clear ventilation planning, and a clean site after completion. Ask how the contractor inspected the roof deck and how the finished work will be checked, rather than judging quality by appearance alone.
Can shingles be installed over an existing roof?
Sometimes, but the answer depends on the existing roof’s condition, the number of layers, local requirements, and whether the deck and flashing can be properly evaluated. A professional inspection should determine whether an overlay is appropriate or whether removal is needed for a sound installation.
How does roof ventilation affect the finished system?
Ventilation helps manage moisture and heat in the roof assembly and supports indoor air quality. It should be planned with the attic layout, insulation, intake openings, and exhaust system in mind. A contractor should explain how those components work together, not treat ventilation as an afterthought. (Source: EPA guidance.)
Ready to Discuss Your Roofing Installation?
A professional inspection can help you understand your roof’s current condition, the work it may need, and the next practical step for your Minnesota home. Referred Restoration can review your roofing installation needs and explain the process in clear terms.
Contact Referred Restoration online to ask about an inspection and next steps, or call (763) 726-4245.