
A new roof is more than a layer of shingles. In Minnesota, lasting performance depends on the condition of the roof deck. Protection at vulnerable edges and valleys, correctly installed flashing, and ventilation that helps manage winter moisture and summer heat.
Contact Referred Restoration online to discuss your roof installation questions before work begins.
A thorough roof installation begins with an inspection and a plan for the existing structure, then moves through tear-off, deck repairs, underlayment, flashing, shingles, ventilation, and final cleanup. Each stage supports the next, so shortcuts can leave hidden weaknesses beneath an otherwise attractive finished roof.
Understanding the sequence helps you ask better questions, recognize careful workmanship, and know what should happen before materials arrive. The first step is determining whether the current roof and supporting structure are ready for replacement.
What Happens Before Roof Installation Begins?
A durable roofing project starts well before the first new shingle is fastened. The preparation phase gives the contractor a chance to understand how the existing roof is performing. Identify hidden structural concerns, and design a system that fits the home’s pitch, materials, and water-shedding needs. This broader evaluation is different from simply choosing a shingle color or reviewing a complete asphalt shingle roof replacement process.
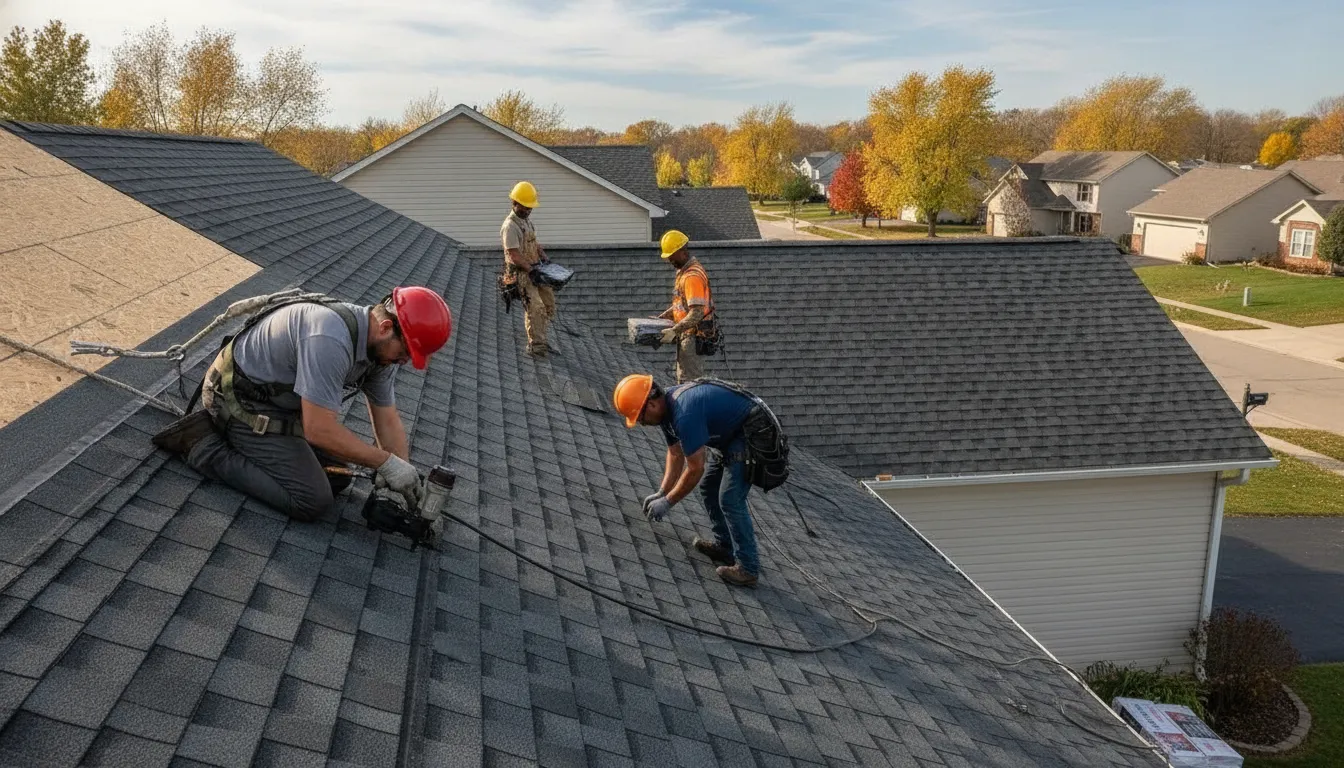
The inspection looks beyond visible shingle damage
A standard roof installation begins with a thorough inspection of the existing roof and structure, followed by removal of the old roofing materials. The inspection considers visible conditions such as curling, cracking, or significant granule loss, which can indicate that replacement should be considered. It also examines areas that are easy to overlook, including roof edges, valleys, penetrations, flashing, and attic conditions.
The roof deck, commonly made from plywood or oriented strand board, must be checked for rot and soft spots. New roofing cannot provide a sound result if it is installed over a weakened surface. A contractor should document damaged areas and explain whether deck repairs are needed before the next layer is applied. This is also the right time to discuss any recurring roof leak warning signs and trace moisture back to its likely entry point instead of treating only the interior symptom.
Preparation accounts for the home’s structure and design
Roof pitch is a primary design factor. It affects how quickly water sheds, which materials are appropriate, and which installation techniques are needed. The assessment should also consider the roof’s total weight. If a homeowner is moving to a heavier premium roofing product, the structure’s capacity needs to be evaluated before installation begins. This structural assessment helps connect material selection to the home itself rather than treating every roof as the same project.
Before work starts, the contractor should also clarify the planned water-shedding details, ventilation approach, and locations where flashing will be replaced or improved. Homeowners comparing energy-related options can review choosing cool roof shingles for installation, while those concerned about winter performance may benefit from understanding proper roof installation techniques to prevent ice dams.
What homeowners should confirm before the crew arrives
- Ask what the inspection found on the roof deck, including any soft or rotten areas.
- Confirm the roof pitch, planned materials, and how the design supports water shedding.
- Ask whether the selected roofing system adds weight that requires a structural review.
- Review the permit and local code requirements, since roof replacement generally requires permitting for safety and compliance.
- Clarify how damaged flashing, roof penetrations, and other transition areas will be handled.
- Discuss protection for landscaping, outdoor belongings, and walkways during tear-off and preparation.
A clear preparation plan makes the installation easier to follow and gives the homeowner useful checkpoints before materials cover the structure. For related exterior planning, see how roof installation and gutter system integration can affect water management around the home.
How Does Roof Installation Protect a Minnesota Home From Water?
A dependable roofing system does more than place shingles over a roof deck. It creates several water-control layers that work together, especially at the parts of a Minnesota roof most exposed to runoff, snow, ice, and freeze-thaw movement. The goal is to direct water down and away from the home while giving the deck added protection if moisture gets beneath the primary roofing material.
Underlayment creates a second line of defense
After the roof deck is inspected and prepared, the installer applies underlayment beneath the shingles. This layer acts as a secondary moisture barrier, helping protect the deck if rain or melting snow gets below the shingle surface. Felt paper is a traditional underlayment option that has been used for decades. Synthetic underlayment is a modern alternative that is lighter, stronger, and more resistant to tearing.
The choice of underlayment should fit the roof design, materials, and installation plan. It also needs to be laid out correctly, with seams and edges positioned so water continues to move downward rather than behind the membrane. A well-installed underlayment cannot compensate for poor flashing or incorrectly installed shingles, but it gives the roof system another important layer of protection.
Ice and water shield reinforces vulnerable areas
Minnesota roofs need additional protection where water can collect or where ice dams can hold water against the roof. Ice and water shield is a self-adhering membrane used in areas such as eaves and valleys. It provides extra resistance against water intrusion when snow melts, refreezes, or backs up behind an ice dam.
Eaves are the lower roof edges where runoff approaches the fascia and gutter system. Valleys are the inside angles where two roof sections meet, and they collect more water than most other roof surfaces. Because valleys are particularly prone to leaks, they require careful treatment with the appropriate underlayment and flashing. Homeowners can also review proper roof installation techniques to prevent ice dams for more Minnesota-specific context.
Eaves and valleys guide water away from the structure
At the eaves, the installation details help keep water from reaching the fascia or wicking behind it. Drip edge flashing runs along the eaves and roof rakes to direct water away from the fascia boards. Starter shingles form the first shingle layer and help create the initial seal along the eaves. These components may be easy to overlook once the finished roof is visible, but their placement affects how reliably runoff reaches the gutters.
At valleys, the installer must maintain a continuous path for water while protecting the junction between roof planes. Shingles, underlayment, and flashing need to work together without blocking the channel or leaving gaps. The same water-shedding principle applies throughout the roof: each layer should overlap the next in the direction of drainage. When these details are handled carefully. The finished roof is better prepared to manage Minnesota weather without allowing routine runoff to reach the deck or interior of the home.
Which Roofing Materials and Flashing Details Matter Most?
A roof installation is a system of layers and transitions, not just a field of shingles. Each material has a specific job in moving water away from the deck, fascia, walls, and living space. The roof pitch also influences material selection and installation methods because steeper and lower-slope areas shed water differently. A sound plan accounts for those details before the first shingle is fastened.
Build the water-shedding layers from the edges inward
At the eaves and rakes, drip edge flashing directs water away from the fascia. Without that edge detail, water can wick behind the fascia and contribute to wood rot. Starter shingles form the first sealed course along the eaves, giving the main shingle field a proper foundation. Field shingles then follow the specified overlapping and fastening pattern. The overlap is not cosmetic. It helps the courses shed water instead of creating paths for water to move beneath the roof covering.
Fastening deserves the same attention as material selection. Roofing nails should be driven flush with the shingle surface. Overdriven nails can damage the shingle, while underdriven nails can leave it raised and more vulnerable to wind-driven movement. The goal is consistent placement and pressure across the roof, following the product and roof design requirements.
| Component | What it does | Installation checkpoint |
|---|---|---|
| Drip edge | Moves water away from the fascia at the eaves and rakes. | It should be integrated at roof edges so water does not reach the fascia. |
| Starter shingles | Creates the first sealed layer for the main shingle courses. | The starter course should be aligned and sealed along the eave. |
| Field shingles | Provides the primary roof covering and sheds water through overlapping courses. | Check overlap, layout, and nails driven flush with the surface. |
| Ridge caps | Covers the roof peak and provides a finished protective seal. | Caps should be installed securely over the ridge and coordinated with ventilation. |
| Penetration flashing | Seals vent pipes, skylights, and other openings through the roof. | Every penetration needs a watertight transition, not just a surface patch. |
Give penetrations and chimneys their own inspection points
Roof penetrations are common leak locations because they interrupt the continuous roofing plane. Flashing around vent pipes, skylights, and similar openings helps create a watertight seal. Chimneys require more than a single visible strip of metal. A properly detailed chimney transition often uses stepped flashing and counter-flashing so water is redirected as it moves down the roof and around the masonry.
Durable flashing may use aluminum, galvanized steel, or copper, depending on the design and compatibility of the surrounding materials. The important question is whether the metal, fasteners, and surrounding layers work together as a water-control detail. Valleys and wall intersections deserve the same close attention because they collect or redirect substantial water.
These details are part of the broader roofing services conversation. Homeowners reviewing an installation should ask how edges, penetrations, chimney flashing, and fastening will be handled, rather than evaluating shingles by appearance alone.
How Are Shingles, Ridge Caps, and Ventilation Finished?
The final stages of roof installation turn a covered roof deck into a complete roofing system. Shingles must shed water in the right direction, ridge caps must protect the roof peak, and ventilation must move air through the attic without creating openings for moisture. In Minnesota, these details matter through summer heat, winter cold, snow, and freeze-thaw cycles.
How the shingle field and ridge are completed
After the underlayment, ice and water protection, and flashing are in place, the crew installs starter shingles along the eaves. This first course creates the foundation and helps form the initial seal at the roof edge. The main shingles then follow an overlapping pattern, with each course aligned and fastened according to the product requirements. Correct overlap supports water shedding, while accurate nail placement helps the shingles remain secure in strong wind. Nails should sit flush with the shingle surface. Overdriven nails can damage the shingle, while underdriven nails may leave it vulnerable to lifting.
The roof’s pitch influences how materials are selected and installed because slope affects how quickly water runs off the surface. Valleys and transitions receive particular attention because they collect and direct substantial amounts of water. At the peak, ridge caps are installed over the ridge line. These specially shaped shingles cover the final exposed joint, add a finished appearance, and help seal the roof’s highest point.
Why balanced attic ventilation matters
A durable ventilation system needs both intake and exhaust. Intake vents at the soffits allow replacement air to enter the attic, while exhaust at the ridge allows warm air to leave. Ridge vents are one method of exhausting warm attic air, but they work as part of a balanced system, not as a standalone opening.
In a Minnesota home, effective attic ventilation helps regulate temperature and limit moisture buildup that can contribute to ice dams. It also helps prevent heat from accumulating beneath the shingles during summer, which can prematurely degrade their materials. The installer should evaluate the existing intake path, confirm that insulation is not blocking airflow. And make sure exhaust openings are continuous and properly integrated with the roof covering.
Short completion checklist
- Starter shingles and field shingles follow the required overlap and fastening pattern.
- Nails are driven flush without damaging the shingle surface.
- Ridge caps cover the peak and are sealed into the surrounding shingle courses.
- Soffit intake and ridge exhaust work together as a balanced ventilation path.
- Valleys, eaves, and roof penetrations remain protected by their designated water-shedding details.
A careful final review should confirm that the visible shingle field, ridge line, and attic airflow all function as one system. That attention to finishing details supports dependable water shedding without relying on unsupported performance guarantees.
What Should Homeowners Check After Roof Installation?
The final inspection is not just a quick look at the new shingles. It is the point when you confirm that the roof installation is complete, the property is safe, and you understand how to care for the system. A careful walkthrough also gives the contractor an opportunity to address small concerns before they become harder to investigate.
Inspect the roof and exterior details
From the ground, look for consistent shingle lines, secure-looking ridge caps, and finished edges around the eaves and rakes. You should also ask the roofing professional to review the areas that are easiest to overlook, including valleys, roof penetrations, skylights, vent pipes, and the chimney. These locations depend on correctly installed flashing to direct water away from openings and joints.
Ask how the shingles were fastened and whether the nails were driven flush with the shingle surface. Overdriven or underdriven nails can allow shingles to lift in high winds. It is also reasonable to confirm that the roof deck was checked during the project. Plywood or OSB with rot or soft spots should be addressed before new roofing is applied, because the roof system depends on a sound surface.
Inside the attic, if it is safely accessible, check for visible daylight, damp insulation, staining, or unusual moisture. Balanced ventilation uses intake at the soffits and exhaust at the ridge. That airflow helps control attic temperature and moisture, which is particularly important through Minnesota’s cold winters and warm summers. Do not climb onto the roof or enter an unsafe attic space for an inspection. Have a professional examine anything that is difficult to reach.
Confirm cleanup and the homeowner handoff
A professional closeout should include a thorough cleanup of the work area. Walk the driveway, walkways, landscaping edges, and areas beneath the eaves with the contractor. Ask specifically about old nails, shingle fragments, underlayment scraps, packaging, and other debris. Removing old nails is an important safety step for household members, visitors, pets, and vehicles.
Before the crew leaves, collect the project information you will need later. That should include the roofing material and color, care instructions, documentation provided by the manufacturer or contractor, and the recommended process for reporting a concern. Ask whether any items remain for a follow-up visit, such as a final inspection, permit closeout, or adjustment to a gutter connection. If the new roof installation involved changes near gutters, confirm that water is flowing into the gutter system rather than behind the fascia.
Use a simple final-walkthrough checklist
- Review shingles, ridge caps, valleys, eaves, rakes, and visible flashing.
- Confirm that roof penetrations and chimney details are sealed and finished.
- Check the attic, when safely possible, for moisture, stains, or blocked ventilation.
- Walk the property to confirm that debris and loose nails have been removed.
- Verify that gutters and downspouts are clear and properly connected.
- Save the material details, project records, and contact instructions.
Know when to call a roofing professional
Contact the contractor promptly if you notice water inside the home, dampness, staining, loose-looking shingles, exposed fasteners, incomplete flashing, or debris that was not removed. Damp conditions associated with roof leaks can contribute to mold growth and may affect indoor health, so do not ignore an attic or ceiling stain. Routine maintenance also matters after the handoff. Clear gutters and remove roof debris periodically, following safe access practices or hiring a professional. Asphalt shingles commonly provide 20 to 30 years of protection, depending on their quality and environmental exposure, but regular observation helps identify problems earlier.
For a broader review of the complete asphalt shingle roof replacement process, use the related guide, or contact Referred Restoration if a post-installation concern needs professional attention.
Contact Referred Restoration online before the final walkthrough if you need help planning a Minnesota roof installation.
Frequently Asked Questions
How long does a professional roof installation take?
Most roof replacements take one to three days, depending on the size and complexity of the home, material selection, crew, and weather. Minnesota rain, wind, or unsafe temperatures can change the schedule. Your contractor should explain the planned sequence, likely work dates, and how the site will be protected if conditions shift. Referred Restoration notes that typical replacements take one to three days.
What should I expect before the old roofing is removed?
The process should begin with an inspection of the roof structure and deck. The crew identifies soft or rotted plywood or OSB, checks the roof pitch, reviews ventilation, and confirms the material plan. A permit may also be required to meet local building codes. Once the scope is clear, the old roofing is removed so the deck can be examined and prepared for the new system.
Which details help prevent leaks during installation?
Water control depends on more than the shingles. Underlayment provides a secondary moisture barrier, while ice and water shield adds protection at vulnerable Minnesota locations such as eaves and valleys. The crew should also install drip edge at the eaves and rakes, and carefully flash penetrations such as chimneys, skylights, and vent pipes. Correct shingle overlap and flush nail placement complete the water-shedding system.
How can I tell whether the job site is ready for closeout?
Walk the property with the contractor after installation. Confirm that shingles, ridge caps, flashing, and ventilation are complete, then check the roof and surrounding ground for visible debris or loose nails. Gutters should be clear, and any discovered deck or flashing repairs should be explained. Keep the installation documentation and ask when routine gutter and roof maintenance should be scheduled.
Ready to Plan Your Roof Installation?
A clear conversation can help you understand the next steps for your Minnesota home and the details that deserve attention before work begins. Contact Referred Restoration online to talk through your roof installation questions and next steps.