Author: mega

  • Choosing a Roofing Company in Waverly MN: What to Know

    Choosing a Roofing Company in Waverly MN: What to Know

    Choosing a roofing company in Waverly MN is about more than finding someone who can put shingles on a house. You want a clear assessment, a scope of work you understand, and a plan that fits your roof’s condition. Referred Restoration is based in Rogers and serves homeowners in the surrounding area; ask about availability for your address and project before scheduling.
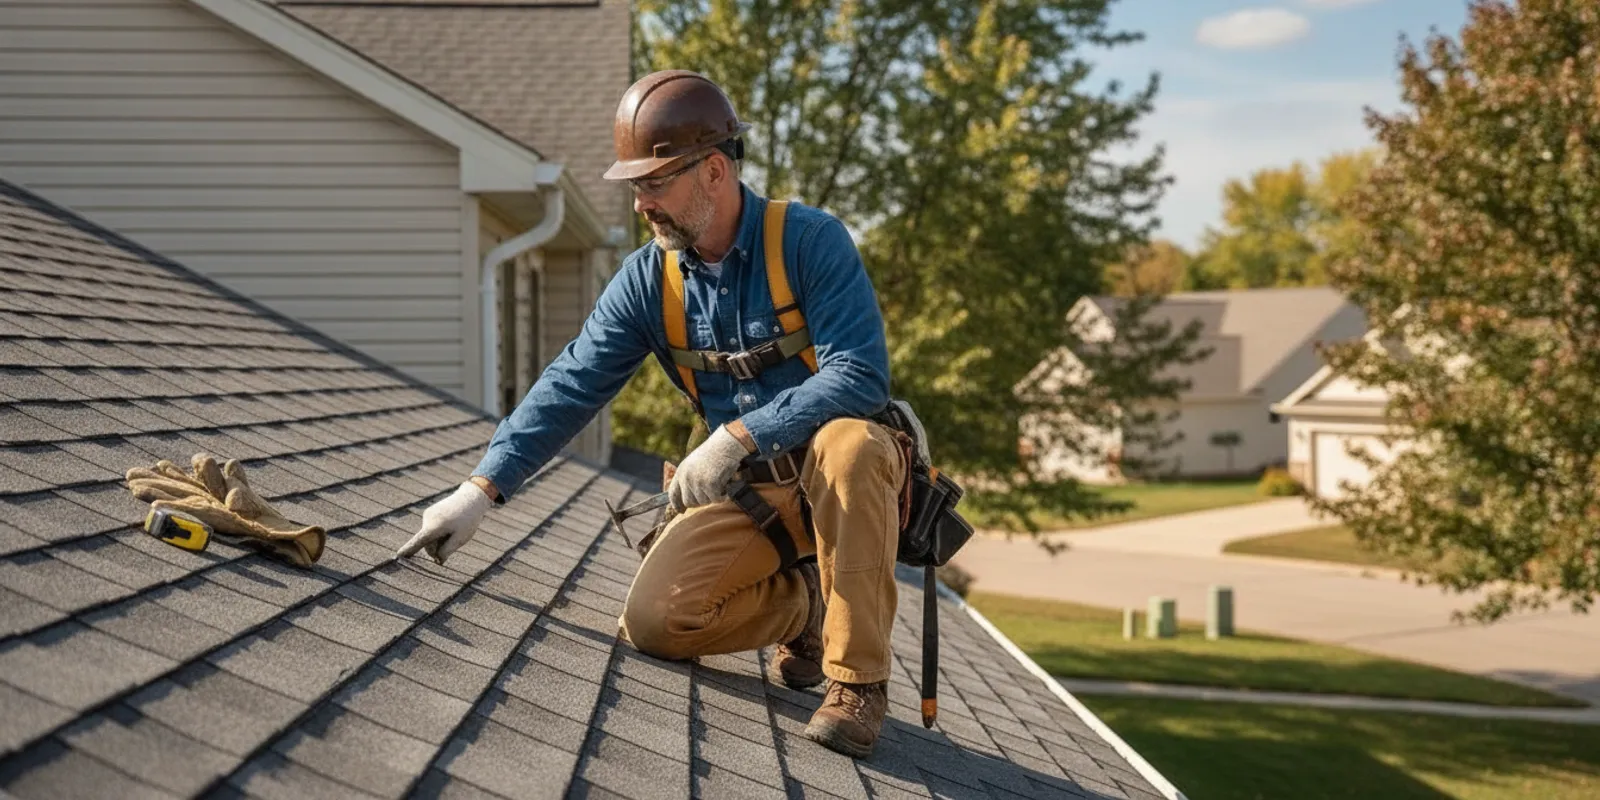
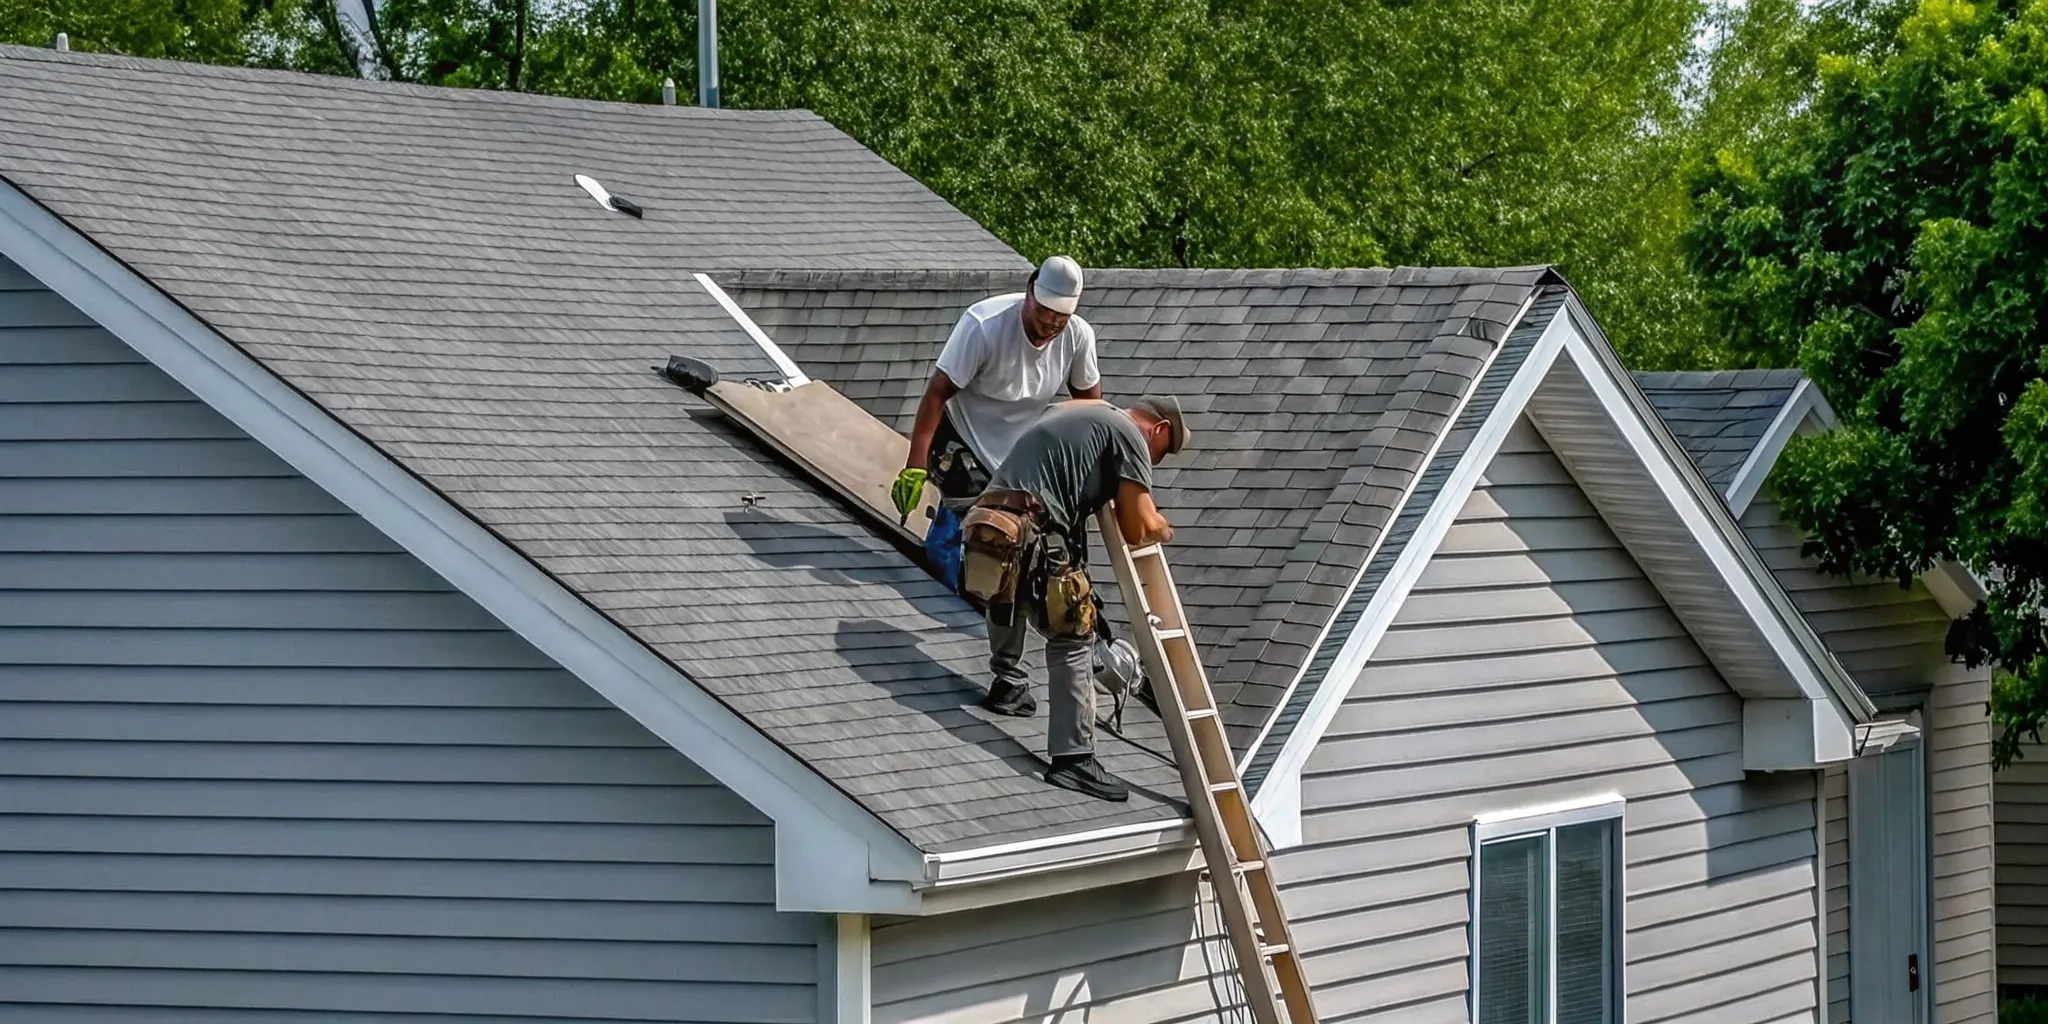
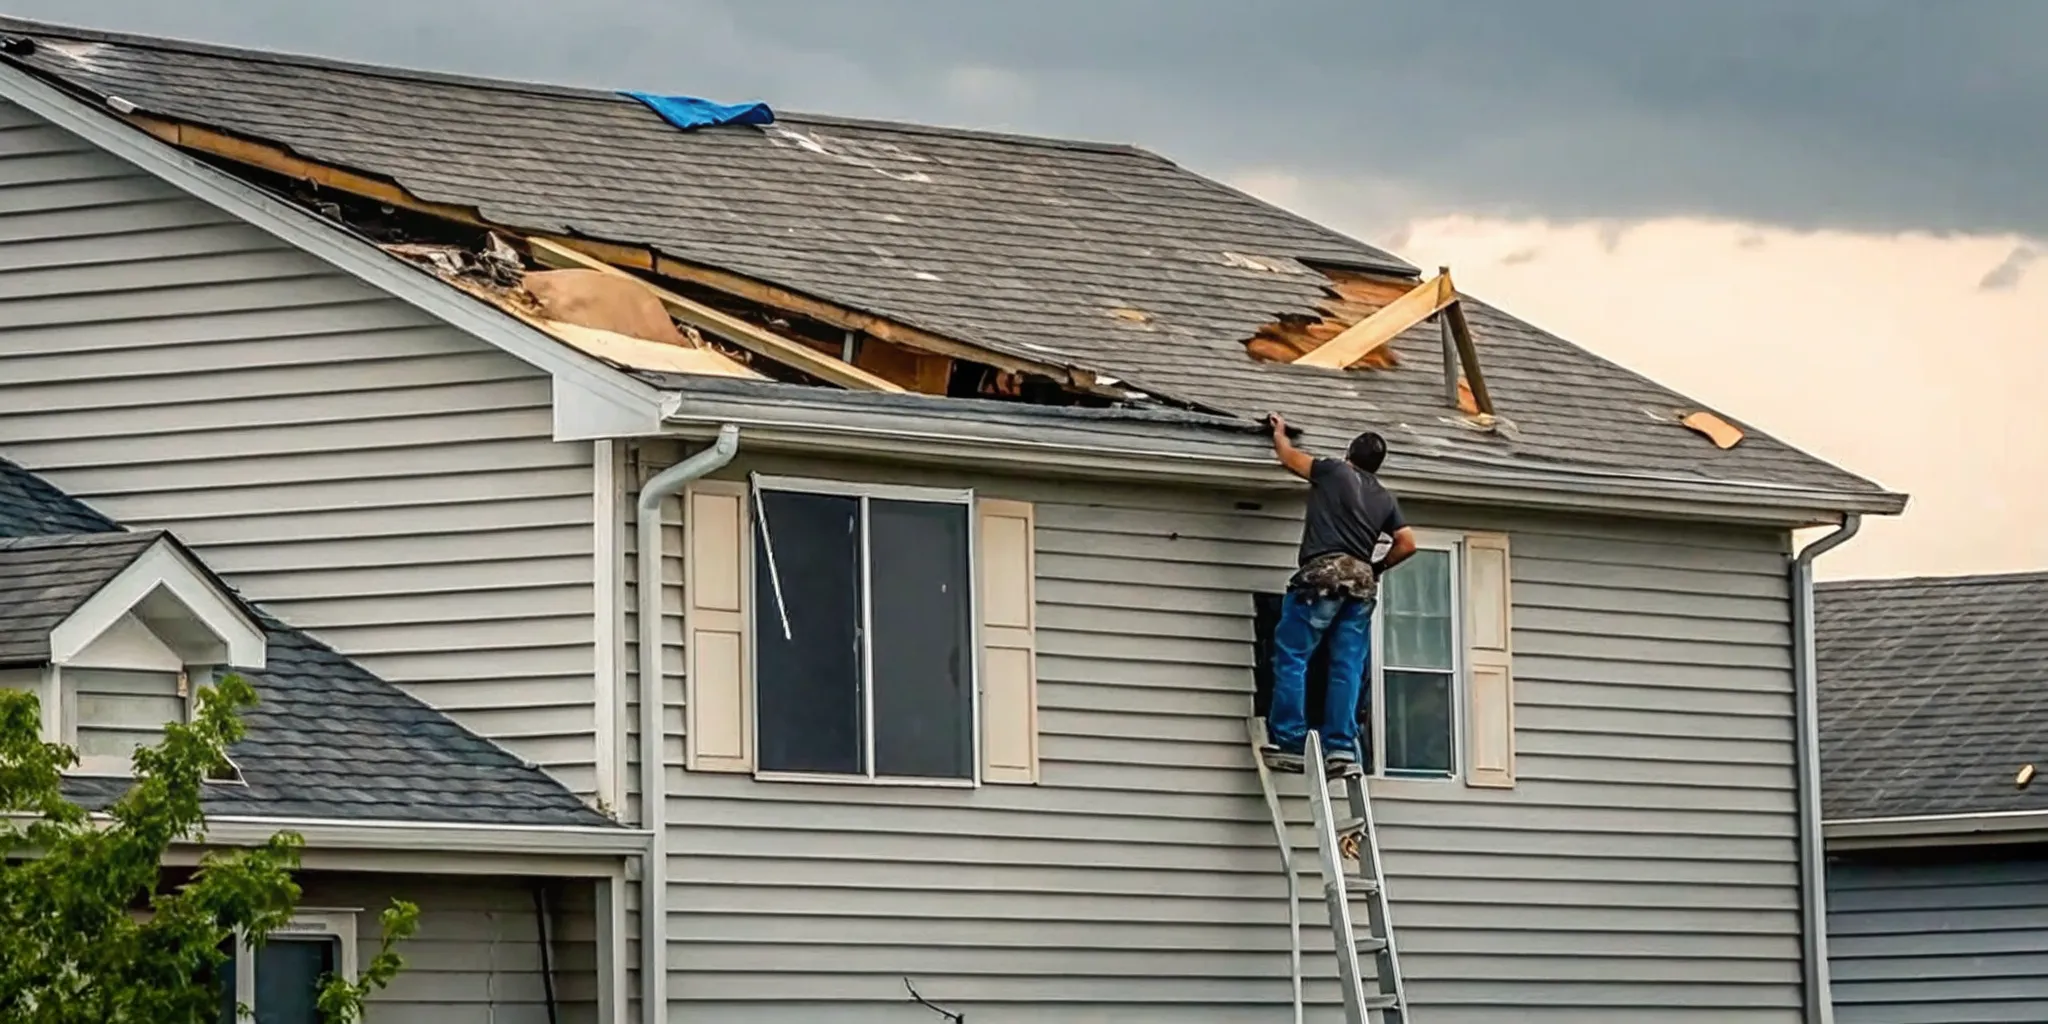
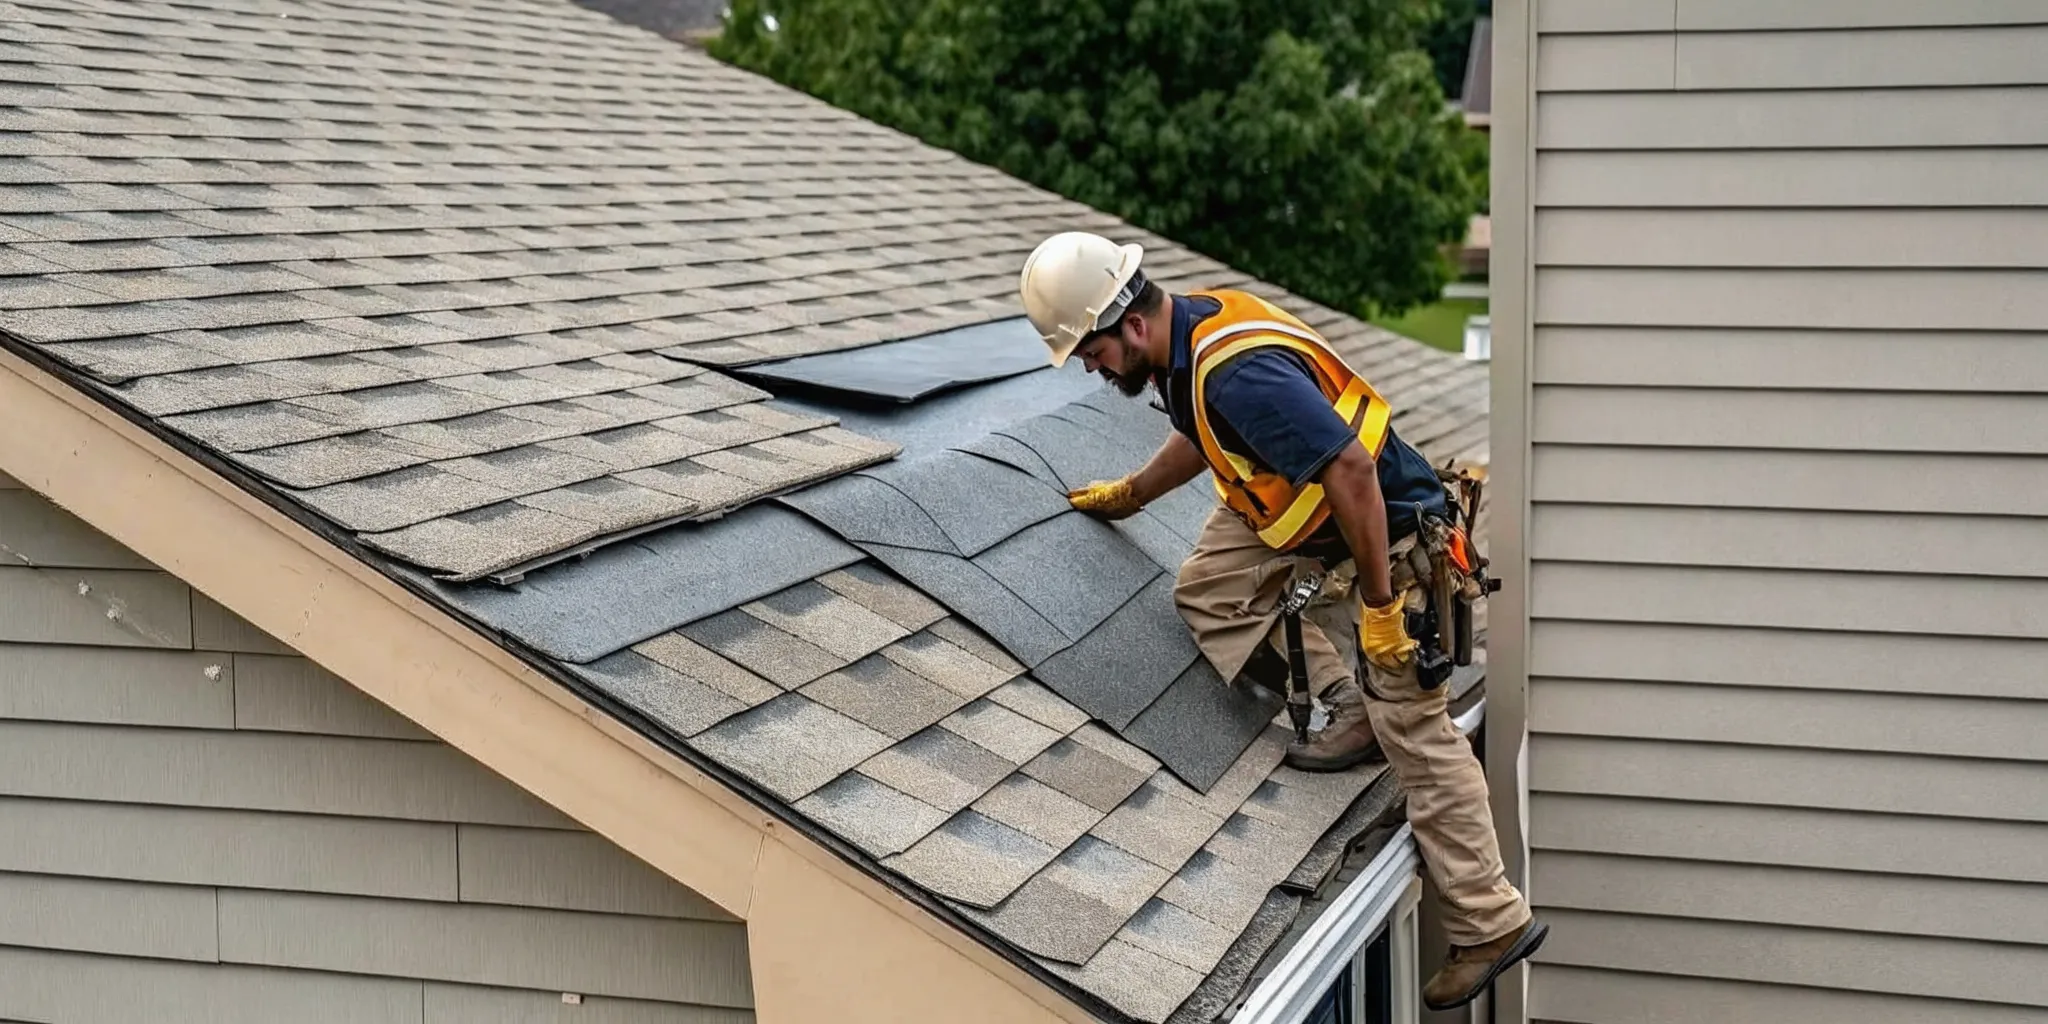
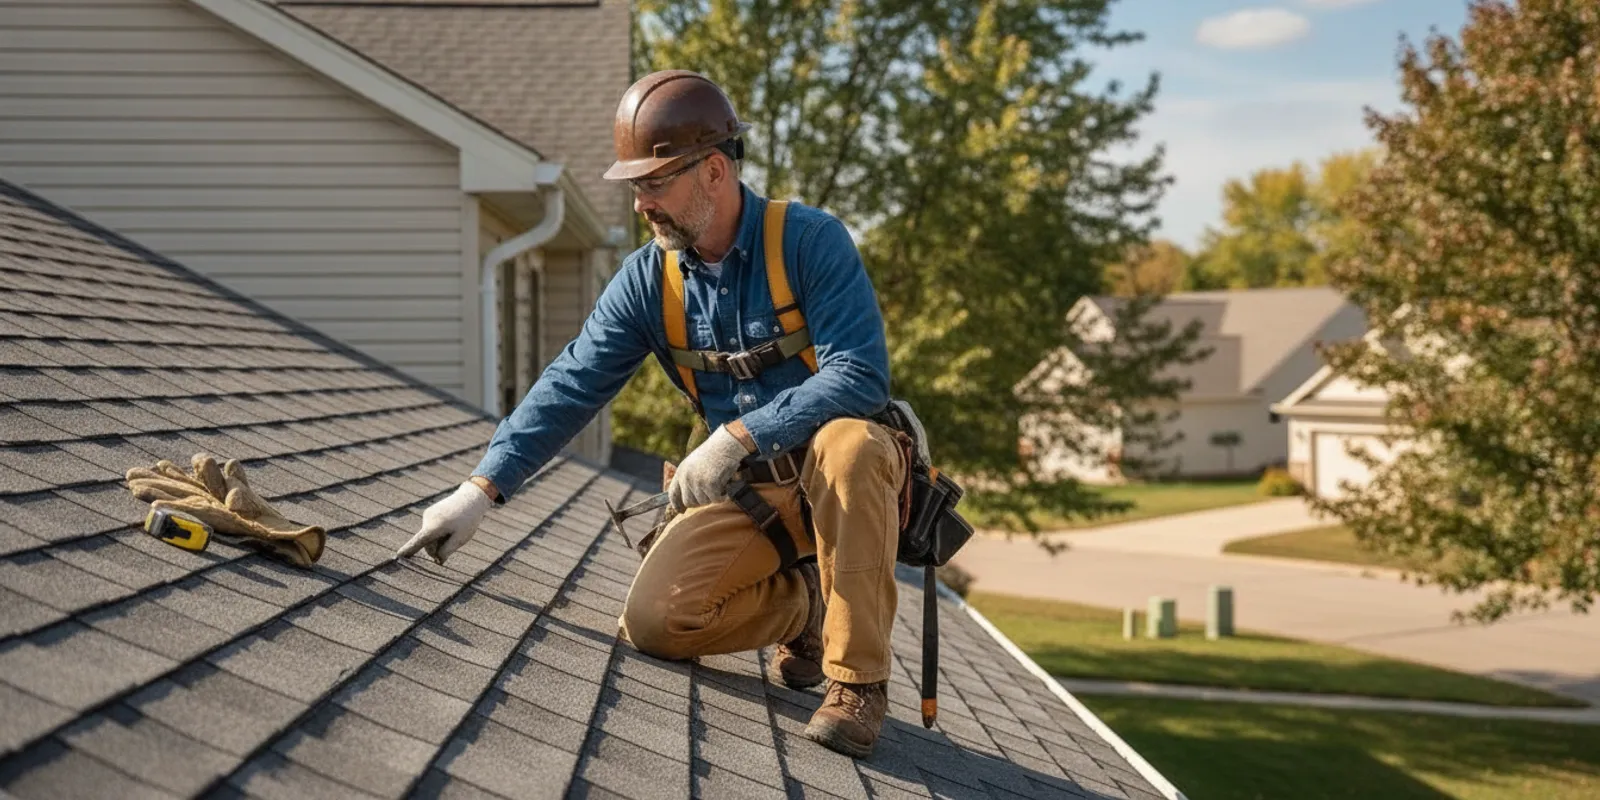
    Roofing professional inspecting an asphalt-shingle roof on a Minnesota home

    Schedule a free roof inspection

    What Should You Look for in a Roofing Company in Waverly MN?

    A good contractor should help you understand the roof problem before recommending a solution. The first conversation should focus on your concerns, the age and condition of the roof if known, and what you have observed inside or outside the home. A roof leak, missing shingles, or storm damage can look straightforward from the ground but may have more than one cause.

    Pay attention to how the company explains its findings. Does the representative distinguish visible damage from suspected damage? Do they describe what they could and could not inspect? Can they explain why repair, replacement, or another evaluation is the appropriate next step? Clear answers are more useful than a quick promise that every problem has one simple fix.

    Before choosing a contractor, compare the written scope, not only the headline recommendation. It should identify the areas involved, proposed work, materials where applicable, and any questions that remain open. Ask how changes discovered during work would be discussed and approved. This helps you compare proposals on the same basis and reduces the chance of misunderstanding.

    • Communication: You can get a plain-language explanation and ask questions without pressure.
    • Documentation: The inspection findings and proposed work are recorded clearly.
    • Fit: The suggested work responds to your roof’s condition rather than a generic sales pitch.
    • Local availability: The contractor confirms it serves your address and can explain the expected scheduling process.
    • Follow-through: You know whom to contact if questions come up before, during, or after the project.

    For more questions to bring to contractor conversations, see this guide on how to choose roofers in Minnesota. Referred Restoration describes its approach as a free inspection followed by a custom solution and professional installation. Ask what each step would mean for your specific project.

    How Can You Compare a Roofing Company in Waverly MN With Other Contractors?

    Two estimates may recommend different work because the contractors saw different conditions, made different assumptions, or included different materials. Do not compare only the totals. Ask each company to explain the findings and the scope so you can see what is included and what is excluded. If a proposal leaves an important point unclear, request clarification in writing before making a decision.

    What to compareQuestions to askWhy it matters
    Inspection findingsWhich areas were inspected, and what evidence supports the recommendation?It shows whether the proposal addresses observed conditions or assumptions.
    Work scopeWhat work is included, and what is outside the scope?Clear boundaries help you compare bids and understand possible follow-up decisions.
    MaterialsWhat product or material is proposed, and are alternatives available?Different material selections can change the project plan and appearance.
    Project coordinationHow will timing, property preparation, and updates be handled?You can plan for access, questions, and communication during the work.
    Written termsWhere are the project details, responsibilities, and applicable warranty terms stated?Written information gives you something concrete to review before agreeing.

    Look for specific descriptions rather than broad phrases such as “fix roof” or “replace as needed.” If a contractor proposes replacing the roof, ask what conditions make repair unsuitable. If another recommends repair, ask what the repair addresses and whether the inspection identified other areas to monitor. A useful proposal makes those differences understandable.

    Homeowners can also consult the Minnesota Department of Labor and Industry for current state contractor and consumer information. Review the agency’s guidance relevant to your project and ask the contractor about any licensing or documentation questions you have. Do not rely on a verbal assurance when you can verify a requirement through an official source.

    How can you make a side-by-side comparison?

    Put the proposals next to each other and compare matching details in order: the condition described, the work proposed, the materials named, project exclusions, and the process for approving a change. If one bid includes a task that another leaves out, ask both contractors to clarify whether that task is needed and why. This is more useful than treating a lower or higher total as proof that one recommendation is better.

    Make a short list of unanswered questions and send the same questions to each contractor. For example, ask whether the inspection included the same roof sections, whether removal and disposal of existing roofing are included when relevant, and who will explain an unexpected condition. Keep written replies with the estimates. If the explanations still differ, ask what additional inspection or documentation could resolve the disagreement before you decide.

    When Is Roof Repair Worth Evaluating?

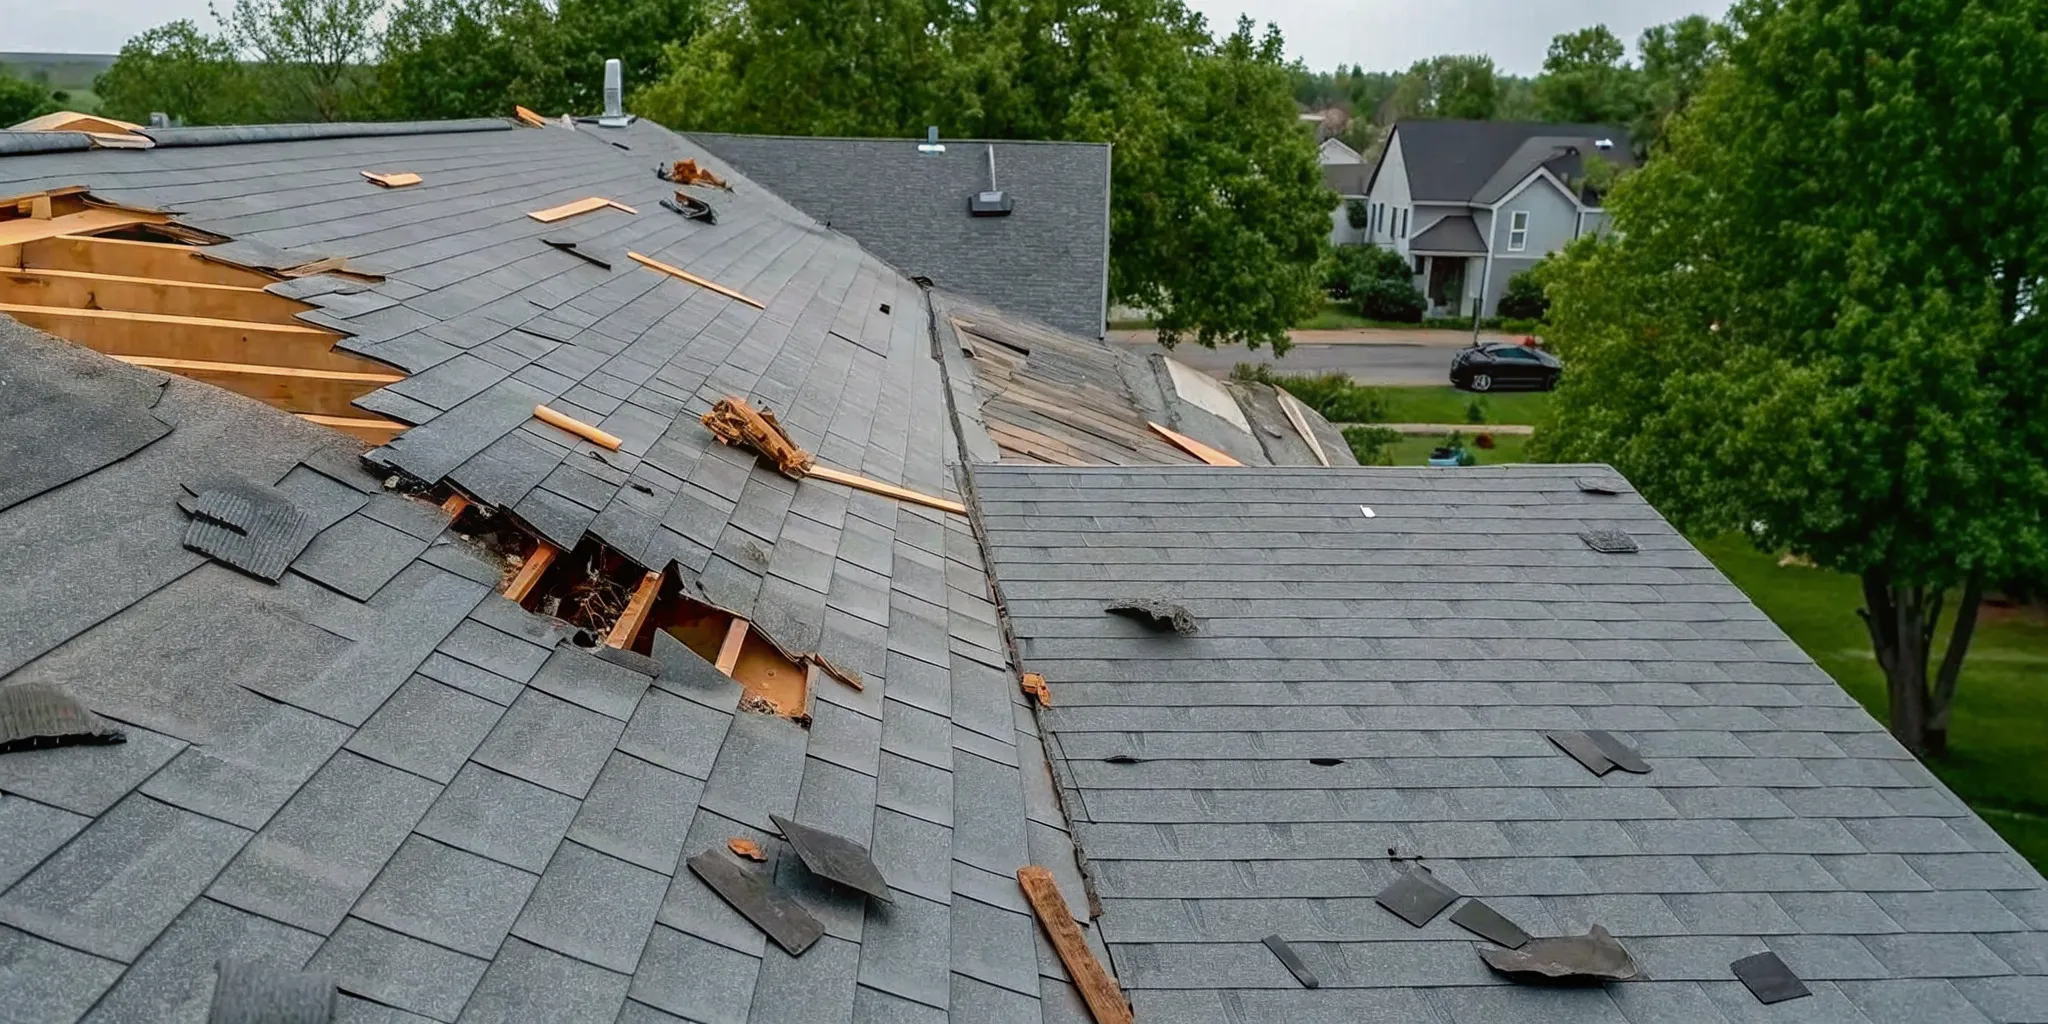
    Roof repair may be a reasonable option when the problem is limited and the surrounding roofing system remains serviceable. Examples of concerns that warrant an inspection include a small leak, a few displaced or missing shingles, damaged flashing, or a new stain on an interior ceiling. These signs do not establish the cause by themselves. Water can travel from the entry point before it becomes visible inside.

    Write down when you first noticed the problem and whether it changes during rain, snowmelt, or wind. Take photos from a safe location if you can do so without climbing onto the roof. Avoid disturbing shingles or opening roof areas to investigate. This record can help a professional understand what you observed, but it cannot replace an inspection.

    Learn more about warning signs and possible next steps in the guide to roof shingle leak repair. For a specific issue, a roof repair evaluation can help clarify whether a localized repair is appropriate. That page describes service in Rogers; confirm service availability for a Waverly address directly.

    A repair discussion should also cover what cannot be determined until the affected area is opened, if that applies. Ask how the contractor would communicate additional findings and what approval would be needed before expanding the work. Avoid assuming that a visible patch resolves every underlying issue, especially when the cause of water entry is uncertain.

    When Should You Consider Roof Replacement?

    Replacement deserves consideration when an inspection finds broad or repeated problems, when repairs may not provide a suitable result, or when the roof’s overall condition calls for a larger project. The roof’s age can be useful context, but age alone does not tell you exactly what work is needed. Material, installation history, ventilation, weather exposure, and maintenance can all affect condition.

    Ask the inspector to separate urgent concerns from longer-term planning. Which conditions need attention now? Which ones should be monitored? What evidence supports replacement rather than repair? A careful explanation makes room for uncertainty and helps you decide whether to seek another opinion.

    If replacement is being considered, review the roof replacement process and ask how the scope would be adapted to your home. Referred Restoration’s Rogers page is not a confirmation of coverage for every nearby address, so verify availability and the details of your project directly. You can also learn about one common roof material in this homeowner guide to asphalt shingles for Minnesota weather.

    How Can You Prepare to Compare Roofing Materials?

    Material selection is one part of the decision, not a substitute for reviewing the whole project. Ask what product is proposed, what color or style choices are available, and whether the written proposal names the material clearly enough for you to compare it with another bid. Ask how the selection fits your roof’s design and what maintenance or care information the manufacturer provides. If you are weighing shingles against another option, consider the roof’s appearance, the scope of work, and the details of each written proposal rather than relying on a single feature.

    A useful point of comparison is whether each estimate describes a similar scope. If one contractor recommends a different material or approach, ask what conditions led to that recommendation and whether any additional work is included. You can review this guide to metal roofing versus shingles to prepare questions about the two options. The guide is general information; an inspection is still needed to determine what is suitable for your home.

    Consider the project’s related details, too. Work may involve roof edges, penetrations, flashing, ventilation, or removal of existing materials. Do not assume that every proposal includes the same related tasks. Ask the contractor to identify what is included, what is excluded, and how additional findings would be discussed with you. The goal is to understand precisely what you are agreeing to and how the proposed work addresses the conditions found.

    What Should You Do After Suspected Storm Damage?

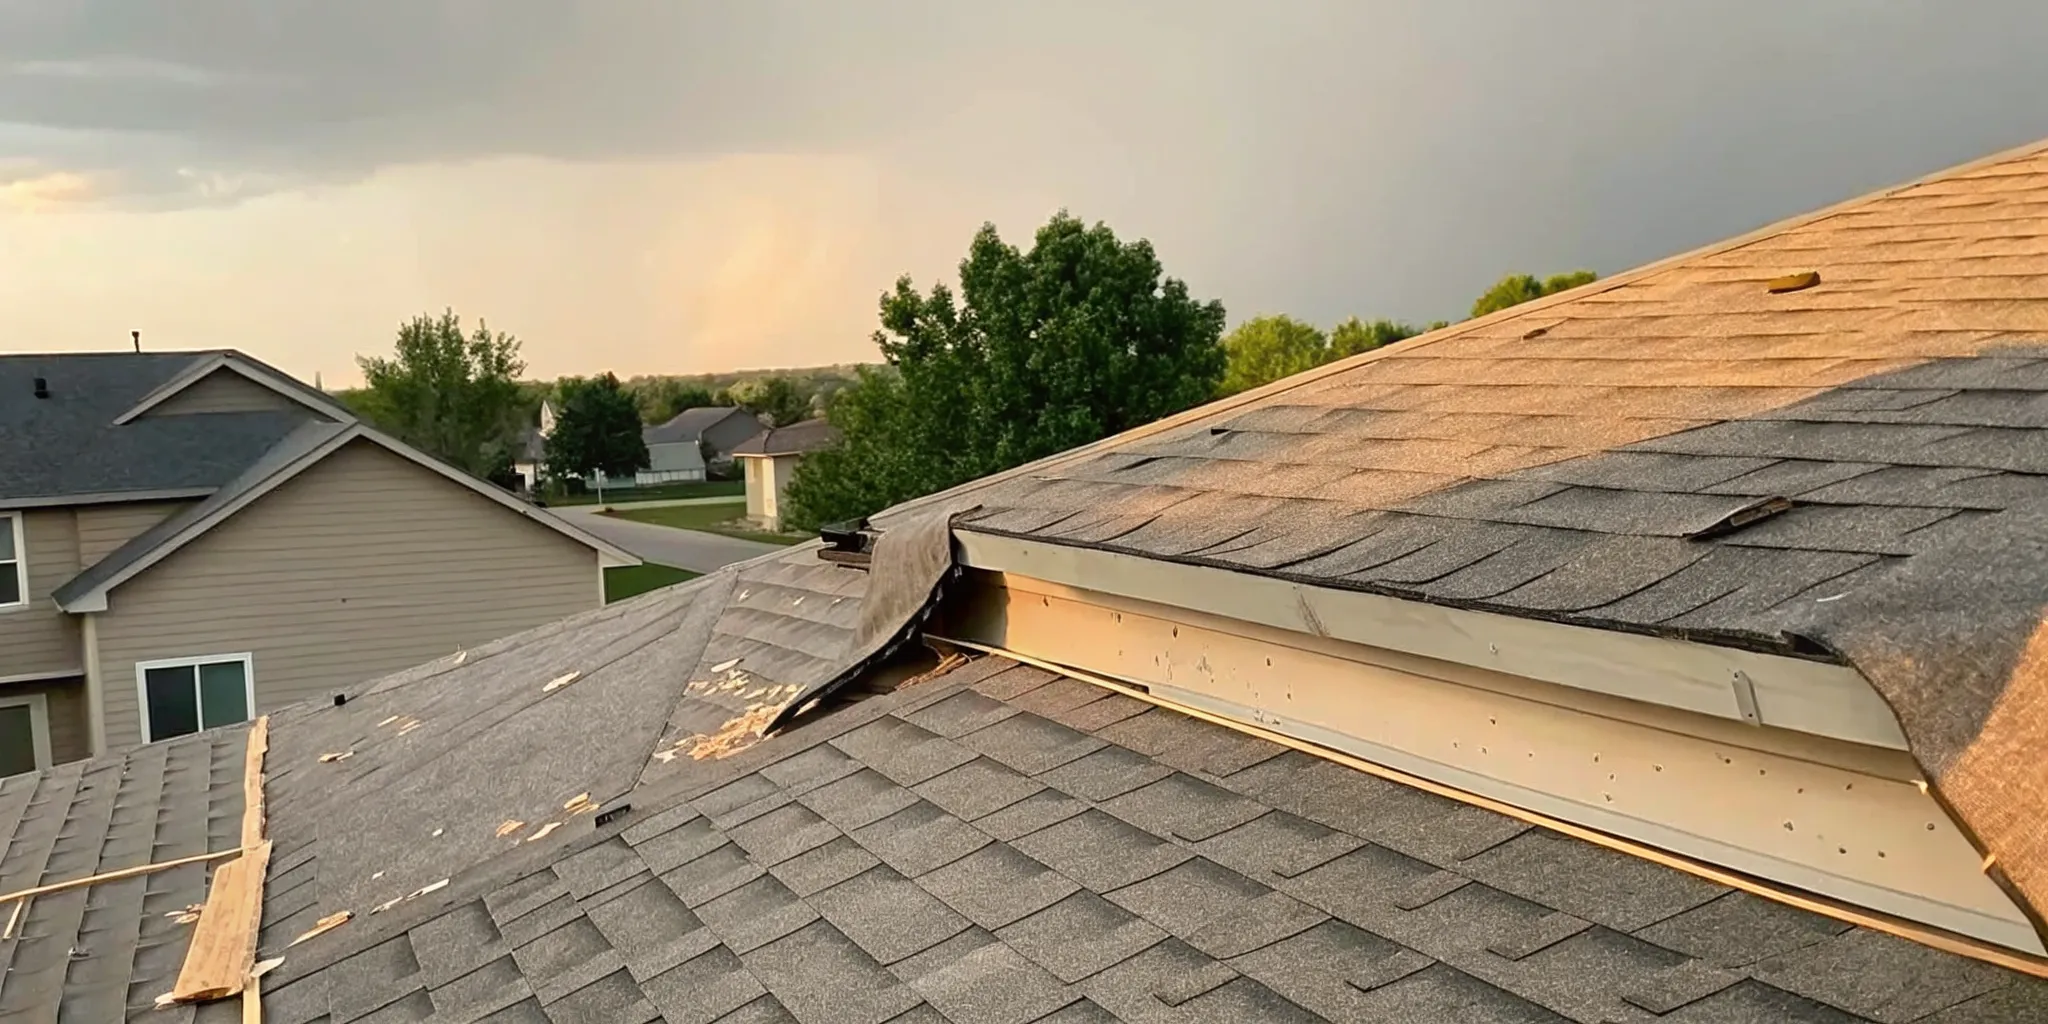
    After a storm, start with safety. Do not climb onto a wet, icy, or damaged roof, and do not approach downed power lines or unstable debris. From the ground, note visible changes such as missing roofing, damaged gutters, or debris. If water is entering the home, protect belongings only where it is safe to do so and contact an appropriate professional to assess the condition.

    Photographs, dates, and notes about where damage appeared can make later conversations clearer. Keep copies of relevant project documents and communications. If you plan to contact your insurer, review your policy and speak with the insurer about its process. A contractor may explain observed exterior conditions, but coverage decisions are made under your policy by your insurer.

    Referred Restoration says it assists homeowners with storm-damage claims. Ask what assistance includes and what remains your responsibility. Its storm damage restoration information can provide a starting point for a discussion; confirm whether the service is available for your home in Waverly.

    What Happens During a Roof Inspection?

    An inspection is a chance to document the roof’s visible condition and discuss your concerns. Before the appointment, make a short list of leaks, stains, past repairs, or storm events you want to mention. Tell the inspector about any areas that are difficult to access and ask how the evaluation will be conducted. You do not need to get on the roof to prepare.

    After the inspection, ask for a plain-language walkthrough of the findings. A helpful conversation distinguishes what was directly observed from what may require further investigation. If the inspector recommends work, ask which problem each part of the scope addresses. Request time to review the written proposal, including the materials and project details, before deciding.

    Referred Restoration offers free inspections, according to its company information. A free inspection can help you gather information. Before scheduling, ask whether there are any terms or expectations attached to the inspection, then compare the recommendation with other written assessments and ask follow-up questions before selecting a contractor.

    How Should You Plan for a Roofing Project?

    Once you have selected a contractor, clarify the practical details before work begins. Confirm the planned scope, the best contact for questions, how schedule changes will be communicated, and what access the crew may need. Ask what you should move or protect around the home and how the contractor plans to manage materials and cleanup. The answers should reflect the project and property rather than relying on assumptions.

    Ask how to handle unexpected findings. Roofing work can expose conditions that were not visible during an initial inspection. Understand how the contractor will document those findings, explain available options, and obtain your approval before making changes that affect the agreed scope. Keep the written proposal and any updates together so you can refer back to them.

    To compare material options, a guide to comparing metal roofing and shingles can help you prepare questions about the differences. A general comparison is not a substitute for inspecting the actual roof or confirming a written project scope.

    What can homeowners do before installation day?

    Use the contractor’s project-specific directions rather than relying on a generic checklist. Confirm where workers and materials may need access, whether vehicles should be moved, and whether outdoor items near the work area should be relocated. Ask what to expect regarding noise, temporary access restrictions, and cleanup. If you have questions about pets, children, or an area that needs special consideration, raise them before the start date so there is time to agree on a practical plan.

    Review the final scope and any written updates before work begins. Make sure you know whom to contact if weather changes the schedule or if you notice a concern during the project. Keep relevant documents in one place, including the proposal and agreed changes. These simple steps make it easier to resolve a question based on what was actually agreed rather than memory alone.

    Why Consider Referred Restoration for a Waverly Roofing Evaluation?

    Referred Restoration is a residential exterior restoration contractor based in Rogers, Minnesota. Its services include roofing, roof repair, replacement, siding, gutters, and windows. The company describes a three-step process: free inspection, custom solution, and professional installation, with an emphasis on clear assessments and transparent communication.

    Waverly is not specifically listed in the customer information as a service location. The company’s stated service area centers on Rogers and nearby communities, so homeowners should confirm their address is covered before setting expectations about scheduling. This is especially useful during busy periods, when project timing can vary.

    A good fit is not decided by a headline or a broad claim. It comes down to whether the contractor can inspect your home, explain the findings, provide a clear written scope, answer your questions, and confirm that it can serve your location. Compare those details with other proposals before choosing. You can also call (763) 726-4245 to ask about service availability.

    Contact Referred Restoration to ask about your roof

    Frequently Asked Questions

    Does Referred Restoration serve Waverly, Minnesota?

    Waverly is not specifically named in the available service-area information. Referred Restoration is based in Rogers and serves the surrounding area. Contact the company to confirm whether it can inspect your address and discuss the current schedule.

    Should I repair or replace my roof?

    That depends on the condition and extent of the roofing problems, not just the roof’s age. Ask an inspector to explain the evidence, the repair options, and why replacement may or may not be appropriate. A written assessment can help you compare recommendations.

    What should I ask a roofing contractor before agreeing to work?

    Ask what the inspection found, what work is included, what materials are proposed, how changes would be handled, and where project terms and applicable warranty information are documented. Confirm that the contractor serves your address and clarify how to reach the project contact.

    Can a roofing company decide whether my storm damage is covered by insurance?

    No. Your insurer determines coverage under your policy. A contractor may discuss observed damage and provide information about its claim-assistance process, but you should direct coverage questions to your insurer and review your policy.

    What should I do if I see a roof leak?

    Stay off the roof, especially when it is wet, icy, or damaged. If safe, note the location and timing of the leak and protect belongings from water. Arrange a professional evaluation to identify the source and discuss next steps.

    For Waverly homeowners, a careful inspection and a clear written scope are practical first steps toward choosing roofing work that fits the home.

  • Cost of New Window Installation: A Planning Guide

    Cost of New Window Installation: A Planning Guide

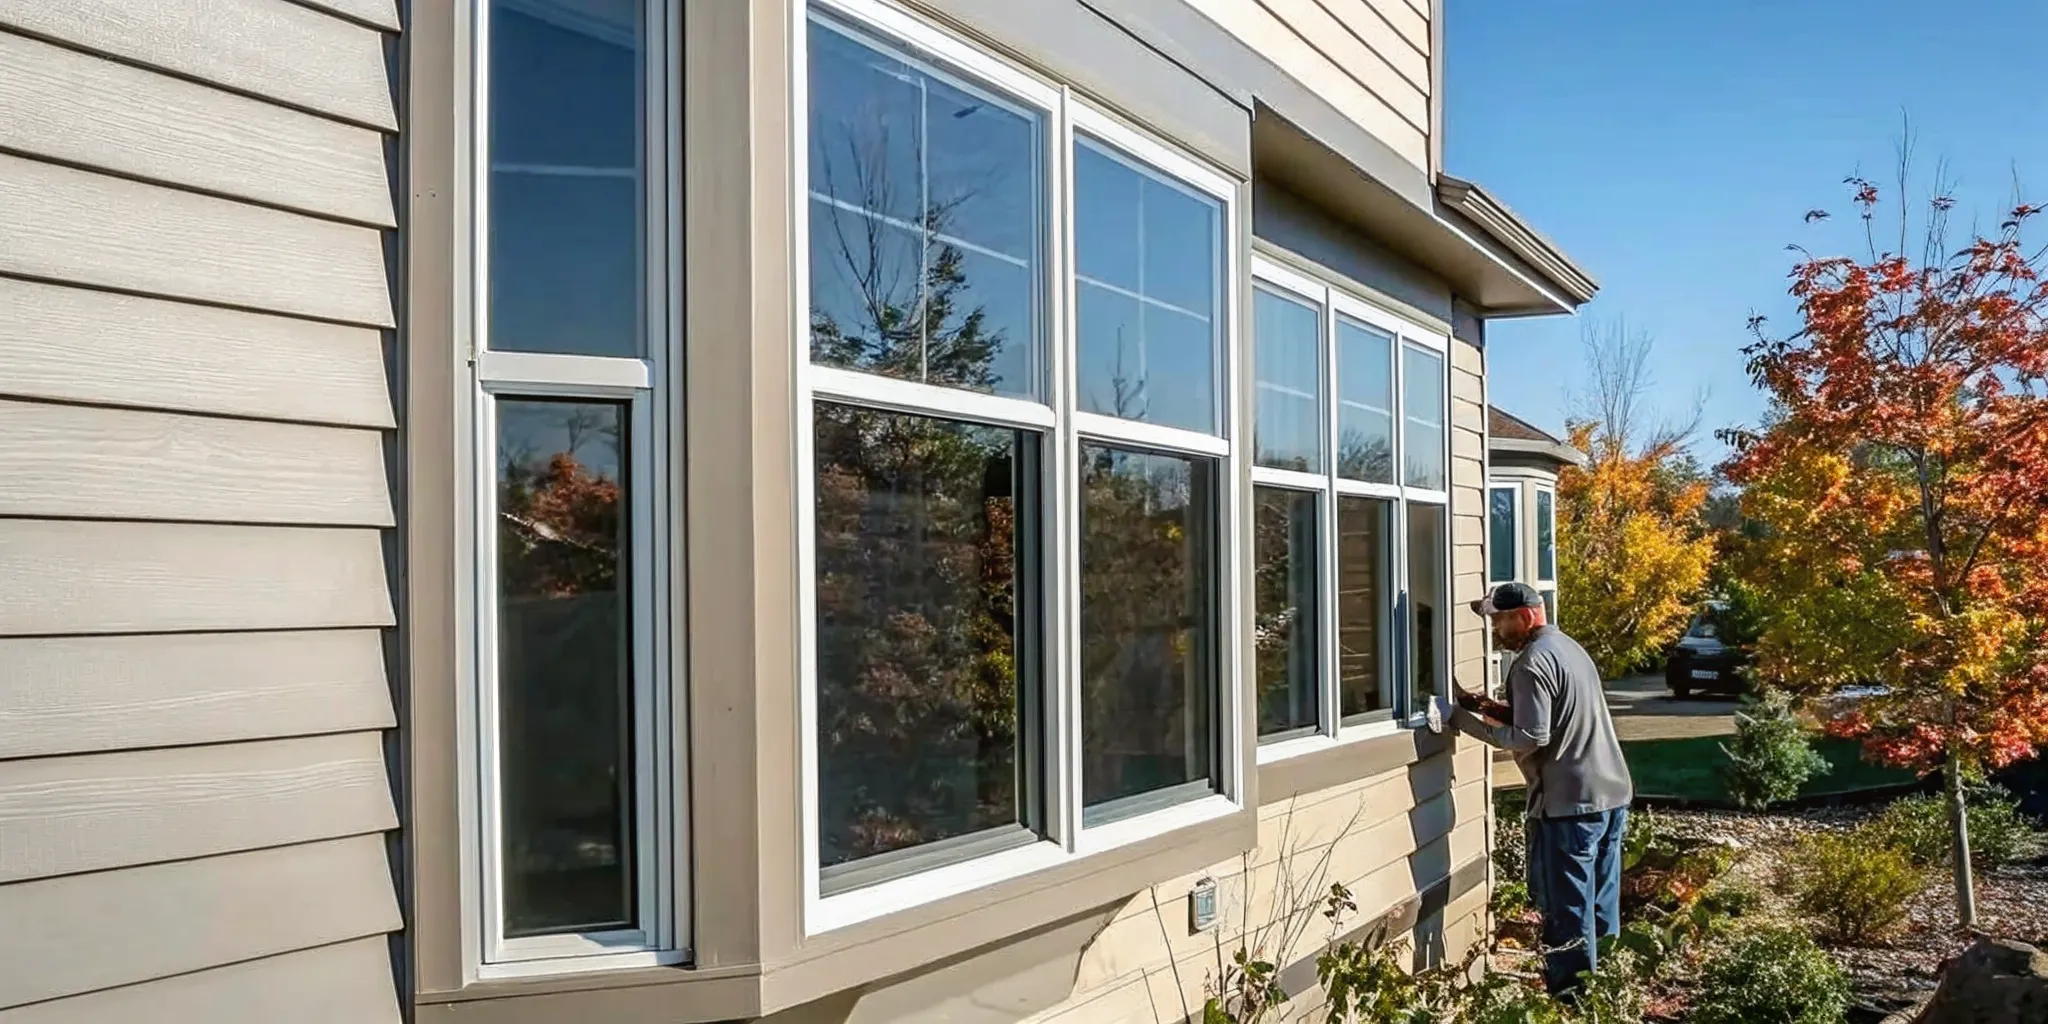
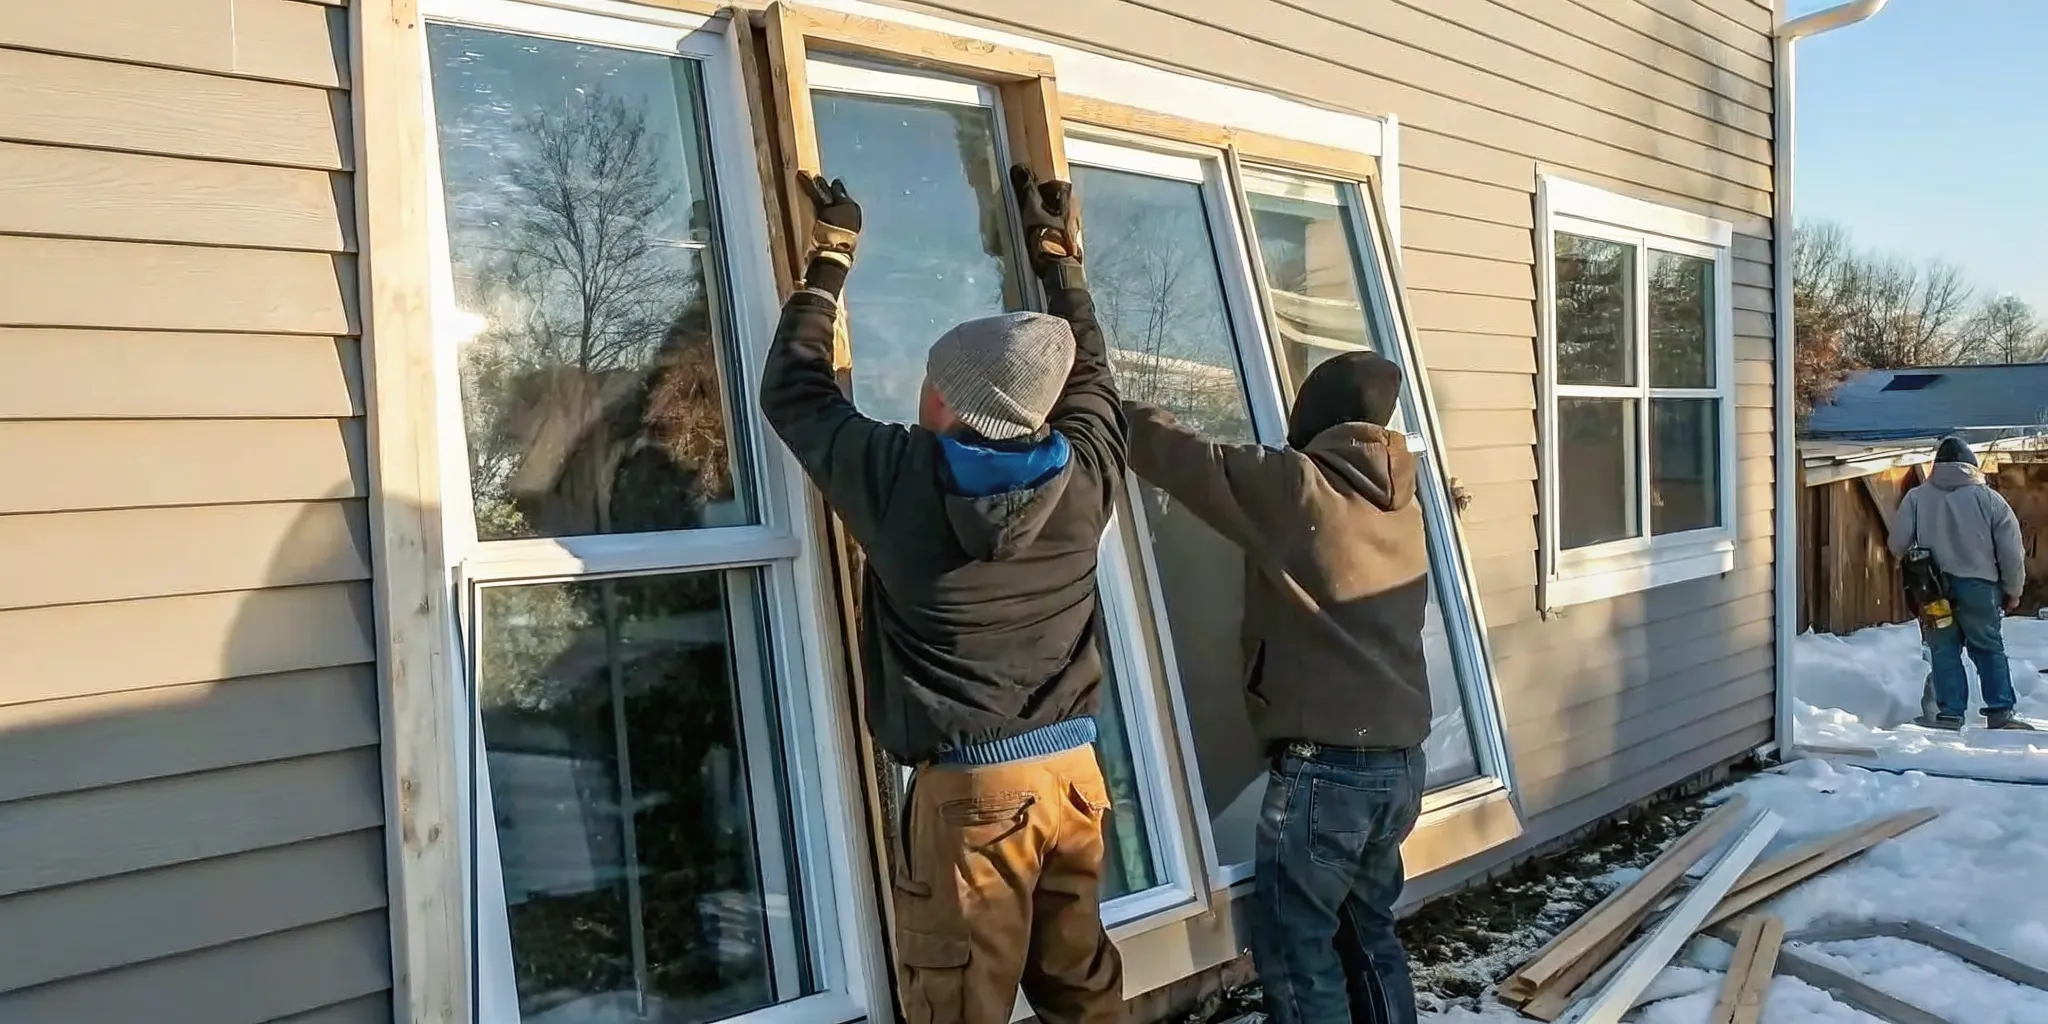
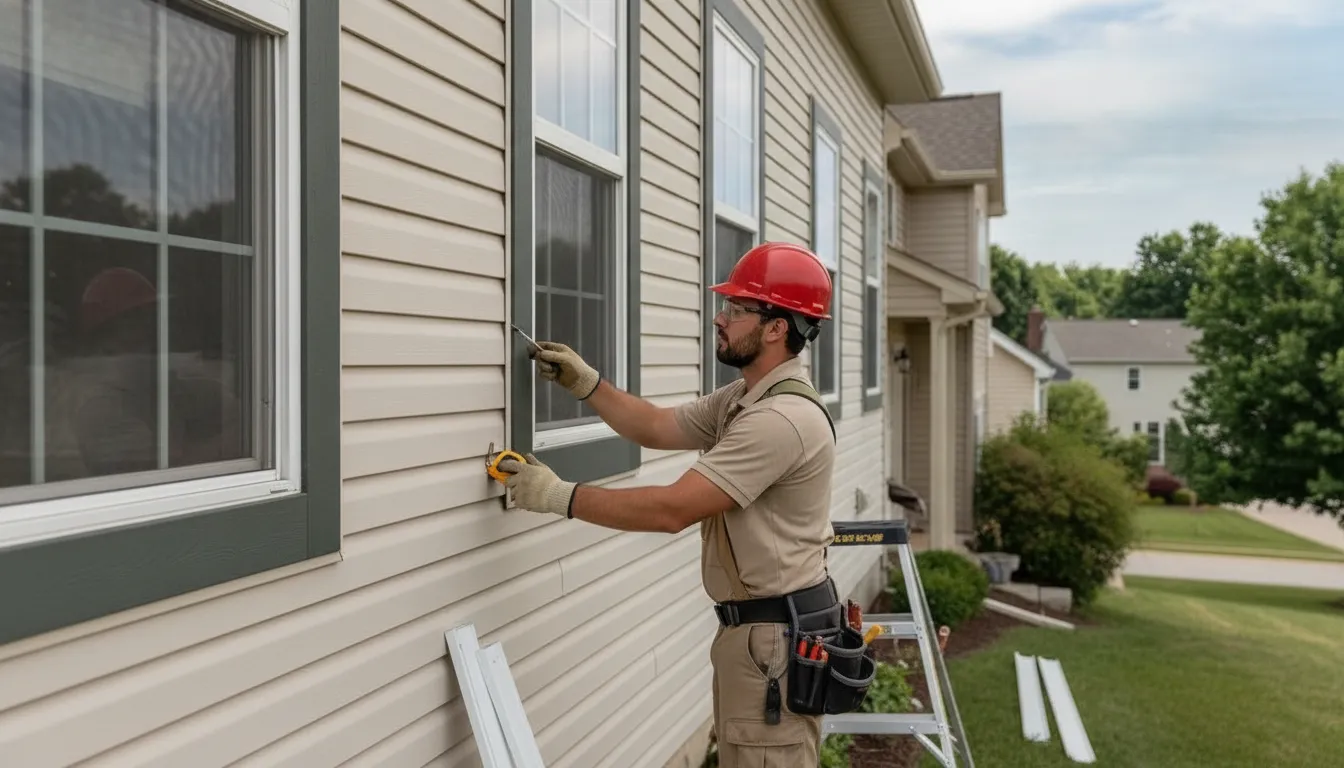
    Homeowner and installer reviewing a new window installation opening

    The cost of new window installation is shaped by the home, the opening, the window selected, and the work required to install it correctly. A per-window estimate can be misleading when it does not account for frame condition, access, finishing, or the installation method. A better planning conversation starts with the questions below.

    Contact Referred Restoration online or call (763) 726-4245 to discuss your window project.

    This guide does not replace an on-site assessment. It explains why two homes with similar-looking windows may need different scopes of work. So you can prepare useful questions before requesting a project-specific recommendation in Rogers or the surrounding Minnesota service area.

    Short answer: New window installation planning depends on window type and material, the size and condition of each opening, and whether an insert or full-frame method is appropriate. Access, energy-performance goals, removal and disposal, and interior or exterior finishing also affect the scope. The most reliable next step is to have each opening measured and inspected before a contractor recommends a scope.

    Which Factors Shape the Cost of New Window Installation?

    Window installation is a project rather than a single product purchase. The final scope reflects what must be supplied, removed, prepared, installed, sealed, and finished at each opening. The same home may even contain several different conditions, especially if windows were replaced at different times.

    • Window style, size, material, glazing, and operating hardware.
    • Whether the existing frame can be retained or a full-frame replacement is safer.
    • Opening condition, including moisture damage, rot, uneven surfaces, or previous repairs.
    • Access, story height, landscaping, interior furnishings, and site protection.
    • Energy goals, climate performance, orientation, and glass specifications.
    • Removal of the existing unit, disposal, trim work, insulation, sealing, and cleanup.

    These factors are why a responsible contractor should ask about the home and inspect representative openings instead of treating every window as an identical unit. The goal is not to make the project seem complicated. It is to prevent a plan that leaves out work needed for a dry, square, operable, and durable installation.

    How Does Window Type Affect the Installation Plan?

    Window type affects more than appearance. It changes the size and weight of the unit, the way it opens, the clearance needed around it, and the details an installer checks after setting it. A fixed picture window, casement window, double-hung window, bay window, and sliding window each place different demands on the opening and surrounding trim.

    Consider these questions before comparing options:

    • Does the room need ventilation, or is a fixed view window suitable?
    • Will furniture, a counter, or a walkway limit how the window can open?
    • Does the opening need a replacement that fits an existing frame?
    • Will a larger or heavier unit require additional planning for delivery and safe handling?
    • Do the window’s dimensions and operating style work with existing screens, trim, and locks?

    Homeowners can review common styles and selection considerations in this Minnesota house-windows selection guide. That article focuses on choosing among window options. For local help with repair or replacement, see Rogers window repair and replacement services. This guide stays focused on the project conditions that influence installation scope after a replacement direction is being considered.

    Material and glass choices matter too

    Frame material, glazing, spacer systems, coatings, and hardware can change the product specification. A homeowner focused on durability may prioritize a different combination than someone focused on low maintenance, daylight, ventilation, or cold-weather comfort. Ask for the exact product and performance details rather than relying on a broad label such as energy efficient.

    Performance information is especially useful when comparing similar-looking units. The U-factor describes how well the window resists heat transfer, while the solar heat gain coefficient describes how much solar heat passes through the window. The ENERGY STAR replacement-window buying guidance explains why climate zone, orientation, and documented product specifications should be part of the discussion.

    Does the Existing Opening Need Repair Before Installation?

    The condition behind the existing trim can be one of the most important variables in a window project. A window may look worn from the room side while the opening remains sound. Or it may look acceptable while hidden moisture has affected the sill, jamb, framing, or surrounding wall assembly.

    During an assessment, look for questions such as:

    • Is there staining, softness, swelling, or a musty odor near the sill?
    • Does the existing frame show movement, gaps, failed sealant, or evidence of water entry?
    • Are the sill and head level enough for the chosen replacement method?
    • Are the opening dimensions consistent from top to bottom and side to side?
    • Has previous work left extra layers of trim, shims, or materials that affect fit?
    • Does the surrounding wall need limited repair before the weather barrier can be sealed?

    Not every irregularity requires the same response. Some openings can be prepared with minor adjustments, while others call for more extensive exposure and repair. The important planning step is to identify the condition before ordering a unit, not after the old window has been removed.

    For a closer look at the homeowner measurements that help an installer plan, see how to measure for replacement windows. Measurements are useful planning information, but they do not replace a professional check of the frame, sill, moisture condition, and wall connection.

    What Is the Difference Between Insert and Full-Frame Replacement?

    The installation method can change the amount of removal, preparation, and finishing required. An insert or pocket replacement generally keeps more of the existing frame in place. A full-frame replacement exposes more of the opening and may include removal of the old frame, exterior trim, or other surrounding materials.

    Planning questionInsert or pocket approachFull-frame approach
    What stays in place?More of the existing frame and surrounding finish may remain.More of the old assembly may be removed to expose the opening.
    When is it considered?When the retained frame is sound, compatible, and appropriately sized.When condition, fit, water management, or a new configuration calls for greater access.
    What should be checked?Frame condition, clear dimensions, drainage, and how the new unit seals to the retained frame.Rough opening condition, flashing, insulation, trim, and the connection to the wall system.
    What can change?Interior and exterior finishing may be more limited, but existing details still need inspection.Trim, siding interfaces, interior casing, and paint or patching may require more planning.

    Neither method is automatically better for every opening. The correct choice depends on the existing assembly and the result the homeowner needs. A full-frame approach may provide more visibility into the opening, while an insert approach may preserve sound finishes when the retained frame is suitable. The installation decision should follow the condition assessment, not a one-size-fits-all rule.

    For the installation sequence, including the relationship between the sill, flashing, insulation, and seal, read this safe window replacement process guide. It covers installation mechanics in more detail than this planning article.

    How Do Access and Home Layout Affect the Work?

    Access influences how the crew protects the home, moves materials, reaches each opening, and completes the work safely. A first-floor window with a clear path is different from a second-story opening above a porch, a tight side yard, or a room filled with furniture.

    Tell the contractor about conditions such as:

    • Second-story or hard-to-reach windows.
    • Porches, decks, roofs, steep grades, or narrow side yards near the opening.
    • Landscaping, fencing, or exterior features that limit equipment placement.
    • Interior furniture, built-ins, window treatments, or flooring that needs protection.
    • Pets, children, security needs, and rooms that cannot remain open during the work.
    • Seasonal weather concerns that may affect scheduling and temporary enclosure.

    Access does not determine product quality, but it can change the preparation and protection plan. A clear conversation helps the installer plan for safe handling, dust control, weather exposure, and cleanup. It also helps the homeowner understand which rooms and exterior areas need to be ready before work begins.

    What Energy Goals Should You Discuss Before Choosing Windows?

    Energy performance is not only a product label. It is a combination of the window specification, the opening condition, installation quality, air sealing, and the home’s broader envelope. A homeowner who wants warmer rooms in winter may ask different questions than one who is mainly trying to reduce glare. Improve ventilation, or protect furnishings from ultraviolet light.

    Discuss the following:

    • Which rooms feel drafty, cold, overheated, or uncomfortable?
    • Which windows receive strong morning, afternoon, or direct summer sun?
    • Are condensation, air leakage, or difficulty operating the window recurring issues?
    • What U-factor and solar heat gain coefficient are appropriate for the home’s climate and orientation?
    • Would air sealing or insulation work elsewhere in the room or wall assembly affect the result?
    • Which product labels, warranty terms, and performance records should be retained?

    The U.S. Department of Energy’s consumer guide to energy-efficient windows explains how insulation, air sealing, climate, orientation, and installation work together. Better performance begins with matching the product and installation approach to the actual home rather than choosing a window from a single feature in isolation.

    Contact Referred Restoration online or call (763) 726-4245 if you want help evaluating window replacement options in Rogers.

    Which Parts of the Project Should Be Included in the Scope?

    A clear scope describes more than the new window itself. Ask the contractor to explain what happens before installation, during removal, and after the unit is set. This makes it easier to compare proposals based on the work included rather than on a single line item.

    1. Assessment and measurement: Confirm which openings were inspected, which dimensions were taken, and whether any conditions need further review.
    2. Product specification: Record the window style, frame material, glass configuration, operating hardware, color, screens, and other selected options.
    3. Removal: Clarify how the existing units, trim, fasteners, and debris will be removed and handled.
    4. Opening preparation: Ask how the crew will address uneven surfaces, moisture damage, framing concerns, insulation, and sill preparation if discovered.
    5. Water management and air sealing: Confirm how the new unit will connect to the surrounding weather barrier and how gaps will be sealed.
    6. Finishing: Identify interior casing, exterior trim, cladding, siding interfaces, caulking, paint, patching, and cleanup responsibilities.
    7. Testing and handoff: Ask how each window will be checked for operation, locking, alignment, draft control, drainage, and visible finish quality.

    The more precisely the scope describes these items, the fewer assumptions remain. If a proposal says installation is included, ask what that phrase includes for removal, preparation, trim, sealing, disposal, and final inspection.

    How Can Homeowners Prepare for a Window Installation Consultation?

    Preparation helps a contractor spend the visit evaluating the right conditions. Make a list of windows that are difficult to open, drafty, fogged, damaged, noisy, or uncomfortable. Note any history of leaks, storm damage, repairs, condensation, or previous replacement work.

    Bring these questions:

    • Is repair, insert replacement, or full-frame replacement appropriate for each opening?
    • What conditions could change the recommended scope after removal?
    • Which window specifications fit the home’s climate, orientation, and comfort goals?
    • What interior and exterior finishing work is included?
    • How will the crew protect the home and manage weather exposure?
    • What should be documented for product records, warranty support, and future maintenance?

    Move curtains, blinds, furniture, and objects away from the window area when practical. Keep access paths clear and identify security, pet, or child-safety concerns before the crew arrives. Do not remove trim or disturb a questionable opening simply to collect more measurements. If you see moisture or damage, document it and let the professional assess the assembly safely.

    What Should You Look for During the Final Walkthrough?

    The final walkthrough is the opportunity to confirm that the installed windows function as expected and that the surrounding work is complete. Each unit should open, close, lock, and remain aligned. Operable windows should not require unusual force, and visible gaps in caulking or trim should be discussed before the crew leaves.

    Check that:

    • Each window matches the selected style, color, glass, and operating direction.
    • Sashes, panels, locks, and screens operate smoothly.
    • Interior and exterior sealant lines are continuous and neatly finished.
    • Trim, casing, siding interfaces, and patched areas are addressed in the agreed scope.
    • Work areas are clean and removed materials are handled as planned.
    • You receive product, warranty, care, and maintenance information.

    ENERGY STAR also recommends checking the installed product and operation before the installer leaves. A careful walkthrough does not replace a warranty, but it creates a clear record of what was completed and what questions still need an answer.

    Contact Referred Restoration online or call (763) 726-4245 to schedule a window inspection and discuss the right next step for your home.

    Frequently Asked Questions

    What is included in new window installation?

    New window installation may include measuring, product delivery, removal of existing units, opening preparation. Setting and fastening the new window, insulation, air sealing, water-management connections, trim or casing, cleanup, and a final operation check. The exact scope should be written clearly for each opening.

    Why can two windows in the same home need different installation work?

    Openings can differ because of age, previous repairs, moisture exposure, framing movement, size, access, and retained trim. One window may be suitable for an insert approach while another needs more exposure and preparation. A room-by-room assessment helps identify those differences before installation begins.

    Should I choose insert or full-frame window replacement?

    That choice depends on the condition of the existing frame, the available dimensions, water-management needs, desired appearance, and the amount of surrounding finish that should be replaced. An installer should assess the opening and explain the tradeoffs instead of recommending one method for every window.

    Do energy-efficient windows require professional installation?

    High-performing windows still need a properly prepared and sealed opening. Incorrect installation can lead to drafts, moisture problems, poor operation, or reduced comfort. Ask about the product’s performance documentation and how the installation will connect to the home’s weather barrier.

    How should I compare window installation proposals?

    Compare the product specification and the complete scope, not just a single line item. Confirm removal, opening preparation, insulation, sealing, trim, disposal, cleanup, warranty documentation, and final testing. Ask which conditions could change the scope and how those changes would be communicated.

    What is the first step if I am planning window replacement in Rogers?

    Start with an inspection and measurement of the openings that need attention. Referred Restoration can review window condition, discuss repair or replacement options, and help you understand the installation plan for your home before you make a decision.

    Contact Referred Restoration online or call (763) 726-4245 to get started.

  • Vinyl vs fiber cement siding cost: Minnesota Guide

    Choosing siding in Minnesota is not only a question of how two materials look on a sample board. Freezing winters, heavy precipitation, hail exposure, existing wall conditions, and the details around windows and corners can all affect what a replacement project involves.

    There is no single answer to vinyl vs fiber cement siding cost because the full project includes more than the siding itself. Material selection, removal, wall preparation, water management, trim, labor, disposal, and installation complexity all shape the scope. A home inspection and written proposal provide a more useful comparison than a material label alone.

    Vinyl is lightweight and PVC-based, while fiber cement is a heavier composite made with cement, sand, water, and cellulose fibers. Those differences can influence handling, installation planning, maintenance expectations, and the finished appearance. Start by looking at what each option requires for your home, then compare the complete scope rather than focusing on one line item.

    Contact Referred Restoration online for a free siding inspection and custom solution.

    What Does Vinyl vs Fiber Cement Siding Cost Really Include?

    A useful comparison does not treat the material label as the entire project. The total scope can include the siding itself, labor, removal of existing materials, wall preparation, trim, flashing, disposal, and cleanup. Home size and design matter too. A simple wall layout may require less detailed cutting than a home with multiple corners, gables, windows, doors, and other penetrations. Whether the work is a full replacement or a partial project also changes what the crew must inspect and complete.

    That is why the phrase vinyl vs fiber cement siding cost has no single answer for every Minnesota home. A written comparison should show what is included, what condition the existing wall is in, and which product and installation details were selected. An inspection can identify damage, rot, or other conditions that may need attention before new siding is installed. For a local evaluation, homeowners can connect with Rogers siding contractors who can assess the home rather than relying on a material name alone.

    How the materials affect project scope

    Vinyl siding is made from polyvinyl chloride, commonly called PVC. It is lightweight and available in profiles such as Dutch lap and clapboard. Its handling characteristics and product design can influence how materials are transported, cut, and installed. The selected profile, color, trim package, and the way the siding meets windows and corners should all be identified in the proposal. These details affect the finished appearance and the amount of fitting required.

    Fiber cement is a heavier composite material made with cement and cellulose or wood fibers. Its weight and handling requirements can change the installation process. Cutting also requires appropriate dust-control practices. The project scope should identify the selected product, finish, trim, and installation method, rather than treating every fiber-cement board as interchangeable. Primed and factory-finished options may also have different maintenance expectations, so the manufacturer instructions should be part of the discussion.

    Look beyond the siding panels

    Preparation often determines whether a comparison is meaningful. Ask whether the proposal addresses removal, inspection of sheathing, water-resistive barriers, flashing, trim, window and door details, corner treatments, penetrations, disposal, and final cleanup. These are not optional details to hide behind a material comparison. They are part of how the exterior is prepared to manage water and achieve a clean, complete installation.

    The strongest decision weighs the exact products, the home’s condition, appearance goals, maintenance expectations, weather exposure, and the full written scope together. That approach makes the comparison clearer without reducing the choice to the lowest initial figure.

    Which Project Factors Change the Siding Budget?

    The material label is only one part of a siding proposal. Two homes choosing the same product can require very different scopes because existing conditions, detailing, and access are not identical. When you compare proposals, look for the work included around the siding, not just the name of the siding itself. These project factors help explain why a vinyl vs fiber cement siding cost comparison should be based on a complete written scope.

    1. Existing siding removal. Some projects can receive new siding after limited preparation, while others require removal of older panels, layers, fasteners, or damaged sections. Removal affects labor, handling, disposal, and the time needed to expose the wall for inspection. A proposal should state whether existing siding is being removed, what happens to hidden debris, and whether disposal and cleanup are included.
    2. Wall and sheathing preparation. Once the exterior is accessible, the condition of the wall matters. Rot, uneven sheathing, deteriorated areas, or other damage may need attention before new material can be installed correctly. Ask whether the proposal includes an inspection of the exposed surface and how unexpected repairs will be documented. A clear allowance or change-order process is more useful than an artificially simple scope.
    3. Water management details. Siding is part of an exterior water-management system. Water-resistive barriers, flashing, drainage details, and sealing around transitions can affect the work, especially where the wall meets roofs, decks, doors, windows, or other materials. This is not a step-by-step installation guide. It is a reminder to confirm that the proposal accounts for the conditions that help protect the wall behind the siding.
    4. Trim, openings, and penetrations. Corners, soffit and fascia transitions, window and door openings, hose bibs, vents, lights, utility lines, and other penetrations require compatible detailing. Fiber cement and vinyl also use different accessory systems and finishing approaches. For more background on one part of this scope, review the guide to Minnesota vinyl siding trim. The goal is not to count trim pieces from a distance, but to make sure the proposal identifies the details that finish and protect the exterior.
    5. Access, disposal, and final cleanup. Multiple stories, tight work areas, landscaping, porches, and additions can change how crews stage materials and move safely around the home. Cleanup should cover removed siding, packaging, fasteners, and job-related debris, along with a reasonable final walkthrough. Ask each contractor to describe these items in comparable language so you are evaluating the same project scope.

    A professional inspection can reveal which factors apply to your home before you choose between materials. If you are comparing proposals in the Rogers area, Rogers siding contractors can help you review the condition of the exterior and separate necessary preparation from optional work.

    How Do Vinyl and Fiber Cement Compare in Maintenance?

    Maintenance is one part of the vinyl vs fiber cement siding cost comparison that is easy to overlook. The material itself matters, but so do the selected finish, installation details, exposure, and condition of the wall beneath the siding. Vinyl is made from PVC and is relatively lightweight, while fiber cement combines cementitious material with cellulose fibers and is heavier. Those differences affect how the exterior is cleaned, inspected, repaired, and maintained over time.

    Neither material eliminates the need for routine observation. Minnesota homes face freezing winters, heavy precipitation, snow, and hail. A seasonal inspection can help identify loose sections, impact damage, open joints, failed caulk, or moisture concerns before a small issue becomes more involved. The table below summarizes the practical differences without treating either option as a universal fit.

    Maintenance areaVinyl sidingFiber cement siding
    Routine cleaning and inspectionUsually involves washing away dirt and checking panels, corners, trim, and flashing for damage or movement. The surface should be inspected after severe weather.Requires routine cleaning and inspection, with additional attention to the finish, joints, caulked areas, and places where water could reach the wall assembly.
    Finish and jointsThe factory-applied color is part of the product, so ordinary upkeep does not follow the same repainting cycle as a primed-to-paint product. Panels and trim still need careful inspection.Maintenance depends on the selected product and finish. Primed fiber cement may require painting and repainting, while joints and penetrations may require periodic caulk attention.
    Repair considerationsIndividual damaged panels may be replaceable, but matching the profile and color can affect the repair approach. Wind or impact damage should be assessed with the surrounding wall details.Damaged boards or panels require careful handling and proper replacement. Cutting and installation should follow appropriate safety practices because fiber-cement work can create dust.
    Appearance tradeoffsVinyl offers multiple profiles, including Dutch lap and clapboard, giving homeowners several ways to shape the exterior appearance.Fiber cement can provide a substantial, painted-board appearance. The desired finish and tolerance for future finish maintenance should be part of the selection.

    The best choice depends on how the home is used and maintained, not on a material label alone. A homeowner who prioritizes simpler surface upkeep may prefer vinyl. While another may value the appearance and finish options of fiber cement and accept more involved joint or coating maintenance. Product-specific instructions matter, especially for cleaning methods, repainting, caulk, and replacement details.

    Ask for a written scope that identifies the siding product, trim, flashing, wall preparation, disposal, and expected maintenance responsibilities. A professional inspection can also distinguish cosmetic wear from damage that may involve the underlying wall. That broader review creates a more useful comparison than judging the initial material choice by itself.

    Which Material Fits Minnesota Weather and Your Home?

    Minnesota siding has to live through freezing winters, heavy precipitation, snow, and frequent hail. That does not mean one material is automatically the right choice for every home. When comparing vinyl vs fiber cement siding cost, consider how the material fits your wall exposure. Existing exterior, maintenance expectations, and installation requirements instead of treating the material label as the whole decision.

    Vinyl siding is lightweight and made from PVC, while fiber cement combines cement-based materials with cellulose fibers. Those differences affect handling, detailing, and the type of installation planning required. A home with multiple wall projections, complex corners, or difficult access may need a different labor approach than a simple exterior, regardless of which siding is selected.

    Account for exposure and moisture management

    Weather reaches different sides of a home differently. Walls facing prevailing winds may receive more driving precipitation, while shaded elevations can stay damp longer. Areas below roof edges, around windows, near deck connections, and at the base of walls also deserve careful attention. The siding is only one part of that assembly. Water-resistive barriers, flashing, trim, and drainage details help direct moisture away from vulnerable areas.

    Before installation, an inspection can reveal damaged sheathing, rot, or conditions that need correction. Covering an unresolved moisture problem with new siding can create a more complicated project later. This is why a written scope should identify wall preparation and water-management work separately from the visible siding material.

    Consider snow, hail, and freeze-thaw conditions

    Repeated temperature changes can place stress on exterior materials and the connections around them. Snow and ice can affect lower wall areas, while hail or falling branches may damage exposed sections. Neither vinyl nor fiber cement should be presented as universally immune to weather-related damage. The product selected, the condition of the wall, the detailing around openings, and the quality of installation all influence how the finished exterior performs.

    Installation quality matters especially at joints, corners, penetrations, and transitions between materials. Fiber cement also requires careful handling and cutting, while vinyl requires appropriate fastening and room for movement. Following the selected product’s installation requirements helps reduce avoidable problems, but no material eliminates the need for inspection and maintenance.

    For a practical recommendation, compare the home’s exposure, condition, appearance goals, and maintenance preferences alongside the complete scope. A local siding inspection and replacement can help identify the custom solution that fits the property rather than assuming the lowest material cost is the best long-term choice.

    How Should You Choose Between Vinyl and Fiber Cement Siding?

    The right choice depends less on a material label and more on how the siding needs to serve your home. A useful decision starts with your ownership horizon, preferred appearance, maintenance expectations, weather exposure, and the condition of the existing exterior. It should also account for the exact product and the complete written scope, not just the siding panel itself.

    Start with how you want to live with the siding

    Consider how long you expect to own the home and how involved you want exterior maintenance to be. Vinyl siding is lightweight and PVC-based, while fiber cement is a heavier material made with cement, sand, water, and cellulose fibers. Those differences can affect handling, installation requirements, trim details, and the preparation needed for your home. Neither material is automatically the better fit for every property.

    Appearance is another practical filter. Compare the actual profiles, textures, colors, and trim options available for the products under consideration. Look at full-size samples in natural light, and consider how the siding will coordinate with roofing, windows, doors, and other exterior features. A product that looks appealing in a small sample may create a different impression across the entire elevation.

    Match maintenance and exposure to the product

    Think honestly about the upkeep you are prepared to handle. Vinyl generally calls for periodic cleaning and inspection. Fiber cement may require attention to its finish, joints, caulk, and product-specific repainting or maintenance instructions. The exact manufacturer guidance matters, so ask for the product documentation rather than relying on broad material claims.

    Minnesota homes also face freezing winters, heavy precipitation, snow, and hail. Exposure varies by elevation and location. A shaded wall, a wind-facing gable, and an area beneath a roof edge may have different maintenance needs. Good installation and water management remain important for either material, and no siding choice should be treated as a guarantee against weather damage.

    Compare the written scope, not just the material

    Before deciding, ask whether the proposal clearly addresses removal, wall inspection, water-resistive barriers, flashing, trim, windows, corners, penetrations, disposal, cleanup, and any needed repairs. A siding inspection can identify rot, damage, or other conditions that affect the work. The exact product, home condition, labor, complexity, and preparation all shape the project scope.

    For a property in the Rogers area, a discussion with Rogers siding contractors can help connect those factors to a custom solution. The goal is a clear comparison and professional installation plan that fits the home, rather than choosing based on the lowest material-only figure.

    What Questions Should You Ask Before Comparing Proposals?

    Two siding proposals can appear similar until you look beyond the material name. A useful comparison starts with the written scope: what the contractor inspected, what preparation is included. Which products are specified, and how the completed work will be protected from water and weather. Ask the same questions of each contractor so you are comparing complete plans rather than abbreviated descriptions.

    1. What exactly is included in the removal and inspection? Ask whether the proposal covers removal of the existing siding, disposal, and an inspection of the sheathing and wall condition underneath. If rot, moisture damage, or other problems are found, ask how those conditions will be documented and handled before new siding is installed. A proposal should make clear which repairs are included and which require your approval.
    2. How will the wall be prepared for the selected material? Request a plain-language explanation of the preparation work, including the water-resistive barrier, flashing, and any transitions around windows, doors, corners, and wall penetrations. These details affect the scope of the project, even when they are not visible after completion. The answer should be specific to your home, not a generic description of siding work.
    3. Which exact siding, trim, and accessory products are specified? “Vinyl” and “fiber cement” describe material categories, not one complete product selection. Ask for manufacturer, product line, profile, color, finish, trim approach, and compatible accessories in writing. If you are considering fiber cement siding installation, confirm that the proposal identifies the products and installation details rather than using a broad label alone.
    4. How are trim, openings, and flashing handled? Ask how the contractor will detail windows, doors, corners, roof-to-wall areas, and other penetrations. Confirm whether replacement or repair of trim is included, and whether the proposal identifies assumptions about existing windows, gutters, vents, and exterior fixtures. Clear answers help prevent unexpected changes in scope.
    5. What does cleanup and project completion include? Ask who handles daily debris, final cleanup, disposal, and inspection of the finished work. Clarify how damaged areas, loose pieces, exposed fasteners, gaps, and unfinished transitions will be addressed. Also ask what maintenance the selected product and finish require, and where manufacturer instructions apply.
    6. What did the inspection find, and what remains uncertain? A trustworthy proposal should distinguish observed conditions from assumptions. Ask the contractor to explain the home’s exposure, existing siding condition, and any areas that could not be evaluated before removal. This gives you a more useful basis for comparing proposals than focusing on the material name alone.

    The goal is not to turn a proposal review into a step-by-step installation manual. It is to confirm that each plan accounts for the same practical work and offers a custom solution for the home. A written scope, careful inspection, exact product information. And clear maintenance expectations make the vinyl vs fiber cement siding cost discussion more meaningful without reducing the decision to a single figure.

    Frequently Asked Questions

    How should I compare vinyl vs fiber cement siding cost?

    Compare the complete project scope, not the material label alone. Review the selected product, removal and disposal, wall preparation, water management, trim, openings, labor, cleanup, and installation details. An inspection can identify hidden conditions that affect the work and help you compare proposals accurately.

    What are the downsides of fiber cement siding?

    Fiber cement is heavier and can require more involved handling and installation. Its maintenance may include attention to the finish, joints, caulk, and product-specific repainting requirements. Ask which product is proposed and what care the manufacturer recommends, then weigh those responsibilities against the appearance and durability characteristics you want.

    Does fiber cement siding lower home insurance?

    Do not assume that a siding material will automatically change your insurance premium. Coverage and underwriting decisions depend on your insurer, policy, property, and documented conditions. If insurance is part of your decision, ask your carrier directly what information it considers and keep the installation documentation for your records.

    Which siding is better for Minnesota weather?

    Neither material is a universal answer for every home. Consider the property’s exposure to freezing weather, precipitation, snow, hail, and wind, along with the existing wall condition and installation details. Proper preparation, flashing, trim, and professional installation are important parts of how the finished exterior performs.

    What should I ask before choosing between vinyl and fiber cement?

    Ask for the exact product, proposed scope, removal and disposal plan, wall-preparation findings, water-management details, trim and opening work, maintenance expectations, and any product-specific requirements. Also explain your priorities for appearance, upkeep, weather exposure, and ownership horizon so the recommendation can reflect your home rather than a generic material comparison.

    Ready to Choose the Right Siding?

    A siding evaluation can help you compare vinyl and fiber cement based on your home’s condition, appearance goals, maintenance expectations, and the full project scope. Referred Restoration can help you discuss a custom solution for your Minnesota home without reducing the decision to material choice alone.

    Contact Referred Restoration online to request a siding evaluation and discuss your options.

  • Average Cost to Replace Siding on a 2000 Sq Ft House

    Average Cost to Replace Siding on a 2000 Sq Ft House

    A 2,000-square-foot home is not automatically a 2,000-square-foot siding project. The exterior area depends on wall height, the number of stories, gables, rooflines, bump-outs, windows, doors, and attached spaces such as garages or porches. In Minnesota, the condition behind the existing siding and the details needed to manage moisture matter just as much as the visible surface.

    The average cost to replace siding on a 2000 sq ft house cannot be determined responsibly from floor area alone. A useful assessment accounts for the actual wall measurements, material selection, tear-off, trim, access, repairs, and installation conditions instead of applying a generic figure.

    Understanding those variables helps you compare recommendations clearly and identify what belongs in a complete scope. Start with the measurements and layout that determine how much exterior surface and trim the project really includes.

    Contact Referred Restoration online at (763) 726-4245 to discuss a siding replacement plan for your Minnesota home.

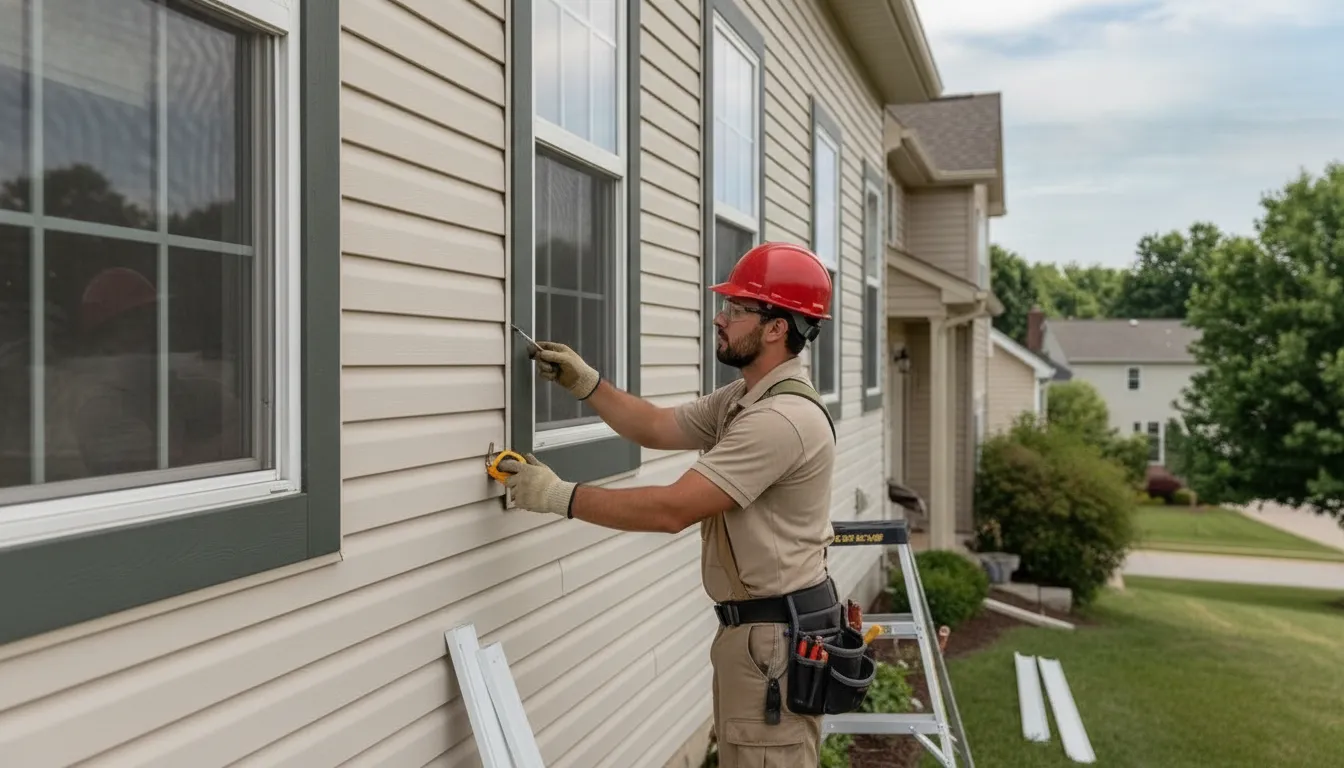
    Minnesota siding professional inspecting the exterior of a suburban home

    What does average cost to replace siding on a 2000 sq ft house really depend on?

    The short answer is that floor area is only a starting point. A home described as 2,000 square feet refers to its interior living area, not the amount of exterior wall surface that will receive siding. The siding quantity must be evaluated from the outside of the home, elevation by elevation, because layout and construction details can change the project scope significantly.

    Wall length and height are central to the assessment. A compact, single-story footprint may present a very different exterior surface than a taller home with multiple stories. The number of stories can affect both the amount of wall covering and the installation approach. Gables, steep rooflines, dormers, and other changes in elevation add distinct areas that require careful fitting, cutting, flashing, or trim transitions.

    Openings also matter. Windows and doors interrupt the wall surface, but they create their own detailing requirements around the edges. The assessment should account for the trim, flashing, corners, and transitions needed to finish those areas properly rather than treating every wall as a simple rectangle. Bump-outs can add more corners and wall sections, while garages and porches may be attached to the main footprint but still require separate measurements and finishing details.

    Other attached structures can affect the scope as well. An attached garage, enclosed porch, or addition may use different wall planes, roof intersections, and trim details from the original portion of the home. Landscaping, decks, fences, and other site conditions do not change the floor area, but they can affect access and installation preparation.

    For a broader look at how Minnesota homeowners can approach these decisions, see our guide to siding replacement decisions. A reliable assessment should document the exterior dimensions, openings, geometry, attached areas, and visible condition before recommending a replacement plan. That is why a generic figure cannot accurately represent every 2,000-square-foot house.

    How do wall condition and tear-off change the scope?

    Replacing siding is not always a simple process of removing one finish and fastening another in its place. The existing siding must be removed, sorted for disposal, and followed by a careful look at the wall assembly. What is found behind the cladding can determine whether the project needs only surface preparation or additional repair before new siding can protect the home.

    What can removal reveal?

    Old siding can conceal moisture damage, rot, pest damage, cracked sheathing, or areas where water has entered around openings and transitions. A wall inspection should look for evidence of bulk-water penetration and other conditions before work proceeds. The U.S. Department of Energy’s Building America Solution Center recommends identifying potential problems beforehand so needed remediation can be included in the siding scope: review its re-siding inspection checklist.

    That does not mean every home needs structural repairs. It means the condition should be verified after removal rather than assumed from the home’s floor area or the visible appearance of the old siding. If sheathing is damaged, it may need repair or replacement. The exposed surface should also be smooth and free of protruding fasteners or irregularities before the weather-control layers and new cladding are installed.

    How do house wrap and flashing fit into the work?

    House wrap is a weather-resistive barrier and drainage plane behind the siding. It helps provide a path for moisture that gets past the cladding to drain away from the wall cavities. It is not a substitute for correctly installed siding or flashing. The barrier should be continuous, sealed, and integrated with flashing around windows, doors, wall penetrations, and the top and base of the wall. The U.S. Department of Energy explains this relationship in its guidance on house wrap as a weather-resistive barrier.

    Depending on the home’s condition and the selected approach, the written scope may also address insulation, trim, soffits, fascia, vents, and other items affected during tear-off. These details matter because a sound siding installation depends on more than the visible panels.

    Repair or replace?

    Repair may make sense when damage is limited to specific sections and the surrounding siding and wall assembly remain sound. Complete replacement may be more appropriate when deterioration is widespread. The existing system cannot be properly integrated with new weather protection, or ongoing moisture problems have affected multiple areas. A local inspection should establish that distinction. Referred Restoration provides siding inspections, repairs, and complete replacement for Minnesota homeowners. Start with a Rogers siding contractor assessment or request a tailored recommendation through the company’s free inspection process.

    Which siding materials and trim details should Minnesota homeowners compare?

    Material selection affects more than the visible color and profile. It also influences installation methods, detailing around openings, maintenance expectations, and how the exterior responds to Minnesota winters, moisture, freezing and thawing, wind, and hail. The right comparison starts with the home’s wall condition and design, then considers which product fits the way the home needs to be protected.

    MaterialQualitative strengthsQuestions to compare
    VinylA practical, economical option with a broad range of profiles and colors.How will the profile, color, exposure, and detailing complement the home’s architecture?
    Fiber cementDurable and weather-resistant, with a substantial appearance.What installation, cutting, fastening, and finish details are required for the selected product?
    LP SmartSide engineered woodA premium engineered-wood option that can provide a wood-inspired appearance.How will edges, joints, penetrations, and finish maintenance be handled?
    Traditional woodA natural material with distinctive texture and character.What preparation, coating, moisture-management, and ongoing care will the exterior require?

    These categories are a starting point, not a universal ranking. Referred Restoration documents vinyl, fiber cement, LP SmartSide engineered wood, and traditional wood as available material options. With vinyl positioned as economical, fiber cement as durable and weather-resistant, and LP SmartSide as a premium engineered-wood choice. You can review broader siding replacement decisions and compare exterior vinyl siding options before narrowing the selection.

    Trim is part of the exterior system

    An accurate scope should name the trim and accessories, not treat them as afterthoughts. Ask how the plan addresses outside and inside corners, window and door casings, soffits, fascia, vents, utility penetrations, gable edges, and transitions between siding materials. These details finish the appearance, but they also help direct water around vulnerable areas. Window and door flashing should be integrated with the weather-resistant barrier so moisture is managed behind the cladding, not trapped at an opening.

    Also compare whether existing trim is being retained, repaired, or replaced, and whether the selected siding requires compatible accessories. A clear material and trim schedule makes the recommendation easier to understand. It also keeps a generic answer from obscuring the actual work your Minnesota home needs.

    How do openings, rooflines, and attached structures affect installation?

    A simple wall is relatively straightforward to side. A home with several openings and changes in shape requires more planning because each transition must be measured, protected, and finished cleanly. Windows, doors, vents, hose bibs, light fixtures, and other penetrations all interrupt the siding pattern. Their trim projections can also affect how the new cladding meets the wall.

    Ask whether the written scope identifies every opening and fixture that will be removed, protected, reset, or replaced. Window and door areas may reduce the amount of open wall receiving siding, but they add detail around the edges. More importantly, flashing at these openings should be integrated with the weather-resistant barrier so water is directed away from the wall assembly. The U.S. Department of Energy Building America Solution Center describes this integration as a key part of protecting against bulk moisture: window and door flashing should work with the weather-resistant barrier.

    Rooflines and wall transitions need their own detail

    Gables, dormers, bump-outs, and multiple roof sections create additional corners and places where siding meets roofing or another wall plane. Complex roofs can require flashing in more locations where roof sections meet side walls. Those transitions should not be treated as incidental trim. Ask how the installer will handle step-flashing areas, kick-out locations, wall bases, and the top edges of siding near the roofline.

    Soffits and fascia also deserve a clear answer. They may be part of the siding project, or they may remain in place if their condition and dimensions work with the selected material. Corners, gable edges, outside projections, and changes in plane should be listed so you know which trim profiles and finishes are included.

    Garages, porches, and other attached areas

    An attached garage, porch, deck connection, or enclosed bump-out can change access and create another junction between materials. Confirm whether those elevations are included, how siding will meet porch roofs and deck surfaces, and whether existing trim will be reused or replaced. Also ask how vents, utility lines, exterior lights, and other fixtures will be protected during removal and installation.

    A useful scope describes each elevation and transition in observable terms. It should explain how the installer will handle openings, rooflines, attached structures, soffits, fascia, and flashing. Do not assume the phrase “new siding” covers every detail.

    What should homeowners ask about access and Minnesota weather?

    Access and weather are easy to overlook when reviewing a siding plan, but they can affect how safely and consistently the work is completed. Before work begins, ask where the crew will stage materials, place ladders or lifts, and move debris. Discuss landscaping, decks, fences, driveways, gardens, play equipment, and other features that may need protection or temporary relocation. Overhead wires, low branches, satellite equipment, and tight side yards can also affect access to individual walls.

    Ask how the contractor will protect the property while siding is removed and installed. A practical plan may include covering plants, protecting paved surfaces, securing loose materials, and keeping water away from exposed wall sections. Clarify who will move outdoor items and whether the homeowner should trim branches, unlock gates, clear the driveway, or remove decorations before the crew arrives. These details reduce avoidable delays and give the installation team a safer working area.

    Minnesota weather deserves specific discussion. Wind, rain, hail, freezing temperatures, thawing cycles, and sudden temperature changes can affect exterior work and the condition of existing siding. Ask what weather conditions would pause installation, how exposed walls will be protected if a delay occurs, and how the crew will secure materials overnight. Temporary protection should be part of the plan whenever portions of the wall are uncovered.

    Seasonal timing can matter because siding, sealants, and related materials may perform differently in extreme cold or heat. The siding guide for Minnesota homes explains why climate and installation quality belong in the planning conversation. Rather than promising a fixed completion date, a contractor should explain the expected work sequence, weather-related contingencies, and how schedule changes will be communicated.

    Useful questions include:

    • Which areas require special staging or temporary access changes?
    • How will landscaping, decks, fences, windows, and driveways be protected?
    • What happens if wind, rain, freezing temperatures, or hail interrupts the work?
    • How will exposed walls and stored materials be secured between workdays?
    • Who will communicate weather delays and confirm the next workable installation window?

    A clear answer to these questions helps distinguish a complete siding plan from one that considers only the visible wall surface.

    Contact Referred Restoration online at (763) 726-4245 to review your Minnesota siding replacement scope.

    What belongs in a written siding replacement scope?

    A written scope should make clear what will be inspected, installed, protected, removed, and checked before the project begins. That matters because the floor area of a home does not equal its exterior siding area. And the final work can vary with wall condition, openings, trim, access, and weather exposure. A clear scope gives you something specific to review instead of relying on a generic description.

    1. Inspection findings: Start with the condition of the existing siding and wall assembly. The inspection should note cracked or loose sections, rot, moisture intrusion, and other visible concerns. If removal may reveal hidden damage, the scope should explain how those findings will be documented and addressed before installation continues. Referred Restoration’s Rogers siding contractors can help determine whether targeted repair or complete replacement is the more appropriate path.
    2. Included elevations and measurements: Identify which sides of the home are included, along with attached garages, porches, dormers, gables, and bump-outs. The measurement plan should account for wall height, stories, rooflines, windows, and doors so the siding and trim quantities reflect the actual exterior.
    3. Removal and disposal: State whether existing siding, old trim, fasteners, and related materials will be removed. The scope should also identify how debris will be contained, hauled away, and managed around landscaping, driveways, decks, and walkways.
    4. Wall preparation: Spell out any needed sheathing repairs, air sealing, insulation, house wrap, and flashing. A weather-resistant barrier should function as a continuous drainage plane, with flashing integrated at windows, doors, and other penetrations. These layers help direct moisture away from the wall assembly.
    5. Products and trim: Name the selected siding material, profile, color, finish, and installation requirements. List replacement or retained items such as corner posts, window and door trim, soffits, fascia, vents, transitions, and caulking. Siding should be installed according to the manufacturer’s instructions.
    6. Access and schedule: Document staging needs, temporary protection, homeowner preparation, weather limitations, and how schedule changes will be communicated. Minnesota cold, heat, wind, precipitation, and freeze-thaw conditions can affect exterior installation and sealants.
    7. Cleanup and completion checks: Confirm daily and final cleanup, removal of protective materials, inspection of lines and transitions, secure fastening, sealed penetrations, and a walkthrough of completed elevations. The process should be easy to follow: a free inspection, a custom solution, and professional installation.

    Frequently Asked Questions

    Does a 2,000-square-foot home need 2,000 square feet of siding?

    No. The home’s floor area is different from the exterior wall area that receives siding. A proper assessment considers each wall’s length and height, the number of stories, gables, rooflines, bump-outs, windows, doors, and attached structures. Those details determine the siding, trim, and accessories the project actually needs.

    How do I know whether to repair or replace the siding?

    An inspection should come before that decision. Referred Restoration provides repairs for damaged or cracked sections as well as complete replacement. The condition of the siding, moisture exposure, rot, and the underlying wall assembly help determine whether targeted repairs are appropriate or a broader replacement makes more sense. Source: Referred Restoration siding services.

    Is removing the old siding always part of the project?

    Not always, but removal and disposal should be clearly identified in the written scope. Once existing cladding is removed, the wall may need preparation, sheathing repairs, house wrap, flashing, insulation, or trim work. The wall should be checked for moisture or other damage before new siding is installed. Source: PNNL re-siding checklist.

    Which siding material is best for a Minnesota home?

    There is no universal answer. Common options include vinyl, fiber cement, LP SmartSide engineered wood, and traditional wood. Compare each material’s appearance, maintenance needs, weather characteristics, installation requirements, and compatibility with the home’s existing trim and design. Minnesota’s winter, moisture, wind, hail, and freeze-thaw conditions make installation quality especially important.

    When is the best time to replace siding in Minnesota?

    Plan around workable weather and contractor availability rather than a single guaranteed season. Extreme cold or heat can affect siding and sealant performance, while peak periods may fill schedules earlier. A contractor should explain weather contingencies, temporary protection, and how the planned installation sequence fits the home’s conditions.

    Schedule a local siding inspection

    A professional inspection helps separate visible siding concerns from the wall condition, trim details, access needs, and weather considerations that shape a replacement plan. Referred Restoration can review your Minnesota home, explain the relevant scope variables, and outline a practical path without relying on generic assumptions about floor area.

    Contact Referred Restoration online at (763) 726-4245 to request a local siding inspection and tailored replacement plan.

  • Exterior Storm Damage Contractor: Coordinating Roof, Siding, Gutter, and Window Repairs

    Exterior Storm Damage Contractor: Coordinating Roof, Siding, Gutter, and Window Repairs

    A single severe storm can tear through your neighborhood and compromise every layer of your home’s exterior in minutes. When hail, heavy snow, or high winds strike, they rarely damage just one area of a property.

    Working with an experienced exterior storm damage contractor is the most reliable way to coordinate complex, multi-component repairs after severe weather. In Minnesota, extreme storms frequently impact roofs, siding, gutters, and windows simultaneously, creating structural risks that require professional evaluation. Hiring a single local provider to manage the entire restoration project ensures that every trade is scheduled in the correct order. Prevents secondary water intrusion, and guarantees that your home’s weather barrier is sealed properly from top to bottom. A comprehensive restoration project always begins with a professional assessment to identify all structural damage before filing an insurance claim.

    Schedule a Free Inspection with a local exterior storm damage contractor to assess every layer of damage before any work begins.

    Managing several different repair crews on your own can lead to communication gaps and overlooked issues. Understanding what to do immediately after a storm damages your home is the first step toward protecting your property and starting the recovery process. Here is how you can take control of the situation and safeguard your investment right away.

    What to Do Immediately After a Storm Damages Your Home

    The first hours after a severe storm determine how smoothly your home restoration goes. Homeowners in Rogers, MN, should focus on personal safety, document visible damage from ground level, secure openings with temporary covers, and contact a professional exterior storm damage contractor for a thorough inspection. Taking these steps immediately protects your property from further damage and creates the documentation your insurer will need to process your claim efficiently.

    Severe Minnesota storms can strike quickly, leaving homeowners with sudden roof or siding damage. Taking the right steps right away helps protect your home from more harm. When severe weather hits, you must focus on safety, gather proof of the damage, and secure your home to prevent water from getting inside.

    Focus on Safety and Avoid High Hazards

    Your first step after a storm is to check for hazards around your yard. Look for fallen power lines, broken glass, or loose tree limbs. Do not walk on your roof after a high wind or hail event. Walking on a damaged roof is unsafe, and you could cause more harm to the shingles. It is always best to let an expert Rogers roof inspection team handle the high work.

    Take Photos of the Damage for Your Records

    Once it is safe to go outside, start taking photos of the damage from ground level. Take clear pictures of missing shingles, dented siding, torn gutters, and broken windows. Having clear photos is crucial when you file insurance claims later. If you need to make temporary repairs to stop leaks, make sure to save every single receipt. Keeping detailed records of all receipts and expenses is the best way to get reimbursed by your insurer.

    Protect Your Interior with Temporary Tarping

    If the storm left holes in your roof or broke windows, you must act fast to stop water from ruining your home’s interior. Placing a heavy tarp over damaged areas is a temporary but necessary step. Using a plastic cover keeps rain from soaking your attic, ceilings, and walls. For safe and secure protection, contact an experienced emergency storm damage repair team. They have the right tools to secure your home before permanent repairs begin.

    Schedule a Professional Storm Damage Inspection

    After you secure your home, you should contact a trusted local exterior storm damage contractor. A professional team can find hidden issues that you might miss from the ground. They will check the entire exterior of your house, including your gutters, trim, and siding. Getting an expert inspection ensures that all storm-related damage is recorded so you can plan your next steps with confidence.

    Why Does a Comprehensive Exterior Inspection Matter After Severe Weather?

    A professional exterior inspection after severe Minnesota weather reveals hidden damage that homeowners cannot see from the ground. Hail impact can crack asphalt shingles and chip away protective granules without any visible signs from your driveway. High winds can loosen siding, bend gutters, and create small gaps that allow water to seep into your wall cavities. A qualified exterior storm damage contractor examines every component of your home’s envelope to catch these issues before they escalate into costly structural repairs.

    Minnesota weather can be severe. In towns like Rogers, Cottage Grove, St. Francis, and Monticello, homes face extreme weather including frequent hail, high winds, and a high annual snow load. These harsh storms cause complex damage that is hard to spot from the ground. When you need help, hiring a professional exterior storm damage contractor is the best way to find hidden issues and protect your home.

    Hidden Damage You Cannot See from the Ground

    A simple look from your driveway is not enough to find storm damage. High winds and large hail often leave marks that are only clear when you get up close. For example, hail impact on asphalt shingles may chip away protective granules or crack the backing. This damage can easily go unnoticed without a close look. Over time, these small spots let water seep into your attic and cause mold or wood rot.

    Professional inspectors look at every part of your home to ensure nothing is missed. They check your roof, siding, trim, windows, and gutters. If you only look at your roof, you might miss issues with other parts of your home. A professional knows how to find thin cracks or soft spots in your siding before they cause leaks.

    How One Bad Component Impacts Your Entire Home

    Your home has an outer layer designed to work as one system. When severe weather hits, damage to one part often means there are broader issues with other areas. High winds can loosen siding, bend trim, or pull gutters away from your roofline. If your siding is cracked, water can run behind it and damage your wall framing.

    Gutters and trim are often overlooked after a storm, but they are vital. When gutters get bent or clogged with hail granules, they can no longer direct water away from your home. This standing water can overflow and lead to structural water issues around your foundation. A complete checkup ensures your entire outer envelope is secure and ready for the next storm. For more details on checking your siding, read our guide on siding damage after a storm.

    How a Single Contractor Coordinates Roof, Siding, Gutter, and Window Repairs

    A single exterior storm damage contractor manages every trade involved in your home restoration, from roof replacement to window installation. You work with one project manager who schedules the work in the correct order, coordinates with your insurance adjuster, and ensures consistent weatherproofing across every component. This approach eliminates the communication gaps that occur when separate crews work independently, reduces the risk of one crew damaging another’s completed work. And delivers a cohesive final result for your home in communities like Rogers, Cottage Grove, St. Francis, and Monticello.

    Storm damage rarely stops at your shingles. A single severe weather event in Minnesota can harm your roof, tear your siding, dent your gutters, and crack your windows. Managing these repairs with different companies often leads to gaps in your home protective seal. Working with a single exterior storm damage contractor like Referred Restoration ensures that every part of your home gets a professional inspection and complete repair.

    One Point of Contact for Your Home Restoration

    Coordinating multiple repair crews can quickly become a full-time job. Homeowners must trade calls with roofers, siding crews, window teams, and gutter installers. A single-source contractor removes this stress by handling the entire process from start to finish. You only have to talk to one project manager who oversees every trade, tracks the work timeline, and answers your questions. This simple approach keeps your project on track and saves you time during a stressful home recovery.

    Consistent Weatherproofing and Eye Appeal

    Your roof, siding, and gutters work together as a single system to keep water out of your home. When different teams work on these parts at different times, they can easily compromise each other’s work. For example, a roofing crew might accidentally damage new siding, or a siding team might misalign your gutters. Coordinating your roofing and siding repairs at the same time ensures consistent weatherproofing and guards your home envelope. Choosing one team also guarantees that your new materials match perfectly, keeping your home exterior looking beautiful and cohesive.

    Clear Communication with Your Insurance Adjuster

    Filing a property claim can feel overwhelming when you have to track multiple bids. Insurance adjusters prefer clear, comprehensive proof of damage to assess your claim accurately. Your contractor helps by providing organized documentation that maps out every repair your home needs. If you have questions about the process, you can learn more about scheduling an insurance roof inspection to see how professional records support your claim. Having one clear scope of work helps the adjuster review your loss without the confusion of mixed estimates from separate crews.

    Local Service in Your Minnesota Community

    Local homes need sturdy materials to stand up to our tough winter weather and summer storms. We serve homeowners in Rogers, Cottage Grove, St. Francis, and Monticello with storm restoration work built to last. Our team treats your property with the same care we would use on our own homes. By handling your entire project under one roof, we ensure that your roof, siding, gutters, and windows are strong enough to protect your family for years to come.

    How Do You Navigate the Insurance Claim Process With a Contractor?

    An exterior storm damage contractor helps you navigate the insurance claim process by providing thorough documentation of every repair your home needs. They inspect your property, photograph all visible and hidden damage, and compile a detailed scope of work that your adjuster can review. While your insurance policy determines coverage limits, having a single contractor’s organized documentation accelerates the review process and reduces back-and-forth between you, the adjuster, and multiple repair crews.

    Dealing with the aftermath of a severe storm can feel overwhelming. Filing a claim for property damage does not have to be a stressful task if you have the right support. A professional insurance roof inspection helps lay the groundwork for a smooth process. When severe weather hits Rogers or Cottage Grove, a skilled exterior storm damage contractor provides the clear proof needed to move your claim forward.

    How Contractors Help With Claims

    Your restoration contractor plays a vital role by offering technical support to make the process easier. The team inspects your home and provides thorough proof to show what needs repair. This deep level of professional proof helps insurance adjusters see the true scope of the storm damage. By showing clear photos and details, the contractor makes it easier to track what needs to be fixed. This step keeps the repair plans clear and accurate for everyone involved.

    The Limits of Coverage and Contractor Roles

    It is important to know that your insurance carrier and your specific policy terms decide what is covered. A contractor can assist with your claim by offering proof, but they cannot make coverage choices or promise specific payouts. The role of an exterior storm damage contractor is to document the issues and complete the actual restoration work. Knowing these boundaries helps you set realistic expectations while working with your insurer.

    Record Keeping and Next Steps

    As you go through this process, keeping detailed records is highly beneficial. Homeowners should save every receipt, bill, and paper related to the temporary repairs or restoration. Keeping track of these repair expenses ensures you have the documentation ready for your files. Taking these organized steps protects your interest and helps make sure your home gets back to its best state quickly.

    What to Look for When Choosing an Exterior Storm Damage Contractor

    When selecting an exterior storm damage contractor in Minnesota, verify that they hold a valid Minnesota Residential Building Contractor License, which is required for structural repair work in the state. Look for a contractor who performs a full exterior envelope assessment rather than a limited roof-only inspection. Avoid out-of-state crews that arrive immediately after storms and pressure you to sign contracts on the spot. A reliable local contractor provides honest assessments, clear timelines, and a single point of contact throughout your restoration project.

    Selecting a restoration team is a major decision after severe weather. A quality exterior storm damage contractor must hold a valid Minnesota Residential Building Contractor License. This credential is required to perform physical repair work in our state. Working with a licensed local professional ensures your repairs meet all state codes. Homeowners in local communities must verify this license before signing. This includes Rogers, Cottage Grove, St. Francis, and Monticello.

    Demand a Complete Envelope Review

    Some crews only inspect your roofing shingles and ignore the rest of the house. A professional contractor conducts a thorough assessment of every single component on your home. This review covers the gutters, siding, windows, and trim. Exterior trim restoration is essential for a weatherproof building envelope. Skipping these secondary areas can leave hidden gaps that allow rain to seep inside your walls.

    Prevent Secondary Water Issues

    Finding storm damage early is the best way to prevent water issues later. Catching siding damage after a storm prevents leaks from rotting your wall framing. When rain bypasses cracked panels, it creates a damp space where mold grows. This moisture can ruin insulation and drywall before you spot a leak. Referred Restoration focuses on honest inspections. We do not use sales pressure.

    Watch for Quick Decision Pressure

    Avoid out-of-state crews who arrive right after a storm and demand fast signatures. Reliable local professionals will never force you into a quick choice. They do not ask for payments before a full inspection is complete. A trusted team walks you through the process, treats your home with care, and helps you recover safely.

    A thorough comparison of material options can help you make an informed decision.

    Material comparison for storm-resilient exterior upgrades.

    Comparing Exterior Restoration Materials for Storm Resilience
    ComponentStandard MaterialStorm-Resistant OptionKey Benefit
    RoofingBasic 3-tab shinglesImpact-resistant architectural shinglesBetter hail impact resistance and wind uplift rating.
    SidingVinylFiber cementDoes not crack or warp under extreme temperature swings.
    GuttersStandard aluminumHeavy-gauge seamless aluminumResists denting from hail and ice buildup.
    WindowsDouble-paneImpact-rated double-paneReduces risk of shattering from wind-borne debris.

    Preparing Your Minnesota Home for Future Severe Weather

    Minnesota’s extreme weather demands exterior materials that can withstand hail, high winds, and heavy snow loads throughout the year. Homeowners preparing their property for future storms should choose impact-resistant architectural shingles for roofing. Fiber cement siding for its durability under temperature swings, heavy-gauge seamless gutters that resist denting, and impact-rated windows for debris protection. A qualified exterior storm damage contractor can recommend the right materials for your home and install them as a coordinated system.

    Minnesota weather is famous for its extreme shifts. With winter temperatures dropping below zero, heavy snowstorms dumping over forty inches of snow. And spring and summer bringing frequent hail and windstorms, your home’s exterior takes a beating all year long. Preparing your property for future storms starts with making smart choices about the materials you use for your roof, siding, and gutters.

    Choose Storm-Resistant Exterior Materials

    The type of materials on your home’s exterior directly affects the amount of damage your property might suffer during severe weather. Standard materials may crack or pull away under stress, but high-resilience products are engineered to withstand extreme elements. Homeowners can protect their investment by choosing premium materials, such as durable siding and high-quality shingle products. Selecting resilient options for your siding and roofing ensures your home’s protective envelope remains strong for years to come.

    Understand the Power of Wind Pressure

    High winds do more than just blow loose items around your yard; they also create immense pressure differences. This wind pressure can bend, deform, or even lift entire roofing systems if they are not installed correctly. Standard roofing and siding can buckle under these extreme forces, leading to major leaks and structural failures. Working with a contractor who understands wind pressure resistance is essential to ensuring your home is built to withstand Minnesota’s strong storms.

    Invest in Long-Term Exterior Durability

    Selecting the right materials is the single most important factor in improving your home’s resilience against severe storms. Premium asphalt shingles and durable siding options are designed to handle impact from large hail and the pulling forces of high winds. By investing in these robust exterior systems, you significantly reduce the risk of future storm damage. Saving yourself from the hassle of repeated repairs and protecting your family all year round.

    Frequently Asked Questions About Storm Damage Restoration

    Who is liable for storm damage to a home?

    Property owners are generally responsible for structural damage caused by natural storms, which is why most homeowners carry insurance policies to help cover restoration. When a severe weather event causes damage. The homeowner must take immediate steps to document the issues and contact a licensed exterior contractor to inspect the property and prevent secondary issues.

    How long after a storm can you claim roof damage?

    The timeframe for filing a storm damage claim depends entirely on your specific insurance policy terms. Some insurance carriers require you to file within one year of the storm, while others may allow up to two years. Because coverage is decided by policy terms, it is crucial to schedule a professional inspection immediately after a storm to document the damage while the evidence is fresh.

    At what wind speed will a roof come off or suffer damage?

    Roof damage can begin at wind speeds as low as fifty miles per hour, which can lift loose shingles or tear off gutters. Severe damage, such as lifting entire roof sections or causing major metal roof deformation, typically happens when winds exceed seventy to eighty miles per hour. Regular inspections help ensure your roofing components are secure before these high-wind events occur.

    What should I do immediately after storm damage to my house?

    Your first step is to focus on safety and avoid hazards like fallen power lines or unstable structures. You should document all visible issues from ground level using photos and avoid walking on the roof yourself. Contact a professional contractor to make temporary repairs like tarping to stop leaks. And be sure to keep detailed records of all receipts and expenses related to the cleanup.

    Coordinate Your Full Storm Restoration With One Trusted Team

    Recovering from a severe storm does not have to be a stressful or complicated process. At Referred Restoration, we treat every home as if it were our own. We serve homeowners throughout Rogers, Cottage Grove, St. Francis, and the Monticello corridor with honest assessments, reliable craftsmanship, and customer-first service.

    Schedule a Free Inspection with our trusted local team. Our expert exterior storm damage contractor will assess every component of your home and create a complete restoration plan. You can also Contact Us Today to learn how we can protect and restore your Minnesota home.

  • Choosing Replacement Windows for Minnesota Cold Weather

    Choosing Replacement Windows for Minnesota Cold Weather

    Minnesota winters can punish any home, and drafty windows are often the first place that heat escapes. When ice builds up on the inside of the glass, it is a clear sign that your old window units can no longer protect your living space.

    Schedule a free window inspection with Referred Restoration to find out if energy-efficient replacement windows are right for your home. Our local team evaluates your current frames, checks for hidden drafts, and provides honest recommendations tailored to your property.

    Upgrading to replacement windows with double-pane insulated glass, low-E coatings, and argon gas fills can lower household energy bills by up to 13 percent. Modern designs block drafts, prevent seal failure, and handle Minnesota freeze-thaw cycles better than older single-pane units.

    Before you choose your new frames, you must know what specific problems to look for in your current setup. Knowing the common warning signs of frame rot and seal failure can help you make a smart choice.

    How Do You Know When It Is Time for Replacement Windows?

    Drafts near closed windows, fog between glass panes, and frames that stick or show rot are clear signs your windows have failed. These issues let cold air in during winter and force your heating system to work harder, raising monthly utility costs.

    Old or worn window units can compromise the comfort and energy efficiency of your home. Recognizing the indicators of window failure early can help you avoid water damage and high utility bills. Homeowners should look for specific physical and performance-related warning signs to determine when to buy replacement windows for their property.

    Drafts and cold air leaks

    If you feel a breeze while standing near a closed window, the seals around your frame or sash have likely failed. These drafts allow cold air to enter during winter and warm air to seep in during summer. When drafts become noticeable, simple repairs are often not enough to restore comfort. To confirm if your seals are broken, you can diagnose drafty windows by checking for visible gaps or listening for whistling wind. You can also use a light source to check for air movement around the edges of the sash.

    Failed glass seals and foggy panes

    Condensation or fog trapped between double-pane or triple-pane glass is a clear sign of seal failure. Modern insulated units use space between glass panes to improve the insulating power of your home. When the seal around these panes breaks, moisture enters the space and creates a cloudy look that you cannot wipe clean. This moisture buildup ruins the thermal protection of the glass, making your HVAC system work much harder to keep your indoor rooms comfortable.

    Difficulty opening and frame damage

    Windows should open and close smoothly without sticking or requiring heavy force. Swelling wood frames, warped vinyl, or rusted hardware can make operating your windows difficult or unsafe. When wood frames show rot or soft spots from water penetration, full replacement is recommended to preserve your home’s structural integrity. Neglecting damaged frames can lead to mold growth and wall damage, especially during extreme freeze-thaw cycles.

    What Replacement Window Types and Materials Work Best in Minnesota?

    Vinyl and fiberglass frames paired with double-pane or triple-pane glass offer the best insulation for Minnesota homes. Casement windows seal tightly against wind, while picture windows provide maximum energy efficiency with no moving parts.

    Choosing the right replacement windows for your home requires looking at both design and durability. In Minnesota, your windows must withstand extreme seasonal shifts, including heavy snowfall and sudden temperature changes. To make a smart choice, homeowners should learn about the main window styles and frame materials available today.

    Common window styles for local homes

    Different window styles offer distinct benefits for insulation, ease of use, and airflow. Double-hung windows are a classic choice where both the top and bottom sashes move. They allow you to easily wash the glass from inside and manage airflow. If you want to understand window components like sashes and frames, starting with these standard styles is helpful.

    Casement windows swing outward using a crank. They provide a tight seal when closed because the wind pushes the sash tighter against the frame, which helps stop cold winter drafts. Picture windows are fixed glass units that do not open. They offer the best insulation because they have no moving parts to let air leak in. Combining these styles helps balance fresh air and winter warmth.

    Frame materials built for cold weather

    The frame material you choose impacts how well your new windows perform during freezing winters. Vinyl frames are a popular, low-maintenance option that resists moisture and rot. They have hollow chambers inside that trap air, which helps keep cold drafts out of your living space. According to the U.S. Energy Star program, vinyl and fiberglass frames also tend to have longer color and finish warranties than wood frames.

    Fiberglass is exceptionally strong and expands at nearly the same rate as glass. This match helps the window maintain its seals during extreme temperature swings, preventing foggy glass and drafts. Wood frames offer a classic look and excellent natural insulation, but they require regular painting or staining to prevent water damage from melting snow.

    Frame MaterialInsulationMaintenanceCold Climate Rating
    VinylGoodLowExcellent
    FiberglassExcellentLowExcellent
    WoodExcellentHighGood with care

    Glass options for winter insulation

    The glass itself is just as important as the frame. Modern replacement windows use advanced glass technology to keep your home warm and shield your interior from damage. Standard single-pane glass lets too much heat escape, which forces your heating system to work harder during cold spells.

    Most energy-efficient options feature double-pane or triple-pane glass filled with argon gas between the panes to improve insulating power. Using double-pane glass with specialized low-emissivity coatings helps block heat loss while protecting your carpets and furniture from fading. Choosing the right combination of style, frame, and glass ensures your home stays comfortable through every season.

    Energy Efficiency: What Minnesota Homeowners Should Know

    ENERGY STAR certified replacement windows can lower household energy bills by up to 13 percent. Double-pane glass with argon gas fills and low-E coatings reduces heat transfer, stops drafts, and protects interiors from UV damage during Minnesota extreme temperature swings.

    When selecting new windows, understanding heat loss and heat gain is key to staying warm during freezing midwestern winters. Local properties face extreme temperature drops that put immense stress on building materials. Upgrading your home with modern features will help block drafty air and keep your heating system from working too hard.

    The Value of Energy Star Certification

    One of the best ways to verify how well a product performs is to look for official efficiency ratings. Replacing old single-pane units with ENERGY STAR certified windows can lower household energy bills by an average of up to 13 percent nationwide. These products are tested under strict guidelines to ensure they can handle cold weather without letting drafts inside. Choosing certified options is a smart way to upgrade your property and lower your monthly utility costs during the coldest months of the year.

    Advanced Glass Coatings and Gas Fills

    Modern glass technology goes far beyond standard clear panes to protect your home. Most high-performance replacement windows come with at least two layers of glass, also known as double-pane construction. Manufacturers fill the small space between these layers with argon gas, which is a safe, non-toxic gas that improves the insulating power of the unit. This dense gas slows down heat transfer, keeping precious warmth inside your rooms when outdoor temperatures plummet below freezing.

    Low-E Coatings for Interior Protection

    Special microscopic coatings on the glass surface are also highly useful for protecting your living spaces. These thin metal layers reflect heat back to its source while letting natural sunlight pass through. They help keep rooms warm in winter and cool in summer, while also cutting down on harmful ultraviolet rays. Reducing this light exposure protects your carpets, curtains, and furniture from fading over time, ensuring your home looks great for years to come.

    Why Professional Installation Matters in Minnesota

    Even the best replacement windows leak air and moisture if installed improperly. Professional installation by a local contractor like Referred Restoration ensures proper flashing, weather-tight seals, and insulation that stands up to Minnesota freeze-thaw cycles.

    Investing in high-quality replacement windows is only the first step toward securing your home. Even the most efficient window unit cannot perform as intended if it is put in place incorrectly. Referred Restoration brings years of local experience to every installation, ensuring a precise fit for the unique demands of Minnesota weather.

    Energy-efficient replacement windows being installed in a Minnesota home with professional weather sealing

    Protecting Your Home from Water and Ice

    Minnesota weather brings heavy snow, driving rain, and sudden temperature shifts. When water gets behind a window frame, it can rot wood, damage drywall, and promote mold growth. To stop this from happening, proper integration of windows into the home’s drainage plane is critical to prevent water penetration and failure in Minnesota climate. Professional contractors know how to layer flashing and wrap the frame so that moisture always flows down and away from your home.

    You can find detailed guidelines on how proper flashing guards against seasonal water issues on the University of Minnesota Extension site. Experienced local installers apply specialized weather-tight seals that expand and contract as the temperature shifts. This extra care keeps wind and melting snow out of your wall cavities through many cold winters.

    Stopping Air Leaks and Boosting Insulation

    Small gaps around a window frame let heated air escape in winter and warm air seep in during summer. When air leaks through these spaces, your heating and cooling systems have to work much harder, which can drive up your energy bills. Professional installers use custom-cut insulation and specialized expanding foam to seal the entire rough opening before the trim goes on.

    A tight seal around your new window frames ensures that your home retains its indoor temperature. Referred Restoration takes a consultative approach to find and fix hidden insulation gaps in your walls. We start with a free inspection to check your current frames, identify drafty spots, and build a custom installation plan that keeps your home comfortable all year long.

    Navigating Storm Damage and Insurance Claims for Windows

    Minnesota ranks third nationally for major hail events, with 6.3 billion dollars in total property damage from extreme weather in 2022. Storm-damaged windows often have cracked glass, broken seals, or bent frames that need prompt replacement to prevent further water damage.

    Minnesota weather can be severe, and homeowners in our state face unique risks. Minnesota ranks third nationally for major hail events. Our state had 6.3 billion dollars in total property damage from extreme weather in 2022, as reported by the Minnesota Department of Commerce. While many people check their roofs after a big storm, strong winds and hail also cause major issues for windows. Finding this damage early is key to keeping your home dry and secure.

    Spotting storm damage on your windows

    Hail and wind can damage your windows in several ways. Heavy hail can crack the glass or dent the metal cladding around the window frame. Strong winds can force debris against the window, causing chips or deep scratches in the glass. Severe storms can also break the seals between your window panes, which leads to foggy glass and poor insulation. If you notice drafts, water stains, or visible cracks after a storm, you likely need window replacement services to protect your home.

    Working with your insurance company

    When you have storm damage, filing a claim can feel hard. Most homeowners policies cover storm damage, but you must act quickly. Start by taking clear photos of all the damage you find. You should also check your policy for any special deductibles for wind or hail. It is helpful to work with a local exterior contractor Rogers MN who knows the local area. Referred Restoration can inspect your home and give you an honest report on what needs to be fixed.

    How a local contractor helps you

    Referred Restoration helps homeowners through the entire process after a storm. Our team can check your windows for hidden damage like broken seals or frame leaks. We provide detailed reports that you can share with your insurance adjuster. If you need new replacement windows, we will help you choose durable options that stand up to our tough local climate. You can schedule a free inspection to find out exactly what your windows need to keep your home safe.

    When Should You Repair Instead of Replace Your Windows?

    Repair a window when the damage is limited to a broken latch, torn screen, or single failed sash on an otherwise solid frame. Replace the entire unit when the frame is rotted, the glass seal has failed between panes, or the window cannot close tightly against drafts.

    Deciding between a minor window fix and installing new units requires a close look at how well your home handles local weather. In Rogers and Cottage Grove, the extreme climate puts major stress on glass and frames alike. Minor issues like a broken latch or a torn screen are easy to fix without replacing the whole unit. However, structural damage and major leaks often mean it is time to invest in quality replace drafty windows solutions.

    Recognizing Failed Glass Seals

    Minnesota winters bring deep freezes followed by rapid spring thaws, which create a harsh cycle for double-pane glass. This temperature swing causes materials to expand and contract, which often leads to seal failure. When a seal fails, the insulating argon gas leaks out and moist air gets in, leaving you with foggy glass that you cannot wipe clean. In our local climate, failed seals severely hurt how well your home holds heat, making a full window swap the most sensible option.

    Assessing Frame and Sash Damage

    Wood frames are highly prone to rotting when water gets trapped during heavy rains and melting snow. If the frame itself is soft, cracked, or warping, repairing the glass will not solve the underlying draft. In cases where the main frame remains solid but the moving parts are sticking or rotting, you might only need a window sash replacement to restore operation. But if rot has spread into the wall or the outer frame, full replacement windows are required to keep water out. According to the University of Minnesota Extension, proper integration of windows into the home’s drainage plane is critical to prevent water penetration and structure damage in our damp climate.

    Evaluating Energy and Draft Issues

    Old, single-pane windows or warped frames can allow massive drafts into your living space, making your heating system work much harder. If your home has rooms that always feel cold or breezy, check the frame edges for visible gaps or light. While temporary weather stripping can help for a short time, it does not stop the heat loss through the glass. Installing modern units with low-E coatings and insulated frames provides a permanent shield against cold winds and intense summer sun.

    Frequently Asked Questions

    Is it worth replacing 30 year old windows?

    Yes. Old windows usually have worn seals, drafts, and poor insulation. Upgrading to modern ENERGY STAR certified models can lower your home energy bills by up to 13 percent. New windows also block drafts, keep your home warm during cold Minnesota winters, and make your rooms more comfortable.

    What are the best replacement windows for the money?

    The best options balance durability with low maintenance. Vinyl and fiberglass windows are excellent choices for our climate. According to ENERGY STAR experts, vinyl and fiberglass frames typically offer longer color and finish warranties than wood. They also resist rotting and warping during wet weather.

    How can you replace your windows affordably?

    You can manage your budget by choosing durable vinyl styles, like double-hung windows, which perform well and last a long time. Working with an experienced exterior contractor in Rogers, MN for a free inspection is a great way to find the most efficient solution for your home without paying for unneeded features.

    How long do replacement windows last in Minnesota weather?

    Quality replacement windows typically last 20 to 30 years depending on the frame material and installation quality. Vinyl and fiberglass frames tend to hold up longer in freeze-thaw conditions because they resist moisture and do not rot like wood. Proper installation by a local contractor also extends the lifespan of your windows.

    Do replacement windows increase home value?

    Yes. New windows improve curb appeal, reduce energy costs, and signal to potential buyers that the home has been well maintained. Real estate experts often note that window replacement projects recover a significant portion of their cost at resale, making them a smart long-term investment for Minnesota homeowners.

    Can you replace windows in winter?

    Yes, experienced installers can replace windows year-round in Minnesota. Professional contractors use temporary seals and insulated panels to keep cold air out during the installation process. Winter window replacement is actually common in Minnesota because homeowners notice drafts and heating issues most during the cold months and want fast solutions.

    Ready to schedule a free window inspection?

    Delaying a window upgrade can lead to drafty rooms, high heating bills, and water damage from harsh Minnesota storms. Taking action now helps secure your home against extreme freeze-thaw cycles and ensures long-term comfort. Referred Restoration can assess your current glass and frames to help you find a durable, weather-tight solution. We make the entire process simple by guiding you through every step from choice to neat setup. You get solid local service that keeps wind and snow outside where they belong.

    Ready to schedule a free window inspection? Visit our contact page to set up a time with our local team and protect your house today.

  • Storm Damage Repair Checklist for Minnesota Homeowners

    Storm Damage Repair Checklist for Minnesota Homeowners

    After a severe Minnesota storm, knowing how to conduct a thorough storm damage repair inspection can save your home from hidden structural issues. This guide walks you through every area of your property, from the roof to the foundation, with steps tailored to weather patterns in Rogers, Cottage Grove, St. Francis, and Monticello. If you spot any signs of trouble, Schedule a Free Inspection with a local expert who can assess the full scope of the damage and help you move forward.

    What Should You Do Immediately After a Storm?

    Your safety comes first after any severe storm. Severe storms in Minnesota can bring high winds, large hail, and even tornadoes. Dangers remain even after the skies turn blue and the storm passes. Homeowners in Rogers, Minnesota must make personal safety their main goal. No home inspection is worth the risk of serious bodily harm or injury.

    Check for Immediate Physical Hazards

    Downed power lines and gas leaks are the most urgent post-storm dangers. Before you step outside, check your home and yard for serious hazards. High winds often pull down utility lines. Avoid electric shock by staying far away from downed power lines.

    These wires can hide in standing water or hang in trees, but they may still carry a live charge. The National Oceanic and Atmospheric Administration warns that dangers remain high after storms, with nearly half of hurricane and major storm deaths occurring in the post-storm period. Walk carefully around the outside of your property. If you smell gas, hear a hissing sound, or suspect a leak, get outdoors immediately, move to a safe distance, and call 911.

    Evaluate Structural Stability

    Structural damage can make your home unsafe to enter. Walk around the building with care to look for structural damage. Look out for loose roof parts, leaning walls, or heavy fallen tree limbs. If you hear shifting sounds or unusual creaks, leave the building right away.

    Debris like broken glass, metal, and sharp nails can cover your lawn and driveway after a severe wind storm. Always wear thick work gloves, safety glasses, and sturdy boots before you start checking the property or picking up debris.

    Document the Scene and Take Quick Action

    Photo documentation is essential for your insurance claim. Once you know it is safe to walk around, take clear photos of all visible damage. Take photos of your roof, siding, windows, and yard before you touch or move anything. These photos will serve as crucial proof when you start your insurance claim.

    If your roof has an open hole or a major leak, you must take fast steps to stop more water from getting inside. You can read our guide on emergency roof tarping to learn how to cover open spots and shield your home from more rain. A team can arrive later to start the permanent storm damage repair process.

    How Do You Inspect Your Roof for Storm Damage in Minnesota?

    A thorough roof inspection helps prevent leaks and prepares you for storm damage repair. Minnesota weather can bring severe winds and heavy hail that tear at your home. When a storm clears, your roof is the first place you should check. Finding the signs of trouble early prevents leaks and prepares you for roof storm damage repair.

    Walk around your yard first to spot problems from the ground. Look for torn pieces of shingles or bent metal trim before you call for help.

    Shingle Damage and Hail Bruising

    Missing shingles and hail bruising are the most common roof storm damage signs. Strong winds can lift, crack, or tear away shingles. Missing shingles leave the underlayment open to rain, which leads to wood rot. Hail also causes quiet harm.

    It leaves dark spots or bruises on asphalt shingles. These bruised spots mean the mat has cracked underneath, which ruins the protection of your home. If you notice these spots, you will need a professional insurance roof inspection guide to document the loss. An expert from Rogers can spot this hidden damage and help you with your next steps.

    Granule Loss and Gutter Clues

    Granules in your gutters signal roof damage that needs immediate attention. Granules shield your roof from the hot sun. When hail hits your roof, it knocks these tiny stones loose. You might find piles of dark sand in your gutters or downspouts after a storm.

    This loss of granules makes your shingles age fast. Without this layer, the sun dries out the asphalt, which makes shingles curl and leak. Checking your gutter exits is a safe way to find hidden roof harm. Look at the ground where your downspouts empty to see if granules are washing away.

    Flashing and Roof Deck Problems

    Damaged flashing and sagging roof decks require professional storm damage repair. Flashing is the metal trim around chimneys, vents, and valleys. High winds can warp or loosen these metal sheets. Damaged flashing allows water to pool and seep into your attic.

    You should also check for sagging areas on the roof deck. A sag often means water has soaked the wood under the shingles. This structural weakening needs immediate help to keep your family safe. Let our team in the Cottage Grove area inspect your roof to catch these hidden issues before they grow.

    What Should You Look for When Inspecting Siding After a Storm?

    Damaged siding compromises your home defenses against Minnesota weather. Your siding protects your home from the harsh Minnesota climate, but severe weather can cause quiet problems. Identifying issues early is a vital part of siding repair after a storm. High winds, flying debris, and heavy hail can weaken your home’s exterior walls, so a close look is necessary to prevent water leaks. Taking time to inspect your siding helps ensure your property stays dry and secure.

    Check for Hail Impact Dents and Cracks

    Hail is a common cause of storm damage repair needs for local homes. On vinyl siding, hail strikes often leave small cracks, chips, or clean splits near the bottom of the panels. Aluminum siding shows hail damage as round dents that are easy to spot when the sun hits the wall at an angle.

    If you have fiber cement siding, look for cracks or deep chips where the hail broke the surface finish. According to storm damage safety guidelines from Oklahoma State University Extension, a professional inspection is the safest way to find hidden issues when you are unsure about the extent of the damage.

    Find Warped Panels and Gaps in Your Walls

    Strong Minnesota windstorms can rip siding panels loose or pull them away from the wall. Walk around your home in Rogers or Cottage Grove to find panels that look warped, bowed, or loose. Wind can also force water or debris behind your siding, which can lead to wood rot over time.

    Look closely at the trim around your window frames and door frames to find new gaps or cracked caulk. These gaps allow moisture to seep into your home and ruin your insulation, so they need quick attention.

    Inspect Your Siding for Holes and Chipped Paint

    Wind-blown branches or debris can puncture siding, leaving small holes that are hard to see from far away. Holes in siding panels let pests and water enter your walls, which creates major issues later. For wood siding or fiber cement panels, look for chipped or peeling paint after a storm.

    Exposed material absorbs moisture quickly, which causes wood to swell and rot. If your home has old siding, you may want to upgrade to James Hardie fiber cement siding. Referred Restoration installs this durable material to give homes in the Rogers-St. Francis-Monticello corridor long-term protection against severe weather.

    Inspecting Gutters, Downspouts, and Windows for Storm Damage

    Your gutters and windows reveal hidden storm damage that may not be visible from the ground. Severe Minnesota storms bring heavy rain, high winds, and large hail. These elements can break down your home drainage systems and window openings. Property owners in Rogers and the broader Rogers-St.

    Francis-Monticello corridor should check these spots after any major weather event. Finding hidden problems early helps you get the right storm damage repair for siding, roofs, and trim before water leaks inside.

    Check Gutters for Dents and Loose Seams

    Heavy hail often leaves deep dents in metal gutters. These impacts can crack the protective finish and lead to rust. Strong winds can also pull gutter brackets away from the fascia board.

    You should check the entire run of your gutters from the ground to see if they sag or tilt. Sagging gutters cannot drain water toward the downspouts, which often leads to water pooling near your foundation.

    Debris from storms can also clog your drainage system. Leaves, twigs, and roof granules can pack into gutters and downspouts during heavy rain. This blockage forces water to spill over the sides.

    The University of Minnesota Extension notes that proper drainage planes and flashings must direct water away from the building. Overloaded gutters fail to do this, which can cause rotting in your fascia boards and roof edge.

    Look for Gutter Ice and Winter Storm Issues

    Minnesota winter storms cause different types of gutter problems. Heavy snow and ice buildup can pull gutters completely off their hangers. Ice dams can force water under your roof shingles and down the back of your gutters.

    When you inspect your home, look closely at the brackets and seams. If you see gaps between the gutter and the roof line, the system has lost its hold and needs repair.

    Examine Windows for Cracked Glass and Seal Failure

    Storm winds can throw branches and debris into your windows. This debris often cracks the glass or tears your window screens. You should check each window pane for chips, stars, or hairline fractures.

    Even a small crack can spread quickly when the next cold front hits. Be sure to check the frames for dents or deep scratches from hail impacts.

    Window seals are also vulnerable during storms. High wind pressure and rapid temperature changes can cause window seals to fail. When a seal breaks, moist air gets between the glass panes.

    This moisture creates a cloudy or foggy look that does not go away. Our local freeze-thaw cycles make these seal failures worse, which can let drafts and water enter your home.

    Scan Window Frames for Water Gaps

    You must also check the trim and caulk around your window frames. Wind-driven rain can push water through tiny gaps. Look for cracked caulk, loose flashing, or soft wood around the frame.

    Addressing these issues early prevents mold growth and rot inside your walls. If you find signs of window or gutter damage, you should Schedule a Free Inspection with a local expert to assess the full extent of the storm damage.

    Interior Warning Signs That Point to Needed Storm Damage Repair

    Water often finds its way inside before exterior damage becomes obvious. Severe Minnesota weather can compromise the envelope of your home, allowing water to find its way inside. Often, the consequences of a severe storm do not show up on the outside of your property right away. Instead, they manifest in subtle changes within your living spaces that point to a pressing need for storm damage repair for siding or roofing. Knowing what to look for inside your home is key to stopping minor leaks from turning into major structural issues.

    Ceiling and Wall Discoloration

    Water stains on your ceilings or walls are the most common signs of a compromised exterior. These spots often look like dark brown or yellow puddles that expand over time, particularly after a heavy downpour. If you notice these stains on upper floors, they usually point to a roof leak, whereas stains on lower levels may indicate water tracking behind your siding. Homeowners should act quickly when spotting these stains to prevent rot from spreading through the wood framing of the house.

    Damp Insulation and Attic Musty Odors

    Your attic acts as the first line of defense against storm water, making it a critical area to check after severe weather. Wet or matted attic insulation is a clear indicator that water has breached your shingles or roof deck. This trapped moisture quickly creates a stale, musty smell that can travel down into your main living areas.

    According to the U.S. Environmental Protection Agency, mold can begin to grow on damp building materials within 24 to 48 hours of exposure, making prompt detection vital for your family’s health.

    Drywall Cracks and Sudden Drafts

    High winds and storm debris can stress the structural framework of your home, leading to subtle interior shifts. Look closely at the drywall around your windows and doors for new or expanding cracks, which indicate that the exterior framing has moved. You might also notice sudden drafts or find that windows and doors are suddenly hard to open or close.

    This resistance often happens when moisture causes the wood framing to swell, or when storm winds have warped the window seals. Signaling that your home needs a professional inspection to assess the full scope of the damage.

    Peeling Paint and Bubbling Wallpaper

    When water penetrates your exterior siding or roof flashing, it often pools behind your interior wall finishes. This trapped water breaks down the adhesive holding wallpaper to the wall or causes latex paint to stretch and bubble. If you pop one of these paint bubbles, you will likely find trapped water inside, confirming an active exterior leak. Addressing these issues early with professional roof storm damage repair or siding replacement is the best way to safeguard the structural integrity of your Rogers home.

    How Do You Work With Insurance for Storm Damage Repair?

    Filing a thorough insurance claim after storm damage starts with proper documentation. Filing an insurance claim after a storm can feel like a heavy task. But taking the right steps early will help you get the support you need. The Minnesota Department of Commerce advises homeowners to call their insurance agent immediately to report any wind or hail damage.

    You can find detailed steps on how to start this process in the official Minnesota state disaster guide. Acting fast ensures you do not miss key filing dates set by your policy.

    Document Every Detail First

    Before you clean up or make any repairs, you must write down and photograph all the damage. Walk around your property to take clear photos and videos of battered siding, dented gutters, and torn shingles. If you need to make temporary repairs to stop further water leaks, keep all your receipts for materials like tarps or wood. Do not throw away damaged items before the insurance adjuster visits your home, as they will need to see them to confirm your losses.

    Partner With a Trusted Local Contractor

    Navigating insurance claims for storm damage repair goes much smoother when you have professional help. A local contractor who knows the Rogers and Cottage Grove areas can meet with the insurance adjuster during the official home inspection. They can point out hidden problems that an adjuster might miss, such as micro-cracks in shingles or soft spots on the roof deck. This joint review helps ensure your claim covers the full extent of the storm damage.

    Understand Your Rights and Timelines

    Minnesota law protects homeowners during the storm recovery process. Insurance companies must send an adjuster to inspect your property within a reasonable timeframe after you file. When you work with Referred Restoration, we help you compile the needed documentation and answer questions from your insurer. We provide honest, detailed estimates that align with what adjusters expect, which helps prevent delays so your storm damage repair can begin as soon as possible.

    Choosing a Trusted Local Contractor for Storm Damage Repair

    Selecting the right contractor after a storm is critical to protecting your home investment. Selecting the right team after a severe storm is critical to protecting your home. Out-of-state storm chasers often travel into Minnesota after heavy winds and hail to profit from homeowners in need. Knowing the warning signs of bad contractors and finding local experts will keep your home and family safe.

    Recognizing Red Flags and Storm Chasers

    Out-of-state storm chasers often pressure homeowners into poor decisions after a storm. Storm chasers often use high-pressure tactics to get you to sign quick agreements. They may drive vehicles with out-of-state license plates and knock on doors soon after a storm has passed. Many of these workers demand large deposits upfront before any work begins, which is a major risk for homeowners. Beware of any contractor who offers to waive your insurance deductible, as this practice is illegal and counts as insurance fraud.

    You can protect yourself by demanding written contracts and checking business addresses. Organizations like the Federal Emergency Management Agency advise homeowners to use local builders who are well known in their communities to prevent fraud. Reliable businesses do not need to use scare tactics or push you to make instant decisions on the spot.

    Red FlagWhat to Watch ForSafe Alternative
    Out-of-state platesWorkers arrive in vehicles with distant platesLocal trucks with MN plates
    Door-knockingSales reps appear right after the stormYou reach out when you are ready
    Large depositThey ask for half or more upfrontModest deposit, pay on completion
    Waives deductibleOffers to skip your insurance deductibleFollows legal billing practices
    No local addressWrong address or a temporary hotelPermanent office in your area

    The Value of Deep Minnesota Building Code Knowledge

    Minnesota weather is unique, with heavy winter snow and intense summer storms. A local contractor understands the exact building codes needed to withstand these harsh weather cycles. They know how to build roofs and siding that handle thermal expansion, ice dams, and heavy snow loads. Working with an experienced professional ensures that your siding repair after a storm meets state and local standards.

    Local contractors have a permanent presence and stand by their craftsmanship. They use durable materials designed for northern climates and do not disappear once the job is finished. Selecting a business from your area gives you a reliable point of contact for future maintenance or warranty issues.

    Referred Restoration: Your Local Corridor Partner

    Referred Restoration serves as a trusted local contractor in Rogers, Minnesota, and across the Rogers, St. Francis, and Monticello corridor. We live and work in the same neighborhoods we serve, bringing real community focus to every project. We handle the entire exterior of your home as a single-source provider, covering your roofing, siding, gutters, and windows with high-quality care.

    Our team understands the stress of storm recovery and helps you navigate the entire process. We provide thorough, honest assessments to prepare your property for complete restoration. Before you commit to repairs, insurance claims for storm damage repair require an accurate inspection, and our local experts are here to help you get started.

    Frequently Asked Questions About Storm Damage Repair

    What should I do immediately after a storm hits my home?

    Your first step is checking for immediate safety hazards like gas leaks or fallen power lines. Once the area is secure, take clear photos of all visible exterior damage from the ground to document the impact. If your roof is leaking, you should take immediate steps before storm damage repair starts to prevent water from ruining your home interior.

    How do I know if I need professional storm damage repair?

    Look for clear warning signs on your building exterior such as dented siding, cracked windows, split shingles, or loose metal flashing. Even if you do not see obvious holes, high winds and large hail can weaken hidden seals and cause slow leaks over time. Getting a professional inspection is the safest way to find this hidden damage before it spreads.

    Does my homeowners insurance cover storm damage repair?

    Most standard homeowners policies cover storm damage repair caused by sudden events like wind, hail, or fallen trees. You must file your claim quickly and supply detailed photos of the damage to your insurer. Working with an exterior contractor who understands insurance claims for storm damage repair can help make the inspection process go much smoother.

    How can I identify a reputable storm damage contractor?

    Choose a locally owned contractor with a permanent physical office in the Rogers or Cottage Grove area. Avoid out of state storm chasers who knock on doors with high pressure sales tactics right after a storm. Reputable local teams will offer a detailed inspection first and work directly with your insurer to plan the work.

    Schedule Your Free Storm Damage Inspection Today

    Do not let hidden storm damage turn into costly repairs. The team at Referred Restoration provides thorough exterior inspections to identify every issue, from roof hail damage to compromised siding and gutters.

    Our local experts in Rogers serve homeowners across the Rogers-St. Francis-Monticello corridor with honest assessments and reliable craftsmanship. We help you navigate insurance claims and recommend the right repairs for your specific situation.

    Schedule Your Free Inspection Today

  • How to Install Gutter Guards in Minnesota: A Complete Guide

    How to Install Gutter Guards in Minnesota: A Complete Guide

    Every fall, Minnesota homeowners face the grueling task of cleaning debris from their gutters before the snow flies. Reliable gutter guards simplify this seasonal burden and keep your drainage system flowing freely through freezing temperatures and heavy snow loads.

    Schedule Your Free Inspection today to learn which gutter guard system fits your home and budget. Our team serves homeowners in Rogers, Cottage Grove, St. Francis, and Monticello.

    Learning how to install gutter guards starts with measuring your roofline, selecting a guard type suited for Minnesota winters, and securing each panel with proper slope and clips. Clean gutters thoroughly before installation to prevent trapped debris from blocking water flow.

    Each style of guard handles snow, ice, and debris differently. The right choice depends on your roof pitch, tree cover, and how much maintenance you want to do over the long term.

    What Types of Gutter Guards Work Best for Minnesota Homes?

    Minnesota homes deal with heavy debris from pine trees, oak leaves, and grit from asphalt shingles. Knowing how to install gutter guards starts with picking the right style for your climate. Each type blocks debris differently and has a different price point for materials.

    Guard TypeMaterial Cost per FtDurabilitySnow Load HandlingMaintenance
    Screen / Mesh$0.50 – $1.50Moderate (aluminum best)Good with sloped installLow; occasional blow-off
    Micro-Mesh / Steel$1.50 – $4.00High (stainless steel)Excellent; rigid frameVery low; blocks fine debris
    Brush / Foam Inserts$1.00 – $2.50Low; degrades in sunPoor; can freeze solidModerate; needs seasonal removal
    Surface Tension / Full Covers$3.00 – $7.00Very high (heavy-gauge aluminum)Superior; sheds snowMinimal; true set-and-forget

    Screen and Mesh Guards

    Screen guards sit on top of your gutters with small holes that let water through while blocking large leaves and sticks. Most are made of plastic or thin metal. Plastic versions can become brittle in subzero cold, so aluminum screens are a better choice for Minnesota homes. They handle snow and ice much better and stay in place during high winds. Parts for these screens range from $0.50 to $1.50 per linear foot. While they stop large debris, fine pine needles and shingle grit can still pass through over time.

    Micro-Mesh and Steel Shields

    Micro-mesh guards use a fine stainless steel mesh to block even the smallest debris. These are ideal for homes surrounded by pine trees. The fine holes are too small for most debris to enter, keeping gutters clear through heavy spring storms. Stainless steel does not rust and can handle the weight of wet snow. Parts run from $1.50 to $4.00 per linear foot. These guards work best when paired with proper flashing that directs water away from the house.

    Brush and Foam Inserts

    Brush guards look like large pipe cleaners that sit inside the gutter trough. Foam guards are porous strips that fill the gutter space. Both are quick to install and cost less upfront than permanent systems. However, small seeds can lodge in the bristles or foam pores. Over time, those seeds can sprout and grow tiny plants right in your gutters. You will need to remove and wash these inserts periodically, making them more labor-intensive than other styles.

    Surface Tension and Full Covers

    Surface tension systems use a curved metal shape that guides water into the gutter while debris slides off the edge. These full covers are made of heavy-gauge aluminum that does not bend under ice weight. Because they cover the entire gutter opening, they keep out nearly all debris. The range for these high-end covers is $3.00 to $7.00 per linear foot. For homeowners in Rogers and Monticello who deal with big storms, this style offers the most reliable long-term protection.

    Tools and Materials You Will Need

    Before you start any guard installation, gather the right gear. Working at roof height demands attention to safety and proper preparation.

    Essential Hand Tools

    • Sturdy extension ladder with a ladder stabilizer
    • Thick work gloves and safety glasses
    • Small trowel or gutter scoop for removing debris
    • Garden hose with spray nozzle for flushing
    • Tape measure to check each gutter run
    • Screwdriver or power drill for mounting clips
    • Sharp tin snips for cutting mesh panels

    Materials for Your Project

    • Gutter guard panels of your chosen style
    • Mounting screws or snap-on clips
    • Roof flashing where needed
    • Replacement hangers for sagging sections

    Most homes have about 200 linear feet of guttering, according to Lowe’s installation data. Measure your roofline first so you buy enough material for the whole house. If your gutters need repair before adding guards, address those issues first. Sagging sections or loose hangers will compromise any guard system you install.

    Pre-Install Preparation

    You cannot install guards over dirty gutters and expect good results. Remove all leaves, twigs, and muck by hand or with a small scoop. Use a hose to flush the downspouts and check that water flows freely. This step also reveals any leaks that need patching before you add the covers. Proper downspout placement and drainage are essential for keeping water moving away from your foundation.

    How to Install Gutter Guards: A Step-by-Step Guide

    Installing mesh gutter guards is a manageable weekend project for most single-story homes. Safety comes first: always use a stable ladder and have a helper nearby. If your home has steep roof lines or multiple stories, consider professional help to avoid injury.

    1. Clean the gutters thoroughly. Remove all debris and flush each run with water to confirm clear downspouts. Wet debris left behind will rot and block flow.
    2. Measure each gutter section. Use a tape measure for every straight run. Mark your mesh panels and cut them slightly long with tin snips for a snug fit.
    3. Fit the first panel. Tuck the back edge under the first row of shingles or snap it onto the gutter rim. Make sure the panel sits flat without lifting the shingles. Lifted shingles create leak paths.
    4. Secure with clips or screws. Fasten the guard at both ends and every 24 inches along the run. Use the hardware that came with your kit. Wind gusts in Minnesota can exceed 40 mph, so tight fastening matters.
    5. Verify the slope. Check that the gutter still pitches toward the downspout after installation. Standing water means the pitch is off and needs correction before you finish.
    6. Test with water. Pour a bucket of water over the guards. It should enter the gutter cleanly and exit through the downspout. Watch for overflow spots that indicate a gap or blockage.

    Correct placement is the difference between guards that work for years and guards that fail in the first winter. If any section does not fit flush, re-measure and trim rather than forcing it. For complex rooflines, professional gutter installation services can ensure a precise fit that protects your investment.

    Close-up comparison of four gutter guard types installed on a Minnesota home gutter system

    What Common Gutter Guard Installation Mistakes Should You Avoid?

    Homeowners often try to save money by installing gutter guards themselves. While DIY work is a great way to manage your property, small errors can lead to big issues later.

    Failing to Clean Gutters First

    Putting guards over dirty gutters traps old debris against your house. That debris rots and holds moisture against the fascia board, accelerating wood rot. You must clean the channels completely before adding any cover.

    Ignoring Roof and Shingle Safety

    Sliding guard material too far under the shingles can lift the roofing edge and break the water seal. This often leads to leaks during heavy rain or snow melt. Proper fascia maintenance and roof flashing keep the drainage plane clear and protect your shingles from damage.

    Improperly Securing the Guards

    If guards are not fastened tightly, Minnesota winds can dislodge them. Loose guards rattle, trap twigs, and eventually clog. Use the correct clips or screws for your guard type. Check every fastening point before moving to the next section.

    Missing the Right Pitch

    Even the best guards cannot fix a gutter that does not slope toward the downspout. Water pools in sagging sections, adding weight that pulls hangers loose. Before adding covers, confirm that each run has at least a quarter-inch drop per 10 feet. Proper pitch ensures water moves quickly away from your foundation.

    Why Minnesota Winters Demand Reliable Gutter Protection

    Minnesota winters bring heavy snow and deep freezes. With about 43 inches of snowfall each year, your home faces real risks from ice dams and moisture damage. Keeping gutters clear is one part of a larger strategy for protecting your roof, siding, and foundation.

    Ice Dams and Roof Heat

    Ice dams form at the roof edge when melting snow refreezes on the cold eaves. Research from the University of Minnesota Extension shows that uneven roof heat causes these dams. Heat loss from your living space warms the upper roof, melting snow that then refreezes at the gutter line. While gutter guards keep out leaves, they do not stop ice dams. You must also improve attic insulation and ventilation to keep the entire roof at one temperature.

    Stopping Mold and Moisture Damage

    Clogged gutters make winter problems worse. Leaves and debris trap water that freezes and expands, adding weight to your eaves. When ice dams force water under shingles, moisture can soak your walls, drywall, and attic framing. Wet spots lead to mold and mildew growth, which can affect indoor air quality. By keeping your gutter system clear with quality guards, you help water flow away before it can freeze solid.

    Water Flow and Your Foundation

    Gutter guards are one part of a full home drainage plan. Water must always flow away from your house, especially during spring thaw when melting snow pools near the foundation. Poor drainage leads to cracks and basement leaks. If you are dealing with storm damage or planning repairs, a complete inspection can identify gaps in your current drainage setup.

    Professional Installation vs. DIY: Making the Right Choice for Your Home

    Deciding whether to install guards yourself or hire a pro depends on your home height, roof complexity, and budget. Many homeowners in Rogers, St. Francis, and Monticello choose professional installation for the peace of mind that comes with proper fit and durable materials.

    FactorDIY InstallationProfessional Installation
    Upfront CostLower material costHigher but includes labor
    DifficultyHigh; requires ladder work at heightNone; handled by trained crew
    Material SelectionBasic retail optionsPremium-grade materials
    Winter PerformanceCan fail under heavy snow loadsBuilt for Minnesota climate
    Warranty CoverageLimited or noneFull labor and parts protection
    Roof Damage RiskHigher if shingles are liftedLow; trained installation methods
    Time RequiredFull weekend or moreTypically a few hours
    Snow Load HandlingProne to collapse with ice buildupReinforced for heavy loads

    Professional installers check that every piece sits tight to avoid gaps. Even small holes let leaves inside, which defeats the purpose of guards. Strong clips keep the system locked to the gutter, even during 50 mph wind gusts. Our team uses heavy-duty components designed for Minnesota winters.

    Roof safety is a top priority during any gutter job. Pushing guard parts under shingles the wrong way can lift the roof edge and create leaks. Trained installers know how to attach guards without voiding your roof warranty or damaging the existing seal. They also verify that each gutter run maintains proper pitch toward the downspouts so rainwater moves away from your home as intended.

    If you want a system that will last through a decade of Minnesota winters, professional installation delivers the best outcome. We treat every home with the care it needs to stay safe from water damage. Contact our seamless gutter team to discuss your options and schedule a visit.

    Frequently Asked Questions

    Can I install gutter guards on my existing gutters?

    Yes, most guard systems work with your current gutters. DIY options include plastic screens and aluminum mesh panels. The average home needs about 200 linear feet of material. For tall homes or steep roofs, professional installation is safer and often produces better results.

    Do gutter guards prevent ice dams?

    Gutter guards keep debris out but are not a primary solution for ice dams. Ice dams form when heat loss from the attic melts snow on the upper roof, and the water refreezes at the cold eaves. Proper attic insulation and ventilation are the most effective ways to prevent ice dams.

    How often do gutter guards need maintenance?

    Quality gutter guards reduce cleaning frequency significantly. Micro-mesh and surface tension covers typically need a visual check once a year, with cleaning only if debris accumulates on top. Brush and foam inserts require seasonal removal and washing to prevent seed germination and clogging.

    What gutter guard type is best for pine needles?

    Micro-mesh stainless steel guards are the best choice for homes with pine trees. The fine mesh holes are too small for pine needles to pass through, while screen guards allow needles to slip through the larger openings. Surface tension covers are also effective at deflecting needles off the curved surface.

    Can gutter guards handle heavy Minnesota snow loads?

    Surface tension covers and micro-mesh steel shields perform best under heavy snow. These styles use rigid frames and thick aluminum that do not bend under the weight of wet snow and ice. Brush inserts and thin plastic screens are more likely to collapse under the same conditions.

    Ready to protect your Minnesota home with gutter guards?

    Installing gutter guards is a smart way to reduce seasonal maintenance and protect your home from water damage. Whether you choose a DIY approach or professional installation, the key is selecting the right guard type for your specific roof and local weather patterns. A free inspection from Referred Restoration can help you evaluate your current gutters, identify any needed repairs, and recommend the best guard system for your home. We serve homeowners throughout the Rogers, Cottage Grove, St. Francis, and Monticello corridor with honest assessments and quality workmanship.

    Schedule Your Free Inspection today and let our team help you keep your gutters working through every Minnesota season.

  • Emergency Roof Tarping: Protect Your Minnesota Home

    Emergency Roof Tarping: Protect Your Minnesota Home

    Severe Minnesota storms often leave roofs vulnerable to sudden leaks and structural decay.

    Emergency roof tarping is a short-term shield used to protect your home from water damage after a severe storm. This job means fixing heavy, waterproof sheets over damaged parts of the roof to stop rain from entering the attic or living rooms. Based on FEMA, homeowners should not wait for an insurance adjuster before they start to stop more damage. Putting a tarp up quickly helps stop the growth of mold and keeps the inside of your house dry. It is a key step while you wait for a full inspection and long-term repairs. Expert teams use thick, strong sheets that can stand up to high winds and keep your family safe. By acting fast, you can avoid more pricey home issues that happen when water sits in your walls for too long.

    Get Your Free Inspection

    If you see signs of a leak or missing shingles, you need to know how this service works. Learning the basics of this fast fix will help you make a plan for your home. You can find more details in the section on What is Emergency Roof Tarping and When Do You Need It? The path begins with.

    What is Emergency Roof Tarping and When Do You Need It?

    Emergency roof tarping is a short-term protective service that covers roof damage with heavy-duty waterproof sheeting to prevent water intrusion after a severe storm. Referred Restoration provides rapid emergency roof tarping in Rogers, Minnesota, to shield exposed attics, prevent mold growth, and secure the home’s structure while long-term repairs are planned.

    How roof tarping works

    A roof tarp is not a final fix for your house, but it serves as a helpful shield. It is a thick sheet made to stop water from getting in through gaps in the roof. Workers use heavy-duty sheets that can stand up to the sun and harsh wind for weeks.

    This helps protect the rooms below the damage from leaks and harmful mold growth. You should always use a pro for this job because climbing on a weak roof is not safe. Pros make sure the tarp is tight and stays in place during the next rain fall.

    This keeps your home safe from more damage while you wait for a crew to fix the roof for good. Taking proactive roof recovery measures is the best way to stop small leaks from becoming big ones.

    A professional roofer inspecting storm damage on a residential roof in Rogers Minnesota before emergency roof tarping
    A thorough storm damage inspection identifies critical roof leaks that require immediate emergency roof tarping.

    Signs you need emergency roof tarping

    You may need a tarp if a storm with high winds or hail hits your town. These winds can pull shingles right off your house and leave the wood open to rain. If you see a tree fall on your home, you will need a tarp right away to stop water. Any time your roof has a hole, you must cover it fast to keep your home dry.

    Look for leaks in your attic or on your top floor after the clouds clear. If you see water spots on your ceiling, your roof is likely leaking in that area. These are all signs that your home needs emergency roofing help to stay safe and dry. A quick tarp can stop more water from coming inside while you plan your next move.

    Acting fast to protect your home

    You must act fast after your roof gets hurt to avoid more trouble later on. Water can lead to mold in as little as 24 to 48 hours after a leak starts. Putting a tarp on your roof right away stops the water and keeps your air clean.

    Do not wait for an insurance person to see your home before you start the work. You can fix leaks and clean up the damage right after a storm ends to save your home. FEMA says that people do not need to wait for a home check to start making repairs. Taking quick action helps keep your home in good shape for years to come.

    How Emergency Roof Tarping Reduces Home Damage

    Emergency roof tarping prevents severe water damage, structural rotting, and rapid mold growth by immediately stopping rain from penetrating the home’s envelope. Referred Restoration installs professional tarping systems to minimize interior property loss, protect ceiling drywall and electrical systems, and ensure homeowners satisfy their insurance policy’s mitigation requirements.

    Why speed matters for water damage

    When a storm hits, your roof is the first line of defense. High winds and hail can rip away shingles or punch holes in the surface. This leaves your home open to rain and debris. Using emergency roof tarping right away stops water from getting inside. Small leaks can turn into big floods in just a few hours. Water that drips through the attic can soak your drywall and ruin your floors. You should not wait for a full repair to start protecting your home. A professional team can set up a tarp to keep your rooms dry. This simple step keeps your personal items safe from water stains and rot. It also protects your attic insulation, which can lose its value if it gets wet. You should act fast to keep the damage in a small area. When you use a tarp, you protect:

    • Ceiling tiles and drywall from sagging or falling.
    • Hardwood floors from warping or buckling.
    • Power systems from shorting out due to moisture.
    • Family photos and furniture from water stains.

    Preventing mold and structural rot

    Moisture is a huge risk for any home in Minnesota. If water sits in your walls, it can cause mold to grow within 24 to 48 hours. Mold can be hard to remove once it takes root in your home. By stopping leaks fast, you stop mold before it starts. This helps keep your family safe and saves you from a messy cleanup later. Quick action also protects the bones of your house. Wood beams can get soft and rot when they stay wet for too long. According to FEMA, you should not wait for an insurance check to start making repairs. Getting a tarp on the roof keeps the wood dry and strong. It is much better to stop the rot now than to fix a collapsed ceiling later. Before you go inside a damaged home, you should also check for structural issues. Report any big shifts or cracks to local officials to stay safe.

    Protecting your insurance claim

    Most home insurance plans want you to take immediate storm mitigation steps after roof damage happens. Insurance companies use the word “mitigating” for this. This is just a fancy way of saying you must stop the damage from getting worse. If you let the rain pour in for days, the company might not pay for all the damage. They may say you failed to protect the home from more harm. A professional tarp job shows the insurance company that you took action. It creates a clear paper trail for your claim. You should always take photos of the holes and the tarp for your records. FEMA suggests taking videos of the inside and outside of the building before you move anything. This helps you get the support you need to fix your home the right way. Our team can provide expert residential roofing support to make the claim process go faster.

    Can I Put a Tarp on a Roof Without Nails?

    Yes, a protective roof tarp can be secured without nails by utilizing heavy sandbags, tension straps, or specialized waterproof adhesive tapes. Referred Restoration utilizes non-destructive tarping methods whenever possible to protect the home without causing additional damage to intact asphalt shingles or complicating the homeowner’s insurance claims process.

    Risks of Using Nails

    When you nail a tarp into your roof, you create new spots for water to enter. These holes may seem small, but they let wetness seep into your home once the tarp is gone. This extra damage can make your insurance claim harder and lead to more repairs later. Proper emergency roofing assistance means protecting your home without causing more harm to the house.

    Non-Destructive Tarp Methods

    There are several ways to hold a tarp down without a hammer. Sandbags are a good choice because they are heavy and do not move in the wind. You can also use long straps that wrap around the edges of the roof. Some pros use strong tape made for outdoor use. These tapes create a tight seal without going through the shingles. Using the right tools helps with immediate steps after roof damage while keeping the roof safe.

    1. Look for damage. Before you go onto your roof, look for big issues. FEMA says you should check for structural damage and tell local officials before you start any work.
    2. Take photos. Take clear photos and videos of the storm damage from the ground. You should record all property damage before you start any cleanup or quick fixes.
    3. Pick your weights. Use heavy sandbags or bricks wrapped in cloth to stop marks. Place them along the edges of the tarp to keep wind from getting under the fabric.
    4. Use straps or rope. Tie the corners of the tarp to solid points like eaves. Make sure the lines are tight so the tarp does not flap in the wind, which can tear the cloth.
    5. Seal the edges. Put waterproof tape along the top edge of the tarp. This stops rain from running under the tarp and reaching the bad area.
    6. Call for a real fix. A tarp is only a short-term fix to stop mold, which can grow in one or two days. You should schedule a professional roof inspection after a storm to find a long-term fix.

    Why Safety Comes First

    Climbing onto a bad roof is very risky, mainly after a storm when parts are wet. Wind and loose shingles make it easy to fall. If you are not sure how to tarp your roof without nails, it is best to call a pro. Keeping your home dry is key, but staying safe is the most vital part of the job.

    Schedule Your Free Inspection with Referred Restoration

    The Hidden Risks of DIY Roof Tarping vs. Professional Service

    DIY roof tarping carries extreme safety hazards including dangerous ladder falls, weak roof decks, and poorly secured sheets that leak or blow away in high winds. Referred Restoration offers safe, professional emergency roof tarping services utilizing OSHA-compliant fall protection and commercial-grade materials to ensure a tight, wind-resistant seal that prevents mold.

    Common safety hazards of DIY attempts

    Climbing onto a roof after a storm is very risky. High winds or fallen trees can leave the roof frame weak or loose. It is vital to check for frame damage before you try to walk on any part of your home. If you miss a soft spot in the wood, you could fall through and suffer a bad harm.

    A loose tarp can also become a sail in a sudden gust of wind. This can pull a person off the roof in seconds. To stay safe, you should follow the first steps after roof damage by calling for help instead of doing it yourself. Experts use safety ropes and boards to make sure they stay on the roof while they work.

    Ladders also pose a big threat to people who do not use them every day. Many folks do not set the base on firm ground or lean it at the wrong angle. Wind can catch the ladder and tip it over while you are near the top. Pros use stable tools that are built for the job and will not slip on wet grass or mud.

    Severe wind storm damage to asphalt shingles on a home roof in Rogers Minnesota
    Wind-damaged or missing shingles expose the roof deck, making emergency roof tarping essential to prevent mold and water leaks.

    The benefit of a professional seal

    Getting a tight seal is the only way to stop water from getting inside. If a tarp is not flat or has loose edges, rain will still leak into your attic. This moisture can cause mold to grow in as little as 24 to 48 hours. A pro knows how to use heavy, UV-proof tarps that can handle the harsh sun and rain in Rogers, MN.

    A good tarp job also helps with your claim later. You should track all home damage with photos before any work starts. A pro team will often take these photos for you to show the agent just what was wrong. This clear proof can help you get the support you need from your claim firm.

    The tools used for the job make a big difference as well. Most home shops only sell thin plastic that tears easily. An expert team uses thick, strong fabrics and cap nails to hold the edges down. These steps ensure the tarp stays in place through the next round of bad weather without peeling back.

    FeatureDIY TarpingProfessional Service
    Personal SafetyHigh risk of falls and harm.Safe work with ropes and gear.
    Seal QualityMay leak or blow off in wind.Tight, durable, and flat seal.
    Materials UsedThin tarps from a local shop.Heavy, UV-proof strong tarps.
    Proof of LossOften missed or done poorly.Full photos for claim files.
    SpeedSlow for one person to manage.Fast response by a trained team.

    Navigating Storm-Damage Insurance Claims with Emergency Tarping

    Emergency roof tarping is a critical step in storm-damage insurance claims because homeowners have a policy duty to mitigate further property loss after damage occurs. Referred Restoration documents all pre-tarping damage with high-resolution photos and provides professional invoices to help homeowners streamline their claims and secure full insurance coverage.

    Protecting your home and your claim

    After a big storm in Rogers, you may feel like you should wait for your insurance adjuster to see the roof. Many homeowners think that moving or covering anything will hurt their claim. However, wait times for an adjuster can be long after bad weather hits Minnesota. During this time, a small leak can turn into a major flood. Professional Rogers roofing services stop the water now. Using a tarp is not just a good idea; it is often a rule in your policy.

    The duty to limit further loss

    Most home insurance plans have a clause called the duty to mitigate. This means you must take active hail damage mitigation steps to prevent more loss. If you let rain pour into your home for days, the company might not pay for the new water damage. emergency roof tarping serves as this needed protection. According to FEMA, you should not wait for a home check or an adjuster before you start to protect your property. Fixing a hole with a tarp shows you are doing your part to keep the house safe. This simple act can stop mold from growing in your walls within two days.

    Documenting the damage first

    You must record the state of your roof before the tarp goes on. Use your phone to take clear photos and videos of all the damage. Get shots of the roof from the ground and any leaks inside your attic or rooms. FEMA suggests you record all property damage with photos before you begin any cleanup work. These records prove to the insurance company that the storm caused the harm. You should also keep physical samples of damaged items like wallpaper or flooring if they got wet. These samples act as extra proof for your claim.

    Safe professional tarping

    Tarping a roof is risky, especially when the wood is wet or broken. Professional teams have the right gear to stay safe while they work on high peaks. They use heavy tarps that can stand up to high winds and more rain. A good tarp job will stay tight and keep your home dry until the final repairs start. At Referred Restoration, we treat your home like our own. We give you an honest look at the damage and help you talk to your agent. Our goal is to make sure you have a dry home and a fair claim process.

    Handling the next steps

    Once the tarp is secure, you can focus on the long-term fix. Your insurance agent will need to see your photos and the bill for the tarp service. Most policies cover the bill for these temporary repairs. Keeping your home dry prevents the need for bigger fixes later on. Our team works with you to provide a full plan for your roof. We use high-quality materials to make sure your home is ready for the next Minnesota storm.

    Frequently Asked Questions

    What is emergency roof tarping?

    Emergency roof tarping is a short-term way to shield your home. After a bad storm, your roof may have holes or missing shingles. A thick tarp covers these open spots to keep rain and wind out. This helps keep your attic and rooms dry until a crew can fix the roof for good. It is a vital step to stop more harm from coming to your house.

    How soon after a storm should I tarp my roof?

    You should tarp your roof as soon as it is safe to do so. Quick action is key to stop leaks from making things worse inside. Expert sources like Referred Restoration say that mold can grow in just 24 to 48 hours. Putting up a tarp right away keeps your home dry. It also gives you more time to plan your real repairs.

    Does emergency roof tarping prevent all water damage?

    A tarp is meant to stop rain and wind from getting in your home. It creates a strong shield over the broken parts of your roof. While it is very good at keeping water out, it is only a short fix. It does not take the place of real repairs. You should still have an expert look at your roof to find a way to fix it for good as soon as you can.

    Should I wait for an insurance adjuster before tarping?

    No, you do not need to wait for a pro to look at your home before you act. The group known as FEMA says you should not wait for a check to start repairs that stop more harm. Just be sure to take many photos and films of the damage first. This proof helps your claim. Tarping now shows that you are trying to protect your home from more loss.

    Can I install an emergency roof tarp myself?

    It is best to hire a pro to tarp your roof. Climbing on a broken roof after a storm is very risky. The top can be slick and the frame might be weak. Experts have the right tools and gear to stay safe. They also know how to tie the tarp so it does not blow away. Using a trained team keeps the work safe and avoids any bad falls.

    Ready to schedule a free storm-damage inspection and protect your Minnesota home?

    Leaving a storm-damaged roof open to the Minnesota weather allows rain to seep into your attic where it will rot the wood and cause mold. This delay makes repairs more hard and costly, but acting right now stops more damage and keeps your home dry while you work through claims. Our team will check every inch of your roof to find leaks and give you the honest answers you need to start your home fix. You will save time and avoid the stress of a growing home repair crisis by taking this simple and fast first step with us today.

    Ready to protect your home? Contact Referred Restoration today to schedule a free storm-damage inspection with our team.

  • Roof Leak Repair: Minnesota Flashing Problems

    Roof Leak Repair: Minnesota Flashing Problems

    Broken roof flashing allows water to slip past shingles during every Minnesota rainstorm. Fixing these metal parts is the best way to prevent moisture from rotting your home.

    Roof leak repair in Minnesota often means fixing metal flashing around chimneys, vents, and valleys to stop water from entering through gaps pulled loose by ice. When flashing fails, water enters your attic and causes wood rot, but expert checks find these hidden entry points before they become major and serious problems. Our team at Referred Restoration provides honest checks and uses top tools like Malarkey shingles and durable metal to keep your local home dry and safe. By choosing to Schedule a Free Inspection, you get reliable work from a trusted neighbor who treats your local property with care. We help you protect your home with honest advice and expert roofing work made for the Rogers area.

    Finding a leak in your home is only the first step in fixing the problem. Roof leak repair starts with finding the real source because water often travels a long way from the first entry point. You need a clear way to look at every part of your roof. The path begins with

    Roof leak repair starts with finding the real source

    Water is tricky. It does not always fall straight down. When you see a wet spot on your ceiling, you might think the hole is right above it. But water can enter in one spot and travel far before it drips. This is why roof leak repair must start with a deep look at the whole system. Finding the true entry point is the only way to fix the issue for good.

    Most leaks follow a path along the roof deck or the wood frame. Water is lazy and takes the easiest route down. It might run along a rafter for many feet before it hits a low spot and starts to soak your drywall. Because of this, the stain in your living room could be far from the real gap in your shingles.

    Why stains are rarely where the leak begins

    The roof on your house is built in layers. When water gets past the top shingles, it hits the base layer or the wood deck. Once it is under the shingles, the water will flow down the slope of the roof until it finds a seam in the wood. This means the wet spot you see on your ceiling is just the place where the water at last pooled and soaked through.

    In many cases, the water enters through a small crack near a vent or a chimney. It then runs down a beam and drips onto the top of your attic floor. From there, it may move along a pipe or a wire until it hits the drywall of a wall or ceiling. This moving effect is what makes finding the source so hard.

    How pros trace the path of water

    When you call a pro for help, they do not just look at the stain. They start by going into the attic. They look for water marks or damp wood on the bottom of the roof deck. A pro will follow these marks up the slope of the roof. Even if the wood is dry now, old leaks leave a dark stain that shows where water once flowed.

    Checking flashing and roof joints first

    Most leaks do not start in the middle of a flat row of shingles. Instead, they start at the joints. These are the spots where the roof meets a wall, a chimney, or a vent. To keep water out of these spots, pros use metal strips called flashing. Flashing is meant to bridge the gap and direct water back onto the shingles. But over time, the seal around the flashing can fail.

    In Minnesota, the weather is hard on these metal parts. Heat and cold make the metal grow and shrink. This change can pull the flashing away from the brick or wood. Also, heavy snow and ice can push against the metal and bend it. If your flashing is loose or rusted, it will let water right into the seams of your roof.

    Where flashing problems commonly cause roof leaks

    Roof flashing is a thin layer of metal that keeps water out of your home. It sits in spots where the roof meets a wall or where something pokes through the shingles. Flashing helps move water away from these gaps and down toward your gutters. Without good flashing, water can slip under your shingles and start to rot the wood below. Many people need a roof leak repair because their flashing has gaps or rust.

    Water does not always fall straight down once it gets inside. It can run along a board or a beam before it shows up as a stain on your ceiling. This makes it hard to find the real source of the leak without help. In Minnesota, the freeze-thaw cycles often pull flashing away from the roof. This leaves your home open to wind, rain, and melting snow throughout the year.

    Cracks in chimney flashing

    The chimney is one of the most common spots for a roof leak. It needs a full set of metal pieces to stay dry. One part sits flat on the roof, and another part tucks into the brick. These pieces must overlap well to shed water. If the caulk around these pieces dries out or cracks, water will find a way in. You might see water stains on the walls near your chimney when this happens.

    Brick and mortar can also soak up water during a big storm. When the water inside the brick freezes, it can push the flashing out of place. This creates a large gap where rain can pour inside. It is best to check your chimney every year to catch these small cracks before they turn into big bills. A quick fix now can save you from a big storm damage project later.

    Leaky roof vents and skylights

    Roof vents and skylights are also prone to leaks. Vents use a rubber or metal seal to keep water from getting into the attic. Over time, the sun can bake these seals until they crack or shrink. When it rains, water drips down the vent pipe and into your home. You might not notice it until you see a wet spot on your ceiling or smell mold in the attic. The CDC warns that mold can grow fast when moisture stays in your home for too long.

    Skylights are even more tricky because they sit at an angle. They rely on thick flashing to keep the edges tight against the roof. If the seals around the glass fail, water will seep into the frame. This can ruin the walls around the skylight and damage your paint. Finding these leaks early is a key part of any smart home care plan. If you see water on the glass or the frame, you should call for a pro check right away.

    Valleys and wall spots

    A roof valley is where two slopes meet and form a V shape. This area carries a lot of water when it rains or snow melts. Because so much water flows here, any small gap in the flashing will lead to a leak. Valleys often collect leaves and dirt, which can trap water against the roof. You should look for these signs of trouble in your roof valleys:

    • Piles of leaves or twigs that stay wet for days.
    • Metal flashing that looks rusted or has holes.
    • Loose shingles along the edges of the V shape.
    • Water stains on the ceiling in the middle of a room.

    Wall spots are where the roof meets a side wall of the house. This area uses step flashing, which looks like small metal steps tucked under each shingle. If these steps are not nailed in right, they can slide out. This lets water run behind the siding and into your wall. This kind of leak is hard to spot from the outside but can cause a lot of damage to your home’s frame. Often checking helps find these loose pieces so you can get the right roof leak repair done fast.

    If you think you have a leak, do not wait for the next storm to act. Getting a free inspection is the best way to find out what is wrong. A pro can look at your flashing and shingles to find the real entry point. They have the tools to see things you might miss from the ground. Taking care of these small spots now will keep your Rogers home safe and dry for years to come.

    How Minnesota weather turns small gaps into leaks

    Minnesota weather is hard on homes and can cause hidden damage. Our state has some of the harshest weather in the country. From heavy snow in the winter to high winds in the spring, your roof must stand up to a lot of stress.

    Small gaps that seem minor in the summer can quickly turn into major paths for water when the seasons change. Knowing how these shifts happen can help you stay ahead of damage. It is often the small, hidden spots that cause the most trouble during a storm.

    The impact of freeze-thaw cycles

    One of the biggest issues for Rogers homeowners is the fast freeze-thaw cycle. In the late fall and early spring, the air often jumps above and below freezing in a single day. When water gets into small cracks or under shingles, it can freeze and expand. This strong force can slowly pull apart your roof layers.

    Over time, these cycles can loosen the metal parts called flashings. These flashings are needed because they direct water away from seams and joints. When they shift even a tiny bit, they leave a clear path for water to seep inside. This often leads to the need for roof leak repair to seal the home back up. If the metal is bent or cracked, it is often better to replace it than to patch it. This choice helps keep your roof dry for a long time.

    As the National Institutes of Health notes, small gaps that let in moisture can cause building parts to rot. This can also lead to health issues like mold.

    Why ice dams are a major threat

    In the winter months, ice dams are a top cause of leaks in our area. An ice dam is a thick ridge of ice that forms at the edge of your roof. This happens when heat from inside your home leaks into the attic and warms the roof surface. This heat melts the snow on top of the roof.

    As that meltwater flows down to the cold eave, it freezes again. This ice ridge blocks water from draining off the roof as it should. The water then pools behind the dam and stays on the roof. Because the water has nowhere to go, it can back up under the shingles and into the house.

    The University of Minnesota Extension explains that ice dams need snow and a roof with uneven heat to form. When water gets past the shingles, it can ruin your insulation and stain your ceilings.

    Best times for a roof check

    It is not just ice and snow that cause problems. High winds during spring storms can lift shingles and drive rain into the smallest openings. Your roof works as a system of layers known as a drainage plane. If the top layer fails, the layers below it must be strong enough to keep the house dry.

    But when high winds hit, rain can move sideways and get under the edge of the shingles. This is why timing is a huge part of roof care. You should check your roof at least twice a year to look for small signs of wear.

    The best times are in the spring, after the snow melts, and in the fall, before the first freeze. After a long winter, look for loose metal, missing shingles, or granules in the gutters. Catching a small gap now can save you from a much larger job later. Taking this step helps you find hidden gaps before they turn into major water leaks during the next big storm.

    What should you do when the roof starts leaking?

    Finding water inside your home during a storm can be scary. You need to act fast to stop the water from hurting your floors and walls. A quick response helps you manage the situation until you can get a professional roof leak repair. In Minnesota, rain or melting snow can find small gaps in your shingles or flashing. Once water gets in, it can move along the wood inside your attic. This means the drip you see might not be right under the entry point.

    Keep your family safe indoors

    Safety is the most important thing when you deal with a leak. Water and electricity are a dangerous mix. If you see water near lights or wall plugs, do not touch them. The Red Cross says you should turn off the power at the main breaker if you see sparks or frayed wires. If you have to stand in water to reach the panel, call an expert. Never go out on your roof while it is raining, windy, or icy. A wet roof is very slick and can lead to a bad fall.

    Manage the water and protect your home

    You can limit the damage by catching the water as it falls. Move your furniture, rugs, and electronics away from the drip. If you cannot move something, cover it with a heavy plastic sheet. Use a bucket or a bin to catch the water. If the water is pooling in your ceiling, it might bow or sag. You can poke a small hole in the middle of the sag with a nail to let the water drain into a bucket. This keeps the ceiling from getting too heavy and falling down.

    1. Clear the area by moving your items and covering large furniture with plastic.
    2. Put a bucket or large bin under the drip to catch the water and keep it off the floor.
    3. Place a towel inside the bucket to stop water from splashing out onto the floor.
    4. Check the attic to see if you can find where the water is entering the house.
    5. Document the leak by taking photos and videos of the water and any damage you see.
    6. Call a local expert to schedule a free inspection of your roof.

    Why professional help matters

    Small leaks can lead to big problems like mold or rot. The EPA notes that mold can start to grow on wet surfaces in just 24 to 48 hours. A skilled team knows how to find the real source of the leak. They will check the flashing around your chimney and vents. In Rogers and Cottage Grove, our teams see many leaks caused by local weather cycles. Getting a pro to look at your roof ensures the fix is done right the first time. This protects your home for years to come.

    Does a leaking roof need a patch or a larger repair?

    Finding the source of the leak

    Finding where water gets into your home can be hard. Water often moves along the roof frame before it drips onto your ceiling. This means the stain you see might not be right under the leak. You need to check your attic to find the real path of the water. Look for damp spots, mold, or light coming through the roof boards.

    During a storm, you must act fast to stop the water from doing more damage. Use a bucket to catch drips and move your things to a dry spot. Do not try to go out on the roof while it is wet or icy. Wait for a dry day and call for a free check to find the real spot that needs work. A pro can find leaks that you might miss from the ground.

    When to choose a targeted patch

    But a patch only works if the rest of the roof is in good shape. If the shingles around the leak are old or dry, a patch will not last long. The new seal may not stick to the old surface as it should. In these cases, fixing one spot may just lead to another leak nearby. You should think about how old your roof is before you choose to patch it.

    Repair TypePrimary GoalWhen to Use It
    Short FixStop water fastDuring a storm or before a pro arrives
    Targeted Flashing RepairFix specific leak pointWhen metal around a vent or wall fails
    Full Roof RestorationRenew the entire systemWhen shingles are old or damage is widespread

    The role of metal flashing

    Metal flashing is a key part of your roof. It sits in spots where the roof meets a wall or a vent. Its job is to guide water away from these seams and joints. In Minnesota, ice and snow can push against these metal parts. This can bend them or pull them away from the roof over time.

    When flashing fails, water can get into the house very fast. A pro can often fix this by putting in new metal and sealing it well. This is a common type of roof leak repair that can help your home. If you see water near your chimney or a vent, the flashing is likely the cause. Catching this early can stop a lot of water from getting into your attic.

    Signs of a larger roof problem

    Sometimes, a leak is a sign that your whole roof is at the end of its life. If you see many leaks at once, a patch will not help much. Look for shingles that are curling or missing many granules. These signs show that the roof can no longer shed water. In this case, a full roof restoration is often the best path.

    If your roof is more than 20 years old, it may be time for a change. Shingles get brittle as they age and lose their power to flex. In Minnesota, the cold winters make this problem worse. When the shingles can no longer grow and shrink, they crack. These cracks let water in across large areas of the roof. A patch cannot fix a roof that has reached this stage of wear.

    Water that gets into your walls can cause big problems like rot. As the National Institutes of Health states, moisture in buildings can lead to rot and health risks. Fixing the roof fast helps keep your home dry and safe. If you wait too long, the wood under the shingles may need to be replaced. This can turn a small fix into a much larger project. It is better to deal with the issue now than to wait for more leaks to show up.

    What happens during a professional roof leak inspection?

    A professional check for a roof leak repair is more than just a quick look at your shingles. Experts from Referred Restoration follow a set path to find the exact spot where water gets in. This work starts inside your home and moves up to the attic before anyone steps onto the roof. Our team looks for wet spots, wood rot, and damp insulation that show where the leak began.

    Indoor and attic review

    The search starts with signs like brown stains on your ceiling or walls. Because water can travel along roof framing, the leak source is often far from the stain you see. We check the attic to trace water trails back to the roof deck. This step is vital because it finds leaks that shingles might hide from the outside. The Federal Emergency Management Agency notes that attic checks help find wet wood and mold risks early.

    In the attic, our team looks at the roof deck for dark streaks or rust on nails. We also check the insulation to see if it is damp or holds moisture. These signs tell us how long the leak has been active and if it has caused hidden damage. We want to be sure we find every weak point before we start any work on the outside of your home.

    Exterior roof surface check

    Once the indoor check is done, we move to the roof surface to find the entry point. We look at shingles for signs of wear like cracks, missing grit, or curling edges. These issues often happen because of Minnesota freeze-thaw cycles and heavy snow. We pay close attention to flashing, which is the metal that guards spots like chimneys, vents, and valleys. Flashing leads water away from roof breaks, but it can fail over time.

    We also check the gutters to make sure water flows away from your home. Clogged gutters can back up and force water under the shingles. This lead to a need for gutter service or roof fixes. Our experts use their knowledge of local weather to find spots that wind or ice dams might harm. This full review helps us give you a clear plan to fix the leak and keep your home dry.

    Tailored fix plan

    After the full check, we give you a clear plan for your roof. We do not use a one-size-fits-all path because every home in Rogers has its own needs. Our team explains what we found and what steps will fix the leak for good. If the leak came from a recent storm, we can also help with storm damage restoration tasks. We focus on honest talk so you know exactly what your home needs to stay safe.

    You can Schedule a Free Inspection with our team to start this process. We treat every home as if it were our own and aim for work that lasts. Our goal is to give you peace of mind with a roof that can stand up to the tough Minnesota weather. Contact us today to get a professional look at your roof and stop leaks before they grow.

    Frequently Asked Questions

    Can I fix a roof leak from the inside of my house?

    You can stop water from doing more damage from the inside, but a real fix must happen on the outside. While inside, you can clear a path for the water and catch it in a bucket. But to stop the leak for good, a pro must seal the hole or fix the metal parts on the roof surface. Putting a patch on the inside will only trap water in your wood frame, which can lead to rot over time.

    How long does a professional roof leak repair take?

    Most small repairs take about two to four hours once a pro is on your roof. This time allows them to find the entry point, remove old shingles, and put in new metal flashing or sealants. If the leak has caused more damage to the wood deck below, the work may take a full day. A pro can give you a better idea of the time needed after a free inspection of your Rogers home.

    Will my homeowners insurance cover roof leak repair?

    Your insurance often covers a repair if a sudden event like hail, wind, or a fallen tree caused the leak. However, most plans will not pay for leaks caused by old age or poor care. It is wise to check your policy or talk to your agent after a storm. If you have storm damage, listing the issues early is a key step when you need to file a claim.

    When should I worry about a water stain on my ceiling?

    You should take any water stain on your ceiling seriously, even if it is small or dry. A stain shows that water has already made its way past your roof and through your insulation. If you wait to act, the water can cause mold to grow or rot your wood frame. It is best to get a roof leak repair check to find the source before the next storm hits.

    Ready to stop your roof flashing leaks and protect your home?

    Small gaps in your roof flashing can let water soak into your home and cause wood rot or mold growth that stays hidden for months. If you fix these small leaks now, you can avoid a much larger repair bill or a full new roof after the next storm. Catching these issues early helps you keep your Rogers home safe and dry while stopping the stress of a sudden leak during a heavy rain.

  • Hail Damage Roof Repair: What to Do Next

    Hail Damage Roof Repair: What to Do Next

    A Minnesota hailstorm can leave a roof looking normal from the yard while bruised shingles, loosened granules, and damaged flashing allow water to enter later. Prompt hail damage roof repair starts with a safe ground-level check, clear documentation, and a professional inspection that identifies both visible and hidden damage.

    Schedule a Free Inspection to get an honest assessment of your roof after a hailstorm.

    Use the steps below to protect your home, prepare for an insurance conversation, and make an informed decision about repair or replacement. Referred Restoration serves Rogers and surrounding Minnesota communities with roofing, siding, gutter, window, and storm restoration services.

    Hail damage roof repair: immediate steps

    After hail stops, confirm everyone is safe, document visible damage from the ground, check the attic for moisture, and arrange a professional inspection. Do not climb onto a wet or damaged roof. Fast, careful action creates a useful record and helps prevent a small opening from becoming a larger leak.

    Wait until conditions are safe

    Stay indoors until the storm has fully passed. Watch for downed power lines, broken glass, fallen branches, and standing water before walking around the property. Wear sturdy shoes and gloves if you need to move through debris. Leave major cleanup and any work at height to trained professionals.

    Complete a ground-level check

    Walk around the home without using a ladder. Look for shingle pieces in the yard, dents in gutters or downspouts, damaged siding, torn window screens, and marks on metal roof vents. These clues do not prove the full extent of roof damage, but they help show where hail struck.

    Check the attic and upper-floor ceilings for damp insulation, active drips, or new water stains. Place a container under an active drip and protect belongings, but do not disturb wet electrical fixtures. If water is entering quickly, ask a qualified contractor about appropriate emergency roof tarping services for temporary protection.

    Document what you can see

    Build a useful storm record without climbing onto the roof:

    1. Take wide photos of every side of the home.
    2. Capture closer photos of visible dents, debris, and exterior damage.
    3. Photograph a hailstone beside a coin or ruler if stones remain.
    4. Record the storm date and approximate time.
    5. Save the files together for your contractor and insurer.
    Minnesota homeowner documenting possible hail damage from the ground
    Photograph visible storm damage from the ground instead of climbing onto the roof.

    How can you recognize hail damage on a roof?

    Common hail damage signs include dark shingle bruises, missing granules, exposed asphalt, cracked shingles, and dents in soft metal components. A homeowner may notice related damage on gutters, siding, or screens, but a trained inspector is better equipped to determine whether the roof system was compromised.

    Bruised or exposed shingles

    Asphalt shingles have a protective granule layer. A hail impact can knock away granules and expose the asphalt below. Fresh impact spots may appear dark, shiny, or soft. Over time, exposed areas face additional stress from sunlight, rain, snow, and Minnesota freeze-thaw cycles.

    Granules also collect naturally as shingles age, so finding a few in a gutter does not automatically mean the roof has storm damage. A professional can compare the pattern, location, and condition of marks to distinguish recent impact damage from normal wear.

    Dented metal and damaged exterior surfaces

    Soft metal often provides clear evidence of a hail path. Inspectors examine roof vents, flashing, gutters, and downspouts for dents. Damage to siding, window wraps, screens, outdoor lights, or deck surfaces can also indicate that hail was forceful enough to affect the roof.

    A storm can affect several exterior systems at once. Referred Restoration provides a single point of contact for roofing and related exterior restoration, including gutter inspections and restoration.

    Indoor signs that need quick attention

    New ceiling stains, damp attic insulation, musty odors, or visible drips can signal that the roof envelope has been breached. Water may travel along rafters before appearing indoors, so the stain may not sit directly below the damaged area. Arrange an inspection promptly if you notice any of these signs.

    Close view of asphalt shingles with hail impact damage
    Hail impacts can dislodge granules and expose the asphalt beneath a shingle.

    Why a professional roof inspection matters

    A professional inspection finds damage that may be difficult to see safely from the ground and creates a clear record of the roof’s condition. The inspector can evaluate shingles, flashing, vents, gutters, and the attic, then explain whether the roof needs monitoring, targeted repair, or broader restoration.

    Roof access requires training and equipment

    Storm-damaged roofs can be slippery, unstable, or covered with loose debris. Walking on weakened shingles may also cause further damage. A roofing professional uses appropriate access equipment and knows how to inspect the system without putting a homeowner at risk.

    A complete inspection looks beyond shingles

    The roof works as a system. An inspector should evaluate the field shingles along with flashing, penetrations, vents, roof edges, gutters, and visible decking or attic conditions. That broader view helps identify water-entry points that a quick yard check could miss.

    Referred Restoration offers free roof inspections and honest recommendations for Minnesota homeowners. Learn more about the team’s roof inspections and storm restoration services in Rogers.

    Documenting damage and handling an insurance claim

    A strong storm-damage record includes dated photos, inspection findings, claim communications, and copies of all documents related to the event. Contact your insurer to understand your policy and required steps. A roofing contractor can explain observed damage and restoration needs, while the insurer determines coverage.

    Organize the storm record

    Create one folder for photos, videos, inspection notes, emails, and claim documents. Write down the names of people you speak with and the date of each conversation. Keep original files rather than editing them. A simple, complete timeline makes follow-up easier.

    Ask your insurer about the process

    Policies and claim procedures differ. Contact your insurer or agent promptly, ask what documentation is required, and confirm any deadlines that apply. Do not assume that every visible mark is covered or that every hail event requires replacement. The insurer makes coverage decisions under the terms of the policy.

    Use the contractor’s findings

    A contractor can provide photos and explain the observed condition of the roof and related exterior systems. Referred Restoration can help homeowners navigate the storm-damage claim process and communicate restoration needs. The goal is a clear scope based on the actual condition of the home.

    Get Your Free Inspection before hidden storm damage has more time to develop.

    Repair versus replacement after hail

    The right solution depends on the location and extent of damage, the condition of the existing roof, and whether the system can be restored reliably. A few isolated damaged shingles may support a targeted repair. Widespread bruising, cracking, or multiple compromised areas may call for replacement.

    Inspection findingRepair may fitReplacement may fit
    Damage patternLimited to a small, isolated areaSpread across multiple roof slopes
    Shingle conditionSurrounding shingles remain serviceableWidespread cracking or exposed asphalt
    Water entrySingle identifiable sourceMultiple vulnerable or leaking areas
    Related componentsMinor localized impactBroad damage to flashing, vents, or edges

    When a targeted repair may work

    Repair may be appropriate when damage is limited and compatible materials can restore the affected area. The contractor should also confirm that nearby shingles and flashing remain functional. Addressing a small issue promptly can help protect the roof deck and interior.

    When replacement may be the stronger option

    Replacement may be recommended when impacts are widespread, shingles are cracked across several slopes, or the existing roof cannot be restored reliably with isolated repairs. Referred Restoration installs asphalt shingle and metal roofing systems and can explain material options suited to Minnesota weather.

    Homeowners comparing materials can review this guide to asphalt shingles for Minnesota homes and the company’s metal roofing guide.

    Choosing a contractor after hail damage

    Choose a contractor that provides a thorough inspection, explains findings clearly, understands Minnesota weather, and recommends work based on the home’s actual condition. Avoid high-pressure decisions. A trustworthy contractor should answer questions, document observations, and provide a clear scope before restoration begins.

    Look for clear evidence and recommendations

    Ask the contractor to show photos and explain what each finding means. The recommendation should connect directly to the observed damage. You should understand which components need attention, what the proposed work will accomplish, and what happens next.

    Choose local exterior-restoration experience

    A local contractor understands the way hail, wind, snow, and freeze-thaw cycles affect Minnesota homes. Referred Restoration is locally owned, serves Rogers and surrounding communities, and provides roofing, siding, gutters, windows, and storm restoration through one team.

    Expect a straightforward process

    Referred Restoration follows a three-step process: a free inspection, a custom solution, and professional installation. The team uses premium, durable materials, including Malarkey roofing products, when they fit the project. Recommendations are tailored to the property after the inspection.

    What happens during the restoration process?

    A well-managed restoration moves from documented inspection findings to a tailored scope, careful scheduling, professional installation, and a final walkthrough. The contractor should explain each phase before work begins and keep the homeowner informed when weather, material availability, or newly discovered conditions affect the plan.

    Review the inspection findings

    The process begins with a conversation about what the inspection found. Ask to see photos of impacted shingles, flashing, vents, gutters, and any interior moisture. The contractor should explain which areas remain serviceable and which need attention. If an insurance claim is involved, keep the inspection record with the rest of your claim documents.

    Confirm the scope and prepare the property

    Once you understand the recommendation, review the proposed scope and ask questions about materials, scheduling, site protection, and cleanup. Before work begins, move vehicles away from the home, secure patio furniture, and keep children and pets clear of the work area. Contractors may also recommend protecting delicate landscaping near the roof edge.

    Installation and final walkthrough

    During restoration, the crew removes damaged materials as required, evaluates the exposed roof deck, and installs the approved system. The team should protect the property and collect debris throughout the work. At the end, walk through the completed project with the contractor, review the work performed, and ask how to monitor the roof after future storms.

    Referred Restoration develops a custom solution after the free inspection rather than applying the same answer to every home. That approach helps homeowners understand the actual condition of their exterior and move forward with a clear, practical plan.

    Frequently asked questions

    Can hail damage on a roof be repaired?

    Yes. Localized hail damage can often be repaired when the surrounding roof remains serviceable. Widespread bruising, cracked shingles, or damage across several slopes may require replacement. A professional inspection is the best way to determine which approach can restore the roof reliably.

    How soon should a roof be inspected after hail?

    Arrange an inspection promptly after conditions are safe, especially if you see missing shingles, dented metal, ceiling stains, or attic moisture. Some hail damage is difficult to see from the ground. Early documentation also gives you a clearer record of the storm’s effects.

    Should a homeowner climb onto the roof to inspect it?

    No. A roof can be slippery or unstable after a storm, and walking on damaged shingles may make matters worse. Document visible signs from the ground, check the attic only when it is safe, and let a trained roofing professional perform the roof-level inspection.

    Does Referred Restoration help with storm-damage claims?

    Yes. Referred Restoration helps homeowners navigate insurance claims for hail, wind, and other covered storm events. The team can document observed damage and explain restoration needs. Your insurer remains responsible for determining coverage under your policy.

    Schedule your free roof inspection

    A timely inspection gives you a clear understanding of your roof after a hailstorm and a practical plan for the next step. Referred Restoration combines local Minnesota weather knowledge, honest assessments, and customer-first service. The team treats every home as if it were its own.

    Schedule a Free Inspection with Referred Restoration to get clear guidance on hail damage roof repair for your home.