Author: Miguel Beltra

  • Vinyl Siding Panels: A Minnesota Installation Guide

    Vinyl Siding Panels: A Minnesota Installation Guide

    Minnesota weather puts every part of a home’s exterior to work. Freezing cycles, heavy snow, high winds, and strong summer sun can expose weak materials or rushed installation long before a homeowner expects problems. That is why the choice of siding is about far more than curb appeal. For homeowners in Rogers, St. Francis, Monticello, and Cottage Grove, the siding you select has to stand up to real temperature swings. Hold its color through glaring summer sun, and shed water and snow for decades.
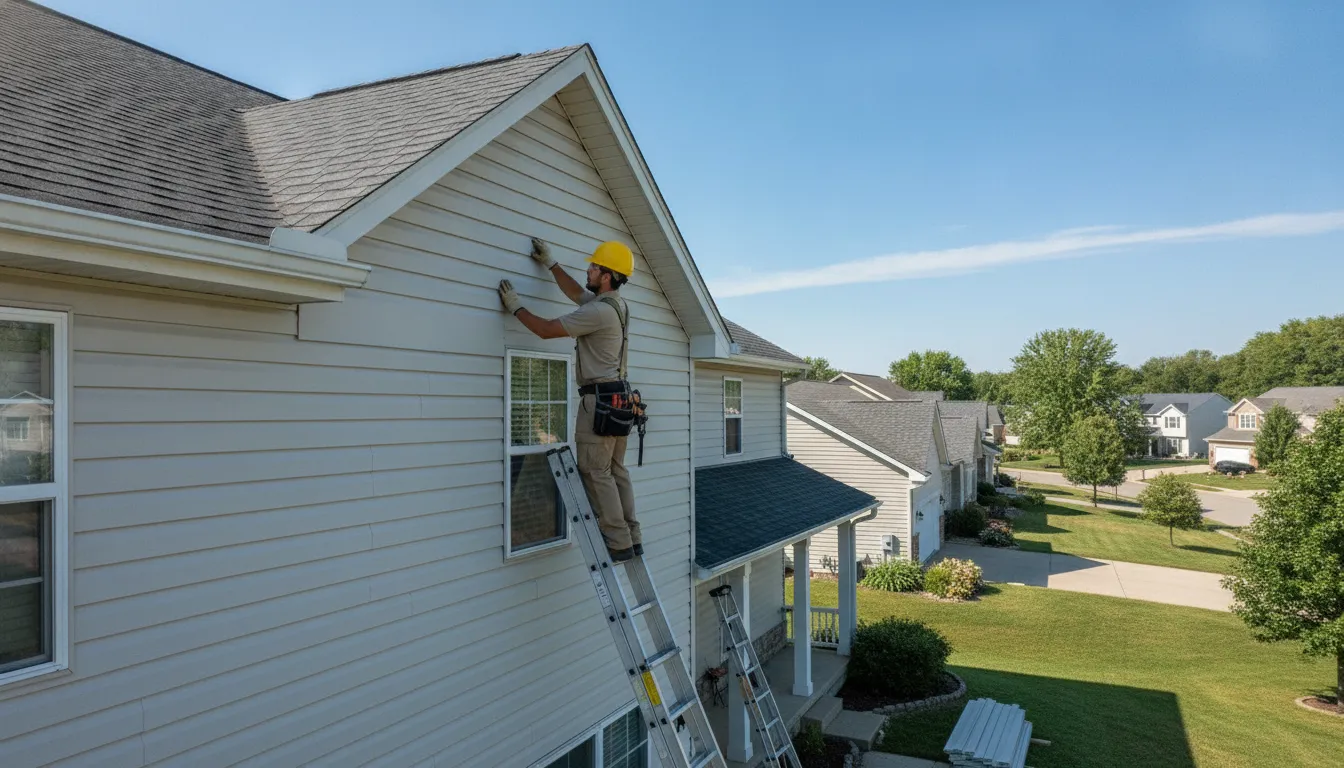
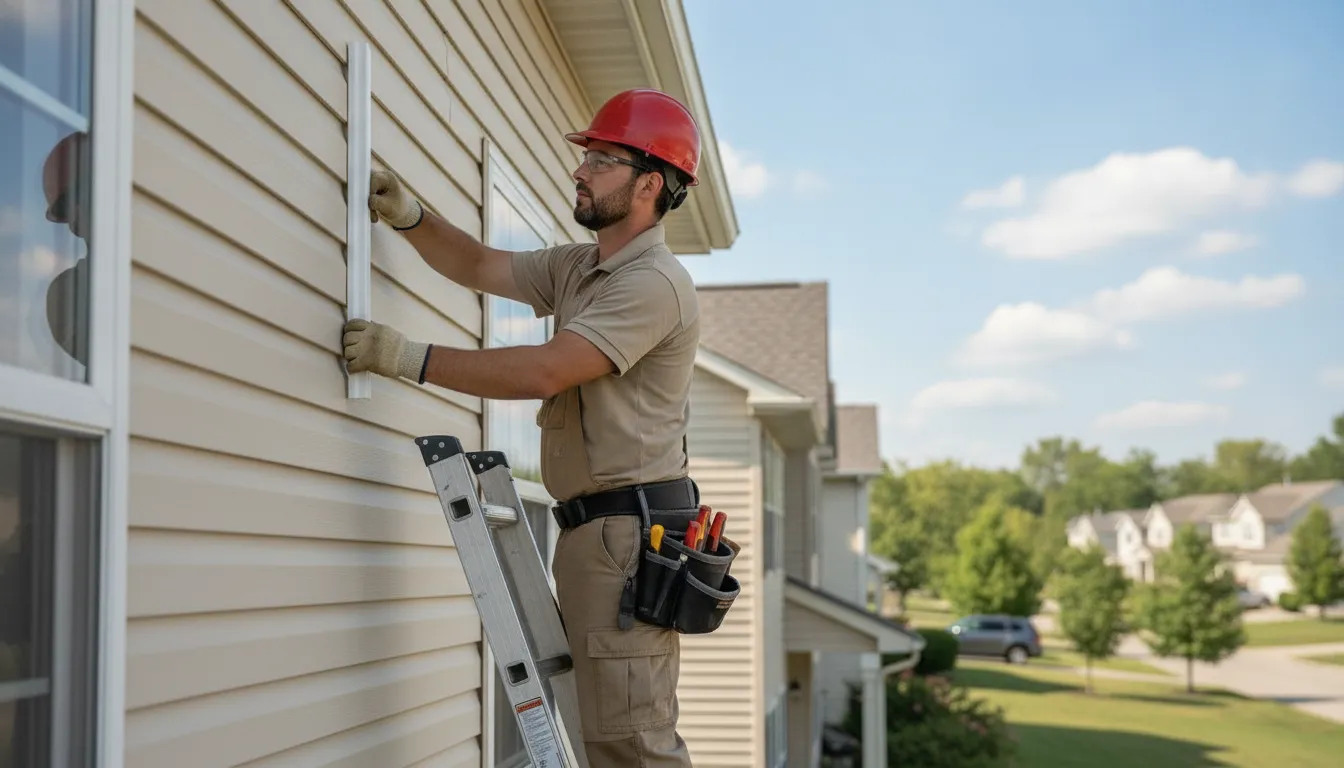
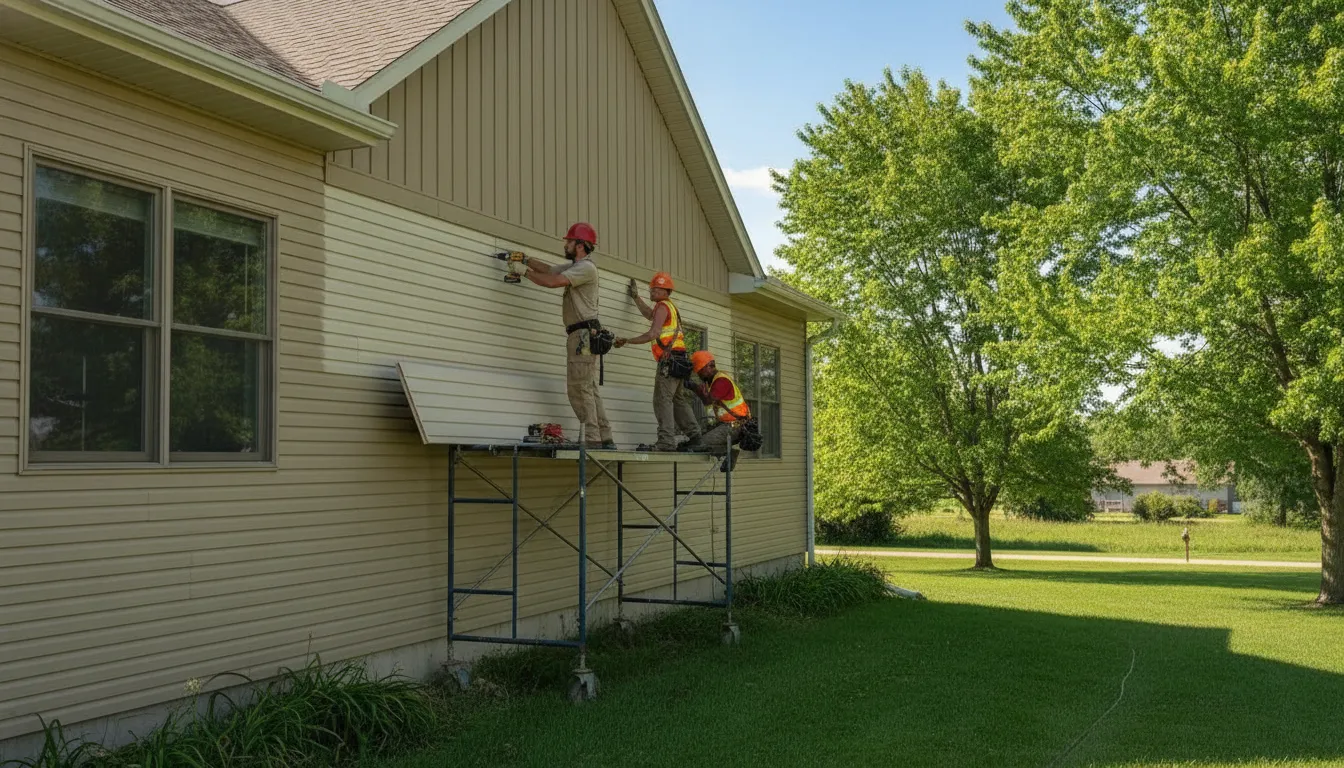
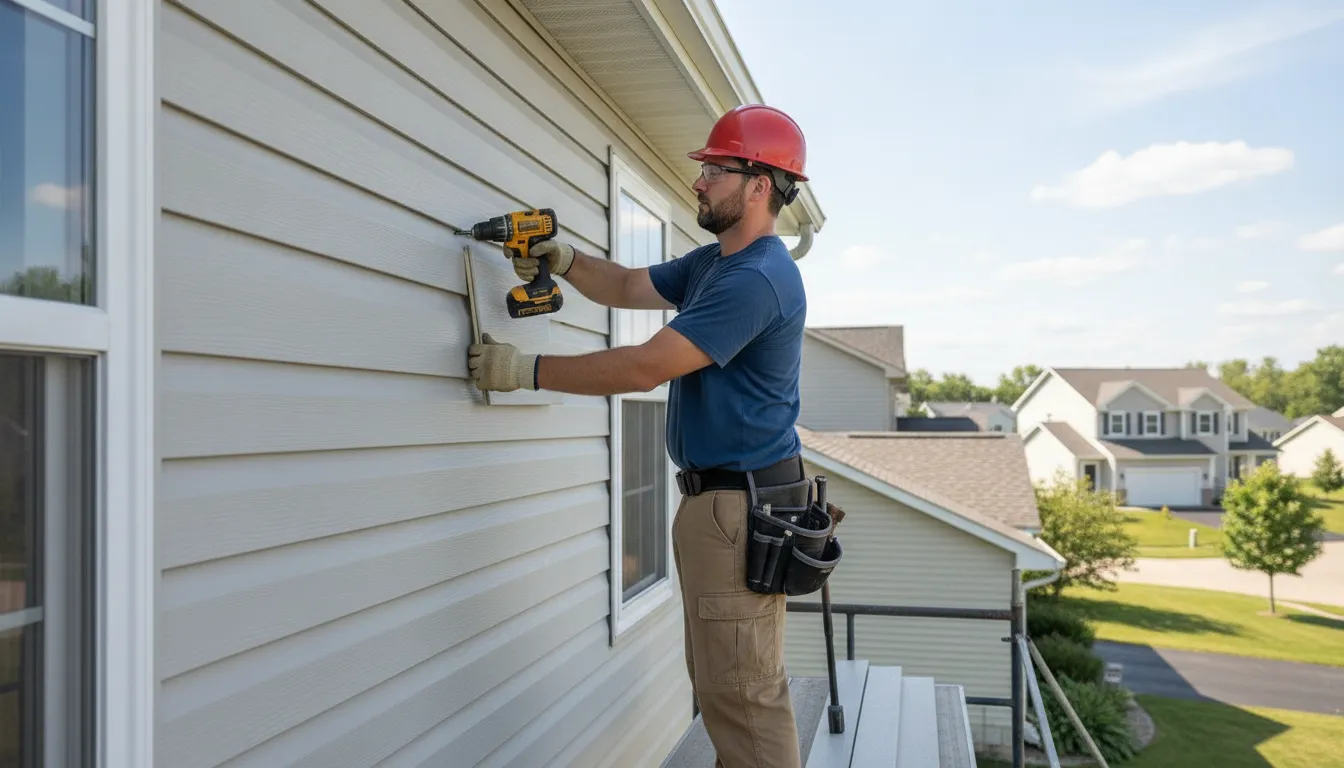
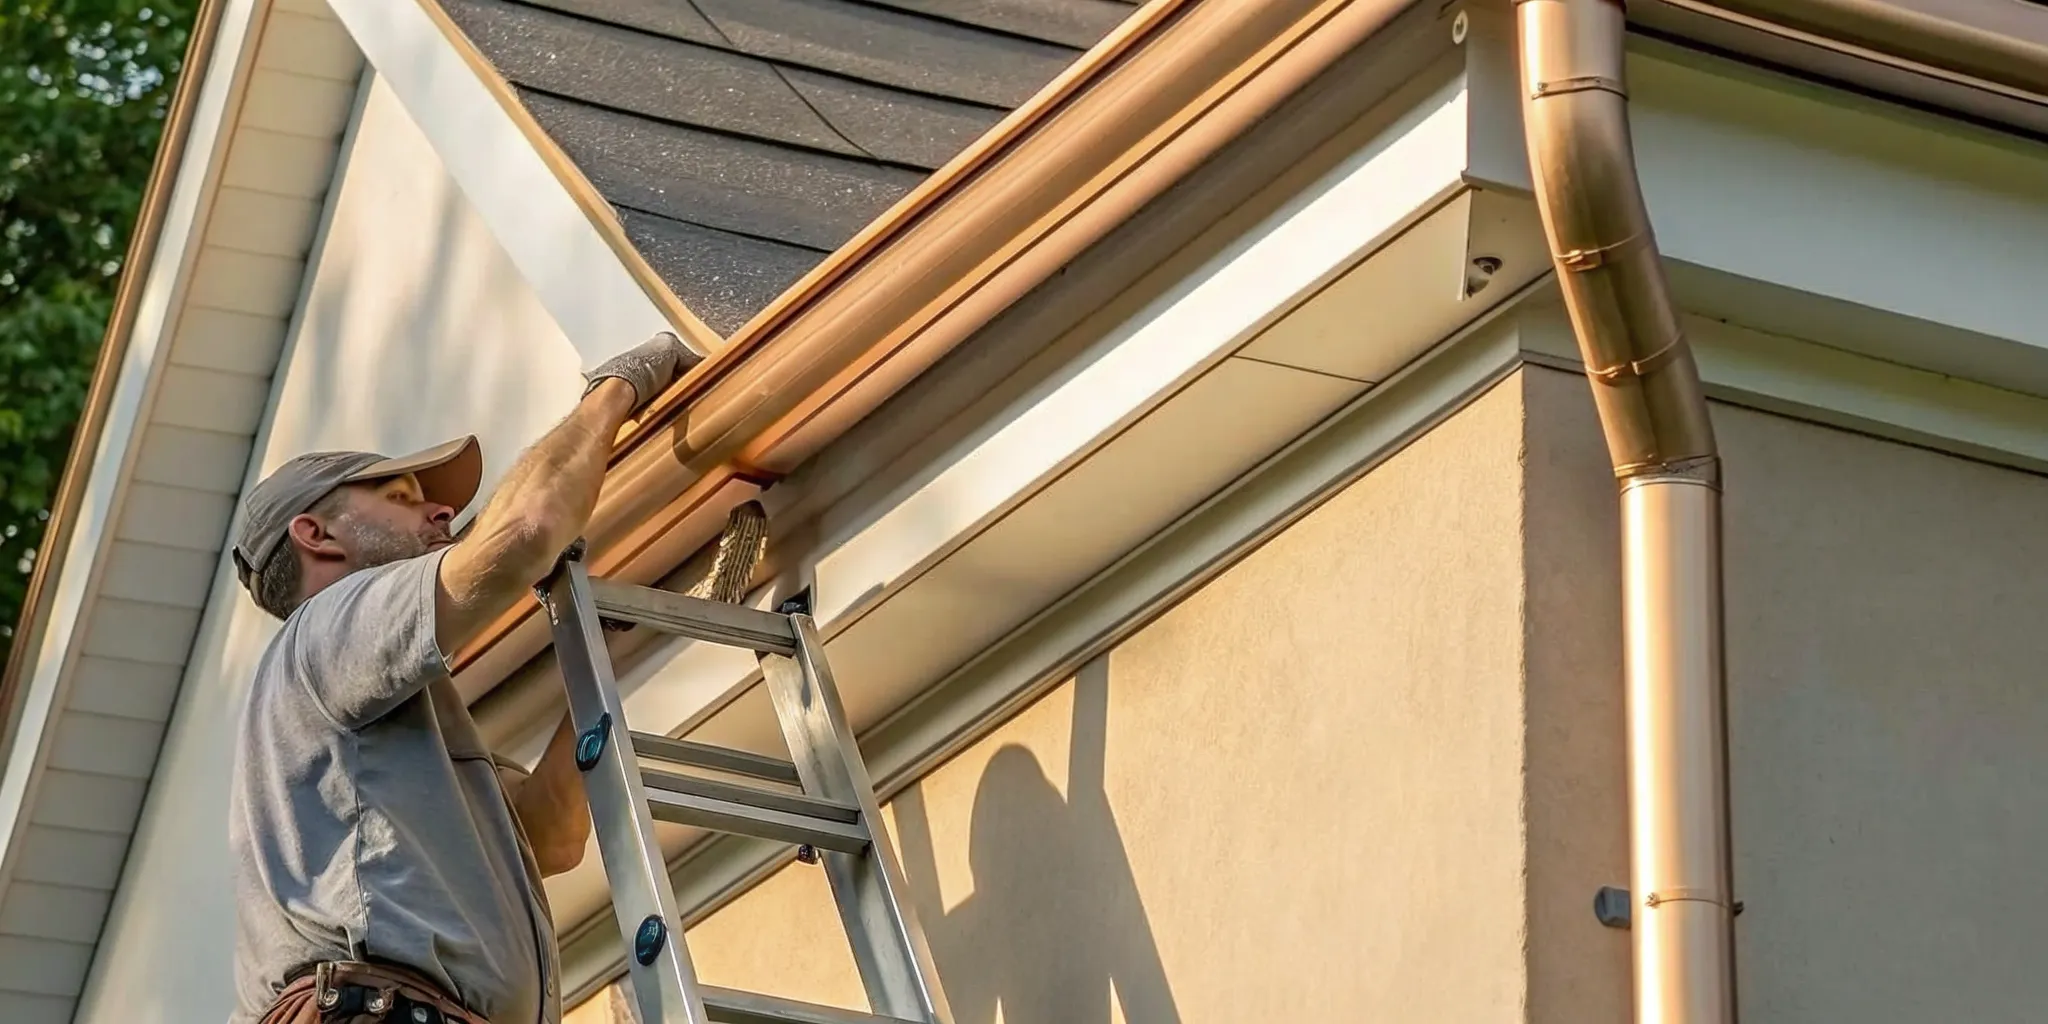
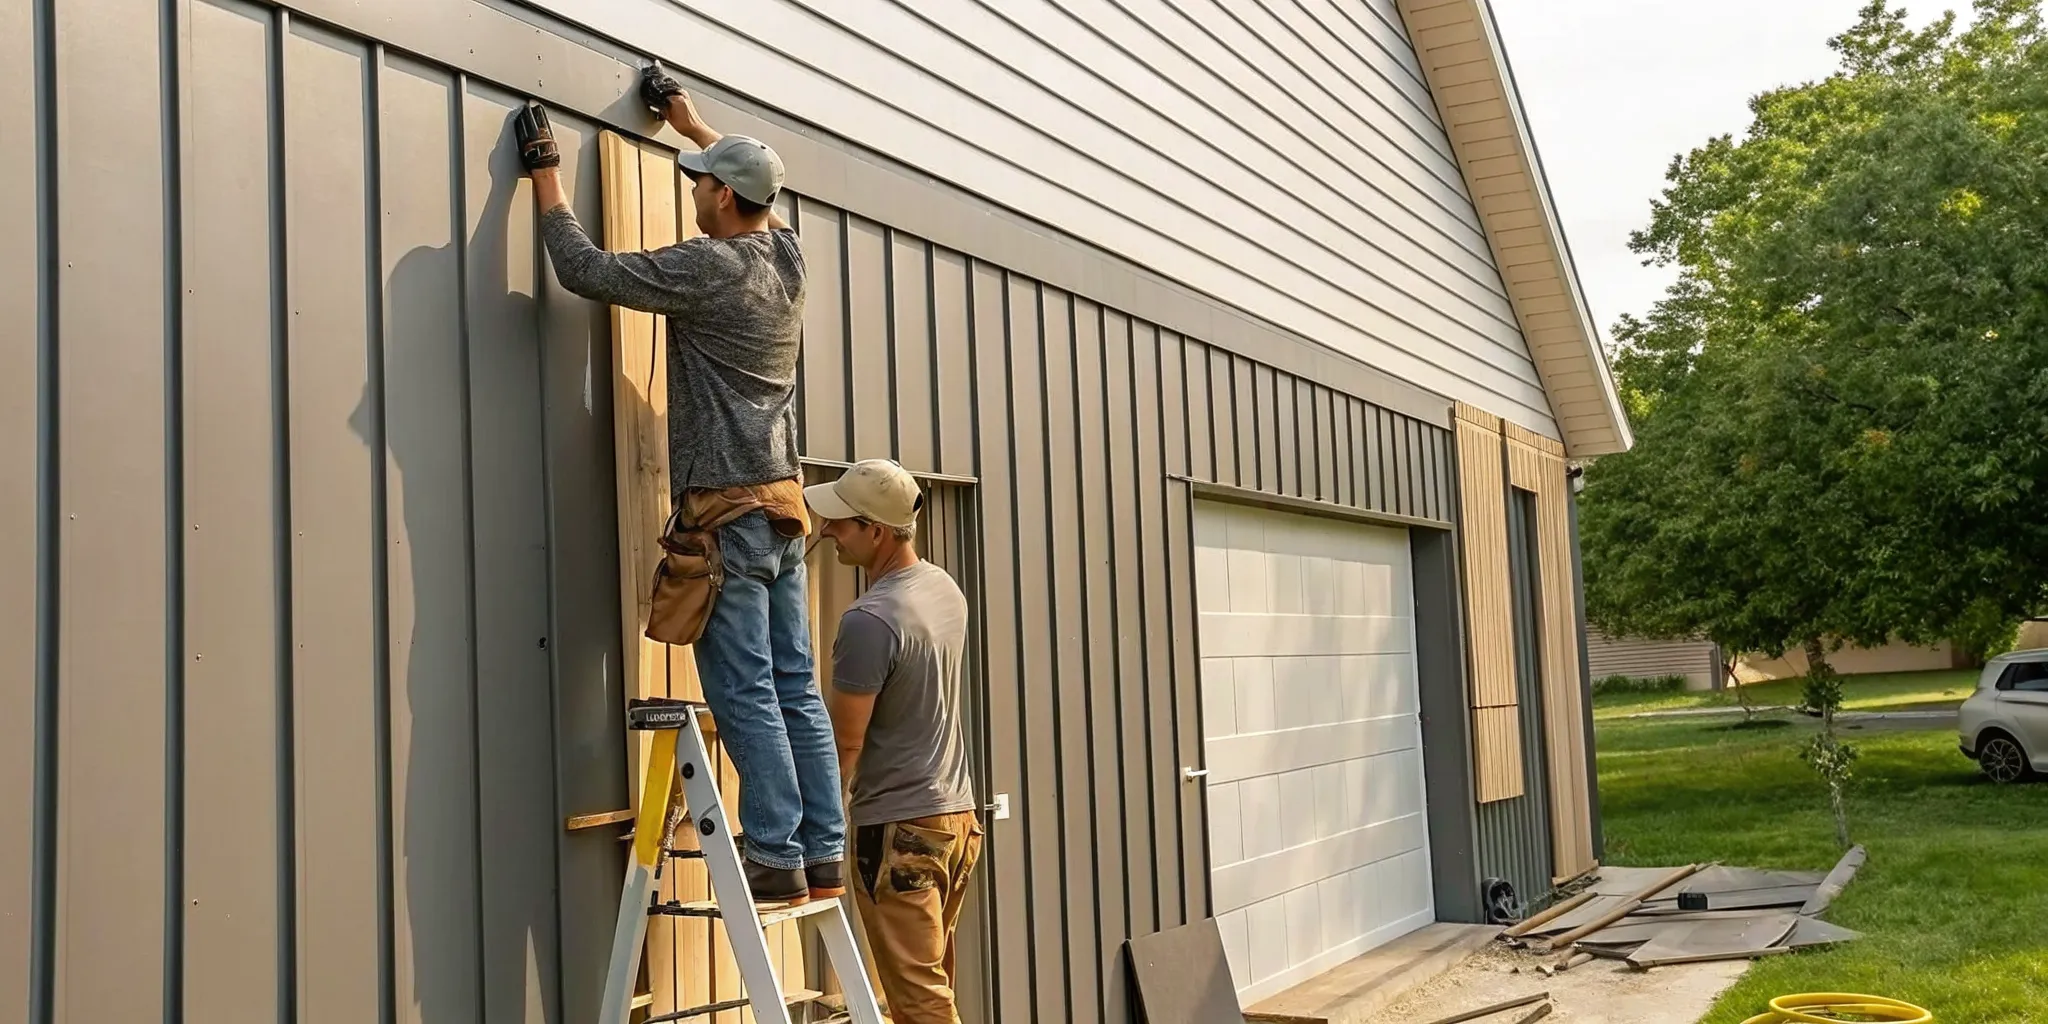
    Siding contractor installing vinyl siding panels on a Minnesota home

    The best vinyl siding panels for a Minnesota home balance the right profile, thickness, color, and installation details for the property’s exposure. A durable panel still depends on a flat substrate, proper weather protection, and room to expand and contract as temperatures change. When those variables line up, vinyl siding delivers one of the most maintenance-friendly exteriors available for the region.

    That decision looks different for a home in Rogers than it does for a property in Cottage Grove, St. Francis, or Monticello. Start by evaluating the home’s climate exposure, wall condition, insulation needs, and architectural style, then narrow the product choices with those factors in mind. This guide walks through the profile families, thickness standards, fade-resistant color options, and installation details that matter most. So you can choose with confidence and know what to expect from a professional install.

    Contact Referred Restoration online to talk through your siding options and get a free consultation for your Minnesota home.

    How to Choose Vinyl Siding Panels for a Minnesota Home

    For homeowners in Rogers, St. Francis, Monticello, and Cottage Grove, choosing siding is about more than selecting a color. Vinyl siding panels form the home’s outer weather barrier, so the panel system should be suited to Minnesota’s snow, freezing temperatures, temperature swings, and wind. A good selection balances appearance with verified product quality, a suitable underlayment, and installation that follows the manufacturer’s requirements.

    Start by looking beyond the sample on the display rack. Ask what standard the product meets, how the panel profile will complement the home, and what preparation the wall assembly needs. The right choice should look at home in the neighborhood while giving the installer a sound, level surface and enough room to account for seasonal movement.

    Confirm the product meets recognized standards

    Product labeling is an important first screen. Owatonna’s vinyl siding guidelines state that vinyl siding should be tested and labeled according to ASTM D3679. This standard helps distinguish a properly identified siding product from an unverified material. Federal regulations also reference ASTM D3679 for vinyl siding used in manufactured homes, providing another reason to ask about the product’s certification and labeling before installation. See the Owatonna vinyl siding guidelines and the federal ASTM D3679 requirements for the applicable references.

    That documentation does not replace an on-site evaluation. An experienced contractor should inspect the existing siding, trim, wall surface, and areas around windows and doors before recommending a panel system. These details affect how the finished siding sheds water and how cleanly it fits around transitions.

    Match the panel system to the wall and climate

    Underlayment is another important part of the decision. When a home is being re-sided, rigid foam underlayment can improve the wall’s energy efficiency and provide a smoother surface for the siding. That can be especially useful on older homes in the Rogers and St. Francis area, where the existing wall may not be perfectly even. The local guidelines identify rigid foam underlayment as a way to support both efficiency and a smooth siding installation. The appropriate assembly depends on the home’s condition, existing layers, moisture management, and project requirements.

    Finally, consider the supporting trim as part of the panel selection rather than as an afterthought. Corners, window surrounds, door trim, and roofline transitions must work with the panel profile and color. Our guide to vinyl siding panels explains how these pieces come together for a more finished exterior. Whether the home is in Monticello or Cottage Grove, a careful assessment and manufacturer-compliant installation are what turn a suitable product into a durable siding system.

    Vinyl Siding Panel Profiles Explained

    Profile is the shape and arrangement you see across the exterior wall. It affects how much shadow line the siding creates, how traditional or modern the home feels, and how the siding works with trim, windows, and rooflines. For Minnesota homes, the profile is a design decision, but it should also support a careful installation that accounts for snow, wind, and seasonal temperature changes.

    Horizontal lap siding is often described as clapboard or Dutch lap. Clapboard has a relatively straightforward, clean horizontal appearance, while Dutch lap has a more pronounced curved or notched face that creates stronger shadow lines. Within this family, double-four (D4) and double-five (D5) describe the width of the board segments within one panel, not a promise of a particular performance level. The PNNL vinyl siding installation manual identifies horizontal lap, vertical, and shake as common profile groups. Review the installation manual for profile terminology and handling guidance.

    Common vinyl siding panel profiles
    Panel ProfileLookTypical ExposureBest For
    Double-4 or double-5 lapHorizontal clapboard or Dutch lap courses with a familiar residential patternRepeated narrow or medium-width horizontal courses, depending on D4 or D5 selectionTraditional homes, ranches, and full-house installations that need a versatile exterior style
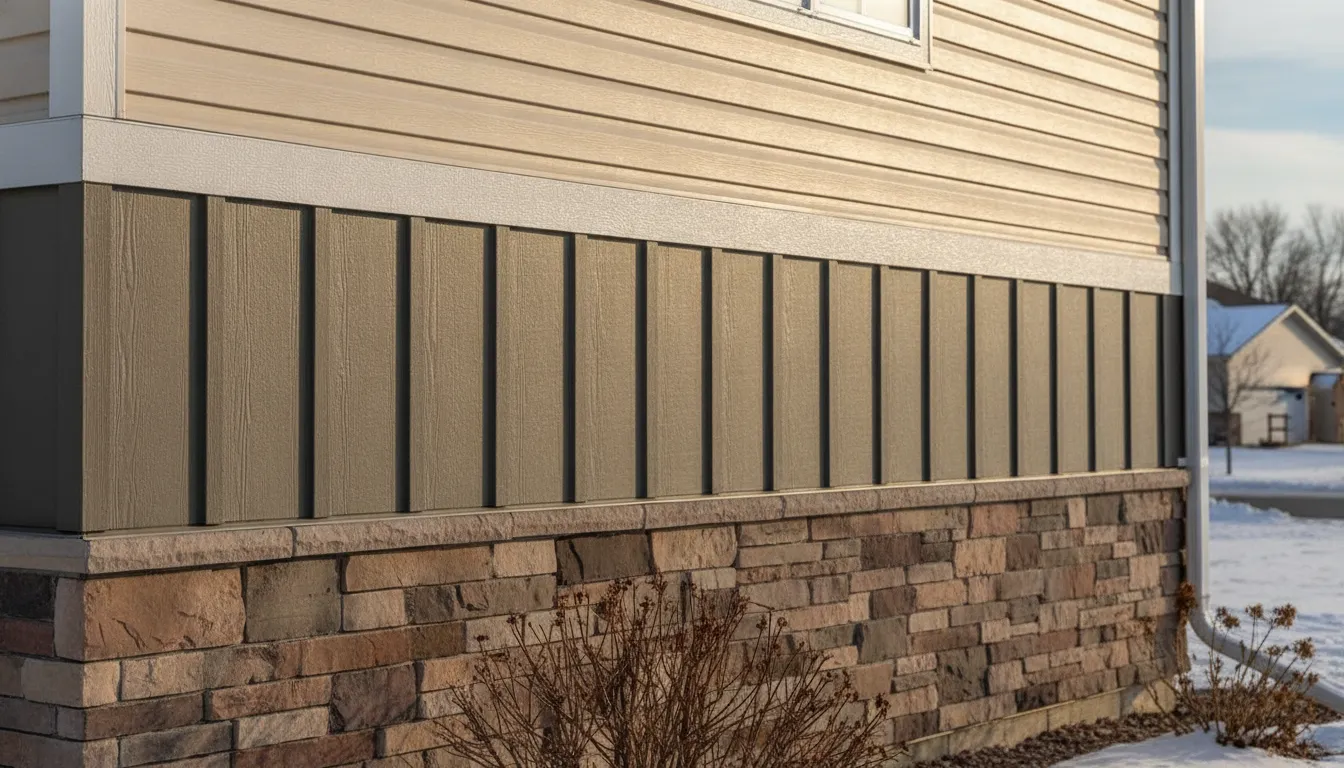
    Board-and-batten or verticalLong vertical panels with raised battens that draw the eye upwardVertical lines and taller visual proportions rather than horizontal course linesGables, accent walls, porches, and homes where a farmhouse or contemporary detail fits
    Shake or shake-and-shingleTextured, irregular-looking units that add a more natural, handcrafted characterShorter visual sections with varied texture and stronger surface detailGables, dormers, entry features, and carefully selected accent areas
    Insulated panelsLap-style siding paired with a backing layer that gives the wall a more substantial appearanceUsually a consistent horizontal exposure, coordinated with the selected lap profileHomeowners prioritizing a smoother wall plane and added support for a Minnesota re-siding project

    Board-and-batten siding can add height to a low roofline. While shake-and-shingle details can help distinguish a gable or front entry without covering the entire home in a highly textured pattern. Lap profiles are usually the easiest visual match when an existing neighborhood has predominantly horizontal siding. The right choice depends on the home’s architecture, the surrounding streetscape, and how the profile will meet corners, soffits, windows, and other trim.

    Whatever the profile, choose a product with clear manufacturer instructions and plan the installation around Minnesota’s movement between hot sun, deep cold, and freeze-thaw conditions. Vinyl expands and contracts as temperatures change, so panels must be fastened without restricting that movement. A thoughtful profile selection paired with correct detailing will look intentional and help the exterior perform through changing seasons.

    Vinyl Siding Panel Thickness: What to Look For

    When comparing vinyl siding panels for a Minnesota home, panel thickness is one useful indicator of how the material may perform through cold weather, wind, and seasonal movement. Standard residential panels commonly fall between 0.040 and 0.046 inches thick. Economy grades are often near the lower end of that range, while premium panels are commonly manufactured at approximately 0.046 inches.

    Thickness is not the only measure of quality, but it affects rigidity. Thicker panel stock generally feels more substantial and is less likely to flex, buckle, or show waviness when properly installed. That added rigidity can be especially helpful during Minnesota winters, when freezing temperatures and impacts from snow, ice, or ordinary outdoor activity put stress on the exterior. It does not make a panel indestructible, and installation quality still matters, but it can provide a stronger starting point for a durable wall system.

    What do D4 and D5 mean?

    Terms such as double-4, or D4, and double-5, or D5, describe the width of the board segments within a siding panel. D4 presents narrower courses, while D5 presents wider courses. The choice is primarily visual, although the profile also affects how the siding fits the home’s scale and architectural style. A D4 profile can create a more detailed, traditional appearance. D5 often gives a broader, cleaner look.

    Do not confuse profile width with panel thickness. A D5 panel is not automatically stronger than a D4 panel, and a wider course does not replace the need to review the product specifications. Ask to see the manufacturer’s stated thickness, profile, installation instructions, and warranty together.

    Look for recognized product standards

    Thickness should be considered alongside compliance and labeling. Minnesota installation guidance states that vinyl siding should be tested and labeled according to ASTM D3679. Federal requirements for vinyl siding used in manufactured homes also reference ASTM D3679 and certification or listing and labeling through 24 CFR 3280.309. These references help confirm that a product has been evaluated against a recognized standard, rather than selected on appearance alone.

    For a home in Rogers, Cottage Grove, or another Minnesota community, a practical checklist is simple: compare the stated thickness. Confirm the ASTM D3679 documentation, choose a profile that suits the house, and use an installer who follows the manufacturer’s fastening and expansion requirements. A thicker panel can improve resistance to buckling and impact. But it performs best when the wall is flat and the siding is allowed to move naturally as temperatures change.

    Choosing Colors That Last in Minnesota Sun and Snow

    Color is one of the most visible decisions in a siding project, but it also affects how the exterior responds to seasonal exposure. A Minnesota home may face intense summer sunlight, sharp winter glare reflected from snow, freezing temperatures, and repeated changes between warm and cold conditions. The right color choice starts with the home itself, then considers the siding product’s formulation and warranty language.

    Balance appearance with sun exposure

    Light and medium siding colors generally absorb less solar heat than very dark colors. That can be useful on broad, south- or west-facing walls that receive strong afternoon sun. Darker colors can create a striking look and add visual weight to a larger home, but they may become warmer in direct sunlight. The actual performance depends on the product, color technology, installation, ventilation, and the home’s exposure, so color alone should not be treated as a guarantee of long-term behavior.

    Modern manufacturing has improved the UV resistance of vinyl siding, helping colors remain vibrant longer in harsh sunlight. The PNNL vinyl siding installation manual identifies this improvement as an important reason contemporary colors are better equipped to resist fading than older products. Ask to see full-size samples outdoors, rather than choosing from a small indoor swatch. Look at them in direct sun and in shade, and compare them with the roof, window trim, entry door, stone, and other permanent features.

    Read the fade-resistance warranty carefully

    A siding warranty can provide useful guidance, but its color language deserves close attention. Review whether the warranty addresses fading, chalking, or color change, and check whether darker or saturated colors have different limitations. Also confirm what maintenance, installation, and product-registration requirements apply. A warranty is not a substitute for correct installation, but it can help you compare how manufacturers stand behind their color systems.

    For homes in Rogers, Cottage Grove, St. Francis, or Monticello, a practical palette often combines a durable main color with trim that creates contrast without making the exterior feel busy. Warm grays, muted greens, soft blues, and natural earth tones can complement Minnesota landscapes, while carefully chosen darker accents can define gables, shutters, or the front entry. Consider how snow will frame the house in winter and how trees, lawns, and neighboring homes will affect the color in summer.

    When comparing vinyl siding panels, bring your preferred samples to the property and evaluate each elevation separately. A local siding professional can help account for orientation, existing materials. And the home’s proportions before you commit to a color that should serve the exterior through many Minnesota seasons.

    Installation Best Practices for Vinyl Siding Panels

    A durable siding project depends as much on installation as on panel selection. Vinyl siding panels need room to move, a properly prepared wall, and a carefully planned drainage layer. The sequence below follows the principles that help an exterior perform through Minnesota’s hot summers, freezing winters, and repeated freeze-thaw cycles. Always follow the specific manufacturer’s instructions, which local installation guidance identifies as a requirement: vinyl siding shall be installed according to the manufacturer’s installation instructions.

    How to Install Vinyl Siding Panels Correctly

    1. Inspect and level the substrate. Begin with a flat, even wall surface. Uneven sheathing, damaged framing, or existing bulges can telegraph through the finished siding and interfere with panel movement. Where the wall cannot be brought flat through normal repairs, use properly aligned furring strips to create a consistent plane. This is especially important on older Minnesota homes, where previous layers may have settled or concealed irregularities.
    2. Install the water-management layers first. Complete the required flashing at windows, doors, roof-to-wall transitions, corners, and other vulnerable joints before covering the wall. Install compliant weather-resistive sheathing paper or another approved weather-resistive barrier as part of the wall assembly. These layers work behind the siding to direct incidental moisture away from the structure. Vinyl panels are not a substitute for flashing or a weather-resistive barrier. Local guidance references flashing requirements under R703.4 and weather-resistive sheathing paper under R703.2: review the applicable vinyl siding guidelines.
    3. Establish straight starter and corner lines. Snap level reference lines before installing starter strips, inside corners, outside corners, and trim. A small error at the base can become obvious across the full wall, particularly with long horizontal runs. Check openings and transitions as you go so trim remains plumb and panels have the correct channel engagement.
    4. Fasten panels without restricting movement. Place fasteners in the center of the slotted nail hem and leave the manufacturer’s specified clearance beneath the fastener head. Do not nail too tightly. Vinyl moves as temperatures change, and the slots are designed to let the panels expand and contract. For horizontal siding, fastener spacing should not exceed stud spacing horizontally and 12 inches vertically, according to the referenced municipal guidance. Use corrosion-resistant fasteners suitable for the wall assembly and the manufacturer’s system.
    5. Keep panels relaxed and avoid stretching. Lock each panel fully into the course below, but do not pull it tight while fastening. Stretching can put the panel under tension and contribute to buckling when it expands. Let the panel rest naturally in the course, maintain the recommended clearances at trim, and avoid forcing a panel into a channel that is out of alignment.
    6. Overlap joints in the correct direction and amount. Stagger seams where the layout allows, and overlap adjoining panels according to the product instructions. Correct overlap helps create a moisture-shedding, weather-tight exterior while keeping the finished pattern consistent. Never guess at the overlap because profiles and panel systems can differ. A clean joint should engage securely without forcing the panel or closing off its movement.
    7. Inspect every course before moving upward. Check that panels remain level, seams are properly engaged, nail heads are not tight, and trim channels are not pinching the siding. Professional installation matters in Minnesota because incorrect fastening, flashing, or clearances can create visible distortion and moisture risks, and may complicate the manufacturer’s warranty requirements. For a closer comparison of installation approaches, see our guide to vinyl siding panels.

    When the wall preparation and movement details are handled correctly, vinyl siding panels can provide a clean. Weather-ready exterior without relying on the siding itself to solve underlying wall problems. A qualified installer can confirm the substrate, drainage details, and product-specific requirements before the first course goes up.

    How Vinyl Siding Panels Handle Minnesota’s Climate

    In Cottage Grove and communities across Minnesota, exterior materials have to manage repeated freeze/thaw cycles, winter moisture, wind, and summer heat. Vinyl siding panels are designed with enough flexibility to move as temperatures change. That movement is not a defect. It is part of how the cladding accommodates seasonal conditions without transferring every temperature shift into the wall assembly.

    Movement matters during freeze/thaw cycles

    Vinyl expands in warmer weather and contracts as temperatures fall. The panels therefore use slotted nail hem holes that allow controlled movement along the wall. Fasteners should hold the siding in place without pinning it tightly, and the panels should not be pulled or stretched during installation. The Vinyl Siding Installation Manual explains that tight fastening or stretched panels can contribute to buckling when the siding expands. Properly hung panels are better prepared for the temperature swings that Cottage Grove homes experience from summer sun to winter cold.

    Installation quality is especially important when a home faces strong wind or storm activity. Vinyl siding can provide a resilient exterior surface, but its performance depends on the complete system: a sound substrate. Correct fastening, properly overlapped courses, and the clearances required by the manufacturer. Vinyl can also be less vulnerable to certain everyday impacts than more brittle cladding materials, although no siding is immune to damage from severe hail or flying debris. A professional assessment can help determine whether the existing wall and chosen panel profile are appropriate for the property.

    Insulation and moisture protection work together

    Insulated panel products add rigid foam backing behind the visible vinyl profile. That backing can improve wall energy efficiency and provide a smoother surface for the panels, a useful combination for Minnesota remodeling projects. It does not replace sound air sealing, weather protection, or properly installed wall insulation, but it can support a more complete exterior envelope.

    Behind the panels, the wall still needs appropriate moisture management. Flashing and a weather-resistive barrier help direct water away from the structure, while correct panel overlap creates a weather-shedding exterior. These details matter during snow, wind-driven rain, and spring melt, when small installation errors can become larger moisture concerns.

    Simple maintenance throughout the year

    Vinyl siding is also practical for homeowners who want a straightforward maintenance routine. Periodic cleaning with soap and water is typically enough to remove surface dirt and grime. Avoid abrasive methods or harsh cleaning practices that could damage the finish, and inspect the siding after major storms for loose, cracked, or displaced panels. For more ideas about working with durable vinyl siding panels, review the related guide before adding exterior accessories.

    With climate-appropriate products and careful installation, vinyl siding can give a Minnesota home a durable, manageable exterior through changing seasons.

    Choosing a Siding Installer for Your Area

    The installer you choose matters as much as the vinyl siding panels themselves. A careful contractor will look beyond color and profile to evaluate the home. The existing wall assembly, local weather exposure, and the details that keep water out through Minnesota’s freeze-thaw cycles. That standard should apply whether your home is in Rogers, St. Francis, Monticello, or Cottage Grove.

    Credentials and installation standards

    Start by asking how the contractor verifies material quality and installation requirements. Vinyl siding panels should carry labeling that identifies compliance with ASTM D3679. And the installer should be prepared to follow the manufacturer’s instructions rather than relying on a generic process. Ask whether the crew has manufacturer-certified installation training for the product being proposed. Certification does not replace good judgment, but it shows that the installer understands details such as fastening, panel movement, flashing, and proper overlap.

    It is also reasonable to ask for documentation before work begins. A reputable installer should explain the material warranty and workmanship warranty in clear language. Including what each warranty covers, how long it applies, and what maintenance or registration requirements may affect coverage. Be cautious of vague promises. A written scope should identify the siding system, trim, weather-resistive barriers, flashing, and ventilation or substrate work that may be needed.

    Look for local craftsmanship

    Local experience is valuable because homes in the Rogers area and throughout central and eastern Minnesota face demanding conditions. Wind, snow, ice, and repeated temperature changes can expose rushed preparation or poorly finished transitions. Look at completed projects, ask how the crew handles uneven walls and existing siding, and confirm who will supervise the work. The best conversation is specific: a contractor should be able to explain how the proposed system will be fitted to your home. Not simply recommend the same package to every property.

    Referred Restoration is a Minnesota exterior restoration contractor serving Rogers, St. Francis, Monticello, Cottage Grove, and surrounding communities. The team approaches each project individually and treats every home as its own, with attention to honest recommendations and durable workmanship. Financing is also available through the trusted Green Sky partner, subject to lender qualification and program terms.

    Contact Referred Restoration online to discuss your home’s siding needs, or call (763) 726-4245.

    Frequently Asked Questions

    What are the benefits of vinyl siding panels?

    Vinyl siding panels provide a durable exterior finish with relatively simple upkeep. Routine cleaning with soap and water is typically enough to remove dirt and grime, and modern manufacturing has improved resistance to fading from sunlight. The right profile and color can also complement both traditional and contemporary Minnesota homes.

    Are vinyl siding panels durable in cold climates?

    They can perform well through Minnesota freeze-and-thaw cycles when the wall assembly and installation are handled correctly. Vinyl moves as temperatures change, so panels need room to expand and contract in their slotted nail holes. Installers should avoid pulling panels tight or fastening them too firmly, which can contribute to buckling. Source: PNNL vinyl siding installation guidance.

    How thick should vinyl siding panels be?

    Common residential panels are approximately 0.040 to 0.046 inches thick, but thickness is only one part of the selection. Look for panels that are properly tested and labeled for ASTM D3679, then consider the profile, fastening system, manufacturer instructions, and the exposure conditions around your home. Source: Owatonna vinyl siding guidelines.

    Can vinyl siding panels be installed over existing siding?

    Sometimes, but the existing surface must be evaluated first. The wall should be sound, flat, and suitable for the new siding, with appropriate flashing and a weather-resistive barrier. Uneven walls may need furring strips so the panels hang straight. Local requirements and the manufacturer’s installation instructions also need to be followed.

    Does color affect the performance of vinyl siding panels?

    Yes. Darker colors generally absorb more solar heat, while fade-resistant technologies can help colors remain attractive in strong sunlight. Ask about the product’s color limitations and warranty before choosing a darker shade, especially for a wall with substantial southern or western exposure.

    Ready to Choose Vinyl Siding Panels for Your Home?

    Choosing the right vinyl siding panels comes down to matching the profile, thickness, and color to your home and Minnesota’s weather, then having it installed to manufacturer standards. The team at Referred Restoration will walk you through the options for your property in Rogers, St. Francis, Monticello, or Cottage Grove and handle the installation details that keep your exterior sound through every freeze-and-thaw cycle.

    Contact Referred Restoration online to schedule a free consultation about your siding project. You can also reach the team by calling (763) 726-4245.
  • Asphalt Shingle Roof Replacement Guide for Minnesota

    Asphalt Shingle Roof Replacement Guide for Minnesota

    Minnesota weather can turn a small roofing concern into a larger home-protection problem. Hail, high winds, heavy snow loads, and ice-related moisture all test the condition of asphalt shingles over time.

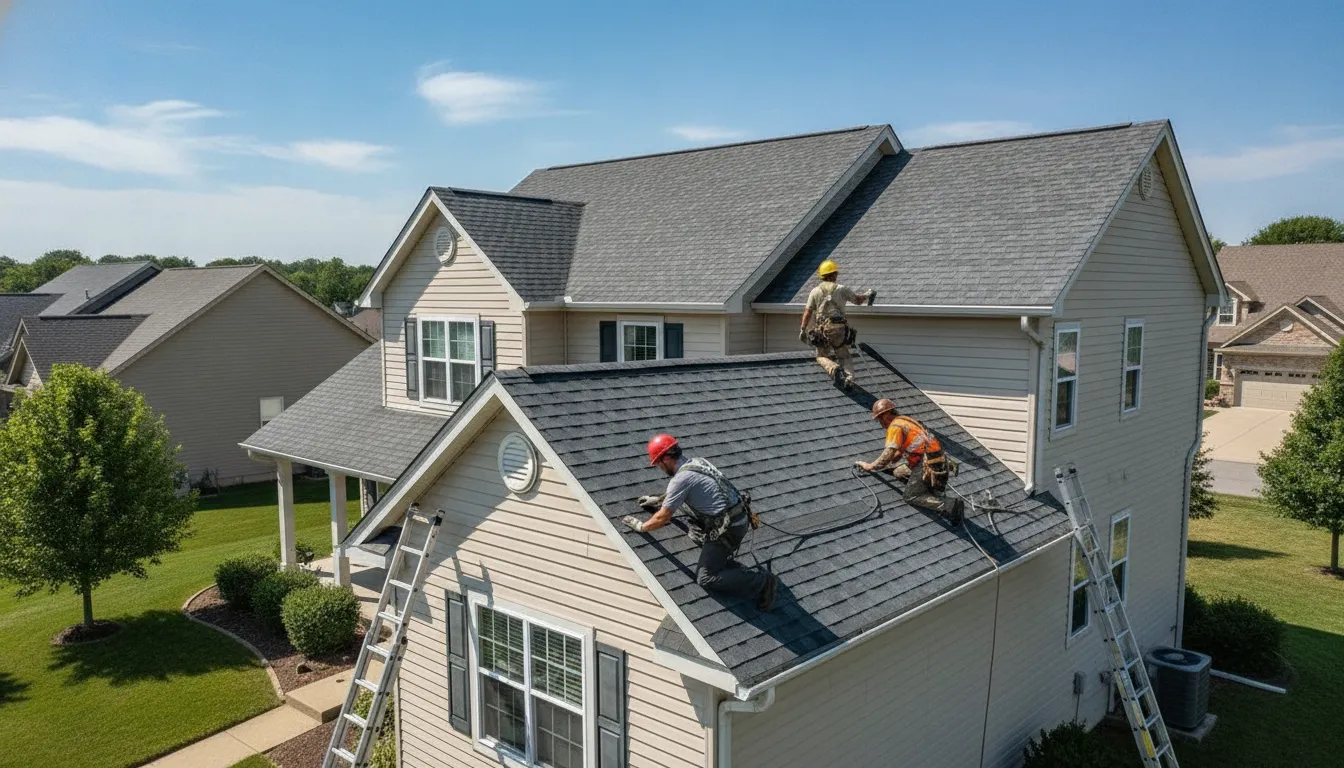
    Roofing contractors installing new asphalt shingles on a Minnesota home roof under a bright blue sky

    Asphalt shingle roof replacement is usually the right path when a roof is beyond its service life, has widespread storm damage, or cannot be reliably repaired. A professional evaluation can distinguish isolated damage from underlying issues, identify whether local code permits another covering, and help document storm damage for an insurance claim.

    The right decision also depends on the shingle type, roof assembly, ventilation, flashing, and installation conditions. Understanding what happens during the work makes it easier to compare options and prepare for a durable result in Minnesota’s changing seasons.

    Contact Referred Restoration online to plan your asphalt shingle roof replacement.

    What Asphalt Shingle Roof Replacement Involves

    For a broader overview, see the complete residential roofing systems guide.

    Asphalt shingle roof replacement means removing or covering an existing roof system and installing a new protective assembly. For a Minnesota home, the work involves more than laying new shingles over the old ones. A complete project evaluates the roof deck, removes failed materials when needed, installs underlayment and flashing, and seals the new shingles against changing weather.

    Roofing professionals generally describe two approaches. Reroofing can mean either replacing the existing roof covering or recovering it with another layer. Recovering, also called an overlay, leaves the old shingles in place. Most jurisdictions allow no more than two roof coverings on a building, and local code may require full replacement rather than an overlay. Check the applicable permit and code requirements before work begins. The Asphalt Roofing Manufacturers Association explains the difference between reroofing and replacement.

    An overlay may appear simpler, but it can add weight and trap heat between layers. Those conditions may shorten the service life of the new shingles. In Minnesota, a full tear-off is often the more dependable choice because it exposes the roof deck for inspection. The installer can identify rot, moisture damage, uneven surfaces, or old fasteners before they become hidden beneath the new roof.

    The watertight layer beneath the shingles

    Shingles are the visible weather surface, but the underlayment is a critical secondary water-resistant barrier. It sits between the shingles and roof deck, helping protect the structure if wind-driven rain or melting snow gets beneath the shingle courses. Correct installation matters at every transition, especially around penetrations and changes in roof direction.

    Flashing is equally important. Valleys, chimneys, and vents concentrate water and create areas where leaks can develop if metal flashing is damaged, poorly fitted, or reused when it should be replaced. A proper replacement includes inspecting these components and integrating them with the new underlayment and shingles. This is why a roof replacement should be treated as a system, not a surface upgrade. Learn more about our asphalt shingle roof replacement services and the components included in a professionally installed roof.

    Once the deck, underlayment, and flashing are ready, the crew installs the new asphalt shingles according to the selected product’s instructions. Proper alignment, fastening, and sealing help the roof withstand Minnesota’s snow, wind, hail, and freeze-thaw conditions. The result should be a coordinated roof system that sheds water reliably from the ridge to the gutters.

    Architectural vs. Standard Asphalt Shingles: Which Is Right for Minnesota?

    Choosing shingles is more than selecting a color. Minnesota roofs face snow loads, freeze-thaw cycles, strong wind, and occasional hail, so the right material should fit your home’s design and exposure. The two common options are standard three-tab shingles and architectural shingles, also called laminated or dimensional shingles. Both can form a dependable roof when installed correctly, but they differ in construction, appearance, and performance.

    Architectural and three-tab asphalt shingle comparison
    FactorArchitectural shinglesStandard three-tab shingles
    AppearanceLayered, dimensional profile with varied shadow lines and a more substantial look.Flat, uniform profile with a repeating tab pattern and a simpler appearance.
    DurabilityMultiple layers generally provide a more robust shingle design and enhanced durability.Single-layer construction can perform well, but offers a simpler level of material depth.
    Wind and hail resistanceOften available in higher-performance products, but the rating depends on the specific shingle and installation.Can resist wind when properly installed, with performance determined by the product rating and roof installation.
    WeightUsually heavier than three-tab shingles because of the additional laminated material.Usually lighter, which may matter when reviewing the existing roof structure and layers.
    Cold-weather performanceQuality products can remain flexible through temperature changes, but installation conditions and ventilation still matter.Can perform in Minnesota when selected and installed for local conditions, with attention to sealing and weather exposure.

    The Asphalt Roofing Manufacturers Association identifies 3-tab, architectural, and luxury designer shingles as standard asphalt shingle styles. Its comparison of architectural and three-tab products also notes that architectural shingles have a multilayered construction that creates a three-dimensional look and can provide enhanced durability. Those differences make architectural shingles a practical fit when appearance and added material depth are priorities.

    Why sealant strips matter in Minnesota wind

    Shingle performance depends on more than the label on the bundle. Many asphalt shingles use an adhesive sealant strip that bonds neighboring shingles as the roof warms in the sun. This seal helps improve wind resistance, but it cannot compensate for poor fastening, damaged decking, inadequate flashing, or installation during unsuitable conditions.

    Referred Restoration partners with Malarkey Roofing Products, whose NEX polymer-modified asphalt is designed to provide increased flexibility and weather resistance in cold temperatures. That type of material consideration can be useful for Minnesota homeowners who want a roof system suited to seasonal temperature swings. The best choice still depends on the roof’s slope, ventilation, structural condition, local code requirements, and the product’s documented ratings. A professional evaluation can connect those details to your asphalt shingle roof replacement plan without treating one shingle style as right for every home.

    How Long Do Asphalt Shingle Roofs Last in Minnesota?

    In Minnesota, a properly installed and ventilated asphalt shingle roof that has not suffered significant damage can last 20 years or more. That is a useful planning range, not a guarantee. The roof’s age, installation quality, attic conditions, exposure, and storm history all affect when replacement becomes necessary.

    Minnesota’s climate places unusual demands on every roofing system. Heavy snow loads stress roof components during winter. Ice dams can allow melting snow to back up beneath shingles and enter vulnerable areas. Summer hail and high winds can bruise, loosen, or remove shingles. Repeated freeze-thaw cycles also contribute to gradual weathering. Research from the National Institute of Standards and Technology identifies heat, ultraviolet exposure, thermal cycling, and freeze-thaw events as stresses that can degrade asphalt shingles.

    Why roof ventilation affects service life

    Attic ventilation is one of the less visible factors in asphalt shingle roof durability. Proper ventilation allows heat to escape instead of allowing excessive heat buildup beneath the roof deck. That helps protect the roofing system through hot summers and reduces conditions that can contribute to winter ice dams. Insulation and ventilation should be evaluated together, because correcting one without addressing the other may leave the underlying problem unresolved.

    For winter preparation, homeowners can review practical guidance on ice dam prevention in Minnesota. Keeping attic air movement and moisture conditions under control supports the roof, insulation, and interior ceilings below it.

    When age becomes a replacement concern

    Once an asphalt shingle roof passes the 20-year mark, schedule a professional inspection even if it appears acceptable from the ground. Consumer Reports advises replacing an out-of-warranty roof that is more than 20 years old, even when obvious damage is not visible. Older shingles may have reduced flexibility and less protection against wind uplift or hail after years of weather exposure.

    Look for warning signs such as missing or exposed granules, cracked or curled shingles, exposed fasteners, repeated repairs, stains in the attic, or leaks around roof penetrations. A roof can also have concealed damage after a severe storm without showing an obvious interior leak. Inspection findings help distinguish isolated repairs from a broader need for asphalt shingle roof replacement.

    Do not wait for the first interior leak to evaluate an aging roof. A timely inspection can clarify whether ventilation, flashing, storm damage, or general wear is shortening its remaining service life.

    The Asphalt Shingle Replacement Process, Step by Step

    Replacing one damaged shingle and replacing an entire roof are different projects. The basic repair sequence is systematic, but full asphalt shingle roof replacement also involves tear-off, roof-deck inspection, flashing, ventilation, weather planning, and safe work at height. The seven-step shingle sequence below explains how an individual shingle is removed and replaced. It is useful for understanding the work, even when a licensed roofing professional handles the project.

    1. Break the seal on the target shingle. Carefully loosen the adhesive seal that holds the damaged shingle to the course below it. A roofing tool can separate the seal without unnecessarily disturbing nearby shingles. Work patiently, because forcing the material can create additional damage.
    2. Break the adjacent seals. Loosen the seal strips around the neighboring shingles. Asphalt shingles overlap one another, so the target shingle cannot be removed cleanly until the adjoining pieces release. Limit the disturbance to the immediate work area.
    3. Remove the nails. Lift the target shingle enough to expose its fasteners, then remove the nails without tearing the underlayment or damaging the roof deck. Any damaged sheathing or underlayment should be evaluated before new shingles are installed.
    4. Remove the adjacent nails. Take out the nails that secure the overlapping neighboring shingles where necessary. This creates enough access to remove the old shingle and gives the replacement a proper fastening surface.
    5. Take out the old shingle. Slide the damaged shingle free and clear away loose debris. The exposed area should be checked for moisture, deteriorated wood, or other conditions that could prevent the new shingle from lying flat.
    6. Install the new shingle. Position a matching replacement so its edges and exposure align with the surrounding course. Fasten it according to the shingle manufacturer’s instructions. Correct placement matters for water shedding, appearance, and wind performance.
    7. Reseal the repair. Press the surrounding shingles back into position and apply compatible roofing sealant where required by the installation instructions. Sun and normal weather help activate adhesive strips, but the repair should be secure before the next storm.

    For a full replacement, the same attention to installation details applies across the entire roof. The crew must remove the existing covering as needed, inspect the deck, install underlayment and flashing, place the new shingles, and protect exposed work from changing weather. Minnesota requires building permits for re-roofing existing dwellings, so homeowners should confirm the permit process with the local authority before work begins. The Minnesota roofing guidance also requires materials to follow the 2020 Minnesota Residential Code and the manufacturer’s installation instructions, which can affect warranty coverage.

    A capable homeowner may complete a limited repair when familiar with roofing procedures, equipped for safe access, and able to plan around dry weather. Full replacement is usually a professional job. Walking a sloped roof, handling tear-off debris, identifying hidden moisture, and installing flashing safely all require experience. Call a state-licensed roofing contractor when damage is widespread, the roof deck may be compromised, multiple layers are present, or you are not comfortable working at height. Professional evaluation can also prevent a small repair from masking a larger roof-system problem.

    Sources: IKO’s seven-step shingle replacement guidance and the Minnesota roofing guidance.

    Does Homeowners Insurance Cover Asphalt Shingle Roof Replacement?

    Homeowners insurance may help cover asphalt shingle roof replacement when a covered event, such as wind or hail, causes sudden damage. Coverage depends on the policy, the cause of loss, the roof’s condition, and the deductible that applies. Normal aging, deferred maintenance, and wear are generally treated differently from storm damage.

    After a severe Minnesota storm, do not assume that visible damage is minor. Missing granules, curled shingles, and bruised areas can indicate wind or hail impact. Document the condition promptly with clear photos, including close-ups and wider views that show where the damage appears on the roof. Photograph related damage to siding, gutters, windows, or other exterior features as well.

    What to document before filing a claim

    Keep a simple record of the storm date, the damage you observed, and any temporary steps taken to prevent additional water intrusion. Save inspection notes, receipts for emergency measures, and correspondence with your insurer. Avoid making permanent repairs before the damage has been properly inspected unless immediate action is needed to protect the home.

    An insurer may send an adjuster to assess whether the damage resulted from a covered storm event and whether repair or full replacement is appropriate. Your contractor can provide a detailed inspection, explain the visible roof conditions, and help organize documentation for the claim. A local contractor familiar with Minnesota hail and wind patterns can also identify damage that is easy to miss from the ground.

    Where a local roofing contractor can help

    Referred Restoration helps Minnesota homeowners navigate the insurance claims process after storm damage. The contractor does not decide what your policy covers, but can help you understand the construction scope. Document affected areas, and communicate the work needed to restore the roof correctly. That support can be especially useful when a storm affects several exterior systems at once.

    For a broader overview, read this guide to navigate the asphalt shingle roof replacement insurance claim. If hail or wind affected more than the roof, learn how to coordinate asphalt shingle roof replacement as part of exterior storm repairs.

    Before authorizing work, review your policy, ask questions about the claim decision, and confirm the contractor’s inspection findings. A careful process protects your home while keeping the insurance discussion grounded in documented damage rather than guesswork.

    When Is It Time for an Asphalt Shingle Roof Replacement in Minnesota?

    Roof problems rarely begin with a dramatic collapse. More often, asphalt shingles show small changes that signal the roof is losing its ability to shed water. In Minnesota, acting on those signs matters because summer storms, freeze-thaw cycles, snow, and ice dams can turn a weakened roof into a larger home repair problem.

    Start with a careful visual inspection from the ground, then have a qualified professional examine areas that are difficult or unsafe to reach. Look for cracked, curled, or cupped shingles, worn mineral coatings, exposed nails, old patches, holes, or visible underlayment and roof sheathing. These are recognized signs of roof damage in Minnesota roofing guidance.

    Watch for granule loss and exposed roofing materials

    Granules protect the shingle surface from weather exposure. When they disappear, the underlying shingle base is exposed to the elements, which can accelerate deterioration. You may notice bare-looking areas on individual shingles or an unusual amount of granule debris in gutters and downspouts. Missing granules do not automatically determine that the entire roof needs replacement, but they warrant a professional assessment.

    Also check for water stains or damp insulation in the attic, especially near vents, chimneys, and walls where flashing may fail. A roof can look acceptable from the yard while allowing moisture into the structure. Delaying action can give a small leak time to damage decking, insulation, drywall, or framing. Winter ice dams can make that risk more urgent by forcing meltwater beneath shingles and into vulnerable areas.

    Age is a reason to investigate, not a reason to wait

    Roof age should be considered alongside its condition, installation quality, ventilation, and storm history. Consumer Reports advises replacing an out-of-warranty roof that is more than 20 years old, even when obvious damage is not visible. That does not replace an on-site evaluation, but it is a useful planning threshold for Minnesota homeowners.

    Schedule periodic inspections rather than waiting for a ceiling stain or active leak. A professional can identify widespread wear, repeated patching, exposed fasteners, and decking concerns before they become emergency issues. If several warning signs appear together, planning an asphalt shingle roof replacement is usually safer than treating each symptom as an isolated repair. Early evaluation gives you time to understand the roof’s condition and prepare for the work before the next major storm or winter weather event.

    Ready to schedule your asphalt shingle roof replacement inspection in Minnesota? Contact Referred Restoration.

    Frequently Asked Questions

    What does replacing asphalt shingles involve?

    Replacement usually means removing the existing shingles, checking the roof deck and flashing, installing the new roofing system, and sealing the shingles. The condition of the underlying materials and local code requirements determine whether the roof can be recovered or needs a full tear-off.

    Can you replace just one shingle on a roof?

    Yes, a single missing or damaged shingle can often be replaced when the surrounding roof is still sound. The replacement should match the existing material as closely as possible, and the roofer should check nearby shingles for storm damage, loose seals, or water intrusion.

    How often does an asphalt shingle roof need to be replaced?

    There is no single schedule for every Minnesota roof. Installation quality, ventilation, hail, wind, snow, ice dams, and maintenance all affect service life. A properly installed and ventilated roof without damage can last 20 years or more, according to the City of Robbinsdale roofing guidance. Consumer Reports advises replacing an out-of-warranty roof more than 20 years old, even without obvious damage.

    Is a permit required for asphalt shingle roof replacement in Minnesota?

    Permit requirements are handled locally, but Minnesota homeowner guidance states that building permits are required for re-roofing existing dwellings. Your roofing contractor should confirm the requirements with the local building department and coordinate the permit before work begins. Robbinsdale’s roofing guidance is one Minnesota example.

    Ready to plan your asphalt shingle roof replacement?

    Minnesota weather can make roof decisions feel complicated, especially when you are weighing wear, storm damage, and the right next step. A professional inspection can help clarify whether your asphalt shingles need repair or full replacement and what to address first.

    Contact Referred Restoration online for a free inspection of your asphalt shingle roof.

  • Financing for Window Replacement in Minnesota

    Financing for Window Replacement in Minnesota

    Drafty windows during a brutal Minnesota winter drain both your heating and your monthly budget. Investing in new windows keeps your property warm, dry, and protected for years to come.

    Minnesota homeowner discussing energy-efficient window replacement with an advisor in a bright living room

    Flexible financing for window replacement allows Minnesota homeowners to secure their properties and complete essential upgrades without any high upfront payments. By working with trusted local contractors, you can find flexible lending paths. These programs split the total expense of new windows and professional setup into steady monthly payments. Many programs offer low fixed interest rates, special interest-free options, or extended terms of up to ten years to match your monthly cash flow. Getting pre-qualified for these plans is often quick and simple, with most lenders offering fast approvals that do not affect your credit score. This allows you to address cold drafts and storm damage right away, improving your home energy efficiency while you pay for the improvements over time.

    How do you find the right payment option for your budget and your home? Understanding your choices is the first step toward a warm property, and we are here to help you explore your options. The path begins with Why Financing for Window Replacement Makes Sense for Minnesota Homes.

    Contact Referred Restoration online to schedule your free inspection and explore your financing for window replacement options.

    Why Financing for Window Replacement Makes Sense for Minnesota Homes

    Minnesota winters bring extreme cold and high heating needs to local homes. Drafty glass and old frames let heat escape and drive up heating bills. Many homeowners worry about paying for an upgrade all at once. Choosing financing for window replacement helps you start the job now and pay over time.

    Drafty Frames and Winter Cold

    Old windows often get leaks around the wood or vinyl frames. These air leaks let warm air escape and allow cold winter drafts into your living space. When you have drafts, your furnace must run non-stop, straining the system. By choosing to replace these units, you stop the draft and keep heat inside.

    Energy Savings and Indoor Comfort

    Newer models use advanced insulation to seal your home and keep rooms warm. Poor insulation forces your heating and cooling systems to work much harder to keep you cozy. Fixing this issue with energy-efficient designs improves comfort and saves energy.

    In fact, improving the energy efficiency of windows can reduce monthly utility bills for homeowners in cold climates. Knowing window energy efficiency ratings helps you choose the best panes for your house. These ratings show how well each unit resists heat transfer during freezing nights.

    Manageable Payments for Home Upgrades

    A complete window upgrade is a major project for any homeowner in Rogers or Cottage Grove. Paying the full amount upfront can strain your family budget or delay needed repairs. Spreading the payments over time through a financing partner lets you address drafty rooms right away. You can set up easy monthly payments that fit your household cash flow.

    This smart approach keeps your savings intact for other needs while making sure your home is safe and warm. Also, financing lets you choose high-quality options rather than settling for cheap, short-term fixes. Better windows offer a great seal, look great, and last longer.

    You can complete your entire house at once instead of doing only one room each year. This saves you from weeks of noise and many service calls. Working with a skilled team ensures your new units are set up right for the next cold season.

    Taking care of your home should not strain your mind or budget. A simple financing path lets you focus on the health of your house. This helps you maintain your home value without putting your life on hold. You get to enjoy a warm, quiet home today while paying for the value over time.

    What Financing Options Are Available for Replacement Windows?

    Replacing windows is a key way to protect your home. But most people do not want to pay for the whole job at once. Finding the right financing for window replacement helps you plan your project. Homeowners often look at a few main paths to cover these home improvements. You can choose from bank loans, home equity, or plans from your window company.

    Common Ways to Pay for New Windows

    A personal loan is a very common choice for home repairs. These are unsecured loans, so you do not need to use your home as collateral. Many lenders let you check if you qualify without hurting your credit score. If you have equity in your home, a home equity loan or line of credit is another path. These often have lower rates because your home secures the loan.

    You can also use credit cards for smaller jobs. But card rates are often high if you do not pay them off fast. For larger window projects, many homeowners prefer plans offered by their window installer. These plans often feature special promos with low monthly payments to fit your budget. Working with your contractor helps you match your project with a good payment plan.

    Before choosing a payment plan, it is smart to review your home needs. A professional inspection can show if you need full window replacement or if simpler fixes will work. You can learn more about these choices by exploring window repair and replacement services in your area. This helps you plan your budget and choose the right option.

    Government Programs and Special Financing

    Energy-efficient upgrades can qualify for special public programs. For example, some locations offer Property Assessed Clean Energy (PACE) programs. Homeowners can use PACE options to finance windows without high upfront payments. This program links the payments to your property tax bill rather than your personal credit. It helps you get efficient upgrades that lower your energy bills.

    State-sponsored energy loan programs are another useful option. These state energy loans provide low-interest funds for qualifying green home improvements. For example, some states offer low-interest energy loans that help make these upgrades more affordable. These programs often let you spread the payments over several years to keep your monthly payments small. Before you start, check what local options are open in your town.

    Financing OptionHow It WorksKey Benefit
    Personal LoansUnsecured bank loans with fixed terms.Fast funding with no home equity needed.
    Home Equity / HELOCLoans secured by your home value.Typically offers lower interest rates.
    Contractor PlansPromotional financing through our partners.Flexible terms matched to your project.
    Credit CardsRevolving lines of credit.Good for small repairs or fast purchases.
    Energy ProgramsPublic loans tied to energy efficiency.No large upfront payments required.

    How Does Financing Work Through Referred Restoration?

    Replacing the windows in your home is a major upgrade. We serve homeowners in Rogers and Cottage Grove, Minnesota. In these areas, cold winters make drafty frames a real problem. We want to make sure you get the right support when you need it. Using financing for window replacement can help you handle this project without stress.

    Our Consulting Phase and Financing Partner

    We believe in a clear and honest process. Our team does not use high-pressure sales tricks. Instead, we look at your home first and find what needs work. We talk about payment options only after we develop a custom plan. This discussion happens during our consulting phase.

    Our team works with Green Sky, our trusted financing partner, to offer these payment options. If you want to use window repair and replacement services, our partner can help. We do not set the loan terms or quote rates here. Your team member will show you how to apply when you are ready.

    The Three-Step Project Path

    We make your window project simple. Our team follows three main steps to get the job done right. We treat your house just like we would treat our own home.

    • First is the inspection. We visit your home to check your current windows. We look for gaps, cracks, and drafts. This first visit is always free.
    • Second is the solution. We sit down with you to choose the best new windows. This is when we can introduce you to our financing partner.
    • Third is the install. Our skilled crew puts in your new windows. We clean up the work area when we finish.

    This simple path keeps you in control from start to finish. You will know what to expect at each step of the way. Our team keeps you informed so you are never left guessing.

    Storm Damage and Insurance Help

    Minnesota storms can be harsh. Strong winds and hail often damage glass and frames. If you have storm damage, we can help you with your insurance claim. This is a helpful way to cover your project.

    You can also choose energy-saving windows. These windows qualify for tax credits through the ENERGY STAR program. This can help lower your overall project expenses.

    To start your project, you can contact Referred Restoration online. You can also call us at (763) 726-4245 to schedule a free visit today.

    What Do Lenders Consider for Window Financing?

    Applying for a loan to upgrade your home is a major step. When you look for financing for window replacement, lenders look at a few main items to check your risk. They want to make sure you can pay back the funds on time. Knowing these facts helps you prepare before you apply.

    Credit score requirements

    Your credit score is often the first thing a lender checks. Many home improvement lending programs look for a score of at least 620 to qualify. If your score is above this mark, you may get better terms and lower fees. But do not worry if your score is lower, because some programs have other ways to qualify.

    You can often check your options without hurting your credit score. Many lenders offer a quick pre-qualification step. This process uses a soft credit check that does not affect your credit score at all. It lets you see what terms you might get before you agree to a full credit check.

    Income and debt history

    Lenders also look at your monthly income to make sure you can afford the payments. They want to see steady money coming in each month. You will need to show pay stubs or tax forms as proof of income. Some lenders will also ask about your job history to check your financial health.

    Your debt-to-income ratio is another key detail that lenders review. This ratio compares your monthly debt payments to your gross monthly income. Most lenders need a credit check to view your financial past before they approve home improvement loans. A lower ratio shows lenders that you have enough room in your budget to take on a new monthly payment.

    Timeline for funding

    Once you find a plan that works for you, the approval process is usually very fast. Many modern lenders can give you a decision in just a few minutes after you submit your form. This quick response helps you plan your home upgrade without long delays or waiting periods.

    After the lender approves your request, the funds can move quickly. Some lenders can disburse the funds within 48 hours so you can start your project. This fast access to cash means you can schedule your window replacement with your contractor right away. Getting fast approval and funding keeps your home improvement project on track.

    Can You Pair Financing With Tax Credits and Energy Incentives?

    Homeowners often wonder if they can combine a loan with public rewards. The good news is that you can use financing for window replacement while still getting tax credits and incentives. This approach helps lower the overall financial stress of your home improvement. By planning your budget and paying over time, you can still claim federal or state benefits.

    Federal Tax Credits for Energy Efficiency

    When you buy new windows, the federal government offers helpful tax incentives. The ENERGY STAR tax credits can help reduce your federal tax bill when you install qualifying models. These credits apply to specific energy-saving windows and skylights. Your chosen products must meet strict performance rules to qualify.

    You do not need to pay cash upfront to get this tax credit. You can use a financing partner to buy the windows, and you can still claim the credit on your next tax return. This approach makes high-quality upgrades much easier to budget.

    State Loans and PACE Programs

    In addition to federal tax credits, you can explore local or state options. Some cities and states offer Property Assessed Clean Energy, or PACE, programs. These programs help you improve your home without a high upfront payment. Instead of a standard bank loan, the PACE program secures the financing through your property tax bill.

    This means you pay back the loan over time through your regular property tax payments. Other areas offer state-sponsored energy loans to help homeowners. For instance, some state energy loan programs offer lower interest rates with long payment terms that can last up to fifteen years. These loans are designed to encourage energy efficiency and pair well with private options.

    How Minnesota Homeowners Can Prepare

    For homeowners in Minnesota, checking local guidelines is a vital first step. In places like Rogers and Cottage Grove, weather-proof windows are crucial for winter comfort. If you upgrade, you should first check the window energy efficiency ratings to make sure your new models qualify for local programs. Selecting the right ratings will ensure your windows block the cold air and keep your heating system from overworking.

    In addition to government programs, local utility companies often offer their own rebates. You can talk to your utility provider to see if they reward energy-efficient upgrades. When you pair these rebates with tax credits and solid financing, the overall investment becomes much easier to handle. This smart planning protects your home, lowers your bills, and keeps you warm.

    Financing Pitfalls to Watch For

    Homeowners often seek financing for window replacement when they need to update aging glass and frames. But choosing the wrong path can lead to extra expenses and stress. It is easy to make a mistake if you do not know what to watch out for before you sign a contract.

    Common Financing Red Flags

    The first danger is high-pressure sales tactics. Some sales reps will push you to sign a loan right away on their first visit by claiming the deal is only good for today. A good contractor will never rush your choice. You should always have time to read the terms and ask questions.

    Here are key red flags to watch for when you review options:

    • Sales reps who demand that you sign right away before you can compare terms.
    • Lenders who refuse to explain how they calculate fees or interest over time.
    • Offers that seem too cheap but carry hidden terms.
    • A lack of clear paperwork for the loan terms.

    Hidden Fees and Unfavorable Terms

    Another major pitfall is buried fees. Some contracts hide extra expenses that you might not notice at first, such as high fees for paying off the loan early. Others may add setup fees that increase the total amount you owe. If you do not compare loan terms, you might end up paying far more than expected.

    Before you choose a path, you should talk to experts who offer professional window repair and replacement services. A trusted team can help you find clear terms and avoid bad deals. Always ask to see the full list of fees before you agree to any loan.

    Overlooking Energy Savings

    Finally, many homeowners ignore how energy efficiency affects the long-term value of their home. New windows can help keep your home warm in the winter and cool in the summer. According to federal guidelines on the Property Assessed Clean Energy program website, poor insulation forces your heating and cooling systems to work much harder. This drives up your monthly utility bills.

    When you finance windows, look for options that support energy-saving upgrades. If you ignore energy efficiency, you might save money on the loan today but pay much more on bills over time. Investing in the right windows now will help protect your home and keep your utility bills low for years.

    Steps to Get Financing for Your Window Replacement

    Planning a home upgrade can feel like a big step. Many homeowners in Rogers and Cottage Grove find that choosing the right path makes the work simple. Working with a professional team helps you get the best fit for your home without stress. You can plan your budget with ease when you know the steps to secure funding.

    Assessment and custom solutions

    The path starts with an honest look at your home. A trained professional must inspect your current frames to see what you need. They will check for leaks, drafts, and wood rot. This helps you choose between full window replacement or simple repairs. Our team offers quality window repair and replacement services to help you make this choice.

    Once the inspection is done, you will get a clear plan. This plan shows the exact scope of the project. It outlines the materials, style, and timeline for your home. This custom solution ensures you do not pay for extra work you do not need. It helps you see how the project fits your budget.

    Our simple process

    You can get Minnesota exterior restoration tips to help you compare your options. When you are ready, follow these five steps to secure the financing you need.

    1. Schedule a free inspection: Reach out to our team to set up a free home visit. A professional will check your windows and find any damage.
    2. Get your custom plan: You will receive a clear proposal made for your home. It shows what is needed without hidden fees.
    3. Discuss terms with our partner: Talk about options with our partner, Green Sky. They offer helpful terms to fit your monthly budget.
    4. Choose your program: Select a simple plan that meets your needs. Review the terms carefully to ensure a good fit.
    5. Set up your installation: Once funding is set, our team will schedule the build. We will install your new windows with care.

    This process is built to keep you in control at every turn. You do not have to worry about high pressure or sudden fees. To make sure your new setup is energy efficient, you can check federal standards on the ENERGY STAR website before you start. Clear steps help you get the durable windows your home needs.

    Contact Referred Restoration online to discuss financing for window replacement with our team before you decide.

    Frequently Asked Questions

    Does window replacement financing affect my credit score?

    Some lenders let you check your options before you apply. This step will not hurt your credit score. If you choose to go forward and apply, the lender will run a full credit check. Talk to our financing partner during your free home assessment to find the best path for your situation.

    What credit score is needed for window financing?

    Lenders look at many factors when you apply. Many programs look for a score of at least 620 to qualify for the best terms. If your credit is lower, you still have options. Some homeowners choose personal loans or equity lines. Our team can help you find a financing partner that fits your household budget.

    Are there federal tax credits to help with window replacement?

    Yes, Minnesota homeowners may qualify for federal tax incentives if they install energy-efficient windows. You can check the ENERGY STAR site to see which products qualify. These credits can help lower your tax bill when you file. Pairing these incentives with our financing partner makes the home upgrade much easier to handle.

    How quickly can you get approved for window financing?

    The approval process is often very fast. Many lenders can give you an answer in just a few minutes. Once you get approval, the funds can be ready in about 48 hours. This quick turnaround helps you start your home project without delay. Our team can guide you through each step of the process.

    Are You Ready to Plan Your Window Replacement?

    Old, drafty windows can drain your home energy budget and let cold Minnesota air inside. When you wait to replace worn windows, small drafts can lead to water leaks and wood rot. These issues often cause expensive damage to your walls and frames over time. Setting up your project now ensures your home stays safe, warm, and dry before the harsh winter weather arrives. Our friendly experts listen to your goals and never use high-pressure sales tactics. And we offer an honest home inspection, a custom solution for your needs, and a professional install.

    Contact Referred Restoration online to schedule your free inspection and explore financing for window replacement.

  • The Complete Guide to Vinyl Siding Trim for Minnesota Homes

    The Complete Guide to Vinyl Siding Trim for Minnesota Homes

    Unprotected siding edges can let harsh Minnesota winter moisture rot your home wood framing. Without the proper finishing pieces, even the highest quality panels cannot keep rain and snow out of your walls. These small components are what truly seal and secure your home exterior.

    Contractor fitting white vinyl siding corner trim on a Minnesota home

    Vinyl siding trim is a system of specialized vinyl pieces, including corner posts, J-channels, and starter strips, that protect your home from severe weather. These parts cover the exposed joints where panels meet windows, doors, and rooflines to prevent wind and heavy rain from slipping inside your walls. According to the Vinyl Siding Institute installation manual, these parts are vital for creating a professional, weather-resistant facade that keeps water from getting behind siding. Properly installed trim also allows the siding panels to expand and contract naturally as outdoor temperatures change throughout the year without buckling. This complete trim network is what turns separate panels into a fully sealed, durable protective shell that keeps your house safe from moisture.

    How do you know which specific pieces your home actually needs to stay dry? To help you understand how these parts work together, let’s look at the basic definition of What Is Vinyl Siding Trim? first. The breakdown starts with

    Schedule your free siding inspection in Rogers, MN today.

    What Is Vinyl Siding Trim?

    What is vinyl siding trim? When you look at a finished house, you see the main siding panels. But you also see other, smaller vinyl parts that finish the job. These parts run around the windows, along the roof, and on the corners of the home.

    Together, this set of parts is called vinyl siding trim. It plays a key role in shielding and sealing your home to protect your structure.

    The Parts That Make Up Your Trim

    A standard home needs many small pieces to finish a job. These pieces are special accessory shapes. Each shape has a clear job to do.

    • J-channel: This is a shape that holds the ends of the siding panels. It runs around doors and windows.
    • Corner posts: These tall pieces cover the upright outer corners of your house.
    • Starter strips: These long metal or vinyl pieces lock the very first row of siding at the bottom of the wall.
    • Undersill trim: This piece holds the top edge of a siding panel where it meets the roof line or window sill.
    • Drip caps: These small parts guide rain away from the tops of doors and windows.

    All of these parts work together. When you plan a vinyl siding trim installation, you must select the right shapes to match your main panels.

    Creating a Weather-Resistant Barrier

    Siding alone cannot keep water out of your walls. Rain and wind can sneak behind panels where they end at windows or roof lines. This is why trim is so vital. It seals the edges of the panels to keep dampness out.

    According to industry guidelines from the Vinyl Siding Institute, these trim parts are key to creating a professional-looking and weather-resistant facade for any building. The trim blocks rain, snow, and wind-driven dampness. In places like Minnesota with high snow and wet seasons, this water barrier stops rot before it can start.

    Protecting Your Home Walls and Framing

    Vinyl trim does much more than just block water. It also helps manage the shifting of your home. Homes expand and shrink as the weather shifts. Siding panels must be free to slide back and forth when this happens.

    Trim pieces hide the ends of these moving panels. Without this special trim, your siding would warp or buckle as the wood underneath shifts. By using a complete system, your home stays safe, dry, and looking sharp for years.

    Why Does Vinyl Siding Trim Matter for Minnesota Homes?

    Every part of your home exterior plays a role in keeping your house dry and safe. Siding panels cover the main walls, but they cannot do the job alone. The edges, corners, and areas around windows need extra shield to block rain and pests. This is where vinyl siding trim becomes the key to a strong home. Choosing the right trim parts keeps your home safe and looks great. It is the final touch that makes your property stand out on the block.

    The extreme Minnesota climate

    Minnesota weather is tough on building materials. In our state, winter temperatures can drop to 3°F, while summer heat often reaches 83°F. This huge shift means materials must stretch and shrink. Along with these huge temperature shifts, we face about 43 inches of snowfall and 32 inches of rain each year. Minnesota also ranks third in the nation for hail events. These harsh shifts put constant stress on your house, making durable materials a must. Without the right setup, storm winds can tear siding loose. Heavy snow can also build up and press against the walls.

    How trim creates a weather seal

    Your siding panels must expand and contract as the temperature changes. Without room to move, the panels will warp or buckle. Trim pieces seal the gaps while letting the panels slide back and forth. This seal keeps wind and water from getting behind the vinyl boards. If water gets in, it can rot your wood frame and cause mold. Homeowners can spot early wear by inspecting your vinyl siding trim after a bad storm. Damaged trim should be fixed quickly to avoid major leaks. Using correct trim parts is needed to create a water-resistive facade that protects your walls from moisture. This keeps your home dry and cozy in any weather.

    Local building codes and guidelines

    Every siding project in Minnesota must meet strict quality standards to keep homes safe. To ensure safety and performance, the work must follow siding manufacturer instructions as well as local rules. Building codes exist to protect your home from high winds and heavy snow. These laws specify how to secure each piece of vinyl. Qualified contractors know how to balance these rules. They make sure every corner post and J-channel fits right. This professional care keeps your home safe and guards its value for years to come. Working with experts gives you peace of mind.

    What Are the Main Types of Vinyl Siding Trim?

    Every home wall needs a proper finish to stay strong against the weather. Vinyl siding panels cannot do this job alone. A full line of trim pieces works to protect your home from wind and water.

    Using different trim parts is key to a good setup. These pieces are vital to form a weather-resistant building facade. They also help give your home a clean, professional look. Choosing the right vinyl siding trim prevents rot and keeps walls dry.

    Channel and corner pieces

    The J-channel is a very common piece. It gets its name from its shape. Installers use J-channel to cover the cut edges of siding panels around windows and doors. This covers rough cuts and stops water from getting behind the boards. Corner posts do a similar job at the edges of your house. They join the siding panels that meet at each corner to keep them secure.

    Starter and closure strips

    Starter strips are the foundation of your siding system. They go at the bottom of the wall, before the first panel is put in place. The bottom edge of the first panel locks into the starter strip. This keeps the siding straight and holds it tight against the wind. It ensures that the rest of the siding stays level as you build upward.

    Undersill trim and drip caps seal the top and bottom of your siding panels. Undersill trim, also called utility trim, holds the top edge of panels where they meet the roof line or window sill. Drip caps are flashing pieces that sit over doors and windows. They shed water away from the wall to prevent leaks. Proper use of these pieces keeps the interior of your walls completely dry.

    Siding trim comparisons

    To help you choose the right parts, the table below compares each trim type. Knowing what each piece does can help you plan a strong siding system.

    Trim TypeMain PurposeWhere It Is UsedWhy It Matters
    J-ChannelCovers cut siding edgesAround windows, doors, and openingsHides rough cuts and stops water leaks
    Outside Corner PostsJoins siding panels at cornersOn external house cornersSeals corner joints and adds strength
    Starter StripsSecures the first siding panelAt the bottom of all wallsLocks panels in place to resist high winds
    Undersill TrimHolds top cut edges of panelsAt the roof line or under windowsKeeps siding secure and prevents sagging
    Drip CapsSheds water away from openingsOver window frames and door framesPrevents water from seeping behind walls

    How J-Channel and Corner Posts Finish Your Siding

    Vinyl siding trim keeps your home safe from rain and wind while giving it a clean look. The two most common trim pieces you will see on a house are J-channel and corner posts. These parts hide raw, cut edges of siding panels and seal the weakest spots on your outer walls.

    Understanding J-channel trim

    J-channel is a useful type of vinyl siding trim that plays a vital role on your home. Workers use J-channel to cover the cut edges of siding panels around windows, doors, and other wall openings. According to the VSI installation guide, this trim is key for creating a clean and finished look. Without it, the rough, cut ends of your siding would be open to the elements.

    If you notice gaps or damage near your windows, you may need a window trim repair and replacement service. Proper trim keeps water from sneaking behind your siding and rotting the wood frames.

    This trim profile also runs along the angled rooflines of your gables. When siding meets the roof at a slant, the panels must be cut to fit the angle. J-channel fits over these cuts, hiding the uneven edges and keeping the lines straight. This channel holds the panels tight while letting them slide as they warm up and cool down.

    Finishing corners with corner posts

    Outside corner posts seal the corners of your house to keep rain out. They create a neat, straight line where two walls meet. Inside the post, deep channels receive the ends of your siding panels. These channels hide cut edges while letting the vinyl expand and contract.

    When crews set up these parts, they must follow clear rules. For example, corner posts should extend one quarter of an inch below the bottom of the siding. This small gap allows water to drain out and keeps the trim from buckling against the ground. Well-hung posts ensure that your entire siding system remains strong and dry during heavy storms.

    If you notice your corner posts are loose or cracked, inspecting your vinyl siding trim after a storm is a smart first step. Damaged corners can let wind and rain seep behind your walls, which leads to rot.

    Roof and wall intersections

    Where a roof meets a wall, water runoff is a major threat to your home. To keep water out, crews must install metal flashing before they put up the J-channel. This layered setup guides rain down the roof and away from the wood framing of your walls. If you install the J-channel first, water can seep behind the trim and cause hidden rot.

    Proper planning is a key part of any vinyl siding trim installation project. Skilled crews know how to layer these parts to keep your house dry in any weather. Working with a skilled team ensures that your flashing, J-channels, and corner posts work together to defend your home from harsh winters.

    How Do Professionals Install Vinyl Siding Trim?

    Putting up siding trim takes great skill and care. Do you want a clean look that keeps out Minnesota rain and snow? Hiring a professional vinyl siding installer is the best choice. Here is how experts get the job done right.

    Key preparation steps

    Before any panels go up, the crew must prep the walls. First, they seal the house with a weather wrap to protect wood framing from moisture. Next, they snap chalk lines to make sure each piece is straight. If the base is not straight, the whole wall will look crooked.

    Every step must meet local building rules. In Minnesota, the climate gets cold in winter and hot in summer. Siding moves a lot as the weather changes. That is why experts follow local building codes and the maker’s guide to keep your warranty safe.

    The step-by-step trim process

    An expert crew puts up each piece of trim in an exact order to prevent water leaks. This process keeps the system strong and dry.

    1. Set the starter strip: The worker snaps a level line and nails the starter strip at the bottom of the wall. This strip holds the first course of siding in place.
    2. Install the corner posts: Workers put up corner posts next. These posts must extend at least 1/4 inch below the siding to drain water. This rule comes from the VSI installation manual.
    3. Hang J-channel around openings: The crew fits J-channel trim around all windows and doors. This channel hides the cut ends of the siding panels and keeps water out.
    4. Leave fastener clearance: Workers leave about 1/32 inch of space under nail heads. This dime-thickness gap lets the vinyl move back and forth without bending.
    5. Allow for panel movement: The crew leaves a minimum 1/4 inch gap at all openings and stops. This space lets the vinyl trim expand and contract safely when the weather swings.
    6. Keep nail heads proud: Builders drive nails so the heads are about 1/16 inch proud of the vinyl. Nailing the trim too tight will cause the plastic to warp or crack.
    7. Flash at the roof line: Workers put metal flashing in place before they attach J-channel where a wall meets a roof. This step stops water from leaking behind your siding.

    Why precise nailing matters

    Proper nailing is the key to a long-lasting siding job. If a worker nails the trim too tight, the vinyl cannot slide. On a hot summer day, the panels will swell, warp, and buckle. This ruins your home’s curb appeal and lets rain leak inside.

    Expert crews use exact tools and steps to make sure each nail is set right. They check the spacing on every single nail. This careful work keeps your home safe and dry for decades.

    How to Choose the Right Vinyl Siding Trim for Your Home

    Choosing the right vinyl siding trim can make or break your home upgrade. In the Rogers, Minnesota area, your trim does more than just look good. It must stand up to bitter winter cold, heavy summer rain, and sudden hail storms. The right trim keeps water out and holds your panels tight. You need to think about color, style, and fit when making your choice. Taking time to plan now will protect your home for years to come.

    Color matching and style

    You can match your trim to your main siding color for a clean, simple look. Or, you can pick a different color to highlight your windows and roof line. For example, white trim around windows looks crisp next to dark siding. You also need to look at other parts of your home. If you are doing window trim repair and replacement, matching your siding trim is a smart move. A unified style adds curb appeal and value to your house.

    Corner profiles and style selections

    Corner profiles come in different sizes and shapes. Standard corners are three inches wide, but you can choose four or five-inch corners for a bolder look. You can also pick between a smooth, flat look or a fluted style with grooves. Your choice depends on the age and style of your home. Traditional homes often look best with fluted trim, while modern homes look better with clean, smooth lines. Choosing the right profile helps your house stand out in your neighborhood.

    Corner pieces are vital parts of this setup. These parts finish the junction between vertical and horizontal strips at building corners. This design forms a continuous barrier to block wind and rain. This standard method is detailed in academic research on corner patents. Strong corners keep your home safe from harsh Minnesota weather. They hold the siding ends secure during high winds.

    Building codes and manufacturer rules

    Your new siding trim must do more than just look nice on your home. Every part of your siding setup must meet local rules. Homeowners must make sure that all vinyl siding trim work follows manufacturer instructions and local building codes. This is crucial for local climate safety. Following these rules ensures your trim lasts and keeps your home dry. Local inspectors in the Rogers area look at these details closely. Proper installation protects your home and keeps your warranty valid.

    Get your free siding inspection started now.

    Frequently Asked Questions

    What is the trim on siding called?

    Siding trim is the name for the plastic parts that finish a siding job. These pieces include starter strips, corner posts, and J-channels. According to a guide by the Vinyl Siding Institute, these parts work to give your home a clean look and make a water-tight wall.

    What are the different types of vinyl siding trim?

    The main types of trim are starter strips, corner posts, and J-channels. Starter strips hold the first row of siding at the bottom. Corner posts cover the areas where two walls meet. J-channels hold siding around windows and doors. You also use finish trim at the top of a wall to lock the last siding panel in place.

    What is vinyl siding J trim used for?

    This trim is a track shaped like the letter J. It covers the cut ends of siding panels around windows, doors, and roof lines to keep rain out. According to the Vinyl Siding Institute, you must install metal flashing before this trim along a roof line to stop water leaks.

    How do you finish vinyl siding corners?

    You finish outside and inside corners with corner posts. These tall pieces have side channels that cover the ends of the siding panels. According to a patent found on PubChem, these pieces form a barrier that keeps out wind and rain. The posts must also hang down a quarter of an inch below the bottom siding panel.

    Why is trim essential for vinyl siding installation?

    Trim is vital because it seals the gaps around windows, doors, and corners where water could leak in. It also allows the siding to grow and shrink as the weather changes. According to the guidelines on Polymeric Exteriors, proper trim setup must follow both the maker’s rules and your local building codes.

    Ready to protect your Minnesota home?

    Damaged trim lets seasonal rain and snow slip behind your vinyl panels, which slowly rots your wood framing and creates major mold problems. Taking action today ensures your home exterior is completely sealed and protected before freezing winter temperatures and heavy snowstorms hit our state. A professional siding inspection helps you find these weak points early so you can keep your family warm and secure all year long.

    Call (763) 726-4245 or contact Referred Restoration online to schedule your free siding inspection today.

  • How to Choose Exterior Siding Panels for Minnesota Homes

    How to Choose Exterior Siding Panels for Minnesota Homes

    Severe Minnesota storms can warp, crack, or strip away home siding in a single afternoon. Choosing the right defense is a critical step to safeguard your largest investment. Your choice of material will determine if your walls stay dry or suffer expensive rot.

    Get your free siding inspection today

    Newly installed exterior siding panels on a Minnesota home

    Exterior siding panels must serve as your home’s main shield, protecting the whole wall structure from severe weather and costly water damage. In Minnesota, our extreme yearly temperature swings put intense stress on these boards. Homeowners must make careful choices to avoid early rot or failure. Homeowners should compare vinyl, fiber cement, engineered wood, and metal based on strength, upfront cost, and upkeep needs. According to a government building science resource, quality siding must shed heavy rain, resist wind pressure, and protect walls from fire, insects, and hail. While cheap vinyl is the most common choice, stronger types like James Hardie fiber cement and LP SmartSide engineered wood offer better winter strength. These tough boards prevent cracking, warping, and moisture damage during deep winter freezes.

    Finding the right material for your unique home requires looking at how each option holds up against severe weather. To help you choose the best fit, we will weigh the costs, lifespan, and strength of each top choice. The comparison begins with Vinyl Siding Panels: Budget-Friendly and Weather-Aware.

    Vinyl Siding Panels: Budget-Friendly and Weather-Aware

    Vinyl is a common choice for home siding. Across the United States, millions of homeowners choose this option because of its low upfront cost. But before you buy, you must think about how it handles local weather hazards. In Minnesota, these hazards can put a lot of stress on your home.

    Upfront cost advantages

    When it comes to cost, vinyl wins. In most cases, a new set of vinyl panels will run about $3,000 to $8,000 per 1,000 square feet. This is much cheaper than fiber cement or wood options. This low cost comes from both the panel itself and the easy setup, making it a great choice for homeowners on a tight budget.

    Because these panels are light, crews put them up fast to save you money on labor. All exterior siding panels must shed rainwater and resist wind pressure to protect your home. Vinyl does this well for many years with very little care. You will not have to worry about rot or insect damage with these man-made panels.

    Winter freeze and cracking risks

    In Minnesota, the winter cold can be very harsh on the outside of your house. This is where vinyl panels show their main weakness. During deep freezes, vinyl gets stiff and brittle, meaning cold panels can crack easily if hail or a stray rock hits them. This is a common problem in northern places where the ground stays frozen for months.

    Once a panel cracks, moisture can seep behind it and cause rot in the wood framing of your house. It is helpful to compare exterior siding panel materials before making a final choice for your home. Fiber cement and engineered wood do not have this same risk during cold winter months. They keep their strength and shape even when the cold drops far below zero.

    Lifespan and long-term upkeep

    Vinyl panels are easy to clean and can last anywhere from 10 to 30 years based on the climate and care. To keep them looking good, you only need to wash them with a hose once or twice a year. You do not need to paint or seal them like you would with real wood. This low upkeep is a big reason why many busy families choose vinyl.

    But in places with extreme weather, you might have to replace some sections sooner. Strong winds and hail can chip or break the panels over time, which happens often during heavy storms. When choosing your siding, it is wise to think about both upfront costs and long-term repair needs. Choosing the right fit now can save you from costly fixes down the road.

    Fiber Cement Siding: Minnesota’s Durable Workhorse

    Many homeowners in Minnesota look for the best balance of beauty and strength. Fiber cement siding, such as James Hardie, is a top choice for homes in cold climates. It offers lasting protection because it does not shrink or rot. This material stands up to the worst weather our state can throw at it.

    Weather protection in deep freezes

    Minnesota winters are famous for deep freezes and rapid temperature changes. Under these extreme conditions, standard vinyl siding can become brittle and crack. Fiber cement, on the other hand, remains highly stable because it is made of sand, cement, and cellulose fibers. This blend helps the exterior siding panels shed heavy rain, resist strong wind, and withstand harsh sun.

    Because the panels do not expand and contract like vinyl, paint stays on them much longer. You will not have to repaint your home every few years. This strength also keeps moisture from getting behind your walls. In Minnesota, preventing water leaks is key to stopping mold and rot.

    Cost versus long term value

    Fiber cement costs more upfront than basic vinyl. On average, you can expect to pay about ten thousand dollars per one thousand square feet for fiber cement. But this investment pays off over time because of the material’s fifty-year lifespan. It resists bugs, fires, and even heavy hail.

    Local housing data shows that fiber cement adds great value to your home. Industry reports show that fiber cement siding can recoup 114 percent of its cost at resale. Based on studies from Consumer Reports and the Journal of Light Construction, buyers love seeing a durable brand like James Hardie on a home. If you want to compare exterior siding panel materials, you will find that fiber cement offers unmatched returns.

    Rigorous testing and trust

    When you pick a siding brand, you should look at how the product is made. Not all fiber cement blends are the same, and some brands use special formulas that are tailored for specific climates. You want to make sure the brand has undergone extensive tests to prove its claims. It is wise to check if the siding has passed tests that go beyond standard industry rules.

    We treat every home as if it were our own, so we only install materials we trust. Brand leaders like James Hardie design their products to resist the severe freezing and thawing cycles of Minnesota winters. This focus on local weather helps prevent peeling and chipping over the years. Choosing tested brands ensures your home remains safe and dry.

    Contractor installing new fiber cement exterior siding panels on a Minnesota home

    Engineered Wood Siding: LP SmartSide’s Cold-Weather Edge

    Engineered wood is a smart choice for many home owners in our state. This product mixes real wood strands with strong wax and glue to resist rot and pests. The final result is a tough siding that looks like real wood but lasts much longer. Brands like LP SmartSide are highly popular for local homes because of this strength.

    Protection from Severe Temperature Swings

    Minnesota winters are harsh on home siding, as rapid freeze and thaw cycles can cause some products to warp or crack. Engineered wood is highly stable in cold weather. It is a top choice for extreme temperature swings because it does not expand and contract like vinyl. If you choose these durable exterior siding panels, your home gets strong protection that holds its shape all year.

    The Importance of Proper Edge Sealing

    While engineered wood resists many weather hazards, it has one key weakness. Wood-based panels absorb moisture through ends and edges faster than through their flat surfaces. This fact is supported by research from Purdue University Extension. If water gets into these raw cuts, it can cause fast rot and swelling in the wood.

    That is why expert builders must seal every cut edge with a quality paint or primer during the build. This simple step keeps the panels dry and prevents early damage. It is a vital part of the install process that protects your investment and keeps your home dry. Our team pays close attention to these small but vital steps.

    Long-Term Value and Storm Strength

    Siding must also protect against heavy storms, strong winds, and hail. Engineered wood is far less brittle than vinyl or plain wood because the binders and wax inside the panels help them absorb impacts. This means hail strikes are much less likely to chip, crack, or dent the surface. It offers peace of mind when summer storms roll across the state.

    This siding offers a good balance of cost and lifespan. It sits between vinyl and fiber cement in terms of price. Homeowners can expect engineered wood to last between 15 and 40 years if it is installed right. The initial cost is moderate, but the long-term strength gives you a warm wood look without constant paint and care.

    Metal Siding Panels: Sleek, Fire-Resistant, and Wind-Tough

    Many people look for a strong, clean style when they choose new products for their home. Metal siding panels have become popular for their sleek look and long life. These modern exterior siding panels shield walls from extreme weather. They protect your home for thirty years or more with little upkeep.

    Modern style and long lifespan

    Metal offers a clean, modern look that many other options cannot match. Homeowners can find panels in many colors and styles to fit their design. Most metal options last for thirty years and make a great investment. They look fresh and new for a long time.

    Unlike wood, these panels will not rot or warp. They do not attract pests or mold, which helps keep the home safe. You do not need to paint or seal them, which saves you both time and money. This means you spend less time on home upkeep.

    Fire and storm resistance

    Metal siding is a great way to defend your home. Federal guides show that siding must shed rain and resist wind to protect walls. Metal panels do this well. They do not absorb water or blow off, and they offer excellent fire safety.

    Minnesota storms can bring heavy hail. Metal siding stands up to these forces much better than vinyl or wood. While other options may crack, metal panels stay strong and keep water out. This gives you peace of mind during storm season.

    Cost and denting considerations

    No siding is perfect. Metal panels have a higher upfront cost than vinyl or wood. They can also dent if hit by large hail, but they do not crack in deep freezes. Homeowners often compare exterior siding panel materials to find the right match.

    If you are replacing damaged exterior siding panels after a storm, metal is a great option. It will last for decades. It keeps your home safe from fire and heavy wind. Talk to a local contractor to see if it fits your home.

    How to Choose the Right Exterior Siding Panels for Minnesota

    Local Weather Threats

    Minnesota homes face major weather threats throughout the year. Data from the University of Minnesota climate resilience guide shows our state has more heavy rain now. We also see more severe storms and large hail. These rapid shifts put severe stress on your home. High winds can pull at loose panels during these storms. This makes a strong, tight fit vital for any home in our area.

    Our intense freeze and thaw cycles cause many materials to expand and contract, which can lead to quick damage. Because of these patterns, you must choose a product that handles local hazards well. You need a tough exterior that resists strong winds and heavy snow. Water can get behind weak siding and freeze, which splits the panels apart. Good choices must keep moisture out through the worst winter months.

    Siding Material Traits

    You should look at how a material shields your home from moisture, fire, and pests. The federal building science guide notes that builders must pick materials made for local hazards. This resource explains that siding should shed heavy rain and resist wind pressure. Choosing the wrong material can let water rot your wall frames.

    For our region, this means you need high impact resistance to protect against summer storms. Your panels must withstand hail strikes without cracking or splitting. This strength helps keep your home safe when debris flies. You should check the test records for any brand you want to buy. Look for items that prove they can stand up to heavy shocks.

    Siding Material Choices

    To find the best fit, you should compare exterior siding panel materials on the market. Each choice has unique strengths and weaknesses when exposed to our harsh local climate. You must balance the price you pay now with long-term value. Some products need yearly work, while others need very little care. Knowing these facts helps you make a smart choice for your home.

    For example, vinyl is cheap but can crack easily in deep winter freezes. Fiber cement provides superb durability. But it costs more to buy and set up than other choices. Engineered wood is highly stable during quick temperature swings. Metal panels resist wind and fire well, though hail can dent them. Review the details below to see how these options stand up against our weather.

    • Vinyl siding panels cost the least but can crack in deep winter freezes.
    • Fiber cement siding offers excellent cold-weather durability but carries the highest upfront cost.
    • Engineered wood siding stays stable through rapid freeze-thaw swings with moderate upkeep.
    • Metal siding panels resist wind, fire, and hail well, though large hail can dent them.
    MaterialAverage LifespanCost RangeCold Weather DurabilityMaintenance Needs
    Vinyl10 to 30 yearsLowPoor (can crack in deep freeze)Very low (clean with hose)
    Fiber CementUp to 50 yearsHighExcellent (highly stable)Medium (needs paint over time)
    Engineered Wood15 to 40 yearsMedium to HighExcellent (very stable)Medium (needs paint over time)
    MetalAbout 30 yearsMedium to HighExcellent (holds shape well)Low (inspect for rust or dents)

    A Simple Way to Decide

    Use these steps to narrow down the right siding for your Minnesota home. Assess your options in this order:

    1. Assess your home’s exposure to hail, wind, and freeze-thaw cycles, since these are the top threats in Minnesota.
    2. Set a realistic budget that covers both the material cost and professional installation.
    3. Rank each material by cold-weather durability, starting with fiber cement and engineered wood.
    4. Confirm the warranty and test records for the brand you plan to install.
    5. Schedule a professional consultation to verify the material fits your home’s structure and local codes.
    Finished exterior siding panels protecting a Minnesota home in winter

    Why Professional Siding Installation Matters in Minnesota

    Even the best siding product can fail if it is not put up the right way. Minnesota weather is harsh, and your home needs a strong outer shield. Hiring an expert team to install your exterior siding panels ensures they will stand up to the local climate. This choice saves you time, stress, and costly repairs down the road. You can rest easy knowing that your walls are safe from the storm.

    Siding performance and proper setup

    Siding must do many jobs at once. Based on research from the Pacific Northwest National Laboratory, siding has to shed rain and resist wind pressures to protect your home. It also guards your walls from insects, hail, snow, and fire. But these panels only perform well when workers fit them with care. Gaps or loose parts can let wet air slip inside, which leads to mold. Proper setup also keeps your warranty good, which protects your cash.

    Critical sealing and edge protection

    Moisture is the biggest threat to your home. Some products need special care during setup to stay dry. For instance, wood-based panels are highly prone to rot if their ends are left bare. Research from Purdue University shows that these wood panels absorb moisture through their edges much faster than through their flat faces. A skilled builder will coat these raw edges with a sealer before they put them up. This step blocks water and keeps the wood strong for years. It prevents the layers from splitting apart when the weather gets wet.

    Coordinating your storm recovery

    If a severe storm hits your street, the damage rarely stops at one spot. High winds and hail often strike your roof, gutters, and siding at the same time. If you are fixing storm damage, installing new exterior siding panels is often just one part of the job. When you fix all these parts at once, you ensure the whole shell of your home is tight. An expert team knows how to fit the flashing, gutters, and siding panels so water flows away from your house. This complete care keeps your home dry and safe.

    At Referred Restoration, we treat every home as if it were our own. We make sure every panel is sealed, aligned, and ready to face the harsh Minnesota winters. To protect your home with high-quality work, you can trust our Rogers siding contractors. We will get the job done right.

    Schedule your free siding inspection

    Frequently Asked Questions

    What is the best exterior siding for Minnesota homes?

    Fiber cement and engineered wood are the best choices for Minnesota. They handle extreme cold and hot days very well. According to the University of Minnesota Extension, state homes face rising risks from heavy rain, wind, and hail. Both of these materials offer great strength against those storms. Unlike older wood, they will not rot easily. They also keep their shape when the weather swings from hot to cold. This keeps your home safe and dry all year.

    Is fiber cement better than vinyl siding for cold weather?

    Yes, fiber cement is much better than vinyl when the weather gets cold. Vinyl panels can shrink and crack in a deep freeze. Fiber cement does not move as much when it is cold, so it stays strong. A report by the Pacific Northwest National Laboratory shows that good siding must protect your walls from snow and hail. Fiber cement stands up to these winter hazards far better than vinyl.

    How much do exterior siding panels cost?

    The cost of your new siding depends on the material you choose and the size of your house. Vinyl panels are the most budget-friendly, often costing about $3,000 to $8,000 per 1,000 square feet. Stronger options like fiber cement or engineered wood can cost $10,000 or more. While these materials cost more at first, they last much longer and protect your home better from storms.

    Do exterior siding panels protect a home from hail?

    Yes, high-quality siding panels act as a shield for your home. According to the Pacific Northwest National Laboratory, siding must resist wind, rain, and hail. In Minnesota, storms can bring heavy hail that cracks weaker materials. Choosing impact-resistant panels like fiber cement or engineered wood protects your walls from deep storm damage. This keeps water from leaking into your home after a storm.

    Ready to choose the best siding panels for your home?

    Leaving old, cracked siding panels on your home lets heavy rain and melting snow seep into your walls, which leads to costly mold and rot. Choosing to install new, strong siding before the severe Minnesota winter freeze hits keeps your home warm and safe while lowering your heating bills. Our expert local crew handles everything from start to finish, ensuring your home is fully safe from the weather for many years to come. You can view our full range of siding services online to see the high quality options we offer to local families. We treat every home as if it were our own, using only top siding brands to ensure you are happy with our work.

    Ready to schedule? Contact Referred Restoration today to schedule a free siding inspection.

  • Copper Gutters for Minnesota Homes: Pros and Cons

    Copper Gutters for Minnesota Homes: Pros and Cons

    Heavy snow and sub-zero temperatures regularly twist, crack, and tear standard gutters from Minnesota roofs. Protecting your home from these extreme seasons requires a drainage system built to survive a lifetime.

    Request your free copper gutter inspection in Minnesota today.

    Copper gutters are among the most durable drainage systems available for your home, often lasting up to a century according to This Old House. This natural metal slowly develops a protective green layer called a patina, which means these systems never rust and never need painting. While the first investment is higher than aluminum, this premium upgrade boosts your curb appeal and adds lasting value to your property. For local homeowners, choosing a custom-fabricated seamless system ensures a perfect fit that handles our freezing winters and heavy snow with ease. These strong and beautiful systems safeguard your siding, landscaping, and foundation from water damage for many decades.

    You might wonder if this premium custom metal is the right choice for your property. Before you decide, read this guide to see whether these durable systems fit your home. We start by looking at why Minnesota homeowners choose copper gutters. Then walk through how they handle our weather, what drives their value, and how they are built and cared for.

    Why Minnesota Homeowners Choose Copper Gutters

    Unmatched curb appeal

    Many local home owners look for ways to boost their curb appeal. Standard systems work well, but they do not offer the same striking look. Choosing copper gutters is a premium choice that adds great value to your home. In time, the metal gets a rich green patina that adds unique charm to your roof.

    This color shift makes each home look custom and grand. The rich tones blend well with many siding styles and brick colors. Buyers in high-end markets often pay a premium for these systems. This means your new gutters do not just look good today, but they also protect your home’s long-term value.

    Historic charm and local rules

    Copper gutters are a classic choice for older and historic homes. They blend well with classic styles like Tudor or Victorian builds. If you live in an area with strict historic rules, you may need special features to keep the home’s style. Local historic district guidelines often suggest copper because it matches the first building plans.

    Using modern plastic or aluminum can ruin the look of an old home. Copper keeps the historic spirit alive and honors the past. It gives the home a touch of old-world craft that is hard to find with standard metals. This detail can make your home stand out in your neighborhood.

    A lifetime of reliable performance

    Beyond their beauty, these systems offer great strength. Copper is one of the toughest choices you can make for your roofline. While standard gutters last for about twenty years, copper can last 50 to 100 years when properly set up. This long life makes it a smart buy for home owners who plan to stay in their homes for decades.

    To get the most out of your gutters, you must work with a team that knows how to set them up. We offer skilled care and custom solutions for your home. You can learn more about our seamless gutters in the Rogers area to see how we build systems that fit. Checking your options for seamless versus copper gutters will help you choose the best fit for your roof.

    Because copper resists rust and wear, it needs very little upkeep over the years. You will not have to worry about peeling paint or constant repairs. This makes copper a stress-free choice that stands the test of time.

    How Copper Gutters Handle Minnesota’s Weather

    Minnesota weather is known for its harsh, fast changes. From heavy snow in winter to harsh storms in summer, homes must be tough. If you are picking new gutters, you want a system that can take a beating without failing. While many homes use aluminum, premium seamless versus copper gutters easily handle our state’s worst seasons.

    Rust resistance in harsh weather

    Most metal gutters rust over time when open to constant rain and snow. When steel gets wet, the metal breaks down and flakes, but copper gutters do not rust. Instead, copper slowly forms a special outer layer called a patina as it ages. This layer seals the metal below from the air, which keeps the system strong for decades.

    This shield makes copper great for wet areas. When rain or melting snow sits in the troughs, it does not eat away at the metal. Because they resist rust so well, these gutters are a great choice for areas with heavy rain or snow. They keep their shape and hold water safely for decades.

    Managing heavy snow and ice dams

    Cold winters bring plenty of snow, which puts great weight on roof edges. A weak gutter system can bend or pull away under a heavy load of ice. To protect your home, you need a setup built for this tough weather. National roofing groups note that strong gutter systems are needed to carry the weight of winter ice and snow.

    Copper is a very strong metal that holds up well under heavy snow packs and does not sag like thin vinyl. Copper also conducts heat very well. If you have ice buildup, you can run heat cables inside the troughs to melt it fast. Because the metal conducts heat so well, these systems clear ice quickly to keep water flowing.

    Handling extreme temperature swings

    Minnesota experiences massive shifts in temperature between winter and summer. According to state weather reports from the Minnesota Department of Natural Resources, these fast swings stress building materials as they expand and contract. When metals heat up, they grow, and when they cool, they shrink. This constant movement can tear apart weak gutter seams and loosen fasteners.

    To handle this stress, copper gutter systems use strong hangers and expansion joints. These parts let the metal move slightly without breaking. Well-planned downspouts are also vital to guide heavy meltwater safely away from your home’s foundation. With the right setup, your gutters will survive the deepest freeze-thaw cycles.

    Copper Gutters vs. Aluminum and Steel

    Choosing the right gutter metal is a key step for your home. You want a system that works well and lasts a long time. While aluminum and steel are common choices, copper offers a unique set of benefits. Seeing how these metals compare helps you make the best choice for your home.

    Lifespan and Metal Strength

    Copper is one of the longest-lasting options you can find. It often lasts from 50 to 100 years when set up right according to home experts. Aluminum and steel systems usually last only two to three decades before they need a replacement. Aluminum gutters usually last around twenty years in cold climates. Galvanized steel can last a bit longer, but it will rust if the surface gets scratched. Research from the National Institute of Standards and Technology shows that copper resists rust and corrosion in tough climates. Because it does not rust, you do not have to worry about weak spots forming. Also, copper does not need paint or coatings to keep its strength over its long life. Other metals like steel often need a new coat of paint to stop rust and peeling.

    Upfront Investment and Resale Value

    The main drawback of copper is the upfront investment. It is a premium metal that needs skilled work to install due to the raw material expense. Steel and aluminum are much more budget-friendly at first. But copper is a great long-term choice. It is a green metal that is 100 percent recyclable. It can be reused fully at the end of its life, which makes it a very sustainable choice. Buyers see copper as a high-end upgrade. This means it can boost the resale value of your home when you sell. Standard metals do not offer this same boost to curb appeal.

    System Design and Leak Risks

    How the system is built also affects how well it works. Standard gutters come in sections that can leak at the seams. A seamless design reduces these weak spots, which protects your home from water damage. Homeowners often weigh the choice of seamless versus copper gutters to find the right balance of value and leak protection. The right design ensures water flows away from your siding and foundation safely. At Referred Restoration, we bring our local seamless gutter installation expertise to help you choose the best system for your home. We treat every property with the care we would give our own.

    Gutter MetalLifespanFirst InvestmentCare NeedsRecyclable
    Copper50 to 100 yearsPremium investmentVery low (no paint)100% recyclable
    Aluminum20 to 30 yearsBudget-friendlyLow (may peel)Highly recyclable
    Steel15 to 25 yearsMid-rangeModerate (needs paint)Fully recyclable

    What Determines the Investment in a Copper Gutter System

    Copper gutters are a top choice to protect your home. While copper demands more than aluminum or steel upfront, its value comes from its extreme life span. The raw material commands a premium, and setting up these systems takes expert work. But this initial investment pays off because these gutters can last for many decades with very little care.

    Raw materials and custom work

    The thick metal used in these systems is a key driver of the total investment. Standard gutter systems come in pre-cut parts, but high-end copper systems are custom-fabricated to fit your roof line. This custom work reduces seams and ensures a perfect match for your home’s shape.

    Installers measure copper by weight, and a thick gauge of sixteen to twenty ounces provides high strength. This heavy metal holds up well under heavy snow and falling tree limbs. Also, copper is a green option for your home. It is a natural metal that is fully recyclable at the end of its life.

    Specialized labor and installation

    Setting up these gutters needs a high level of skill. Standard gutters are often glued or sealed, but copper seams must be soldered by hand to stay watertight. This custom work demands skilled hands and the right tools.

    A proper fit is vital in our region because of the intense weather. Extreme temperature swings like those tracked by the Minnesota Department of Natural Resources put stress on gutters. Under these conditions, standard seams can fail, but solid soldered joints will hold up.

    Long-term value and resale benefits

    When you look at the total life of your home, copper pays off well. These systems do not rust and never need to be painted. While other gutters might fail in fifteen to twenty years, copper gutters can easily last for over fifty years. This long life makes copper a smart choice for the future of your property.

    While many homeowners compare seamless versus copper gutters, copper offers the highest level of strength. This low upkeep keeps your spending down over the years. Plus, copper is known as a premium feature that boosts curb appeal. Future buyers view these systems as a sign of high quality, which can lift the resale value of your home.

    Every home has its own unique needs and layout. We believe in giving clear facts and honest guidance without high-pressure sales or hidden fees. To find the right gutter plan for your home, we suggest starting with an expert check. Contact us to schedule a free gutter inspection and get a custom plan for your home.

    Custom Fabrication and Professional Copper Gutter Installation

    Setting up copper gutters needs exact work and skilled hands. Homes in the Rogers to St. Francis area gain from custom systems that match their style. A custom system ensures that the metal fits the home and lasts for many years. Let us look at the steps for a successful project.

    Selecting the right copper thickness

    Before work begins, you must choose the proper copper weight. Most high-quality systems use sixteen-ounce or twenty-ounce metal. Selecting a thick gauge helps your system withstand physical impact from ladders or heavy storms. When choosing between seamless versus copper gutters, a heavy copper gauge offers unmatched strength. A custom-made layout provides a precise fit that standard options cannot match.

    Our local team works with you to choose the best thickness for your home design. We measure every roofline to ensure we prepare the right amount of material. This custom approach keeps your project on track and avoids waste.

    Steps for custom home installation

    The setup of these systems involves a detailed sequence of events. Our experienced crew handles each stage with care to protect your home. Here is how our skilled crew sets up a new system:

    1. First, the crew takes on-site measurements of your roofline to plan the custom layout.
    2. Next, the workers cut and shape the copper sheets to form seamless runs.
    3. Then, they join the pieces using hot solder to create watertight seals at all seams.
    4. After that, they secure the heavy hangers to the fascia boards to support winter ice loads.
    5. Finally, they connect the downspouts and check the pitch to ensure smooth water flow.

    Handling thermal movement in Minnesota

    Minnesota weather poses unique challenges for metal gutters. Extreme cold and heat cause copper to expand and contract. In Minnesota, extreme seasonal temperature swings can stress metal joints, making proper thermal design vital. Standard gutters might buckle or pull away from the fascia under these conditions. To prevent this, local crews install special thermal expansion joints that allow the metal to slide safely without warping.

    Ensuring watertight joints and drainage

    Skilled crews use expert gutter soldering techniques to seal corners and end caps. Solder is far more durable than standard caulk, which can crack or leak after a few winters. A seamless gutter system reduces the number of joints, which lowers the risk of leaks. For homes from Rogers to St. Francis, we ensure the downspouts are properly connected to drain water far away from your foundation.

    Working with a local expert ensures your gutters function perfectly for decades. We treat every home as our own, from the first measurement to the final inspection. If you need help with your exterior, consider a professional gutter installation to protect your investment.

    How Do You Care for Copper Gutters?

    The natural patina process

    When you get new copper gutters, they start with a bright, shiny look. Over time, the metal shifts to a dark bronze and then turns into a unique green shade. This green layer is called a patina. As shown by the Copper Development Association, this color shift adds real character to your home.

    The patina takes several years to grow, depending on your local climate and weather. This green layer does more than look nice. A Bob Vila guide explains that the patina protects the metal. It stops the copper from rusting so the system lasts longer without losing its strength.

    Minimal lifetime maintenance

    Many homeowners love copper because it needs very little upkeep over its long life. Unlike steel or aluminum gutters, copper gutters do not need painting. They keep their strength without any coatings, as noted by Bob Vila. This saves you time and money on maintenance.

    Copper also has natural traits that keep it clean. It resists the growth of mold, algae, and fungi. The Copper Development Association reports that these traits help keep the inside of the gutter clean. Because of this, you do not have to worry about organic growth clogging your pipes.

    Recommended cleaning and care

    Even with low upkeep, you still need to care for your system to keep it working. We suggest simple cleanings to clear out leaves, pine needles, and twigs. A report by This Old House explains that cleaning prevents water from backing up and hurting your home’s wood fascia.

    This task is key in our local area. Minnesota weather has big heat and cold shifts that stress homes, as shown by the Minnesota Department of Natural Resources. To help plan your seasonal care, check out our guide on the maintenance needs for copper gutters.

    If you have many trees near your roof, you might want to add gutter guards to block falling debris. You can learn about gutter guard compatibility with copper gutters to see if they fit your needs. Proper care ensures your gutters protect your home’s walls and siding for many years.

    Are Copper Gutters Worth It for Your Minnesota Home?

    Choosing a new gutter system is a major choice for any homeowner. While standard systems work well, many people look at premium materials like copper gutters to protect their homes. This investment is not right for every budget, but it offers unique benefits for local properties.

    Long-term value and durability

    The main draw of copper gutters is how long they last. Standard gutters often need to be replaced after a couple of decades. In contrast, copper is one of the most durable materials you can buy, with a lifespan that can span 50 to 100 years when properly installed. You may never need to replace them again.

    This long lifespan helps balance the higher initial spend. While the first investment is higher, the long-term value is clear when you consider their low maintenance needs over several decades. They do not rust, peel, or need painting to keep their strength. This reliable performance gives real peace of mind for local homeowners.

    Minnesota weather can be tough on standard exterior materials. Our state has extreme temperature swings that stress building systems, as documented by the Minnesota Department of Natural Resources. These constant changes cause materials to expand and contract, which can damage weaker systems. Copper is tough enough to handle these cycles without cracking or warping.

    Curb appeal and resale value

    Beyond durability, copper gutters add striking curb appeal to your home. The bright metal slowly matures into a rich bronze shade and then a classic green patina. This premium look makes a strong impression on guests and potential buyers alike.

    In the housing market, buyers see the value of this premium upgrade. Homes with copper gutters often see a boost in appeal and overall resale value because of the material’s long lifespans. This investment helps your property stand out if you sell in the future.

    How to make your decision

    How do you decide if copper gutters are the right choice for your home? You should weigh your long-term goals, your home’s style, and your target budget. If you plan to stay in your home for many years, the long lifespan makes copper a smart choice.

    If you want a budget-friendly and reliable system, you can explore seamless versus copper gutters to compare options. Standard seamless gutters give excellent protection with a lower first investment.

    At Referred Restoration, we believe in a transparent and honest process. We do not use high-pressure sales tactics or hide extra fees. We treat every home in our Rogers and St. Francis community as our own. We can help you look at your home’s structure and gutter needs with an honest assessment.

    Schedule your free copper gutter consultation before winter arrives and protect your home from snow and ice water damage.

    Frequently Asked Questions

    Do copper gutters rust?

    No, copper gutters do not rust. Unlike steel gutters, copper does not wear down from water or air. Instead of rusting, it changes color over several years. This process creates a protective green layer called a patina. According to Bob Vila, this patina acts as a shield. It protects the metal under it from weather damage, keeping the system strong for decades.

    How long do copper gutters last?

    Copper gutters can last for a very long time. With proper setup and basic care, these systems often last between 50 and 100 years. As noted by This Old House, copper is one of the toughest materials you can choose for your home. While other metals like aluminum or steel may need to be replaced after 20 years, copper stands up to time. This makes it a great long-term choice for your roof.

    Do copper gutters need a lot of maintenance?

    No, copper gutters do not need much work to keep them in good shape. You do not need to paint them or seal them. The metal naturally stops moss and algae from growing inside the system. According to the Copper Development Association, these natural qualities keep your gutters cleaner for longer. You only need to clear out fallen leaves and debris once or twice a year to keep water flowing well.

    How do copper gutters handle heavy snow and ice?

    Copper gutters are very strong and work well in cold winter weather. The heavy metal can support the weight of snow and ice without bending. Since copper conducts heat well, it works great with heated cables to stop ice dams. As noted by the National Roofing Contractors Association, a strong system is key to managing meltwater in snowy climates. This helps protect your home from winter water damage.

    Ready to shield your Rogers home with strong copper gutters?

    Leaving old or bad gutters on your roof can cause water to run over, which often leads to wood rot and expensive foundation damage. Acting today protects your Rogers home from heavy storms and deep snow before the cold winter freeze starts to settle in our local area. You can see how these copper gutters work against standard ones by reading our seamless versus copper gutters comparison post to choose your fit.

    Are you ready to secure your home? Request your free gutter inspection to set up your job today. We will schedule an honest, transparent assessment to find the best custom setup for your Minnesota home.

  • Gutter Sealant 101: Sealing Seams and Preventing Leaks

    Gutter Sealant 101: Sealing Seams and Preventing Leaks

    Minnesota winter freeze-thaw cycles can split a gutter joint and send water directly into your foundation. Small leaks in your drainage system often grow into massive water damage issues during seasonal storms.

    Schedule a free gutter inspection in Rogers, MN today

    A reliable gutter sealant is the best tool for fixing leaking joints, as this specialized compound fills small gaps at seams to stop active leaks. It prevents escaping water from rotting your wood fascia boards, damaging your exterior siding, and eroding the soil around your home’s basement foundation. Because Minnesota weather has big temperature changes, choosing a flexible gutter sealant is key to make your repairs last. According to the University of Minnesota Extension, winter freeze-thaw cycles cause major structural failures if water is allowed to penetrate. Using a flexible silicone or polyurethane formula ensures that these sealed joint areas remain completely watertight throughout our extremely cold and harsh Rogers winters.

    To keep your home safe, you must find exactly where your gutters are losing water. If you want to spot and fix these weak areas, you should first understand the spots that fail most frequently. We will explore these vulnerable spots in the section below, starting with the points that fail most often.

    Where Do Gutters Leak? Common Points on Seams and Joints

    Gutters protect your home by moving water away from your roof and foundation. But as water flows through the system, it often finds weak spots. The most common areas for leaks are the seams, joints, end caps, and corners of the system. Downspout outlets are also major leak points. Over time, water wears down these areas and creates gaps where drips can start.

    The Primary Leak Points in Gutter Systems

    Sectional gutters are made of short metal pieces joined together. Every place where these pieces meet is a seam. End caps are placed at the ends of the runs, and joints connect gutters at the roof corners. These joints are held by screws and sealed with a special glue. When that seal fails, you must repair leaking gutter seams to stop water from spreading. This leaves tiny holes where water can drip. Downspout outlets are also quick to leak when the seal fails.

    Because sectional systems have so many seams, they need a lot of care. A guide from the city of Duluth, Minnesota shows that runoff from your roof must flow smoothly to protect your yard. When seams leak, water drops right next to your home instead of flowing away. This can pool near your walls and crack your foundation. Seamless systems use one long piece of metal, so they have far fewer joints to seal.

    How Minnesota Winter Weather Hurts Sectional Gutters

    Minnesota winter weather makes gutter leaks much worse. During cold months, ice dams can form on your roof. This heavy ice puts stress on your gutters. Water freezes and thaws over and over, which forces small seam gaps to grow. The University of Minnesota Extension explains that these wet and dry cycles can cause wood and metal to fail. To survive these shifts, any seal you use must stay flexible. If the seal is stiff, the moving metal will tear it apart.

    The Damage Caused by Leaking Seams

    When you ignore leaking seams, the water does not just drip. It will splash backward onto your siding, which can lead to mold and stains. Water also runs behind the gutter. This moisture will quickly rot your wooden fascia boards and ruin your soffit. Over time, the dampness can even leak inside your walls, which attracts pests and causes major damage. If water pools near your basement, it can crack the foundation. Checking your system often will help you find these tiny leaks before they grow.

    What Is the Best Gutter Sealant for Minnesota Homes?

    Minnesota winters bring harsh cold and rapid weather shifts. These extreme freeze-thaw cycles can split metal joints if water gets inside. When seams fail, water leaks near your home’s foundation and siding, which leads to costly damage. To keep your home dry, you must choose the right gutter sealant for our local climate.

    Silicone options for extreme temperature swings

    One of the most common products used today is 100% silicone. This product stretches well and stands up to sunlight and heat. The Minnesota Department of Transportation shows that silicone sealants bend well in both heat and cold. This trait is vital in Rogers and the Twin Cities, where summer heat shifts quickly to winter ice.

    High-quality silicone is also quick to dry. Some blends are rain-ready in just thirty minutes and help keep mold away for ten years. This gutter sealant meets strict ASTM C-920 rules, which proves its strength on outer joints. It works best on aluminum and vinyl gutters, but it does not stick well to wood.

    Polyurethane and tripolymer options

    Polyurethane is another strong option for sealing metal and wood gutters. It is very tough and can be painted to match your home’s siding. But polyurethane takes longer to dry than silicone and can become brittle in extreme cold. For this reason, many local homeowners choose tripolymer sealants instead.

    Tripolymer mixes like Geocel 2320 can seal gaps up to 1/4 inch wide. This makes them ideal for older gutters that have shifted over time. But these tripolymer sealants need about five days to fully dry. You should plan your work with care around the local weather to allow for this long cure time.

    A comparison of gutter sealant materials

    When you prepare to fix your gutters, you must think about material match, dry time, and cold-weather flex. It is a good practice to clean and inspect your gutters twice each year to catch issues early. If you find leaks, you can apply gutter sealant to prevent leaks and protect your home.

    The table below compares the main types of sealant used on home gutters. Each option has unique benefits depending on your home’s setup and the current season.

    Sealant Type.Material Fit.Flex Range.Dry Time.Best Use.
    100% Silicone.Aluminum and vinyl.Very high flex.30 minutes to rain.Sealing joints and end caps.
    Polyurethane.Metal and wood.High flex.24 to 48 hours.Structural seams.
    Butyl Tripolymer.All metals and wet wood.Good flex.5 days to full cure.Narrow seams up to 1/4 inch.

    How Do You Choose the Right Gutter Sealant?

    Choosing the right gutter sealant is key to keeping your home safe from water damage. Minnesota weather puts gutters under heavy stress. When water freezes inside clogged joints, it expands and forces seams apart. If you do not seal these gaps, water can leak and damage your siding or foundation. State experts at the University of Minnesota Extension stress that your drainage system must overlap properly to direct water away from the home. You should check your gutters twice a year and apply gutter sealant to prevent leaks before winter starts. To pick the best product, you must look at a few main factors.

    Matching Sealant to Gutter Materials and Color

    First, you must check what your gutters are made of. Most modern homes use aluminum gutters, but some older houses have wood or steel. Not every sealant works on every surface. For example, some polyurethane sealants bond well to wood and metal but do not stick to plastic. Silicone sealants are a great choice for aluminum gutters because they form a tight, watertight seal on clean metal.

    You also want to think about color. Most sealants come in white, gray, black, or clear. Aluminum gutters often look best with a clear or gray sealant that matches the metal. If you plan to paint your gutters, make sure you choose a paintable sealant. Pure silicone cannot be painted, so you would need a paintable polyurethane or co-polymer sealant instead.

    Weather Resistance and Local Climate Factors

    Your sealant must withstand extreme cold and strong sun. Rogers, Minnesota sees big temperature swings from summer to winter. These shifts cause metal gutters to grow and shrink. Because of this, you need a flexible product. According to a Minnesota Department of Transportation report, silicone sealants stay flexible in hot and cold weather. This makes them best for sealing outdoor joints that face harsh freeze-thaw cycles.

    Polyurethane is another strong option that handles physical wear well, but it can break down faster under direct sun. Silicone has a natural defense against UV rays, which helps it last longer on sunny rooflines. Choosing a high-quality silicone keeps your seal tight even when the gutter flexes during the coldest winter days.

    Application Ease and Drying Time

    How you apply the sealant is also important. Most gutter sealants come in a standard tube that fits a caulk gun. This tool makes it easy to apply a smooth, even bead of sealant along a clean seam. Some thicker compounds must be spread with a trowel, which is harder to guide and can leave a messy look.

    Finally, look at the drying time and rain-ready time. Some sealants need a few days to cure before they can get wet. In contrast, advanced silicone sealants can meet federal standard ASTM C-920 and become rain-ready in just thirty minutes. Picking a fast-cure product is a smart move if you need to seal a leak when rain is in the forecast.

    How Do You Seal a Leaking Gutter Seam?

    Leaking seams can cause major water damage to your roof, fascia, and foundation. Sealing these joints is a key part of your yearly home care. You can do this work yourself if you have the right tools and take proper safety steps. Over time, water can rot your wood or crack your concrete. Good care keeps your home dry during big storms.

    Contractor applying gutter sealant to a leaking gutter seam on a Minnesota home

    Safety on the ladder

    Working on gutters means spending time on a ladder. Ladder falls are a major risk for homeowners. You must set your ladder on flat, firm ground and use a standoff stabilizer to avoid crushing the gutter. Never reach too far to the side while on a rung. It is always safer to climb down and move the ladder than to risk a bad fall. If you feel unsafe high up, seek a pro to help.

    The sealing process

    When you plan your home care, you can apply gutter sealant to prevent leaks at the joints. A good silicone sealant is often best because it stays flexible during cold winter weather. Based on a study on exterior joint performance, silicone sealants stay flexible across a wide temperature range. This stretch helps them withstand harsh freeze-thaw cycles. You must remove the old sealant the right way so the new product can stick.

    Step-by-step application guide

    Follow these key steps to apply your gutter sealant and fix your leaking seams. Taking your time will ensure a watertight bond that lasts for years.

    1. Inspect and clean the seam. Use a stiff brush and water to clear away all dirt, leaves, and debris from the leaking joint.
    2. Prep the surface. Scrape away the old caulk with a plastic scraper so the new bead bonds to the clean metal. You may need to use a special solvent to clean off the leftover gunk.
    3. Dry the surface fully. Use a clean rag to wipe the area dry, as moisture will prevent the sealant from sticking.
    4. Mask the area. Put painter’s tape on both sides of the seam to keep your work clean and neat.
    5. Apply a smooth bead. Cut the nozzle of your gutter sealant tube at an angle and apply a steady line across the seam. Use your finger or a tool to smooth the bead into place.
    6. Allow the proper dry time. Some silicone products are rain-ready in thirty minutes. Others like tripolymer sealants can take up to five days to dry fully. Refer to the product label for the exact drying rules.

    Why Seamless Gutters Leak Less in Minnesota Freeze-Thaw Cycles

    Minnesota winters are tough on home gutters and roofs. The constant shift from freezing to thawing puts a massive strain on your roof drainage. When snow melts on the roof, water flows into the gutters.

    If that standing water freezes again at night, the ice expands. In sectional gutters, this expanding ice forces the seams apart, creating gaps where water leaks out.

    How Winter Ice Damages Gutter Seams

    During a normal Minnesota winter, the weather climbs above freezing during the day and drops below freezing at night. This cycle happens dozens of times each season. As ice builds up in your gutter, it forms ice dams that hold pooled water back on your roof shingles.

    The expanding ice places outward pressure on your gutters, forcing joints and seams to bend. Once a seam bends, it creates a path for water to leak next spring.

    Standard sectional gutters come in short pieces that workers join during setup. Every joint relies on a bead of gutter sealant to stop leaks. But as ice forms and melts, it puts constant stress on these sealed joints.

    Over time, the sealant cracks and peels under the pressure of the ice. As shown by local home drainage rules, sectional gutters are more prone to seam leaks due to having many joints. This means sectional setups need frequent repairs in areas with heavy winter snow and ice.

    How Seamless Gutters Limit Leaks

    A seamless system solves this issue by using one long run of metal. Because the metal is formed from one single piece, it does not have seams along the straight runs. There are joints only at the very ends of the run and at the downspout holes.

    This means there are far fewer spots where you need to apply gutter sealant to prevent water leaks. If you want a system that lasts through harsh winters, a professional seamless gutter installation is a smart upgrade. It cuts out the weak points where old gutters fail.

    Custom Fit and Winter Strength

    Custom gutters also stand up better to heavy snow loads. DIY sectional kits often sag or bend because they do not match the exact shape of your home. In contrast, expert systems are cut on-site to fit your roof perfectly.

    Academic roof drainage guides show that custom-fit systems offer greater strength in cold climates. They require fewer seams, which keeps them strong when filled with winter ice.

    This custom fit keeps water moving safely away from your home’s roofline. It guards your siding and foundation from costly rot and deep water damage.

    Gutter Sealant or Professional Gutter Repair: When Does DIY Fail?

    Choosing between a quick home fix and expert help can save you from costly water damage. While a tube of gutter sealant is helpful for small leaks, it cannot fix a failing drainage system. Homeowners often need to balance simple upkeep with long-term structural care.

    When diy sealant works

    If you are exploring your gutter guard options, you might find minor leaks during the process. A tube of sealant is a great tool for these small, localized issues. If you find a single leaking joint or a loose end cap, you can often clean and seal it yourself. This simple care keeps water flowing to the downspouts.

    Signs you need expert help

    But some problems are too big for a quick surface fix. If you see gutters that sag, pull away from the roof, or show heavy rust, sealant will fail. Major issues like gaps wider than a quarter inch need a professional exterior repair to restore proper drainage. Sagging gutters often mean the wood backing is rotting.

    When water overflows from failing seams, it can cause severe damage to your fascia, soffit, and siding. This moisture can also reach your basement or wash away soil near your walls. Local rules suggest directing downspout runoff at least 6 feet from your home. This is needed to protect your foundation, as shown in homeowner drainage guidance. When gutters fail to carry water away, even a strong foundation can suffer.

    Why winter breaks diy fixes

    In many cases, simple surface sealant cannot withstand local winter weather. The freeze-thaw cycles in Minnesota put extreme stress on your home exterior. Water that seeps behind a loose seam will freeze, expand, and break the seal again. Academic research from the University of Minnesota Extension shows how wetting and drying cycles cause rot in wood framing. This happens when water is not kept out. An expert can fix the root cause so your system survives the winter.

    Instead of risking your safety on a tall ladder, you can get an expert opinion. Referred Restoration provides honest assessments to help you make the right choice for your home. Our team can inspect your roof and gutters to find the best long-term solution. An expert inspection is free, and any work is priced after our team sees your home in person.

    Call (763) 726-4245 to book your free gutter inspection

    Frequently Asked Questions

    What is the best way to seal a leaking gutter joint?

    To seal a leaking joint, you must first clean and dry the area. Remove all old gutter sealant with a scraper. Next, apply a fresh bead of sealant inside the seam. According to the University of Minnesota Extension, each part of your roof drainage system must overlap to direct water outward. Press the seal into the joint to make a tight bond, then let it dry for at least twenty-four hours.

    Can I use silicone as a gutter sealant?

    Silicone is a great choice for gutters because it resists sun damage and does not crack easily. According to the Minnesota Department of Transportation, silicone sealants keep their bend across a wide range of hot and cold weather. This helps the seal survive severe Minnesota winter freeze-thaw cycles. However, silicone will not stick to wet surfaces or dirty metal. You must clean the gutter and let it dry fully before you apply the sealant.

    How long does gutter sealant last?

    Most high-grade gutter sealants will last between ten and fifteen years. However, harsh Minnesota weather can shorten this life. Severe winter freeze-thaw cycles and heavy snow put extra strain on gutter joints. According to a homeowner drainage guide from the City of Duluth, you should check your gutter drainage system often to find leaks early. If you see cracks or gaps in the sealant, you should scrape it away and apply a fresh layer.

    Does flex seal really work on gutters?

    Flex Seal can seal gutter leaks for a short time, but it is not a long-term fix. It is a thin rubber spray or paste that does not withstand the heavy weight of ice and snow. Minnesota freeze-thaw cycles will quickly cause the thin coating to crack and peel. For a lasting repair on your home’s roof drainage system, it is much better to use a heavy-duty silicone gutter sealant.

    Ready to seal your gutters and stop seasonal leaks?

    Water from leaky gutter joints can quickly rot your wooden siding, mold your inside walls, and ruin the soil under your home foundation. Fixing these small gaps now before the freezing Minnesota winter months arrive prevents heavy ice dams and costly water damage in the spring. Our local crew can inspect your Rogers gutters today and find any weak spots before they cause major trouble.

    We believe in giving honest assessments rather than high-pressure sales to our Rogers neighbors. Our team will give you a clear and simple breakdown of what your home needs to stay safe and dry all year long.

    Ready to stop water damage? Call (763) 726-4245 to schedule a free gutter inspection.

  • Metal Siding for Minnesota Homes: Types and Durability

    Metal Siding for Minnesota Homes: Types and Durability

    Hail and bitter cold can quickly crack standard vinyl siding on Rogers homes. Strong winds also strip cheap boards away when the season turns. Local homeowners need an exterior that stands up to these harsh shifts.

    Call (763) 726-4245 for a free metal siding inspection

    Installers fitting vertical metal siding panels on a Minnesota home exterior

    Metal siding is a very tough, low-maintenance exterior material that protects Minnesota homes against extreme climate shifts, heavy snow, and severe storms. According to the Pacific Northwest National Laboratory, siding must shed heavy rainwater and resist strong wind pressures. It also protects the inner wall structures from long-term damage caused by sun, pests, fire, hail, and winter snow. To meet these needs, steel siding comes in styles like horizontal lap, vertical board-and-batten, and corrugated panels. Homeowners in the Rogers area choose this material because it does not crack in freezing temperatures, split, or rot. This durable metal shield is a strong barrier that keeps your family dry and safe through every season of the year.

    If you are planning a siding update, you might wonder if steel is the right fit for your home. To help you make the best choice, let us start with what metal siding actually is and why so many Minnesota homeowners choose it.

    What Is Metal Siding and Why Minnesota Homeowners Choose It

    Metal siding is a strong exterior finish made from tough steel panels. Homeowners in the Rogers area often choose this option to protect their homes. According to a federal building resource guide, the main jobs of any siding are to shed rainwater, resist wind, and protect walls from sun damage. This tough outer layer also keeps out pests, fire, hail, and winter snow.

    A strong shield against local weather

    In Rogers, Minnesota, our homes face extreme weather throughout the year. Heavy snow, strong winds, and sudden hail can cause severe damage to weak home exteriors. Steel siding offers the best defense against these local climate problems. It will not warp, rot, or crack like wood or vinyl often do when the weather turns harsh.

    Winter strength for local homes

    Freezing winters and hot summers can take a heavy toll on weaker siding. Common options like vinyl often become brittle when it gets below zero. When this happens, a flying branch or a heavy hailstone can easily crack the cold plastic. Steel panels do not have this issue, and they stay strong and steady during our deepest freezes.

    This winter strength is a major reason why local home owners choose steel panels. As noted by the Minnesota Department of Labor and Industry, steel does not become brittle in freezing cold. Because of this, your home’s outer walls stay safe from cracks that let in water. If you want a strong upgrade, a siding replacement in the Rogers area is a great step. Our team at Referred Restoration can help you select the best metal siding for your home.

    Modern look and curb appeal

    Beyond raw strength, steel panels offer great style and high curb appeal. Many homeowners in Rogers want a clean, modern look for their homes, and metal panels can give an older house a fresh start. A state building fact sheet shows that metal siding is a common choice for barndominiums because of its industrial look and tough build. It is an easy way to make your home stand out in your neighborhood.

    This modern look is backed by national building science research. A report from the Department of Energy BASC shows that siding provides a beautiful finish to enhance curb appeal. When we perform a siding job, our team will make sure your new exterior fits your style while guarding against storms. We treat every home as our own, so we never cut corners on quality.

    Metal Siding Types: Horizontal, Board-and-Batten, and Corrugated

    Your choice of siding shapes how your home looks and stands up to the weather. Metal siding panels come in many profile designs to fit any home style. You can choose horizontal lap, vertical board-and-batten, or corrugated metal options to match your vision.

    Each type has a unique style and has its own strengths when storms hit. A main job of siding is to shed rain and protect walls from wind, snow, and hail.

    Horizontal Lap Panels for Classic Appeal

    Horizontal lap panels give your home a classic look that mimics real wood. But unlike wood, these panels use 26-gauge steel to provide great strength. This tough steel keeps your home safe from flying debris without cracking or rotting.

    Owners love this style because it blends old-world charm with modern strength. Some of these systems use hidden fasteners to secure the panels. This design hides the screws from view and keeps water from leaking into your walls.

    Board-and-Batten Panels for Modern Style

    Vertical board-and-batten siding gives your home a bold, modern look with clean vertical lines. Many families use this style to make their homes look taller and more unique. Our team installs 10-inch vertical board and batten siding pieces that are 10 feet long for a seamless finish.

    This metal siding option blocks strong winds for homes in the Rogers area. If you want to compare style options, read our board and batten siding guide. Using steel for this style protects your home from rot better than wood or vinyl. It resists heavy winds and will not crack when freezing weather hits Minnesota.

    Corrugated Metal Panels for Industrial Strength

    Corrugated metal panels have a wavy shape that makes them very strong and stiff. This wavy pattern helps the panels shed water quickly and resist heavy impacts. You will often see this strong steel on modern homes, cabins, and barns.

    In fact, steel siding is a common choice for barndominiums and modern metal buildings across Minnesota. It offers an industrial look that stands up to the harshest storms. If your home gets hit by heavy storms, check our tips on fixing metal siding. This helps you spot dents or leaks before they cause larger issues.

    The table below shows how these three siding profiles compare in style and function. You can use this guide to find the best fit for your home.

    Profile TypeStyle and LookBest ForWeather Performance
    Horizontal LapClassic look that mimics real wood siding.Classic homes, ranch homes, and suburban neighborhoods.Sheds water well and can use hidden fasteners to stop leaks.
    Board-and-BattenModern vertical design with bold lines and deep shadows.Modern farmhouse designs, high gables, and accent walls.Resists strong winds and lets rain run off fast.
    CorrugatedIndustrial, wavy design with a rugged textured look.Modern custom homes, barndominiums, cabins, and barns.Highest protection against hail and flying storm debris.

    How Does Metal Siding Hold Up in Minnesota Weather

    Minnesota weather is hard on homes. From heavy winter snow in Rogers to summer hail in Cottage Grove, home siding must face tough weather. Choosing the right type is key to protect your home. If you are planning a siding replacement in the Rogers area, you should check how metal siding holds up in our local climate. Our team at Referred Restoration has worked for years helping local homeowners choose the best siding.

    Extreme cold and freeze-thaw cycles

    During winter, the ground freezes and temps drop far below zero. Some types, like vinyl, get brittle in these cold snaps and can crack when struck. In cold climates, steel does not become brittle in freezing temperatures, as shown in reports by the Minnesota Department of Labor and Industry. It keeps its shape and strength even when the temperature drops quickly.

    Winter sun and snow glare also wear down some siding types. Vinyl siding often fades or chalks over time when exposed to bright sun. Modern metal siding panels keep their look longer than vinyl, as shown by the Natural Resources Conservation Service. The tough finish resists fading and chalking, keeping your home looking clean and new year after year. This helps your home keep its curb appeal through every season.

    Hail, wind, and storm strength

    Summer storms in Minnesota bring strong winds and heavy hail. High winds can blow debris against your home walls. Steel siding stands up well to wind-borne debris, hail, and fire, as noted by the Pacific Northwest National Laboratory. This defense helps stop leaks and wall damage during severe storms. It keeps your family safe and warm inside when storms hit.

    Huge hail can dent steel panels, but the metal still holds up better than plastic options. While steel siding can dent from large hail, it keeps its finish better and will not crack like vinyl. It also keeps its strength, as shown by the Natural Resources Conservation Service. If you face storm damage, you can schedule a storm-damaged siding repair to fix the panels.

    Pest and fire defense

    Minnesota pests can also harm the outside of your home. Wet winters and warm summers make a great home for pests that eat wood. Carpenter ants and termites often tunnel through wood siding, causing costly damage over time. Unlike wood, steel is impervious to pests like termites and carpenter ants, as shown by the Natural Resources Conservation Service. This makes steel a smart, worry-free choice for your home outside.

    Fire safety is another key benefit of choosing metal. Wildfires or nearby house fires can spark and spread quickly on wood or vinyl siding. Metal siding materials are non-combustible, which improves fire safety ratings for homes, according to reports by the National Institute of Standards and Technology. Choosing steel panels adds a strong layer of fire defense to your home.

    Minnesota Code Requirements for Metal Siding Installation

    When you plan to update your home, you must follow local rules. In Minnesota, any new exterior cladding must meet the 2020 Minnesota Residential Code. This state law says you must install products like wood, vinyl, or metal siding based on both the code and the maker’s rules. Following these rules keeps your home safe and sturdy. It also ensures your project meets state standards.

    Permits and Framing Support Checks

    Before we start any work, our team checks that your home is ready. You will need a permit. This building permit must come from your local office before you begin. Steel is heavy, so we must make sure your home’s wood framing can support the extra weight of the metal. Local building sheets from towns like Bloomington show that heavy steel requires proper framing and support during setup. We check your house to make sure the walls are strong enough.

    Steps for a Code-Compliant Siding Project

    When we install siding replacement in the Rogers area, we follow a strict process. It keeps your home safe. Our process ensures that every step meets state laws to protect your walls from moisture and wind. This careful approach prevents hidden damage and saves you from future headaches. Here is the exact sequence we follow.

    1. Obtain the Siding Permit. You must get a building permit from your local town office before you begin a re-siding project. Always check with your city hall to learn about the local rules. They can give you info sheets that explain the code.
    2. Strip Old Materials and Repair Frame Damage. Remove the old siding. You must replace any rotted or damaged sheathing, framing, and insulation before you proceed. This keeps your home’s structure sound. We also check that your framing can support the heavy steel.
    3. Install an Approved Water Barrier. Put down a water-resistive barrier. This step is a key part of the 2020 Minnesota Residential Code. Proper barrier setup stops moisture from getting trapped behind the metal panels to prevent wood rot. A good barrier acts as a shield against damp weather.
    4. Flash Openings and Gaps. You must flash windows, doors, and all wall joints so they stay dry. It stops leaks. Good flashing ensures your walls stay dry even if wind-driven snow gets past the outer siding. This is vital for long-term safety.
    5. Use Recommended Fasteners. Only use the fasteners recommended by the steel maker. The right screws prevent corrosion. They also keep panels from blowing off in high winds. Using cheap or wrong metals causes rust. It can ruin your beautiful siding.
    6. Pass the Electrical and Final Siding Tests. If workers move any outdoor outlets, you must have an electrical inspection. This check must happen first. Your town must perform the final siding inspection after the wires are approved. Once these steps are done, your project is complete. You can enjoy your tough new exterior with peace of mind.

    Metal Siding Maintenance and Longevity

    Choosing metal siding for your home means you’ll have a strong shield against harsh weather. While this metal is very tough, a small amount of care keeps it looking new for decades. Routine checks can prevent minor wear from turning into bigger issues.

    Routine cleaning and care

    You do not need to spend hours keeping your home clean. According to the City of Bloomington, routine siding maintenance involves simple cleaning to wash away dirt and pollutants. This basic step prevents long-term wear on the metal finish. You can use a mild soap and water with a soft brush once a year to keep the panels clear of grime.

    Minnesota storms can sometimes bring heavy hail that dents steel panels. If you see dents after a storm, you can pop them back out or replace single panels. For severe weather damage, you may want to get professional storm-damaged siding repair to keep your home safe.

    Moisture control and cut edges

    Metal does not rot or decay like wood does. However, if water gets behind the panels during a poor installation, it can cause problems. Trapped moisture leads to rot in the wood framing under the siding, as shown in national lab research. This is why proper drainage behind your cladding is so important.

    Your installer must protect every raw edge to keep your walls bone dry. Installers cut steel panels on site to fit around windows and doors. The City of Bloomington requires builders to protect these raw cut edges to prevent rust. A quick coat of paint or sealant on the trimmed edges blocks rust.

    Advanced finishes and sustainability

    Advanced coatings on modern metal siding protect your home from the sun. These paint systems block UV rays to resist fading and chalking for decades. You will not need to repaint every few years because the finish lasts so long. Your siding will keep its bright color even after years of direct sunlight.

    Choosing steel is also a great choice for the environment. Steel is one of the most recycled materials in the world, according to the Environmental Protection Agency. This means your siding is fully recyclable when its long life ends. If you are ready for a new look, we can help you with siding replacement in the Rogers area to upgrade your home.

    Is Metal Siding the Right Choice for Your Home

    Before you invest in new cladding, you must weigh how well it will guard your home. The main job of any siding is to shed rainwater and block wind. A high-quality siding protects your wall layers from water, UV rays, insects, and fire. In our local climate, choosing this shield is vital to protect your home from hail and snow.

    Primary protective functions

    Modern metal siding offers high durability against severe weather and does not warp or crack when the temperature drops. Some metal siding options feature hidden fasteners that give a very clean look. These hidden fastener siding systems also help with weather defense. By cutting the number of exposed screws, they keep moisture from leaking into the walls.

    This strength is very helpful if your home has had past weather issues. If your home has storm-damaged siding in need of repair, steel is a great upgrade. It resists big impacts and keeps its clean look for decades. Our team at Referred Restoration can check your home to see if steel is the best fit.

    Checklist for local homes

    While metal siding is a great choice, it may not suit every house. There are key details about your home to think about before you make a plan. Here is a short guide to help you decide if this siding fits your goals:

    • Metal siding is a great fit if: You want a siding that does not rot or crack in the cold. It is also ideal if you want a fire-resistant shield and love a modern look.
    • Other options might be better if: Your local area has strict old design rules that ban metal. Wood or vinyl may also be better if you prefer a classic local style.

    Building codes and project scope

    When planning your project, the overall scope will change based on several choices. The profile, thickness, gauge, and finish of your panels will shape the setup plan. Since every town has its own rules, you must check local codes before you start. You should always consult your local municipal building department about town codes.

    Our team can help you find these rules and check the load on your walls. We will guide you through the process to ensure your new siding meets all codes.

    Call (763) 726-4245 to schedule your free siding inspection

    Frequently Asked Questions

    Do I need a permit to install metal siding in Minnesota?

    Yes. You need a building permit to setup new siding on your home in Minnesota. According to the Minnesota Department of Labor and Industry, permits are needed to re-side existing homes. Getting a permit helps make sure your new metal siding meets all local building codes. Our team at Referred Restoration can help you with this process.

    What are the disadvantages of metal siding?

    Metal siding is very tough, but it can dent from heavy hits like large hail. It is also heavy, so your home must have proper wood framing to hold the weight. Lastly, if the setup is not done right, water can get trapped behind the panels. According to the Pacific Northwest National Laboratory, trapped moisture can cause rot in the wood parts of your walls. Working with a skilled crew helps prevent these issues.

    Do I need plywood under metal siding?

    Yes, you need a solid wood backing like plywood or sheathing under your metal siding. Wood sheathing gives your walls strength and provides a flat surface for setup. If we find rotted wood when we remove your old siding, it must be replaced first. As noted by the Minnesota Department of Labor and Industry, any damaged sheathing, framing, or insulation must be replaced before the new siding is put on.

    How do you keep metal siding from rusting?

    Modern metal siding has tough coatings that guard against rust. To keep it safe, any raw edges cut during setup must be sealed. According to guidelines from the City of Bloomington, cut or trimmed metal edges must be protected to prevent rust. You should also wash your siding with water once a year to clear off dirt and debris that can damage the finish over time.

    Ready to Protect Your Home with Durable Metal Siding?

    Putting off siding work can lead to deep leaks, mold, and wood decay during the next big Minnesota storm. When the weather gets harsh, old walls won’t hold up and can leave your home open to cold winds. Getting a free check now ensures your house stays dry, safe, and warm before freezing weather starts. Our local team at Referred Restoration will help you find the right style and fit. We treat every home in the Rogers area as our own and we never use pressure. We will make sure you get a clear view of what your home needs to stay secure.

    Ready to start? Call or request your free inspection today at (763) 726-4245.

  • Best Gutter Guards Minnesota: Options for Your Home

    Best Gutter Guards Minnesota: Options for Your Home

    Gutter Guard Options for Minnesota: Choose the Right Type Before You Buy

    Every Minnesota homeowner knows the autumn ritual: climbing the ladder to scoop wet maple and oak leaves out of the gutters before the snow arrives. Gutter guards reduce that chore, but picking the wrong style for Minnesota’s weather can cause more problems than it solves. Mesh screens, reverse curve covers, foam inserts, and brush guards all block debris differently, and each handles maple leaves, ice, and snow in its own way. This guide identifies the best gutter guards Minnesota homeowners can choose from, compares how each type performs through a Rogers-area winter, and helps you match a guard to your roof and tree cover.

    Get Your Free Inspection
    Our team will assess your roofline and recommend a gutter guard system suited for Minnesota winters.

    Minnesota home with seamless gutters fitted with gutter guards in early winter

    If you are ready to learn the hands-on process after reading this, our guide on how to install gutter guards in Minnesota covers measuring, slope, and securing each panel. This article focuses on the choice itself, because the guard you select has a bigger impact on long-term performance than the installation details.

    Why Minnesota’s Climate Makes Gutter Guard Choice Harder

    Minnesota gutter guards face a double test that milder climates do not. The first test comes from tree debris. Rogers and surrounding communities sit in a belt of heavy deciduous trees, and maple, oak, and cottonwood leaves drop in dense clumps each fall. The second test is winter. Four-plus months of freezing temperatures, ice, and drifting snow put stress on any guard, and some designs trap material that later freezes into a solid block.

    Because of this combination, the best gutter guards in Minnesota are not simply the most popular national brand. They are the types that shed maple leaves without clogging, drain fast in heavy rain, and resist ice buildup along cold rooflines. Annual snowfall in the region can reach more than 40 inches, and repeated freeze-thaw cycles amplify any weakness in a guard system.

    Maple leaves collecting in snow-dusted gutters on a Minnesota home in late autumn

    What Are the Main Gutter Guard Types?

    Gutter guards fall into four broad families: screen and mesh guards, reverse curve (surface tension) covers, foam inserts, and brush guards. Each family uses a different mechanism to keep water flowing while blocking leaves. Understanding that mechanism is the fastest way to narrow your choice.

    Screen and mesh guards sit on top of the gutter with a flat or arched surface of small holes. Water passes through the openings while leaves and twigs stay on top. Mesh versions use a much finer weave, which blocks shingle grit and pine needles that standard screens miss.

    Reverse curve guards use a curved cover that water follows over the edge and down into the gutter, while debris slides off the front. They rely on surface tension, which means they depend on consistent water flow to work well.

    Foam inserts wedge directly into the gutter channel. Water soaks through the porous foam while leaves collect on top of the guard instead of sinking into the channel.

    Brush guards look like oversized pipe cleaners. Bristles fill the top of the gutter, holding leaves out while water flows through the gaps between their rows.

    Mesh vs. Reverse Curve vs. Foam vs. Brush: A Minnesota Comparison

    The table below compares the main gutter guard options Minnesota homeowners consider, with a focus on how each handles maple leaves, snow, and year-round upkeep.

    Guard TypeHow It Blocks DebrisMaple Leaf HandlingSnow and Ice PerformanceMaintenance LevelBest Fit
    Micro-meshFine stainless steel or aluminum weave on top of the gutterExcellent; stops leaves and fine debrisGood with proper slope; sheds snow and ice wellVery lowHomes with heavy trees or pine needles; most Minnesota homes
    Standard screenCoarse perforated screen or expanded metalGood for large leaves; fine grit can passModerate; plastic versions can become brittle in subzero coldLow to moderateBudget-conscious homes with large debris only
    Reverse curveCurved cover that sheds debris off the frontGood when installed with correct pitchCan shed ice well; depends on consistent flowLow when installed correctlyHomes where a pro sets precise slope and water flow
    Foam insertPorous foam block inside the gutter channelGood; leaves sit on topWeak; can freeze solid and hold moistureModerate; may need periodic removalWarm-climate homes, not ideal for Minnesota winters
    Brush guardVertical bristles filling the top of the channelModerate; large leaves stay on topModerate; can trap ice between bristlesModerate; needs periodic rinseHomes with light debris and mild freeze-thaw

    For most Minnesota homes, a stainless steel micro-mesh guard is the strongest all-around choice. It blocks the fine debris that clogs standard screens, handles heavy snow loads with a properly sloped install, and needs the least hands-on maintenance. For a deeper look at the trade-offs between seamless and sectional gutter systems, see our seamless gutter installation guide. Reviewers at This Old House and guides from EcoWatch offer independent looks at how the main guard types compare.

    Gutter contractor inspecting a clean micro-mesh gutter guard system on a Minnesota roofline in winter

    What Is the Best Gutter Guard Minnesota Homeowners Choose?

    The best gutter guard for northern climates is one that combines fine debris filtration with the ability to shed snow and ice rather than trap them. Minnesota’s repeated freeze-thaw cycle is the deciding factor. A guard that holds water against the gutter edge in subzero weather can turn into a solid ridge of ice by mid-January.

    Rigid guards with a solid mounting surface, such as stainless steel micro-mesh or a professionally pitched reverse curve cover, outperform soft foam and loose brush options in cold regions. Foam and brush guards have many small internal pockets that can hold water and freeze, which defeats the purpose of a guard that is supposed to keep water moving. If you frequently battle ice buildup, our ice dam prevention guide for Minnesota explains how roof and gutter conditions combine to form ice dams.

    Maple Leaves and Other Debris: What Minnesota Trees Throw at Gutters

    Rogers-area properties face a specific mix of debris that shapes the best gutter guard options Minnesota homeowners should consider. Maple and oak leaves fall in heavy waves, often while wet, and they mat together quickly. Cottonwood fluff in late spring is lightweight but airborne. Shingle grit and granules shed off asphalt roofs over time and wash into the gutter. Pine needles, where present, are thin enough to slip through coarse screens.

    • Wet maple and oak leaves mat into dense layers that a coarse screen can bridge and block.
    • Pine needles are thin enough to slip through many standard screens and require a fine mesh.
    • Shingle grit from aging asphalt roofs is fine and abrasive, so it settles in any guard with large openings.
    • Cottonwood fluff is airborne and lightweight, coating surfaces in late spring.

    Because this debris is varied in size, a one-size-fits-all coarse screen often underperforms. Fine micro-mesh blocks grit and needles, while a slightly arched profile lets wet maple leaves slide off instead of sticking flat to the surface. Leading home-exterior reviewers consistently rank fine stainless steel micro-mesh systems among the top performers for blocking the fine debris that coarse screens miss. Matching the guard’s opening size to the debris you actually see on your roof is more useful than picking a guard based on brand name alone.

    Snow and Ice: The Minnesota Reality Check

    Snow and ice are the factors that separate a good gutter guard from a bad one in Minnesota. Heavy snow can weigh down a flimsy guard or collapse a poorly installed section. Ice dams form when heat escapes from the home and melts snow at the roof edge, where the meltwater refreezes over the cold gutter. A guard that collects ice along this line can make the problem worse by giving the ice more surface to grab.

    Three features matter most for Minnesota winters: a rigid frame that holds its shape under snow load, a sloped install that lets water drain before it can freeze, and a design that keeps the water path clear of trapped debris. If your gutters already sag, are misaligned, or leak at the joints, adding a guard will not fix the underlying problem. It may be worth addressing gutter condition before investing in protection. Our Minnesota gutter maintenance calendar lays out a year-round schedule that aligns repairs and upgrades with the seasons.

    How to Match a Gutter Guard to Your Home

    There is no single best gutter guard for every Minnesota house, but a few simple questions narrow the field quickly.

    • What trees are near your home? If you have maples or oaks with heavy leaf drop, choose a guard with a solid surface and a tight opening, like micro-mesh. If pine needles are the main concern, a fine mesh is almost mandatory because needles slip through coarse screens.
    • What is your roof pitch? Steeper roofs drain fast and are easier to fit with most guard types. Low-pitch roofs put more demand on a guard’s ability to keep water moving over the curve or through the mesh.
    • How much maintenance do you want to do? Micro-mesh and well-installed reverse curve systems are nearly set-and-forget. Foam and brush guards generally need more frequent rinsing and occasional removal, which is more work than most Minnesota homeowners want in January.
    • Is your gutter system in good shape? Guards protect healthy gutters. If your gutters leak, sag, or pull away from the fascia, plan to repair or replace them first. A professional inspection can confirm whether your current system can support a guard.

    Get Your Free Inspection
    Our Rogers team will evaluate your gutters, roofline, and tree cover to recommend the right guard type for your home.

    Should You Install Gutter Guards Yourself or Hire a Pro?

    Simple screen guards are a reasonable weekend project for a handy homeowner, especially on a single-story roofline. Reverse curve systems and full gutter-mounted covers are more demanding because the slope and water flow have to be precise. A guard installed with the wrong pitch can channel water wrong and fail within a single winter.

    For most Minnesota homes, a professional install is worth considering because the fine-tuning that matters for snow performance is hard to replicate with a ladder and a cordless drill. Professionals also handle roof-edge safety, fascia repairs, and gutter alignment, which protect the investment beyond the guard itself. Whatever path you choose, our installation guide gives the step-by-step details.

    Frequently Asked Questions

    Do gutter guards work in Minnesota winters?

    Yes, when they are made of rigid materials, installed with proper slope, and matched to your debris load. Stainless steel micro-mesh and pitched reverse curve guards handle snow and ice well. Soft materials that hold water, like foam, are a weaker fit for Minnesota’s freeze-thaw cycle.

    Which gutter guard is best for heavy leaves?

    Micro-mesh and reverse curve systems are the strongest options for heavy maple and oak leaf drop. Both use a solid surface that shed leaves rather than letting them settle. Coarse screens work only if your debris is large and you accept that some finer material will pass through.

    Do gutter guards prevent ice dams?

    Gutter guards do not prevent ice dams by themselves, but a rigid guard that keeps gutters clear can reduce one contributing factor. Ice dams involve roof heat and ventilation, not just gutter blockage. A thorough roof and gutter assessment is the reliable way to address ice dam risk.

    How often do gutter guards need cleaning?

    With a well-matched micro-mesh guard, Minnesota homeowners may only need a quick inspection once or twice a year, plus a rinse after heavy leaf drop. Foam and brush guards need more frequent attention. No guard is truly zero-maintenance.

    Are gutter guards worth it for a Minnesota home?

    For homes with significant tree cover, yes. Guards reduce the frequency of dangerous ladder work, keep gutters flowing through winter, and protect the roof, siding, and foundation from water damage. The right guard type, chosen for your specific debris and climate, makes the biggest difference.

    Choose the Right Gutter Guard for Minnesota

    Choosing a gutter guard for Minnesota means weighing how each type handles maple leaves, ice, snow, and year-round upkeep. Micro-mesh is the strongest all-around pick for most Rogers-area homes. Reverse curve works well when installed with precision, and foam and brush guards are better suited to milder climates. Match the guard to your tree cover, roof pitch, and maintenance preferences, and make sure your gutters are in good condition before you invest.

    Ready to protect your gutters before the snow flies? Contact us for a free inspection, and our team in Rogers, Minnesota will help you pick the best gutter guard options for your home.

  • Window Trim Repair and Replacement Guide for Minnesota Homes

    Window Trim Repair and Replacement Guide for Minnesota Homes

    In Minnesota, a small crack or open joint around a window can expose more than the trim itself. Freeze-thaw movement, snow, hail, and driving rain test the seal between the window frame and the wall, especially on homes throughout Rogers, St. Francis, Monticello, and Cottage Grove.

    Schedule a Free Inspection for Your Window Trim

    Minnesota home exterior with freshly replaced white window trim framing energy-efficient windows

    Window trim frames the opening and helps seal the gap between the window and wall, directing moisture away from the home. Choosing whether to repair or replace window trim depends on the extent of cracking, peeling, soft wood, or rot, along with the condition of the sill and surrounding wall assembly.

    Understanding what the trim does makes it easier to spot early problems and select a durable repair. The right approach starts with the trim’s role in protecting the window opening, not simply its appearance.

    What Is Window Trim and Why Does It Matter in Minnesota?

    Window trim is the finish material that frames a window and closes the transition between the window assembly and the wall. Interior casing gives the opening a finished appearance, while exterior casing covers the gap between the window frame and the exterior wall. Together, these pieces help define the character of a home while supporting the weather barrier around each window.

    Exterior casing is more than decorative detail. Properly installed trim helps prevent water from entering the joint between the window and wall. Flashing directs water away from the opening, and the trim provides the final sealed transition. This relationship is described in window-installation references from the National Library of Medicine patent database. If casing pulls away, cracks, or loses its seal, moisture can reach sheathing and framing where damage is harder to see.

    Minnesota weather puts this part of the exterior envelope through repeated stress. Freeze-thaw cycles can open small joints as materials expand and contract. Snow, which averages about 43 inches statewide, can remain against lower trim, while hail can damage finishes and create impact points around exposed corners. These conditions make careful detailing especially important for homes in Rogers, St. Francis, Monticello, and the surrounding communities.

    Window casings are made of horizontal and vertical pieces that frame the opening around the glass and sash. Their proportions, profile, and finish influence whether a home feels traditional, modern, or understated. Interior trim can also conceal uneven transitions and create a clean visual line between the window and wall. A well-matched profile therefore supports both the home’s style and the quality of the finished work.

    When checking exterior window trim, give extra attention to corners, mitered joints, and transitions near the sill. These are often the first locations to show water entry or movement because they contain multiple seams. The casing must work with flashing and maintain a sound seal, while the sill needs enough downward slope to shed water rather than hold it against the assembly. For homeowners comparing larger window upgrades, our guide to replacement windows for Minnesota cold provides related planning context.

    Early warning signs include peeling paint, open joints, soft wood, staining, or a visible gap between the casing and wall. Addressing a small failure can help protect the surrounding envelope. Trim that has lost its moisture barrier, however, may require a closer inspection of the sill and adjacent materials. A careful assessment distinguishes a finish issue from a deeper window or wall problem before repairs begin.

    How Do You Choose the Right Window Trim Material for Minnesota?

    Minnesota exterior window trim must withstand freeze-thaw cycles, moisture, wind, and wide temperature swings without losing its seal or shape. The best material depends on the condition of the opening, the home’s design, and how much ongoing finishing and inspection the trim will require. A careful assessment in Rogers, St. Francis, Monticello, or Cottage Grove should look beyond appearance and consider how the trim will manage water over time.

    Wood Window Trim

    Wood remains a strong choice when you want a traditional appearance, detailed profiles, or a close match to existing trim on an older Minnesota home. High-quality original wood, including old-growth material, may be worth restoring when it remains sound. Wood can also be repaired and refinished rather than removed when damage is limited.

    Its performance depends on preparation and maintenance. New wood trim should be properly dried before installation, then primed or sealed on every side, including the back and cut ends. This creates a more stable moisture barrier and helps limit warping. Exposed finish surfaces still need periodic inspection for peeling paint, open joints, and moisture entry, especially around corners and the lower sill.

    Vinyl Window Trim

    Vinyl or PVC trim is naturally resistant to rot and moisture, making it useful where repeated wetting is a concern. It does not require the same recurring paint protection as wood, but installation still matters. The pieces must be fitted to accommodate movement from temperature changes. And the flashing and fasteners must be installed so sealant directs water away from the opening rather than trapping it behind the trim.

    Vinyl can provide a clean, consistent exterior appearance, though its profile and finish should be coordinated with the siding and the home’s architectural character. A material that resists rot cannot compensate for a leaking sill or poorly sealed joint.

    Composite Window Trim

    Composite trim combines a wood-like appearance with strong resistance to moisture-related deterioration. It can be a practical middle ground when the goal is durable exterior protection with less routine upkeep than traditional wood. Composite products vary, so confirm the manufacturer’s installation, fastening, expansion, and finishing requirements before work begins.

    For any material, the installation details determine much of the result. The sill should retain a downward pitch so water sheds away, and corrosion-resistant fasteners help prevent rust streaks. When trim is damaged, connect the material decision to the condition of the sill. The wall assembly, and the existing seal instead of treating the visible trim as an isolated surface.

    How Do You Decide Between Repairing and Replacing Window Trim?

    The first question is not whether the trim looks worn. It is whether the assembly can still keep water out. Sound exterior trim seals the joint between the window frame and wall, but cracked, loose, or softened material can leave the opening vulnerable to moisture. In Rogers, St. Francis, Monticello, and Cottage Grove, repeated freeze-thaw cycles can turn a small failure into broader deterioration if water remains trapped behind the trim.

    Begin with the sill, where water commonly pools. Look for soft spots, darkened wood, peeling paint, open joints, and staining below the window. Check that the sill still has a downward pitch so water sheds away from the wall rather than resting against the frame. Examine the corners and joints as well. A gap at a joint may be limited to a failed seal, or it may point to movement, hidden moisture, or decay beneath the visible surface.

    Repair is generally reasonable when the damage is localized and the surrounding material remains solid. A small split, loose section, or failed caulk joint may be addressed by removing compromised material, securing the trim, restoring the seal, and refinishing the exposed area. Small repairs can be suitable for a capable homeowner, but the repair must preserve the sill’s downward pitch and leave every joint tight against water. Covering soft material with new paint or sealant only hides the problem temporarily.

    Replacement becomes the responsible path when rot has spread through the trim or reached the sill. Rot is a primary sign that the material is no longer a moisture-tight barrier, which means nearby sheathing or other structural components may also be affected. Extensive damage is difficult to judge from the outside, particularly when flashing, siding, or the wall opening conceals the failure. In that situation, a professional assessment can determine whether the trim alone needs replacement or whether the surrounding moisture barrier also requires attention. Referred Restoration provides professional window repair in Rogers with an inspection-led approach suited to this decision.

    Do not choose replacement solely because the finish is faded, and do not choose repair solely because the damage appears small. Compare the condition of the sill, joints, fasteners, and material behind the visible trim. A careful inspection protects the window opening and helps ensure the selected work addresses the source of the moisture, not just the symptom.

    How Do You Seal and Protect Window Trim Against Minnesota Weather?

    Minnesota’s freeze-thaw cycles put repeated stress on the joints around a window. Water can enter through a hairline gap, freeze, expand, and widen the opening before warmer, humid conditions add another source of moisture. Routine exterior envelope care helps keep window trim from becoming the first weak point around an otherwise sound window assembly.

    Sealing and Caulking

    Inspect the joint where the trim meets the wall, especially at the upper corners, side seams, and lower sill area. A compatible, high-quality exterior caulk at an intact joint helps limit both air infiltration and water entry. The sealant should bond to clean, dry surfaces and remain flexible as the surrounding materials expand and contract. Caulk is not a substitute for replacing trim that is soft, swollen, or pulling away from the wall. Those conditions can indicate moisture behind the visible joint.

    Pay attention to the sill’s downward pitch as well. The sill should shed water away from the window rather than creating a pocket where water can sit against the trim. Homeowners in Rogers, St. Francis, and Monticello can also use diagnosing drafty windows as a starting point when a room feels cold near the opening, though an air leak and a water-management problem may require different repairs.

    Fasteners and Finish Maintenance

    When trim needs to be secured or replaced, corrosion-resistant stainless steel fasteners help prevent rust streaks and preserve the connection over time. Fasteners should be appropriate for exterior use and installed without damaging the surrounding material. A poor fastening pattern can leave movement at the joints, allowing the seal to fail during repeated temperature changes.

    Wood trim also needs a continuous, weather-resistant finish. Prime or seal every side, including the back and cut ends, before installation when the product and manufacturer instructions call for it. Apply the specified paint or stain system to all exposed surfaces, following the manufacturer’s preparation and recoating guidance. A sound finish limits moisture absorption and helps reduce swelling, splitting, and paint failure. Vinyl and composite products still need their joints, edges, and transitions inspected because a durable material does not correct a failed seal.

    Ventilation and Moisture Control

    Keep air moving around interior window areas to reduce condensation. Blocked registers, heavy coverings pressed against the glass, and trapped humid air can leave moisture on the assembly, which may degrade wood trim from the inside. If condensation returns, look beyond the trim and address the room’s airflow and humidity. Seasonal checks after winter and after periods of heavy summer humidity can reveal small failures before they spread into the wall assembly.

    Wood vs. Vinyl vs. Composite Window Trim: A Head-to-Head Look

    The best exterior trim material balances appearance with the demands of Minnesota weather. Wood, vinyl or PVC, and composite can all produce a clean window surround, but they respond differently to moisture, maintenance, and repeated temperature changes. The comparison below focuses on the conditions that matter around homes in Rogers, St. Francis, Monticello, Cottage Grove, and nearby communities.

    Window trim material comparison
    MaterialWeather and moisture resistanceMaintenance levelFinish and lookDurability in Minnesota freeze-thaw
    WoodCan perform well when every exposed surface is properly primed, sealed, and protected. Unchecked moisture can contribute to swelling or rot.Highest. Painted or stained surfaces need regular inspection and timely attention at joints, end grain, and damaged areas.Offers natural grain and flexible profiles. Paint creates a more uniform appearance, while stain highlights the wood’s traditional character.Can expand and contract with temperature changes, so installation, sealing, and finish quality are especially important during repeated freeze-thaw cycles.
    Vinyl or PVCRot-resistant and well suited to damp locations. It does not absorb moisture like wood, but joints and fastener points still require careful detailing.Low. Its resistance to rot and moisture can reduce routine upkeep, although gaps, movement, and sealant should still be checked.Provides a consistent manufactured finish and works well for straightforward contemporary trim designs.Handles moisture exposure well, but the installation must allow for movement as temperatures shift from deep winter cold to summer heat.
    CompositeRot-resistant and designed for demanding exterior conditions. Its performance depends on sound water management behind and around the trim.Low to moderate. A properly applied weather-resistant finish helps protect exposed surfaces and preserve the trim’s appearance.Can provide a painted, uniform look while supporting profiles that resemble traditional exterior detailing.Its resistance to moisture and warping makes it a practical option where snow, ice, and freeze-thaw movement place sustained stress on exterior assemblies.

    Material selection should follow the home’s actual exposure, not a one-size-fits-all rule. A window on a windward wall in Rogers or along an open lot near Monticello may receive more snow and driving moisture than a protected elevation. Hail damage, persistent shade, and water collecting at a sill can also change the repair decision. Exterior trim materials such as PVC and composite are commonly chosen for their rot and moisture resistance. Wood may remain appropriate when its character suits an older home and its finish can be maintained. In every case, the finish system matters: high-quality paint or stain applied to exposed surfaces according to the manufacturer’s recommendations supports longer-lasting protection.

    What Should You Know Before Starting a Window Trim Project in Minnesota?

    A window trim project is more than a finish update. Exterior casing helps close the gap between the window frame and wall, while properly aligned trim supports a tight seal against Minnesota moisture and wind. Before work begins on a Rogers home, a property along the St. Francis to Monticello corridor, or a Cottage Grove residence, identify whether the trim problem is cosmetic, moisture-related, or connected to the window assembly itself.

    Lead-paint considerations for older homes

    Age matters when painted surfaces will be disturbed. The Environmental Protection Agency explains that exterior repair or maintenance disturbing less than 20 square feet of painted surface may fall within minor repair and maintenance guidance. It also notes that removing a sash by releasing hinges or a jambliner may disturb less than six square feet when only paint on the hardware and screws is affected. These thresholds do not replace a project-specific assessment, especially when casing, sill, surrounding walls, or larger painted areas are involved. Review the EPA guidance on window repairs and lead-paint rules before work begins on an older Minnesota home.

    Inspection essentials before installation

    A careful assessment should trace the visible trim problem back to its source. Check the sill for a downward pitch that sheds water and for gaps at corners and joints. Examine the nearby siding and wall surfaces for signs of recurring moisture as well. If the sill or framing has deteriorated, replacing the trim alone may leave the underlying issue unresolved. Homeowners who want a broader evaluation can review our page about professional window repair in Rogers.

    During installation, the window and surrounding trim need to be plumb and level so each piece fits tightly without compromising the seal. Wood trim should be primed or sealed on every side, including the back, before it is installed. A local contractor can assess the existing assembly, explain which areas require repair, and recommend a practical path that protects the home without disturbing sound original materials.

    Get Your Free Inspection for Window Trim Today

    Frequently Asked Questions

    When should you repair or replace window trim?

    Repair may be appropriate when damage is limited to a small area and the surrounding trim remains solid, dry, and securely attached. Replacement is generally more dependable when rot, swelling, separation, or repeated moisture damage extends along the casing, sill, or adjacent wall area. An inspection can determine whether the visible damage is cosmetic or part of a larger moisture problem.

    How can you identify rot in exterior window trim?

    Look for soft or crumbly wood, peeling paint, dark staining, swollen joints, gaps in the caulk, and trim that feels spongy when gently pressed. Moisture often collects at the sill and lower corners, so those areas deserve close attention. Rot can continue behind finished surfaces even when the visible damage appears small.

    Can window trim be repaired without replacing the whole window frame?

    Often, yes. If the damage is confined to the exterior casing, sill, or a small trim section. The affected material may be repaired or replaced without removing the complete window unit. The repair should also address flashing, fasteners, and sealant so water is directed away from the opening.

    What materials work well for exterior trim in Minnesota?

    Wood offers a traditional appearance and can suit older Minnesota homes, but it requires careful sealing and ongoing maintenance. Vinyl, PVC, and composite options can provide better resistance to rot and moisture. The right choice depends on the home’s existing materials, exposure to freeze-thaw conditions, desired appearance, and how the trim connects to the wall and window.

    Does damaged window trim affect energy efficiency?

    It can. Open joints, failed caulk, and gaps around the casing may allow air and water infiltration, creating drafts and exposing surrounding materials to moisture. Properly repaired trim, sound flashing, and continuous exterior sealing help protect the opening. If drafts remain, the window unit and adjacent wall should be evaluated as well.

    Schedule a Free Inspection for Your Window Trim

    A careful inspection can help identify moisture damage, gaps, or failing trim before a small exterior issue affects surrounding materials. Referred Restoration provides straightforward guidance for Minnesota homes, including properties in Rogers, St. Francis, Monticello, and Cottage Grove. When you are ready to review your window trim, Schedule a Free Inspection with the team.

  • Window Energy Efficiency Ratings Minnesota Guide

    Window Energy Efficiency Ratings Minnesota Guide

    When a Rogers home feels cold near the windows, the glass is only part of the story. Minnesota’s winter conditions make the numbers on the NFRC label useful decision tools, especially for homes along the Highway 101 corridor. Drafts, wind, and heavy snowfall can expose weak points in an aging window assembly.

    Get Your Free Inspection

    Bright double-pane window letting winter sunlight into a Minnesota home

    For window energy efficiency ratings Minnesota homeowners should focus first on a low U-factor, which indicates stronger resistance to heat loss. Then compare air leakage for a tighter seal, SHGC for sunlight-related heat, and VT for natural light. Together, these ratings show how a window may perform through a Rogers-area winter rather than relying on appearance alone.

    The U-factor often deserves the most attention in extreme cold, but the other ratings help explain comfort, daylight, and summer performance. Understanding what each measure tells you makes it easier to compare replacement options for your home and move into a closer look at the complete window label.

    What Window Energy Efficiency Ratings Matter for Minnesota Homeowners?

    What do the numbers on a window label actually mean for a home in Rogers, Minnesota? The National Fenestration Rating Council (NFRC) label is designed to make that comparison clearer. Instead of relying on a sales description, you can look at four measurements that describe how a window handles heat, sunlight, daylight, and outside air. That matters in metro-west Minnesota, where homes along Highway 101 and the Rogers-to-St. Francis-to-Monticello corridor experience cold, wind, and substantial snowfall.

    U-factor measures insulation. It indicates how readily heat passes through the window assembly. A lower U-factor means better resistance to heat loss, which is especially important when a Rogers home is being heated through a long cold-weather stretch. The U-factor explanation from the National Fenestration Rating Council confirms that lower values represent more energy-efficient windows. Think of this number as the label’s primary indicator of how well the glass and frame help hold indoor warmth.

    Solar Heat Gain Coefficient, or SHGC, measures sunlight-driven heat. This number ranges from 0 to 1. A lower SHGC blocks more heat from sunlight, which can help limit overheating during bright summer afternoons. However, the best choice depends on the home’s orientation, shading, and comfort goals. A south-facing room in Elk River may need a different balance than a shaded room in St. Francis.

    Visible transmittance, or VT, measures daylight. It also ranges from 0 to 1, but higher values mean more natural light passes through the glazing. Air leakage measures tightness. A lower air-leakage rating means less air passes through joints and gaps in the window assembly. If you feel drafts near a frame, diagnosing drafts and air leakage before deciding whether repair or replacement is the appropriate next step can save time and money. Together, these ratings show why window selection should consider insulation, solar exposure, daylight, and installation quality rather than one number alone.

    U-Factor: The Number That Defines a Cold-Climate Window

    U-factor measures how readily heat moves through a window assembly. A lower U-factor means stronger insulation and less heat loss through the glass during winter. For homeowners along the Rogers, Elk River, and Monticello corridor, that distinction matters when extended subzero stretches and wind-driven cold off open fields put steady pressure on the home’s heating system. The region also receives about 43 inches of snow annually, so window performance should be evaluated as part of the home’s full weather protection. The NFRC consumer guide explains that the lower the U-factor, the more energy-efficient the window. Read the full guide to window ratings for the technical definition.

    What U-Factor Should Minnesota Homes Target?

    For many Minnesota homes, a practical target is a U-factor of 0.30 or less. Homeowners seeking superior cold-weather efficiency should look for 0.25 or less, provided the complete window design and installation suit the opening. These numbers are not a substitute for reviewing the entire NFRC label. But they give you a useful starting point when comparing replacement windows for a home near Highway 101, St. Francis, or western Rogers.

    U-factor should also be considered alongside the window’s frame, glazing, and installation details. A strong rating on the product label can lose practical value if the unit is poorly fitted or the surrounding opening allows drafts. Ask for the rating of the complete window, not just the center of the glass. The National Fenestration Rating Council label standardizes these measurements, giving homeowners a consistent way to compare products from different manufacturers. That makes the ratings Minnesota homeowners review more meaningful than a broad claim about insulating glass alone.

    Why Older Windows Fall Short

    Older windows often have noticeably higher U-factors than current cold-climate products. One industry estimate places typical windows that are eight or more years old in the 0.32 to 0.35 range. That difference can show up as colder interior glass, uneven rooms, and more heat escaping around aging assemblies during a Rogers winter. It does not mean age alone proves replacement is necessary. Frame condition, seal failure, operation, and installation quality all deserve an inspection.

    When comparing options, focus on the U-factor that addresses your home’s actual exposure and comfort problems. A careful assessment can distinguish heat loss through the glass from drafts around the frame, helping you choose a durable window system rather than relying on a single number.

    SHGC, VT, and Air Leakage: Reading the Rest of the Window Label

    Once you understand U-factor, the rest of the NFRC label helps you match a window to your home. The label is not a marketing score. It is a standardized comparison tool that lets homeowners review the same performance categories across different window products. The NFRC consumer guide explains how to read these window ratings and compare a window’s energy properties.

    SHGC, or Solar Heat Gain Coefficient, is expressed on a scale from 0 to 1. It describes how much heat from sunlight passes through the glass. A lower SHGC blocks more solar heat, which can help a room stay more comfortable when strong summer sun enters through a west-facing window. That detail matters in Minnesota homes along the Highway 101 corridor, where a bright western exposure can create afternoon heat even when the rest of the house feels comfortable. The right SHGC is not automatically the lowest available value. It should fit the window’s direction, shading, and the room’s comfort needs.

    VT, or Visible Transmittance, also ranges from 0 to 1. A higher VT allows more natural light through the glazing. That can be useful in a dark north-side room in a Rogers or Monticello home, especially during Minnesota’s shorter winter days. More daylight can also mean more glare, however, so a very high VT may not be the best choice for a room with an unobstructed view of bright snow or a frequently used screen. The NFRC consumer guide recommends weighing daylighting goals against glare reduction when comparing VT values.

    Air leakage measures how much air passes through joints in the window assembly. Here, lower is better because it indicates a tighter assembly with less air moving through cracks around the frame. In Minnesota, that performance matters year-round. Wind-driven cold along the Rogers-to-St. Francis corridor can expose weak seals, while summer humidity can make poorly sealed rooms feel uncomfortable. The rating describes the product, but installation also matters. A well-rated window can still allow drafts if it is not fitted and sealed correctly. If you are trying to diagnose drafts and air leakage, compare the NFRC air-leakage rating with what you observe around the frame, sash, and surrounding trim.

    Read SHGC, VT, and air leakage together rather than selecting a window from one number alone. A west-facing room may benefit from stronger solar control, a dark north-facing room may need more visible light, and every Minnesota room benefits from a properly sealed installation.

    Double-Pane vs. Triple-Pane Windows for Minnesota Winters

    Both double-pane and triple-pane windows can improve comfort in a Rogers home, but they are not interchangeable choices. A double-pane unit has two layers of glass separated by an insulating space, commonly filled with argon. A triple-pane unit adds a third layer and a second insulating space, creating another barrier between the heated room and a Minnesota winter. That additional glazing can support stronger cold-weather performance, although the complete window assembly matters more than pane count alone.

    When comparing NFRC ratings, focus first on U-factor, where a lower number indicates better insulation. Industry guidance commonly places a suitable Minnesota target around 0.30 or lower, with 0.25 or lower described as superior performance. These figures are benchmarks rather than guarantees for every opening. Triple-pane products typically reach lower U-factors than comparable double-pane products. Framing material also affects the result: ENERGY STAR notes that fiberglass frames provide good insulation and durability, while professional installation helps prevent air leakage around the assembly.

    Double-pane and triple-pane window considerations for Minnesota homes
    ConsiderationDouble-paneTriple-pane
    ConstructionTwo glass panes with one insulating space and commonly one gas fill.Three glass panes with two insulating spaces and commonly two gas fills.
    U-factor performanceCan meet efficient cold-climate targets when the glass, frame, and installation are well specified.Typically reaches lower U-factors than comparable double-pane units. Some guidance cites 0.30 or lower as an appropriate target and 0.25 or lower for superior performance.
    Winter comfortInterior glass may feel colder near the opening during severe cold.Warmer interior glass can improve comfort near the window and reduce the cold-radiation sensation.
    Weight and fitLighter and often easier to accommodate in existing openings.Heavier, so the frame, sash, and opening should be evaluated. Fiberglass framing can provide a strong, insulating option.
    Best fitA practical choice when balanced performance and a lighter assembly suit the home.A strong fit when maximum winter insulation and room-side comfort are the priority.

    Seal condition deserves attention in either design. Persistent condensation between panes can indicate foggy windows from failed seals, which changes how the unit performs regardless of whether it began as double-pane or triple-pane. For homes along Highway 101 or the Rogers-to-Monticello corridor, the right decision should account for the opening’s size, frame condition, and installation details rather than relying on pane count alone.

    Low-E Coatings and Gas Fills: How Glazing Technology Changes the Ratings

    The glass package inside a window has a direct effect on how well it resists heat transfer. That matters in Rogers and across the Highway 101 corridor, where a window must help hold indoor heat through cold, windy weather without making the home feel closed off from natural daylight. Low-E coatings and insulated gas fills work together, but they influence the window’s performance in different ways.

    Low-E Coatings

    Low-E means low emissivity. The coating is a thin, nearly invisible layer applied to the glass that limits radiant heat transfer. In winter, the right Low-E configuration helps reflect indoor heat back toward the living space instead of allowing it to pass through the glazing. Manufacturers can tune the coating for a colder climate, solar exposure, and the balance between heat retention and daylight.

    That tuning is important because a window is not judged by one feature in isolation. The Low-E selection affects the unit’s U-factor and solar heat gain characteristics, while visible transmittance helps determine how much daylight enters the room. A south-facing room in a Rogers home may call for a different balance than a shaded elevation or a room exposed to winter wind moving through the St. Francis and Monticello corridor. The NFRC consumer guide to window ratings explains how these measurements work together.

    Gas Fills

    In a double- or triple-pane window, the space between panes can be filled with an insulating gas rather than ordinary air. Argon and krypton slow heat movement through those cavities, helping lower the overall U-factor. The result depends on the complete assembly, including the number of panes, spacer design, frame material, and seal quality. A gas fill should be evaluated from the NFRC label rather than treated as a standalone guarantee.

    Frame material also contributes to the final performance. ENERGY STAR guidance identifies fiberglass frames as durable and well insulated, which can support a lower overall window U-factor when paired with appropriate glazing. Reliable installation matters as well, because gaps around even highly rated windows can allow air leakage.

    Home energy guidance reports that replacing old windows with ENERGY STAR certified products can reduce a home’s utility bills by an average of 13%, though the result varies by house and installation. For a Minnesota homeowner, the practical question is whether the full window assembly is suited to the home’s exposure, existing condition, and comfort goals, not whether one label feature sounds impressive.

    ENERGY STAR Ratings and Minnesota’s Climate Requirements

    ENERGY STAR certification gives Minnesota homeowners a useful starting point when comparing window performance. ENERGY STAR-certified windows are independently tested, certified, and verified by the National Fenestration Rating Council (NFRC). They must also meet strict efficiency guidelines established by the U.S. Environmental Protection Agency (EPA), rather than relying only on a manufacturer’s marketing claims. ENERGY STAR’s product criteria explain how those independent ratings support a more consistent comparison.

    For homes in Rogers, Elk River, St. Francis, and the corridor toward Monticello, the cold-climate requirements deserve particular attention. Minnesota winters place sustained demand on a window’s insulating performance, so a low U-factor is central to the ENERGY STAR criteria for the Northern Climate Zone. The published threshold is a U-factor of 0.22 or less, paired with a solar heat gain coefficient (SHGC) of 0.17 or greater for qualifying windows in the referenced criteria. A lower U-factor indicates better resistance to heat transfer, while the SHGC requirement recognizes that some solar warmth can be useful in a northern climate.

    These figures should be read from the NFRC label for the specific window, not assumed from the product line or glass package alone. Frame material, glazing configuration, size, and installation all affect how the finished assembly performs. A certified window can still underperform if it is poorly fitted or sealed, allowing drafts around the opening. That is especially relevant for homes exposed to wind-driven cold along Highway 101 or across open metro-west neighborhoods.

    Some Minnesota utility programs also use ENERGY STAR certification or equivalent energy-rating thresholds when determining whether a home qualifies for an efficiency rebate. Requirements can vary by utility and program, so homeowners should confirm current eligibility before selecting a product. For broader guidance on matching ratings to local weather, see our guide to choosing replacement windows for Minnesota’s weather. A window assessment can then connect the label values to the home’s orientation, existing drafts, and winter comfort needs.

    Putting Window Ratings to Work for a Rogers, Minnesota Home

    A window label gives you a useful starting point, but the right selection depends on how the entire opening performs in your home. Along the Rogers-to-Elk River-St. Francis-Monticello corridor, a window must handle wind-driven cold, heavy snow, and extended subzero stretches. A model with strong efficiency ratings can still leave a room uncomfortable if the opening is poorly prepared or the frame is not sealed correctly.

    Start by comparing the NFRC label for each model under consideration. Give particular attention to U-factor for winter insulation, then review air leakage, visible transmittance, and solar heat gain based on the room’s orientation and use. Rogers homes near Highway 101 may have very different exposure and wind conditions from a more sheltered Metro West suburb, so a rating should support a site-specific recommendation rather than replace one.

    Questions to Ask Before You Replace Windows

    Ask what U-factor the exact model carries, not just the series name, and whether it is ENERGY STAR certified for the Northern Climate zone. Confirm how the installer will inspect the rough opening, manage flashing, and seal the space around the frame. A low air-leakage rating describes the factory-built assembly, but real-world air leakage also depends on the seal around the frame. Lower air leakage means less air passes through cracks in the window assembly, which is why installation quality matters as much as the printed rating: review the NFRC consumer guide to window ratings.

    Also ask how the proposed glazing fits the room. A south-facing space may need a different solar heat gain approach than a shaded north-facing room, while bedrooms and living areas may call for different daylight and ventilation priorities. With roughly 43 inches of annual snowfall and long cold periods, the goal is not simply to choose the lowest number. It is to match the product, opening, and installation details so the home stays more comfortable through winter and uses energy more efficiently.

    A free inspection can help identify whether discomfort comes from failed glazing, worn seals, or the surrounding opening before you commit to a replacement plan. Referred Restoration can assess the current condition and explain which ratings and installation details make sense for your Rogers-area home.

    Frequently Asked Questions

    What window energy efficiency ratings are best for Minnesota’s climate?

    For Minnesota homes, prioritize a low U-factor, a low air leakage rating, and a window assembly suited to cold-weather exposure. ENERGY STAR’s Northern Climate criteria use a U-factor of 0.22 or less and an SHGC of 0.17 or greater for qualifying windows. Although the best specification can vary by orientation, shading, and the home’s heating needs. ENERGY STAR’s product criteria provide a useful comparison point.

    What is the recommended U-factor for windows in Minnesota?

    A U-factor of 0.30 or less is commonly cited as an appropriate Minnesota target, while 0.25 or less represents a stronger cold-climate choice. The key rule is simple: lower U-factor means better insulation and less heat transfer through the glass. Compare the whole-window U-factor on the NFRC label, not only the center-of-glass value. The NFRC consumer guide explains U-factor ratings.

    Why is a low U-factor important during Minnesota winters?

    Rogers, Elk River, and the St. Francis-to-Monticello corridor experience prolonged heating demands and wind-driven cold. A lower U-factor slows heat loss through the window, which can improve comfort near the glass and reduce the energy required to maintain indoor temperatures. It is especially important when replacing older, poorly insulated units.

    How does SHGC impact window efficiency in Minnesota?

    SHGC measures how much solar heat enters through a window on a scale from 0 to 1. A lower SHGC blocks more sunlight heat, while a higher SHGC admits more passive solar warmth. South-facing windows may benefit from a different balance than shaded or east- and west-facing windows, so orientation matters instead of applying one number to every opening. The NFRC consumer guide defines SHGC and its range.

    What is the role of air leakage in window performance?

    Air leakage measures how much air passes through joints in the window assembly, and a lower rating indicates a tighter unit. Installation matters just as much as the label: gaps around a properly rated window can still create drafts. Ask how the installer will seal the opening and connect the replacement unit to the existing wall assembly.

    Schedule a Free Window Assessment

    Clear ratings make it easier to compare window options for a Minnesota home and identify where insulation, glazing, or installation details may matter most. Referred Restoration can review your current windows and discuss practical next steps for your home. Schedule a free window assessment to get started with a tailored conversation about improving comfort through Rogers-area winters.

  • James Hardie vs LP SmartSide Minnesota: Honest Comparison

    James Hardie vs LP SmartSide Minnesota: Honest Comparison

    Choosing siding in Minnesota means looking beyond the sample color. A home in Rogers, Otsego, or St. Francis has to handle deep winter cold, freeze-thaw movement, driving rain, and roughly 43 inches of annual snowfall. The right comparison starts with how each material responds to those demands, then considers installation, maintenance, impact resistance, and the look you want.

    Schedule a Free Inspection

    Two exterior installers fitting a fiber cement siding panel on a two-story Minnesota home with cedar and gray lap siding

    James Hardie vs LP SmartSide Minnesota is not an automatic winner-take-all decision. Fiber cement offers a rigid, substantial exterior with strong resistance to rot, termites, and fire. While engineered wood offers a lighter, more flexible siding option that can absorb impact and accommodate some movement. Both can perform well in Minnesota when the material and installation approach fit the home.

    Understanding what sits inside each panel makes the rest of the comparison easier. The materials themselves set different expectations for durability, handling, and performance through Minnesota weather.

    James Hardie vs LP SmartSide in Minnesota: What Each Siding Is Made Of

    The materials look similar from the curb, but they behave differently because their cores are different. James Hardie siding is a fiber cement siding product made from cement, sand, and cellulose fibers. LP SmartSide is an engineered wood siding product formed from wood strands, resin binders, and wax. Those underlying ingredients influence how each material handles movement, impact, installation, and the visual character of a Minnesota home.

    How James Hardie and LP SmartSide siding materials compare
    CharacteristicJames Hardie fiber cementLP SmartSide engineered wood
    Base ingredientsCement, sand, and cellulose fibers form a dense composite material.Wood strands are combined with resin binders and wax for a stable engineered panel or board.
    TreatmentThe cement-based composition is inherently resistant to rot, termites, and fire.Zinc borate treatment helps defend the wood strands against termites and fungal decay.
    Rigidity and movementIts rigid structure gives the siding a substantial feel, but significant settling or structural movement can lead to cracking.Its engineered wood structure has more flexibility, allowing it to accommodate some building movement with less tendency to crack.
    Typical lookA thicker profile and realistic wood-grain texture create a substantial, traditional exterior appearance.Cedar-grain and smooth textures provide design flexibility, while tight-fitting boards can reduce the visibility of joints.
    Weight and installationThe denser material is approximately 2.3 pounds per square foot in the cited comparison, so careful handling, moisture management, and installation details matter.The lighter material is approximately 1.0 pound per square foot in the cited comparison, which can make handling and installation easier.

    Neither composition is automatically the right answer for every property. Fiber cement’s density and rigidity can suit homeowners who want a pronounced, substantial exterior profile and a non-combustible material. Engineered wood’s lighter, more flexible construction can suit a home where impact absorption, easier handling, or reduced joint visibility carries more weight. Both materials still depend on correct flashing, moisture barriers, clearances, and fastening. The installation system is part of the siding decision, not an afterthought.

    For homeowners in Rogers, Otsego, and Maple Grove, the honest tradeoff is straightforward: denser fiber cement offers a rigid. Substantial surface, while engineered wood uses flexible wood strands that can better accommodate some movement. A property-specific inspection can account for the home’s existing cladding, wall details, exposure, and preferred appearance before recommending James Hardie or LP SmartSide.

    Freeze-Thaw Performance: How These Siding Materials Hold Up in Minnesota Winters

    Minnesota siding has to manage more than cold air. In Rogers, an average January low of 3 degrees Fahrenheit can give way to summer highs near 83 degrees. With about 43 inches of snow and 32 inches of precipitation each year. Those repeated shifts matter because water can enter small gaps, freeze, expand, and then retreat as temperatures rise. Over time, that movement can stress boards, seams, fasteners, and the wall assembly behind the siding.

    For a closer look at the climate considerations behind fiber cement siding in Minnesota, it helps to separate the material from the installation. Both James Hardie fiber cement and LP SmartSide engineered wood can perform well in Minnesota when installed according to the applicable manufacturer requirements. Neither material can compensate for poor drainage, missing flashing, or moisture trapped behind the cladding.

    Why freeze-thaw cycles create siding problems

    Snow and wind-driven rain can place moisture at joints, corners, window openings, and transitions between siding and other exterior materials. If the wall system does not provide a reliable drainage path and adequate ventilation, that moisture may remain against the back of the siding. Repeated freezing and thawing can accelerate deterioration, especially where an opening was cut incorrectly or a joint was left exposed.

    Fiber cement is rigid, which gives it a substantial feel and helps it resist everyday surface damage. But rigidity also means it has less tolerance for movement in the structure below. Significant settling or shifting can contribute to cracking. LP SmartSide has more flexibility and can accommodate some building movement with less risk of cracking, but its wood-based composition still makes moisture management and protected edges important. The practical question is not which material ignores Minnesota weather. It is whether the selected system and installation details suit the home’s exposure.

    Installation and ventilation matter in every community

    On homes along the Rogers-to-St. Francis-to-Monticello corridor, installers may encounter different rooflines, additions, porch connections, and wall exposures from one property to the next. A home in Otsego may need careful attention around snow-shedding roof sections, while an Elk River property may have vulnerable transitions around older windows or prior siding repairs. In each case, correct overlaps, flashing, clearances, weather-resistive barriers, and a ventilated drainage plane help keep water from becoming a freeze-thaw problem.

    That same discipline applies to both materials. Fiber cement generally requires careful handling and specialized fastening because its density and rigidity affect how boards are cut and secured. LP SmartSide is lighter and more flexible, but it still needs properly sealed cuts, protected penetrations, and installation that keeps water moving away from the wall. A thorough inspection can identify whether the existing assembly is prepared for either option, rather than treating the siding choice as a stand-alone product decision.

    For homeowners comparing the two materials, James Hardie may suit a property where a rigid, substantial exterior and strong moisture detailing are priorities. LP SmartSide may suit a home where flexibility, lighter handling, and a wood-based appearance are more important. In Rogers and nearby Minnesota communities, the better result comes from matching those priorities with sound ventilation and installation details.

    Hail and Impact Resistance: Fiber Cement vs Engineered Wood After a Minnesota Storm

    Minnesota ranks third nationally for hail events, so impact resistance deserves more attention than a materials brochure usually gives it. A storm moving across Maple Grove, Plymouth, Ramsey, or Dayton can leave siding with a very different kind of damage than ordinary wind-driven rain. The right comparison is not simply which product is strongest. It is how each material responds when hail, flying debris, or a hard object strikes the wall.

    Fiber cement is the harder surface. That hardness helps it resist dents and small surface impacts, preserving a crisp profile after ordinary exposure. The tradeoff is brittleness. A sufficiently hard hit can crack a rigid fiber-cement board. Especially if the underlying wall has movement or the panel was not installed with the required clearances and support. A crack is more than a cosmetic mark because it can expose the surrounding assembly to moisture.

    Engineered wood siding takes a different approach. LP SmartSide is softer than fiber cement, but its layered wood-strand construction can flex slightly under hail impact instead of cracking immediately. That impact absorption is a meaningful advantage when a storm sends repeated hits across a broad elevation. The visible result may be a dent or compression mark rather than a fracture, so the siding still needs a careful inspection after a major storm. Flexibility also helps the material accommodate modest movement in the wall without the same crack pattern associated with a more rigid board.

    Homeowners along the Rogers-to-St. Francis-to-Monticello corridor may see both damage patterns after the same storm. A Hardie panel can remain free of dents where a SmartSide panel shows a shallow impression. While an unusually forceful impact can crack the Hardie and leave the SmartSide intact but marked. Neither outcome supports an absolute winner. The better fit depends on whether the priority is maximum dent resistance or greater impact absorption, along with the home’s exposure, wall condition, and installation details.

    For a closer look at the engineered-wood side of the comparison, see the LP SmartSide siding guide. After hail in Rogers, Maple Grove, Plymouth, Ramsey, or Dayton, inspect more than the most visible wall. Check corners, trim, lower courses, and areas beneath roof edges, then document damage before making repairs. Referred Restoration can assess whether the marks are dents, cracks. Or surface-only damage and help you choose between James Hardie and LP SmartSide based on the home’s actual conditions.

    Rot, Fire, and Long-Term Maintenance: Which Siding Lasts Longer in Minnesota

    Rot and fire resistance are meaningful differences when you are choosing siding for a Minnesota home. Fiber cement, including James Hardie, is non-combustible and resists rot and termites. Its cement, sand, and cellulose composition does not provide the same food source for biological decay as wood-based products. That can be especially reassuring for homes in Cottage Grove or Lakeville where shaded elevations, wet landscaping, and limited sun can keep siding damp after rain or snow.

    LP SmartSide takes a different approach. Its engineered wood strands are treated with zinc borate to help resist termites and fungal decay. The treatment improves the material’s resistance, but it does not make engineered wood non-combustible. LP SmartSide is treated for fire resistance while remaining a combustible siding material. Fiber cement is also non-combustible, a distinction documented in material research from PubChem. Neither material eliminates the need for sound wall assembly, flashing, and installation that manages moisture.

    For a home near mature trees in Cottage Grove, resistance to biological decay may carry more weight. For a property in Lakeville where exterior fire performance is a central concern, fiber cement’s non-combustible classification may make the decision more straightforward. These are material characteristics, not an absolute verdict for every house. Wall design, exposure, existing damage, and installation quality still influence how a siding system performs.

    Maintenance is another point where the two materials feel different over time. Fiber cement creates a durable base, but its finish may eventually need repainting. That paint lifecycle should be part of the ownership plan, particularly on south- and west-facing walls that receive stronger ultraviolet exposure. LP SmartSide factory finishes are designed to resist fading and chalking, which can reduce finish-related maintenance for many homeowners. However, the finish remains part of the protection system, so damaged areas should not be ignored.

    Both options are lower-maintenance than traditional wood siding when correctly installed, but neither is maintenance-free. Regular cleaning, prompt inspection of caulk and joints, and attention to paint or finish condition help maximize service life. In Rogers, Cottage Grove, Lakeville, and other Minnesota communities, an inspection should also look for moisture paths around windows, doors, roof lines, and lower wall edges. Referred Restoration can compare both materials against the home’s exposure and recommend the system that fits the owner’s priorities rather than treating one product as the universal answer.

    Appearance and Curb Appeal: Choosing the Look That Fits Your Minnesota Home

    Siding affects more than weather protection. It establishes the visual scale, texture, and character of your home’s exterior, so the best choice should work with the architecture rather than follow a material trend. For a farmhouse, colonial, or traditional Minnesota home in Rogers, St. Michael, or Albertville, both James Hardie and LP SmartSide can deliver a convincing wood-style appearance. The decision comes down to how you want the grain, profile, and board transitions to read from the street.

    James Hardie fiber cement is known for a realistic wood grain that gives lap siding a substantial, authentic appearance. Its generally thicker profile can make the courses look more dimensional, especially on larger two-story homes or exteriors with wide gables. That visual weight often suits traditional designs, where pronounced shadow lines and a more formal facade support the home’s existing proportions. It can also pair well with contrasting trim around windows, doors, and rooflines.

    LP SmartSide offers cedar-grain textures as well as smooth options, giving homeowners more flexibility when the design calls for either visible texture or a cleaner surface. Its engineered construction can minimize the appearance of joints between boards, creating a more continuous field across the wall. That quality may be especially appealing on modern or minimal ramblers, where uninterrupted lines and restrained detail matter more than a heavy, deeply layered profile.

    Let the home’s proportions guide the texture

    Newer developments around Rogers, St. Michael, and Albertville often include simple roof forms, broad front elevations, and compact ramblers. A smooth SmartSide finish can reinforce that streamlined look, while cedar grain can add warmth without making the facade feel busy. Older or more traditional homes along the Rogers-to-St. Francis corridor may benefit from the deeper visual texture and thicker presence of fiber cement, though either product can be designed to fit the setting.

    Color, trim width, exposure, and the relationship between siding and stone or brick can change the result as much as the siding material itself. A homeowner in Otsego or Monticello may prefer Hardie’s pronounced grain and profile for a classic exterior. While a homeowner in Maple Grove or Plymouth may prefer SmartSide’s smoother texture and less visible joints for a simpler elevation. Neither material is automatically the better-looking choice. The right recommendation follows the home’s architecture, surrounding streetscape, and the level of texture you want to see when you pull into the driveway.

    Frequently Asked Questions

    Is James Hardie siding better than LP SmartSide?

    Neither material is automatically better for every Minnesota home. James Hardie fiber cement is a strong fit when you prioritize a rigid, non-combustible exterior with resistance to rot and termites. LP SmartSide engineered wood is lighter and more flexible, which can help it absorb impact and accommodate limited movement. The installation details, wall moisture management, exposure, and the home’s design should guide the recommendation.

    What are the disadvantages of LP SmartSide?

    LP SmartSide is wood-based, so it remains combustible and depends on correct sealing, flashing, clearances, and ongoing surface maintenance. It can also be more vulnerable to damage when moisture reaches unprotected edges or joints. Those concerns do not make it a poor choice, but they make installation quality and routine inspection especially important in areas such as Rogers, St. Francis, and Monticello.

    Is LP SmartSide better than fiber cement?

    LP SmartSide may be the better match when a homeowner wants a lighter siding material, a wood appearance, and more flexibility during hail or minor building movement. Fiber cement may be the better match when fire resistance, a substantial profile, and resistance to biological damage are higher priorities. Both can perform well in Minnesota when installed according to the applicable manufacturer requirements and protected from uncontrolled moisture.

    Does LP SmartSide siding need to be painted?

    LP SmartSide does need its finish maintained, although a factory-applied finish can resist fading and chalking. Whether repainting is needed depends on the selected finish, exposure, preparation, and the condition of the surface over time. Keep the siding clean, inspect seams and penetrations, and address damaged finish or exposed material promptly rather than waiting for moisture problems to develop.

    How should Minnesota homeowners choose between the two materials?

    Start with an inspection of the existing wall assembly, trim, flashing, ventilation, and areas exposed to hail or wind-driven rain. Then compare the home’s appearance goals with its moisture, fire, impact, and maintenance priorities. A site-specific recommendation is more reliable than choosing from a material label alone, whether the home is in Maple Grove, Plymouth, Ramsey, or Cottage Grove.

    Schedule a Free Siding Inspection

    James Hardie and LP SmartSide can both be strong choices for a Minnesota home, but the right fit depends on your home’s exposure, design, and maintenance priorities. A careful inspection gives you a clearer basis for choosing between them without relying on a one-size-fits-all answer.

    Schedule a Free Inspection to receive an honest, tailored siding recommendation for your Minnesota home.