Author: Miguel Beltra

  • Window Seal Failure: How to Spot Foggy Windows and Fix

    Window Seal Failure: How to Spot Foggy Windows and Fix

    Foggy glass is more than a cosmetic annoyance, especially during a Minnesota winter. When moisture appears inside a double- or triple-pane window, the insulating unit may no longer be protecting your home as designed. Knowing what that moisture means can help you address the problem before drafts, damaged frames, or permanent glass etching develop.
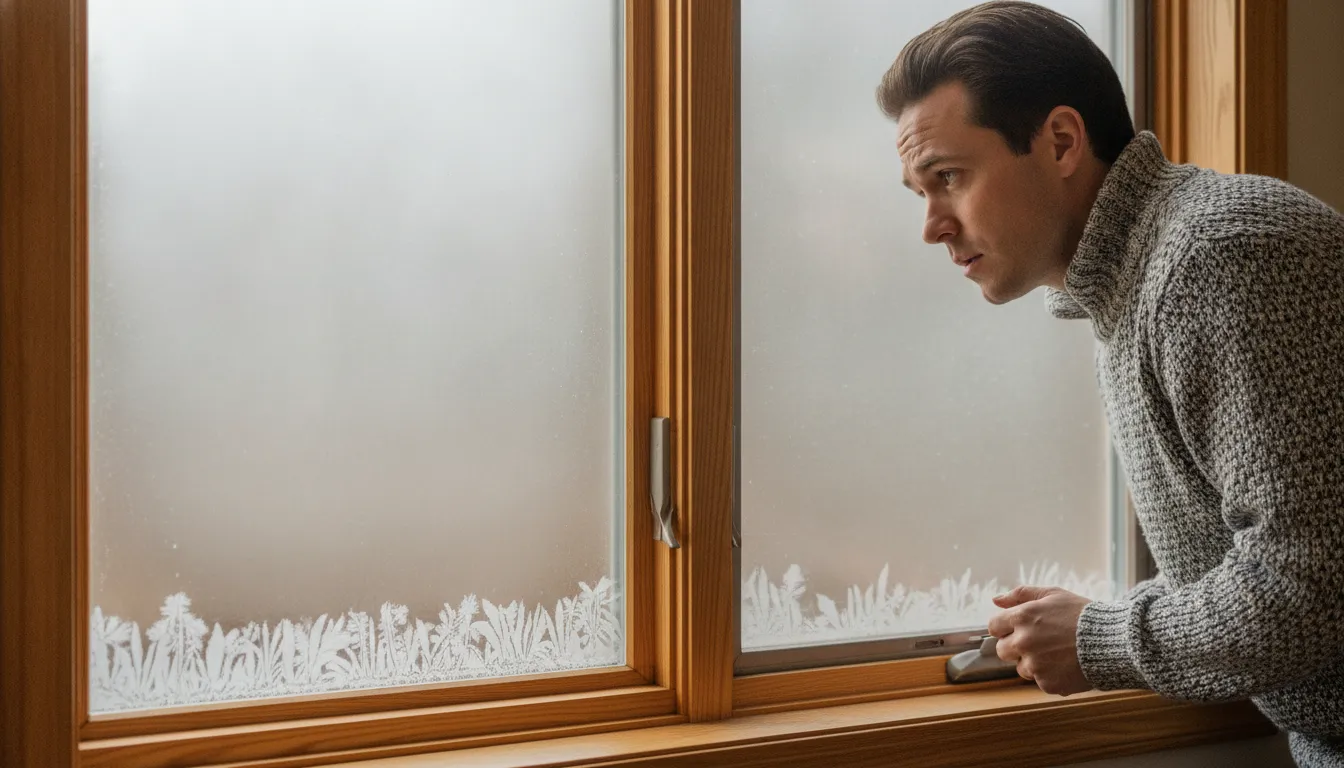
    Foggy double-pane window with condensation trapped between panes inside a Minnesota home

    Window seal failure occurs when the hermetic seal around insulated glass breaks, allowing insulating gas to escape and moisture to enter between the panes. Common clues include fog, haze, water droplets, drafts, and a noticeable decline in comfort near the window. Most insulated glass units are designed to last about 15 to 20 years, although regional weather and installation conditions can affect that lifespan. In many cases, the practical solution is replacing the insulated glass unit, while a full window replacement may make more sense when the frame is aging or damaged.

    Contact Referred Restoration online

    Minnesota’s freeze-thaw cycles, heavy snow, and sharp temperature changes can place added stress on window components. A compromised seal can reduce the window’s insulating performance, leaving rooms colder near the glass and making it harder to maintain consistent indoor comfort. The moisture also signals that the space between the panes is no longer staying properly protected. Understanding how local weather and installation conditions affect that seal is the first step toward identifying the underlying causes and choosing the right repair or replacement path.

    What Causes Window Seal Failure in Minnesota Homes

    Window seals have a demanding job. They close the space between panes, help retain the insulating gas inside the insulated glass unit, and keep outdoor moisture from entering. When that hermetic seal breaks, moisture can collect between the panes and the window gradually loses some of the thermal performance it was designed to provide.

    In Minnesota, repeated weather changes can accelerate that process. Heavy snowfall, freezing temperatures, and fast shifts between freezing and thawing expose window materials to repeated expansion and contraction. That movement stretches the seal. Over time, the sealant can lose flexibility, pull away from the glass, or develop a break. Rapid temperature changes are especially hard on double-pane windows because the inside and outside surfaces may be at very different temperatures at the same time.

    This thermal stress is one reason window seal failure may appear after several challenging seasons rather than from one obvious event. The problem can become more noticeable during periods of extreme cold or sharp seasonal swings. A window that looked clear in mild weather may show haze, droplets, or frost when the temperature difference increases.

    Aging and sunlight exposure

    Age also matters. Insulated glass units are built to last for years, but sealant materials naturally deteriorate as they cycle through heat, cold, and moisture. Direct sunlight adds another source of wear. Ultraviolet rays can break down organic sealant materials over time, with south-facing windows often receiving the most intense exposure. That does not mean every sunny window will fail early, but it can contribute to premature deterioration when combined with weather stress.

    Installation and frame movement

    Improper installation can create another path to failure. If a frame is racked, twisted, or not properly supported, the pressure can transfer to the glass and its edge seal. Small installation or alignment problems may not be obvious at first, but ongoing movement can accelerate degradation. This is why installation quality matters as much as the glass specification when protecting long-term window energy efficiency.

    Window seals can also be affected by moisture intrusion around the opening. The University of Minnesota Extension recommends proper sealing around windows and other exterior openings to help keep water out: learn more about sealing windows against moisture. If fogging or moisture appears between panes, the cause may be age, weather, installation, or a combination of factors. An inspection can identify whether the insulated glass unit, the frame, or the surrounding opening needs attention.

    How to Spot a Broken Window Seal in Your Home

    The clearest sign of a broken window seal is foggy or hazy glass that you cannot wipe away. Look closely at the space between the panes of a double- or triple-pane window. If you see water droplets, a cloudy film, or streaks trapped inside the insulated glass unit, the hermetic seal has likely failed. That break allows insulating gas to escape and moisture to enter the space between the panes.

    Fogging is more than a cosmetic problem. The desiccant inside the window is designed to absorb moisture and keep the airspace dry. Once the glass begins to fog, that desiccant has become saturated. The window can no longer maintain the dry, insulating environment it was designed to provide.

    Other signs to check

    • Drafts near the glass: A failed seal can reduce the window’s insulating performance. However, drafts may also come from worn weatherstripping or gaps around the frame, so the location of the airflow matters.
    • Higher heating or cooling bills: When insulating gas escapes, the window transfers more heat. A gradual increase in energy use, especially alongside visible fogging, can point to window seal failure.
    • Frost on the interior glass: In Minnesota winters, frost buildup on the inside of the pane can signal that the window has lost insulation. It may be most noticeable during particularly cold stretches.
    • Changing visibility: A window may look clear in one season and hazy in another. Temperature swings can make the moisture more apparent, so inspect the glass at different times of day and during peak seasonal changes.

    Morning is often the best time to inspect. The temperature difference between your home’s interior and the outdoor air may be greatest then, making haze, condensation between panes, and frost easier to identify. View the window from several angles and clean both accessible surfaces first. If the cloudiness remains inside the unit, it is not ordinary surface condensation.

    For more context on related window problems, review this guide to signs you need new windows. A professional inspection can then determine whether the problem is limited to the insulated glass unit or involves the frame and surrounding materials.

    How Can You Tell Fog From a Broken Seal vs. Normal Condensation?

    Not every wet or hazy window means the insulated glass unit has failed. The first question is where the moisture appears. Condensation on the room-facing surface or the outdoor-facing surface of the glass is usually a normal response to a temperature difference. Warm, humid indoor air can meet cold glass and leave water on the interior surface. Outdoor humidity can create a similar film on the exterior surface. In either case, the moisture is on the glass, where you can wipe it away.

    Fog from window seal failure looks different. Double- and triple-pane windows have a sealed space between the panes. When that hermetic seal breaks, insulating gas can escape and moisture can enter the space. The resulting haze, droplets, or fog is trapped between the panes instead of sitting on the surface. Run a clean, dry cloth over both sides of the glass. If the cloudiness remains in the space between the panes, it is a strong sign that the seal has failed.

    Pay attention to when the fog appears

    Moisture between panes is often easiest to notice in the morning. Overnight, indoor and outdoor temperatures may create a sharper temperature differential, making the haze more pronounced in the early hours. The same pattern can occur during Minnesota’s peak seasonal temperature swings, especially when a warm day follows a cold night or when winter temperatures change rapidly. A window may look clearer later in the day without the underlying problem being resolved.

    Normal surface condensation can also come and go with weather and indoor humidity. That does not automatically mean the window is defective. However, recurring fog between panes, water drops that cannot be wiped away, or a hazy band around the glass deserves closer attention. In Minnesota winters, reduced insulation may also show up as frost on the interior glass. That symptom is not proof of a broken seal by itself, but it can support the need for an inspection when it repeatedly affects the same window.

    Look at the glass from several angles and compare the affected window with nearby windows exposed to similar conditions. If only one insulated unit stays cloudy between the panes, the evidence points more strongly toward a localized seal problem than ordinary household condensation. A professional inspection can confirm whether the issue is limited to the glass unit or involves the frame, installation, or another source of moisture.

    Window Seal Repair vs. Replacement: Which Is the Right Call?

    Once a sealed window unit has failed, the usual solution is not to patch the old seal. The practical choices are replacing the insulated glass unit (IGU) or replacing the entire window. An IGU contains the panes, spacer, seal, and insulating space, while the existing frame and sash remain in place. The right path depends primarily on the condition of the frame, the age of the window, and any warranty coverage.

    ConsiderationInsulated glass unit (IGU) replacementFull window replacement
    Best fit whenThe frame and sash are square, stable, and free of rot or warping, and the problem is fogging or moisture between the panesThe frame is damaged, the unit is hard to operate, or drafts continue around the frame
    What changesNew glass, spacer, seal, and insulating space installed inside the existing frameThe entire window unit, frame and sash included, with fresh installation
    When it makes senseA window with a sound frame whose glass unit has failedMultiple components near end of life or broader envelope issues
    Trade-offMore economical when the frame is soundHigher overall project, warranted when the frame no longer supports a durable fix

    When IGU replacement makes sense

    Replacing only the IGU is generally the more economical route when the frame is square, stable, and free from rot, warping, or water damage. It can restore a clear view and return the glass unit to its intended insulating function without disturbing a sound frame. This approach is especially worth considering when the window opens, closes, and locks properly and the problem is limited to fogging or moisture between the panes.

    Age provides useful context, but it should not be the only deciding factor. Most IGUs are designed to last approximately 15 to 20 years, although Minnesota’s temperature extremes, freeze-thaw cycles, installation quality, and exposure can affect actual performance. A newer window with one failed unit may be a strong candidate for glass replacement. Before authorizing work, check the original manufacturer warranty. Some manufacturers warrant the IGU against seal failure for 10 to 20 years. And the warranty may determine whether the glass can be replaced through the manufacturer or an approved provider.

    When full window replacement is the better choice

    Replacing the whole window is usually more appropriate when the frame or sash is damaged. The unit is difficult to operate, drafts continue around the frame, or multiple components are reaching the end of their service life. A failed seal can be one symptom of a broader window problem. Rot, persistent water intrusion, poor installation, or significant warping may limit what an IGU-only replacement can accomplish.

    A professional assessment should distinguish moisture trapped between panes from condensation on a glass surface, then examine the frame, sash, exterior trim, and installation. That evaluation helps prevent an incomplete repair and clarifies whether the issue is isolated to the glass unit or part of a larger envelope problem. If full replacement is recommended, reviewing the professional window installation process can help you understand how the opening is prepared, sealed, and finished.

    For homeowners considering a complete project, Referred Restoration can also explain available window replacement financing options without turning the decision into a pressure-filled sales conversation. The goal is to match the repair to the actual condition of the window, preserve sound components when appropriate. And replace the unit when its frame or performance no longer supports a durable fix.

    What Happens If You Leave a Broken Window Seal Untreated?

    A foggy insulated window is more than a cosmetic annoyance. When a seal breaks, insulating gas can escape and moisture can enter the space between panes. That means the glass no longer provides the insulating value it was designed to deliver, even if it still looks structurally intact. In a Minnesota home, the effect can become more noticeable during extreme winter cold, summer heat, and rapid shifts between indoor and outdoor temperatures.

    Reduced insulation affects comfort and energy use

    As the insulating layer between panes is compromised, the window becomes a weaker thermal barrier. Rooms near the failed unit may feel colder in winter or warmer in summer. And your heating or cooling system may need to work harder to maintain a consistent indoor temperature. Higher heating and cooling bills can follow, but the more immediate clues are often a draft. Cold glass, or frost forming on the interior during a Minnesota cold snap.

    The technical issue is not simply that the glass is cloudy. The lost gas and added moisture change how the insulated glass unit performs. A window with ongoing moisture problems should be evaluated because moisture that remains in a building component can contribute to deterioration over time. Treating the visible fog as a purely visual defect can allow the underlying failure to continue.

    Moisture can damage the frame and glass

    Repeated moisture exposure can affect more than the view through the window. If water reaches surrounding wood sash or frame materials, those components may gradually soften, stain, swell, or deteriorate. Damage that begins around the glass can eventually complicate the repair decision, particularly if the frame is no longer sound. Look for discoloration, soft wood, peeling finish, or moisture collecting near the lower edge of the window.

    There is also a risk of permanent glass damage. Recurring moisture between the panes can leave mineral deposits or cause etching on the glass surface. The academic discussion of seal materials and degradation in insulated glazing systems helps explain why edge-seal performance matters over the life of the unit. In some cases, the fogging may remain even after the seal problem is addressed because the glass itself has been marked.

    Early evaluation limits the damage

    Window seal failure does not always require replacing the entire window, but waiting rarely improves the condition. An inspection can distinguish a failed insulated glass unit from damage to the frame or surrounding materials. It can also clarify whether a glass-unit replacement is appropriate or whether the window needs more extensive attention. Addressing the issue while the frame remains sound gives you more options and helps prevent a small performance problem from becoming a broader moisture concern.

    Contact Referred Restoration online to schedule a free window inspection, or call (763) 726-4245.
    Frequently Asked Questions

    What is window seal failure?

    Window seal failure happens when the airtight seal around a double-pane or triple-pane insulated glass unit breaks down. Insulating gas can escape, and moisture can enter the space between the panes. The result is often foggy glass, haze, or visible droplets that cannot be wiped away from either surface.

    How can I tell the difference between seal failure and normal condensation?

    Normal condensation appears on the inside or outside surface of the glass and can usually be wiped away. Moisture or fog trapped between the panes points to a failed seal. The difference may be easiest to see in the morning or during Minnesota’s sharp seasonal temperature changes.

    Can a failed window seal be repaired?

    In most cases, the practical repair is replacement of the insulated glass unit rather than patching the old seal. If the frame and sash remain sound, replacing the glass may be enough. A full window replacement may make more sense when the frame is damaged, the unit has other problems, or the manufacturer warranty does not support an IGU replacement.

    Should I replace a window as soon as I see fog between the panes?

    Fogging is not always an emergency, but it should not be ignored. A failed seal reduces the window’s insulating performance and may allow recurring moisture to affect nearby frame materials. Check the manufacturer’s warranty first, then arrange an inspection to determine whether the existing frame can be retained or the whole window should be replaced.

    Ready to Address a Failing Window Seal?

    If foggy glass, moisture between panes, or a draft is affecting your home. An inspection can clarify whether the issue involves the insulated glass unit or the full window. Referred Restoration can help you understand the condition and the practical repair or replacement path for your home.

    Contact Referred Restoration online to schedule a free window inspection, or call (763) 726-4245.
  • Flat Roof Gutter Installation: Minnesota Homeowner Guide

    Flat Roof Gutter Installation: Minnesota Homeowner Guide

    Water management is one of the most important details on a flat or low-slope roof. Although these roofs are not truly flat, their slight pitch leaves less room for drainage problems when rain, snowmelt, or debris slows the flow.

    Reliable flat roof gutter installation can direct runoff away from the roof edge and foundation, but the right solution depends on the roof’s slope, edge detail, and drainage layout. Minnesota homeowners also need a system that continues working through freeze-thaw cycles and heavy ice damming.

    Gutters are not the only option. Internal drains and scuppers may be better suited to some roof designs, while properly sloped exterior gutters work well on others. Understanding how water moves across a low-slope roof is the first step toward choosing a system that handles heavy rainfall and rapid snowmelt without encouraging ponding or leaks.

    This guide covers the drainage considerations a flat or low-slope roof creates, how gutters are sized for those conditions, and the step-by-step installation process. If you would prefer a professional evaluation of your property’s roof edge and drainage before deciding, that can reveal which approach fits best.

    Contact Referred Restoration online

    Why Flat Roofs Need a Different Kind of Drainage

    Flat and low-slope roofs are not completely flat. They are typically built with a slight pitch, often about 1/4 inch per foot, to guide rainwater and melting snow toward a planned drainage point. That pitch is modest, so the roof depends on clear, correctly routed drains, scuppers, or gutters to move water off the surface.

    On a steeper roof, gravity helps water reach the eaves quickly. A low-slope roof gives water more opportunity to collect around seams, penetrations, edge details, or areas where the surface has settled. Even a small obstruction can slow runoff. When water remains on the roof, it adds weight and keeps roofing materials exposed to moisture for longer periods. Over time, that can contribute to leaks and premature deterioration.

    Drainage becomes even more important in Minnesota. Rogers, Cottage Grove, and the broader Twin Cities metro experience heavy rainfall, rapid snowmelt, repeated freeze-thaw cycles, and ice damming. Water that reaches a gutter but cannot move freely may freeze, back up, and push moisture beneath the roof edge. A reliable system needs a clear route from the roof surface to the downspout and away from the foundation, not simply a gutter attached at the perimeter.

    That route may involve an exterior gutter system, internal drains, or scuppers, depending on the roof design and edge construction. If gutters are part of the solution, the connection to the fascia or roof edge must be sealed carefully. And the gutter must maintain enough slope toward its downspouts to prevent standing water. Seamless gutter systems can also help reduce the number of joints where leaks may develop, although the design still has to match the roof’s drainage needs.

    For Minnesota properties, effective flat roof gutter installation is therefore a water-management decision as much as an exterior upgrade. The right layout accounts for rainfall, snowmelt, freezing conditions, and the roof’s existing pitch before materials are installed.

    Does a Flat Roof Really Need Gutters?

    Not always. A flat or low-slope roof needs an effective drainage plan, but traditional exterior gutters are only one possible solution. The right system depends on the roof’s design, slight pitch, edge detail, surrounding walls, and where water can safely discharge. Common options include internal drains, scuppers, and exterior gutters.

    Internal drains direct water through openings in the roof into connected pipes inside the building or wall system. They can keep drainage points out of sight and work well on roofs designed around a central or planned drain layout. However, they require careful installation and ongoing attention because a blocked drain can leave water standing on the roof.

    Scuppers are openings through a parapet or raised roof edge that allow water to flow outward. They are often paired with conductor heads or downspouts and can provide a visible path for runoff. Because the opening and surrounding edge must remain clear, their placement and discharge point deserve careful planning.

    Traditional exterior gutters collect water along the roof edge and carry it to downspouts. They may be appropriate when the roof has a compatible fascia or edge detail and enough slope to move water through the gutter. Correct attachment and sealing matter, especially in Minnesota, where freeze-thaw cycles, snowmelt, and ice damming can stress drainage components.

    Drainage OptionHow It WorksBest Fit
    Internal drainsMoves roof water through drain openings and concealed pipes.Roofs designed with planned internal drainage routes.
    ScuppersChannels water through the roof edge or parapet to an exterior discharge point.Buildings with parapets or raised edges that can support clear outlets.
    Exterior guttersCollects edge runoff and directs it through downspouts.Roofs with compatible edge details and sufficient runoff direction.
    Common flat-roof drainage options vary by roof design, slope, and edge detail. Learn more about flat-roof drainage approaches.

    The goal is not to add gutters automatically. It is to prevent pooling and move water away from the roof and foundation through a system suited to the property. An inspection can identify whether flat roof gutter installation, scuppers, internal drains, or a combination offers the most reliable approach.

    What Gutter Size and Slope Does a Flat Roof Need?

    There is no single gutter size that fits every flat or low-slope roof. The system should be selected according to the roof area that drains into it. The expected rainfall intensity, the number and placement of downspouts, and the roof edge detail. A smaller system may struggle during heavy storms, while an oversized or poorly configured system can still perform badly if water has nowhere to go.

    Although often called flat, these roofs typically have a slight pitch that directs water toward a drainage point. The gutter must work with that existing drainage pattern rather than interrupt it. During gutter guards selection, make sure the product is compatible with the gutter profile and does not restrict the flow of rainwater or snowmelt.

    Match the gutter to the roof drainage area

    A roofing professional evaluates how much roof surface contributes water to each gutter run. They also consider valleys, membrane transitions, parapet walls, and other areas that can concentrate runoff. In Minnesota, heavy rainfall and rapid snowmelt can send a large volume of water toward the edge in a short time. So the system needs adequate capacity for local conditions.

    Downspouts should be spaced and positioned to serve the drainage layout, not simply placed at convenient corners. Longer runs or sections receiving concentrated runoff may need additional outlets. Downspout discharge also matters. Water should be directed far enough away from the foundation and protected from freezing or backing up against the building.

    Maintain a consistent slope toward downspouts

    Gutters need a continuous, consistent slope toward their outlets. A low spot can hold water after a storm, add weight to the gutter, and allow debris to collect. A slope that changes abruptly can also leave part of the run draining in the wrong direction. The gutter should be securely attached to the roof edge or fascia, with transitions and connections sealed correctly. This is a core requirement of effective flat roof gutter installation, because even a properly sized channel cannot perform if water pools along the run.

    The National Roofing Contractors Association recommends annual inspections of flat-roof drainage systems to keep scuppers and drains clear. That inspection should include gutters, downspouts, attachment points, seals, and areas where water may be lingering. Regular attention is especially valuable through Minnesota’s freeze-thaw cycles, when small drainage problems can become leaks or ice-related damage.

    The Flat Roof Gutter Installation Process, Step by Step

    A dependable flat roof gutter installation is more than attaching a channel along the roof edge. The system must work with the roof’s drainage design, edge detail, and downspout locations. On a flat or low-slope roof, small installation errors can leave water standing near the edge or direct runoff toward the fascia. A careful process helps protect the roof assembly through Minnesota’s freeze-thaw cycles, heavy rain, and rapid snowmelt.

    1. Assess the roof edge and existing drainage. Start by examining the roof membrane or covering, edge metal, fascia, scuppers, drains, and current downspouts. The installer should identify where water naturally travels and look for signs of ponding, overflow, loose materials, or damaged wood. This assessment determines whether exterior gutters are appropriate and where the system needs additional support.
    2. Choose compatible gutter material and width. The gutter must match the roof edge, fascia, flashing, hangers, and local weather demands. Width is selected based on the roof area draining to that run, the expected rainfall, and the number and placement of downspouts. Materials and fasteners should also tolerate Minnesota’s repeated expansion, contraction, and icing rather than separating during seasonal changes.
    3. Secure and seal the roof-edge connection. Gutters are attached to sound fascia or a properly prepared roof-edge assembly. The connection must not compromise the roof covering or trap water behind the gutter. Flashing and sealant are applied where needed so water moves into the gutter instead of behind it. Correct sealing to the roof edge or fascia is essential for a watertight installation, as described by flat-roof gutter installation guidance.
    4. Set a consistent slope toward the downspouts. Even a low-slope roof drainage system needs the gutter itself to guide water steadily toward its outlets. The installer establishes a continuous fall without creating low spots, abrupt dips, or sections that reverse direction. Downspouts should discharge where water can move safely away from the foundation and other vulnerable exterior surfaces.
    5. Seal the seams and transitions. Every joint, end cap, outlet, and transition is checked and sealed with a compatible product. Pay particular attention to movement points and connections between dissimilar materials. For a closer look at this part of the work, review the guide to sealing gutter seams.
    6. Test water flow and inspect the finished system. Run water through each gutter section and observe how quickly it reaches the downspouts. Check for leaks, overflow, standing water, loose fasteners, and discharge problems, then correct them before the installation is considered complete. Future inspections should keep outlets and drainage paths clear. The National Roofing Contractors Association recommends annual inspections of flat-roof drainage to help keep scuppers and drains clear, according to industry drainage guidance.

    Documenting the completed slope, outlets, and water-flow test also gives homeowners a useful baseline for future maintenance. If the roof edge, fascia, or existing drainage shows damage, repairs should be addressed before a new gutter system is installed.

    Common Flat Roof Gutter Mistakes to Avoid in Minnesota

    Flat and low-slope roofs depend on carefully planned drainage. A small mistake at the roof edge, gutter, or downspout can leave meltwater sitting where it should be moving away from the building. That risk is especially important in Minnesota, where freeze-thaw cycles, heavy snowmelt, and ice damming can test every part of the drainage system.

    Allowing water to pool

    Standing water is not a harmless sign of a flat roof. It can add weight, stress roof materials, and increase the chance that moisture will find a weak seam or penetration. Drainage neglect can reduce a flat roof’s lifespan by up to 30% and contribute to water damage, according to industry guidance. Learn more about flat-roof drainage risks before a recurring pond becomes an interior leak.

    Ignoring the roof edge detail

    Gutters do not work independently from the roof edge. The edge metal, fascia, membrane termination, and gutter must work as one water-management system. If the connection is poorly planned or left unsealed, water can run behind the gutter and reach the decking, fascia, or wall assembly. Check the edge detail during any flat roof gutter installation, rather than treating it as a cosmetic finishing step.

    Using the wrong gutter size or slope

    A gutter that is too small may overflow during intense rainfall or rapid snowmelt. One with inconsistent slope may hold water instead of directing it toward the downspouts. The correct size and layout depend on the roof area, drainage path, edge configuration, and number and location of downspouts. A level-looking installation is not necessarily a functional one.

    Skipping seam sealing

    Every seam, outlet, end cap, and transition is a potential leak point. Sealant should be compatible with the gutter material and applied to a clean, dry surface. Homeowners comparing gutter materials should consider how each option handles movement, fasteners, and future repairs, not just its appearance.

    Neglecting annual maintenance

    Leaves, roof sediment, ice, and debris can restrict outlets and downspouts long before a problem is visible from the ground. The National Roofing Contractors Association recommends annual inspections of flat-roof drainage to keep scuppers and drains clear. In Minnesota, inspect before winter and again after snow and ice have receded. Look for loose edge components, failed seams, blocked outlets, and evidence of overflow. Early maintenance is usually far simpler than repairing a saturated roof assembly or interior water damage.

    Contact Referred Restoration online to have your flat or low-slope roof’s drainage assessed by a local Minnesota team.

    Frequently Asked Questions

    Do flat roofs need gutters?

    Not every flat or low-slope roof needs traditional exterior gutters. Some roofs direct water to internal drains or scuppers instead. Gutters can be the right choice when the roof edge and fascia can support them and the system can move runoff safely to downspouts. The roof design, slope, edge detail, and local weather exposure should guide the decision.

    Can you put rain gutters on a flat roof?

    Yes. A qualified installer can add gutters when they are compatible with the roof edge and sealed correctly to prevent leaks. The gutter run also needs a consistent pitch toward its downspouts. On a Minnesota home, the design should account for rapid snowmelt, freeze-thaw movement, and ice buildup rather than treating the roof like a standard steep-slope installation.

    What is the best drainage system for a flat roof?

    There is no single best system for every property. Internal drains can move water through the building’s drainage network, while scuppers discharge water through the parapet or wall. Exterior gutters collect runoff along the roof edge. A roofing professional should evaluate the roof’s slope, structure, edge detail, outlet locations, and maintenance access before recommending one option or a combination.

    How do you maintain flat roof gutters to prevent clogs?

    Clear leaves, ice, and other debris before they restrict flow, and check that downspouts discharge away from the foundation. Look for loose fasteners, separated seams, damaged sealant, sagging sections, and standing water after rain or snowmelt. The National Roofing Contractors Association recommends annual inspections of flat-roof drainage systems to help keep scuppers and drains clear.

    Get Started With a Flat Roof Drainage Plan

    A professional assessment can clarify how your roof edge, slope, downspouts, and gutter capacity should work together through Minnesota’s freeze-thaw cycles and snowmelt. Referred Restoration can help you evaluate the existing drainage setup and plan an installation suited to the property.

    Contact Referred Restoration online to get started, or call (763) 726-4245 to discuss your flat or low-slope roof.

  • How Much Do Energy Efficient Windows Save in Minnesota?

    How Much Do Energy Efficient Windows Save in Minnesota?

    Drafty windows can make a Minnesota home feel uncomfortable even when the furnace or air conditioner is running normally. Glass, frames, and worn seals all affect how quickly heated or cooled air escapes, especially during sharp winter cold and hot summer weather.

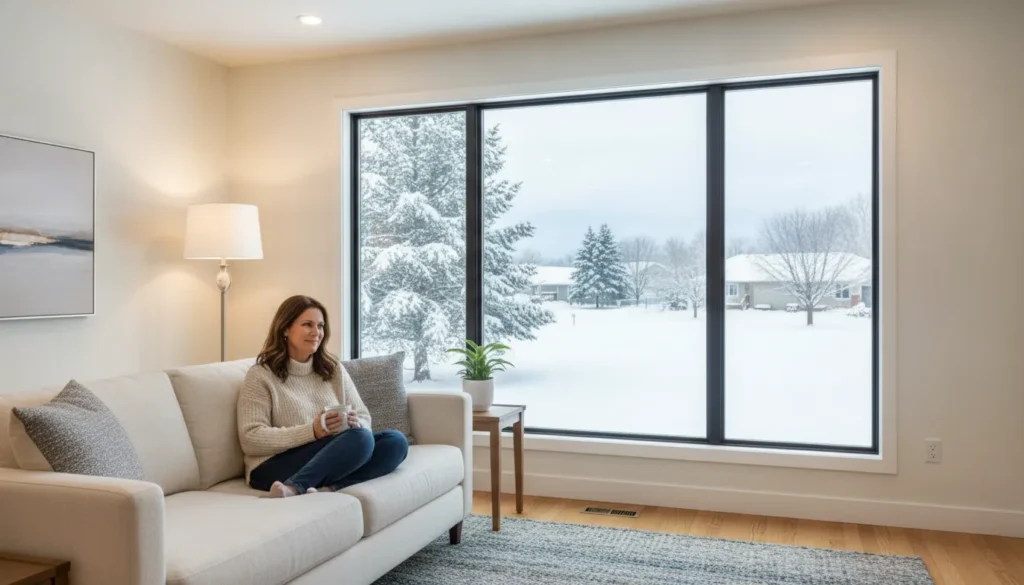
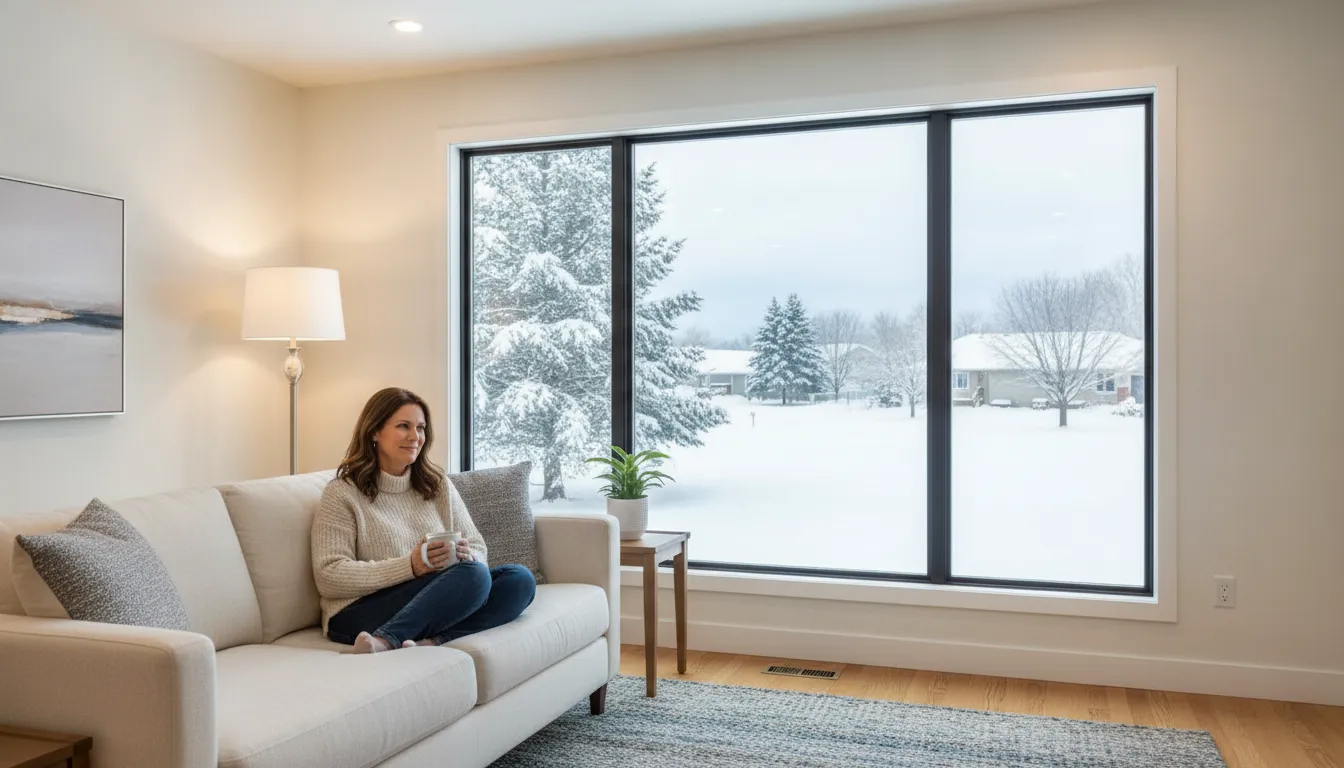
    Homeowner relaxing in a bright living room near a large energy-efficient window with snowy Minnesota winter outside

    So, how much do energy efficient windows save? They can reduce the energy lost through your windows and make heating and cooling more consistent. But the result depends on your home’s existing windows, insulation, local utility rates, and the products selected. The U.S. Department of Energy reports that windows account for roughly 25% to 30% of residential heating and cooling energy use, which shows why upgrades can make a meaningful difference.

    There is no single savings figure that applies to every Minnesota homeowner. A useful evaluation starts with the condition of your current windows, the severity of air leakage, and the performance ratings of a replacement. From there, climate-specific guidance can help you set realistic expectations for comfort and energy use.

    How Much Do Energy Efficient Windows Save in Minnesota?

    The honest answer is that how much do energy efficient windows save depends on the home, the existing windows, and the way the house uses energy. In Minnesota, however, the opportunity is meaningful because windows must perform through bitter winter temperatures, summer heat, and rapid changes between the two seasons.

    Heat gain and heat loss through windows account for roughly 25% to 30% of residential heating and cooling energy use, according to the U.S. Department of Energy. That means improved windows can affect a substantial part of the utility bill, especially when older units have single-pane glass, deteriorated seals, or air leaks around the frame. The savings generally appear as a reduction in the heating and cooling portion of household energy use, rather than as a fixed amount every homeowner can expect.

    In winter, efficient glazing and tighter construction help slow the movement of indoor heat toward the cold outdoors. Rooms near the glass can feel more comfortable, and the furnace may not need to run as often to maintain the thermostat setting. During summer, improved windows can reduce unwanted solar heat gain and help keep conditioned air inside. That can make bedrooms, living areas, and sun-facing rooms easier to keep comfortable.

    Actual results vary with local climate conditions, utility rates, home size, window orientation, insulation, HVAC equipment, and the condition of the existing frames. A home with failing seals may see a more noticeable comfort improvement than a home that already has modern double-pane windows. Likewise, replacing only a few problem windows produces a different result from upgrading the entire house. ENERGY STAR explains that its Version 7.0 windows are designed for performance across extreme climate zones, making climate-appropriate ratings especially relevant for Minnesota homeowners. See the ENERGY STAR residential windows guidance and its window and storm-window recommendations for additional selection information.

    For a clearer comparison, review the window energy efficiency ratings before choosing a product. A professional assessment can also separate window-related energy loss from issues such as insulation gaps, weatherstripping, or ventilation. That helps you invest in the improvement most likely to deliver comfort and efficiency for your home.

    Contact Referred Restoration online to discuss your Minnesota window replacement options.

    Why Old Windows Waste Energy in Minnesota

    Minnesota puts windows through demanding conditions. Homes in the Rogers and Cottage Grove area may face deep winter freezes, heavy snowfall, frequent hail, and hot summer weather. A window that performs reasonably in a mild climate can become a major source of discomfort and energy loss when outdoor temperatures swing sharply.

    Heat gain and heat loss through windows account for approximately 25% to 30% of residential heating and cooling energy use, according to the U.S. Department of Energy’s ENERGY STAR guidance. That does not mean every home will see the same result from replacement. It does show why window condition and design deserve attention during an energy-efficiency review.

    Air leakage makes your HVAC system work harder

    Gaps around an aging frame, deteriorated caulk, worn weatherstripping, or damaged trim can allow outdoor air to move around the window assembly. In winter, heated indoor air escapes while cold air enters. The furnace then runs longer to maintain the thermostat setting, while rooms near the affected window can still feel chilly. Air leakage can also create drafts along floors and walls, making a comfortable temperature harder to maintain.

    In summer, the same weaknesses allow warm outdoor air into the home. Your air conditioner must remove that added heat and humidity, even when the rest of the house is well insulated. Repairing failed caulk or deteriorated trim may help when the window itself remains in good condition. Referred Restoration’s window trim repair guidance covers how these surrounding components can affect leaks and efficiency.

    Older glass transfers heat and signals seal failure

    Single-pane glass offers little resistance to outdoor temperatures. Heat moves through it readily, so the interior surface can become very cold during a Minnesota winter and intensely warm in direct summer sun. Older double-pane windows generally provide better insulation, but the sealed space between panes can fail over time. When that happens, fogging or condensation between the panes is a visible warning that the insulating seal is no longer performing as intended.

    Persistent interior condensation can also indicate excessive indoor humidity, cold glass, or inadequate air movement. It should not be ignored, especially when moisture reaches wood, trim, or surrounding insulation. A careful inspection can distinguish a repairable air-sealing issue from a failed window unit. The goal is not simply to install new glass. It is to reduce uncontrolled air movement, improve thermal comfort, and help your heating and cooling equipment operate under less strain.

    What Makes Energy Efficient Windows Save Energy

    Energy-efficient windows work as a system. The glass, coatings, spaces between panes, spacers, seals, and frame all influence how easily heat moves through the unit. The U.S. Department of Energy identifies frame types, glazing, gas fills, and spacers as key window choices, rather than treating the glass alone as the full measure of performance. In Minnesota, that complete design matters because a window must help retain indoor heat during cold weather while limiting unwanted solar heat during warmer months.

    Glass coatings and multiple panes

    Low-emissivity, or low-E, coatings are thin layers applied to glass to manage radiant heat. Depending on the window design, the coating helps reflect indoor heat back into the room during winter and reduce solar heat entering during summer. Two or more panes also create insulating spaces that slow heat transfer compared with a single sheet of glass.

    Those spaces can be filled with an inert gas such as argon or krypton. These gases conduct less heat than ordinary air, so the sealed space between panes can improve the window’s insulating performance. The result is not just a warmer pane. It can also reduce drafts caused by a colder interior glass surface and help rooms feel more consistent from one side of the house to another.

    Spacers and frames complete the system

    Warm-edge spacers separate the panes while reducing heat transfer around the perimeter of the glass. Frame construction matters too. A well-designed frame helps limit conduction and air leakage, while a poorly matched or deteriorated frame can undermine otherwise efficient glazing. The overall U-factor therefore reflects more than the center of the glass. Frame materials, gas fills, and spacers all contribute to the finished window’s performance.

    Qualitative comparison of common window configurations
    Window typePanesLow-E coatingGas fillTypical heat transfer
    Single-PaneOneUsually noneNoneHigh
    Double-Pane ClearTwoUsually noneAir or noneModerate
    ENERGY STAR certifiedUsually two or moreTypically included as part of an efficient designOften argon or kryptonLow, when properly selected and installed

    ENERGY STAR certification and NFRC labeling make these differences easier to compare. The label provides standardized performance information instead of relying on a single marketing claim. Review the product’s full ratings, including U-factor and air leakage, and consider installation quality before choosing a replacement. ENERGY STAR provides additional guidance on certified residential windows and doors at its residential windows resource.

    How U-Factor and Air Leakage Ratings Affect Your Energy Bill

    Window labels make it easier to compare products without relying on broad claims such as “high performance” or “maximum efficiency.” Start by looking for the ENERGY STAR label. Then review the detailed ratings from the National Fenestration Rating Council (NFRC). The U.S. Department of Energy recommends this process because NFRC ratings provide a consistent way to evaluate a window’s energy properties across different manufacturers. You can find a broader explanation in this guide to window energy efficiency ratings.

    U-factor: the key winter rating

    U-factor measures how readily heat passes through a window. Lower is better because a lower-rated window resists heat transfer more effectively. This rating deserves special attention in Minnesota, where keeping indoor heat inside is a major concern during a long heating season. A window’s U-factor is influenced by more than the glass alone. Frame material, the number of panes, gas fills between panes, spacers, and the overall construction can all affect performance.

    That is why comparing only “double pane” or “triple pane” descriptions can be misleading. Two windows with the same basic glazing description may have different U-factors because their frames, coatings, edge spacers, or gas-filled cavities are different. The NFRC label gives you a more useful basis for comparison than a sales phrase by itself.

    Air leakage and solar heat gain

    Air leakage, shown as AL on the NFRC label, indicates how much air passes through the window assembly when it is closed. A lower AL rating generally means less uncontrolled air movement around the sash and frame. This matters for drafts and comfort, especially when winter wind exposes weak seals or installation gaps. AL is not the same as U-factor: U-factor describes heat transfer through the assembly, while AL describes air movement through it.

    Solar heat gain coefficient, or SHGC, describes how much solar heat enters through the window. A lower SHGC can help limit unwanted summer heat, while a higher value can allow more winter sunlight to warm a home. The right balance depends on orientation, shading, glass design, and the home’s heating and cooling needs. Visible transmittance, also included on many labels, describes how much daylight passes through the glass, but it is not a direct measure of insulation.

    Use the full label rather than chasing one impressive number. In a heating-dominated Minnesota climate, U-factor and air leakage often deserve priority, while SHGC helps fine-tune comfort on sunny exposures. Ratings are most useful when matched to the home, and the installation must preserve the window’s intended seal and alignment.

    Is Replacing Windows Worth It? How to Decide

    Window replacement is not automatically the best answer for every home. A clear decision starts with the condition of the existing units, the comfort problems they create, and the energy loss you may continue to experience. Use this process to compare repair and replacement without relying on a generic promise about how much do energy efficient windows save.

    1. Inspect the frame, sash, glass, and surrounding trim. Look for soft or damaged wood, water staining, deteriorated seals, cracked glass, and frames that no longer operate correctly. If the window is structurally sound, targeted improvements may restore comfort without a full replacement. Caulking and weatherstripping can be more cost-effective when the window itself remains in good condition. Storm windows or panels can also add another layer of thermal insulation to a well-maintained window. ENERGY STAR’s guidance on windows and storm windows describes these options alongside replacement considerations.
    2. Check for drafts, fogging, and uneven temperatures. On a windy day, feel around the sash and frame for moving air. Condensation between panes can indicate a failed insulating seal. While persistent cold spots or rooms that are difficult to heat may point to air leakage or poor glass performance. Also check whether damaged trim or gaps around the opening are contributing to the problem. These observations help separate a repairable sealing issue from a window that has reached the end of its useful performance.
    3. Consider the window’s age and repair history. Older units may have inefficient glass, worn hardware, or frames that require repeated maintenance. However, age alone does not prove replacement is necessary. Compare the expected future energy loss and ongoing repair needs with the upfront investment of new windows. The right choice depends on the home’s condition, climate exposure, and how long you expect to remain in the property.
    4. Review ENERGY STAR and NFRC information. If replacement is under consideration, do not compare products by glass description alone. Look for the ENERGY STAR label, then review the National Fenestration Rating Council ratings for the complete window. NFRC labels provide a consistent way to compare energy properties, including the effects of frame construction, gas fills, and spacers.
    5. Compare repair, insert replacement, and full-unit replacement. A new insert may fit into an existing frame and provide a less invasive path when the frame is sound. A full-unit replacement may be more appropriate when the frame, opening, or surrounding materials are damaged. Ask a professional installer to evaluate both approaches rather than assuming one method fits every opening.
    6. Get a site-specific recommendation. A qualified installer can assess drafts, moisture, trim, operation, and installation conditions together. That review helps you choose the least disruptive option that addresses the actual source of energy loss and improves comfort through Minnesota’s changing seasons.

    Other Ways to Cut Energy Loss From Windows

    Full window replacement is not the only way to improve comfort and reduce unwanted heat transfer. If your existing frames and glass are in good condition, targeted improvements can address drafts, summer heat, and weak insulation without changing every window in the home. The right choice depends on where energy is being lost and whether the window has a repairable seal, an aging frame, or a more serious defect.

    Start by checking the perimeter of each window for visible gaps, cracked caulk, or worn weatherstripping. Fresh caulk can close small stationary gaps, while replacement weatherstripping can improve the seal around an operable sash. These measures are most useful when the window itself opens, closes, and locks properly. If trim or surrounding materials are damaged, repairing that area may also help protect the seal from Minnesota’s snow, ice, and changing temperatures. Learn more about window trim repair when leaks or deteriorated trim are part of the problem.

    For windows that receive strong afternoon sun, solar control film can reduce summer heat gain while allowing the existing unit to remain in place. This approach may be especially useful in rooms that become uncomfortable during the cooling season. It should be selected carefully for the specific glass and window construction, since not every film is appropriate for every unit.

    Exterior shading addresses the same seasonal challenge from outside the glass. Awnings, exterior blinds, and overhangs can block direct sunlight before it reaches the window. Reducing the amount of solar heat that enters the room and the work required from the air conditioner. Shading can also improve comfort near large south- or west-facing windows without changing the home’s interior appearance.

    Storm windows or panels add another layer between the interior and exterior. When installed over well-maintained existing windows, they can provide additional thermal insulation and reduce drafts. The U.S. Department of Energy identifies caulking, weatherstripping, solar control film, exterior shading, and storm windows as options for improving existing windows when replacement is not necessary. ENERGY STAR’s window and storm window guidance provides additional information about these approaches.

    • Seal small gaps and replace worn weatherstripping.
    • Use solar control film or exterior shading where summer sun is the main issue.
    • Consider storm windows or panels when the original units remain sound.
    • Inspect trim and surrounding materials before assuming the glass must be replaced.

    These upgrades can be practical first steps, but they will not correct failed seals, warped frames, or persistent water intrusion. A careful inspection can help separate a manageable efficiency improvement from a window that has reached the end of its useful service life.

    Why Professional Installation Matters for Energy Savings

    Even a high-performance window can underdeliver if it is installed with gaps, uneven pressure, or inadequate weather protection. In Minnesota, installation quality matters as much as the window selected. The assembly must create an air-tight boundary between the home and the outdoors. While allowing the frame and surrounding materials to perform through bitter cold, summer heat, snow, and heavy rain. The U.S. Department of Energy identifies proper installation as a key consideration alongside window design, energy use, labeling, and warranties. And ENERGY STAR confirms that selecting the right product matters as much as how it is put in. See ENERGY STAR’s residential windows guidance for its discussion of design, labeling, and installation.

    Air sealing protects comfort and efficiency

    A professional installer checks the opening, sets the unit square and level, and seals the connection between the frame and wall. That work helps limit drafts that can make rooms feel cold even when the glass itself has strong efficiency ratings. Correct flashing directs water away from the opening, while sealed trim and properly fitted weatherstripping help prevent air leaks and water intrusion when snow melts around the window. Referred Restoration’s window trim repair and replacement guide explains why this surrounding work is part of protecting efficiency, not merely a cosmetic finishing step.

    Installation also affects durability. Small gaps can allow moisture into the wall assembly, where repeated freeze-and-thaw cycles may contribute to swelling, rot, or damage around the opening. A careful crew evaluates the existing sill, flashing, trim, and exterior transitions before closing everything up. If the surrounding structure needs attention, addressing it at the same time is usually more reliable than covering a problem and hoping the new window compensates for it.

    Choose the replacement approach with an installer

    Not every project needs the same scope. A frame-replace or insert installation may work when the existing frame is sound and the opening is properly sized. A full-unit replacement can be more appropriate when the frame, sill, flashing, or surrounding materials are deteriorated. Discussing both options with an experienced installer helps match the approach to the home’s condition, rather than selecting a method based only on the product brochure. The Department of Energy recommends discussing replacement-in-frame options with a window retailer and installer because suitability depends on the individual opening.

    That assessment also gives homeowners a clearer view of warranty requirements and maintenance needs. Ask what the installation warranty covers, how water management is handled, and how the crew will verify the seal before trim is finished. Homeowners considering a broader project can review window repair and replacement services for a local starting point. If replacement is the right fit, window replacement financing may provide a qualitative path to discuss with a participating lender, subject to qualification and applicable terms.

    Contact Referred Restoration online to discuss your window project with a local team serving Minnesota homeowners.

    Frequently Asked Questions

    How much money can energy-efficient windows save you?

    There is no single savings amount for every Minnesota home. Results depend on the condition and number of existing windows, local utility rates, the home’s insulation, and the selected window’s ratings. The U.S. Department of Energy reports that heat gain and heat loss through windows account for 25% to 30% of residential heating and cooling energy use. So reducing drafts and unwanted heat transfer can make a meaningful difference. Learn more from ENERGY STAR.

    Are energy efficient windows worth the cost in Minnesota?

    They can be, particularly when existing windows are drafty, damaged, difficult to operate, or poorly suited to Minnesota’s seasonal temperature swings. Besides helping control heating and cooling demand, better windows can improve indoor comfort and reduce cold spots near the glass. If the existing units are in good condition, caulking, weatherstripping, storm panels, or exterior shading may be a more practical first step than full replacement.

    What are the benefits of energy efficient windows?

    Energy-efficient windows can reduce air leakage, limit winter heat loss, control summer heat gain, and make rooms feel more consistent. They may also reduce condensation concerns and improve day-to-day comfort. Compare the ENERGY STAR label and NFRC ratings rather than relying only on a product’s general efficiency claims. Frame materials, glazing, gas fills, spacers, and installation quality all affect performance.

    Is it worth replacing 20-year-old windows?

    Age alone does not determine the right choice. Inspect the windows for drafts, failed seals, rot, water intrusion, stuck sashes, and recurring repairs. A professional can help determine whether weatherization, an insert replacement, or a full-unit replacement best fits the frame and the home’s condition. Proper installation and sealed trim matter as much as the window selection for long-term performance.

    If you are ready to cut energy loss and improve comfort in your Minnesota home, get a clear. No-pressure assessment of your windows from a local team that treats every home as its own. Contact Referred Restoration online today to schedule a free window inspection and talk through the energy-efficient options that fit your home and your budget. You can also reach us by phone at (763) 726-4245.

  • Signs You Need New Windows in Your Minnesota Home

    Signs You Need New Windows in Your Minnesota Home

    When a Minnesota living room feels cold even with the heat running, the windows may be telling you more than the thermostat can. Drafts, foggy glass, condensation, and windows that no longer open smoothly can point to worn components, failed seals, or broader frame damage.

    Homeowner inspecting a drafty window during a Minnesota winter with snow outside

    The most common signs you need new windows include noticeable drafts, fog between the panes, recurring condensation. Rising energy use without changed habits, sticking or jammed sashes, and rot or water damage around the frame. Some problems call for a targeted repair, while widespread or structural damage may make replacement the better long-term choice.

    In the Twin Cities, Rogers, Cottage Grove, and communities along the Highway 101 corridor. Repeated freeze-thaw cycles and sharp temperature swings put extra stress on window seals and frames. A closer look at how Minnesota winter affects your windows can help you separate normal seasonal discomfort from problems that deserve an inspection.

    Contact Referred Restoration online or call (763) 726-4245 to schedule a free inspection.

    Why Minnesota Winter Is Hard on Your Windows

    A Minnesota winter puts your windows through a demanding cycle. Inside, your home is heated for comfort. Outside, temperatures can fall well below freezing, then rise and drop again as weather moves through the Twin Cities. That extreme difference between indoor and outdoor temperatures stresses window glass, seals, frames, and surrounding materials. Over time, repeated expansion and contraction can accelerate seal failure, especially in older units. The Minnesota Department of Commerce identifies this temperature stress as a reason window and door seals can deteriorate faster in the state.

    That pattern is familiar in homes around Rogers, along the Highway 101 corridor, and in Cottage Grove. A window may look acceptable in mild weather but reveal problems when a cold, windy day exposes a weak seal or an air gap. You might notice a colder area near the glass, a draft at the frame, or rooms that are harder to keep comfortable. These symptoms do not automatically mean every window needs replacement, but they do show that the window system deserves a closer inspection.

    Windows also influence more of your home’s energy performance than many homeowners realize. The U.S. Department of Energy reports that heat gain and heat loss through windows account for about 25% to 30% of residential heating and cooling energy use. When older windows have poor insulation, failed seals, or open gaps, your heating system may work harder to maintain a steady indoor temperature. You can learn more about the factors behind this performance in our guide to window energy efficiency ratings.

    For homes with single-pane windows, moving to modern multi-pane units can significantly improve insulation and indoor comfort in a cold climate like Minnesota. However, replacement is not always the right first step. If an older home’s frames are sturdy and the problem is limited to weatherstripping. Caulking, hardware, or another nonstructural defect, repair or restoration may extend the window’s useful life. A professional evaluation can separate fixable maintenance issues from signs of deeper failure, so you can choose the solution that fits the condition of your home.

    The Clearest Signs You Need New Windows: Drafts and Air Leaks

    A noticeable draft near a window is more than an annoyance on a cold Minnesota morning. It can indicate that outdoor air is moving through gaps around the sash, frame, or weatherstripping. The Minnesota Department of Commerce identifies noticeable drafts, especially on windy days, as a key indicator of air infiltration. That makes a draft one of the clearest signs you need new windows, particularly when it continues after basic maintenance.

    Start by checking each window when the wind is moving through your Twin Cities, Rogers, or Cottage Grove neighborhood. Hold your hand near the edges of the closed sash and along the frame. A persistent breeze with the window fully closed points to worn or compressed weatherstripping. If the window rattles during a gust, the sash may be loose and need new weatherstripping or a track adjustment. Those problems do not automatically mean the entire window must be replaced, but they do warrant a closer inspection.

    Look at the frame perimeter from inside the home as well. If you can see daylight around the edge of the frame, air can pass through easily. The same gaps can allow moisture to enter and may become more noticeable as temperatures shift between a freezing exterior and a heated interior. Sealant, trim, and installation details all matter, so the source of the leak should be identified before choosing a repair or replacement path.

    It is also important not to assume that the window unit is the only cause. The Minnesota guidance notes that complaints about drafts, frost, condensation, and uncomfortable room temperatures are often caused by air leaks around the window or door assembly. Gaps at the frame, casing, or surrounding wall can create symptoms that look like a failed window. A professional assessment can separate a weatherstripping issue from a damaged sash, deteriorated frame, or larger opening problem.

    • Drafts on windy days: possible air infiltration around the window assembly.
    • A breeze with the window closed: worn or failed weatherstripping.
    • Rattling during wind: a loose sash, track issue, or inadequate weatherstripping.
    • Visible light at the frame: significant perimeter leakage that needs attention.

    For homeowners along the Highway 101 corridor and nearby communities, addressing these leaks can improve comfort before the next severe temperature swing. Referred Restoration can evaluate whether targeted repairs or window replacement is the more appropriate solution for the condition of the home.

    Source: Minnesota Department of Commerce guidance on repairing and maintaining doors and windows.

    Foggy Glass and Failed Seals: What That Window Condensation Really Means

    Foggy glass is more than a cosmetic annoyance when the haze appears between the panes of a double-pane window. It usually means the sealed space around the glass is no longer airtight. The Minnesota Department of Commerce identifies fogging between the panes as a sign that the window seal has failed. Once that seal breaks down, moisture can enter the space, and insulating gas can escape. The window then loses part of the insulation that helped separate your warm indoor air from a Minnesota winter.

    That loss can make the glass feel colder, especially during a January cold snap. A colder interior pane can contribute to uncomfortable rooms, chill near the window, and more visible condensation. It can also force your heating system to work harder to maintain a consistent temperature. A single foggy window does not automatically mean every window in the home needs replacement, but repeated fogging, damaged glass, or several failed units deserve a professional assessment.

    Check where the condensation appears

    The location of the moisture helps distinguish a failed seal from a humidity problem. Condensation between the glass panes is always a sign of a failed seal. Moisture that forms only on the room-facing side of the glass can instead point to high indoor humidity. This difference matters in older Minnesota homes, where winter air sealing, cooking, showers, drying clothes, and humidifiers can all affect indoor moisture levels. Minnesota guidance on repairing and maintaining windows explains both conditions.

    • Between the panes: the insulated glass unit’s seal has failed, so repair or replacement options should be evaluated.
    • On the indoor surface: check indoor humidity, ventilation, and airflow before assuming the window itself has failed.
    • On the outdoor surface: this can occur when an efficient window is keeping the inside pane warmer, so it is not by itself proof of a defect.

    Reduce winter condensation while you investigate

    Controlling indoor humidity during winter can reduce condensation on windows. Use kitchen and bathroom exhaust fans, keep air moving around glass, and avoid adding humidity without a specific need. These steps will not restore a failed seal. But they can help protect sound windows and clarify whether the moisture is coming from the room or from inside the insulated glass unit.

    Look for a persistent haze that does not wipe away, moisture trapped in the sealed cavity, or a pattern that returns after cleaning. Those are practical signs you need new windows, or at least a window professional’s evaluation of the affected units. The right recommendation may be a glass-unit repair, weatherization, or full replacement, depending on the seal, frame, and surrounding condition.

    Rising Energy Bills Without a Change in Habits

    If your heating routine has stayed the same but your Minnesota energy bills keep climbing, your windows deserve a closer look. Aging components can allow conditioned air to escape, leaving your furnace to run longer to maintain the temperature you set. This is especially noticeable during a Rogers, Cottage Grove, or Twin Cities winter, when cold outdoor temperatures expose weak points around frames, sashes, and seals.

    Window performance has a measurable effect on a home’s heating load. ENERGY STAR notes that replacing old, inefficient windows lowers household energy bills, with the largest gains when older single-pane units are upgraded. ENERGY STAR’s residential window guidance explains how better-performing windows reduce heat loss and ease the demand on a furnace. A room with poorly insulated or leaky windows may feel colder even when the thermostat reading appears normal.

    Why winter air leakage increases furnace demand

    Cold air can enter through worn weatherstripping, gaps around the frame, deteriorated caulk, or a sash that no longer closes tightly. On a windy day, you may feel a steady breeze near the glass or perimeter. In some cases, the opening is subtle. The room may simply feel less comfortable near the window, or the furnace may cycle more often as heat escapes.

    Minnesota’s temperature swings place additional stress on window materials. Interior warmth and exterior cold cause frames and seals to expand and contract, and older components may lose flexibility over time. A failed seal can also reduce the insulating performance of a multi-pane window. Making the glass feel unusually cold and increasing the amount of heat your home must replace.

    What to check before assuming the furnace is the problem

    • Compare comfort from room to room, especially near large or north-facing windows.
    • Check for drafts around the frame on a windy day, without removing trim or attempting unsafe repairs.
    • Look for gaps in caulk, loose weatherstripping, or visible light around the frame perimeter.
    • Notice whether the glass feels cold or whether a room remains difficult to warm despite normal thermostat settings.

    Higher bills alone do not prove that every window needs replacement. Air sealing or other repairs may correct an isolated problem, while widespread drafts, failed seals, and declining comfort can point to replacement being the more durable solution. A professional inspection can separate a window defect from insulation, ductwork, or heating-system issues before you decide what to do next.

    Windows That Stick, Jam, or Won’t Stay Open

    A window should open smoothly, close firmly, and remain in position without extra effort. When it sticks, jams, or drops shut as soon as you release it, the problem is more than an everyday annoyance. It can signal frame warping, worn operating hardware, or a failing balance system. These operation problems are among the practical signs you need new windows, especially when they affect several windows in the same room or across the home.

    Minnesota’s seasonal conditions put repeated stress on window components. During a humid summer, wood and other materials can absorb moisture and expand. In winter, dry indoor air and sharply colder outdoor temperatures create another round of movement. Repeated expansion and contraction can change how the sash fits within the frame, while years of use wear down tracks, hinges, locks, and balance mechanisms. The Minnesota Department of Commerce identifies windows that are hard to open or close. Stick, or will not stay open as common indicators of frame warping or mechanical failure. Read the Minnesota window maintenance guidance for additional context.

    What the operating problem may indicate

    • Hard opening or closing: The sash may be rubbing against a distorted frame, or the track and operating hardware may be damaged or misaligned.
    • A window that falls shut: A worn balance system may no longer support the sash. The recommended remedy may involve adjusting the balance system or replacing its hardware.
    • Sticking during certain seasons: Seasonal changes can reveal a frame that has shifted or swollen. A window that works in mild weather but binds during Minnesota’s humid summers or cold winters deserves inspection.
    • Multiple affected windows: Problems in several openings can point to age, installation concerns, or broader moisture exposure rather than one isolated broken component.

    Not every difficult window requires full replacement. A professional can check whether the issue is limited to a balance, track, hinge, lock, or weather seal. Older windows with sturdy frames may be repairable, while a warped frame or recurring mechanical failure can make replacement the more dependable long-term choice. Avoid forcing a stuck sash, since that can crack glass, damage the frame, or create a safety hazard. If a window will not stay open, address it promptly, particularly in rooms where ventilation or emergency egress matters.

    Repair vs Replace: When Are New Windows Worth It for a Minnesota Home?

    Not every draft, rattle, or sticking sash means the entire window must come out. Minnesota guidance notes that aging windows may be repairable when the underlying problem is not structural. A careful inspection should separate a worn component or failed seal from damage to the frame, surrounding wall, or water-management system. That distinction helps you choose the work that restores comfort without removing sound materials unnecessarily.

    Repair is often a sensible first step when the frame is solid and the issue is limited to caulking, weather-stripping, hardware, glazing, or paint. These maintenance measures can extend a window’s useful life and reduce air leakage. Older homes may also have original windows that can be restored and upgraded, rather than replaced completely. The Minnesota Department of Commerce describes restoration as an option when the frame remains sturdy and the glass can be improved: Minnesota window maintenance guidance.

    Repair may be appropriate when…Replacement may be warranted when…
    The frame is sound, square, and free of significant rot.The frame is warped, decayed, or no longer structurally reliable.
    Air leakage comes from worn weather-stripping, caulk, or adjustable hardware.Leaks, failed seals, or operating problems affect multiple components and keep returning.
    The glass, glazing, sash, or balance system can be serviced without disturbing the full opening.Glass, frame, and surrounding areas have broad damage or persistent moisture intrusion.
    The existing window fits the home’s needs after restoration or a targeted upgrade.A replacement is needed for dependable performance, improved insulation, or safer operation.

    Replacement does not always mean removing every surrounding frame or creating extensive disruption. A replacement-in-existing-frame approach may be available, depending on the opening and the condition of the current frame. Discuss that option with an installer before deciding on a full tear-out. It can preserve sound portions of the opening while addressing a window that has reached the end of its practical service life.

    If you are unsure which path fits your home, an inspection can identify whether the problem is a repairable air leak or a deeper failure. Referred Restoration provides professional window repair services for homeowners in Rogers and nearby Minnesota communities. The goal is a clear recommendation based on the frame, glass, seals, and installation conditions, not an automatic replacement.

    Rot, Decay, and Water Intrusion Around the Window Frame

    Water damage around a window can begin quietly, then worsen through repeated Minnesota freeze and thaw cycles. Inspect the frame, trim, sill, nearby drywall, and flooring for clues that moisture is getting past the window or its surrounding seal.

    Visible rot is more than a cosmetic problem

    Soft, darkened, swollen, or crumbling wood on the exterior frame or sill indicates that moisture has remained in the assembly. Visible exterior rotting or decay around a wooden window frame suggests its structural integrity may be compromised, according to the Minnesota Department of Commerce window maintenance guidance. A small area of damaged trim may be repairable, but widespread deterioration can affect how securely the window sits and how well it sheds water.

    Peeling or cracked paint is another warning sign. Paint protects exposed wood and other surfaces from moisture. Once it breaks down, water can enter through the finish and accelerate rot and decay in the framing. Look especially closely at lower corners, horizontal sills, and joints where trim meets siding. These areas receive runoff and may stay damp after rain or melting snow.

    Water stains can point to a failed exterior seal

    Brown or yellow staining on the wall or flooring below a window after rain should not be dismissed as an old mark. Water stains near windows often indicate failing flashing or external seals. The leak may be at the window itself, where the frame meets the wall, or higher on the exterior and traveling downward before it becomes visible inside.

    Document when the stain appears and whether it follows wind-driven rain, snowmelt, or a heavy storm. Do not cover the area with fresh paint before the source is evaluated. Trapped moisture can continue damaging the framing and interior finishes even when the surface looks clean.

    Check the glazing and surrounding seal

    On older wood windows, the glazing compound holds the glass in the frame. When it cracks, crumbles, or falls away, the window seal is compromised and can allow both air and water leaks. Missing glazing, gaps around the glass, or recurring dampness along the sash deserves prompt attention.

    These conditions are among the signs you need new windows, but they do not automatically mean every window must be replaced. An inspection can distinguish localized trim or flashing repairs from damage involving the frame, sill, or wall opening. Addressing active water intrusion early helps protect the surrounding structure and clarifies whether repair or replacement is the sounder path.

    What to Look For in New Windows for a Minnesota Home

    Once replacement makes sense, the window label and installation plan deserve as much attention as the glass itself. Start by looking for the ENERGY STAR label, which identifies products that meet established efficiency requirements. The right window should also be selected for Minnesota’s cold winters, summer sun, and wide temperature swings.

    Pay close attention to the ratings. The U-factor is a standardized measure of the window’s overall insulation value. In general, a lower U-factor indicates better resistance to heat moving through the window. The Solar Heat Gain Coefficient, or SHGC, measures how much solar heat a window allows into the home. These ratings work together, so do not judge a window by one number alone. For a deeper explanation, review these window energy efficiency ratings before comparing products.

    Low-E glass is another feature worth discussing with your installer. New high-efficiency windows often use a low-E coating to manage solar heat gain and improve insulation. The best combination of glass, coatings, and ratings depends on the home’s orientation, existing frames, and comfort concerns.

    Compare Frame Materials and Maintenance Needs

    Frame material affects durability, appearance, and upkeep. Vinyl, wood, and fiberglass each offer different maintenance requirements and performance characteristics. Vinyl is generally known for simple upkeep, wood can complement traditional architecture but needs more attention to moisture and finish, and fiberglass is valued for durability. Ask how each option will perform in the specific openings being replaced, rather than choosing based on appearance alone.

    Review the Installation and Warranty

    Even a high-quality window can perform poorly if it is installed incorrectly. Confirm how the existing opening will be prepared, sealed, and flashed, and ask whether an in-frame replacement is appropriate. Review the warranty carefully, including coverage for insulated-glass seal failure and mechanical components such as balances, locks, and operators. Also clarify who handles service if a problem appears after installation.

    A careful evaluation should connect the product to the problem you are trying to solve, whether that is a draft, failed seal, difficult operation, or uneven comfort. An honest assessment can help you choose a durable solution without unnecessary upgrades.

    Contact Referred Restoration online or call (763) 726-4245 to discuss your window replacement needs.

    Frequently Asked Questions

    What is the most common sign you need new windows?

    Persistent drafts are one of the clearest warning signs, especially when you feel moving air near a closed window on a windy day. A breeze may point to worn weatherstripping, while visible light around the frame indicates significant air leakage. The Minnesota Department of Commerce notes that some draft complaints come from air leaks around the unit. So an inspection can help separate a repairable gap from a failing window.

    Can foggy windows be repaired or just replaced?

    Fog or moisture between double-pane glass generally means the insulating seal has failed, according to the Minnesota Department of Commerce. Depending on the window design and the condition of the frame, you may be able to replace the glass unit rather than the entire window. If the frame is warped, rotting, or difficult to operate, full replacement may be the more dependable solution.

    How much does it cost to replace windows in Minnesota?

    The investment varies with the number of windows, their sizes, the frame material, the glass package, and installation conditions. A professional evaluation is more useful than a broad general estimate because it can identify which units need replacement and which may only need caulking. Weatherstripping, or hardware service. Referred Restoration can review the condition of your windows and explain the available options without guessing from symptoms alone.

    Do new windows really save energy in a Minnesota winter?

    They can improve comfort and reduce unwanted heat loss when the existing units are drafty, single-pane, or degraded. ENERGY STAR reports that replacing old windows with certified units lowers household energy bills, with the biggest gains on older single-pane windows. Performance also depends on proper installation, weather sealing, and choosing suitable U-factor and SHGC ratings, as covered in ENERGY STAR’s residential window guidance.

    Schedule a Free Window Inspection

    If drafts, foggy glass, condensation, or difficult operation are affecting your Minnesota home, a professional inspection can help clarify whether repair or replacement is the better next step. Referred Restoration can review the condition of your windows and explain practical options for your home.

    Schedule a free professional window inspection or call (763) 726-4245 to discuss your concerns with Referred Restoration.

  • Residential Window Installation: What the Process Involves

    Residential Window Installation: What the Process Involves

    When a Minnesota window needs attention, the problem is rarely limited to the glass. A proper residential window installation protects the opening from cold air, moisture, and the temperature swings that can stress frames and seals through winter. It begins with a careful inspection and measurement, followed by selecting a window that fits the home and supports better energy efficiency.

    Professional installer lifting a new vinyl window into a bright opening in a Minnesota home

    Residential window installation typically includes accurate opening measurements, careful removal of the old unit, inspection of the surrounding frame, installation of flashing, and thorough sealing and finishing. In a Minnesota home, each step helps limit drafts and water intrusion while supporting steadier indoor temperatures during cold winters.

    The work should be treated as a complete system rather than a simple swap. After the new window is secured, the installer checks its operation. Seals the perimeter and completes the interior and exterior trim so the opening is protected and finished cleanly. Understanding what happens at each stage makes it easier to evaluate recommendations for your home.

    Contact Referred Restoration online or call (763) 726-4245 to discuss your window project.

    What Residential Window Installation Involves

    A residential window installation is more than removing an old unit and placing a new one in the opening. The work needs to create a dependable connection between the window, the wall, and the home’s weather barrier. That connection helps keep cold air, wind, and moisture outside during a Minnesota winter.

    The process usually begins with careful measurements and an inspection of the existing opening. The installer confirms the dimensions, checks whether the surrounding framing is sound, and identifies conditions that could affect the installation. This is also the point to discuss the appropriate replacement method. Including whether the new window can fit within the existing frame or whether more extensive preparation is needed.

    Preparing the opening

    After the old window is removed, the opening is cleaned and examined for damaged wood, gaps, or moisture intrusion. Any problems must be addressed before the new unit goes in. Installing over a compromised opening can hide a larger issue and make it harder for the new window to perform as intended.

    Flashing and sealing are especially important. Flashing helps direct water away from the opening, while compatible sealants and insulating materials close gaps around the frame. Together, these details reduce the risk of air leakage and water damage. They also help the window remain stable as the materials expand and contract through Minnesota’s seasonal temperature changes.

    Setting and finishing the new window

    The new window is placed into the prepared opening, aligned, and secured so the sash can operate correctly. The installer checks that it opens, closes, locks, and sits squarely before completing the exterior and interior finish work. Exterior trim and sealant provide a weather-resistant transition, while interior casing or trim gives the installation a clean, finished appearance.

    Installation quality matters as much as the window product itself. The ENERGY STAR tips for buying and installing replacement windows explain that even a high-quality window can perform poorly when it is installed incorrectly or mismatched to the opening. Windows account for a substantial share of residential heating and cooling energy loss. So gaps or poor seals can undermine the comfort and efficiency homeowners expect from a replacement.

    A thorough final inspection should confirm that the unit is secure, the seals are complete, drainage paths are clear, and the finished surfaces are protected. For homeowners in Rogers, Cottage Grove, and nearby Minnesota communities. Doing each step carefully is the best way to make a new window a lasting improvement rather than a temporary fix.

    Step 1: Measuring and Preparing the Window Opening

    A successful residential window installation begins before the old unit is removed. The opening must be measured accurately, the replacement must match the specified dimensions, and the surrounding materials must be protected during removal. Small errors at this stage can leave gaps that allow cold air and water to enter later.

    1. Inspect the existing window and opening. Check the frame, sill, trim, surrounding drywall, and exterior cladding for rot, movement, staining, or other damage. A window that looks worn may need repair rather than full replacement if its frame remains sturdy. Conversely, concealed moisture or structural deterioration can affect the installation plan. Look for air leaks around the perimeter, not only through the glass. The Minnesota Department of Commerce notes that many draft and comfort complaints are caused by air leaks in the surrounding assembly, rather than by the window unit alone: Minnesota window maintenance guidance.
    2. Measure the opening at several points. Record the width across the top, middle, and bottom, then measure the height along the left side, center, and right side. Compare the measurements instead of assuming the opening is perfectly square. Check the diagonals and note any variation, bowing, or settling. The installer uses the smallest reliable dimensions to determine the correct replacement size and the space needed for shimming and adjustment. Accurate measurements help the finished unit sit square, close tightly, and shed water as intended.
    3. Confirm the replacement specification. Match the measured opening to the selected window type, operating style, frame material, glazing, and energy ratings. The order should reflect the actual conditions of the home, including any unusual dimensions or trim requirements. Confirm which parts are being replaced and how the new unit will interface with the existing wall assembly. In some projects, replacing the window within its existing frame may be an option that reduces construction disruption. The ENERGY STAR guidance on replacement windows recommends discussing that approach with the window retailer and installer to determine whether it fits the opening and project.
    4. Remove the old window carefully. Protect nearby flooring and furnishings, then remove sashes, fasteners, trim, and the existing unit without damaging the opening. Scrape away loose material and clean the sill so the replacement can be positioned on a sound, level surface. Any damaged wood or masonry should be addressed before installation continues. Rushing removal can create gaps or damage that compromise later flashing, sealing, and insulation work.
    5. Prepare for a square, weather-tight fit. Before fastening the replacement, verify that the opening is level, plumb, and properly supported. Plan the flashing and sealing details so water is directed outward and the perimeter is insulated without distorting the frame. Proper installation matters as much as the window product itself, because even a high-quality window can perform poorly when installed incorrectly.

    Step 2: Flashing and Sealing the Window

    Flashing is the layer of weather-resistant material that directs water away from the window opening and toward the exterior of the wall. It works with the sill, frame, sealants, and surrounding trim to keep rain and melting snow from moving behind the window. A window can look sound from inside while a weak flashing detail allows moisture to enter the wall assembly.

    Sealing the perimeter is just as important. Gaps around the frame can let outdoor air into the home, making rooms feel colder and forcing the heating system to work harder. The Minnesota Department of Commerce notes that many complaints about drafts, frost, and condensation are actually caused by air leaks, not only by the window unit itself. If you can see daylight around the frame, air can pass through that opening easily. A persistent breeze near a closed window or a rattling sash can also point to worn weatherstripping or a loose fit.

    Why Minnesota weather puts this work to the test

    Minnesota windows have to handle sharp changes between indoor and outdoor temperatures. Those extreme temperature swings place stress on frames, joints, and seals, which can accelerate seal failure over time. Proper flashing and a continuous perimeter seal help the opening move through those seasonal changes without giving air and water an easy path into the wall.

    Look for practical warning signs after installation or during a home inspection. Water stains on the wall, ceiling, or floor below a window after rain may indicate failing flashing or exterior seals. Cracked or crumbling glazing, the compound that secures glass to the frame, can also compromise the seal and create air or water leaks. These problems deserve attention before moisture reaches insulation, drywall, or structural framing.

    When reviewing window energy efficiency ratings, remember that the product rating is only part of the result. Even a high-performing window can underperform if the opening is not prepared, flashed, and sealed correctly. A careful installation should address the condition of the existing opening, establish a reliable drainage path, and leave the perimeter protected against Minnesota wind and precipitation.

    Step 3: Installing and Finishing the Window

    Once the opening is prepared and the new unit is ready, installation quality becomes the deciding factor in how the window performs. A high-quality window cannot deliver its intended comfort, efficiency, or weather protection if it is installed out of square, left with gaps, or sealed incorrectly. The ENERGY STAR guidance on replacement windows notes that proper installation is essential, because even the highest-quality window can perform poorly when installed improperly.

    Setting and leveling the new unit

    The installer first positions the window in the prepared opening and checks that it is square, plumb, and level. Small alignment errors can affect how the sash moves, whether the locking hardware engages, and how evenly the frame contacts the weatherstripping. The unit should open, close, and latch smoothly before the installation moves forward.

    Shims help support and align the frame without placing uneven pressure on the window. The installer also confirms that the replacement fits the opening and that the surrounding materials remain sound. In some homes, a replacement-in-frame approach may be appropriate, while other openings require more extensive preparation. The right method depends on the existing frame, the condition of the opening, and the design of the new unit.

    Insulating and sealing around the frame

    After the window is properly positioned, the space around the frame is insulated and sealed. This step helps limit air movement and supports a more consistent indoor temperature through Minnesota’s winter temperature swings. Flashing and exterior sealing also help direct water away from the opening, reducing the risk of moisture entering behind the trim or wall materials.

    Insulation should fill the perimeter without distorting the frame. Excessive pressure or an incorrect product can make the window difficult to operate. Exterior sealant must create a continuous weather barrier, while interior sealing helps reduce drafts. These details are easy to overlook once the window appears finished, but they have a direct effect on long-term performance.

    Finishing the interior and exterior trim

    The final stage is fitting and sealing the trim on both sides of the opening. Interior trim creates a clean transition into the room, while exterior trim helps protect the joint between the window and the siding or surrounding wall. If existing trim is damaged or no longer fits, window trim replacement may be part of the project.

    Before the crew leaves, inspect the finished window from inside and outside. Look for consistent sealant, secure trim, smooth operation, and any gaps around the frame. A careful final check confirms that the installation is not only attractive, but ready to handle drafts, moisture, and seasonal movement.

    Energy Efficiency: Why Installation Quality Matters in Minnesota

    In a Minnesota winter, an efficient window is only part of the solution. The opening, frame, flashing, insulation, and seal around it must work together to keep heated air inside and cold air outside. A high-performing product can still leave a room uncomfortable when it is installed out of square, sealed unevenly, or fitted without careful attention to the surrounding wall.

    Proper installation is essential because even a high-quality window can perform poorly when installed incorrectly. That makes the installer and the installation method important parts of any window energy efficiency decision. A careful installation should address air sealing, water management, and the way the new unit sits within the existing opening.

    Start with the window’s energy ratings

    When comparing products, look for the ENERGY STAR label. It provides a useful starting point for identifying windows designed to meet energy-efficiency criteria. Then review the performance ratings rather than judging a window by appearance alone, using the guidance in ENERGY STAR’s replacement window tips.

    U-factor measures the insulation value of the entire window unit. In a cold climate, a lower U-factor generally indicates better resistance to heat flow through the window. This rating covers more than the center of the glass, so it can help you compare the combined performance of the glazing, frame, and other components.

    Solar Heat Gain Coefficient, or SHGC, measures how much solar radiation the window allows into the home. It matters because different rooms and exposures receive different amounts of sunlight. Your installer can help you consider orientation, shading, and comfort goals instead of treating one rating as ideal for every opening.

    Why multi-pane and low-E glass help in cold weather

    Replacing single-pane windows with double- or triple-pane units can significantly improve insulation and indoor comfort in cold climates like Minnesota. Additional panes create insulating spaces within the unit, while low-E glass coatings help manage solar heat gain and improve insulation. These features can reduce cold surfaces and temperature swings, but they cannot compensate for gaps around the frame.

    Installation details are especially important where Minnesota’s indoor and outdoor temperatures differ sharply. Those fluctuations place stress on windows and can accelerate seal failure. The work should include a close inspection of the opening, consistent perimeter sealing, and proper flashing so the assembly resists both air leakage and water intrusion. Ask how the installer will handle the existing frame, since replacement within that frame may be appropriate in some homes and can reduce construction disruption.

    Before winter arrives, combine professional installation with practical maintenance. Check for failed caulking, damaged weatherstripping, and moisture around the opening, and use the guidance in winterize your home to prepare the rest of the exterior. The goal is not simply a newer window. It is a properly integrated part of a more comfortable, durable home envelope.

    Signs a Window Needs Replacement vs. Repair

    Not every window problem means the entire unit must be replaced. A careful inspection should distinguish a worn seal or weatherstripping from damage that affects the frame, opening, or surrounding wall. If the frame remains sound and the issue is limited to a replaceable component, repair may restore comfort and function. When several warning signs appear together, replacement is more likely to provide a durable solution.

    Problems that may be repairable

    A draft does not automatically mean the window itself has reached the end of its service life. Noticeable drafts, especially on windy days, indicate air infiltration, but the source may be a gap around the frame or worn weatherstripping. The Minnesota Department of Commerce notes that a persistent breeze near a closed window can point to worn weatherstripping. Caulking, weatherstripping, or a track adjustment may resolve an otherwise sound window.

    Look closely at the perimeter of the frame. If you can see daylight around the window, air can pass through easily, which signals a significant leakage problem. That condition deserves prompt attention, but the appropriate remedy depends on whether the frame and surrounding materials are still intact. A professional window inspection can identify whether sealing and component repairs are sufficient. See our professional window repair services if you are unsure where to start.

    Signs replacement is the better path

    Fog between the panes of an insulated double-pane window is a stronger replacement signal. It means the seal has failed, allowing moisture into the space between the panes. Condensation on the room-facing side of the glass can instead relate to indoor humidity, but condensation between the panes indicates a failed seal. In either case, the distinction matters because wiping the glass or adjusting the room temperature will not restore a failed insulating unit.

    Visible rot or decay in an exterior wooden frame is another serious warning sign. Decay can compromise the frame’s structural integrity and create a path for additional air or water intrusion. Water stains on the wall, trim, or floor below a window after rain should also be investigated promptly, especially when paired with deteriorated wood or recurring dampness. These are not merely appearance issues. They may indicate that the window assembly or its surrounding seals can no longer protect the opening reliably.

    In practical terms, replacement becomes more likely when you see fog between panes, recurring drafts. Visible light at the frame perimeter, rot or decay, and water staining in the same opening. An intact frame with one isolated, repairable defect may not require a full replacement. A professional assessment can separate a manageable repair from a window that needs replacement for lasting protection in Minnesota weather.

    Choosing a Residential Window Installation Company

    The company you choose matters as much as the window product. Proper installation is essential, and even a high-quality window can perform poorly when it is installed incorrectly. Look for a residential window installation company that can explain its process clearly, inspect the existing opening, and show experience with Minnesota homes and weather conditions. Local experience is especially useful when a contractor is familiar with freeze-thaw cycles, winter air leaks. Moisture exposure, and the construction styles common across the Minnesota service area, including Rogers, St. Francis, Monticello, and Cottage Grove.

    Start with recent reviews, but read beyond the star rating. Look for comments about communication, preparation, cleanup, installation quality, and how the company handled questions after the project. Before signing, ask whether the contractor is properly licensed and insured for the work in your area. A reputable company should be willing to explain its coverage and provide documentation rather than treating basic questions as an inconvenience.

    Warranty details deserve the same attention. Ask what covers glass-seal failure and mechanical components, since these are specifically identified as important areas to review when choosing new windows. Also ask who handles a warranty claim, how long coverage lasts, and whether the warranty can transfer if you sell the home. A transferable warranty may provide useful continuity, but the actual terms and registration requirements control, so request them in writing. Professional window repair services may also be appropriate when the existing frame is sound and the issue is limited to hardware, sealing, or another repairable component.

    Compare frame materials before you choose

    Vinyl, wood, and fiberglass each have different durability and maintenance requirements. The best choice depends on the home’s design, exposure, desired appearance, and how much upkeep you want to handle. Use the comparison below as a starting point, then ask the installer how each material will perform in your specific openings.

    Window frame material considerations
    Frame materialPotential advantagesQuestions to ask
    VinylGenerally low maintenance and available in practical designs.How will the product handle seasonal temperature changes and match the home’s appearance?
    WoodNatural appearance and a traditional fit for many older or character-rich homes.What exterior protection and ongoing maintenance will the frame require?
    FiberglassDurable option with a different maintenance profile from wood.Which finish, warranty terms, and installation details apply to this product?

    A strong contractor should connect the material recommendation to the whole project, including the opening, flashing, sealing, operation, and long-term maintenance. That level of explanation is a better sign than a generic product pitch. For older Minnesota homes, ask whether replacing the window within the existing frame is appropriate and whether the surrounding structure needs attention first. Clear answers help you choose a solution that supports comfort, durability, and the home’s character.

    Contact Referred Restoration for a free window inspection and get practical guidance on replacing or upgrading your windows.

    Frequently Asked Questions

    What is the most common sign you need new windows?

    Persistent drafts are one of the clearest warning signs, especially when you feel moving air near a closed window on a windy day. A breeze may point to worn weatherstripping, while visible light around the frame indicates significant air leakage. The Minnesota Department of Commerce notes that some draft complaints come from air leaks around the unit. So an inspection can help separate a repairable gap from a failing window.

    Can foggy windows be repaired or just replaced?

    Fog or moisture between double-pane glass generally means the insulating seal has failed, according to the Minnesota Department of Commerce. Depending on the window design and the condition of the frame, you may be able to replace the glass unit rather than the entire window. If the frame is warped, rotting, or difficult to operate, full replacement may be the more dependable solution.

    Do new windows really save energy in a Minnesota winter?

    They can improve comfort and reduce unwanted heat loss when the existing units are drafty, single-pane, or degraded. The U.S. Department of Energy reports that heat gain and heat loss through windows account for 25% to 30% of residential heating and cooling energy use. Performance also depends on proper installation, weather sealing, and choosing suitable U-factor and SHGC ratings, as covered in the ENERGY STAR replacement window guidance.

    How do I choose the right company for residential window installation?

    Look for a contractor who can explain the full process, inspect the existing opening, and show experience with Minnesota homes and weather. Read reviews beyond the star rating, confirm the company is licensed and insured, and ask about warranties that cover glass-seal failure and mechanical components. Local experience with freeze-thaw cycles and winter air leaks is a strong indicator of dependable, well-sealed installation work.

    Ready to schedule a free window inspection?

    A professional inspection can help you understand whether your Minnesota home’s windows need repair, replacement, or closer monitoring. Referred Restoration can review the condition of your windows and help you choose a practical next step for your residential window installation project.

    Schedule a free window inspection with Referred Restoration or call (763) 726-4245 to discuss your project.

  • How to Choose a Siding Contractor in Minnesota

    How to Choose a Siding Contractor in Minnesota

    Siding protects your home from Minnesota’s snow, wind, moisture, and rapid temperature changes, so the contractor you hire matters as much as the material you select. A trustworthy company should make the decision easier, not pressure you into it.

    Siding contractor inspecting newly installed siding panels on a Minnesota home exterior

    When learning how to choose a siding contractor, look for verified licensing and insurance, relevant experience with your preferred material, recent local references, clear warranties, and a detailed written scope. A free, honest inspection can also help you understand your home’s needs before you commit.

    The right evaluation starts with practical questions about installation standards, project communication, and accountability. For homeowners in Rogers, Cottage Grove, and communities throughout Minnesota. Those answers reveal whether a contractor is prepared to protect both the finished siding and the home beneath it.

    Contact Referred Restoration online to schedule your free siding inspection

    How to Choose a Siding Contractor in Minnesota

    Learning how to choose a siding contractor starts with verification, not a sales presentation. A qualified contractor should make it easy to understand who will perform the work. How the project will be managed, and what protection you have if something goes wrong. Use the following checklist to compare contractors serving your Minnesota home.

    Verify the license and insurance

    Before signing anything, confirm the contractor’s residential license through the Minnesota Department of Labor and Industry. The state advises homeowners to hire only licensed contractors. And its official verification resource is the best place to check the business rather than relying on a salesperson’s claim. See the Minnesota DLI contractor verification guidance.

    Ask for current proof of workers’ compensation and liability insurance, then confirm that the coverage applies to the full scope of your siding project. Minnesota licensing requirements include workers’ compensation and liability insurance for licensed contractors. The DLI also recommends verifying that a contractor is licensed, bonded, and insured before hiring. If a contractor hesitates to provide documentation or gives vague answers, treat that as a reason to pause.

    Contact references from similar projects

    Ask for recent references from homeowners whose projects resemble yours. A contractor who installs siding regularly should be able to provide references for the material, home type, or repair situation you are considering. Contact those homeowners directly instead of relying only on online reviews. Ask whether the crew communicated clearly, protected the property, handled unexpected issues, and completed the work as described.

    Local references can also help you assess whether the contractor understands Minnesota conditions. Look for experience with siding projects in communities such as Rogers, Cottage Grove, and nearby areas, especially where freeze-thaw cycles, wind, snow, and moisture affect exterior materials.

    Ask about material-specific experience and warranties

    Different siding products require different installation details. Ask how much experience the contractor has with the specific material you are considering, such as vinyl, fiber cement, or engineered wood. The Minnesota DLI recommends asking about experience with the type of siding selected. A knowledgeable contractor should explain how the material fits your home, how moisture will be managed, and which manufacturer installation requirements matter.

    Review both the product warranty and the contractor’s workmanship warranty. Confirm what each warranty covers, how long it lasts, who handles claims, and whether installation must follow specific manufacturer standards. A clear explanation is more useful than a broad promise that the work is simply guaranteed.

    Check consumer protections and the written agreement

    Minnesota homeowners may have access to the Contractor Recovery Fund when a licensed contractor fails to perform or causes damage. This protection has eligibility requirements, so review the Minnesota Contractor Recovery Fund information and do not treat it as a substitute for checking a contractor carefully.

    Finally, require a written contract that identifies the work scope, materials, project timeline, warranty terms, and responsibilities for permits and cleanup. The Minnesota DLI’s homeowner hiring guidance is a useful reference. Choose the contractor who answers questions directly and documents the plan clearly, not simply the one who makes the fastest promise.

    Questions to Ask Siding Contractors Before You Hire

    A short conversation can reveal whether a siding contractor is prepared to manage the details of a Minnesota project. Ask the same core questions of each company, listen for specific answers, and request documentation when appropriate. A contractor who explains the reasoning behind a recommendation is easier to evaluate than one who responds with vague assurances.

    1. What siding materials do you install, and which do you recommend for my home? Ask about the contractor’s experience with the specific product you are considering, whether that is vinyl, fiber cement, or engineered wood. The recommendation should account for your home’s exposure, existing wall conditions, maintenance preferences, and Minnesota’s changing weather, not just the contractor’s preferred product. You can also ask how the contractor evaluates competing brands. Reviewing the comparison between James Hardie and LP SmartSide can help you evaluate siding contractors and understand the material conversation before your appointment.

    2. Are you licensed and insured for the full scope of this work? Confirm the contractor’s Minnesota license through the Department of Labor and Industry before signing a contract. Minnesota guidance tells homeowners to hire licensed contractors, and licensed contractors are required to carry workers’ compensation and liability insurance. Ask whether the coverage is current and applies to the siding work, crew, and project conditions at your property. Do not rely only on a verbal statement. A certificate of insurance or other documentation gives you a clearer record of what is covered. Sources: Minnesota DLI licensing guidance and DLI hiring tips.

    3. Can you provide references from local projects similar to mine? Request recent references from homeowners whose projects involved comparable siding, home styles, or repair conditions. Ask those customers whether the crew communicated consistently, protected the property, handled changes responsibly, and completed the work as described. Online reviews can provide useful context, but a direct conversation may reveal details that a star rating cannot. Local references also help you determine whether the contractor understands conditions common in Minnesota neighborhoods.

    4. Who handles permits, and how will you inspect moisture and ventilation conditions? Ask the contractor to explain whether permits are needed, who submits them, and how inspections are scheduled. Before new siding covers the walls, the crew should look for moisture intrusion, damaged sheathing, flashing concerns, and ventilation conditions that could affect performance. Moisture management and proper installation techniques are especially important as Minnesota temperatures and weather patterns change. A contractor who identifies these issues before installation can explain what needs attention and why, rather than treating siding as a purely cosmetic covering. See the Minnesota vinyl siding installation guide for more context on climate-related installation considerations.

    5. What is the expected timeline, and how do you handle weather or other delays? Ask when the work could begin, how long the installation is expected to take, and which events could change that schedule. Minnesota weather can affect exterior work, so a reliable contractor should explain how rain, wind, temperature, material availability, or concealed damage would be handled. Ask how often you will receive updates and who will contact you if the schedule changes. Clear communication about timelines and delays is a sign of professionalism, not a promise that every project will proceed without interruption.

    6. Will I receive a written contract with the complete scope, materials, and warranties? The contract should identify the work to be completed, siding and accessory materials, preparation or removal work, project timeline, payment terms, and warranty information. It should also explain how unexpected conditions or change requests are approved. Minnesota’s Attorney General advises homeowners to obtain a written contract that details the work, materials, costs, and completion timeline. Read the document before signing and ask questions about any term that is unclear. A written record helps keep the homeowner and contractor aligned from the first inspection through final cleanup. Source: Minnesota Attorney General home building guidance.

    Strong answers will be specific, documented, and connected to your home’s actual conditions. If a contractor avoids basic questions, pressures you to decide immediately, or cannot explain the scope in plain language, treat that as information during your vetting process.

    Why Siding Materials Expertise Matters for Minnesota Homeowners

    Siding is not a one-size-fits-all installation. Vinyl, fiber cement, and engineered wood each have different handling requirements, fastening details, clearances, and maintenance considerations. When you compare contractors, ask how much experience they have with the specific material you are considering, not simply how long they have been in business. Minnesota’s Department of Labor and Industry specifically recommends asking about experience with the type of siding selected: the right questions can help you choose a qualified contractor.

    Material knowledge matters even more in Minnesota, where freeze-thaw cycles, snow, wind, humidity, and rapid seasonal changes put continual stress on an exterior. A durable product can still perform poorly if it is installed without proper planning for the home, climate, and wall assembly. The contractor should be able to explain why a material fits your home’s exposure. Design, and maintenance expectations instead of presenting one product as the answer for every property.

    Installation details protect against moisture problems

    Good siding work is about more than creating a straight, attractive surface. The installer must manage water as it moves around windows, doors, rooflines, corners, and penetrations. Flashing, drainage paths, and appropriate clearances help keep moisture from being trapped behind the siding. Ventilation also deserves attention, particularly where the siding system interacts with the roof, attic, soffits, or other parts of the exterior.

    Minnesota-specific installation guidance emphasizes the importance of moisture management in this climate. Before signing a contract, ask the contractor how the proposed system handles drainage and ventilation. What existing moisture issues they will inspect, and how they will protect vulnerable transitions. A professional should answer in clear language and connect the recommendation to your home’s actual conditions. For more detail, review this guide to hiring a professional siding installer.

    Product quality and installer skill work together

    Premium, durable materials can be a sensible choice for homes exposed to harsh Minnesota weather, but the product alone does not guarantee a successful result. The installer needs to follow the manufacturer’s specifications for storage, cutting, fastening, spacing, trim, and detailing. Ask whether the crew regularly installs the product, whether the company has material-specific training or manufacturer certification, and who will supervise the work. Those questions help distinguish a contractor with relevant expertise from a generalist who treats every siding system the same.

    A knowledgeable contractor should also explain the tradeoffs among materials without pressuring you toward a particular brand. You can use this overview of finding a reliable siding company to consider how different panel materials respond to local weather. If you are comparing fiber cement and engineered wood options, learning how the products differ can help you evaluate siding contractors based on the quality of their recommendations, not just the appearance of a sample.

    The strongest contractor conversations are specific. You should leave with a clear understanding of the material proposed, why it suits your home. How moisture and ventilation will be addressed, and which installation standards will guide the work. That level of explanation is a practical sign that the contractor is prepared to take responsibility for the complete siding system.

    How Free Inspections and Honest Assessments Help You Decide

    A siding project should begin with information, not a sales pitch. A reputable contractor can inspect the exterior, identify the specific issues affecting your home, and explain which repairs or replacement options make sense. That inspection-first approach gives you a clearer starting point, especially when damage is difficult to see from the ground or when several exterior components may be involved.

    Referred Restoration offers free, honest inspections as a first step for homeowners. The purpose is to reduce barriers and help you understand the condition of your siding before you make a decision. An inspection may look at visible wear, storm damage, moisture concerns, installation problems, and areas where the siding meets other parts of the exterior. The contractor should be willing to explain what was observed, what still needs investigation, and what does not require immediate work.

    Look for education instead of pressure

    One of the clearest signs of a trustworthy contractor is the way they handle your questions. You should receive a straightforward explanation of the recommended work, the materials being considered, the installation process, and the expected timeline. If weather or material availability could affect scheduling, those possibilities should be discussed early rather than presented as a surprise later. Minnesota homeowners can also review the state’s guidance on tips for hiring a contractor as they compare providers.

    An honest assessment may confirm that a repair is appropriate, recommend replacement in a specific area, or identify a problem that should be monitored first. That kind of neutral guidance is more useful than a contractor who creates urgency without showing evidence. Be cautious when someone pressures you to decide immediately, asks for full payment upfront, or avoids answering basic questions about the work. Minnesota’s Department of Labor and Industry advises homeowners to hire licensed contractors, and its licensed contractor guidance provides a practical place to verify credentials.

    Expect clear communication from inspection through completion

    The inspection is also an early test of the working relationship. A contractor who communicates openly at the beginning should continue explaining the process as the project moves forward. Ask how updates will be handled, who will answer questions, and how any changes or delays will be communicated. Before work begins, make sure the written agreement describes the scope, materials, responsibilities, and timeline. The Minnesota Attorney General’s home building and remodeling guidance recommends getting these details in writing.

    For storm-related siding damage, experience with insurance claim navigation can be helpful. Referred Restoration’s team has experience helping Minnesota homeowners work through that process, while keeping the focus on documenting the home’s needs and explaining the next steps. Throughout the project, the company’s guiding philosophy is to treat every home as its own. For homeowners in Rogers, Cottage Grove, and nearby communities. That means choosing a contractor who values a careful assessment, transparent communication, and a decision you can make with confidence.

    Comparing Siding Contractor Quotes: What to Look For

    When you compare siding proposals, the most useful question is not which contractor has the lowest number. It is whether each proposal describes the same project with the same level of detail. Minnesota’s Department of Labor and Industry recommends getting multiple estimates so homeowners can compare the work scope and material quality, not just the final figure: review the state’s contractor hiring guidance.

    Read each proposal alongside the others and look for what is included, what is excluded, and what remains unclear. A thorough proposal should explain preparation, removal and disposal, flashing, moisture management, installation, trim, cleanup, and how unexpected conditions will be handled. It should also identify the siding product and the installation approach, rather than relying on a broad material label.

    Use this comparison checklist when reviewing siding proposals
    A proposal worth examining closelyWarning signs to question
    Names the siding material, accessories, preparation, removal, installation, and cleanup.Uses a low-ball scope that leaves major parts of the work undefined or excludes important preparation.
    Includes a written contract detailing the scope, materials, responsibilities, and realistic timeline.Offers no written contract, or asks you to rely on verbal promises and a one-page general estimate.
    Provides a written manufacturer or workmanship warranty and explains what each one covers.Uses a vague warranty without identifying coverage, exclusions, or the process for requesting service.
    Explains scheduling, weather considerations, communication, and possible delays before work begins.Pressures you to decide immediately or makes promises that leave no room for weather or site conditions.
    Can provide recent local references for comparable siding projects and welcomes reasonable questions.Won’t provide references, avoids specific answers, or insists on full payment upfront.
    Reviews the home first, documents visible conditions, and recommends materials based on the property.Pushes a standard package before inspecting the exterior or explaining why the recommendation fits.

    Look for scope clarity, not just a polished presentation

    A professional proposal makes it possible to compare one contractor’s work with another’s fairly. Ask whether the material description includes the exact product line, color, trim, fasteners, and related components. If the home has existing damage, ask how the contractor will address sheathing, water intrusion, or other conditions discovered after removal. The answer may depend on an inspection, but the process for documenting and approving additional work should be clear.

    Minnesota’s Attorney General advises homeowners to get a written contract that details the work, materials, and timeline. A clear agreement reduces misunderstandings and gives both sides a shared reference throughout the project. Read it before signing, and ask for revisions when an important promise appears only in a conversation or text message: see the Minnesota home-building contract guidance.

    Pay attention to how the contractor communicates

    The proposal itself is also evidence of the professional approach you can expect during the project. A contractor who explains options, answers questions directly, and sets realistic expectations is easier to work with than one who creates urgency. You should have time to review the documents, verify licensing and insurance, contact references, and consider whether the plan fits your home. An inspection-first review is especially valuable because it connects the recommendation to actual exterior conditions instead of a generic sales pitch.

    Comparing siding contractor quotes this way helps you choose a partner based on complete work, appropriate materials, accountability, and communication. The strongest proposal is the one you can understand before work begins and use to confirm what was promised after the project is underway.

    The Single-Source Advantage for Rogers and Cottage Grove Homeowners

    Exterior projects rarely stay limited to one surface. A siding replacement may reveal roof-edge concerns, require updated gutters, or prompt questions about aging windows. When separate contractors handle each part, you may find yourself coordinating schedules, comparing recommendations, and deciding who is responsible when one piece affects another. A single-source exterior restoration team simplifies that process.

    Referred Restoration can coordinate roofing, siding, gutters, and windows through one accountable team for homeowners in Rogers and Cottage Grove. That does not mean every project needs every service. It means the recommendations can be considered together, with a clearer view of how the exterior works as a whole. Explore the company’s exterior restoration services to see how those projects fit together.

    One plan, one point of accountability

    With one contractor overseeing related work, communication has a natural home. You have one team to contact with questions about sequencing, material coordination, or the transition between siding and roofing. The same approach can help reduce avoidable gaps around gutters, windows, trim, and other details that influence water management and the finished appearance.

    Accountability also matters after the work begins. If a concern involves more than one part of the exterior, you do not have to determine which contractor should investigate it first. A single team can review the situation, explain what it sees, and outline the next step in plain language. For homeowners learning how to choose a siding contractor, that level of coordination is worth evaluating alongside installation experience and material knowledge.

    A local, inspection-first approach

    Referred Restoration serves homeowners in Rogers and Cottage Grove with a philosophy of treating every home as its own. The first step is a free, honest inspection, giving you an opportunity to understand the condition of the exterior before making decisions. A useful inspection should distinguish observed damage from routine wear, explain which concerns deserve attention, and avoid creating urgency where the evidence does not support it.

    Transparency remains important when a project is substantial. Referred Restoration can discuss available financing through its GreenSky partnership for qualifying major exterior restoration projects, while leaving the specific terms to the lender and your individual qualifications. The goal is to make the path clear, not to push you toward work that does not fit your home or priorities.

    Whether you need siding alone or a broader exterior plan, local coordination can make the experience easier to manage. Homeowners in Cottage Grove can review the company’s Cottage Grove siding and roofing services, then Contact Referred Restoration online to request an honest starting point for the project.

    Request a free inspection and honest assessment of your siding project today

    Frequently Asked Questions

    What should I look for in a siding contractor?

    Look for a contractor with Minnesota licensing, current insurance, relevant experience with your chosen siding material, recent local references, and clear warranty terms. The Minnesota Department of Labor and Industry recommends hiring licensed contractors and checking their credentials before signing an agreement: Minnesota DLI hiring guidance. A professional should also explain the installation process, expected timeline, and how the proposed materials suit your home’s exposure to Minnesota weather.

    How do I verify a siding contractor’s reputation?

    Ask for references from recent projects similar to yours, then contact those homeowners with specific questions about communication, site care, workmanship, and follow-through. Review independent feedback on platforms such as Google or the Better Business Bureau. And look for a consistent history of local work rather than relying on a few testimonials. A contractor who answers questions directly and shares project details openly gives you more useful information than one who pressures you to decide immediately.

    How can I assess a contractor’s siding experience?

    Ask which siding materials the crew installs regularly, how they manage moisture and ventilation, and whether they follow the selected manufacturer’s installation requirements. Minnesota DLI advises homeowners to ask about experience with the specific type of siding chosen: DLI contractor hiring tips. Request photos or references for comparable homes, and ask who will supervise the work. The answers should be specific to your material and property, not a generic promise that every installation is the same.

    What should be included in a siding contract?

    Get the complete scope in writing, including removal and preparation, materials, installation details, cleanup, timeline, warranty terms, and how changes will be handled. Minnesota’s Attorney General recommends a written contract that identifies the work, materials, costs, and completion timeline: Minnesota home-building guidance. Read the document before signing and confirm that every verbal commitment appears in it. Avoid contractors who demand a rushed decision or full payment upfront.

    Ready to Choose the Right Siding Contractor?

    A careful inspection can help you understand your home’s siding needs, compare your options, and move forward with a clear plan. Referred Restoration provides free, honest siding inspections for Minnesota homeowners, with a straightforward approach and attention to the details that matter.

    Contact Referred Restoration online to schedule your inspection, or call (763) 726-4245.

  • House Siding Replacement: Planning a Full Exterior Refresh

    House Siding Replacement: Planning a Full Exterior Refresh

    Replacing the siding on an entire Minnesota home is more than choosing a new color. The work should account for the condition behind the panels, the demands of snow, hail, and freeze-thaw cycles, and the details that keep water out after installation.

    Contractor installing fresh siding panels on a Minnesota home during a full exterior refresh

    A complete house siding replacement typically includes inspecting the existing exterior, deciding what can stay, removing unstable materials. Repairing or protecting the wall assembly, selecting durable siding, and installing new panels with properly finished trim. Re-siding can also create an opportunity to improve energy performance with insulating sheathing. When the wall design supports it, according to the University of Massachusetts Building and Construction Technology program.

    Warning signs such as rotting boards, warped or loose panels, recurring painting, mold, or mildew deserve a closer look. The first step is determining whether the siding is showing surface wear or signaling deeper exterior problems.

    Contact Referred Restoration online for a free siding assessment and an honest look at what your home’s exterior really needs. You can also call (763) 726-4245.

    How to Know When It’s Time for House Siding Replacement

    Siding does more than determine how your home looks from the street. It helps shield the wall assembly from Minnesota’s snow, wind, hail, moisture, and freeze-thaw cycles. When that exterior layer is no longer performing well, a full replacement may do more than improve appearance. It can help protect the structure and create a better foundation for the next phase of your home’s exterior maintenance.

    Several warning signs deserve a closer look:

    • You are repainting repeatedly. If the siding needs paint every few years, the finish may be failing faster than normal maintenance can address. Repeated painting can become a signal that the underlying siding is nearing the end of its useful service.
    • Boards are soft, rotting, or deteriorating. Rot often points to prolonged moisture exposure. Damaged boards should not simply be covered without checking the wall beneath them, especially around seams, trim, windows, and other areas where water can enter.
    • Panels are warped, loose, cracked, or pulling away. Distorted or unsecured siding can allow wind-driven rain behind the exterior. It may also indicate that the material has become brittle, that fasteners have failed, or that the installation needs a broader assessment.
    • Mold or mildew keeps returning. Surface growth can have several causes, but recurring mold or mildew is a reason to investigate drainage, ventilation, and moisture conditions rather than repeatedly cleaning the same area.
    • Your energy bills have increased without another clear cause. Aging siding is not always the sole reason for higher energy use, but changes in the exterior envelope can contribute. A replacement project may provide an opportunity to evaluate insulation and air movement as part of the larger plan.
    • The home has sustained severe weather or pest damage. Hail, strong winds, fallen branches, insects, and other pests can damage more than the visible face of a panel. A professional inspection can help determine whether isolated repairs are appropriate or whether the damage is widespread.

    Sometimes the reason is simpler: the siding no longer fits the way you want your home to look. A new exterior is a major home improvement that can refresh curb appeal while adding a renewed layer of protection for the structure. That does not mean every defect requires complete replacement. The right decision depends on the extent of damage, the condition of the wall assembly, and whether repairs would provide a durable result.

    For Minnesota homeowners, an inspection is the practical next step. Look beyond color and surface appearance, and ask whether the siding is still dry, secure, and functioning as part of the home’s exterior system. That assessment helps distinguish a manageable repair from a replacement plan designed to protect the home for years to come. James Hardie’s overview of siding replacement signs provides additional context for evaluating these conditions.

    Assessing Your Current Siding Before a Full Replacement

    A careful inspection should come before any decision about house siding replacement. The goal is not simply to decide whether the visible siding looks dated. It is to determine which portions are still sound, what is happening behind the cladding, and whether the wall assembly can support the new materials you are considering.

    Start by walking the exterior in good light and looking for loose, warped, cracked, or soft sections. Pay close attention around windows, doors, rooflines, corners, and areas where water may collect. Staining, mold, mildew, recurring paint failure, or visible rot can indicate that the siding is no longer protecting the wall as intended. A professional inspection should also include a close look at trim, flashing, penetrations, and the condition of the sheathing beneath any exposed areas.

    Separate stable siding from unstable sections

    Not every section has to be handled in the same way. Existing siding that remains stable can often be re-secured as part of the re-siding work. That may involve correcting loose attachment points and preparing the surface for the new exterior system. According to guidance from the University of Missouri Extension, unstable siding should instead be removed and replaced with a plywood backer before new siding is installed: see the re-siding installation guidance.

    This distinction matters because covering an unstable section does not correct the movement or weakness below it. Removing the problem area gives the installer an opportunity to inspect the wall, repair damaged material, and create a firm, consistent base. It also helps prevent uneven finished courses, loose panels, and future moisture pathways.

    Look beyond the visible cladding

    Before adding new layers, the assessment should account for moisture management, shear loads, insects, and fire. These concerns become especially important when insulating sheathing is part of the plan. Rigid foam can improve the energy performance of an existing home during re-siding, but most foam sheathing is typically non-structural. As the University of Massachusetts Building and Construction Technology program explains. Extra components may be needed to provide the structural support that the foam does not supply on its own. The program’s guidance on insulating outside existing walls outlines the supporting components a proper assembly requires.

    In practical terms, the right assembly depends on the condition and construction of your home. A siding consultant should identify where repairs, backer material, flashing, or additional fastening are needed before the new exterior is ordered. That evaluation also makes it easier to compare choosing exterior siding panels based on how they will perform on your particular walls, rather than choosing by appearance alone.

    Siding Materials Built for Minnesota Weather

    Minnesota siding has to do more than improve curb appeal. It is part of the home’s exterior defense against snow, hail, moisture, and repeated freeze-thaw swings. The right material depends on the home’s exposure, wall assembly, architectural style, maintenance preferences, and the condition found during inspection. A durable product can still perform poorly if the wall behind it is damaged or if flashing, trim, and installation details are overlooked.

    Vinyl is identified as a recommended choice for re-siding in a housing guide from the University of Missouri Extension, but it is not the only appropriate option. Referred Restoration works with Vinyl, Fiber Cement, LP SmartSide, Metal, and Wood siding. Allowing the material decision to follow the needs of the home instead of forcing every project into one product category. Review the available siding material options before choosing a finish, and consider how vinyl siding installation details affect the final result.

    How common siding materials fit Minnesota homes
    MaterialDurabilityInsulationMaintenanceMinnesota fit
    VinylResists routine weather exposure when properly installed, with profiles and thicknesses suited to different homes.Insulated options can support the wall assembly, while the siding itself is not a substitute for complete wall insulation.Generally low maintenance, with periodic cleaning and inspection for impact or storm damage.A practical choice for many re-siding projects, especially when clean installation and matching trim are priorities.
    Fiber CementDurable and fire-resistant, though its heavier, more involved installation requires careful professional handling.Works as part of a properly designed wall assembly, but added insulation must be evaluated separately.Requires attention to paint or finish condition, joints, and water-management details.Well suited to homeowners seeking a substantial, stable exterior with a more traditional appearance.
    LP SmartSideEngineered wood siding designed for exterior use, with performance depending on correct detailing and installation.Provides the siding layer, while the contractor evaluates sheathing and insulation needs behind it.Routine inspection and finish maintenance help protect exposed edges, joints, and surfaces.A strong option when the home calls for an engineered wood look and a carefully managed moisture barrier.
    MetalHandles demanding exposure and can provide a durable solution when selected and installed for the home’s conditions.Usually relies on the wall assembly and added sheathing for meaningful insulation performance.Low routine upkeep, with inspections after hail or other impacts that may dent or affect the finish.Useful for specific architectural styles, trim applications, or areas where a hard-wearing surface is desirable.
    WoodCan perform well when protected from prolonged moisture and maintained consistently, but it is not maintenance-free.Insulation performance comes primarily from the wall system behind the boards or panels.Needs regular attention to paint, stain, joints, and signs of moisture, rot, or insect activity.Best for homeowners who value natural character and are prepared for a more involved maintenance plan.

    Insulation and the wall behind the siding

    A house siding replacement project can create an opportunity to improve the building envelope. The University of Massachusetts Building and Construction Technology program notes that adding rigid foam insulating sheathing during re-siding can improve energy performance. That upgrade is not automatic, however. Rigid foam is typically non-structural, so the design may require additional components to handle structural loads and maintain reliable attachment points.

    The assessment should also account for moisture movement, flashing, ventilation, and the condition of the sheathing. A new exterior covering cannot correct concealed rot or an improperly managed wall system by itself. The goal is a tight, dry, durable assembly that is prepared for Minnesota’s seasonal stress before the finished siding goes on.

    Trim and installation matter as much as the product

    Material selection is only one part of the decision. During re-siding, exposed wood trim, drips, and fascias may need to be covered with vinyl or metal that coordinates with the new siding. This protects vulnerable edges while giving the exterior a finished appearance. The University of Missouri Extension also emphasizes following the manufacturer’s installation instructions. A careful inspection, sound preparation, compatible trim, and properly managed water details help the chosen siding perform through snow, hail, and temperature changes.

    From Siding Removal to New Installation: The Process

    A well-managed siding replacement is more than fastening new panels over an old exterior. The work should address the condition of the wall beneath the siding. Control water at vulnerable transitions, and leave the home ready for Minnesota’s snow, hail, and freeze-thaw cycles. The sequence may vary with the home’s construction and the selected material, but a careful installation generally follows these steps.

    1. Inspect the siding and prepare the work area. The project begins with a close inspection of the existing siding, trim, wall surface, windows, doors, soffits, and other exterior transitions. The crew identifies loose or damaged areas, signs of moisture, deteriorated wood, and places where the current assembly is not performing well. This is also the time to confirm the layout, material selections, access needs, and any required preparation. A thorough inspection keeps hidden conditions from becoming surprises after installation begins.
    2. Protect the yard, landscaping, and property. Before removal, the crew establishes a controlled work area. Landscaping, walkways, outdoor fixtures, windows, and nearby surfaces should be protected from falling debris and dust. Removal can create sharp scraps and substantial waste, so organized staging and cleanup are part of protecting the home, not an afterthought.
    3. Remove unstable siding and expose problem areas. Stable existing siding may be re-secured when the wall assembly supports that approach. Unstable siding, however, should be removed rather than covered. Missouri Extension guidance says unstable siding should be removed and replaced with a plywood backer, while stable siding should be re-secured where appropriate. That distinction helps the new exterior rest on a sound, properly supported surface: review the siding installation guidance.
    4. Repair the wall and address moisture and insulation. Once the wall is accessible, damaged sheathing or framing can be evaluated and repaired. The crew also considers how water moves around windows, doors, corners, rooflines, and other openings. Re-siding creates an opportunity to add rigid foam insulating sheathing and improve the home’s energy performance. But that layer is typically non-structural and must be integrated with the correct supporting components. The goal is not simply more insulation. It is a wall assembly that manages moisture while providing a dependable base for the exterior.
    5. Install flashing and water-management details. Flashing, weather barriers, and properly treated transitions help direct water away from the wall rather than allowing it to collect behind the panels. These details deserve careful attention because a siding surface can look finished while poorly managed water is causing damage below it. Openings, penetrations, corners, and the base and top of the wall should be completed according to the assembly and the material manufacturer’s instructions.
    6. Install the new siding panels. With the substrate prepared and water-management details in place, the crew installs the new panels in a consistent layout. Panels must be aligned, fastened, and allowed to accommodate normal movement without buckling. Professional installation matters because the exterior skin is part of the home’s defense against moisture and weather. When the assembly is properly constructed, it can create a tight, dry, warm, and durable structure, as described by the University of Massachusetts Building and Construction Technology guidance.
    7. Finish trim, edges, and sealant. Exposed wood trim, drips, fascias, and related details should be covered with matching vinyl or metal so the finished exterior is protected and visually consistent. Soffits and other supporting surfaces should also be repaired when needed. The final pass includes caulking appropriate joints, checking corners and penetrations, securing finish pieces, removing debris, and reviewing the completed work with the homeowner. These finishing details help close the small paths where water and air can otherwise enter.

    The result should be more than a fresh appearance. When inspection, preparation, moisture control, insulation, installation, and finishing are handled as one coordinated process. The new envelope is better positioned to stay tight, dry, warm, and durable through the seasons.

    Why One Contractor Should Handle Your Full Exterior Refresh

    A full exterior refresh is more than a series of separate projects. The roof, siding, gutters, and windows all meet at important transition points, so the order of work and the quality of those connections matter. When one locally-owned contractor coordinates the work, homeowners in Rogers, Cottage Grove, St. Francis, and Monticello have one team responsible for the plan instead of several subcontractors managing disconnected pieces.

    That coordination is especially valuable when you want to find a local siding contractor you can trust. A qualified contractor should look beyond the visible siding and consider how the complete exterior performs together. For example, siding installation may need to align with roof edges, window trim, wall penetrations, and gutter placement. Planning those details as one project can reduce avoidable rework and make the finished exterior look intentional.

    Better sequencing from inspection through installation

    Referred Restoration uses a straightforward three-step process. First, the team provides a free inspection to understand the condition of the home and identify areas that need attention. Next, they develop a custom solution based on the home’s exterior, the homeowner’s goals, and the materials selected. Finally, professional installation puts that plan into action.

    This sequence gives homeowners a clear point of contact from the first conversation through completion. It also creates an opportunity to address related issues before new siding covers them. Roof edges, flashing areas, window openings, gutters, and exterior trim can be reviewed together rather than discovered one at a time after another trade has finished.

    Fewer gaps between exterior trades

    Using one contractor does not mean every home needs every service. It means the work can be evaluated as a connected system. If a siding replacement affects gutter placement, that relationship can be planned early. If window details meet new siding, the installation team can account for the transition. If roof and wall intersections require careful flashing, those details can be included in the same scope and discussed clearly.

    Homeowners also have one team to ask when they need an update, clarification, or documentation. Warranty information should be reviewed for the specific products and work involved. But keeping project records and responsibilities coordinated makes it easier to understand what was installed and who handled each part.

    For Minnesota homes exposed to snow, hail, and sharp temperature changes, a coordinated exterior plan supports durable results without forcing homeowners to manage several schedules. Referred Restoration’s customer-first approach is built around treating every home as its own, with transparent recommendations and no high-pressure sales tactics.

    How Long Does a Siding Replacement Project Take?

    For many Minnesota homes, a full siding replacement takes a few days to about a week. The actual schedule depends on the size and shape of the house, the siding material selected, and the condition of the exterior beneath the existing siding. A straightforward one-story home with accessible walls may move faster than a larger, multi-story home with detailed trim, multiple additions, or areas that need structural repair.

    Homeowners should also plan around Minnesota weather. Snow, hail, rain, strong wind, and sharp freeze-thaw changes can affect when exterior work begins and whether a crew needs to pause. A responsible contractor will explain the expected work window rather than promise a rigid completion date before inspecting the property.

    What can change the project timeline?

    • Home size and layout: More wall area, dormers, gables, corners, and architectural details require additional preparation and installation time.
    • Number of stories: Second-story and hard-to-reach areas require more staging, setup, and careful movement around the home.
    • Removal of old siding: Taking off unstable or damaged siding adds time, especially when fasteners are difficult to remove or multiple layers are present.
    • Hidden damage: Rot, moisture intrusion, or damaged sheathing may need to be addressed before new siding can be installed. Discovering and correcting those problems helps prevent the new exterior from covering an unresolved issue.
    • Material and trim details: Vinyl, fiber cement, LP SmartSide, and wood each have different handling, cutting, fastening, and finishing requirements. Soffits, fascia, window trim, and corner details also influence the pace.
    • Weather conditions: A safe, clean installation takes priority over rushing through unfavorable conditions.

    What should homeowners expect while work is underway?

    The project generally begins with protecting landscaping, walkways, windows, and nearby surfaces. The crew then removes the siding in the planned work areas and inspects the underlying structure. If repairs or additional preparation are needed, the contractor should explain what was found and how it affects the sequence. New siding, trim, and finishing details are installed after the surface is ready, followed by cleanup and a walkthrough.

    Because siding work temporarily exposes parts of the exterior, homeowners should keep doors and windows closed near active work. Move fragile outdoor items away from the walls, and expect some construction noise during removal and installation. Ask where materials will be staged, how daily cleanup will be handled, and who to contact if weather changes the schedule.

    How often should siding be replaced?

    There is no single replacement interval for every home. Siding lifespan depends on the material, installation quality, exposure to sun and storms, maintenance, and whether moisture has reached the wall assembly. Instead of replacing siding solely because it has reached a certain age, look for recurring painting. Warped or loose sections, cracking, rot, mold or mildew, and areas that no longer protect the home effectively. A professional inspection can help determine whether isolated repairs are appropriate or whether a full replacement is the more practical long-term solution.

    Contact Referred Restoration online to start planning your siding replacement with a free assessment. You can also call (763) 726-4245.

    Frequently Asked Questions

    Is it worth replacing siding on a house?

    Replacement can be worthwhile when siding is repeatedly failing, allowing moisture intrusion, requiring frequent painting, or making the home harder to protect through Minnesota weather. New siding can improve the exterior appearance and help protect the structure. But the right decision depends on the condition of the siding, trim, sheathing, and any moisture damage underneath. An inspection can determine whether targeted repairs or a full replacement is the better fit.

    Can you replace just pieces of siding?

    Yes, individual panels, boards, or trim pieces can sometimes be replaced when the surrounding siding is stable and matching material is available. Spot repairs are less suitable when the siding is broadly warped, loose, rotted, faded, or affected by recurring moisture. The installer should check behind damaged areas before replacing the visible piece, because the sheathing or framing may also need attention.

    How often should house siding be replaced?

    There is no universal replacement schedule. Siding life depends on the material, installation quality, exposure, maintenance, and the severity of local weather. Instead of relying on age alone, look for recurring painting, rot, warping, loose sections, mold or mildew, and rising energy concerns. Regular inspections can identify problems early and help you plan replacement before damage spreads.

    What should be included in a full siding replacement?

    A complete project should cover more than installing new panels. The process typically includes inspecting the existing exterior, protecting the work area, removing unstable siding, repairing exposed wood or structural areas. Addressing flashing and insulation opportunities, and installing new siding with properly finished trim, drip edges, fascias, and caulking. Coordinating siding with related exterior work can also help keep the finished home weather-tight and visually consistent.

    Ready to Refresh Your Home’s Exterior?

    A full siding replacement can bring a clearer plan to your home’s protection, appearance, and long-term upkeep. Referred Restoration can review your existing siding, discuss material options suited to Minnesota weather, and outline the next steps for your project.

    Contact Referred Restoration online to schedule a free siding assessment and get a custom exterior refresh plan. You can also call (763) 726-4245.

  • CertainTeed Vinyl Siding Options for Minnesota Homes

    CertainTeed Vinyl Siding Options for Minnesota Homes

    Minnesota siding has to do more than complement a home’s architecture. It must handle freeze-thaw cycles, wind, moisture, and strong seasonal temperature changes while continuing to look finished year after year. The product line you choose matters, but so do the installation details behind it.

    Home exterior finished with clean horizontal vinyl siding panels in neutral gray, professionally installed

    For Minnesota homeowners, certainteed vinyl siding offers a practical combination of durable performance, fade-resistant color options, and multiple styles for different home designs. CertainTeed also states that its vinyl siding carries a Lifetime Limited Warranty, subject to the product’s terms and conditions. The right choice still depends on your home’s exposure, design goals, existing wall assembly, and installation plan.

    Before comparing profiles and colors, it helps to understand why this product line is often considered for demanding northern climates. The following factors can help you evaluate its performance with clear expectations, rather than choosing on appearance alone.

    If you are exploring a siding replacement in the Rogers, Cottage Grove, or surrounding Minnesota communities, the conversation rarely starts with a single brand. It starts with the condition of your current siding, the way your walls handle water, and the goals you have for your home’s look and long-term value. CertainTeed is one of the families a verified siding contractor will walk you through. Alongside the practical decisions that affect how it performs in Minnesota weather: which profile suits your house. How the siding integrates with windows and doors, and how it will be flashed and installed to shed water reliably.

    Contact Referred Restoration online to plan your Minnesota siding project around the right CertainTeed options.

    What Makes CertainTeed Vinyl Siding a Strong Choice for Minnesota Homes

    For Minnesota homeowners, siding needs to do more than improve curb appeal. It should provide a dependable exterior layer through changing temperatures, seasonal moisture, and years of everyday exposure. CertainTeed has built a strong reputation by combining practical performance features with a broad range of finish and color options.

    CertainTeed states that its vinyl siding is engineered for exceptional durability and includes fade-resistant color technology. That combination matters on homes that receive strong sunlight during the summer and experience repeated seasonal changes. A color system designed to resist fading can help the exterior maintain a consistent appearance longer, while durable siding supports the home’s weather-protection envelope.

    The manufacturer also lists a Lifetime Limited Warranty as a feature of its vinyl siding products. That warranty should be reviewed for the specific product line, installation requirements, coverage terms, and exclusions. It is not a substitute for proper installation or routine inspection. But it can provide an additional layer of product support when the siding is selected and installed according to the applicable requirements.

    A reputation built around long-term performance

    CertainTeed is widely considered a top-rated brand in the vinyl siding industry for quality, durability, and service. That reputation is relevant to Minnesota projects because homeowners are often balancing several priorities at once: a finished appearance. Material reliability, maintenance expectations, and confidence in the product behind the installation.

    Brand reputation alone should not determine the right siding choice. The home’s exposure, wall condition, design, color goals, and installation details all deserve attention. Still, starting with a manufacturer known for quality and durability can make the selection process more straightforward. Especially when the project involves replacing aging siding rather than simply changing the exterior color.

    Homeowners comparing high-quality vinyl siding should also look beyond the panel itself. Proper fastening, trim integration, water management, and compatibility with windows and doors affect how the finished system performs. A durable product is strongest when the entire exterior assembly is planned carefully.

    For a Minnesota home, CertainTeed vinyl siding can be a strong starting point when the goal is a resilient, low-maintenance exterior with established manufacturer support. The next step is matching the available product line, profile, and finish to the home’s architecture and the conditions at the property.

    Exploring the CertainTeed Vinyl Siding Product Line

    CertainTeed offers more than one siding construction, so the right comparison starts with the material category. Its portfolio includes vinyl, polymer, and insulated options for both new construction and exterior restoration. That range lets homeowners compare appearance, reinforcement, and insulation goals instead of treating every siding panel as interchangeable.

    The table below summarizes four commonly considered product families. MainStreet and Monogram are vinyl siding lines. CedarBoards is associated with insulated siding, while Northwoods is designed to provide a more natural wood look through a polymer siding construction. Confirm available colors, profiles, and installation requirements for your specific project before making a final selection.

    CertainTeed siding product family comparison
    Product lineBest forKey featuresStyle options
    MainStreetHomeowners seeking a practical vinyl siding foundation with traditional profilesClass 1(A) fire rating, patented STUDfinder installation feature, and a low-gloss wood-grain finishClapboard, Dutch lap, and beaded profiles
    MonogramProjects where added rigidity and high wind-load performance are prioritiesRigidForm 210 technology, wind loads up to 210 mph, CertaLock locking system, and a full rollover nail hemClapboard and Dutch lap profiles
    CedarBoardsHomeowners who want insulated siding as part of an exterior upgradeInsulated siding family intended to combine a wood-grain appearance with a more substantial panel profileWood-inspired siding styles, with options varying by CedarBoards collection
    NorthwoodsRestoration projects that call for a pronounced, natural wood appearancePolymer siding family with a textured wood-inspired look and substantial visual characterNatural wood-style profiles and colors, subject to the selected collection

    For Minnesota homes, product selection should also account for the building’s exposure, existing wall assembly, and desired architectural style. A traditional clapboard profile may suit a simple ranch, while Dutch lap or beaded siding can change the scale and character of a larger elevation. Insulated siding may be worth discussing when the project goals extend beyond surface appearance.

    Reviewing certainteed vinyl siding options can help narrow the visual direction before an on-site assessment. A qualified installer should then verify the product’s current specifications, accessory compatibility, and required installation details for the home.

    How CertainTeed Vinyl Siding Stands Up to Minnesota Weather

    Minnesota siding must handle more than changing seasons. Hail, strong winds, heavy snow, moisture, and sharp temperature swings can all test an exterior over time. CertainTeed vinyl siding is designed around the performance requirements that help rigid PVC siding remain stable through those conditions.

    One useful benchmark is ASTM D3679, the standard specification for rigid PVC siding. It addresses dimensions, impact strength, expansion, appearance, and windload resistance. That does not mean every installation performs identically in every storm. Product selection, fastening, wall preparation, and installation quality still influence how the finished siding responds to Minnesota weather.

    Designed for impact and wind resistance

    Hail and wind place sudden stress on siding panels. ASTM D3679 establishes testing and requirements related to impact strength and windload resistance, giving manufacturers a defined performance standard to work toward. A qualified contractor can also help match the product line and profile to the home’s exposure, layout, and restoration needs.

    Heavy snow adds another seasonal concern, especially where drifting snow contacts lower wall areas or moisture can collect around transitions. Vinyl siding is not a substitute for proper water management, but its uniform exterior surface supports a durable, low-maintenance finish when the wall assembly is detailed correctly.

    Built to accommodate temperature swings

    Minnesota can move from deep winter cold to intense summer heat within a few months. Materials expand and contract as temperatures change, so siding needs room to move without buckling or pulling against fasteners. ASTM D3679 specifically addresses thermal characteristics, including linear expansion and nail-slot allowance for thermal expansion.

    That standard matters because installation details must work with the material’s movement. Panels should be fastened according to the manufacturer’s instructions rather than locked tightly in place. Proper clearances and correctly installed joints help the siding adjust as temperatures rise and fall.

    Fade-resistant color with less upkeep

    CertainTeed identifies its vinyl siding as offering fade-resistant colors. The ASTM specification also calls for uniform color and a surface free from visual or structural changes such as peeling, chipping, cracking, flaking, or pitting. Together, those characteristics support the practical benefit many homeowners want from vinyl siding: an exterior that continues to look consistent without frequent painting.

    ASTM D3679 also states that PVC siding must not contain elemental lead or lead compounds, other than incidental traces associated with raw materials or manufacturing. For homeowners comparing exterior materials, that is one more clearly defined specification to review alongside appearance, profile, exposure, and installation requirements.

    The result is a siding option that can offer durable color and straightforward maintenance, provided it is selected and installed for the home. Referred Restoration can assess the existing exterior and explain which CertainTeed approach fits the property’s weather exposure and long-term goals.

    What to Consider Before Choosing CertainTeed Siding

    Choosing siding is about more than selecting a color from a sample board. The right material should suit your home’s architecture, project conditions, maintenance expectations, and long-term goals. CertainTeed siding can often be used for both new home construction and exterior restoration projects. Which makes the product family relevant to very different homeowners and scopes of work.

    Start with the home’s style and the look you want

    Consider how the siding profile will work with your roofline, windows, doors, and existing trim. Clapboard siding offers a familiar horizontal appearance, while dutch lap siding adds a more pronounced shadow line. Beaded profiles can create a more distinctive, traditional look. Reviewing full-size samples in natural light is helpful because colors and texture can appear different outdoors than they do under showroom lighting.

    Color selection deserves the same care. A broad palette can make it easier to coordinate the siding with roofing, masonry, soffits, and trim, but more choices also make comparison important. Look at several shades beside the home’s permanent features. A color that works well on a small sample may feel very different across an entire exterior.

    Match the product line to the project

    CertainTeed offers vinyl, polymer, and insulated siding options. The best fit depends on the home’s design, the desired appearance, the wall assembly, and the performance priorities for the project. A new-construction installation may allow more flexibility in planning the exterior layers and details. An exterior restoration or retrofit must account for the existing siding, sheathing, trim, windows, doors, and any conditions discovered during removal.

    Ask the installer to explain which product line is being recommended and why. The answer should connect the selection to your home’s condition and the project’s goals, rather than simply presenting the most expensive option. Value comes from choosing a suitable system and installing it correctly, not from selecting features that do not solve a need.

    Read the warranty terms carefully

    A manufacturer warranty can be an important part of the decision, but it should not be treated as a substitute for reviewing the actual documentation. Read the terms, limitations, transfer provisions, and required maintenance language that apply to the specific product. Coverage can depend on the product line and installation conditions, so avoid relying on a general statement about the brand.

    A verified installer can explain what the manufacturer warranty addresses and help distinguish product coverage from workmanship responsibilities. Before work begins, request the product information and keep the warranty documents with your project records. That practical review gives you a clearer basis for comparing options and choosing siding that fits the home, not just the brochure.

    Why Professional Installation Matters for CertainTeed Siding

    High-quality siding protects a home only when the water-management details behind it work as intended. In Minnesota, repeated rain, snow, ice, and freeze-thaw cycles make installation completeness especially important. A professional installer does more than fasten panels to the wall. They build a coordinated exterior system that manages water around the siding, windows, doors, corners, and other openings.

    The University of Minnesota Extension explains that exterior materials unable to withstand repeated water exposure need protection from another layer, often called a drainage plane. That principle applies to siding replacement as much as it does to new construction. The drainage plane should give incidental water a reliable path back outside instead of allowing it to collect behind the cladding. Learn more about drainage planes and water protection from the University of Minnesota Extension.

    Installation must follow both standards and product instructions

    Vinyl siding should be installed according to recognized practices, including ASTM D4756, along with the instructions for the specific manufacturer and product. Those instructions address details such as fastening, clearances, panel movement, and how components fit together. Following only a general siding routine can leave out requirements that matter for a particular CertainTeed profile or accessory.

    This is also why installation quality cannot be judged by the finished wall alone. Panels may appear straight and attractive while hidden laps, fasteners, or transitions create weaknesses. An experienced crew plans the wall assembly before covering it, checks the substrate, and follows the required sequence from water-shedding layers through the visible finish.

    Flashing and openings need careful coordination

    Flashing is one of the most important parts of the drainage system. Each piece must direct water down and out over the layer below it. If a flashing transition is reversed, interrupted, or poorly sealed, water can be directed behind the wall assembly instead of away from it.

    Windows and doors deserve particular attention because they interrupt the wall surface. The University of Minnesota Extension notes that these openings are part of the building’s outer surface and must be carefully integrated with drainage-plane components. The siding, trim, flashing, and surrounding weather-resistive layers need to work together. That integration helps reduce the risk of moisture entering at one of the most vulnerable areas of the exterior.

    Trim is part of this detailing, not merely a decorative finish. Review the guide to CertainTeed siding trim to understand how trim choices and installation details support a complete exterior system.

    Workmanship protects the investment

    A verified siding contractor should be able to explain how the project will manage water, accommodate the wall’s conditions, and coordinate siding with existing windows and doors. They should also inspect for issues that need attention before new panels conceal them. This workmanship focus matters because durable materials still depend on a complete, correctly sequenced installation.

    For homeowners comparing installation options, Referred Restoration’s siding contractors can assess the property and explain the recommended approach for its Minnesota exposure. The goal is a clean appearance supported by the drainage, flashing, and integration details that help the siding perform over time.

    How Much Does CertainTeed Vinyl Siding Cost?

    The total investment for a CertainTeed siding project depends on more than the brand name. Your selected product line, siding profile, home size, and installation complexity all affect the scope of work. CertainTeed offers vinyl, polymer, and insulated options, so the material package can vary significantly from one home to another. The company also offers multiple styles and profiles, which may require different trim, accessories, and installation details.

    What affects the project investment?

    A smaller, straightforward exterior with accessible walls usually involves a different installation process than a larger home with multiple stories, additions, dormers, or complex rooflines. Existing siding also matters. Your contractor may need to evaluate its condition, address damaged sheathing, improve preparation, or coordinate the new siding with windows, doors, soffits, and trim.

    Style and performance goals are part of the decision as well. A homeowner comparing standard vinyl, insulated siding, or another CertainTeed product line should consider appearance, maintenance expectations, weather exposure, and how the siding fits the home’s exterior. CertainTeed’s product range includes options for both new construction and exterior restoration, which gives homeowners flexibility when planning the work. Review CertainTeed’s product options before your consultation, then discuss which choices make sense for your home.

    Why an on-site assessment matters

    An accurate estimate requires an on-site assessment rather than a generic online figure. A trusted contractor can measure the exterior, inspect the current wall assembly, identify repairs, review access conditions, and explain which materials and details are included. This process also helps you understand the investment as a complete exterior project, not just a stack of siding panels.

    Referred Restoration takes a consultative approach to siding projects in Minnesota. The goal is to provide clear recommendations based on your home’s condition, design, and protection needs without pressuring you into a decision. That conversation can also clarify the expected installation sequence, preparation work, trim choices, and long-term maintenance considerations.

    Financing may be available

    For qualifying homeowners, Green Sky financing may provide another way to plan a siding project. The process generally involves choosing the project, submitting an application for lender review, and completing the agreement if approved. Financing is subject to lender qualification and terms, so ask your contractor for current program details and review the lender’s disclosures carefully.

    For a project-specific assessment, Contact Referred Restoration online or call (763) 726-4245. A site visit is the best way to understand your options and receive guidance tailored to your home.

    Is CertainTeed the Right Vinyl Siding for Your Home?

    CertainTeed can be a strong fit for a Minnesota homeowner who wants durable exterior protection without a demanding maintenance routine. The manufacturer describes its vinyl siding as offering exceptional durability, fade-resistant color technology, and a Lifetime Limited Warranty. Those features make it worth considering when you are replacing worn siding or planning a broader exterior restoration project.

    The product line also gives homeowners flexibility. CertainTeed manufactures vinyl, polymer, and insulated siding options, so the right selection can depend on the home’s existing exterior. Desired appearance, insulation goals, and the scope of the project. Its products can be used in both new construction and exterior restoration, which makes the brand relevant for more than one type of property or renovation plan. Review CertainTeed’s vinyl siding information for the manufacturer’s product overview.

    Still, a quality product is only part of the decision. In Minnesota, professional installation should be a central consideration. The installer must verify the wall assembly, establish a reliable drainage approach, and follow the product’s installation requirements. They should also account for how the siding meets windows, doors, rooflines, and trim. A careful assessment helps prevent a product choice from being undermined by avoidable workmanship or water-management problems.

    CertainTeed may be right for your home if:

    • Your exterior faces strong wind, heavy precipitation, hail, or repeated seasonal temperature changes.
    • You want siding with fade-resistant color and minimal ongoing maintenance.
    • You are evaluating drip-edge, drainage, or efficiency improvements as part of a larger exterior project.
    • Your current siding is faded, cracked, damaged, or no longer complements the home’s design.

    The best choice should match the home’s condition, the appearance you want, and the installation details required for lasting performance. A qualified siding professional can compare appropriate CertainTeed options, identify repairs that should happen first, and explain where professional installation matters most. That process gives you a clearer answer than choosing by color sample or brand name alone.

    Ready to explore CertainTeed siding for your home? Contact Referred Restoration online for a free siding assessment.

    Frequently Asked Questions

    Is CertainTeed vinyl siding a good choice for Minnesota homes?

    It can be a strong choice when the product line, profile, color, and installation details fit the home. CertainTeed describes its vinyl siding as durable, fade resistant, and covered by a Lifetime Limited Warranty. Independent industry commentary also recognizes the brand for quality, durability, and service. Review the actual warranty terms and choose an installer who understands Minnesota weather conditions. CertainTeed’s vinyl siding information provides the manufacturer’s product overview.

    How much does CertainTeed siding cost?

    There is no single price for a siding project. The total depends on the product line, profile, color, project size, removal needs, trim details, and installation complexity. A home with extensive window, door, roofline, or wall transitions may require more labor and flashing work. A professional evaluation can separate material choices from underlying preparation needs without relying on a generic per-square-foot estimate.

    What is the best CertainTeed vinyl siding product?

    The best option depends on the home’s design, exposure, insulation goals, desired appearance, and project type. CertainTeed offers vinyl, polymer, and insulated siding options, with profiles such as clapboard, Dutch lap, and beaded styles. Compare samples in the home’s actual light, then confirm the selected product’s installation requirements and warranty coverage before ordering.

    Who manufactures CertainTeed siding?

    CertainTeed manufactures its own siding product lines, including vinyl, polymer, and insulated options. The company publishes product information for individual lines and installation requirements. For a Minnesota replacement project, use those manufacturer instructions alongside applicable installation practices. And make sure the siding is properly integrated with flashing, windows, doors, and the home’s drainage plane. See the University of Minnesota guidance on keeping water out.

    Schedule Your CertainTeed Siding Consultation

    A thoughtful assessment can help match the product line, style, and installation approach to your Minnesota home. Referred Restoration can review your existing siding, discuss your priorities, and provide clear guidance without pressure.

    Contact Referred Restoration online or call (763) 726-4245 to schedule your CertainTeed vinyl siding consultation and assessment.

  • Seamless Gutters for Metal Roof Drainage That Works

    Seamless Gutters for Metal Roof Drainage That Works

    Metal roofing sheds rain and melting snow quickly, which makes the gutter system more than a finishing detail in Rogers, Cottage Grove, and communities along the Monticello corridor. That runoff must be directed away from siding, walkways, and the foundation before Minnesota’s freeze-thaw cycles create larger problems.

    Roofing technician installing seamless aluminum gutters along the edge of a standing-seam metal roof

    For Minnesota homes, seamless gutters for metal roof systems should be sized for the roof area. Matched to the panel layout, and secured with attachment methods that account for metal expansion and contraction. The right combination helps control fast runoff while reducing joints where snowmelt can expose weak points.

    Contact Referred Restoration online

    The best design starts by looking at how a metal roof moves water and where that water goes next. That connection between roof shape, gutter capacity, and winter conditions explains why choosing the right gutters matters.

    Why Metal Roofs Need the Right Gutters

    Metal roofing is designed to move water and snowmelt off the roof efficiently. That is an advantage during Minnesota storms, but it also means the gutter system must be ready to receive and control a fast-moving volume of runoff. When the gutter is too small, poorly pitched, or not positioned correctly. Water can overshoot the channel, pool at the roof edge, or discharge too close to the house.

    The goal is not simply to attach a gutter beneath the roof. It is to create a continuous path from the metal panels to the gutter, through the downspouts, and safely away from the home.

    Fast runoff needs enough capture capacity

    Metal roofs can shed rain and melting snow quickly, especially when the roof has a steep pitch or a large uninterrupted surface. A narrow gutter may fill faster than it can drain. While a gutter installed too far below the eave may allow water to leap over the front edge during a heavy downpour. The result can look like a roof problem even when the underlying issue is drainage capacity or placement.

    Seamless gutters for metal roof installations should be evaluated with the roof area, pitch, valleys, and downspout locations in mind. The correct approach may include larger channels, additional downspouts, or carefully planned outlet locations rather than treating every roof edge the same.

    Controlled discharge protects siding and the foundation

    A gutter system protects more than the roofline. Without controlled collection, runoff can streak or saturate siding, splash onto windows, erode soil, and collect beside the foundation. Repeated moisture at the foundation can contribute to settlement concerns, basement seepage, or damage to nearby landscaping. Downspouts should direct water away from the house and discharge where the surrounding grade can carry it away.

    Correct pitch matters just as much as channel size. Gutters that sag or slope away from their outlets hold water and debris instead of moving runoff to the downspouts. In winter, that standing water can freeze and add weight to the system. A properly aligned installation keeps the drainage path open through both summer rain and spring thaw.

    Minnesota winter conditions add another concern

    Snowmelt and freezing temperatures can expose weak points in a roof drainage system. The University of Minnesota Extension explains that ice dams form when snow melts on warmer portions of a roof. Then refreezes at a colder roof edge and backs water up. That process is driven primarily by uneven roof temperatures and heat moving from the home toward the roof, so gutters alone cannot prevent every ice dam. However, a sound gutter system helps manage water at the edge and reduces avoidable overflow against the exterior.

    Choosing the right drainage plan starts with understanding the roof’s specific runoff pattern. Homeowners comparing materials can also review the metal roof drainage needs of different roofing systems before finalizing the gutter layout.

    Seamless vs Sectional Gutters for Metal Roofs

    Metal roofing can shed rain and snowmelt quickly, so the gutter system must handle concentrated runoff without creating weak points along the roofline. The key difference between seamless and sectional gutters is the number of joints. Seamless gutters are formed in one continuous run for each side of the home, while sectional gutters are assembled from shorter pieces joined together.

    Fewer joints generally mean fewer locations where sealant can fail, fasteners can loosen, or movement can open a gap. That matters during Minnesota snowmelt, when water may move through the system repeatedly as temperatures rise and fall. Seamless gutters are not maintenance-free, and they can still leak if the slope, hangers, outlets, or downspouts are poorly designed. However, reducing the number of seams removes one common source of trouble. For more context on durable seamless drainage systems, consider how material choice and continuous construction work together.

    Seamless and sectional gutters compared for metal roofs
    ConsiderationSeamless guttersSectional gutters
    Joint countFew joints, usually limited to corners, outlets, and end capsMultiple joints where each gutter section connects
    Leak riskFewer seam locations can reduce opportunities for leaks during snowmeltMore seams create more potential leak points as seals age or shift
    MaintenanceStill requires cleaning and inspection, but has fewer seams to monitorRequires cleaning and checking each connection for separation or failed sealant
    Best fitHomes where long, continuous runs and winter runoff control are prioritiesSmaller repairs, short runs, or projects where modular replacement is useful

    Installation still determines performance

    A seamless profile does not compensate for incorrect pitch or inadequate support. The installer should account for the roof area draining into each run. Place downspouts where they can carry the volume, and use attachments suited to the fascia and metal-roof configuration. The U.S. Environmental Protection Agency describes a seamless-gutter installation method using self-tapping screws, with the cumulative size of the holes kept small. That detail reinforces an important principle: attachment should be deliberate and should avoid unnecessary penetration or damage to surrounding components. See the EPA’s seamless gutter installation guidance for the documented method.

    Sectional gutters can work when properly designed and maintained, but every seam deserves attention. If you are comparing options or troubleshooting an existing system, learn more about avoiding gutter leaks on metal roofs. The right choice depends on the home’s roof area, run length, attachment conditions, and exposure to Minnesota snow and ice, not on the word seamless alone.

    What Size Gutters Are Recommended for a Metal Roof?

    For most residential projects, the practical starting point is a 5-inch gutter. But a 6-inch system can be the better choice for a metal roof with a large drainage area, steep pitch, or concentrated runoff. The right answer is not determined by roof material alone. It depends on how much water reaches each gutter run and how quickly that water needs to be carried to the downspouts.

    Metal roofing deserves particular attention because smooth panels can shed rain and melting snow quickly. During a heavy Minnesota storm or spring thaw. A gutter that is too small may be more likely to overflow at corners, valleys, or low sections of the roof. Oversizing is often wise when the roof has a steep slope, broad sections that drain toward one run, or limited downspout capacity.

    When a 5-inch gutter may be enough

    A 5-inch gutter can work well on a smaller, moderately pitched roof when the gutter runs are short and downspouts are positioned to divide the water load. The installer should still account for roof sections that discharge into the same run, rather than judging the system by the visible edge of the house alone. Dormers, valleys, additions, and transitions can send more water to one area than a simple roof outline suggests.

    Pitch matters because a steeper roof can increase the speed and force of runoff entering the gutter. Rainfall intensity matters too. A system sized for ordinary showers may struggle during a short, intense storm. That is why a professional assessment should look at drainage zones, not just measure the gutter length.

    Why a 6-inch system may be the safer choice

    A 6-inch gutter provides more capacity for roof areas that produce rapid or concentrated runoff. It is often worth considering for large metal roofs, steep roof planes, long gutter runs, or homes where a valley pours water into one section. Larger gutters may also pair better with larger downspouts, helping move water away from the fascia and foundation instead of allowing it to spill over the front edge.

    The United States Department of Agriculture Natural Resources Conservation Service provides guidance for evaluating roof runoff, gutter capacity, and downspout sizing in its Roof Gutters and Downspouts guide. Its approach reinforces an important point: gutter and downspout decisions should be based on contributing roof area and expected runoff, not a one-size-fits-all rule. The SMACNA downspout and gutter sizing calculator is another useful technical reference for evaluating those variables.

    What to review before choosing a size

    • Measure each roof drainage area separately, including valleys and lower roof sections.
    • Evaluate pitch and the speed at which water will enter the gutter.
    • Account for local rainfall intensity, snowmelt, and the possibility of concentrated flow.
    • Match gutter capacity with enough downspouts and place them where water can leave the system efficiently.
    • Check fascia condition and attachment points before installation.

    In short, 5-inch gutters may suit a smaller, straightforward roof, while 6-inch gutters offer added capacity when metal panels shed water quickly or the roof geometry concentrates runoff. A site-specific review can determine whether seamless gutters for metal roof applications should use standard or oversized components, and whether the downspouts need to be upgraded with them.

    How Seamless Gutters Attach to a Metal Roof

    Installing seamless gutters for metal roof systems requires more than fastening a gutter to the nearest edge. The installer has to identify the roof’s drainage path, locate sound attachment points, and preserve the way the metal panels move as temperatures change. A secure system should handle fast runoff, snowmelt, and winter weather without bending the roof panels or pulling the gutter out of alignment.

    Fascia-mounted and hidden hangers

    On many homes, the gutter is mounted to the fascia board beneath the metal roof edge. Fascia-mounted hangers attach through the back of the gutter and into the fascia or supporting structure. This approach keeps fasteners out of the roofing panels when the fascia is sound and properly aligned. It also provides a clean finished appearance at the roofline.

    Hidden hangers use the same basic support location but conceal the hardware inside the gutter. They are spaced and fastened so the trough remains level enough to direct water toward the downspouts while resisting the added load of wet leaves, snow, and ice. The important question is not whether the hardware is visible. It is whether each fastener reaches a reliable structural material rather than thin trim or unsupported metal.

    Standing-seam clips and panel-friendly attachment

    Some metal roofs use standing seams that create a continuous raised connection between panels. In those cases, specially designed standing-seam clips can provide an attachment point without drilling through the roof surface. The clip grips the seam, while the gutter support connects to the clip. This can help preserve the roof’s weather barrier, but the clip and hanger still need to be selected for the specific panel profile and gutter load.

    Where a fascia or clip-based method is not suitable, an installer may use self-tapping screws in an appropriate structural location. The EPA describes a seamless-gutter installation method using self-tapping screws and notes that the cumulative hole area can be limited when the work is planned carefully. That reference is useful because it highlights a key principle: attachment should be deliberate, minimized, and sealed correctly rather than scattered across the roof surface. Read the EPA’s description of self-tapping seamless-gutter installation.

    Allowing for thermal movement

    Metal expands when heated and contracts as it cools. A gutter installation must support the drainage system without locking the roof panels in place or creating pressure at panel seams. Rigidly fastening through a moving panel, overtightening hardware, or choosing an incompatible clip can contribute to distortion, noise, or a compromised roof connection over time.

    For that reason, the installer should follow the roofing and hanger manufacturer’s requirements, use compatible fasteners and sealants, and leave movement where the system is designed to move. A careful assessment of the fascia, roof edge, seam profile, slope, and downspout locations determines the most appropriate attachment method for the home.

    Keeping Gutters Working Through Minnesota Snow and Ice

    Minnesota winter weather tests a gutter system in more than one way. Snow can accumulate on the roof, melt during a warm spell, and refreeze when temperatures fall. Metal roofing can move that meltwater quickly. So gutters and downspouts need to remain open and securely attached when drainage demand changes from nearly nothing to a concentrated flow.

    Ice dams develop when roof temperatures are uneven. According to the University of Minnesota Extension. Heat from the house can warm upper portions of the roof enough to melt snow, while the roof edge remains below freezing. The water runs toward that colder edge and freezes, creating a dam that can back water beneath the roofing and into the attic. Heat reaches the roof through conduction, convection, and radiation, so gutter maintenance is one part of a broader ice-dam strategy. Not a substitute for proper insulation, air sealing, and ventilation. The University of Minnesota Extension explains how ice dams form and how to prevent them.

    Why seamless construction helps during freeze and thaw cycles

    Seamless gutters have fewer joints than sectional systems, which means fewer locations where movement, sealant failure, or accumulated ice can create a leak. That does not prevent an ice dam from forming at the roof edge, but it can help the gutter channel handle snowmelt without adding avoidable weak points. Secure hangers, correct slope, properly positioned downspouts, and adequate capacity still matter.

    Homeowners looking deeper into seamless gutters for ice dam mitigation should also remember that the gutter cannot solve heat loss above the ceiling. If ice is already building heavily, avoid chopping at it or applying makeshift heat. Those actions can damage roofing and create a safety hazard. A qualified professional can assess the roof edge, drainage path, insulation conditions, and signs of moisture intrusion.

    Keep guards clean and inspect before winter

    Gutter guards can reduce the amount of leaves and debris entering the channel, but they are not maintenance-free. Pine needles, grit, small seeds, and windblown debris can collect on the guard surface or at the outlet. Before freeze-up, inspect the full system, clear the guards and downspouts, and look for sagging sections, separated joints, loose fasteners, or water stains below the eaves. After major snow or ice events, check for displaced guards and areas where meltwater is spilling over the front edge.

    For homes with metal roofing, compare guard designs and attachment methods rather than choosing by appearance alone. Our guide to gutter protection for metal roofs can help frame that discussion. The goal is a drainage system that remains accessible for inspection and continues directing meltwater away from siding and the foundation throughout Minnesota’s repeated snow and thaw cycles.

    How Do You Hire a Gutter Pro for a Metal Roof?

    A professional installation should begin with an evaluation, not a preset package. Metal roofing can move differently with temperature changes than other roofing materials, and the right gutter layout depends on roof size. Pitch, drainage paths, fascia condition, and the way snow and water move around the home. A careful consultation helps you avoid an undersized system, poorly placed downspouts, or fasteners that create problems later.

    When you speak with Referred Restoration, the process is designed to be practical and transparent. You can ask questions, review the recommended approach, and understand the work before making a decision. Financing may also be available through Green Sky for qualifying projects and services. The available path depends on lender requirements and the project, so it is discussed as an option rather than presented as a guarantee.

    1. Start with a free inspection. The first visit should look beyond the existing gutter line. A professional checks the roof edge, fascia, soffit, drainage grade, downspout locations, and areas where runoff could affect siding, landscaping, or the foundation. In Minnesota, the inspection should also account for heavy snow, spring snowmelt, and conditions that can stress a gutter system during winter.
    2. Review an honest assessment. A trustworthy contractor explains what needs attention and what does not. That may include recommending repairs to supporting wood, adjusting a downspout route, or confirming that part of the existing system can remain. Look for clear recommendations and transparent, no-hidden-fee pricing rather than pressure to approve a larger scope.
    3. Confirm custom sizing and layout. Seamless gutters for metal roof applications should be sized and positioned for the home’s actual drainage demands. The contractor should consider roof area, pitch, valleys, water concentration, and downspout capacity instead of choosing a standard size without measuring. The plan should also show how hangers and attachments will support the gutter while allowing the roof and gutter materials to perform as intended.
    4. Expect a professional installation. The crew should use compatible attachment methods, maintain consistent slope, secure the system at appropriate intervals, and seal or protect connection points. They should work carefully around the metal roof so installation does not damage panels, trim, or protective finishes. Before leaving, the team should check flow and confirm that water reaches the intended discharge points.
    5. Plan for follow-up and maintenance. Even a well-installed system needs periodic attention. Ask what to watch for after the first major rain, snowmelt, or freeze-thaw cycle, including sagging, overflow, loose hangers, and blocked downspouts. Gutter guards, seasonal cleaning, and prompt repairs can help maintain performance, but the best maintenance plan depends on trees, roof design, and the home’s surroundings.

    For homeowners in Rogers, along the corridor to Monticello, and in Cottage Grove, a local conversation can connect the installation details to the conditions your property actually faces. The next step is knowing which questions to ask before choosing a system and contractor.

    Get a custom gutter assessment for your metal roof

    Frequently Asked Questions

    What type of gutters are best for a metal roof?

    Seamless aluminum gutters are often a practical choice because they have fewer joints where leaks can develop and can be formed to fit the roofline. The best system still depends on the roof area, pitch, edge detail, fascia condition, and the home’s drainage layout. A professional should match the gutter profile, hangers, and downspouts to the roof’s runoff rather than selecting a system by material alone.

    Can you do gutters on a metal roof?

    Yes. Gutters can be installed on a home with a metal roof when the attachment method accounts for the roof edge. Fascia, flashing, and the movement that can occur as metal expands and contracts. Installers should avoid fastening through the roof panels when a secure fascia or approved edge attachment is available. The EPA describes seamless-gutter installation using self-tapping screws and notes that the total hole area can be limited to a couple of square inches: EPA installation guidance.

    What size gutters are recommended for a metal roof?

    There is no universal size based only on roofing material. Five-inch and six-inch gutters are common residential options, but the right choice depends on roof area, pitch, rainfall intensity, valley concentration, and downspout capacity. A sizing review should use the roof’s contributing drainage area and a recognized design reference, such as the USDA NRCS gutter and downspout guidance, rather than relying on a visual guess.

    What are the common problems with seamless gutters?

    Seamless gutters reduce joint-related leak points, but they can still overflow, sag, pull away from the fascia, clog with debris, or drain too close to the foundation. Metal-roof runoff can expose undersized systems to especially fast flows. In Minnesota, snow and ice can also stress hangers and block drainage. Correct sizing, sturdy attachment, adequate downspouts, and seasonal inspection help prevent these issues.

    Ready to Schedule Your Gutter Inspection?

    A properly planned drainage system can help your metal roof handle Minnesota rain and seasonal snowmelt while directing runoff away from vulnerable areas around your home. Referred Restoration can review your roof, gutters, and downspout layout and explain practical next steps without pressure.

    Schedule a free gutter inspection with Referred Restoration

    Contact Referred Restoration online, or call (763) 726-4245 to get started.

  • Cool Roof Shingles: What They Are and How They Work

    Cool Roof Shingles: What They Are and How They Work

    Roofing choices in Minnesota have to do more than shed snow. They also face summer sun, frequent hail, and sharp temperature swings that can stress roofing materials and affect indoor comfort. That makes reflectivity worth considering when you are planning a replacement or evaluating a new roof.

    Cool roof shingles installed on a Minnesota home under bright sunlight

    Cool roof shingles are designed to reflect more sunlight and absorb less solar energy than conventional roofing, helping the roof surface stay cooler. The U.S. Department of Energy reports that a reflective roof can remain more than 50 degrees Fahrenheit cooler than a conventional roof on a sunny afternoon. Which may reduce summer air-conditioning demand. See ENERGY STAR’s cool roof guidance for the underlying performance principles.

    That does not mean a reflective roof is automatically the right choice for every Minnesota home. Winter heating considerations, shingle design, roof ventilation, and the home’s overall condition all matter. Understanding how these shingles reflect and release heat provides a clearer basis for weighing their benefits in a cold-climate roofing system.

    Thinking about reflective roofing for your next replacement? Contact Referred Restoration online to learn whether cool roof shingles fit your Minnesota home.

    What Are Cool Roof Shingles?

    Cool roof shingles are roofing products designed to stay cooler in direct sunlight than conventional shingles. They do this through two related properties: solar reflectance and thermal emittance. Solar reflectance describes how much sunlight a roof surface sends away instead of absorbing. Thermal emittance describes how efficiently the surface releases heat it has absorbed. Together, these properties help limit how hot the shingles become during sunny weather.

    The U.S. Department of Energy explains that a cool roof reflects more sunlight than a conventional roof, absorbing less solar energy in the first place. That can reduce heat transfer through the roof assembly and help keep attic and upper-floor spaces more comfortable during hot weather. It does not mean the roof stays completely cold, and it does not replace proper insulation or ventilation. Rather, it reduces the amount of heat the roofing materials need to manage.

    Solar reflectance and thermal emittance are measured separately because a roofing surface can perform differently in each area. A product with high solar reflectance sends more of the sun’s energy away. A product with high thermal emittance releases absorbed heat more effectively instead of holding it at the roof surface. The California Air Resources Board identifies these as key performance characteristics when evaluating cool roofing materials: solar reflectance and thermal emittance.

    Why asphalt shingles can benefit from reflective technology

    Traditional asphalt shingle roofs are among the least reflective widely used roofing types in the United States, according to the Department of Energy. That does not make asphalt shingles a poor roofing material. Asphalt remains a common choice because homeowners value its appearance, availability, and compatibility with many residential roof designs. It does mean that the shingle’s color, surface treatment, and formulation can influence how much sunlight it absorbs.

    Cool asphalt shingles use reflective granules or other material improvements to increase solar reflectance while maintaining the familiar shingle format. Some high-performance cool asphalt shingles target a solar reflectance of about 0.40, although actual performance depends on the specific product and its tested rating. Looking at documented product data is more useful than judging a shingle by color alone.

    For Minnesota homeowners, cool roof shingles are one part of a complete roof system. Roofing materials still need to withstand snow, hail, moisture, and large temperature swings. Proper ventilation remains important for managing heat retention and reducing ice-damming risk. A qualified roofing professional can evaluate the roof deck, ventilation, insulation, and shingle selection together so the system fits the home’s structure and local climate.

    How Do Cool Roof Shingles Work?

    Cool roof shingles work by changing how the roof responds to sunlight. Instead of absorbing as much solar energy as conventional roofing, a reflective roof sends more of that energy away and stays cooler at the surface. The result is less heat moving through the roof assembly and into the attic and living space. The U.S. Department of Energy identifies solar reflectance and thermal emittance as the key properties that determine how effectively a roof manages heat. ENERGY STAR’s cool roof guidance explains how reflective roofs stay cooler.

    Solar reflectance describes the portion of sunlight a roofing surface reflects. Thermal emittance describes how readily the surface releases the heat it does absorb. Together, these properties influence the roof’s temperature during sunny weather. A shingle does not need to look bright white to provide this benefit. Roofing manufacturers can use reflective granules and surface treatments to improve performance while maintaining colors and styles that fit a residential exterior.

    Why a cooler roof can reduce air-conditioning demand

    On a sunny afternoon, the difference between a conventional roof and a reflective roof can be substantial. The Department of Energy reports that conventional roofs can reach 150 degrees Fahrenheit or more under intense summer sun. While a reflective roof can remain more than 50 degrees cooler under the same conditions. That lower surface temperature can reduce the amount of heat conducted into the attic and upper levels of the home.

    When less heat enters the building, the air conditioner may not need to run as often or work as hard to maintain a comfortable indoor temperature. Cool roof shingles therefore address one part of the home’s energy load: solar heat gain through the roof. They do not replace insulation, air sealing, or proper ventilation, but they can complement those measures. In homes without air conditioning, reducing heat flow from the roof can also support more comfortable indoor conditions.

    What makes cool asphalt shingles different?

    Asphalt shingles are widely used, but standard asphalt shingle roofs are among the least reflective roofing types commonly found on U.S. homes. High-performance cool asphalt shingles are designed to improve that characteristic. The Department of Energy notes that these products may target a solar reflectance of about 0.40, which represents a meaningful performance goal for an asphalt-based roofing product. Actual results depend on the product, roof orientation, shading, attic insulation, ventilation, and local weather.

    Lower roof temperatures may also reduce repeated heat stress on roofing materials, which may help extend service life. In Minnesota, the roof still needs to handle snow, hail, and major temperature swings, so reflective performance is only one part of a sound roofing decision. A balanced design pairs the shingle selection with proper installation and ventilation, helping manage summer heat without overlooking the rest of the roof system.

    Do Cool Roof Shingles Make Sense for Minnesota Homes?

    They can, but the answer depends on the whole roof system, not just the shingle surface. Minnesota homes face sharp temperature swings, summer sun, winter cold, heavy snow, and frequent hail. Referred Restoration evaluates those conditions for homeowners along the Rogers, St. Francis, and Monticello corridor, as well as in Cottage Grove, before recommending a roofing approach.

    Reflective roofing technology can help manage Minnesota’s temperature extremes throughout the year. A cooler roof surface absorbs less solar energy during sunny weather, which may reduce heat moving into the attic and living space. The U.S. Department of Energy reports that a reflective roof can remain more than 50 degrees Fahrenheit cooler than a conventional roof under the same hot, sunny conditions. That does not mean every home will see the same result, but it illustrates why reflectance can matter during Minnesota’s warmest periods. ENERGY STAR explains how cool roofs work.

    Consider the full Minnesota weather cycle

    Summer performance is only one part of the decision. Minnesota receives about 43 inches of snow annually and experiences frequent damaging hail. Shingles must still be selected and installed for impact exposure, snow loading, water shedding, flashing details, and the roof’s overall condition. A reflective surface cannot compensate for loose materials, damaged underlayment, failed flashing, or poor installation.

    Ventilation is especially important. Proper roof ventilation helps control heat retention and is critical for reducing ice-damming risk in Minnesota homes. Cool roof shingles should therefore be considered alongside balanced intake and exhaust ventilation, adequate insulation, and careful air sealing. The goal is not to make the roof cold at all times. It is to manage heat and moisture so the roof assembly performs consistently through changing seasons. Ventilation should be assessed as part of the system rather than treated as an optional add-on.

    Balance summer benefits with winter conditions

    There is also an honest cold-climate consideration: cool roofs can create a winter heating penalty. Because a reflective surface absorbs less sunlight, it can provide less passive solar warming at the roof, potentially increasing reliance on mechanical heating during winter. That tradeoff does not automatically rule out cool roof shingles in Minnesota. It means the recommendation should account for attic insulation, ventilation, roof orientation, shade, heating patterns, and the home’s existing energy performance. ENERGY STAR notes both the summer advantages and winter tradeoff.

    For a replacement or new roof, cool roof shingles may make sense when the homeowner wants to manage summer heat without overlooking winter performance and storm durability. They are less likely to be the right answer as a stand-alone fix for ice dams, attic heat, or an aging roof. A local assessment can identify whether reflective shingles, ventilation improvements, repairs, or a different roofing material best fit the home. Referred Restoration brings that climate-specific perspective to homes in Rogers and Cottage Grove, with recommendations based on the roof’s actual condition rather than a one-size-fits-all claim.

    Cool Roof Shingles vs. Regular Shingles

    Cool roof shingles and regular asphalt shingles can look similar from the ground, but their performance in direct sunlight differs. The key distinction is how much solar energy the roof reflects instead of absorbing. Standard asphalt shingle roofs are among the least reflective roofing materials widely used on U.S. homes. While cool asphalt shingles are designed to reflect more sunlight and stay cooler.

    That distinction matters most on sunny days, when roof temperatures can rise quickly. The U.S. Department of Energy reports that conventional roofs can reach 150 degrees Fahrenheit or more on a sunny summer afternoon. While a reflective roof may remain more than 50 degrees cooler under the same conditions. The comparison below shows where that difference may affect a Minnesota home.

    Cool roof shingles compared with regular asphalt shingles
    ConsiderationCool roof shinglesRegular asphalt shingles
    Solar reflectanceDesigned to reflect more sunlight. High-performance cool asphalt shingles aim for a solar reflectance of about 0.40.Typically absorb more sunlight and are among the least reflective widely used roofing materials.
    Surface temperature on a sunny dayCan stay substantially cooler than a conventional roof under the same sunny conditions.Can reach 150 degrees Fahrenheit or more during a hot, sunny afternoon.
    AC and heating effectMay reduce summer heat entering the home and lower air-conditioning demand. In cold climates, reduced solar absorption may increase winter heating needs.May absorb more warmth in winter, but can transfer more solar heat into the home during summer.
    Roof lifeLower temperatures may reduce heat stress and help extend roof service life, depending on the full roof system and installation.Durability depends on shingle quality, ventilation, installation, weather exposure, and maintenance.
    Best fitHomeowners prioritizing summer heat management, reflective performance, and a balanced roof design for local conditions.Homeowners seeking a familiar asphalt shingle system with broad color and product availability.

    For Minnesota homeowners, neither option should be evaluated by reflectance alone. The state sees major temperature swings, about 43 inches of annual snowfall, and frequent damaging hail. A cool roof may help manage summer heat, but proper ventilation remains critical for controlling heat retention and reducing ice-damming risk. During a roof replacement, the right decision also depends on roof orientation, attic performance, shingle design, color, and the home’s heating and cooling patterns.

    Cool roofing products are generally positioned as a practical alternative during new construction or replacement, rather than a completely separate roofing category. A qualified contractor can compare compatible products and explain how their reflective properties fit the rest of the roof system. For more context, review our asphalt shingle roof replacement guidance before planning the next step.

    Sources: ENERGY STAR guidance on cool roofs, the U.S. Department of Energy, and the California Air Resources Board.

    How to Choose Cool Roof Shingles

    Choosing cool roof shingles involves more than selecting the lightest color on a sample board. Look for documented solar reflectance, a roofing system suited to Minnesota weather, and an appearance that fits your home. A qualified contractor can help you compare those factors during a roof replacement without treating energy performance as the only consideration.

    Start with solar reflectance

    Solar reflectance, or SR, describes how much sunlight a roofing surface reflects rather than absorbs. The rating is expressed from 0 to 1, with a higher number indicating greater reflectance. The U.S. Department of Energy identifies about 0.40 as a target for high-performance cool asphalt shingles, which is notably more reflective than many standard asphalt shingle products. Ask for the product’s published SR rather than relying on the general label “cool.”

    It is also useful to check whether the product has a rating verified by the Cool Roof Rating Council, or CRRC. CRRC-verified information gives homeowners a consistent way to review a product’s solar reflectance and thermal emittance. Reflectance addresses incoming sunlight, while thermal emittance describes how effectively the surface releases absorbed heat. Considering both values provides a clearer picture than color or marketing language alone.

    Compare colors and material options

    Color affects reflectance. In general, lighter and cooler-toned shingles reflect more sunlight than dark shingles made from otherwise similar materials. That does not mean you must choose a bright white roof. Manufacturers offer a range of blends and neutral tones, so ask to see the product’s performance rating for the exact color you are considering. A color that looks similar on a sample may have a different reflective rating in the manufacturer’s specifications.

    Material selection matters as well. Cool asphalt shingles can be a practical choice for homeowners who want a familiar shingle profile while improving solar performance. Referred Restoration also evaluates quality roofing materials, including premium options such as Malarkey roofing, based on the home’s design and Minnesota’s weather demands. The right choice should account for more than reflectance, including durability, installation requirements, ventilation, and the roof’s exposure to hail, snow, and seasonal temperature swings.

    For more context on the replacement process and asphalt shingle materials, review this asphalt shingle roof replacement guide. During an assessment. Ask the contractor to show the SR and CRRC information for each proposed color and explain how the complete roof system will manage heat and moisture. In Minnesota, proper ventilation remains critical for reducing heat retention and helping prevent ice damming, so reflective shingles should complement, not replace, sound roof design.

    Environmental and Community Benefits of Cool Roofing

    The value of cool roofing extends beyond the individual home. When roofing materials reflect more sunlight and absorb less solar energy, they can help reduce heat at the building, neighborhood, and community level. That makes cool roof shingles one part of a broader approach to managing summer heat and electricity demand.

    Less heat in developed areas

    Dark, heat-absorbing roofs can contribute to higher outdoor temperatures in densely developed areas. This is part of the urban heat island effect, in which pavement, buildings, and other surfaces retain heat and keep local air warmer than surrounding areas. Community-wide use of reflective roofs can lower local outside air temperatures and lessen that effect, according to ENERGY STAR.

    That benefit is not limited to large cities. Neighborhoods with many homes and other heat-retaining surfaces can also experience the effects of concentrated summer heat. A single roof will not transform local conditions, but broader adoption can add up. Particularly when reflective roofing is combined with shade trees, efficient buildings, and light-colored hard surfaces.

    Potential air-quality benefits

    Hotter air can accelerate the chemical reactions that form smog from air pollutants. By helping cool the air outside, cool roofs may slow smog formation, especially when many buildings in the same area use reflective roofing. This is an environmental benefit rather than a guarantee of improved air quality, since local weather, emissions, and transportation patterns also play important roles.

    Lower peak demand for electricity

    On sunny days, a cooler roof can reduce the amount of heat transferred into the building. That may reduce reliance on air conditioning during the hottest periods, when many households and businesses are using electricity at the same time. Cool roofing can therefore help reduce peak electricity demand and may support grid reliability by lowering the strain that contributes to potential power outages.

    Reflecting sunlight also sends more solar energy back toward outer space, which the Department of Energy identifies as one way cool roofs can help offset global warming. These effects should be considered alongside Minnesota-specific factors. Cool roofs can create a winter heating penalty in colder climates because they absorb less sunlight during the heating season. Proper insulation and ventilation remain essential, particularly in a state with heavy snowfall and ice-damming risks. Homeowners can review additional seasonal preparation steps in this winterize checklist for Minnesota homes.

    Have questions about cool roof shingles or a roof replacement in your area? Contact Referred Restoration online for a free consultation.

    Frequently Asked Questions

    Do cool roof shingles really save energy?

    They can reduce heat absorbed through the roof by reflecting more sunlight and staying cooler than conventional roofing. That may lower air-conditioning demand during hot weather, although the results depend on roof design, insulation, ventilation, climate, and the home’s cooling needs. In Minnesota, it is important to weigh summer benefits against the possibility of increased winter heating demand. ENERGY STAR explains the seasonal tradeoffs.

    How are cool roof shingles different from regular shingles?

    Regular asphalt shingles typically absorb more sunlight, while cool shingles are designed with reflective surfaces that send more solar energy away from the roof. High-performance cool asphalt shingles may target a solar reflectance of about 0.40, according to the U.S. Department of Energy. Both options still require proper installation, attic ventilation, and materials suited to Minnesota weather.

    Are cool roof shingles a good choice for Minnesota homes?

    They may be a reasonable option when summer heat management is a priority, particularly as part of a complete roofing system. Minnesota homes also face heavy snowfall, hail, and wide temperature swings, so reflectance should not be the only selection factor. Proper ventilation remains important for managing heat retention and ice-damming risk. A roofing professional can evaluate the roof slope, attic, insulation, orientation, and existing damage before recommending a product.

    Do cool roof shingles come in different colors?

    Yes. Reflective roofing products are available in multiple colors, but darker and lighter finishes do not perform identically. Product ratings provide a more reliable comparison than color names alone. Ask for the manufacturer’s solar reflectance and thermal emittance information. Then balance the appearance with the home’s architectural style, neighborhood requirements, and the performance needs of the roof assembly.

    Ready to weigh cool roof shingles for your Minnesota roof replacement? Contact Referred Restoration online to discuss your home’s roofing options with a local team.

  • Roof Shingles Leak Repair: How to Find and Fix Leaks

    Roof Shingles Leak Repair: How to Find and Fix Leaks

    A ceiling stain after a Minnesota thaw is more than a cosmetic nuisance. Water may have traveled from a roof valley, damaged shingle, or flashing around a wall, chimney, or vent before it became visible indoors. Finding the entry point quickly helps limit damage to the roof deck, insulation, and interior finishes.

    Roofing contractor repairing damaged asphalt shingles on a Minnesota residential roof

    Roof shingles leak repair starts with tracing moisture from the attic or ceiling stain back toward its entry point, then correcting the underlying issue. That may mean replacing missing shingles, resealing a minor crack, or repairing flashing and ice-dam-related damage. The right repair depends on where water is entering, not simply where the stain appears. Schedule your free roof inspection with Referred Restoration for a clear assessment.

    In cold weather, heat-driven ice dams can push water beneath shingles, while freeze-thaw cycles can worsen small gaps. Before deciding whether a repair is enough, it helps to understand the roof areas most likely to collect runoff and develop leaks.

    If your Minnesota roof is leaking, schedule your free roof inspection with Referred Restoration to pinpoint the source before the damage spreads.

    Where Roof Shingle Leaks Start

    A roof leak doesn’t always begin directly above the ceiling stain. Water can travel along the roof deck, framing, or insulation before it becomes visible inside the home. When you’re checking for a problem, focus on the areas where shingles meet other roof surfaces, where water collects, or where something passes through the roof.

    Valleys carry heavy runoff

    A valley is the inside angle where two roof slopes meet. It channels water from both sections toward the eaves, so it handles more runoff than much of the surrounding roof. That volume makes valleys a common leak location, especially when shingles are damaged, the underlayment is missing or deteriorated, or debris prevents water from moving freely. The U.S. Department of Energy’s Building America program notes that proper installation at open valleys, hips, and ridges is part of keeping a shingle roof watertight. See the asphalt shingle roof installation guidance before attempting to inspect one from a ladder.

    Flashing protects walls and roof penetrations

    Flashing is the metal or other water-resistant material installed where roofing meets a wall, chimney, vent pipe, or similar feature. At a wall, step flashing helps keep water from getting behind the siding. Around chimneys and vent pipes, flashing and the surrounding seals have to remain intact as the roof expands and contracts through Minnesota’s weather cycles. Cracked, exposed, loose, or poorly installed flashing can let water enter even when the shingles nearby appear to be in good condition. Roof penetrations such as vents, pipes, and chimneys are frequently associated with flashing failures, according to Lowe’s roof leak repair guidance.

    Missing shingles leave the roof exposed

    High winds, hail, aging materials, and improper fastening can loosen or remove shingles. Cracked, curled, or damaged shingles can create openings around their edges, allowing water to reach the layers beneath. Missing or damaged shingles are primary entry points for water penetration, as explained in the U.S. Department of Energy’s Building America asphalt shingle roof guidance. Look for bare patches, lifted tabs, exposed underlayment, or shingle pieces in the yard, but avoid walking on a steep or wet roof.

    Gutters and skylights can redirect water

    Clogged gutters and downspouts can cause water to back up at the roof edge or overflow against fascia and siding. Leaves, granules, and ice can all interfere with drainage. Skylights are another vulnerable area because their flashing and seals interrupt the shingle surface. If a leak appears near a skylight, the visible water may come from failed flashing rather than the glass itself.

    These areas can overlap. A damaged shingle may let water reach a wall flashing detail, while a clogged gutter can worsen runoff during a storm. A careful inspection should trace the water path instead of treating the first visible stain as the source.

    Finding a Roof Shingle Leak Before the Damage Spreads

    A roof leak often announces itself indoors before the damaged shingle is visible outside. Look for brown or discolored marks on ceilings, damp insulation, or moisture stains on attic rafters and the underside of roof sheathing. These are common early indicators of water intrusion, according to Lowe’s roof leak guidance. Even a small mark deserves attention, especially after heavy rain, strong winds, or a Minnesota freeze-thaw cycle.

    Start by documenting where you see the stain, then inspect the attic if it is safe to enter. Use a flashlight to follow damp wood, darkened sheathing, or water marks toward the roof deck. Check the area around penetrations, such as vent pipes, chimneys, and skylights, along with nearby valleys and roof-wall transitions. Do not climb onto a wet or steep roof to investigate the exterior. A roof surface can be slippery, and stepping on shingles may create additional damage.

    Trace the water path, not just the stain

    The indoor stain does not always sit directly below the leak. Once water passes through a damaged shingle, failed flashing, or an opening around a roof penetration. It can travel along the roof sheathing or follow a rafter before dripping into the attic. That means a ceiling mark several feet away from the actual entry point can still be connected to one small opening higher on the roof.

    From the attic, trace the path uphill toward the exterior area where water may be entering. On the roof, a professional can then examine the corresponding shingles, seams, flashing, and seal points. Missing, cracked, or damaged shingles can expose the roof structure to water penetration, while an issue in a valley can affect a much larger flow of runoff. The visible symptom alone is not enough to determine which repair is appropriate.

    Why professional diagnosis matters

    A temporary patch near the stain may stop water briefly without correcting the source. A professional inspection connects the interior evidence with the roof’s drainage patterns and identifies the true entry point. That is particularly important when wind or hail has affected multiple parts of the exterior. For professional roof leak repair and coordination, an inspection can help establish whether the roof, siding, gutters, or related flashing also needs attention.

    If you find a new stain, contain dripping water indoors and arrange an inspection promptly. Referred Restoration provides free roof inspections for homeowners in Rogers, Cottage Grove, and nearby Minnesota communities. With recommendations based on the actual condition of the roof rather than the location of one visible mark.

    How Roof Shingles Leak Repair Fixes Damaged Shingles and Flashing in Minnesota

    Repair depends on where water is getting through and whether the surrounding roof materials are still sound. A missing or cracked shingle can expose the underlayment and roof structure to water, but replacing one visible shingle does not always address the full leak path. Water can travel beneath shingles before it appears inside the home, so the repair should include the nearby flashing, underlayment, and roof deck when needed.

    Repairing cracked or loose shingles

    For a minor crack or a shingle that has lifted but is otherwise in good condition. A roofing professional may use a specialized sealing compound to re-adhere the shingle to its substrate and create a watertight barrier. This approach is documented for minor shingle cracks, but it is not a substitute for replacing shingles that are split. Missing granules, badly curled, or damaged across a larger area. Specialized shingle sealing compounds can support a limited repair when the underlying materials remain sound.

    DIY sealing may help slow water entry until an inspection can be completed, but it is a stopgap. Applying sealant over a damaged area can hide the source without correcting failed underlayment or nearby flashing. A durable repair should restore the roof’s water-shedding layers, not simply cover the symptom.

    Replacing flashing at walls, chimneys, and vents

    Flashing is formed metal or another water-resistant material that directs water away from vulnerable joints. At a roof-wall intersection, step flashing is installed in overlapping pieces so water cannot get behind the siding. The U.S. Department of Energy’s Building Science Education guidance identifies step flashing as essential for preventing water intrusion at these intersections. See the step flashing guidance for a technical explanation.

    Kick-out flashing is the small transition at the lower end of a roof-wall intersection. It directs runoff away from the wall assembly instead of allowing water to collect behind the siding. Without it, repeated Minnesota rain, snow, and freeze-thaw exposure can contribute to moisture damage in the wall. Building Science Education explains kick-out flashing and its role in managing that runoff.

    Flashing around chimneys, vent pipes, and other roof penetrations also needs careful attention because these are frequent leak locations. The repair may involve replacing deteriorated flashing, correcting overlaps, or repairing a vent boot rather than adding surface sealant. If you are deciding when to replace asphalt shingle roofs, an inspection can distinguish an isolated repair from broader shingle, underlayment, or flashing failure.

    Why Minnesota Weather Triggers Roof Shingle Leaks

    Minnesota weather can turn a small weakness in a roof into an active leak quickly. Homes in Rogers, Cottage Grove, St. Francis, and Monticello face repeated exposure to snow, ice, hail, strong wind, and sharp temperature changes. Each condition stresses shingles and the materials beneath them in a different way.

    Freeze-thaw cycles and ice dams

    During a cold winter, heat escaping from the living space can melt snow on the warmer sections of a roof. That water runs toward the colder roof edge, where it refreezes and forms an ice dam. As the dam grows, meltwater can back up beneath the shingles and enter the roof assembly. The University of Minnesota Extension explains how ice dams form and how to prevent the water backup they cause. Learn about preventing ice dams from the University of Minnesota Extension.

    Ice dams can also conceal the original damage. Once warmer weather arrives, trapped moisture may show up as staining in the attic or on a ceiling, even when the roof looks intact from the ground. Homeowners concerned about recurring winter leaks can review our guide to preventing roof leaks from ice dams.

    Snow load, hail, and wind damage

    Heavy snow adds weight to the roof system and can place extra stress on aging shingles, flashing, and underlying decking. Snow and ice may also hide cracked or displaced materials, making a leak harder to locate until water reaches the attic or interior.

    Hail can bruise, crack, or loosen the protective surface of an asphalt shingle. The damage may be subtle, but it can leave the underlying layers more vulnerable to water. High winds create a different problem by lifting shingle edges, breaking tabs, or exposing fasteners. Once a shingle no longer lies flat and seals correctly, rain can work beneath it during the next storm.

    What homeowners should do after a storm

    After severe weather, look for missing shingles, loose granules, lifted edges, bent metal, and debris on the roof or in the gutters. Avoid climbing onto a wet or icy roof. A professional inspection can check areas that are difficult to see safely, including valleys, roof edges, and flashing around vents and walls. If damage is widespread or the roof is nearing the end of its service life, compare repair options with the condition of your existing asphalt shingle roofs before choosing a solution.

    When to Repair vs Replace Your Shingle Roof

    A roof leak doesn’t automatically mean the entire roof needs to come off. The right recommendation depends on whether the problem is isolated or whether the roofing system is failing in several places. A small repair may make sense when damage is limited to a few shingles, one flashing detail, or a single leak area. Replacement deserves closer consideration when deterioration is widespread, repairs keep recurring, or the roof is nearing the end of its expected service life.

    Asphalt shingle roofs typically last about 20 to 30 years, although installation quality, ventilation, weather exposure, and maintenance all affect that range. Missing or damaged shingles leave the underlying roof structure vulnerable to water penetration, as the U.S. Department of Energy’s Building America program explains. Use the comparison below as a starting point, not as a substitute for an inspection.

    When a shingle roof repair or replacement may be appropriate
    ConditionSmall repair may fitFull replacement may fit
    Extent of damageDamage is confined to a small, clearly identified area, such as a few missing or cracked shingles.Damage is widespread across multiple sections, with deterioration of the shingles or roof deck.
    Age of roofThe roof is relatively young and most shingles remain flexible, sealed, and firmly attached.The roof is approaching or beyond its typical 20-to-30-year service range and shows broad aging.
    Number of leak areasThere is one isolated leak with a traceable source and no signs of related damage elsewhere.Multiple leaks appear across different slopes, valleys, penetrations, or roof-wall intersections.
    Repeated repair needsA targeted fix addresses the underlying issue and is unlikely to be followed by another repair nearby.Repeated repairs are needed in different locations, suggesting the roofing system is no longer performing consistently.
    Overall shingle conditionMost shingles are flat, intact, and well bonded, with only limited cracking or displacement.Widespread granule loss, curling, brittleness, exposed mat, or missing shingles appears across the roof.

    Ventilation can influence where a roof falls on that spectrum. Adequate attic ventilation helps reduce heat and moisture buildup, which can prematurely damage shingles and shorten their useful life, as explained in the U.S. Department of Energy’s guide to durable attics. If ventilation, insulation, or moisture problems are contributing to deterioration, replacing surface materials alone may not solve the underlying issue.

    For a deeper look at the decision, review our guide to when to replace asphalt shingle roofs. A professional inspection can compare the roof’s age, leak pattern, shingle condition, and ventilation before recommending a focused repair or a complete replacement.

    Preventing Future Roof Shingle Leaks

    A repair addresses the immediate entry point, but a few maintenance habits can help protect the rest of the roof through Minnesota’s snow, wind, hail, and freeze-thaw cycles. Prevention starts with the roof system as a whole, including the attic, drainage paths, nearby trees, and the condition of the shingles.

    Keep attic moisture and heat under control

    Proper attic ventilation allows heat and moisture to move out of the attic instead of building up beneath the roof. That matters in every season. Excess heat and moisture can prematurely damage asphalt shingles, shorten their service life, and contribute to conditions that make future leaks more likely. The U.S. Department of Energy’s guide to durable attics covers the role of balanced ventilation in managing heat and moisture.

    Ventilation should be evaluated as part of the entire roof system, not treated as a quick add-on. A roofing professional can look for blocked intake vents, inadequate exhaust, or insulation and air-sealing issues that allow warm household air into the attic. Improving airflow does not replace a damaged shingle or failed flashing, but it can reduce stress on otherwise sound materials.

    Maintain gutters and clear nearby branches

    Gutters and downspouts need a clear path to carry water away from the roof and foundation. Leaves, granules, and other debris can restrict drainage, allowing water to back up along the roof edge. Check them after heavy storms and again before winter, then confirm that downspouts discharge water away from the home.

    Overhanging branches deserve attention as well. Wind can bring limbs down onto shingles, while repeated contact from smaller branches can wear the surface over time. Trimming branches back from the roof reduces debris and makes it easier to see damaged areas during a visual inspection. Tree work should be handled safely, especially near power lines or steep roof edges.

    Schedule inspections before small damage becomes a leak

    Routine inspections can identify cracked, curled, or missing shingles before water enters the roof assembly. The University of Minnesota’s roofing maintenance inspection checklist emphasizes early detection of these conditions. An inspection should also review valleys, flashing, vent penetrations, gutters, and areas affected by recent wind or hail.

    After a storm, coordinating the roof with related exterior components is important. Siding, gutters, windows, and flashing can all be affected by the same event. So a broader assessment helps prevent one overlooked problem from sending water back into the home. For storm-related concerns, professional roof leak repair and coordination can help organize the inspection and repair process before visible damage spreads.

    Unsure whether your roof needs a repair or replacement? Contact Referred Restoration online to schedule a free inspection in Rogers, Cottage Grove, and surrounding Minnesota communities.

    Frequently Asked Questions

    How do you fix leaky roof shingles?

    Start by tracing the water from the attic or ceiling stain to its entry point, because the visible drip may be away from the actual roof defect. A repair may involve replacing missing or cracked shingles, resealing a minor crack, or correcting flashing around a wall, chimney, vent, or valley. Damaged shingles can expose the roof structure to water penetration, so the repair should address both the shingle and any wet underlayment beneath it. See Building America’s shingle repair guidance.

    Is roof leak repair covered by insurance?

    Coverage depends on your policy, the cause of the damage, and whether the issue resulted from a covered event or long-term wear. Before disturbing the area, take photos, note when the leak appeared, and contact your insurance carrier for instructions. A roofing professional can document visible damage, but no contractor can guarantee that an insurance claim will be approved.

    Can you fix a roof leak without replacing the whole roof?

    Often, yes. A localized leak may be repairable when the surrounding shingles, flashing, roof deck, and underlayment remain serviceable. Replacement becomes more likely when leaks recur in several areas, shingles are broadly damaged, or moisture has affected the underlying structure. An inspection can separate a small repair from a roof-wide condition without assuming the answer in advance.

    Is it normal for a roof to leak in heavy rain?

    No. Heavy rain can expose a weak valley, failed flashing, clogged drainage path, or damaged shingle, but a sound roof should shed water. In Minnesota, snowmelt and freeze-thaw conditions can also create ice dams that back water beneath shingles, according to the University of Minnesota Extension. Treat a recurring leak as a warning to investigate the roof and attic promptly.

    Ready to Schedule Your Free Roof Inspection?

    A professional inspection can help pinpoint whether a leak starts with a damaged shingle, flashing, or a weather-related issue before repairs become more involved. Schedule your free roof inspection by contacting Referred Restoration online, or call (763) 726-4245. You’ll receive a clear assessment and practical next steps for your Minnesota roof, without pressure.

  • How to Choose House Shingles Siding for Curb Appeal

    How to Choose House Shingles Siding for Curb Appeal

    A roof replacement and a siding project should not be treated as separate design decisions. On a Minnesota home, the materials meet at edges, corners, windows, and trim, so their color, profile, and installation details all influence the finished result. Coordinating them from the start can create a cleaner exterior while helping the home stand up to snow, hail, and seasonal temperature swings.

    Exterior home restoration contractor reviewing coordinated roof shingles and siding color samples on a Minnesota suburban house

    When choosing house shingles siding combinations, start with the roof’s color and texture, then select siding and trim that support its undertones, architectural style, and maintenance needs. Just as important, confirm that the roofing, siding, flashing, and water-resistive layers will work together to direct moisture away from the structure.

    That balance of appearance and performance matters whether you are updating a home in Rogers, St. Francis, Monticello, or Cottage Grove. Before comparing colors or siding materials, it helps to understand why these exterior systems need to be planned as one connected assembly.

    Contact Referred Restoration online for a free exterior assessment and consultation before you settle on a roof and siding pairing.

    Why House Shingles and Siding Need to Work Together

    Your roof and siding are separate systems, but they share one job: moving water away from the house. That is why choosing house shingles siding as a coordinated exterior system matters beyond appearance. On Minnesota homes in Rogers and Cottage Grove, the roof, wall cladding, flashing, windows, doors. And trim all need to work together through snow, hail, rain, and seasonal temperature changes.

    Think of the exterior as a continuous drainage plane. The University of Minnesota Extension describes this protective layer as including the weather-resistive barrier, flashings, and roofing components. Together, those layers help protect the structure from water intrusion. If one transition is poorly planned or improperly installed. Water can find a path behind the siding or around a roof edge, where hidden moisture may cause damage over time.

    Water-shedding works through overlap. Each layer should direct water outward and over the layer below it, in the same way roof shingles overlap to carry water downhill. Siding courses, step flashing, wall flashing, kick-out flashing, and roof-edge details must preserve that direction. The exact details vary by home and material, but the principle stays the same: never create a seam that sends water behind the exterior system.

    Transitions deserve special attention

    Roof-to-wall intersections are especially important because they combine two systems in a small area. Windows, doors, and skylights also have to integrate carefully with the drainage plane. The University of Minnesota Extension notes that these openings are part of the building’s outer surface and must be integrated with siding and roofing components to help prevent moisture damage. A replacement project is an opportunity to inspect these connections instead of treating the roof and siding as unrelated surfaces.

    Coordination also improves curb appeal. A roof color, siding profile, and trim scheme that complement one another make the home look intentional from the street. More importantly, coordinating the work helps avoid mismatched edges, exposed transitions, or repairs that look like separate patches. Homeowners planning restoration after wind or hail damage can review coordinating exterior finishes as part of the broader repair process.

    Using one restoration team for roofing and siding can simplify that coordination. Referred Restoration can evaluate the connected exterior, plan the transitions, and keep the finish details aligned from the first inspection through installation. For homeowners in Rogers, Cottage Grove, and nearby Minnesota communities, single-source convenience means fewer handoffs and one team accountable for how the completed exterior performs and looks.

    What Is Shingle Siding and How Is It Different From Roof Shingles?

    Shingle siding is a wall-cladding style made from overlapping horizontal courses. The individual pieces create a layered appearance that resembles the texture of roof shingles, which is why the terms can sound interchangeable. Shingle siding may also be called shake siding or shingle-style siding, depending on the material and profile.

    Shingle siding covers walls

    The primary job of shingle siding is to cover and protect the exterior walls of a home. Its overlapping layout helps create the distinctive stepped pattern homeowners often choose for gables, dormers, accent walls, or an entire exterior. The material is selected for its appearance and its suitability as wall cladding, then installed as part of the home’s siding and moisture-management system.

    Common shingle siding materials include cedar, fiber cement, vinyl, and engineered wood. Each produces a somewhat different texture and level of visual variation. Cedar can provide a natural, hand-crafted look, while fiber cement, vinyl, and engineered wood offer other approaches to a consistent shingle profile. The right choice depends on the home’s design, the desired maintenance routine, and how the siding will work with the roof, trim, and other exterior finishes.

    Roof shingles protect the roof deck

    Roof shingles serve a different purpose and are installed on the roof rather than the walls. They form the weather-exposed roof covering over the roof deck, where the system must shed rain, melting snow, and other precipitation. Although both products may overlap, roof shingles and shingle siding are not automatically interchangeable. They have different profiles, installation requirements, and roles in the building envelope.

    That distinction matters when planning a replacement. The roof material establishes one major exterior texture, while shingle siding adds another on vertical surfaces. Reviewing both together can help prevent an exterior that feels visually disconnected. For more context on selecting a roof system, see our guide to shingle and siding compatibility before finalizing the combination.

    In short, shingle siding borrows the layered look of roof shingles for the walls, but the two products should be evaluated as separate parts of the home. Coordinating their profiles, colors, and installation details creates a more unified exterior without confusing their functions.

    Popular Siding Materials That Pair Well With Shingle Roofs

    The best siding choice depends on more than appearance. In Minnesota, exterior materials need to stand up to heavy snow, hail, moisture. And repeated temperature swings while still creating a balanced transition from the roofline to the walls. Shingle siding is installed in overlapping horizontal courses that resemble roof shingles, and it is available in several materials, including vinyl, fiber cement, engineered wood, and cedar.

    Vinyl siding

    Vinyl is a practical option for homeowners who want a clean, consistent exterior with relatively simple upkeep. It can complement asphalt shingle roofs in traditional, contemporary, and cottage-inspired designs. When paired with the right roof color and trim, vinyl helps create a cohesive look without competing with the texture of the shingles. Proper installation remains important, especially around corners, windows, and roof transitions where wind-driven rain and melting snow can test the exterior envelope.

    Fiber-cement shingle siding

    Fiber cement offers a more substantial shingle-style appearance and is well suited to homes where durability and a textured finish are priorities. Hardie Shingle provides a fiber-cement shingle look with ColorPlus finishes and a 30-year substrate warranty. Those specifications can make it a strong fit for Minnesota exteriors, although the installation details and flashing still matter as much as the product itself. The roof and siding should be planned together so the courses, trim, and roof edge create a deliberate transition.

    Engineered wood

    Engineered wood can deliver the warmth and dimensional character homeowners want from wood siding while offering a consistent manufactured profile. It pairs naturally with architectural or dimensional shingle roofs, particularly when the goal is a welcoming Craftsman, farmhouse, or transitional exterior. A qualified installer should account for moisture management, clearances, and vulnerable joints so seasonal expansion and contraction do not undermine the finished system.

    Cedar shake and shingle

    Cedar brings authentic texture and character to a roof-and-siding combination. Its natural variation can soften a bold roof color or reinforce a rustic design, but it also requires careful installation and ongoing attention to preserve its appearance. Cedar shake and shingle siding is considered a premium material, so its specific installation needs should be part of the planning conversation. For more guidance on matching your siding finishes, compare the material’s texture, maintenance requirements, and weather exposure with the rest of the home.

    Whether the home is in Rogers, St. Francis, Monticello, or Cottage Grove, the most reliable pairing is one that connects appearance with sound water-management details. Roof and siding materials should work as one exterior system, not as separate decisions made at different times.

    Choosing House Shingles and Siding Colors for Curb Appeal

    The right color pairing makes a roof and siding feel intentional rather than selected as separate projects. When homeowners compare house shingles siding combinations, begin with the character of the home itself. A simple ranch, a traditional two-story, and a Craftsman-inspired exterior each have different lines, proportions, and details that can guide the palette.

    Architectural history can help, too. Historic preservation guidance from the Cambridge Historical Commission recommends considering a home’s architectural style, the historical context of its materials, and the way colors influence one another. You do not need to reproduce an original color scheme exactly, but the home’s design should remain the starting point. A restrained palette usually supports older or traditionally styled homes, while a contemporary design may allow stronger contrast between the roof, siding, and entry door.

    Start with the roof’s visual weight

    Roof shingles cover a large surface and often have a varied, dimensional appearance. Look at the shingle sample in daylight, then compare it with siding samples beside the home’s brick, stone, or other permanent features. A roof with warm brown, tan, or red undertones generally works best with siding that shares some warmth. Gray or blue-gray shingles can support cooler siding colors, although a neutral siding tone may bridge the two.

    Matching does not mean making every exterior element the same color. In fact, a subtle difference between roof and siding can add depth. The goal is to repeat one undertone or connect the materials through a neutral trim color. Test larger samples when possible, because a color that looks balanced on a small card can appear much stronger across an entire wall.

    Use trim to define the design

    Trim around windows, doors, corners, and roof edges is more than a finishing detail. The placement of color can be more important to communicating a building’s design than the colors themselves, according to the Cambridge Historical Commission. Use trim to emphasize the home’s strongest lines, separate a darker roof from lighter siding, or frame architectural features without making them compete.

    For practical guidance on selecting those transition pieces, see our guide to coordinating house shingles and siding. Homeowners in Rogers, St. Francis, Monticello, and Cottage Grove can also review samples at the exterior of their home before committing. A careful comparison of roof, siding, trim, and fixed masonry helps create curb appeal that feels natural in its Minnesota setting.

    How to Coordinate Roof and Siding Undertones Without Clashing

    Once you have narrowed down your roof and siding materials, compare their undertones rather than judging each sample by its main color. Undertones are the subtle warm or cool influences beneath a visible shade. A gray shingle may lean blue, while another gray may carry brown or taupe. The same distinction matters with siding, especially when Minnesota daylight, snow cover, and seasonal shadows change how the exterior appears.

    Start by identifying warm and cool influences

    Warm undertones include red, tan, brown, cream, and yellow. Cool undertones include blue, green, violet, and some crisp grays. Matching two warm finishes usually creates a comfortable, traditional appearance. Cool finishes can feel clean and modern. You can also mix warm and cool materials, but one finish should clearly lead while the other supports it.

    View roof and siding samples outdoors, ideally at different times of day. Hold them near the brick, stone, driveway, or other fixed elements that will remain on the home. A roof that looks neutral in a showroom may appear distinctly blue or brown beside an existing masonry surface. Consider the architectural style and surrounding context as well. Guidance from the Cambridge Historic Commission explains that architectural style and the way colors influence one another both matter when selecting exterior colors.

    Use trim as the visual bridge

    Trim around windows, doors, corners, fascia, and soffits can connect a roof with siding that has slightly different undertones. For example, warm siding and a cooler gray roof may work when the trim repeats a quiet gray, cream, or blended neutral found in both surfaces. White trim can provide a sharper break, but it may emphasize the difference between warm and cool finishes rather than soften it.

    Trim placement can be as important as the colors themselves. It outlines transitions and controls where the eye moves across the exterior. Which is why the placement of colors is often more important to a building’s design than the colors alone, according to the same exterior-color guidance. For practical ideas on using these transition areas, review this guide to coordinating house shingles and siding.

    Keep the proportions simple

    A straightforward proportion approach helps prevent a busy facade. Let the roof and primary siding carry most of the visual weight, then use trim as the smaller connecting element. A common starting point is to treat the roof as one major color and the siding as another major color. With trim as an accent rather than adding several competing shades. If the roof has a strong pattern or contrast, choose quieter siding. If the siding has pronounced texture, a more restrained roof can keep the exterior balanced.

    Before making a final selection, view larger samples against the actual home. Check how the combination looks beside existing windows and landscaping, then confirm that the trim completes the transition instead of introducing another undertone.

    Single-Source Exterior Restoration: One Contractor, One Vision

    Replacing more than one exterior component is easier to manage when one contractor oversees the full plan. Roof shingles, siding, gutters, and windows are not separate systems at the edge of a house. Their details meet at corners, eaves, wall openings, and other transition points. Coordinating those connections from the start helps the finished exterior look intentional and perform as a complete system.

    This matters in Rogers, St. Francis, Monticello, and Cottage Grove, where homes experience snow, hail, wind, and seasonal temperature changes. A roofing crew may focus on shingles while a separate siding crew approaches wall transitions differently. If no one owns the overall sequence, small differences in flashing, trim, color, or installation can leave the exterior looking pieced together. One project lead can keep the design decisions and installation details aligned.

    Coordination protects the areas where materials meet

    Windows and doors need careful integration with the surrounding siding and roofing components. The University of Minnesota Extension explains that these openings must connect properly with the drainage plane to help prevent water penetration and moisture damage. The drainage plane includes weather-resistive barriers, flashings, and roofing components, and it should protect the home from the bottom to the top. Learn more about how the drainage plane keeps water out.

    Installation sequence is part of that protection. Building components should overlap so water moves out and over the layer below, in the same way roof shingles overlap. When one contractor coordinates the roof, siding, gutters, and windows, the team can plan these layers together instead of leaving each trade to solve only its own portion.

    A consistent plan also improves the finished appearance

    A single-source approach reduces the chance of mismatched trim profiles, uneven transitions, or siding and roofing choices that compete with one another. The goal is not to make every material identical. It is to create a clear relationship between the roofline, wall cladding, window surrounds, gutters, and other visible details.

    That same coordination is useful after storm damage, when several exterior finishes may need attention at once. Read more about coordinating exterior finishes before starting repairs. A local team that treats the home as a whole can explain which work should happen together. Identify transition points early, and maintain one vision from planning through completion.

    Comparing Shingle-Look Siding Materials

    Shingle siding, also called shake or shingle-style siding, is installed in overlapping horizontal courses that resemble roof shingles. That repeating profile can add texture and a distinctive character to a Minnesota home, but the best material depends on more than appearance. Homeowners should compare how each option handles seasonal exposure, how much upkeep it requires, and how its installation needs fit the project.

    Cedar, fiber cement, vinyl, and engineered wood can all create a shingle-look exterior, but they offer different combinations of natural texture, consistency, resilience, and maintenance. The table below provides a practical starting point. A site assessment can then account for the home’s existing roof, trim, windows, drainage details, and the finish that best suits the architecture.

    Comparison of shingle-look siding materials
    MaterialAppearanceDurabilityMaintenanceCost
    Cedar shakeNatural grain, variation, and a warm, traditional texture.Can perform well when properly selected, installed, and protected, but natural wood remains sensitive to moisture and weathering.Typically requires more ongoing attention than manufactured alternatives, including monitoring, cleaning, and finish maintenance.Premium material with installation requirements that can increase the overall project investment.
    Fiber-cement shingleClean shingle or shake profile with consistent sizing and a wide range of finish options.Strong long-term performance with low-maintenance characteristics. Hardie Shingle includes ColorPlus finishes and a 30-year substrate warranty.Generally lower maintenance than natural cedar, although it still needs proper installation and periodic inspection.Mid-to-premium investment, depending on the product, finish, access, and installation scope.
    Vinyl shingleUniform color and texture, with styles that can create a crisp or traditional appearance.Resists routine moisture exposure and does not require wood-style refinishing, but product quality and installation matter.Usually straightforward to maintain with periodic washing and inspection for impact or installation damage.Often a more accessible material option, with the final investment shaped by the product and labor involved.
    Engineered woodDesigned to capture the visual warmth and variation of wood with a manufactured profile.Offers consistent performance when installed according to the manufacturer’s requirements and protected from moisture intrusion.Usually requires less upkeep than traditional cedar, but exposed edges, joints, and finish should be inspected regularly.Moderate investment that varies with the product line, detailing, and installation needs.

    Material selection should also include the details behind the finish. The drainage plane, weather-resistive barrier, flashings, and roofing components work together to protect the home from water intrusion. Installation should overlap components so water moves outward and over the layer below, rather than behind the siding. For that reason, choosing a material and choosing an experienced installer are connected decisions. Referred Restoration can help homeowners compare options while coordinating the roof and siding as one exterior system.

    Steps to Coordinate Your Exterior for Your Next Replacement

    Coordinating a roof and siding replacement takes more than choosing two attractive colors. On a Minnesota home, the exterior must also manage snow, rain, ice, and seasonal temperature changes. A clear plan helps the roof, siding, trim, windows, and drainage details work as one system, whether the project is in Rogers, St. Francis, Monticello, or Cottage Grove.

    1. Assess the current roof and siding state. Start with a whole-exterior inspection rather than evaluating each surface in isolation. Look for aging shingles, loose or damaged siding, deteriorated trim, soft areas, and signs of moisture around windows, doors, roof edges, and wall transitions. This assessment helps determine whether the roof and siding should be replaced together or sequenced carefully. It also identifies details that may be hidden once new materials are installed. The University of Minnesota Extension explains that a home’s drainage plane includes the weather-resistive barrier. Flashings, and roofing components, all of which help protect the structure from water intrusion. Review the drainage-plane guidance before finalizing the scope.
    2. Choose the roof and siding together from a shared palette. Collect roof and siding samples at the same time, then view them outdoors in morning, afternoon, and overcast light. The roof usually covers a large visual area, so its color and texture should establish the foundation for the siding choice. Consider the home’s architectural style and how the colors influence one another, not just whether each sample looks appealing on its own. A shared palette can include a dominant roof tone, a complementary siding finish, and one restrained accent for doors or shutters.
    3. Plan trim as the bridge between materials. Trim connects rooflines, siding fields, windows, doors, and corners. Decide where it will frame transitions and whether it should repeat a roof undertone, contrast with the siding, or provide a neutral separation. Placement matters as much as color. Guidance from Cambridge’s Historic Commission notes that color placement can be more important to a building’s design impression than the colors themselves. Use trim deliberately around gables, soffits, fascia, and openings so the exterior feels organized rather than visually busy.
    4. Coordinate drainage and flashing. Confirm how water will move from the roof edge across siding transitions and around windows and doors. Materials should overlap in a way that directs water outward and over the layer below, similar to the overlapping courses of roof shingles. Window and door flashing must also integrate with the siding and roofing components to reduce the risk of moisture damage. These details are especially important on Minnesota homes exposed to repeated freeze-thaw cycles. Ask for the installation sequence and transition details before work begins, not after the surfaces are covered.
    5. Schedule a single exterior contractor when practical. One coordinated contractor can keep the roof, siding, trim, gutters, and related flashing decisions aligned. That reduces handoff gaps between crews and gives you one point of contact for questions about sequencing and finish consistency. It also makes it easier to address an unexpected transition condition without separate contractors working from different assumptions. Choose a local team that explains the plan clearly, documents the scope, and treats the home as an integrated exterior system.

    Contact Referred Restoration online to plan your roof and siding replacement as one coordinated project.

    Frequently Asked Questions

    What is the siding called that looks like shingles?

    It is commonly called shingle siding, shake siding, or shingle-and-shake siding. It is installed in overlapping horizontal courses that resemble roof shingles. Common options include cedar, fiber cement, vinyl, and engineered wood, so the appearance can be tailored to the home’s style and the performance needs of the exterior.

    What is the difference between roof shingles and siding?

    Roof shingles cover the roof deck and shed water from the top of the home. Siding covers the vertical wall surfaces and helps protect the wall assembly from weather. Shingle-style siding borrows the layered appearance of roof shingles, but it is a separate wall-cladding product with its own installation requirements.

    Do roof shingles and siding have to match?

    No. They do not need to be identical, but they should work together through compatible colors, undertones, and trim. A roof with a warm undertone may pair more naturally with warm siding, while contrasting siding can still work when the trim creates a deliberate visual bridge.

    Are shingles cheaper than siding?

    That comparison depends on which products you mean. Roof shingles and siding serve different parts of the home and should be selected and planned as separate systems. Among shingle-look siding options, cedar is generally a premium material, while vinyl is often a more economical choice. Fiber cement and engineered wood provide additional appearance and durability tradeoffs.

    What siding materials work well with asphalt shingles?

    Vinyl, fiber cement, engineered wood, and cedar-style siding can all pair well with asphalt shingles. The best choice depends on the desired appearance, maintenance expectations, exposure to Minnesota weather, and how the siding color relates to the roof’s undertone. Reviewing both finishes together helps prevent an accidental mismatch.

    Ready to Coordinate Your Roof and Siding?

    A coordinated exterior can help your home look finished while keeping material choices and installation details aligned. Referred Restoration can review your roof, siding, trim, and overall exterior design to help you plan the next step with confidence.

    Contact Referred Restoration online for a free exterior assessment and consultation. You can also call (763) 726-4245 to discuss coordinating your roof and siding.