Author: Miguel Beltra

  • Owens Corning Shingles for Minnesota Homes

    Owens Corning Shingles for Minnesota Homes

    Minnesota roofs face more than one season at a time. Snow, freeze-thaw cycles, wind, hail, summer heat, and ice-dam conditions can all affect how a new roof performs. That makes the shingle label only one part of the decision.

    Contact Referred Restoration online or call (763) 726-4245 for a free roof inspection.
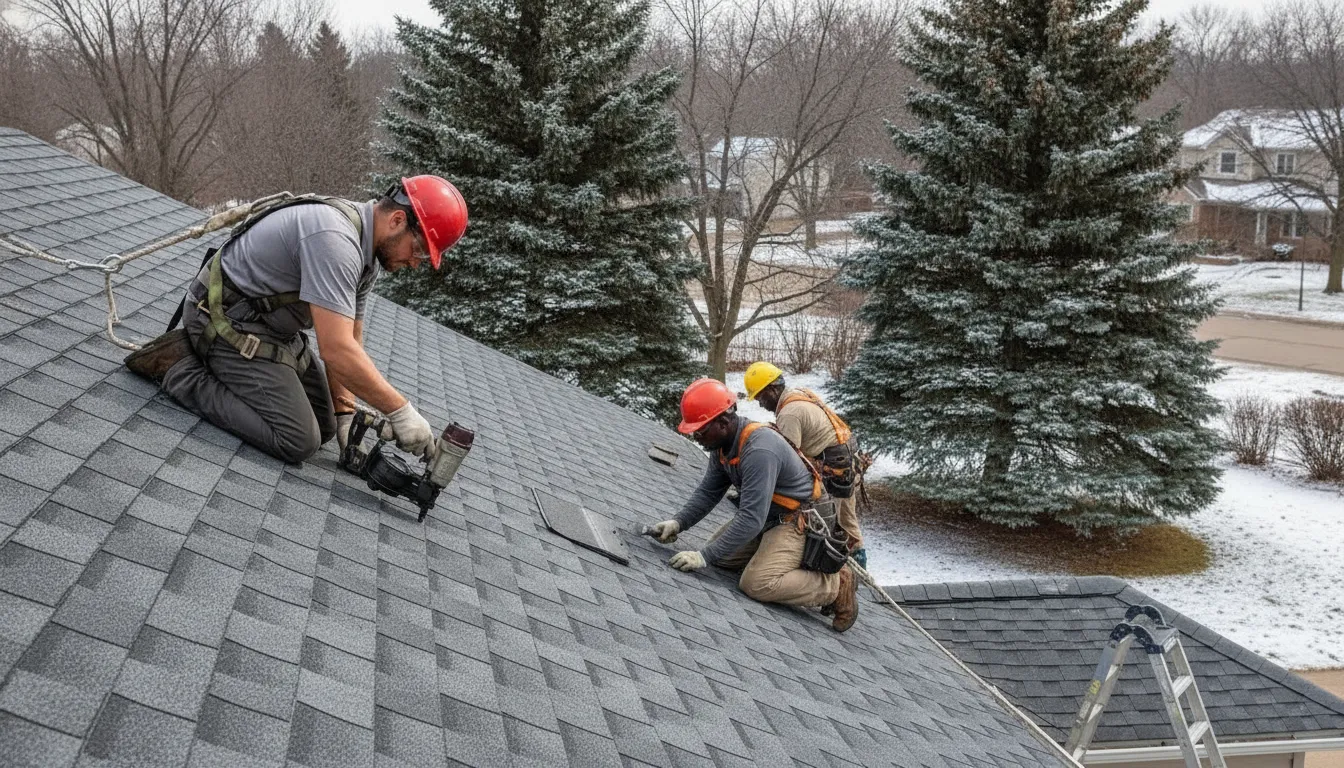
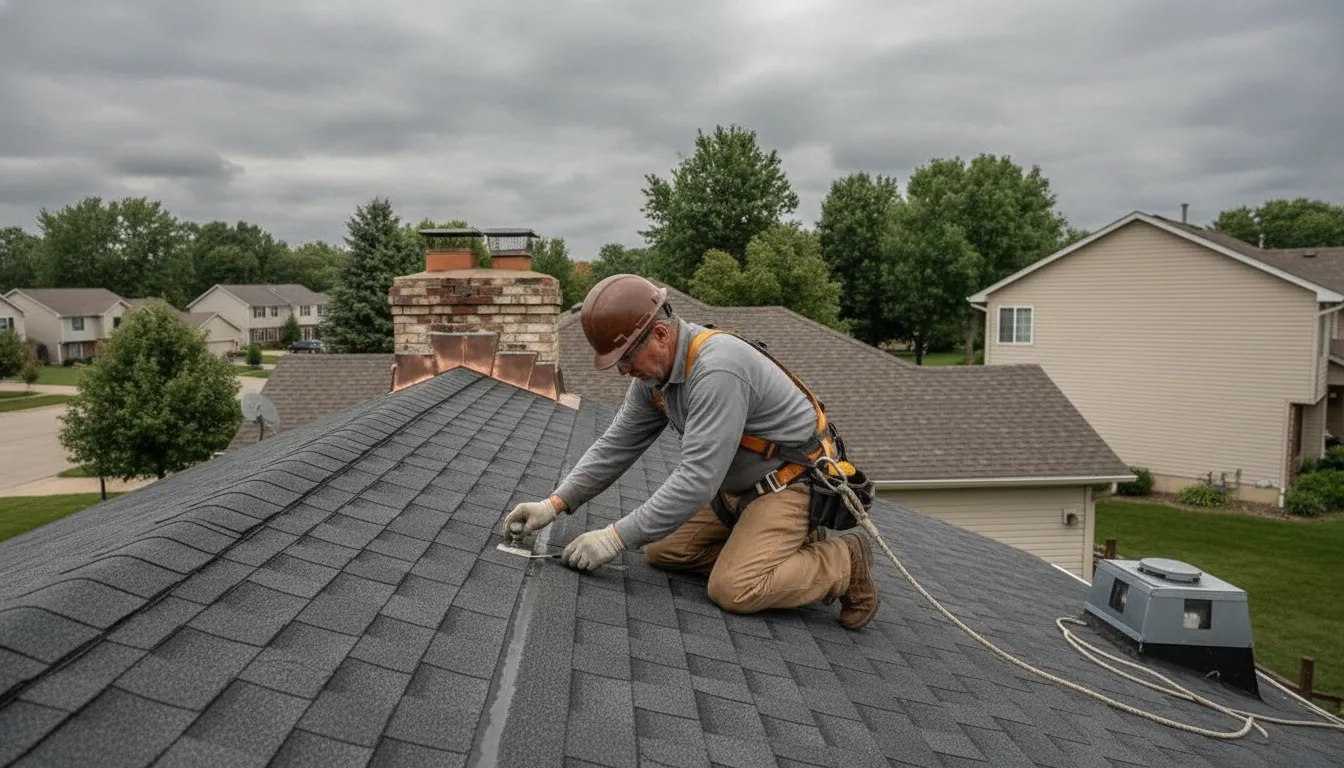
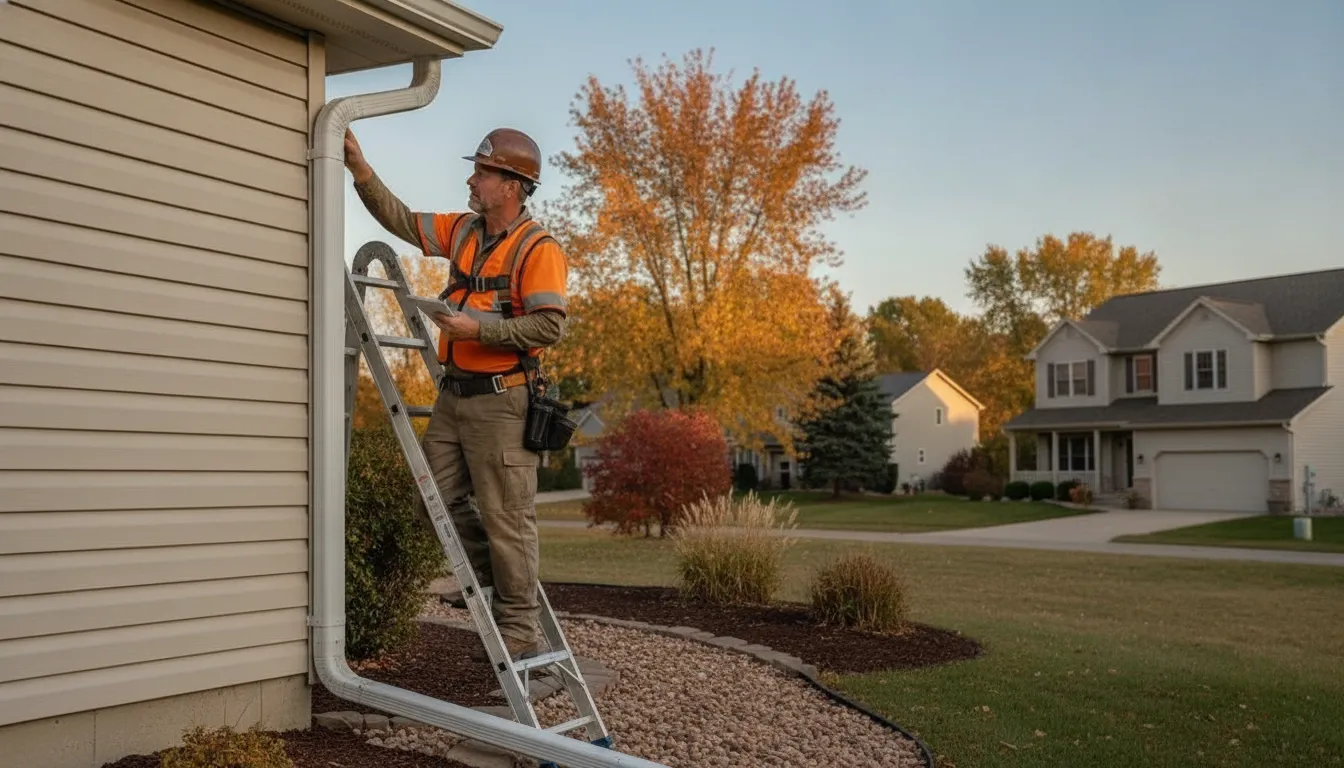
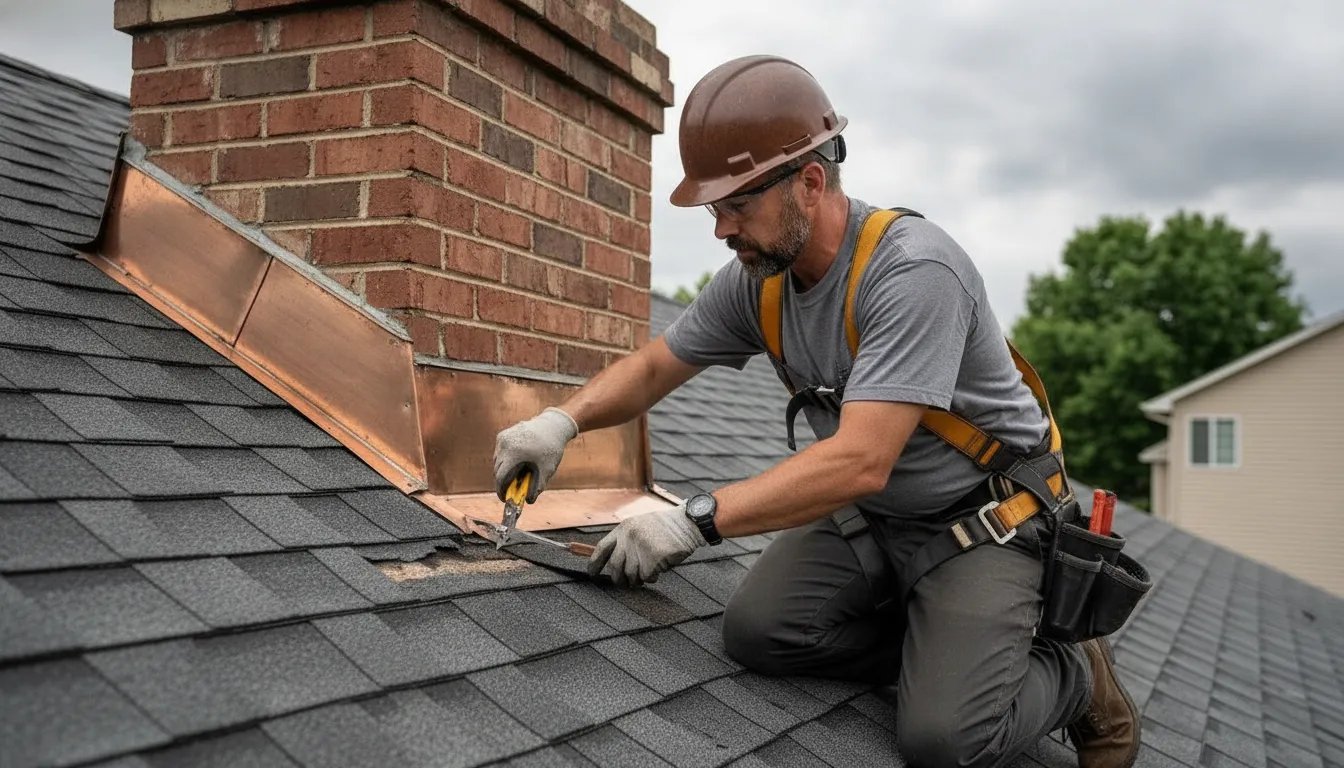
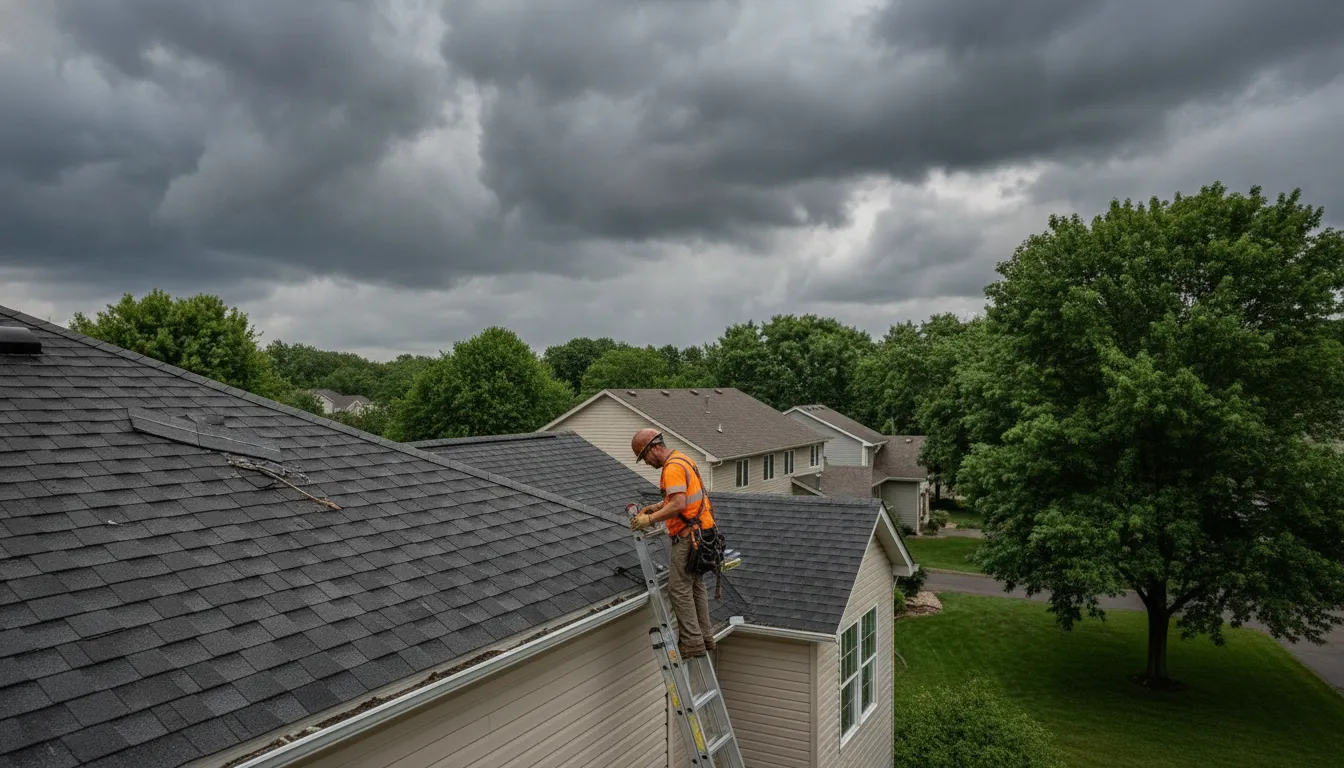
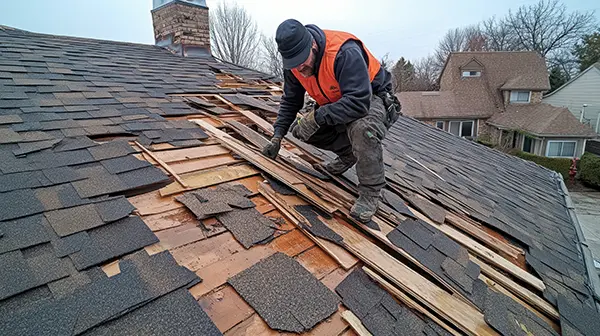
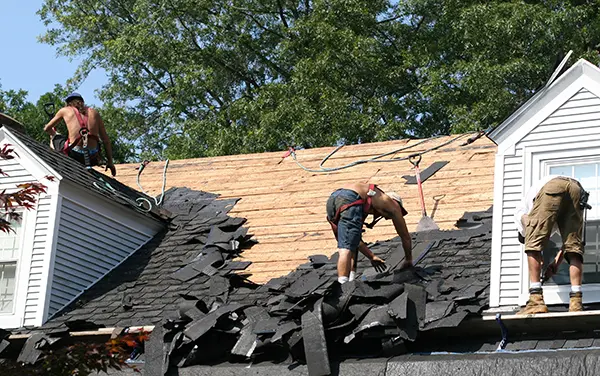
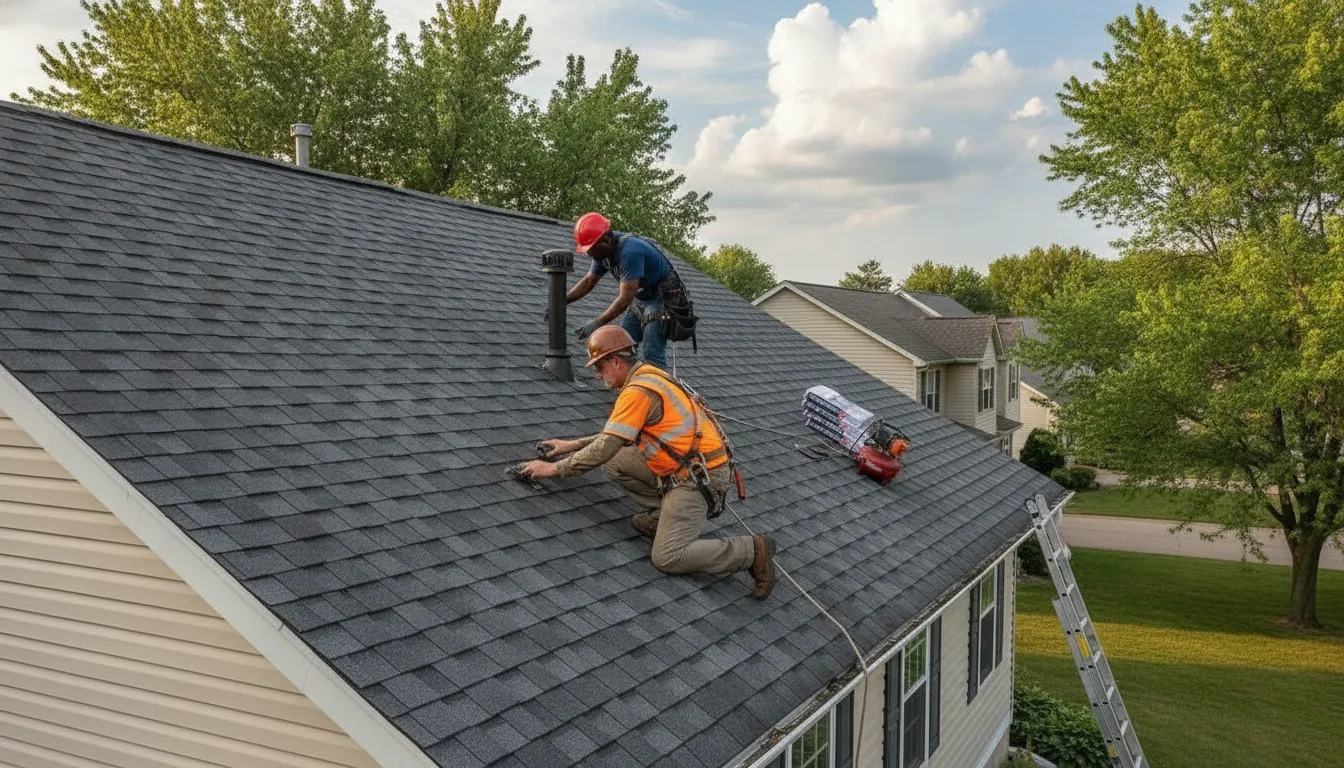
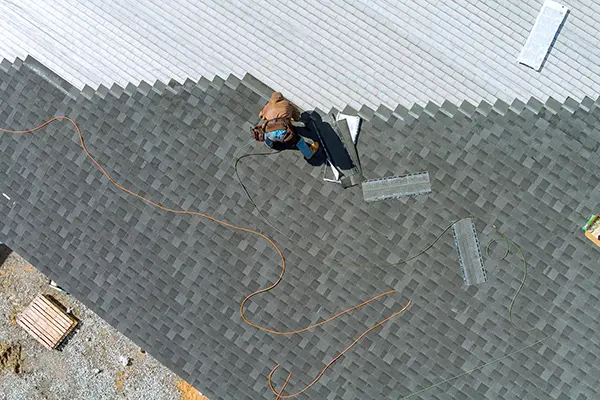
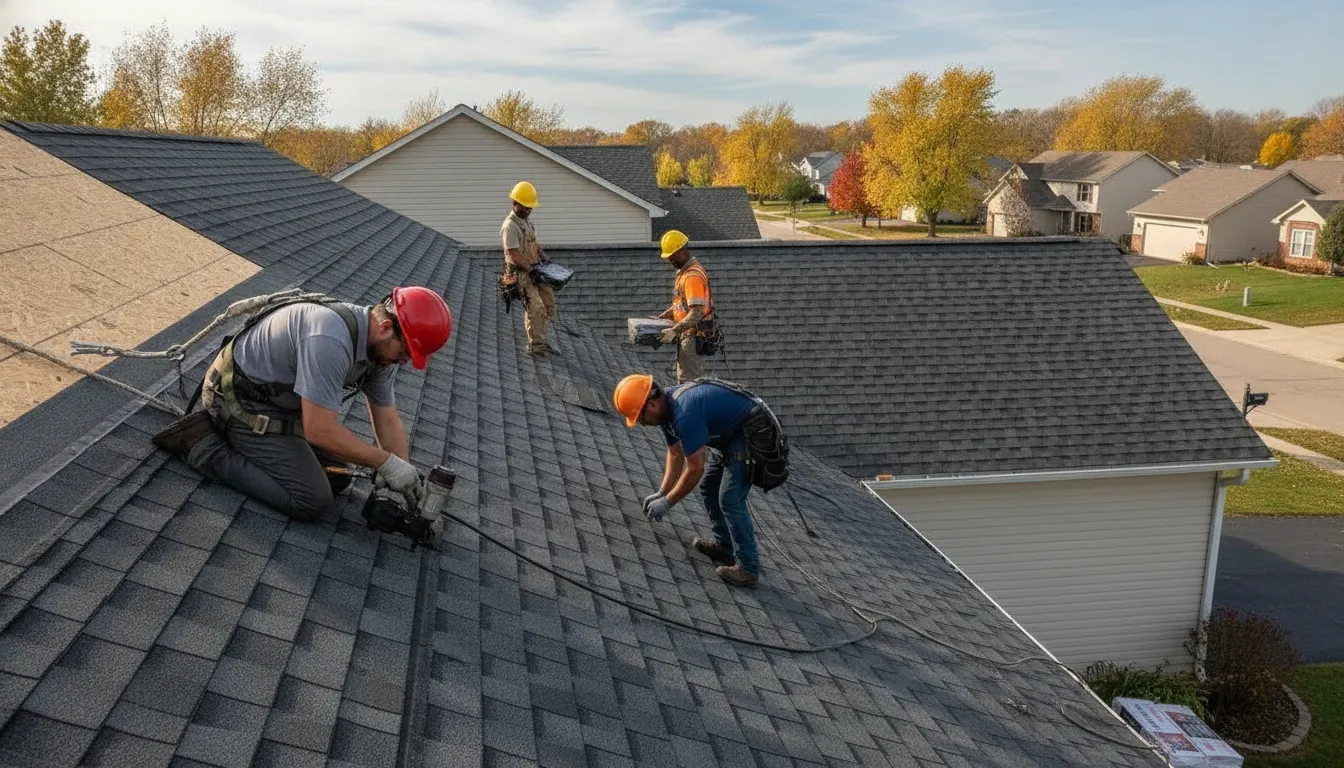
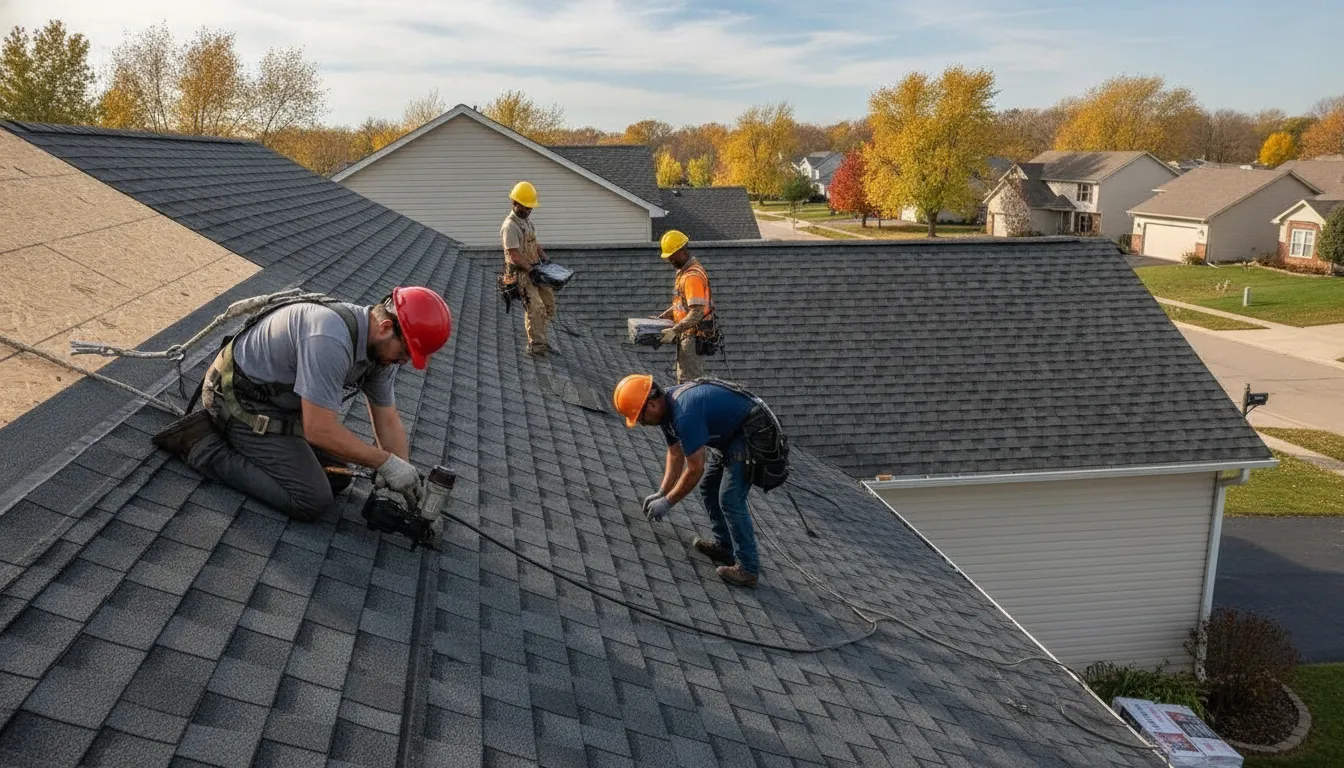
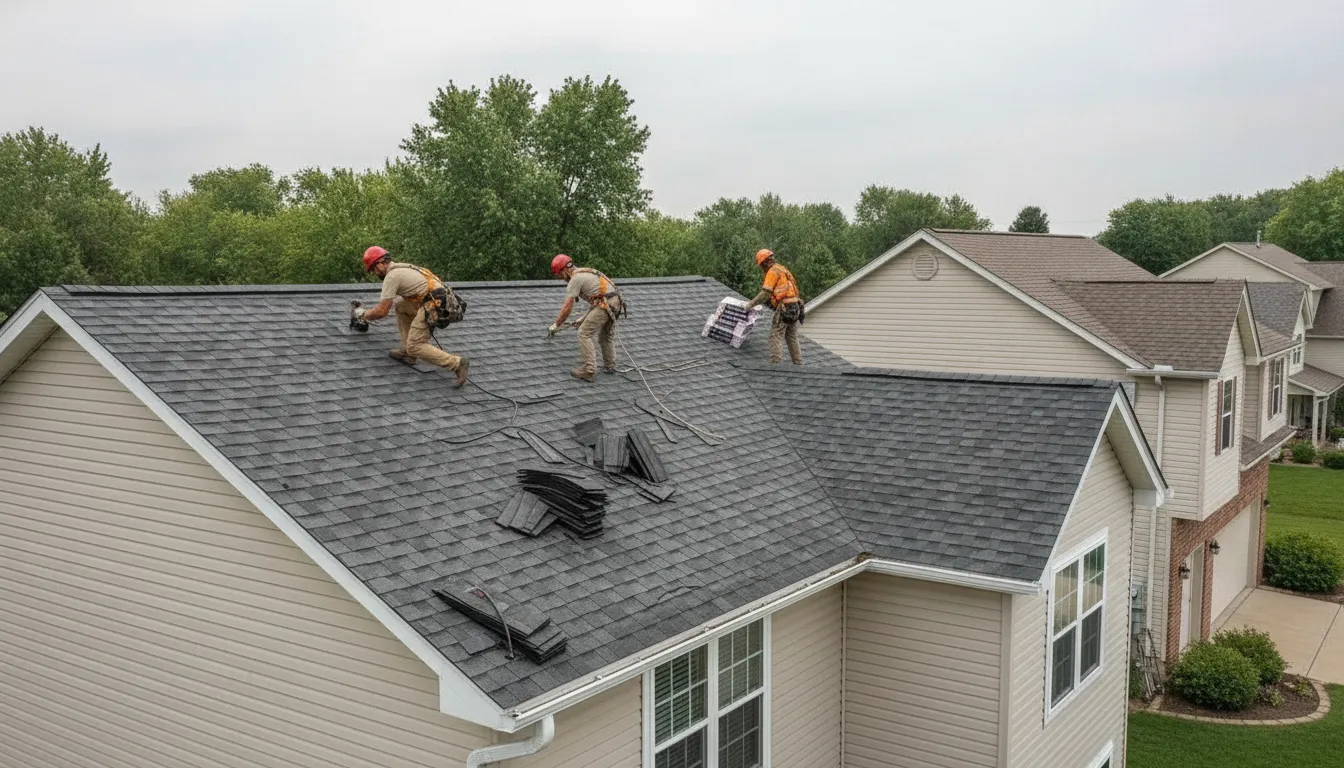
    Roofer installing Owens Corning shingles on a Minnesota home

    For homeowners comparing owens corning shingles, the right choice depends on the product line, the roof’s ventilation and moisture-control details, and the quality of installation. Owens Corning offers architectural asphalt options with features such as SureNail Technology, algae-resistant granules, and product-specific wind-performance claims. Those features can be useful, but they do not replace sound decking, balanced airflow, correct flashing, or proper fastening.

    A practical evaluation starts by separating what the manufacturer builds into the shingle from what the contractor must build into the complete roof assembly. Understanding the product families makes that comparison clearer.

    What Are Owens Corning Shingles?

    Owens Corning shingles are asphalt roofing shingles made for residential steep-slope roofs. Like other architectural shingles, they combine a fiberglass mat with asphalt and mineral granules, creating a layered surface that sheds water and gives a home a dimensional roofline. The brand offers several product families, so the name alone does not identify one universal level of performance.

    For a Minnesota homeowner, the useful question is how a specific shingle line fits the roof system, installation plan, and exposure to snow, wind, hail, and freeze-thaw cycles. Product selection matters, but decking condition, underlayment, flashing, ventilation, and fastening also influence how the finished roof performs.

    How the main product lines differ

    Owens Corning’s TruDefinition Duration line uses the manufacturer’s SureNail Technology. Owens Corning describes this feature as part of the shingle’s design for adhesion and performance. The line also includes a range of color options, which can help homeowners coordinate a roof with siding, brick, trim, and the home’s architectural style.

    The Oakridge line is a separate architectural shingle family. Its traditional design may suit homeowners who want a straightforward dimensional appearance. Comparing Oakridge with Duration should involve more than color samples. Ask which specifications apply to the selected product, how it will be installed, and whether the roof’s slope and existing assembly are appropriate.

    Owens Corning also identifies Duration FLEX as a polymer-modified asphalt product. That construction can make it a product line worth discussing for certain projects, but it should not be treated as a guaranteed solution for every Minnesota roof. A qualified evaluation should consider the home’s design, local weather exposure, ventilation, and the manufacturer’s current installation requirements.

    What the brand name does not tell you

    Many Owens Corning shingles are tested for fire resistance, and manufacturer materials describe eligible products and installation conditions in detail. Those claims should be read alongside the applicable product documentation and warranty terms. A warranty is not a promise that every roof will avoid damage, and it does not replace correct installation or ongoing inspection.

    In short, Owens Corning is a manufacturer with multiple asphalt shingle options, not a single roofing system. The best choice depends on the specific line, the roof assembly, and the workmanship supporting it.

    Which Owens Corning Shingles Fit a Minnesota Home?

    There is no single shingle line that fits every Minnesota roof. The right choice depends on the home’s roof slope, exposure to wind and hail, attic conditions, existing decking, desired appearance, and the installation details that complete the roof system. Start by comparing the product families, then have the roof evaluated as a whole.

    Owens Corning’s Oakridge and TruDefinition Duration lines are architectural asphalt shingles, but they are positioned differently. The Duration family features SureNail Technology, while Oakridge offers a traditional architectural design. Owens Corning also describes Duration FLEX as a polymer-modified asphalt product. These manufacturer descriptions are useful starting points, not a substitute for checking whether a specific roof assembly is appropriate for local conditions.

    How common Owens Corning shingle lines may fit a Minnesota roofing project
    Shingle lineWhat it may offerQuestions for your roof
    OakridgeTraditional architectural styling and a broad range of color choices.Does the roof’s exposure, slope, and overall condition support this product family?
    DurationArchitectural styling with SureNail Technology and a design focused on wind performance.Will the installer follow the specified nail placement and use the compatible system components?
    Duration FLEXPolymer-modified asphalt construction intended for homeowners considering a more specialized option.Is this line suitable for the roof design and installation conditions, and what do the current product documents require?
    Decision lensMatch the shingle to the complete roof system, not just the color or product name.Check decking, slope, flashing, underlayment, ventilation, weather exposure, and documented installation requirements.

    Look beyond the shingle package

    In Rogers, Cottage Grove, St. Francis, Monticello, and nearby communities, a roof may face snow accumulation, freeze-thaw cycles, wind-driven rain, hail, and summer heat. Those conditions make the supporting details important. Damaged decking can affect fastening and water shedding. Incorrect overlap, missed nail zones, weak flashing, or inadequate underlayment can undermine a well-chosen shingle.

    Ventilation deserves the same attention. Balanced intake and exhaust airflow, together with appropriate insulation and air sealing, helps manage attic moisture and roof-system performance. It also addresses conditions that can contribute to ice dams, although ventilation alone is not a guarantee against them. Homeowners planning broader exterior improvements can also review our window replacement services in Rogers.

    Color is a practical decision as well as an aesthetic one. Lighter roofing materials generally reflect more solar heat than darker materials, so color can be discussed alongside the home’s design and summer comfort goals. Ask for the current manufacturer documentation, confirm the roof system components, and compare the installer’s plan with the needs of your specific Minnesota home. See Owens Corning’s Oakridge product information, Duration details, and Duration FLEX information before making a final selection.

    Are Owens Corning Shingles Good Quality for Minnesota Weather?

    Yes, Owens Corning shingles can be a sound choice for a Minnesota home, but the brand alone does not determine roof performance. The specific shingle line, roof assembly, installation quality, ventilation, flashing, and maintenance all matter. A product designed for wind performance may still fail when nails are misplaced, decking is compromised, or water backs up behind an ice dam.

    Wind, hail, and snow performance

    The TruDefinition Duration line is designed for wind resistance up to 130 mph, according to Owens Corning’s product information. That is a manufacturer design rating, not a promise that every installed roof will withstand every storm. Proper nail placement and the correct installation method are essential to achieving the intended wind performance. See the Owens Corning Duration specifications for the product’s stated requirements.

    Minnesota roofs also face hail, heavy snow, and repeated movement as temperatures rise and fall. A quality shingle can be part of a durable system, but no asphalt shingle should be described as hail-proof. After a significant storm, look for missing or lifted shingles, exposed mat, damaged flashing, and loose granules. Snow load and drifting also make the condition of the roof deck, slope, and supporting structure important considerations before replacement.

    Algae resistance and freeze-thaw cycles

    Some Owens Corning shingle materials use algae-inhibiting granules intended to help limit dark streaks and visible algae growth. The underlying technology is described in this technical patent record. Algae resistance is primarily an appearance and maintenance benefit. It does not replace proper drainage, cleaning practices, or an evaluation of the roof’s overall condition.

    Freeze-thaw weather tests every layer of a roof. Water can enter small weaknesses, freeze, expand, and expose problems in shingles, underlayment, flashing, or decking. Durable results depend on a complete water-shedding assembly, including sound decking and correctly overlapped shingles. At the eaves, an appropriate ice and water barrier can help protect against leakage caused by ice-dam backup, but it cannot correct excessive attic heat loss by itself.

    What the warranty does not cover

    Owens Corning offers limited lifetime warranties on many eligible residential shingle installations. The word “limited” matters because coverage can depend on the product, installation conditions, transfer rules, maintenance, and the specific warranty document. A warranty is not a guarantee against hail, storm damage, ice dams, poor workmanship, or every cause of premature aging. Read the manufacturer warranty terms and ask the installer which responsibilities remain with the contractor.

    How Do Roof Airflow and Ventilation Affect Shingle Performance?

    Shingles are the visible weather layer, but the attic and roof assembly behind them also affect how the system performs. A sound ventilation plan moves air through the attic without allowing uncontrolled outdoor air to enter the living space. That balance matters in Rogers, Cottage Grove, and other Minnesota communities where roofs face humid summers, cold winters, and repeated freeze-thaw conditions.

    Intake and exhaust must work together

    Balanced ventilation uses properly sized intake vents, commonly at the soffits or eaves, and exhaust vents near the roof peak or upper roof area. Intake air enters low, warms as it moves through the attic, and exits high. The exact vent type and sizing depend on the roof design. Adding an exhaust vent without enough intake air can limit the intended airflow rather than solve the problem. The University of Central Florida describes balanced attic ventilation as a system with properly sized intake and exhaust vents. Review the UCF attic insulation and ventilation guidance for additional context.

    Moisture control starts above the ceiling

    Warm, moist air from bathrooms, kitchens, and the living area can migrate into an attic through gaps around light fixtures, wiring, ductwork, and other penetrations. If that moisture remains trapped, it can contribute to condensation, wet insulation, wood deterioration, and damage to the roof deck. Ventilation helps remove attic moisture, but it is not a substitute for properly vented bathroom fans or careful air sealing at the ceiling plane.

    Insulation and air sealing therefore belong in the same conversation as shingle selection. Insulation helps limit heat transfer from the home into the attic. Air sealing reduces the movement of conditioned, moisture-laden air through gaps. Ventilation then supports the removal of heat and residual moisture that enters the space. The U.S. Department of Energy explains how attic insulation and ventilation work together to support roof performance and moisture management: see the DOE guide to durable attics.

    Why this matters during Minnesota winters

    Ice dams form when heat escaping into the attic warms portions of the roof while the eaves remain cold. Snow can melt higher on the roof, then refreeze at the colder edge. Insulation and air sealing help reduce the uneven heating that contributes to this cycle, while ventilation can help keep the roof deck temperature more consistent. Ventilation alone cannot guarantee that ice dams will not form. Properly installed ice and water protection at vulnerable eaves is another important part of the system.

    During an inspection, ask how the proposed work addresses soffit intake, exhaust capacity, attic insulation, air leaks, and eave protection together. That system-level review is more useful than choosing a shingle color or product line in isolation.

    What Should Homeowners Check Before Choosing a Shingle Line?

    The right shingle line depends on more than color or a product label. Before choosing Owens Corning shingles, look at the roof assembly, the home’s exposure, and the installation plan. A careful review can identify conditions that affect water shedding, wind performance, attic moisture, and long-term appearance.

    Use these questions during an inspection or contractor consultation:

    1. Is the roof decking sound? Ask whether the wood beneath the existing shingles shows rot, delamination, soft spots, or water staining. Damaged decking should be repaired or replaced before new shingles are installed so fasteners have a reliable base and the roof can shed water properly. The Owens Corning asphalt shingles replacement guide provides additional context on what a Minnesota roof replacement involves.
    2. Does the roof slope suit the planned material? Roof pitch affects how quickly water drains and which products can be used safely. Confirm that the proposed shingle line and installation method are appropriate for each roof plane, including lower-slope sections and additions.
    3. Is attic ventilation balanced? Ask where intake air enters and where exhaust air leaves. Intake and exhaust should work together, while insulation and air sealing help limit heat and moisture movement into the attic. Ventilation alone is not a guarantee against ice dams, but it is an important part of a sound roof system.
    4. Are flashing details being addressed? Review the flashing around chimneys, skylights, walls, valleys, vents, and other penetrations. New shingles cannot correct failed or poorly integrated flashing.
    5. What underlayment and ice-barrier plan will be used? In Minnesota, ask how the contractor will protect eaves, valleys, and other vulnerable areas from water backing up behind ice. The answer should identify the underlayment and ice-and-water barrier, not just say that a membrane is included.
    6. Will the color fit the home and local conditions? Compare samples outside, where daylight changes their appearance. Lighter and darker roofing surfaces can absorb different amounts of solar heat, so consider the home’s design, attic performance, and summer comfort together. Learn more about professional shingle installation before making a final selection.
    7. What exactly does the warranty cover? Read the manufacturer and contractor warranty terms. Confirm required installation practices, limitations, maintenance expectations, and who handles a claim. A limited lifetime warranty is not a promise that every roof will perform the same way under every condition.
    8. Who will install the roof, and what will be documented? Ask about the crew, nail placement, starter and ridge components, cleanup, ventilation work, photos, and final inspection. Clear documentation makes it easier to verify that the selected system was installed as specified.

    For a Rogers-area homeowner, these answers are more useful than choosing a shingle from a sample board alone. They reveal whether the product, roof structure, and installation plan work together for the property’s actual conditions. A broader exterior review can also include gutter services in Rogers when drainage affects the roof edge.

    How Does Installation Change the Result?

    Even well-designed shingles depend on the roof system beneath and the workmanship above it. The same Owens Corning shingles can perform very differently when a crew misses key installation details. In Minnesota, that matters because roofs face wind, snow, freeze-thaw movement, and ice-dam conditions throughout the year.

    Nail placement and shingle alignment

    Fasteners must be placed in the manufacturer’s specified nail zone, driven flush rather than overdriven, and kept out of the seal strip. Correct placement helps the shingle resist wind uplift. Each course also needs the specified exposure and overlap so water sheds across the surface instead of finding gaps between rows. The Owens Corning installation guidance explains why these installation fundamentals affect water-shedding performance.

    Complete the roof system, not just the field shingles

    A durable installation includes more than the visible field shingles. Starter shingles help secure the first course and direct water at the eaves. Matching hip and ridge components finish roof transitions and protect the ridgeline. Underlayment and ice-and-water protection add another line of defense where wind-driven rain and ice dams can create backup, especially along eaves and valleys.

    Ventilation also needs to be considered before the roof is closed in. Balanced intake and exhaust airflow helps manage attic moisture and supports roof-system performance. Ventilation alone does not guarantee that ice dams will not form, so insulation and air sealing should be reviewed as part of the same assessment.

    Flashing, cleanup, and documentation

    Flashing around chimneys, walls, skylights, plumbing penetrations, and roof valleys must be integrated correctly. Reusing damaged flashing or covering hidden deck problems can leave a new roof vulnerable despite its new shingles. Before installation, the deck should be checked for water damage and weak areas, then repaired where needed.

    After the work, a professional crew should remove loose nails and debris, inspect penetrations and transitions, and document the products and installation details. Keep records of the shingle line, accessories, permits when applicable, photographs, and warranty information. Those details make future maintenance and warranty questions easier to resolve. Homeowners in Rogers can review Rogers roofing services when comparing local inspection and installation support.

    Contact Referred Restoration online or call (763) 726-4245 for a free roof inspection and a clear review of your roof system.

    Frequently Asked Questions

    Are Owens Corning shingles good quality for Minnesota weather?

    They can be a strong choice when the shingle line matches the roof and the installation is done correctly. Owens Corning’s Duration line is designed for wind performance, while the complete roof system also needs sound decking, appropriate underlayment, flashing, and correct nail placement. No shingle brand can eliminate every risk from hail, snow, ice dams, or freeze-thaw cycling. Review the manufacturer’s product and warranty terms rather than treating a limited warranty as a promise of damage-free performance. See the official Duration information for product-specific details.

    Which Owens Corning shingle line is best for cold weather?

    There is no universal best line for every Minnesota home. Oakridge, Duration, and Duration FLEX have different product designs and should be compared with the roof’s slope, exposure, ventilation, existing deck, and project requirements. Owens Corning identifies Duration FLEX as a polymer-modified asphalt product, which makes it an option to discuss with a qualified roofer rather than an automatic solution for every cold-weather roof. A site inspection should guide the selection.

    Do Owens Corning shingles resist algae?

    Some Owens Corning shingle products use algae-resistant granules intended to help limit dark streaks and algae growth. That feature supports appearance, but it is not a guarantee that a roof will never develop discoloration. Roof orientation, moisture, nearby trees, and local conditions still matter. Confirm the specific algae-resistance language for the product being considered, including any limitations in its warranty or installation requirements. Product materials describe the use of algae-inhibiting granules in roofing shingles: technical patent record.

    Does attic ventilation matter with new shingles?

    Yes. Balanced intake and exhaust ventilation helps manage attic moisture and supports roof-system performance, but ventilation alone does not prevent ice dams. Attic insulation and air sealing are also important because heat loss can warm the roof unevenly in winter. The U.S. Department of Energy explains the relationship between attic insulation, ventilation, and ice-dam conditions in its attic guidance. Ask the roofer to evaluate the entire attic system before installation.

    Contact us to plan the right roofing system

    A shingle choice is only one part of dependable Minnesota roof performance. A roof inspection can help clarify the condition of your decking, ventilation, flashing, and other system components before you choose a product line. Referred Restoration can help you evaluate the next step for your home, with practical guidance rather than a one-size-fits-all recommendation. Call (763) 726-4245 or reach out online.

    Contact Referred Restoration online for a free roof inspection
  • Flat Roof Repair: Common Problems and Fixes in Minnesota

    Flat Roof Repair: Common Problems and Fixes in Minnesota

    Flat roof repair is often more involved than covering the spot where a ceiling stain appears. Low-slope roofs can hide water beneath a membrane, insulation, or flashing before a leak becomes visible inside. In Minnesota, snow, ice, freeze-thaw movement, and standing water can stress seams and drainage details. Knowing what to look for helps homeowners protect the roof assembly and choose the right next step.

    Contact Referred Restoration online or call (763) 726-4245.

    Flat roof repair corrects a localized problem in a low-slope roof system, such as an open seam, damaged membrane, failed flashing, or puncture. The appropriate repair depends on the roof material, moisture below the surface, drainage, and the condition of the structural deck. A professional inspection determines whether a patch, detail repair, recovery, or broader replacement plan is appropriate.

    This guide explains common warning signs, how a professional evaluates a low-slope roof, and when a small repair may not be enough. It also outlines safe steps for homeowners in Rogers, Cottage Grove, St. Francis, Monticello, and nearby Minnesota communities.

    What Does Flat Roof Repair Address?

    Flat roof repair addresses a defect in a low-slope roof assembly without automatically replacing the entire system. Most roofs called flat roofs are designed with some slope so water can move toward drains, scuppers, or roof edges. A repair may focus on the membrane, a seam, flashing, a penetration, or a drainage detail.

    Low-slope systems may use built-up bitumen, modified bitumen, TPO, PVC, or EPDM. Each material has different bonding, welding, and patching requirements. A repair material that works on one membrane may not create a reliable bond on another. The roofer should identify the existing system before selecting a repair method.

    Why the visible leak is not always the source

    Water can travel along a roof deck, insulation layer, seam, or framing member before appearing indoors. A ceiling stain may therefore be several feet away from the exterior entry point. The area directly above the stain still matters, but the inspection should also examine nearby seams, edges, penetrations, drains, and previous patches.

    The Building America Solution Center explains that low-slope roofs depend on membrane continuity, flashing, drainage, and material compatibility working together. The practical takeaway is simple: a durable repair treats the failure and the condition that allowed it to develop.

    Localized damage versus a broader roof problem

    A single puncture or open seam may be localized. Repeated ponding, widespread surface cracking, wet insulation, or a deteriorated deck suggests that the roof needs a broader evaluation. The repair recommendation should explain the observed condition, the limits of the proposed work, and whether concealed moisture or structural damage still needs investigation.

    Which Problems Usually Need Flat Roof Repair?

    Several defects appear repeatedly on low-slope roofs. Some are surface issues, while others point to drainage or concealed moisture. Use this table as a screening guide, not as a substitute for a roof inspection.

    Warning signWhat it may indicateWhy it matters
    Ponding waterWater remains after rain or snowmeltRepeated standing water can increase membrane and deck exposure.
    BlistersRaised areas in the membrane or surfacingAir or moisture may be trapped below the surface.
    Open seamsMembrane sections have separatedThe opening can let water enter the assembly.
    Cracks or alligatoringWeathered bitumen or aging surfacingWidespread cracking may exceed a simple patch.
    Failed flashingDamage around edges, vents, curbs, or pipesTransitions and penetrations are common entry points.
    Interior stainingMoisture has reached the building belowThe visible mark may not identify the exterior source.

    Ponding water and drainage trouble

    Ponding water is water that remains on the roof after a reasonable drainage period. A blocked drain, clogged scupper, damaged edge, or low area can allow water to collect. Clearing a blockage may be part of the answer, but recurring ponding deserves a closer look at slope, drainage capacity, membrane condition, and the deck.

    Standing water can hide small punctures and make a repair area difficult to clean and dry. A roofing professional should determine whether the water is a symptom of one blocked path or a drainage pattern affecting the roof.

    Blisters, cracks, and surface wear

    Blisters are raised bubbles or pockets in the roof surface. They may form when air or moisture is trapped and expands as the roof warms. A blister should not be cut open casually. Opening it without understanding the surrounding material can spread damage or allow additional moisture into the assembly.

    Cracking and alligatoring are surface clues associated with weathered bitumen. A few small cracks may receive localized attention, while widespread cracking may indicate that the roof surface is aging throughout. The repair plan should account for the pattern, not only the most noticeable crack.

    Open seams and flashing failures

    Seams join membrane sheets or layers. If a seam loses its bond, water can enter even when most of the membrane still looks intact. Flashing protects changes in direction and penetrations around vents, curbs, pipes, walls, and edges. Movement, weather exposure, and earlier repairs can weaken these details.

    In Minnesota, a seam or flashing defect may become more obvious after snowmelt or a freeze-thaw cycle. Interior staining, damp insulation, peeling paint, or a musty odor should prompt an inspection rather than a surface-only patch.

    How Is Flat Roof Repair Completed?

    A professional repair is a sequence of diagnosis, preparation, compatible installation, and follow-up inspection. The exact steps vary by membrane and weather conditions, but the purpose stays the same: find the entry path. Prepare a sound surface, restore water resistance, and address contributing conditions.

    1. Inspect the membrane, seams, and details

    The roofer examines the membrane, seams, flashings, penetrations, drains, scuppers, edge metals, and areas near the interior symptom. A seam probe or another inspection method can reveal a weak bond that is not visible from the ground. The roofer also considers past repairs, surface wear, and whether water has moved below the membrane.

    2. Evaluate moisture and the structural deck

    A patch may not solve a problem if insulation is wet or the deck is deteriorated. The inspection should determine whether the visible damage is isolated and whether the underlying materials can support the planned repair. Moisture assessment helps distinguish a small membrane defect from a larger roof-assembly problem.

    3. Prepare a clean, dry repair area

    Loose material, contamination, and failed repair remnants are removed as appropriate. The area must be clean and dry enough for the selected material or bonding method. Work at height should be performed by trained professionals with suitable fall protection. A homeowner should not climb onto a wet, icy, or visibly damaged roof to investigate a leak.

    4. Use a compatible patch or detail repair

    Built-up and modified bitumen systems may require compatible bitumen materials and reinforcement. TPO and PVC membranes may be repaired with compatible patches joined by heat welding. EPDM is a thermoset membrane and typically relies on specialized adhesive bonding or compatible uncured material. Equipment, temperature, surface preparation, and overlap all affect the result.

    Sealant alone is not a universal repair. It may be part of a flashing or detail treatment, but it does not correct every open seam, wet insulation area, drainage defect, or weakened deck. Material compatibility and workmanship matter more than the visible size of the leak.

    5. Review drainage and surrounding conditions

    After the primary defect is addressed, the roofer should review water movement around the repair. A recurring low area, blocked outlet, damaged edge, or nearby flashing failure can undermine otherwise sound work. The final assessment should identify maintenance needs and explain whether additional roof areas should be monitored.

    The Oak Ridge National Laboratory overview of replacing or re-covering older roofs also emphasizes evaluating the existing roof before adding another layer. This supports a condition-based decision rather than treating age alone as the deciding factor.

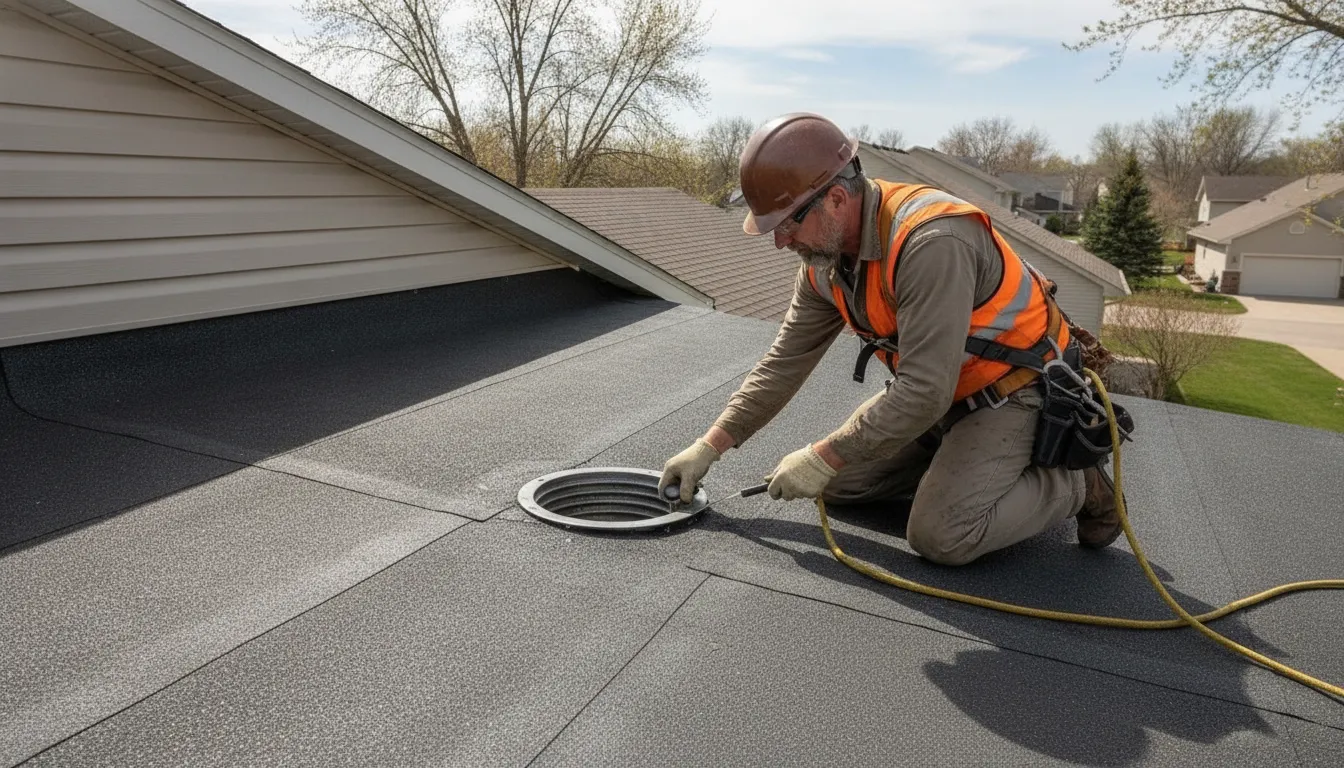
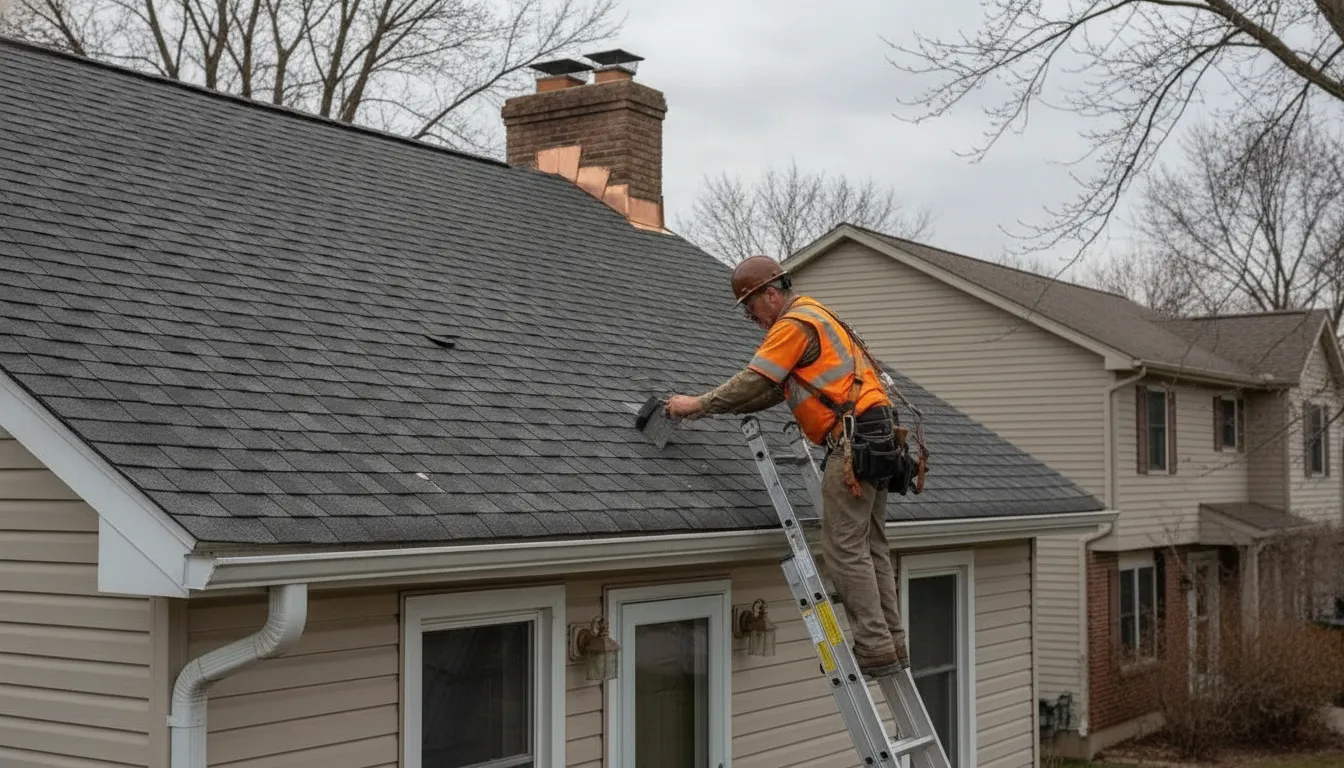
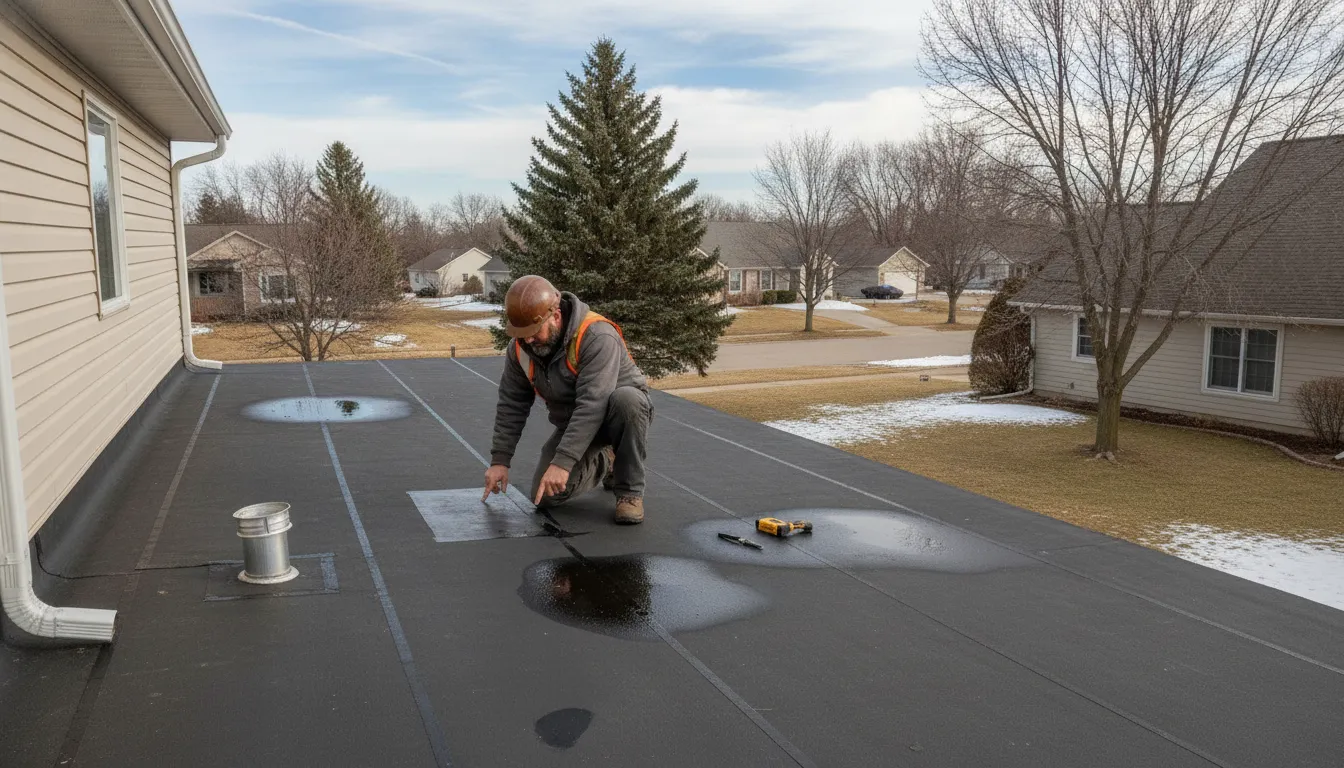
    Professional inspecting a membrane seam during flat roof repair

    How Does Minnesota Weather Affect Low-Slope Roofs?

    Minnesota weather exposes flat and low-slope roofs to repeating cycles of moisture, freezing, thawing, snow, and ice. These conditions do not automatically mean a roof will fail, but they can reveal weak seams, poor drainage, and damaged flashing. Seasonal inspection helps identify changes before a small defect becomes an interior leak.

    Freeze-thaw movement

    Roofing materials and flashing can expand and contract as temperatures change. Repeated movement may place stress on seams, edges, and transitions. A repair completed without checking the surrounding detail may leave the nearby weakness in place. Inspectors should pay close attention to areas where different materials meet.

    Snowmelt and ice

    Snow and ice can obstruct drains and scuppers. Ice can also hold water against roofing details and force moisture beneath a membrane. Do not walk onto an icy roof or attempt to remove heavy snow without the right training and equipment. From the ground, note visible drainage issues and share them with the roofing professional.

    Moisture below the surface

    A roof can look dry after a leak stops while moisture remains in insulation or other components. Wet insulation may lose thermal performance and can complicate decisions about repair or recovery. If moisture is suspected, the inspection should address the assembly instead of treating the interior stain as the entire problem.

    Seasonal maintenance

    A practical maintenance rhythm is an inspection after winter conditions and another before the next cold season. Additional attention is appropriate after severe weather, unusual ponding, or interior staining. Maintenance does not guarantee that a roof will avoid damage, but it can make changes easier to identify while the repair scope is still clear.

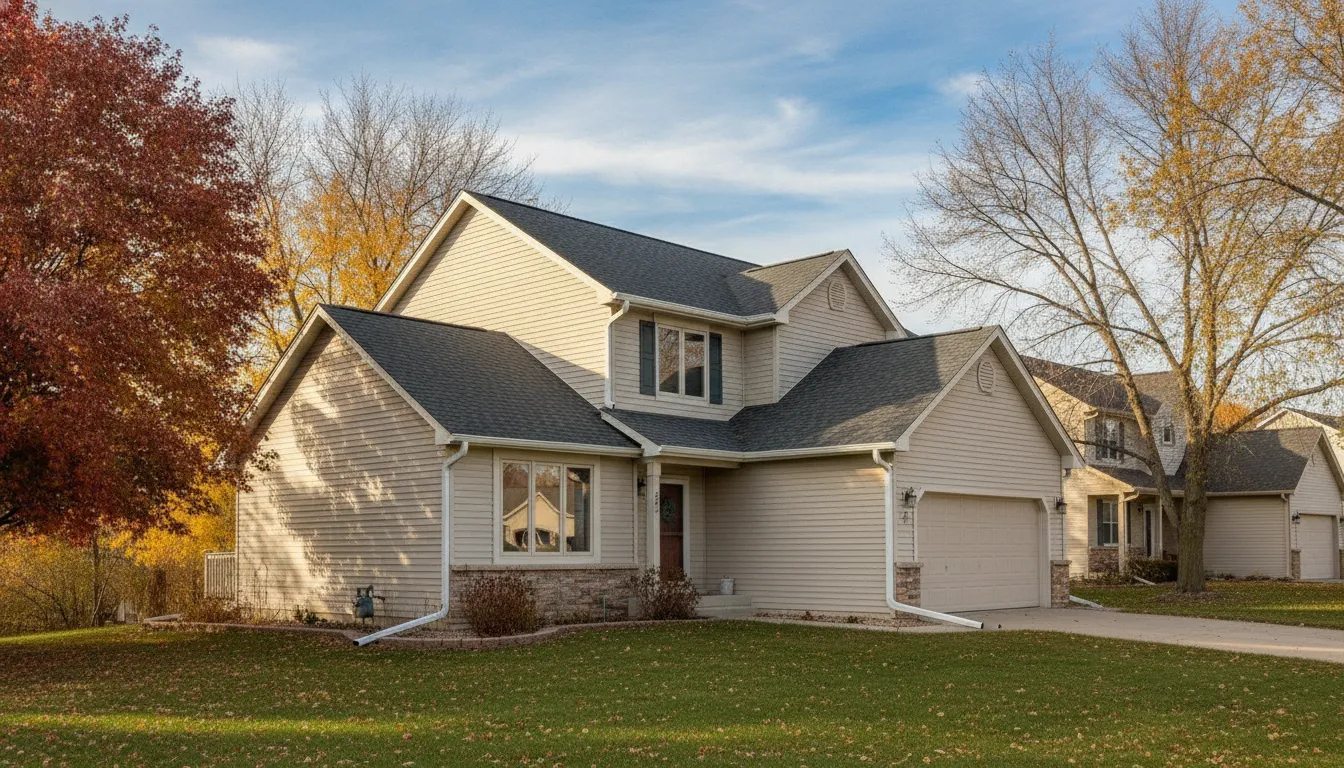
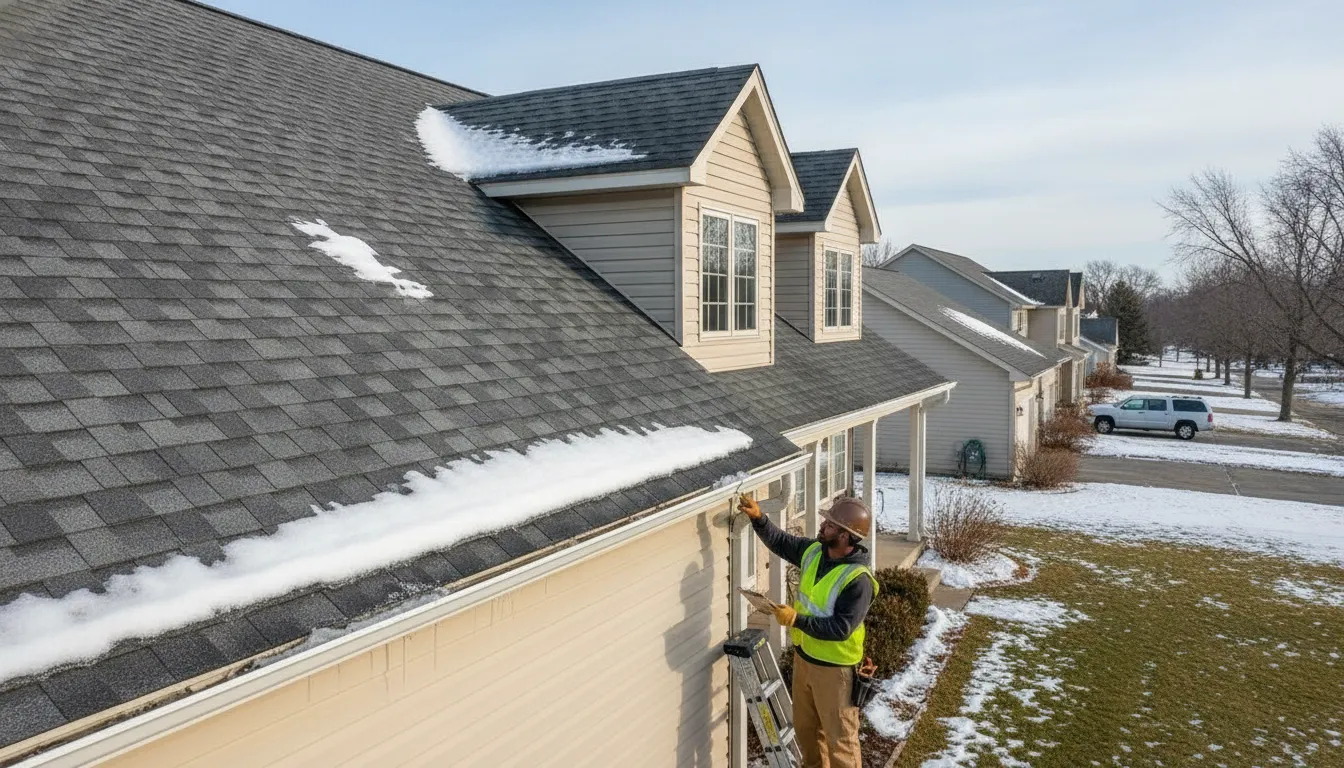
    Roofer checking drainage on a Minnesota low-slope roof

    Can Flat Roof Repair Delay a Full Replacement?

    Sometimes a localized repair can extend the useful service of an otherwise stable roof system. A puncture, open seam, or failed flashing detail may be repairable when the surrounding membrane, insulation, and deck remain sound. A small patch is less likely to be durable when moisture and deterioration are widespread.

    Conditions that support localized repair

    • Defined damage , The damaged area can be located and separated from surrounding serviceable material.
    • Sound membrane , The surrounding membrane remains attached and suitable for compatible repair work.
    • Limited moisture , Moisture is not spread through the insulation or roof assembly.
    • Stable deck , The structural deck provides a sound base for the planned work.
    • Functional drainage , Drainage works properly or can be corrected as part of the repair.

    When a broader plan may be appropriate

    Recovery or replacement becomes more likely when wet insulation covers a large area, the deck is deteriorated, seams are failing throughout, or the membrane has widespread cracking. A new layer should not conceal a wet or unstable assembly. The roof professional should explain which observations support the recommendation and which areas remain uncertain.

    Roof coatings can be useful in the right system and condition, but a coating does not dry concealed moisture, rebuild a weakened deck, or correct every drainage problem. The roof’s actual condition matters more than its age alone. A clear inspection report helps the property owner compare the repair scope with the condition of the full assembly.

    What Should Homeowners Do Before an Inspection?

    Start inside and from the ground. Do not climb onto a wet, icy, sagging, or visibly damaged roof. Instead, document what you can see safely and give the roofer specific information about when the problem appeared.

    Document interior symptoms

    • Photograph symptoms , Record ceiling stains, peeling paint, damp drywall, or visible drips.
    • Mark locations , Note the room and approximate location of each symptom.
    • Record timing , Note whether the issue followed rain, snowmelt, or a freeze-thaw period.
    • Protect belongings , Move furniture and electronics away from an active leak.
    • Contain drips , Place a container below a drip, but avoid opening ceilings or walls.

    An interior stain does not prove that the roof defect is directly above it. The information is still useful because it helps the roofer correlate timing and location with exterior conditions.

    Look for safe ground-level clues

    From the ground, note visible sagging, ponding, damaged edge metal, overflowing drainage, or debris near an outlet. Do not use a ladder or step onto the roof to get a closer view. Share photographs and observations during the inspection so the professional can evaluate them alongside the roof surface.

    For more detail about tracking an interior symptom, read how to find a roof leak from the inside. Homeowners can also review the Referred Restoration roofing and exterior restoration services available in the local service area.

    How Can Rogers-Area Homeowners Choose the Next Step?

    The next step should match the evidence, not just the most visible symptom. Ask the roofing professional to identify the roof system and show where water is entering. Describe whether moisture is present below the membrane, and ask how drainage and flashing affect the recommendation.

    A useful inspection conversation covers four questions:

    1. What defect is allowing water to enter?
    2. Is the problem localized, or are nearby areas showing the same pattern?
    3. Is the insulation or structural deck affected?
    4. What maintenance or follow-up inspection should happen after the repair?

    For homeowners in Rogers, Cottage Grove, St. Francis, Monticello, and surrounding communities, local weather exposure is relevant, but the roof’s current condition remains the deciding factor. Referred Restoration can assess the membrane and details, explain the repair path, and identify when a wider roof evaluation is warranted. Homeowners considering related exterior work can also review Rogers siding services or Rogers gutter services when drainage and exterior protection overlap.

    Contact Referred Restoration online to discuss a flat roof concern in Minnesota.

    Frequently Asked Questions About Flat Roof Repair

    Can a homeowner patch a flat roof?

    A homeowner can document an interior leak and protect belongings, but roof access and membrane repairs are safety- and material-sensitive tasks. A temporary interior measure does not identify the exterior entry point. A qualified roofer should inspect the membrane, seams, flashing, drainage, and roof assembly before a permanent repair.

    How quickly should ponding water be checked?

    Recurring ponding should be evaluated rather than ignored, especially when it appears after ordinary rain or snowmelt. Standing water may be connected to a blocked drain, a low area, a membrane defect, or a broader drainage issue. From the ground, document where water collects and tell the roofing professional when it occurs.

    Are blisters always a sign that the roof must be replaced?

    No. A blister’s significance depends on its size, location, cause, surrounding membrane, and whether moisture is present below it. Do not cut into a blister without knowing the system and repair method. An inspection can determine whether the defect is localized or part of more widespread surface or assembly deterioration.

    What is the difference between a roof repair and a roof recovery?

    A repair corrects a localized defect or detail. A recovery, sometimes called a re-cover, adds a new roofing layer over an existing system when the existing assembly is dry, stable, and suitable for the proposed materials. Deck condition, moisture, drainage, and compatibility must be evaluated before recovery is considered.

    Does a ceiling stain show exactly where the roof leaks?

    Not necessarily. Water can travel through the roof assembly or building framing before it becomes visible indoors. The stain is an important clue, but the roofer should also inspect nearby seams, penetrations, flashings, drains, and low areas to locate the actual entry path.

    Contact Referred Restoration online or call (763) 726-4245 to request the next step for your roof.

  • Gutter Replacement for Minnesota Homes: Warning Signs

    Gutter Replacement for Minnesota Homes: Warning Signs

    How Do You Know When Gutter Replacement Is Needed?

    Minnesota gutters work through snow, freeze-thaw cycles, heavy rain, and seasonal debris. Small problems can become bigger exterior concerns when water spills over the edge, collects near the foundation, or reaches the fascia and roof edge.

    Contact Referred Restoration online

    gutter replacement is usually worth considering when damage is widespread, sections repeatedly sag or leak, or the system no longer directs water away from the home. A condition-based inspection can separate an isolated repair from a better long-term solution, including custom-fitted seamless gutters with fewer potential leak points.

    Referred Restoration provides honest assessments for homeowners in Rogers, Cottage Grove, and nearby Minnesota communities. Its Rogers gutter services can be considered after reviewing the system. The right decision depends on the condition of the gutters, downspouts, attachment points, and surrounding roof edge, not on a one-size-fits-all recommendation.

    Start by looking for the visible signs that indicate your gutter system may be struggling.

    What Are the Signs You Need Gutter Replacement?

    Gutters do more than collect rainwater. They guide runoff away from your siding, fascia, foundation, and basement. When the system can no longer do that reliably, replacement may be more practical than repeated patching. The right decision depends on the pattern and extent of the damage, not on one isolated blemish.

    Visible wear along the gutter channel

    Walk around the home and look for gutters that sag, pull away from the fascia, or have loose and detached sections. Sagging often points to loose, broken, or poorly spaced hangers. It can also change the gutter’s slope, allowing water to sit instead of moving toward the downspouts. Other visible warning signs include peeling or bubbling paint, rust spots, cracks, and splits. Peeling paint can indicate moisture escaping at a seam, while rust suggests the protective coating has broken down. Even a small crack can enlarge and allow water to leak onto nearby trim. These are recognized signs of gutter wear, but an inspection can determine whether a local repair is sufficient. Rogers gutter repair and replacement services can be evaluated based on the condition of the full system.

    Overflow during ordinary rainfall

    Water pouring over the front edge during a normal storm deserves attention, especially when the gutters are clear. A blockage from leaves, twigs, or shingle grit may be the cause. But recurring overflow can also point to an incorrect slope, undersized downspouts, separated joints, or a system that has lost its shape. Watch for water stains on the siding and trim, or for streams forming where downspouts should be carrying runoff. If overflow continues after cleaning, the problem is likely more than routine debris.

    Pooling water and eroded soil

    Check the ground after rainfall. Puddles near the foundation, channels cut into the soil, washed-out mulch, or exposed soil can show that runoff is not being directed away effectively. Protecting adjacent siding is also part of the exterior review, especially when splashback is persistent. Uncontrolled discharge may contribute to foundation damage or basement leaks over time. Downspout extensions should move water away from the foundation rather than releasing it directly beside the wall. These ground-level signs are easy to overlook because they develop gradually, but they can be more meaningful than a gutter’s appearance alone.

    Damage at the fascia or roof edge

    Overflowing or leaking gutters can keep fascia boards wet and may contribute to rot. Clogged gutters have also been associated with damage to fascia and the roof deck. Look for soft wood, staining, peeling finishes, or gaps where the roof edge meets the gutter. During a replacement assessment, the fascia and roof edge should be checked before new gutters are attached. A broader roof inspection in Rogers may be useful when damage extends beyond the gutter line. Addressing any underlying damage helps the replacement system sit securely and function as intended.

    Replacement is worth discussing when several signs appear together, when damage is spread across multiple sections, or when the system repeatedly fails after maintenance. A condition-based inspection can separate a repairable issue from a broader drainage problem without treating every aging gutter as an emergency.

    Can Gutter Replacement Be Avoided With Repairs?

    A small, isolated problem does not always mean the entire gutter system needs to be replaced. A loose fastener, separated joint, or limited leak may be reasonable to repair when the surrounding gutter is still straight, intact, and securely attached. The right choice depends on whether the damage is local or a symptom of broader system failure.

    When a repair may be enough

    Repair can make sense when one section has a minor crack, a single leaking connection, or a detached hanger. The rest of the system should be straight, intact, and securely attached. The repair should address the underlying issue, not just cover the visible leak. For example, resealing a joint will not solve a gutter that is pulling away from the fascia because its hangers are loose or the supporting wood is deteriorated.

    It is also worth checking what happens during rain. If water flows through the system without pooling, overflowing, or spilling against the house, a targeted repair may restore proper performance. A professional can inspect the affected area and determine whether a repair is durable or likely to be temporary.

    When replacement becomes more practical

    Replacement is generally more practical when problems appear in several places or keep returning after repairs. Widespread rust and corrosion, multiple cracks, repeated leaks, and long sections that sag or pull away from the fascia suggest that the material or attachment system has reached the end of its useful service. Peeling paint can also indicate moisture leaking from gutter seams, rather than being only a cosmetic issue. Visible signs such as rust, cracks, sagging, and detached sections are commonly associated with gutters that need replacement (source).

    Look beyond the gutter itself. Pooling water or soil erosion near the foundation may mean runoff is not being directed away effectively (source). Overflow can also affect fascia boards and the roof edge over time. If the system has poor pitch, water may sit in the channel instead of moving toward the downspouts. Correct slope and secure attachment are important parts of effective installation (source).

    How Minnesota Weather Changes Gutter Performance

    Gutters in Minnesota manage more than ordinary rainfall. Homes across the state face frequent precipitation and about 43 inches of annual snowfall, which puts repeated stress on the roof edge, gutter hangers, seams, and downspouts. A system that performs well during a mild summer storm can struggle after snow accumulation, spring thaw, or a series of heavy showers.

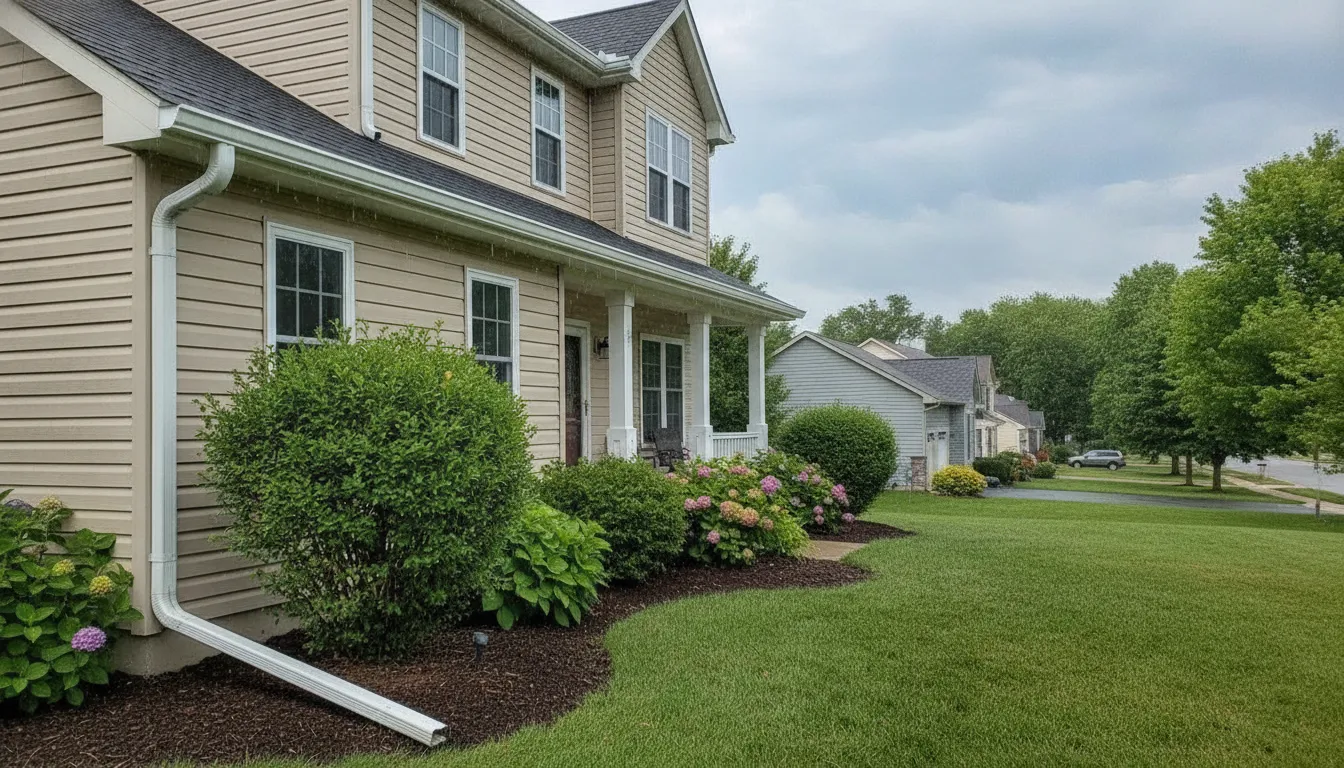
    Minnesota home gutters directing rainwater away from the foundation

    Ice dams can redirect melting snow

    The University of Minnesota Extension defines an ice dam as a ridge of ice at the roof edge that prevents melting snow from draining off the roof. Water that backs up behind an ice dam can enter the home and damage walls, ceilings, insulation, and other areas. Persistent moisture may also support mold and mildew growth. Read the University of Minnesota Extension guidance on preventing ice dams for additional safety and maintenance information.

    Gutters do not cause every ice dam, and replacing them does not solve every roof-ventilation or insulation problem. However, damaged, clogged, or poorly sloped gutters can make drainage problems worse. Ice-dam concerns should be evaluated alongside the roof edge, attic conditions, and overall water-management plan.

    Heavy precipitation and fast runoff expose weak drainage

    During a strong storm, water moves quickly from the roof into the gutter. Downspouts that are undersized, blocked, or poorly positioned may not carry that flow away efficiently. Overflow can leave wet soil against the foundation, erode landscaping, or stain and damage fascia. Downspout extensions also matter because they help direct runoff away from the foundation rather than releasing it beside the wall.

    Professional gutter inspection on a Minnesota home

    For a broader look at how roof design and drainage work together, review this guide to proper roof installation and drainage. A professional gutter replacement assessment should consider roof runoff, downspout locations, fascia condition, and the home’s surrounding grade rather than treating the gutter channel as an isolated component.

    Why Choose Seamless Gutters for a Minnesota Home?

    Seamless gutters can be a practical option when an older system has repeated leaks, loose joints, or sections that no longer direct water reliably. Unlike sectional gutters, which are assembled from multiple pieces, seamless systems are formed in long runs with fewer connection points. That reduces the number of places where seals can weaken and water can escape. The result is not a guarantee against leaks, but it can simplify the system and reduce a common source of gutter problems.

    Fewer seams and less routine maintenance

    Every joint is a potential maintenance point. Seamless gutters reduce those joints, which may help limit leak points and the need for repeated sealing compared with a traditional sectional system. They are also considered a sleek, durable, and low-maintenance choice. However, seamless does not mean maintenance-free. Leaves, twigs, shingle grit, and ice can still affect the channels and downspouts, so the system should be checked regularly.

    Choosing between aluminum and steel

    Material selection should reflect the home, roof runoff, and the installation conditions. Aluminum is lightweight and rust resistant, making it a common choice for residential gutter systems. Steel is heavier duty and may suit homeowners who want a more substantial material. An installer can discuss the practical differences and recommend an option based on the home’s layout and the existing fascia, the trim board that supports the gutter.

    Gutter optionPotential fitWhat to consider
    Seamless aluminumMany residential rooflinesLightweight and rust resistant
    Seamless steelHeavier-duty material needsHeavier material that needs secure attachment
    Gutter guardsProperties with recurring debrisCan reduce debris, but inspections remain important

    A custom fit for the roofline

    Seamless gutters are commonly custom-fabricated on site to match a home’s specific dimensions. That allows the installer to plan each run around roof edges, corners, valleys, and downspout locations rather than relying only on standard sections. Correct slope, secure attachment, and properly placed downspouts still matter as much as the gutter material. A well-fitted system should move water toward its outlets instead of allowing it to sit in low spots.

    What Happens During a Professional Gutter Replacement?

    A professional gutter replacement should be more than removing an old channel and attaching a new one in the same location. The installer first evaluates how water moves across the roof and around the home, then builds a system that fits the roofline, fascia, and discharge points. That process matters in Minnesota, where frequent precipitation, snow, and freeze-thaw conditions can put added stress on exterior drainage.

    1. Inspect the existing system and roof edge. The visit begins with a review of the gutters, downspouts, hangers, fascia boards, and roof edge. The installer looks for leaks, sagging, loose sections, corrosion, blockages, and areas where water has been pooling or overflowing. The fascia and roof edge should also be checked for rot or other damage, since replacing gutters can reveal problems that were hidden behind the old system. This inspection helps determine whether the project involves gutter replacement alone or whether related repairs should be discussed first.
    2. Plan the drainage path. Next, the installer maps the roofline and identifies where water should enter the gutters, how sections should be divided, and where downspouts can discharge safely. The plan should account for roof valleys, corners, entrances, landscaping, and the location of the foundation. A gutter system is only useful when it moves water away from the house rather than concentrating runoff beside it.
    3. Set the pitch and secure the gutters. Gutters need a controlled pitch, meaning a slight slope that guides water toward the downspouts instead of allowing it to stand in the channel. The installer positions the system along the fascia and secures it with appropriate hangers and fasteners. Correct slope and secure attachment help the system handle runoff without sagging or retaining stagnant water. The result should follow the roofline cleanly. It should also maintain a dependable path for water.
    4. Install downspouts and discharge extensions. Downspouts are connected at planned collection points and routed vertically along the exterior. Extensions or other discharge solutions carry water away from the foundation rather than releasing it directly beside the wall. Downspouts also need to remain clear and appropriately sized for the roof area they serve, especially during heavy rainfall.

    How Do You Maintain New Gutters After Installation?

    New gutters still need routine attention. A simple maintenance schedule helps you catch blockages, loose attachments, and drainage problems before runoff reaches the siding, fascia, or foundation. Inspect the system at least twice a year, ideally in spring and fall, and look it over again after a major storm. Heavy rain, wind, and falling branches can shift sections or add debris even when the gutters were recently installed.

    Clear debris before it becomes a blockage

    Remove leaves, twigs, and accumulated shingle grit from the gutter channel. Sediment can collect in low areas and wash toward the downspouts, where it may create a deeper blockage. The result can be overflow during the next heavy rain. Gutter maintenance guidance commonly recommends checking the system twice yearly and after major storms to confirm that it remains clear and properly attached.

    Do not stop at the visible section. Run water through each downspout and confirm that it exits freely at the bottom. Check that extensions or splash areas direct water away from the foundation rather than allowing it to pool beside the home. If water backs up, a downspout is loose, or an extension has shifted, correct the issue before the next storm. Properly sized and unobstructed downspouts are especially important when rainfall is heavy.

    Know when to leave the ladder work to a professional

    Only clean gutters yourself if you can work from stable, level ground with the right equipment and a clear weather window. Never climb onto a wet, icy, or unstable roof, and do not stretch sideways from a ladder to reach another section. If the gutters are high, difficult to access, visibly pulling away, or damaged after a storm, arrange a professional inspection instead. A technician can assess the attachment points, pitch, downspouts, and any water-related damage without turning routine maintenance into a safety risk.

    Contact Referred Restoration online

    Frequently Asked Questions

    Do I need gutter replacement?

    Replacement may be appropriate when gutters repeatedly leak, sag, overflow, or pull away from the home. Water pooling near the foundation, soil erosion, or damaged fascia can also indicate that the system is no longer directing runoff effectively. An inspection can help distinguish an isolated repair from broader failure.

    How often should gutters be replaced?

    There is no universal replacement schedule. Material, installation quality, maintenance, weather exposure, and physical damage all affect service life. In Minnesota, snow, ice, freeze-thaw cycles, and frequent precipitation can place added stress on gutters, so condition matters more than age alone.

    What are the benefits of seamless gutter replacement?

    Seamless gutters have fewer joints than sectional systems, which reduces potential leak points and can simplify maintenance. They are commonly custom-fabricated for a home’s dimensions. Referred Restoration offers lightweight, rust-resistant aluminum and heavy-duty steel options, depending on the home’s needs.

    Do I need to replace my downspouts when I replace my gutters?

    Not always, but downspouts should be evaluated as part of the replacement. They need to be free of damage and appropriately sized and positioned to carry water away from the foundation. Reusing sound downspouts may be practical, while damaged or poorly placed components may need replacement or adjustment.

    Ready to Discuss Gutter Replacement?

    A closer look at your gutters can help clarify whether targeted repairs or a complete replacement makes sense for your Minnesota home. Referred Restoration can review the system, discuss your concerns, and help you understand the next practical step.

    Contact Referred Restoration online to discuss gutter replacement.

    You can also call (763) 726-4245 with questions.

  • Fascia Board: Repair and Protection for Minnesota Homes

    Fascia Board: Repair and Protection for Minnesota Homes

    At the edge of your roof, a narrow trim component helps connect several parts of the exterior system. It sits where runoff, gutters, soffits, shingles, and siding meet, so a small problem there can become a water-management concern after heavy rain, snow, or repeated freeze-thaw cycles.

    Contact Referred Restoration online to request a free inspection if you see staining, soft areas, peeling, or a gutter that is pulling away from the roof edge.

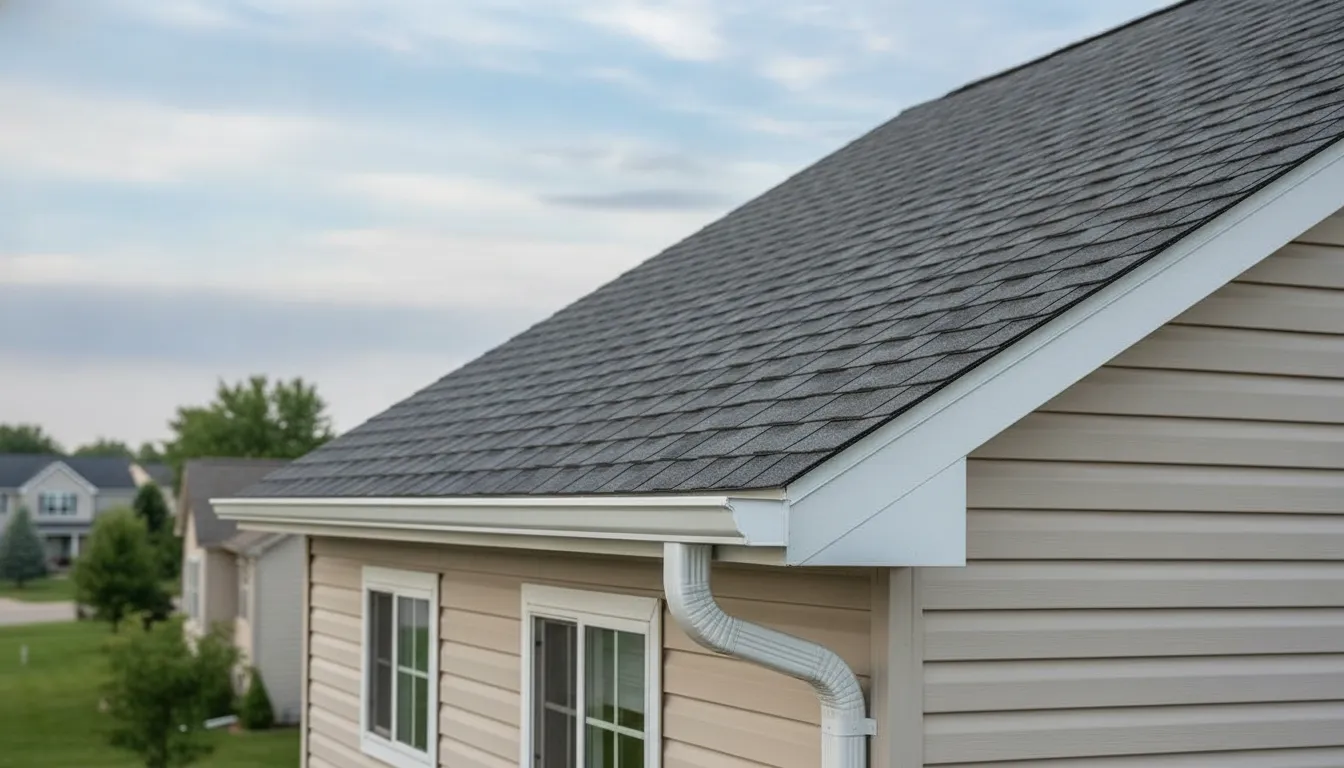
    Minnesota home roof edge with fascia and gutters

    A fascia board is the trim and support surface along the roof edge. It helps protect vulnerable materials from moisture and provides an attachment point for many gutter systems. Because roofs and gutters work together to manage water, visible symptoms should be assessed as part of the same exterior system, not treated as an isolated cosmetic issue.

    Understanding what this edge component does makes it easier to recognize warning signs and ask better questions during an inspection. Start with how it supports the roof edge and helps guide water away from your Minnesota home.

    What Does a Fascia Board Do Along the Roof Edge?

    A fascia board is the visible board that runs along the lower edge of a roof, where the roofline meets the exterior wall. It creates a finished edge, helps protect the roof structure from moisture, and provides an important attachment surface for the gutter system. Trex identifies moisture protection as one purpose of fascia boards. The board is also part of a larger roof-edge assembly that includes the roof covering, flashing, gutters, and soffit.

    That assembly works as a connected path. Rain lands on the roof and flows toward the eaves. The fascia sits at the edge behind or alongside the gutter, helping support the gutter in the correct position to collect that runoff. From there, the gutter directs water to a downspout, which should carry it away from the home rather than allowing it to collect beside the foundation. The U.S. Department of Energy’s Building America Solution Center explains that gutters and downspouts help direct rainwater away from a home and reduce the chance of saturating the soil around the foundation: see this overview of roof drainage.

    The soffit is the finished surface below the fascia and rafters. It closes the underside of the eave while often supporting airflow into the attic through soffit vents. A sound fascia helps keep this edge aligned and protected, while the soffit helps finish and ventilate the area beneath it. Because these components meet at the same roof edge, water damage in one area may affect the others. A loose gutter, for example, can allow water to run against the fascia or behind the edge instead of following the intended drainage path.

    Water management depends on each layer directing water outward and over the layer below it. The University of Minnesota Extension describes this principle as part of a home’s drainage plane. If roof-edge details, flashing, or adjoining materials are poorly aligned, water may move into the assembly rather than away from it. That does not mean every stain or loose fastener confirms a fascia problem. In Rogers and nearby Minnesota communities, an inspection should consider the fascia, gutter attachment, soffit, roof edge, and drainage route together.

    How Can You Tell if a Fascia Board Is Damaged?

    Look for changes along the roof edge, but treat each one as an inspection cue rather than a diagnosis. A damaged fascia board may have a moisture problem behind it, a gutter attachment issue, or a related roof-edge defect that is not visible from the ground.

    Visible changes along the roof edge

    Soft, spongy, or crumbling areas are important warning signs, especially near gutter fasteners, joints, and places where water regularly collects. Rot may also appear as darkened wood, open grain, swelling, or a section that no longer holds paint. Peeling or blistered paint can indicate repeated moisture exposure, although normal aging and poor surface preparation can create similar symptoms.

    Staining deserves attention as well. Brown or gray marks beneath the roof edge may point to runoff, a leaking gutter, or water moving behind the fascia. Exposed fasteners, pulled-out screws, or gaps at seams can show that the board or the attached gutter is no longer holding securely. Do not probe elevated areas or climb onto a roof to confirm a suspected problem. A close visual inspection from a safe position is enough to decide whether professional evaluation is warranted.

    Gutter movement can be a related clue

    Watch the gutter line during and after rain. Sagging, separation from the fascia, open end gaps, or water spilling behind the gutter can indicate a drainage or attachment problem. Referred Restoration provides gutter inspections and repairs for leaks, sagging, and damage, and its guidance treats gutter defects and roof-edge damage as one exterior system. That matters because roof and gutter systems work together to manage water. A gutter that pulls away may be contributing to moisture exposure, or the fascia behind it may no longer provide a sound attachment point.

    For a focused look at related symptoms, review these gutter replacement warning signs, then keep the fascia question separate: the goal is to determine whether the roof-edge board, gutter, or both need attention.

    Why an inspection matters

    Repeated water exposure can contribute to mold and rot, while Minnesota homes must withstand freezing winters, precipitation, snow, wind, and hail. Those conditions can affect more than the visible trim. An inspection should trace the likely water path and check the fascia, gutter attachment, soffit, roof edge, and nearby siding together. A qualified professional can then explain whether the signs are consistent with localized damage or a broader moisture issue, without recommending work based on appearance alone.

    Why Does Minnesota Weather Matter for Fascia Boards?

    Minnesota weather matters because snow, wind, precipitation, and repeated freezing and thawing can expose the fascia board and connected roof-edge components to moisture and movement. The condition of the fascia should be assessed with the gutters, soffit, roof edge, and drainage details rather than as an isolated trim issue.

    Snow, ice, and freeze-thaw exposure

    Minnesota homes face freezing winters, snow, precipitation, wind, and hail. These conditions make weather resistance an important part of exterior durability. The University of Minnesota Extension explains that materials unable to withstand repeated water exposure need protection from another layer. A fascia board at the roof edge is therefore part of a larger water-management assembly, not simply a finished surface.

    Ice dams add another winter concern. According to the National Weather Service, they can form when heavy snow melts during the day and refreezes overnight. After repeated melt-freeze cycles, water and ice may work beneath shingles. That intrusion can reach roof-edge materials and create conditions where rot or other deterioration becomes possible. Keeping gutters and downspouts clear of snow and icicles also helps maintain the intended drainage path. Homeowners who notice winter roof or ceiling symptoms can review roof repairs homeowners should not delay for related warning signs.

    Why the roof edge must be reviewed as one system

    Water does not stop at the first visibly damaged component. Gutters collect runoff, the fascia often supports or adjoins the gutter edge, and the soffit closes the underside of the eave. If water is not directed away correctly, moisture can contribute to mold and rot. A problem with gutter attachment, roof drainage, flashing, or adjacent trim can therefore affect the same area as a damaged fascia board.

    Soffit airflow matters during winter as well. The National Weather Service identifies airflow from beneath the eaves or soffit area through the roof vents as essential for minimizing roof freeze-thaw cycles. Blocked or compromised soffit areas should be considered during a roof-edge assessment, especially when ice dams or recurring moisture are present. The right next step is an inspection that follows the water path and checks the fascia, gutter attachment, soffit airflow, roof edge, and nearby materials together. This helps separate a localized repair from a broader moisture-management issue without assuming the visible symptom identifies the source.

    Should You Repair or Replace a Fascia Board?

    Repair may be appropriate when damage is localized, the board remains securely attached, and the moisture source has been corrected. Replacement is more likely when the fascia board is extensively deteriorated, no longer holds its fasteners, or is part of a broader roof-edge problem. Those signs are evaluation guidelines, not a diagnosis. A qualified inspection should assess the board, gutter connection, roof edge, and nearby exterior materials together.

    Start with the extent of the damage

    A small, isolated area of visible damage may be repairable if the surrounding material is sound. The inspection should determine whether the affected area is limited to the surface or extends into the board and its attachment points. Softness, staining, peeling, or localized deterioration can indicate moisture exposure, but the visible symptom does not identify the full source by itself.

    Replacement deserves closer consideration when deterioration extends across a longer section, when the board cannot securely support its attachments, or when the material is aged and severely damaged. A new section should be integrated with the existing roof-edge assembly rather than treated as a cosmetic patch. Referred Restoration describes repairs as an option for leaks, visible damage, and water intrusion, while replacement may be considered for aged or severely damaged exterior components.

    Find and correct the moisture source

    Replacing a fascia board without addressing the water path can leave the same problem in place. The inspection should consider roof-edge flashing, shingles, gutter alignment, end joints, and nearby transitions. Roof and gutter systems work together to manage water, so gutter defects and roof-edge damage should be assessed as one exterior system. The gutter may be leaking, pulling away, or directing water behind the fascia rather than carrying runoff away from the home.

    The surrounding soffit also matters. Damage at the fascia-soffit transition can reflect a wider moisture issue, while restricted or damaged soffit areas may affect airflow beneath the roof. The roof itself should be checked for conditions that could continue exposing the replacement material to water. In Minnesota, freezing winters, snow, wind, hail, and heavy precipitation add repeated stress to exterior components.

    Check adjoining exterior work

    Fascia replacement can overlap with gutter, roof, soffit, or siding work. Where the roof edge meets siding, review the transition carefully so new trim, flashing, and siding details shed water in the intended direction. For related planning guidance, see this guide to siding for Minnesota homes.

    The practical choice is the one that restores a sound roof-edge system, not simply the fastest way to cover a visible mark. Ask for an honest assessment of the damaged area, the moisture source, attachment integrity, and related components before deciding whether a fascia board repair or replacement is appropriate.

    Which Fascia Board Materials Fit a Minnesota Home?

    There is no single best material for every roof edge. Trex identifies composite, wood, PVC, and aluminum among the common fascia board options. The right choice depends on how the material will work with the existing roof, gutters, soffit, and siding. Minnesota homeowners should also consider maintenance needs and how well the assembly sheds water through seasonal changes.

    MaterialPlanning consideration
    WoodCan match existing trim, but needs careful moisture protection and maintenance.
    Composite or PVCMay suit a lower-maintenance plan, subject to compatibility with adjacent trim and gutter attachment.
    AluminumCan coordinate with aluminum gutters, while the underlying roof-edge structure still needs evaluation.

    Wood

    Wood can suit a home where the existing trim and roof edge already use wood. It can be painted to coordinate with siding and other exterior details, which may matter during a partial repair. However, wood requires careful protection and ongoing attention around joints, fasteners, and exposed edges. If moisture has already affected the surrounding assembly, replacing the visible board without addressing the water path may leave the same problem in place.

    Composite and PVC

    Composite and PVC can be useful when a homeowner wants a lower-maintenance alternative to traditional wood. Their appearance, fastening requirements, and compatibility with adjacent trim should be reviewed before installation. The fascia board also has to connect cleanly with the soffit and provide a sound surface for gutter attachment. A material that looks appropriate on its own may not be the best fit if it conflicts with the existing roof-edge details.

    Aluminum

    Aluminum is commonly associated with gutter systems because it is lightweight and rust-resistant, according to Referred Restoration’s gutter guidance. Those characteristics can make aluminum an appropriate consideration for some roof-edge assemblies, particularly when matching or coordinating with aluminum gutters. The installer still needs to evaluate the underlying structure, the fascia-soffit connection, and the finish’s fit with the home’s siding.

    Material selection should therefore be part of a broader exterior assessment, not a stand-alone product decision. Review the roof edge, gutter alignment, soffit, siding, and likely maintenance needs together. For related exterior planning, see this guide to siding for Minnesota homes. An inspection can help distinguish a material preference from work needed to correct moisture or attachment problems.

    What Should Homeowners Check Before Fascia Work?

    Good preparation helps an inspection stay focused on the roof edge rather than treating one visible symptom in isolation. Observe the area from the ground, note what changes during rain or after winter weather, and gather questions about the fascia board, gutters, soffit, siding, and roof. Do not climb onto the roof or probe suspected damage yourself.

    1. Record safe, visible clues. From the ground, look for staining, peeling finishes, a visibly uneven roof edge, sagging gutters, overflowing water, or gaps around the eaves. Take dated photos from several angles if you can do so safely. These signs do not confirm rot or another specific problem, but they give the inspector useful context.
    2. Ask how water is moving. Gutters and downspouts are intended to direct rainwater away from the home and help reduce saturated soil around the foundation, according to the Department of Energy’s building guidance. Ask whether the gutter system appears adequately sized, whether downspouts discharge effectively, and whether leaks or sagging could be affecting the fascia. Referred Restoration evaluates gutter inspections and repairs as part of the exterior system.
    3. Include connected components. Ask the inspector to review the soffit, roof edge, flashing, siding transition, and gutter attachment along with the fascia. Every drainage-plane layer should direct water out and over the layer below it; reversed or poorly overlapped layers can direct water into the building, as the University of Minnesota Extension explains.
    4. Discuss the moisture source. Ask what may be allowing water to reach the area and what should be corrected before or during fascia work. Minnesota homes face freezing winters, snow, wind, hail, and heavy precipitation, so replacing a board without addressing related drainage or roof-edge issues may leave the underlying concern unresolved.
    5. Bring a clear inspection list. Ask whether the recommendation is localized repair or broader replacement, which adjacent components need attention, how the gutter attachment will be supported, and how the completed work will be checked. A qualified professional should explain the evidence behind the recommendation and identify uncertainties rather than present a symptom as a diagnosis.

    Frequently Asked Questions

    What is a fascia board?

    A fascia board is the horizontal board along the lower edge of a roof. It helps finish and protect the roof edge, provides an attachment point for gutter components, and helps connect the roof, soffit, and siding into one exterior assembly. Because roof and gutter systems work together to manage water, damage in one area should be evaluated alongside the others.

    What is the difference between a fascia board and a soffit?

    The fascia is the visible board facing outward along the roof edge. The soffit is the finished surface underneath the overhang, below the fascia and rafters. Soffit areas can also support airflow beneath the roof, which is important for limiting freeze-thaw problems in cold climates. Damage to either component can affect the condition of the surrounding roof edge.

    Can I replace a fascia board myself?

    A small, accessible repair may appear straightforward, but replacing fascia safely requires checking the moisture source, roof-edge attachment, gutter support, and nearby soffit or siding. Working from a ladder or near a roof edge adds risk. If the board is soft, stained, pulling away, or supporting a sagging gutter, an inspection can help determine whether the visible section is the full problem.

    What materials are used for fascia boards?

    Common options include wood, composite, PVC, and aluminum. The right choice depends on the home’s existing exterior, exposure to water, ventilation details, and how the gutter system attaches. Materials that cannot withstand repeated water exposure need protection from another layer, according to the University of Minnesota Extension: water-management guidance.

    How does a fascia board support a roof and gutters?

    It forms part of the roof edge and commonly provides a mounting surface for gutter hardware. A compromised board can therefore affect gutter alignment or attachment, but sagging or leaking gutters do not prove that the fascia is damaged. Have the roof edge, gutter, and drainage path assessed together so repairs address the source rather than only the most visible symptom.

    Contact us for a fascia and gutter assessment

    Fascia concerns can involve the roof edge, gutters, soffit, or nearby exterior materials. An inspection can help clarify what needs attention and support a practical repair or replacement plan for your Minnesota home. Referred Restoration can provide the free inspection and honest assessment described in this guide.

    Contact Referred Restoration online or call (763) 726-4245 to request an inspection.

  • Roof Repairs Minnesota Homeowners Should Not Delay

    Roof Repairs Minnesota Homeowners Should Not Delay

    A small roof problem can stay out of sight until Minnesota weather gives it a chance to spread. A loose flashing detail, damaged shingle, or faint ceiling stain can become a larger water-intrusion issue through rain, snow, ice, and repeated freeze-thaw cycles. This guide focuses on Rogers, Cottage Grove, St. Francis, Monticello, and nearby Minnesota communities.

    Contact Referred Restoration online

    Timely roof repairs help protect your home by stopping water before it reaches insulation, decking, or structural framing. Start with signs that threaten water protection or structural integrity. Arrange a professional evaluation when damage is active, difficult to reach, or unclear, especially after wind, hail, heavy snow, or ice.

    Not every concern requires the same response. The right next step depends on where the damage appears, whether water is entering now, and how severe the affected area is. A practical priority check helps homeowners act without guessing.

    What Roof Repairs Should Minnesota Homeowners Address First?

    Minnesota homeowners should address active leaks, sagging roof areas, storm damage, exposed roof materials, and failed flashing first. These conditions can allow water into the roof assembly or signal a structural concern. Document what is visible from the ground, protect belongings indoors, and arrange an inspection before attempting a risky roof repair.

    When several roof problems appear at once, start with the issue that threatens structural integrity or allows water into the home. A missing shingle matters, but an active leak over a finished room or a visibly sagging roofline deserves faster attention. If the issue follows wind, hail, or heavy snow, document the visible condition from the ground before arranging a professional evaluation.

    1. Address active leaks and interior water damage. A ceiling stain or wall mark may be an early clue, even when the source is not directly above it. Move belongings away from the area and contain dripping water only when safe. Water can affect insulation and roof materials before exterior damage is obvious. Learn how to identify a roof leak from inside the home before investigating.
    2. Escalate sagging or uneven roof areas. A dip in the roofline, sagging deck, or new ceiling movement may indicate weakened decking or framing. Avoid climbing onto a steep or damaged roof. A professional should evaluate the structure and determine whether the area is safe.
    3. Inspect after wind, hail, or heavy snow. Look from the ground for displaced materials, exposed sections, damaged vents, or debris. Do not walk on a wet, icy, or visibly damaged roof. Storm-damage inspection guidance supports checking the roof after severe weather.
    4. Protect exposed openings. Missing or lifted shingles can expose the roof assembly to rain, snow, and wind. A qualified roofer can determine whether underlayment, flashing, or decking also needs attention. For a related overview of shingle damage, see roof shingles and leak repair.

    Minnesota weather can turn a small opening into a more complicated problem. When the priority is unclear, an inspection can separate urgent repairs from items that can be monitored during planned maintenance. Referred Restoration’s Rogers roofing service explains the broader inspection and repair path for local homeowners.

    Which Warning Signs Point to Needed Roof Repairs?

    Warning signs include ceiling stains, damp attic materials, missing or curling shingles, loose flashing, exposed underlayment, unusual granule buildup, musty odors, and daylight through the roof. A roof does not need to drip visibly to need attention. Early evaluation can identify the entry point and limit damage to concealed materials.

    Roof problems do not always announce themselves with an active drip. Some begin as small changes on the shingles or evidence that water has traveled beneath the surface. Look for patterns rather than relying on one symptom.

    Look inside for evidence of water

    Check ceilings, upper walls, attic insulation, and roof decking for stains or dampness. A musty odor can also signal persistent moisture. Water may travel along framing before it becomes visible, so the stain may not align with the exterior entry point. Do not cut into a ceiling or disturb insulation around an electrical fixture. If water is near wiring, keep clear and contact a qualified professional.

    Check the roof surface and drainage points

    From the ground, look for missing, cracked, curled, or lifted shingles. Pay attention to flashing around chimneys, skylights, vents, and roof-to-wall transitions. Granules in gutters can indicate shingle wear, while clogged or damaged gutters can keep water against roof edges. Referred Restoration also provides gutter inspection and repair services when drainage is part of the problem.

    Roofer inspecting Minnesota roof damage after a winter storm

    Stay on the ground when conditions are unsafe

    Roof inspections are not a reason to climb onto a steep, wet, icy, or damaged surface. Use binoculars for a distant view and photograph visible conditions from a safe location. A professional inspection can examine areas that are not safely accessible and distinguish ordinary wear from storm damage.

    Why Delaying Roof Repairs Can Put Your Home at Risk

    Delaying roof repairs can let water spread into insulation, decking, framing, and finished areas. The original opening may become harder to isolate after repeated wetting. Prompt evaluation does not mean assuming the worst. It means identifying the source, limiting further exposure when safe, and choosing a response based on evidence.

    A roof problem rarely stays limited to the shingle, flashing, or seam where it first appears. When water gets past the roof covering, it can move through the assembly and reach insulation, decking, framing, and finished areas inside the home. The visible symptom may be a small stain while the underlying damage continues to develop.

    Moisture can affect more than the roof surface

    Wet insulation may no longer perform as intended. Water can also remain in decking or framing members. Chronic leaks may contribute to decay in structural components, weakening materials that help support the roof system. Pacific Northwest National Laboratory building-science guidance explains why water management matters in roof assemblies.

    Persistent moisture deserves attention because mold can grow on many materials after water damage. Drying alone may not address the source if water is still entering through the roof. The National Park Service also explains the importance of maintaining roof components in its roofing preservation brief.

    Why a small issue can become harder to manage

    Leaves, branches, and other debris can trap moisture against roofing materials. A compromised area may also allow repeated wetting during later weather events. Document the condition and review applicable warranty information before work begins. Prompt action helps clarify whether the need is a focused repair or a broader roof evaluation.

    • Early stage: A damaged shingle, flashing detail, or opening allows water to enter during rain or melting snow.
    • Spreading moisture: Water reaches insulation or decking, and trapped debris can keep affected materials damp.
    • Material deterioration: Ongoing exposure may contribute to mold growth or decay in roof components.
    • Broader repair needs: The original defect and affected interior or structural materials may all require evaluation.

    Referred Restoration offers free inspections for homeowners who want a clear assessment of roof damage and appropriate next steps.

    How Do Minnesota Winters Affect Roof Damage?

    Minnesota snow, ice, wind, and freeze-thaw cycles can stress shingles, flashing, drainage, and structural components. Ice dams can redirect meltwater beneath shingles, while heavy snow and brittle materials can expose weak areas. Post-storm checks and attention to recurring moisture help homeowners address problems before the next weather cycle.

    Minnesota winter weather can turn a small roofing weakness into an active leak or structural concern. Seasonal awareness matters when planning roof repairs in Rogers, Cottage Grove, St. Francis, Monticello, and surrounding areas.

    Ice dams and attic ventilation

    Ice dams form when attic heat melts snow on the roof. Water runs toward colder eaves, refreezes, and creates a ridge that blocks normal drainage. Water can then work beneath shingles and into the roof assembly. The University of Minnesota Extension explains ice dams and prevention.

    Ventilation is only one part of the solution. Air sealing, insulation, flashing, and drainage also affect how a roof handles winter moisture. If recurring ice buildup appears with ceiling stains or damp attic materials, arrange an inspection to identify the source.

    Roofer repairing flashing around a Minnesota home chimney

    Snow load and brittle shingles

    Heavy snow can stress roof framing, especially where water damage or weakened materials already exist. Cold conditions can also make some roofing materials less flexible during handling. Do not scrape, shovel, or walk on the roof without appropriate training and equipment. After a major storm, a ground-level check followed by a professional evaluation is safer.

    What to check after a winter storm

    Look for fallen branches, displaced shingles, damaged vents, new stains, and water near attic or ceiling areas. Check gutters from the ground for heavy granule accumulation or unusual debris. If the roofline sags or the leak is active, treat the issue as urgent and keep people away from the affected area.

    Can Roof Repairs Be Enough, or Is Replacement Needed?

    A focused repair may be enough when damage is localized and the surrounding shingles, underlayment, decking, flashing, and drainage paths remain sound. Replacement may be more appropriate when damage is widespread or the roof system has reached the end of its service life. An inspection should guide that decision.

    The visible symptom alone cannot determine whether a roof needs a focused repair or a larger project. An inspection should consider the affected area, the surrounding materials, the roof’s age and condition, prior repairs, drainage, and the source of the damage.

    When a focused repair may make sense

    Localized roof repairs can be reasonable when damage is confined to a small area and the surrounding roof system remains sound. A contractor may address isolated storm damage, a small leak, or deteriorated flashing without disturbing the rest of the roof. Flashing seals roof intersections and penetrations while directing water away from the deck. National Park Service guidance discusses roof maintenance.

    Why an inspection should guide the decision

    A repair plan should explain what was found and why the proposed work fits the condition. Ask whether the underlayment and decking remain sound, whether the repair addresses the source of water, and whether nearby materials show related damage. A clear explanation helps homeowners compare the recommendation with the evidence.

    Roof replacement is a separate decision from fixing one damaged area. Referred Restoration provides a Minnesota guide to asphalt shingle roof replacement for homeowners who need to understand that broader option.

    ConditionFocused repair may fitBroader evaluation may be needed
    Damage patternLocalized leak, flashing issue, or isolated storm damageWidespread leaks, multiple damaged areas, or recurring moisture
    Surrounding systemNearby shingles, decking, underlayment, and drainage remain soundAdjacent materials show wear, deterioration, or related damage
    Recommended next stepDocument the affected area and confirm the repair addresses the sourceArrange a complete inspection to compare repair and replacement paths

    What Should You Ask Before Hiring a Roof Repair Contractor?

    Ask a roof repair contractor to explain the inspection findings, affected materials, repair scope, drainage and ventilation conditions, documentation, protection plan, and cleanup process. Confirm who will communicate updates and how storm-related damage will be recorded. A clear, evidence-based scope helps you make a confident decision without pressure.

    A good contractor should make the condition of your roof easier to understand. Before hiring anyone, use questions that reveal how the inspection, recommendation, and work plan connect.

    Ask for a specific inspection and scope of work

    Ask which areas were inspected, what caused the damage, and which materials are affected. Request photographs or other documentation when available. If wind or hail may be involved, ask whether the inspection will document storm-related damage with a written report. A qualified contractor should explain what is included and what remains uncertain.

    Discuss materials, drainage, and ventilation

    Ask which replacement materials will be used and how they will integrate with the existing roof. Have the contractor inspect flashing around penetrations and intersections. Ask how the repair will maintain drainage and whether damaged gutters, downspouts, or other water-management details contribute to the issue. Referred Restoration also serves homeowners seeking coordinated exterior restoration services, including those who need to plan roof work alongside window repair in Rogers.

    Confirm protection, documentation, and communication

    Before hiring anyone, verify licensing and both liability and workers’ compensation insurance. Clarify who your contact will be, how updates will be shared, what areas will be protected, and how the crew will handle debris, nails, and final cleanup. Referred Restoration follows a customer-first process from free inspection to recommended exterior restoration.

    Request a roof repair inspection from Referred Restoration

    Frequently Asked Questions

    What are the common causes of roof leaks?

    Common causes include damaged, curling, or missing shingles; failed flashing around chimneys, vents, and other penetrations; and worn valleys where water flow concentrates. Ice dams, storm debris, and deteriorated roof components can also allow water into the roof assembly.

    Can a minor roof leak cause major damage?

    Yes. Even a small leak can wet insulation, drywall, decking, or framing. A ceiling stain may be the first visible clue while the actual entry point is farther upslope. Prompt evaluation helps identify the source and affected materials.

    What are the warning signs of a roof leak?

    Look for ceiling or wall stains, drips, damp attic materials, musty odors, and daylight visible through the roof. Outside, check for missing, cracked, or curling shingles, loose flashing, exposed underlayment, and unusual granule buildup. Do not climb onto a wet or icy roof.

    Can attic ventilation cause moisture that looks like a roof leak?

    Yes. Warm, moist attic air can condense on colder roof surfaces, creating stains or damp insulation that resemble a leak. Proper insulation and ventilation help keep the roof deck cold and reduce ice-dam formation. An inspection can distinguish condensation from water entering through the roof.

    Are roof repairs necessary if the leak seems minor?

    Prompt evaluation is wise because leaks rarely improve on their own. A localized repair may be enough when the surrounding roof system remains sound, but delaying can let moisture spread into concealed materials. After hail, wind, or heavy snow, a visual inspection can identify damage before it becomes more extensive.

    Ready to Protect Your Home With Timely Roof Repairs?

    A free roof inspection can clarify which issues need attention now and which areas should be monitored. Referred Restoration helps Minnesota homeowners evaluate leaks, storm damage, and other roofing concerns with a consultative approach.
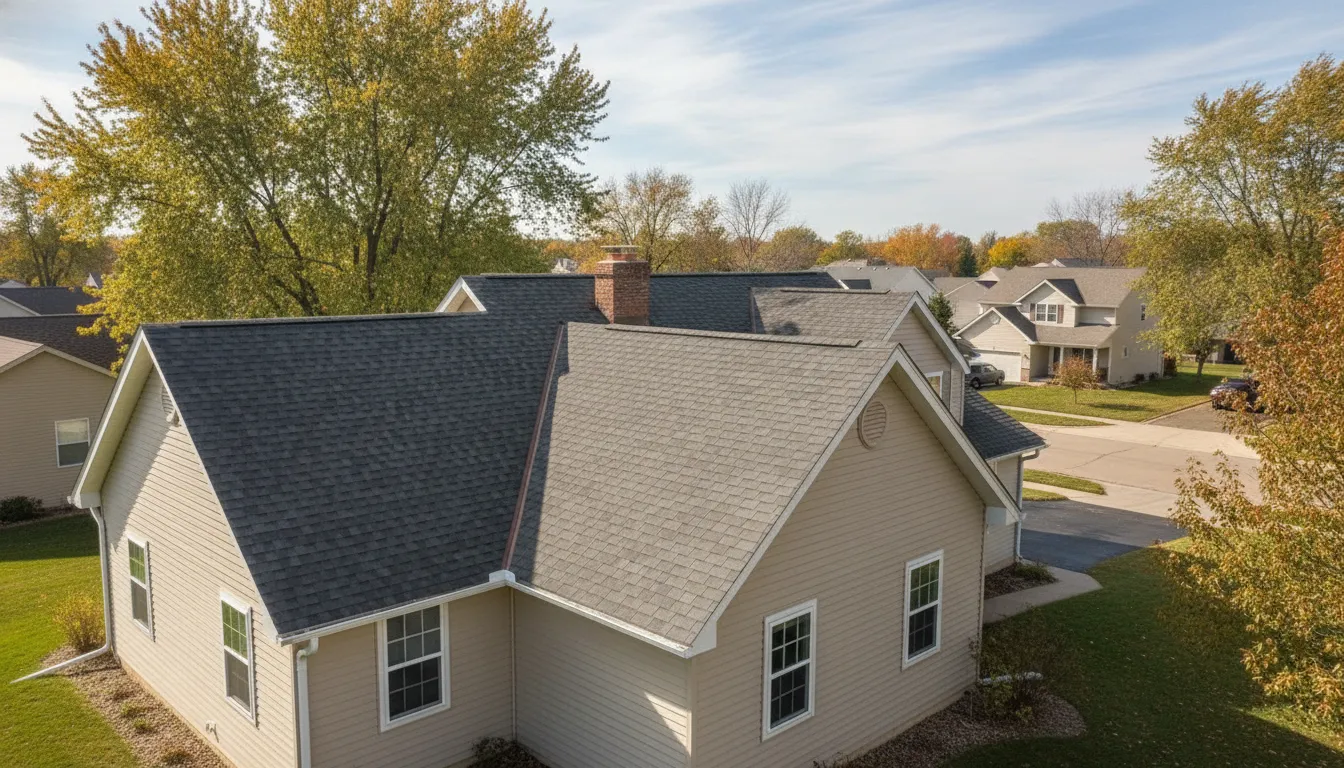
    Call (763) 726-4245 or reach out online to request your free inspection.

    Contact Referred Restoration online

  • Roofing Repair in Minnesota: Signs, Steps, and Help

    Roofing Repair in Minnesota: Signs, Steps, and Help

    A roof problem rarely stays limited to the spot where you first notice it. A missing shingle can expose the layers below. Failed flashing around a chimney, wall, or vent can also let water travel before it appears indoors. For homeowners in Rogers, Cottage Grove, St. Francis, and Monticello, Minnesota’s freeze-thaw cycles, wind, hail, and winter moisture make early attention especially important.

    Contact Referred Restoration online

    Roofing repair typically means locating the actual source of damage, correcting affected shingles or flashing, and checking nearby roof components for hidden moisture or deterioration. Prompt attention to leaks, lifted shingles, granule loss, and storm damage can help protect the home’s interior.

    From the ground, homeowners can look for curling edges, bald patches, or missing materials. Inside, check for ceiling stains or damp attic areas. A visible symptom does not always identify the entry point. The right next step depends on what an inspection finds and how the roof is performing as a whole.

    What Does Roofing Repair Usually Include?

    Roofing repair can include replacing damaged shingles, correcting flashing, improving a failed water-shedding detail, or addressing storm damage. The right scope depends on the visible surface, the underlayment, the roof deck, and nearby transitions. A focused inspection helps separate a localized problem from broader roof-system deterioration.

    Roofing repair is not limited to replacing a visibly missing shingle. The scope depends on where water or weather has compromised the roof system and whether nearby components are still directing water correctly. A careful assessment may include shingles, flashing, drainage paths, vents, and areas where protective granules have worn away. Referred Restoration’s Rogers roofing services include inspections, repairs, replacements, and storm-damage restoration.

    Shingles and the layers below

    Repair may involve replacing shingles that are missing, torn, lifted, or otherwise damaged. A professional also looks at the surrounding shingles instead of treating one piece in isolation. Wind, hail, and repeated freeze-thaw cycles can affect adjacent areas even when the issue is not obvious from the ground.

    The repair should restore the shingle pattern and its ability to shed water. It should also account for the underlayment and roof deck beneath the visible surface. If those underlying layers are compromised, replacing only the top shingle may leave the actual water-entry problem unresolved.

    Flashing at roof joints

    Flashing protects joints where the roof meets a chimney, wall, vent, skylight, or another change in direction. These transitions are frequent failure points when flashing is incomplete, displaced, or improperly integrated. The University of Minnesota Extension explains how roof and wall details move water outward rather than channeling it into the structure.

    Roofing repair may include resealing, replacing, or correcting flashing. The goal is not simply to cover a visible gap. It is to rebuild the joint so water follows the intended path and remains outside the home.

    Drainage and granule loss

    A roof works as part of a larger drainage plane. Its layers should overlap, directing water out and over the layer below. Granules on asphalt shingles help protect the material from ultraviolet exposure. When they are missing, exposed asphalt can age more quickly. An inspection can distinguish isolated storm damage from broader wear.

    What Are the Most Common Signs You Need Roofing Repair?

    Common signs include missing, lifted, curled, cracked, or torn shingles, heavy granule loss, damaged flashing, recurring leaks, ceiling stains, damp attic insulation, and sagging along the roofline. These clues show that a roof deserves closer evaluation, but they do not always identify the actual point where water enters.

    Roof problems often start with small changes that are easier to spot from the ground or inside the home than from the roof surface. Watch for curled or lifted shingle edges, missing shingles, torn areas, or bald-looking patches. After high wind or hail, these signs deserve particular attention.

    Roofing repair inspection of damaged shingles on a Minnesota home

    From the ground, use binoculars instead of climbing onto a sloped or wet roof. Look for uneven rows, exposed underlayment, loose materials, and damaged flashing around chimneys, vents, skylights, and roof-to-wall transitions. Do not pry up shingles or disturb flashing during a basic inspection.

    Interior clues can be just as useful. Check ceilings and upper walls for brown stains, damp spots, peeling paint, or bubbling drywall. In the attic, look for damp insulation, darkened wood, daylight through the roof deck, or an unusual musty smell. A leak may appear several feet away from the entry point because moisture can travel along framing or other roof components.

    Other warning signs include recurring leaks after earlier patching, granules collecting heavily in gutters, and visible sagging along the roofline. Clogged gutters can also back water up under the roof edge. These symptoms can have more than one cause, so do not assume the most obvious damaged shingle is the entire problem. Referred Restoration’s guide to roof shingle leak repair provides additional context for identifying leak patterns.

    How Does Minnesota Weather Affect Roof Damage?

    Minnesota weather can stress roofing through freeze-thaw cycles, wind, hail, snow, and ice dams. These conditions may loosen shingles, damage flashing, remove protective granules, or redirect water toward vulnerable joints. A roofing repair assessment should trace the damage pattern instead of addressing only the first stain or loose shingle a homeowner notices.

    Minnesota weather can test a roof in several different ways over one year. A roof may face freeze-thaw cycles, strong wind, hail, and snow-related moisture. These conditions do not always create an obvious opening immediately. They can loosen materials, stress vulnerable transitions, or expose a weakness that becomes a leak during the next storm.

    Roofing repair should therefore address the source and pattern of damage, not only the visible symptom inside the house. A professional assessment can help distinguish isolated damage from a condition affecting a larger area.

    Freeze-thaw cycles

    Moisture that freezes and thaws around shingles, flashing, seals, and joints can place stress on those components. Areas where the roof meets a chimney, wall, or vent deserve particular attention. Water can travel beneath roofing materials before it appears as a ceiling stain, so a professional may need to trace the entry point and inspect the underlying materials.

    Wind and hail

    Wind may lift, tear, or remove shingles, while hail can cause granule loss or impact damage that is difficult to identify from the ground. Avoid climbing onto the roof after a storm. Note loose materials, fallen debris, or new interior water marks from a safe location, then arrange an assessment.

    Ice dams

    Ice dams form when snow melts on warmer upper sections and refreezes at the colder roof edge. The resulting ridge can block drainage and allow water to move into the roof system or home. The University of Minnesota Extension explains ice-dam formation and prevention. Address damp areas promptly while the source is being evaluated.

    Can You Repair Part of a Roof Instead of Replacing It?

    A localized roofing repair may fit when the damage is confined, the roof deck and structure remain sound, and new materials can be integrated correctly. Replacement deserves consideration when damage is widespread, underlying layers have deteriorated, or separate patches would not restore dependable weather protection across the roof system.

    Sometimes a roof needs a focused repair rather than complete replacement. The deciding factor is not simply how visible the damage appears. An assessment should determine whether the roof deck and supporting structure remain sound and whether the affected area can be integrated correctly with the existing roof.

    ConsiderationLocalized repair may fitReplacement may be more appropriate
    Extent of damageThe problem is confined to a clearly identified section.Damage is widespread or affects multiple roof areas.
    Underlying conditionThe roof deck and structure remain sound after inspection.Hidden deterioration affects the roof system.
    Material integrationNew materials can be properly tied into the existing roof.A lasting repair requires broader system work.
    Weather performanceThe repaired area can provide dependable protection.The existing system cannot reasonably handle local weather demands.

    Replacement becomes a stronger consideration when damage is not isolated, the supporting layers are no longer sound, or separate repairs would not restore dependable protection. That decision should follow inspection findings rather than pressure to choose the largest project. See this Minnesota roof replacement guide for broader decision context.

    What Should You Do After Wind, Hail, or Ice Damage?

    After wind, hail, or ice damage, keep people away from unsafe roof surfaces and downed lines. Document visible conditions from the ground, limit interior water exposure, and arrange a professional assessment. Do not remove roofing materials or make a patch that could conceal the original storm damage before it is evaluated.

    After a storm, start with safety rather than a ladder. Look from the ground for lifted or missing shingles, exposed underlayment, fallen branches, damaged vents, loose flashing, and interior water marks. Do not climb onto a wet, icy, or visibly damaged roof. If a tree, power line, or unstable structure is involved, keep clear and contact the appropriate emergency service.

    Professional roofer assessing storm damage during roofing repair

    Six practical steps

    1. Protect people first. Keep away from unstable structures, downed lines, and unsafe roof surfaces.
    2. View the roof from a safe location. Use binoculars when helpful, but do not climb onto a wet or damaged roof.
    3. Limit interior exposure. Place containers under active drips and move belongings away from the area.
    4. Document what you can see. Take photos and note the storm date, visible damage, and interior symptoms.
    5. Preserve the condition. Avoid removing roofing materials or making a repair that hides the original damage.
    6. Arrange an assessment. Share your notes with a professional who can evaluate visible and hidden damage.

    A professional inspection can connect visible storm evidence with less obvious roofing repair needs. Referred Restoration helps homeowners in Rogers and neighboring communities assess hail and wind damage. The team can also help navigate the insurance-claim process. For a related overview, read the Minnesota roof insurance claim process guide. Homeowners in Cottage Grove can also review the company’s Cottage Grove exterior restoration services when several exterior systems need attention.

    How Can You Prevent Small Roof Problems From Growing?

    Homeowners can reduce avoidable roof problems by keeping gutters and downspouts clear. Watch for shingle or flashing changes from the ground, check attic areas for moisture, and arrange professional help when a roof is steep, wet, icy, or damaged. Maintenance does not replace an inspection after a storm or active leak.

    Preventive maintenance can help limit water intrusion and protect areas that are harder to inspect. Work from the ground whenever possible, and leave steep, wet, icy, or visibly damaged surfaces to a professional.

    Maintain drainage

    Leaves, twigs, and roof granules can collect in gutters and restrict the path water needs to follow. When water backs up at the roof edge, it can contribute to shingle deterioration. Inspect gutters after major storms, check downspouts, and confirm that discharge moves away from the foundation. Referred Restoration provides gutter services in Rogers when the drainage system needs attention.

    Track visible changes

    Keep notes and photos from ground-level checks so missing, lifted, cracked, or worn shingles are easier to recognize over time. Also watch for loose material near eaves and in gutters. These observations do not replace an inspection, but they can help a professional understand when a change began.

    Watch transitions and the attic

    Flashing at chimneys, walls, skylights, and vents helps waterproof joints. From the ground or attic, watch for displaced flashing, staining, damp insulation, or daylight where it should not appear. If active water is present, protect furniture and flooring, avoid electrical hazards, and arrange help rather than waiting for another storm.

    When Should You Call a Professional for Roofing Repair?

    Call a professional when water enters the home, a leak returns, storm damage is visible, the roof is unsafe to access, or the source of moisture is unclear. Professional help is especially important around flashing, vents, skylights, multiple roof slopes, and any situation where a temporary patch has not solved the underlying problem.

    Contact a professional when a leak continues after a temporary measure, water stains return, or you cannot identify where moisture is entering. Water may travel along roof decking, framing, or insulation before it appears inside, so the visible stain is not necessarily below the damaged area.

    Professional help is also appropriate when damage is widespread, the roof is steep or unsafe, flashing or penetrations are involved, or a storm may have affected multiple slopes. Repeatedly sealing the spot where water appeared can delay the correct repair if the actual entry point is elsewhere.

    A consultative process should begin with an assessment, followed by a solution suited to the home’s condition and professional installation. Referred Restoration describes its process as inspection, custom solution, and installation. The assessment can clarify whether localized roofing repair is appropriate or whether damage extends into the underlying roof system. If related exterior work is also needed, the team provides Rogers siding services alongside its roofing work.

    Contact Referred Restoration online

    You can also call (763) 726-4245 to discuss a roofing repair concern with the team. The phone number is displayed as text only so the article uses the verified URL-based contact path.

    Contact Referred Restoration online

    Frequently Asked Questions

    Can you repair just part of a roof?

    Often, yes. A targeted repair may address a limited area of damaged shingles, flashing, or another roofing component when the surrounding roof deck and structure remain sound. An inspection helps determine whether the problem is localized or part of broader deterioration.

    What is the most common roof repair?

    Common repairs include replacing missing or damaged shingles, correcting flashing, sealing water-entry points, and addressing damage after wind or hail. The visible symptom does not always show the full scope, so the surrounding roof and underlying layers should also be evaluated.

    How do you identify roof shingle damage?

    From the ground, look for missing, lifted, curled, cracked, or torn shingles, uneven rows, and areas with heavy granule loss. Inside, check for stains, damp insulation, musty odors, or daylight through the roof deck. Do not climb onto an unsafe roof.

    When should you call a professional for roof repair?

    Call when water is entering the home, a leak returns, storm damage is visible, the roof is unsafe to access, or you cannot identify the source of moisture. Professional assessment is especially important when flashing, roof penetrations, or multiple roof areas may be involved.

    Contact Referred Restoration online

    A timely assessment can clarify the condition of your roof and the next practical step for your Minnesota home.

  • Roofing and Roof Repairs for Minnesota Homes

    Roofing and Roof Repairs for Minnesota Homes

    Roofing and roof repairs on a Minnesota home

    Minnesota roofs work hard through freezing temperatures, heavy snow, ice dams, strong wind, and summer storms. A small problem can begin as a few missing shingles or a lifted flashing edge, then allow moisture into the roof system and interior of the home.

    Contact Referred Restoration online

    Roofing and roof repairs for Minnesota homes require attention to both visible damage and the condition of the full roof system.

    Roofing and roof repairs are often appropriate when damage is limited and the underlying roof remains sound. Replacement may make more sense when problems are widespread, recurring, or combined with advanced age. An inspection is the practical way to determine which path fits your home.

    This guide explains the warning signs Minnesota homeowners should understand, what an inspection should clarify, and what to do after wind, hail, or ice dam damage. The goal is a safer, evidence-based decision, not an automatic recommendation for the largest possible project.

    How Do Roofing and Roof Repairs Address Minnesota’s Common Problems?

    Minnesota homeowners most often encounter roof leaks, damaged flashing, missing or curling shingles, ice dams, wind damage, and hail impacts. These problems can appear separately or combine after severe weather. A ground-level check followed by a professional inspection helps identify the source and the appropriate roofing and roof repairs.

    Minnesota roofs face repeated freeze-thaw cycles, snow, ice, strong winds, and rapid seasonal changes. Those conditions can expose small weaknesses before they become visible inside the home. Knowing the common warning signs helps you decide when to monitor an area and when to arrange a professional inspection.

    Leaks and damaged flashing

    A ceiling stain, damp attic insulation, or water around a skylight does not always point directly to the opening in the roof. Water can travel along the underside of the roof before it reaches the interior. Flashing, the thin material installed around chimneys, vents, skylights, and roof-to-wall joints, is another frequent area to check. If flashing is loose, cracked, or no longer sealed, water may enter even when surrounding shingles look intact. For more detail, review common roof leak repair procedures and have the source confirmed rather than sealing only the visible stain.

    Missing, loose, or curling shingles

    Shingles protect the roof surface from weather and direct water toward the gutters. Missing shingles leave an exposed area, while loose shingles may lift during the next storm. Curling edges can signal deterioration, especially on roofs exposed to Minnesota’s cold climate. Wind damage can also compromise the seals that help shingles stay in place, increasing the possibility of future leaks. A few damaged shingles may call for a targeted repair, but the right scope depends on the roof’s overall condition.

    Ventilation problems and ice dams

    Roof ventilation helps manage heat and moisture in the attic. When airflow is inadequate, moisture can linger and temperature differences can contribute to winter ice buildup. An ice dam forms when melting snow refreezes near the colder roof edge. The ridge of ice can hold water against the shingles and create a path into the roof system. Homeowners can review ways to prevent winter roofing problems, but attic conditions and roof drainage should be addressed together.

    Wind and hail damage

    After a severe storm, damage may be subtle. Hail can affect shingle surfaces, and wind can lift, crease, or remove shingles. Check from the ground for missing pieces, uneven rows, or debris, but avoid climbing onto the roof. An inspection can document storm-related concerns and identify whether water-shedding components, flashing, or ventilation also need attention.

    Roofer inspecting Minnesota roof shingles after a storm

    How Can You Tell if Roofing and Roof Repairs Are Enough?

    Roofing and roof repairs may be enough when damage is localized, the surrounding shingles remain sound, and the roof has no pattern of recurring leaks. Replacement deserves consideration when damage is widespread, materials are failing across multiple slopes, or an isolated patch would leave underlying problems unresolved. An inspection should connect the recommendation to observed conditions.

    A visible problem does not automatically mean the entire roof needs to be replaced. The right scope depends on what an inspection finds, including the extent of the damage, the condition of nearby materials, and the roof’s age. A missing shingle in an otherwise sound section may call for a targeted repair. Widespread deterioration, repeated leaks, or an aging roof may point toward broader work.

    Start with the source of the problem rather than the most obvious symptom. Leaks can travel along the underside of the roof before appearing on a ceiling. Wind can loosen shingle seals before damage is easy to see from the ground. You can review how to identify roof leaks safely, but do not climb onto the roof to investigate.

    Indicators that may support repairIndicators that may support replacement
    Damage is limited to a small, identifiable area.Damage extends across multiple roof sections.
    Most shingles remain flat, sealed, and in good condition.Shingles are broadly curled, missing, or failing.
    The roof system is relatively young with no pattern of recurring leaks.The roof is near or beyond its expected service life, or leaks keep returning.
    Inspection finds a localized flashing or weather-related problem.Inspection finds widespread water intrusion or concerns beneath the visible surface.

    What an inspection should clarify

    A useful inspection connects the symptom to the underlying condition. The contractor should identify affected shingles, flashing, vents, valleys, and surrounding areas, then explain whether the damage is isolated or part of a larger pattern. Roof age matters, but it should not be the only deciding factor.

    Asphalt shingles typically last 20 to 30 years, so an older roof may deserve a wider evaluation even when one repair seems straightforward. Metal roofing can often last 40 years or more, but its service life depends on the specific system and its condition. These indicators are guides, not a substitute for a roof-specific assessment.

    Referred Restoration follows a simple process: a free inspection, a custom solution, and professional installation when installation is needed. Ask for photos or clear explanations of the findings, the areas included in the recommended work, and any conditions that could change the scope.

    Stay safe while deciding

    Roof surfaces, ladders, and wet or icy conditions create serious fall hazards. The CDC and NIOSH roof-safety guidance emphasizes fall prevention during roofing work. Keep children and visitors away from the work area, avoid walking on the roof, and leave elevated inspections to trained professionals.

    When Does a Roof Need Replacement Instead of Repair?

    A roof may need replacement instead of repair when shingles are failing across multiple slopes, leaks recur, water intrusion reaches underlying layers, or the system is near the end of its expected service life. A few missing shingles on an otherwise sound roof may support a targeted repair. The decision should follow an inspection of the full roofing system.

    A targeted repair can make sense when damage is limited to a small, clearly defined area and the rest of the roofing system remains sound. Replacement becomes more appropriate when several warning signs point to broader wear or when fixing one symptom would leave larger problems in place. The roof’s age and the extent of damage should be considered together.

    Age and widespread damage

    Asphalt shingles typically last 20 to 30 years. If an asphalt roof is approaching or beyond that range, isolated repairs may provide only a short-term solution when surrounding shingles are also brittle, curling, or losing their protective surface. A few missing shingles after a storm may be repairable, but widespread wind damage, repeated shingle loss, or damage across multiple roof slopes can indicate that the system needs a more complete plan.

    Material type also matters. Metal roofing can often last 40 years or more, so its age should be evaluated according to the specific system and its condition. An inspection can help distinguish normal aging from damage that affects the roof’s ability to shed water and protect the home.

    Recurring leaks and underlying system concerns

    A recurring leak deserves more than another surface patch. Water may be entering through worn flashing, damaged underlayment, or a broader failure in the roof assembly. Moisture can also affect the decking beneath the shingles. Ventilation concerns may contribute to uneven aging through Minnesota’s repeated cycles of freezing temperatures, snow, and warming weather.

    Replacement planning should account for the materials and installation approach suited to the home. Referred Restoration uses high-quality Malarkey roofing products for demanding Minnesota weather. When replacement is recommended, a typical project may take one to three days, depending on the home’s size and weather conditions.

    Review when a full roof replacement may be needed for more planning guidance. A clear assessment should identify the visible damage, check related components, and explain why the proposed scope fits the roof’s actual condition.

    Roofing professional examining attic ventilation in a Minnesota home

    What Should You Do After Wind, Hail, or Ice Dam Damage?

    After wind, hail, or ice dam damage, protect the interior, document visible conditions from the ground, stay off the roof, and arrange a professional inspection. Keep photographs and storm notes for your insurer. Prompt evaluation can distinguish a localized repair from broader damage while reducing the risk of additional interior moisture.

    Storm damage can be stressful, especially when water is entering the home or snow and ice are still covering the roof. Focus first on protecting people and the interior. Then document what you can safely observe and arrange a professional inspection. A careful sequence helps preserve useful evidence without creating additional damage.

    1. Protect the interior. Move furniture, electronics, and other belongings away from active drips. Place containers under leaks and use towels to limit the spread of water. If water is near electrical fixtures, outlets, or wiring, avoid contact with the area and call a qualified professional.
    2. Document visible damage from the ground. Take clear photographs and videos of fallen shingles, damaged gutters, siding impacts, debris, interior stains, and standing water. Note the approximate date of the storm and which rooms or areas were affected. Do not climb a ladder just to obtain a closer image.
    3. Stay off the roof. Wet shingles, loose materials, ice, and steep slopes can create serious fall hazards. The CDC and NIOSH identify falls from roofs, ladders, and scaffolds as a significant construction safety concern. Leave an elevated inspection to a trained professional.
    4. Arrange an inspection. An inspector can look for missing or lifted shingles, compromised flashing, hidden leaks, and damage that is not obvious from the yard. Referred Restoration offers free inspections and helps homeowners with wind and hail insurance claims when appropriate.
    5. Contact your insurer when appropriate. Ask your insurance company about its reporting process and keep copies of photographs, notes, and related communications. For more context, read this guide to handling roof damage insurance claims. If ice dams contributed to the problem, review winter roof protection steps.

    Once the roof and interior are safe, an inspection can separate storm-related damage from older maintenance concerns. That distinction helps homeowners make an informed plan for roofing and roof repairs without rushing into unnecessary work.

    How Should You Choose a Minnesota Roofing Repair Plan?

    Choose a Minnesota roofing repair plan that identifies the damaged components, explains the likely cause, and matches the work to the roof’s condition. The plan should distinguish a localized repair from replacement, address flashing and ventilation where relevant, and explain safety, materials, timing, and next steps in plain language.

    A sound repair plan should explain what is damaged, why it happened, and what work will address it. Be cautious of a recommendation that lists materials or labor without connecting them to inspection findings. Ask for photographs or a plain-language explanation of affected shingles, underlayment, flashing, ventilation, and any areas where moisture may have traveled.

    The scope should distinguish a targeted repair from broader roof work. A few wind-damaged shingles may call for a focused solution, while recurring leaks, widespread curling, or aging materials may point to a larger project. The roof’s condition and age should guide that decision together. If you are comparing options, review roof replacement planning guidance.

    Ask what the plan includes

    A complete proposal should identify the roofing material, the areas being repaired, and how the work will address vulnerable details. Flashing around chimneys, walls, skylights, and roof penetrations deserves specific attention because these transitions can allow water inside when they are damaged or improperly sealed. Ventilation should be discussed as well. Balanced airflow can help a roof system manage Minnesota’s seasonal temperature changes, but the right approach depends on the home’s existing design.

    Ask whether the recommended material matches the rest of the roof and the home’s exposure to snow, ice, wind, and changing temperatures. Referred Restoration uses high-quality Malarkey roofing products. That does not replace the need for an inspection-based recommendation, but it gives the homeowner a clear starting point for discussing material selection.

    Confirm timing, safety, and local support

    Clarify when preparation will begin, how weather could affect the schedule, and what the crew will do to protect landscaping, vehicles, and the home’s interior. Roof work carries fall hazards, so homeowners should leave roof access and elevated inspections to trained professionals. Ask who will communicate schedule changes and how questions will be handled during the work.

    For homeowners in Rogers and nearby Minnesota communities, including Cottage Grove, St. Francis, and Monticello, Referred Restoration follows a three-step process: free inspection, custom solution, and professional installation. The team can also help homeowners navigate wind and hail insurance claims when appropriate. Learn more about Rogers roofing services or arrange an inspection to discuss the findings and next steps.

    Contact Referred Restoration online

    Frequently Asked Questions About Roofing and Roof Repairs

    How do I know if my roof needs repair or replacement?

    Look for missing or curling shingles, active leaks, recurring moisture, and damage across multiple roof areas. A small, isolated issue may be repairable, while widespread damage or an aging roof may support replacement. An inspection is the best way to determine the scope because a visible symptom does not always show the condition of the underlayment, flashing, or roof deck.

    What roofing problems are common in Minnesota?

    Minnesota homeowners commonly deal with ice dams, wind damage, and shingle curling during cold-weather cycles. Wind can weaken shingle seals, while ice dams can contribute to water intrusion. After severe weather, inspect from the ground for missing or lifted shingles and arrange a professional evaluation rather than climbing onto the roof.

    How long do common roofing materials last?

    Asphalt shingles typically last 20 to 30 years, while metal roofing can often last 40 years or more. Actual service life depends on installation quality, ventilation, weather exposure, maintenance, and the condition of the roofing system. A roof-specific inspection provides better guidance than age alone.

    Is it safe to inspect a roof myself?

    Homeowners can check the attic and view the roof from the ground. Climbing onto a roof or ladder creates fall hazards, especially when surfaces are wet, icy, or damaged. The CDC and NIOSH identify falls from roofs, ladders, and scaffolds as a serious construction safety concern. Arrange a professional inspection when damage is suspected.

    What should I do after a Minnesota hailstorm?

    Protect the interior, photograph visible damage from the ground, avoid roof access, and arrange an inspection. Keep storm notes and photographs available for your insurer. A professional evaluation can identify damage that is not visible from the yard and help separate a localized repair from broader work.

    Ready to Take the Next Step With Your Roof?

    An inspection can clarify whether a focused repair is appropriate or whether broader replacement planning makes more sense for your home. Referred Restoration serves homeowners in Rogers and surrounding Minnesota communities with free inspections, custom solutions, and professional installation when needed.

    Contact Referred Restoration online

    Call (763) 726-4245 if you prefer to speak by phone.

  • How to Choose Roofers in Minnesota

    How to Choose Roofers in Minnesota

    A roofing project can affect your home’s protection through every Minnesota season, so the right contractor should offer more than a quick inspection and a broad promise. You want someone who can explain what your roof needs, document the work, and communicate clearly before anything is signed.

    Contact Referred Restoration online

    When comparing roofers, look for verifiable licensing and insurance, consistent reviews, experience with the materials and weather conditions your home faces, and clear answers about scope, safety, cleanup, and warranty. A free inspection can help you understand whether repair or replacement is appropriate, but the contractor’s process matters just as much as the recommendation.

    Start by asking practical questions and checking the answers, not simply comparing the first proposal you receive. Licensing, workers’ compensation coverage, and jobsite safety are the foundation of a responsible hiring decision.

    For homeowners in Rogers, Cottage Grove, and nearby Minnesota communities, choosing among roofers starts with documentation and a clear process, not a rushed decision.

    What should you look for when hiring roofers in Minnesota?

    The best roofers in Minnesota can show current credentials, explain their inspection findings, recommend materials suited to local weather, and provide a written scope. Compare how each contractor handles safety, communication, cleanup, warranties, and unexpected conditions, not just the initial recommendation.

    Choosing among roofers is easier when you compare the way each contractor works, not just the promise of a finished roof. Minnesota homes face freezing winters, snow, hail, wind, and repeated freeze-thaw cycles. The right company should understand local conditions and explain how its recommendations address them.

    What to compareQuestions to ask
    Credentials and coverageIs the company licensed, insured, and able to provide a current workers’ compensation certificate?
    Inspection and scopeWhat did the inspection find, and is the recommended work documented in writing?
    Materials and weather fitWhich materials are proposed, and how do they fit the home’s Minnesota exposure?
    Project managementWho performs the work, how will communication and cleanup be handled, and what warranty applies?

    Start with credentials, insurance, and local experience

    Ask whether the contractor is licensed, and request current proof of insurance before signing anything. You should also ask to see a workers’ compensation certificate and clarify whether the crew members work directly for the company. The CDC advises homeowners to ask these questions because independent contractors may not be covered by workers’ compensation. You can review that guidance at the CDC’s roofing safety recommendations.

    Local experience matters, but ask for specifics rather than accepting a broad claim. Can the roofer explain common issues found on Minnesota homes? Does the team handle both storm damage and aging roofs? A contractor serving the Rogers area should be comfortable discussing how snow, hail, and seasonal weather affect materials, ventilation, flashing, and drainage.

    Look for clear communication and a written scope

    Roofers inspecting a Minnesota home roof

    A professional inspection should lead to a written explanation of the work. The scope should identify whether the recommendation is a repair or replacement, the areas involved, the materials proposed, ventilation work, cleanup responsibilities, and the expected sequence. It should also explain what happens if concealed damage appears after work begins. If you need background before comparing proposals, review this guide to evaluating professional roofers for your installation.

    Pay attention to how the contractor answers questions. Clear roofers explain unfamiliar terms, document findings, and communicate schedule changes promptly. Be cautious if someone pressures you to sign immediately, avoids written details, or makes guarantees they will not put in writing.

    Confirm safety, cleanup, and warranty details

    Ask what fall-protection equipment the crew will use, such as lifelines or guardrails. Safety planning should extend beyond the roof to protect people, landscaping, siding, windows, and outdoor equipment. Confirm who will remove old materials, collect nails, protect the property during installation, and complete the final cleanup.

    Finally, read the warranty before work begins. Separate the manufacturer’s material warranty from the contractor’s workmanship warranty, and ask who handles a future concern and how to submit it. A complete answer across credentials, communication, scope, safety, cleanup, and warranty gives you a much stronger basis for choosing roofers than a polished sales pitch alone.

    How can you verify a roofer’s license, insurance, and safety practices?

    Before discussing materials or scheduling work, verify that the company can answer basic questions about credentials, coverage, and job-site safety. A confident, transparent response should include specific documentation and a clear explanation of who will perform the work. The CDC’s roofing safety guidance offers a practical starting point for these conversations.

    1. Ask whether the contractor is licensed

      Ask the roofer directly whether the company holds the licenses required for its work. Then ask which agency issues the license and how you can verify its current status. Keep a record of the company name and license information so you can compare candidates consistently. A vague answer, a quick change of subject, or pressure to sign before you receive basic details deserves caution. Licensing requirements can vary by location and project, so avoid assuming that a contractor’s statement alone proves compliance.

    2. Request a workers’ compensation certificate

      Ask whether the company carries workers’ compensation insurance, and request a copy of the current certificate rather than relying only on a verbal assurance. Check that the named business matches the company you are hiring and ask whether the coverage applies to the crew expected at your home. If the contractor says the certificate will be provided later, make receiving and reviewing it a condition of moving forward. This documentation helps clarify how workplace injuries are handled and can reduce uncertainty for the homeowner.

    3. Clarify who will be on your roof

      Ask whether the workers are direct employees of the roofing company or independent contractors. If subcontractors will be used, ask for the subcontractor’s business name, insurance information, and responsibility for the work. The crew structure matters because independent contractors may not be covered by the hiring company’s workers’ compensation policy. You should know who is performing the work, who supervises the crew, and who handles questions if the plan changes.

    4. Ask about fall protection

      Ask what fall-protection measures workers will use while they are on the roof. The answer may include equipment and systems such as lifelines, guardrails, or other controls suited to the roof and work being performed. A professional response should explain how the crew will protect workers around roof edges, openings, ladders, and changing weather conditions. Do not treat safety as a formality. It is part of evaluating whether a contractor has a controlled process for working on your home.

    5. Confirm liability coverage and documentation

      Ask what liability insurance the company carries and request documentation you can review. Ask who is responsible if property is damaged during the project, and make sure the answer is reflected in the written agreement. If a prospective roofer cannot confirm licensing, insurance, or safety practices, consider another professional. A serious incident on your property can create complicated liability questions, so unresolved answers are a meaningful warning sign, not a minor paperwork issue.

    How do reviews and references help you compare roofers?

    Reviews and references can show you what it is like to work with a roofing contractor after the initial conversation ends. Use them to evaluate patterns in communication, workmanship, scheduling, and follow-through. Do not treat one enthusiastic comment or one complaint as the complete story.

    Look for repeated patterns, not isolated comments

    Read several recent reviews across more than one platform, if available. Pay attention to themes that appear repeatedly. Do homeowners mention clear explanations, timely updates, respectful crews, careful cleanup, or help navigating storm damage? Do multiple reviewers describe missed calls, unclear scope, debris left behind, or difficulty resolving concerns? Repeated details are more useful than a star rating by itself.

    Also consider whether the reviews describe projects similar to yours. A contractor may have strong feedback for small repairs, but you may be comparing roofers for a full replacement after hail or wind damage. Look for comments about comparable roof types, project size, weather conditions, and communication with the homeowner. Reviews cannot prove that a contractor is the right fit, but they can help you identify questions worth asking.

    Ask references focused questions

    If a roofer provides references, ask permission to contact them and keep your questions practical. You might ask:

    • Did the contractor explain what the inspection found and what work was recommended?
    • Was the written scope consistent with the work that was completed?
    • How clearly did the crew communicate schedule changes or unexpected issues?
    • How did the company respond when you raised a concern?
    • Was the property left orderly after the work?

    The response to a problem can be especially revealing. No project is completely predictable, and a reasonable reference may describe a correction or delay. What matters is whether the roofer acknowledged the issue, explained the next step, and followed through without making the homeowner chase for answers.

    Use reviews as one part of your comparison

    Online feedback should support, not replace, a broader review of each candidate. Compare what you learn from reviews with the contractor’s inspection process, written scope, insurance documentation, material recommendations, and answers to your questions. Be cautious when testimonials are vague, unusually repetitive, undated, or disconnected from verifiable project details. A transparent roofer should be comfortable discussing its process and responding directly to reasonable concerns.

    For homeowners in Rogers and nearby Minnesota communities, communication matters alongside technical work. Snow, hail, wind, freezing temperatures, and freeze-thaw conditions can make exterior projects stressful. A roofer who explains the process clearly and keeps you informed gives you better information for making a careful decision.

    What should roofers explain about materials and Minnesota weather?

    A useful roofing conversation starts with what the inspection found, not with a product name. Ask the roofer to show you the visible evidence of damage or wear. Then ask whether the recommended work is a targeted repair, a larger section replacement, or a full replacement. The scope should match the condition of the roof, not a one-size-fits-all sales pitch.

    Clarify the scope before discussing shingles

    For a repair, the written explanation should identify the affected area, the suspected source of the problem, and how the repair will protect the surrounding roof assembly. For replacement work, ask what will be removed, what will be installed, and whether the proposal includes flashing, underlayment, edge details, and ventilation. Those components affect how the roof manages water and air, even though they may not be visible from the ground.

    Material expertise matters because shingles are only one part of the system. Ask which products the roofer recommends for your home and why. Referred Restoration lists Malarkey roofing materials among its offerings. Homeowners should still expect a clear explanation of the proposed material’s intended use, installation requirements, and compatibility with the existing roof. You can also review this guide to evaluating professional roofers for your installation before comparing proposals.

    Ask how the roof will handle Minnesota conditions

    Minnesota roofing materials prepared for weather

    Minnesota roofs face more than ordinary rainfall. Freezing winters, snow, hail, wind, and repeated freeze-thaw cycles all place stress on shingles, flashing, seals, and drainage paths. A roofer should connect those conditions to the recommendation without exaggerating the risks. Ask how the design and installation plan address water shedding, snow exposure, ventilation, and areas where ice or changing temperatures may create recurring problems.

    Ventilation deserves a specific explanation. Ask whether the current attic ventilation appears balanced, whether improvements are needed, and how the proposed work will preserve or correct airflow. A responsible roofer should distinguish an observed ventilation issue from a possibility that still needs investigation.

    Confirm cleanup and warranty details

    Before work begins, clarify how the crew will protect landscaping and property, collect roofing debris, handle exposed fasteners, and check the site after installation. Ask what warranty applies to the materials, what workmanship coverage is provided, and which conditions or maintenance responsibilities could affect that coverage. If hail or wind damage is involved, ask how inspection documentation will support the insurance process. Clear answers on scope, materials, weather exposure, cleanup, and warranty make it easier to compare roofers on quality and fit rather than on vague promises.

    What questions should you ask roofers before signing?

    A written conversation before work begins helps you compare roofers on more than a quick inspection or a polished presentation. Ask each contractor the same core questions, then keep the answers with the proposal so you can review them later.

    1. What exactly does the inspection show, and what work do you recommend? Ask the roofer to explain whether the plan involves a repair, partial replacement, or full replacement. The written scope should identify the affected areas, materials, ventilation work, flashing, and any related exterior repairs. If the project follows hail or wind damage, ask how the findings will be documented for your insurance company. Referred Restoration discusses the value of hiring an experienced roof contractor when several parts of a home’s exterior need attention.
    2. Who will perform the work? Ask whether the crew consists of the contractor’s direct employees or independent contractors, and who will supervise the job. Workers’ compensation questions matter because independent contractors may not be covered by the roofing company’s policy. The CDC also recommends asking to see a workers’ compensation certificate before signing, along with confirming that the contractor is licensed. See the CDC hiring guidance for these safety questions.
    3. What is the expected schedule, and what could change it? Ask when the work could start, how long the planned scope should take, and how weather, material availability, or concealed damage could affect the schedule. Get any schedule assumptions in writing. A responsible roofer should explain how the crew will protect exposed areas if rain, snow, or high winds interrupt the work.
    4. What permits, inspections, or property requirements apply? Ask who will determine whether permits or local requirements apply and who is responsible for arranging them. If your home is part of an association or another managed property, confirm whether approvals are needed before materials arrive.
    5. How will you coordinate with my insurance company? Ask what documentation the roofer will provide, what decisions remain yours, and how supplements or disputed damage will be handled. Insurance assistance should be transparent. You should understand the approved scope rather than signing an open-ended authorization.
    6. How will the crew handle safety and cleanup? Ask what fall protection will be used, how landscaping and exterior features will be protected, and how nails, scraps, and other debris will be removed. Also ask who completes the final inspection and how unresolved cleanup or property concerns will be reported.
    7. What warranty applies, and how are changes handled? Request the material and workmanship warranty terms in writing, including exclusions, registration requirements, and the process for making a claim. Finally, ask how concealed damage or any change to the original scope will be documented and approved. Do not rely on a verbal promise. Require a written change description and your approval before additional work begins.

    How do you make the final roofer decision?

    Once you’ve narrowed the field, compare the finalists using the same written checklist rather than relying on the most confident sales presentation. A strong candidate should provide verified credentials, clear inspection findings, a detailed scope of work, material information, a realistic communication plan, and written warranty terms. The goal is to understand exactly who will work on your home and how the project will be managed.

    Start by confirming the basics. Ask whether the contractor is licensed, request current insurance documentation, and verify who will actually perform the work. The CDC also recommends asking to see a workers’ compensation certificate and asking whether workers are direct employees, since independent contractors may not be covered by workers’ compensation: review these contractor safety questions. Ask what fall-protection practices the crew will use, such as lifelines or guardrails. A contractor who avoids straightforward questions about licensing, insurance, or safety is giving you useful information: keep looking.

    Next, compare the inspection quality. The roofer should explain what was observed, distinguish repairable damage from conditions that may require replacement. And connect the recommendation to Minnesota realities such as snow, hail, freezing temperatures, and freeze-thaw cycles. The written scope should identify materials, ventilation, flashing, cleanup, expected communication, and warranty coverage. If important details are described only verbally, ask for them in writing before signing.

    Review how each finalist handles uncertainty and accountability. Red flags include pressure to sign immediately, vague answers about subcontractors, reluctance to document storm damage. Unclear change-order procedures, missing warranty details, or promises that sound broader than the written agreement. Be cautious when a contractor focuses only on materials or a fast start while skipping inspection findings and site safety.

    This decision guide is about vetting and hiring, not installation technique. For project-specific preparation, you can continue with the guide to evaluating professional roofers for your installation. Homeowners in the Rogers area can also review Rogers roofing services to understand the local roofing support available.

    Contact Referred Restoration online or call (763) 726-4245 to discuss your roofing concerns with a Minnesota restoration professional.

    Frequently Asked Questions

    What should I look for when hiring roofers?

    Look for clear communication, relevant material experience, proof of insurance, a written scope of work, and a process for cleanup and warranty questions. Ask how the crew will protect your property and who will be responsible for the work from inspection through completion.

    Are roofers licensed, bonded, and insured?

    Requirements and coverage can vary, so verify each contractor’s current credentials rather than assuming. Ask whether the company is licensed, request an insurance certificate, and confirm whether the workers are direct employees or independent contractors. The CDC recommends these questions when hiring a roofing contractor, including asking about workers’ compensation coverage.

    How do I compare roofing companies?

    Compare the details behind each proposal, not just the headline recommendation. Review the inspection findings, materials, ventilation plan, schedule, cleanup responsibilities, warranty terms, and change-order process. Check whether reviews describe consistent communication and completed work, then ask for references if you still have questions.

    How do I request a free estimate from roofers?

    Start by scheduling an inspection and explain any leaks, storm damage, or other concerns you have noticed. Ask the roofer to document the condition of the roof and provide the recommended repair or replacement scope in writing. A free inspection is an important first step, but you should still review the proposed work carefully before signing.

    Can roofers work with my insurance company?

    Some roofing contractors can help document hail or wind damage and coordinate information for an insurance claim. That support does not replace your insurer’s coverage decision. Ask what documentation the roofer will provide, who communicates with the adjuster, and which work is included in the written scope.

    Ready to talk with a Minnesota roofing professional?

    A thoughtful conversation can help you clarify your inspection findings, understand the recommended scope, and identify the questions worth asking before work begins. Referred Restoration can discuss your roofing needs and help you consider an appropriate next step for your home.

    Contact Referred Restoration online to discuss your roofing inspection or project. You can also call (763) 726-4245.

  • Residential Roofing Systems for Minnesota Homeowners

    Residential Roofing Systems for Minnesota Homeowners

    A Minnesota roof does more than keep rain out. It must manage snow, ice, wind, freeze-thaw cycles, and water moving through multiple connected layers. That is why residential roofing should be evaluated as a complete system, not only as a choice between shingle colors.

    Contact Referred Restoration online to discuss your Minnesota roofing questions. Call (763) 726-4245 to connect with the team.

    Residential roofing is the complete roof assembly that protects a home. It includes the roof deck, underlayment, roof covering, flashing, ventilation, insulation, and drainage components. In Minnesota, the right assembly depends on the home’s design, location, weather exposure, and how well each part directs water and manages moisture.

    Understanding these components helps homeowners compare asphalt shingles and metal roofing, recognize warning signs, and ask better questions before repair or replacement work. The key is to look at how the layers work together from the roof deck outward.

    What Is a Residential Roofing System?

    A residential roofing system is a coordinated set of structural, water-shedding, weather-sealing, and ventilation components. The visible roof covering is important, but it is only one part of the assembly. A roof can have apparently sound shingles and still experience problems if the deck, flashing, underlayment, attic conditions, or drainage path is compromised.

    The roof deck is the structural surface attached to the home’s framing. It supports the layers above it and must be sound before new materials are installed. Underlayment sits above the deck and provides a secondary water-shedding layer beneath shingles or metal panels. It can help limit intrusion when wind-driven rain or melting snow gets below the outer covering.

    The roof covering sheds most of the weather. Asphalt shingles suit many home styles, while metal roofing offers a different appearance and service-life expectation. Neither material works alone. Valleys, roof-to-wall intersections, chimneys, vents, and other penetrations need carefully planned flashing to guide water around vulnerable transitions.

    The University of Minnesota Extension explains that every element of a drainage plane should direct water out and over the layer below it. Its guidance also notes that more complex roof designs require flashing in more locations than simpler designs. This layered approach is central to reliable residential roofing in a wet, snowy climate.

    What Components Make Up a Residential Roofing System?

    Each roof component has a distinct job, but its performance depends on the connection to the components around it. A damaged deck can weaken the surface above it. Poorly integrated flashing can direct water behind otherwise sound shingles. Inadequate attic ventilation can contribute to moisture and temperature problems.

    Roof Deck

    The deck provides the base for the underlayment and roof covering. During an inspection or replacement, a contractor may look for soft, stained, sagging, or otherwise damaged areas. Installing a new covering over a weak section does not correct the underlying structural or moisture issue. The deck also needs proper fastening and preparation for the planned roof assembly.

    Water-Shedding Layers

    Shingles, metal panels, and underlayment should overlap so water continues moving downward and outward. The outer covering handles most exposure, while the underlayment provides added protection below it. Correct sequencing matters. Each layer should work with the next layer rather than create a pocket where moisture can collect.

    Flashing and Penetrations

    Flashing protects places where the roof changes direction or meets another surface. Common locations include valleys, chimneys, skylights, plumbing vents, wall intersections, roof edges, and dormers. These details deserve close attention because a small opening at a transition can allow water to reach the deck or interior. The University of Minnesota Extension roof and wall drainage guidance explains why drainage-plane sequencing and flashing placement matter.

    Ventilation and Insulation

    Insulation helps limit heat transfer between the living space and attic. Ventilation helps manage air movement and moisture when the roof assembly is designed for balanced airflow. Blocked vents, gaps, or uneven insulation can affect attic conditions. These factors can be relevant when homeowners see recurring condensation, frost, or ice-dam concerns.

    Drainage and Gutters

    Water management continues beyond the roof surface. Valleys, eaves, gutters, downspouts, and the grade around the home should move runoff away from walls and the foundation. A clogged gutter or poorly directed downspout can leave water at the roof edge, where it may affect fascia, siding, or flashing. A complete inspection looks at the path water takes from the roof to the ground.

    Residential roofing details on a Minnesota home, including roof valleys and gutters
    Roof valleys, flashing, and gutters work together as part of a residential roofing system.

    How Does Minnesota Weather Affect Residential Roofing?

    Minnesota weather tests a roof in several ways at once. Snow adds weight, melting snow can contribute to ice dams, and repeated freezing and thawing can move water into small openings. Wind and hail can damage shingles or exposed flashing. Heavy runoff can reveal weaknesses in valleys, gutters, and downspouts.

    Snow-load requirements are not identical throughout Minnesota. The Minnesota Department of Labor and Industry roof snow-load map illustrates regional differences. The map is not a universal rating for every home. Applicable requirements depend on location, the project, and the building’s design, so a homeowner should not apply one statewide assumption to a specific roof.

    Snow and attic conditions can also affect ice-dam risk. When heat escapes into a cold roof area, snow may melt and refreeze near the eaves. Ice can interfere with drainage and allow water to move beneath roofing materials. Insulation, ventilation, air sealing, roof geometry, and edge detailing all influence how the roof handles this cycle. Homeowners can also review Referred Restoration’s guide to ice dam prevention.

    Freeze-thaw movement can stress flashing, penetrations, joints, and sealants. After hail or high winds, a roof review should look beyond the center field. Valleys, wall intersections, chimneys, vents, and drip edges deserve attention because they must shed water while accommodating the roof’s shape.

    Which Residential Roofing Materials Work Well in Minnesota?

    There is no single best roofing material for every Minnesota home. The right choice depends on the roof design, weather exposure, ventilation, supporting structure, desired appearance, and installation details. Asphalt shingles and metal roofing can both perform well when they are selected and installed as part of a complete system.

    MaterialPotential fitPlanning considerations
    Asphalt shinglesVersatile appearance and compatibility with many residential roof designsReview roof slope, ventilation, flashing, ice-management details, and exposure to wind and hail
    Metal roofingDistinct appearance and a long service-life expectation when appropriately selectedReview structural support, fastening, seams, penetrations, ventilation, and compatibility with the home’s design

    Asphalt shingles are familiar and work with a wide range of architectural styles. Customer guidance describes asphalt shingles as lasting about 20 to 30 years, depending on conditions and maintenance. That wording is a general expectation, not a guarantee for every roof. Installation quality, attic conditions, weather exposure, and maintenance all affect performance. Read the asphalt shingle replacement guide for related planning information.

    Metal roofing may appeal to homeowners who value its appearance and long service-life expectation. Customer guidance describes metal roofing as lasting 40 years or more, but the roof still needs compatible flashing, ventilation, fastening, and penetration details. For a closer comparison, see the article on metal roofing versus shingles in Minnesota.

    The quality of the installation often matters as much as the product category. A material should fit the home’s structure and drainage plan rather than compensate for problems below the surface.

    How Should Homeowners Compare Roofing Options?

    Start by considering the home’s exposure. A roof with strong wind exposure, limited shade, or areas where snow drifts collect may have different needs from a sheltered roof. Ask how the proposed assembly will handle snow, ice, wind, hail, rain, and seasonal temperature changes.

    Next, review the roof geometry. Valleys, dormers, wall intersections, chimneys, skylights, and other penetrations create more places where water must be directed and sealed. Ask how each transition will be flashed and how the planned layers will overlap. Do not evaluate only the field shingles or panels.

    Drainage and ventilation deserve equal attention. Gutters, downspouts, valleys, eaves, underlayment, and flashing should function as one water-management system. Each drainage-plane layer should direct water out and over the layer below instead of trapping moisture inside the assembly. Balanced attic conditions also depend on the home’s insulation, air sealing, and ventilation details.

    Compare materials based on appearance, maintenance, serviceability, roof structure, and compatibility with the existing home. Ask who will perform the work, how inspection findings will be documented, how ventilation will be checked, and what details are included around valleys and penetrations. A clear explanation of the complete assembly is more useful than a material recommendation without context.

    For a local evaluation, homeowners can review Rogers roofing services. Referred Restoration’s process begins with an inspection, then moves to a custom solution and professional installation. The team also works with homeowners on storm-damage restoration and insurance-claim questions.

    When Does a Residential Roof Need Inspection or Replacement?

    A roof does not always fail in one obvious event. Small changes in the shingles, flashing, attic, ceiling, or drainage path can indicate that water is no longer moving through the system as intended. Minnesota weather makes regular attention useful because snow, ice, wind, hail, and freeze-thaw cycles can expose weaknesses that are easy to miss from the ground.

    1. Look from the ground and inside the home. From a safe location, look for missing, lifted, cracked, or visibly damaged shingles; exposed underlayment; sagging areas; and displaced flashing. Inside, check for damp insulation, daylight through the roof deck, staining, bubbling paint, or peeling surfaces. These clues do not identify the exact leak source by themselves.
    2. Check the roof after severe weather. After hail, high winds, or a heavy snow and ice event, document visible changes from the ground when practical. Pay attention to gutters, downspouts, roof edges, and flashing. If there is active leaking, contain interior water safely and arrange an evaluation.
    3. Schedule a professional inspection. A qualified roofer can assess valleys, penetrations, transitions, ventilation, and areas that are difficult or unsafe for a homeowner to reach. Referred Restoration offers inspections as part of its consultative process for Rogers and nearby Minnesota communities.
    4. Compare repair with replacement based on system condition. A localized defect with sound surrounding materials may be a repair candidate. Widespread damage, recurring leaks, sagging, deteriorated flashing, or multiple failing components may justify a replacement discussion. The decision should account for the deck, drainage, ventilation, and installation details, not only the surface covering.

    Keep inspection notes and photographs with your home-maintenance records. Clear documentation can help track changes over time and explain storm-related concerns to a contractor or insurer. For related leak questions, read the roof shingle leak repair guide.

    Contact Referred Restoration online before a small roofing concern becomes a larger system problem. Call (763) 726-4245 for the next step.

    Frequently Asked Questions

    What is residential roofing?

    Residential roofing is the complete roof system protecting a home, not only the visible shingles or metal panels. It includes the roof deck, underlayment, flashing, ventilation, insulation, drainage features, and roof covering. These parts must work together to shed water, manage moisture, and handle local weather.

    What is the best roofing material for a Minnesota home?

    There is no universal best material. Asphalt shingles and metal roofing can both be appropriate, depending on the home’s structure, roof shape, weather exposure, desired appearance, ventilation, and installation details. A professional evaluation should consider the complete assembly before recommending a material.

    What makes a roof suitable for Minnesota weather?

    A suitable roof assembly manages snow, ice, wind, hail, rain, and freeze-thaw cycles. It needs sound decking, correctly overlapped water-shedding layers, well-integrated flashing, healthy attic conditions, and drainage that moves water away from the home. Local design requirements and site exposure also matter.

    Why are flashing and drainage important on a residential roof?

    Flashing protects transitions and penetrations where water could otherwise enter. Drainage components move water from the roof surface through valleys, eaves, gutters, and downspouts. If either path is poorly installed or blocked, water can reach the deck, walls, fascia, siding, or foundation.

    How often should a Minnesota roof be inspected?

    Inspection timing depends on the roof’s age, condition, weather exposure, and recent storms. A review after significant hail, wind, snow, or ice events is sensible. Homeowners should also arrange an evaluation when they notice leaks, staining, damaged shingles, sagging, recurring ice-dam concerns, or other changes.

    Contact us to plan your next roofing step

    A complete roof evaluation can clarify whether a concern calls for observation, repair, or a broader replacement discussion. Referred Restoration serves Rogers and nearby Minnesota communities with a consultative process built around inspection, a custom solution, and professional installation.

    Contact Referred Restoration online to request the next step for your home. Call (763) 726-4245 with questions about residential roofing.

  • Roof Installation: Minnesota Homeowner Guide

    Roof Installation: Minnesota Homeowner Guide

    A new roof is more than a layer of shingles. In Minnesota, lasting performance depends on the condition of the roof deck. Protection at vulnerable edges and valleys, correctly installed flashing, and ventilation that helps manage winter moisture and summer heat.

    Contact Referred Restoration online to discuss your roof installation questions before work begins.

    A thorough roof installation begins with an inspection and a plan for the existing structure, then moves through tear-off, deck repairs, underlayment, flashing, shingles, ventilation, and final cleanup. Each stage supports the next, so shortcuts can leave hidden weaknesses beneath an otherwise attractive finished roof.

    Understanding the sequence helps you ask better questions, recognize careful workmanship, and know what should happen before materials arrive. The first step is determining whether the current roof and supporting structure are ready for replacement.

    What Happens Before Roof Installation Begins?

    A durable roofing project starts well before the first new shingle is fastened. The preparation phase gives the contractor a chance to understand how the existing roof is performing. Identify hidden structural concerns, and design a system that fits the home’s pitch, materials, and water-shedding needs. This broader evaluation is different from simply choosing a shingle color or reviewing a complete asphalt shingle roof replacement process.

    Roof installation preparation on a Minnesota home
    Roof installation planning begins with a careful inspection and preparation.

    The inspection looks beyond visible shingle damage

    A standard roof installation begins with a thorough inspection of the existing roof and structure, followed by removal of the old roofing materials. The inspection considers visible conditions such as curling, cracking, or significant granule loss, which can indicate that replacement should be considered. It also examines areas that are easy to overlook, including roof edges, valleys, penetrations, flashing, and attic conditions.

    The roof deck, commonly made from plywood or oriented strand board, must be checked for rot and soft spots. New roofing cannot provide a sound result if it is installed over a weakened surface. A contractor should document damaged areas and explain whether deck repairs are needed before the next layer is applied. This is also the right time to discuss any recurring roof leak warning signs and trace moisture back to its likely entry point instead of treating only the interior symptom.

    Preparation accounts for the home’s structure and design

    Roof pitch is a primary design factor. It affects how quickly water sheds, which materials are appropriate, and which installation techniques are needed. The assessment should also consider the roof’s total weight. If a homeowner is moving to a heavier premium roofing product, the structure’s capacity needs to be evaluated before installation begins. This structural assessment helps connect material selection to the home itself rather than treating every roof as the same project.

    Before work starts, the contractor should also clarify the planned water-shedding details, ventilation approach, and locations where flashing will be replaced or improved. Homeowners comparing energy-related options can review choosing cool roof shingles for installation, while those concerned about winter performance may benefit from understanding proper roof installation techniques to prevent ice dams.

    What homeowners should confirm before the crew arrives

    1. Ask what the inspection found on the roof deck, including any soft or rotten areas.
    2. Confirm the roof pitch, planned materials, and how the design supports water shedding.
    3. Ask whether the selected roofing system adds weight that requires a structural review.
    4. Review the permit and local code requirements, since roof replacement generally requires permitting for safety and compliance.
    5. Clarify how damaged flashing, roof penetrations, and other transition areas will be handled.
    6. Discuss protection for landscaping, outdoor belongings, and walkways during tear-off and preparation.

    A clear preparation plan makes the installation easier to follow and gives the homeowner useful checkpoints before materials cover the structure. For related exterior planning, see how roof installation and gutter system integration can affect water management around the home.

    How Does Roof Installation Protect a Minnesota Home From Water?

    A dependable roofing system does more than place shingles over a roof deck. It creates several water-control layers that work together, especially at the parts of a Minnesota roof most exposed to runoff, snow, ice, and freeze-thaw movement. The goal is to direct water down and away from the home while giving the deck added protection if moisture gets beneath the primary roofing material.

    Underlayment creates a second line of defense

    After the roof deck is inspected and prepared, the installer applies underlayment beneath the shingles. This layer acts as a secondary moisture barrier, helping protect the deck if rain or melting snow gets below the shingle surface. Felt paper is a traditional underlayment option that has been used for decades. Synthetic underlayment is a modern alternative that is lighter, stronger, and more resistant to tearing.

    The choice of underlayment should fit the roof design, materials, and installation plan. It also needs to be laid out correctly, with seams and edges positioned so water continues to move downward rather than behind the membrane. A well-installed underlayment cannot compensate for poor flashing or incorrectly installed shingles, but it gives the roof system another important layer of protection.

    Ice and water shield reinforces vulnerable areas

    Minnesota roofs need additional protection where water can collect or where ice dams can hold water against the roof. Ice and water shield is a self-adhering membrane used in areas such as eaves and valleys. It provides extra resistance against water intrusion when snow melts, refreezes, or backs up behind an ice dam.

    Eaves are the lower roof edges where runoff approaches the fascia and gutter system. Valleys are the inside angles where two roof sections meet, and they collect more water than most other roof surfaces. Because valleys are particularly prone to leaks, they require careful treatment with the appropriate underlayment and flashing. Homeowners can also review proper roof installation techniques to prevent ice dams for more Minnesota-specific context.

    Eaves and valleys guide water away from the structure

    At the eaves, the installation details help keep water from reaching the fascia or wicking behind it. Drip edge flashing runs along the eaves and roof rakes to direct water away from the fascia boards. Starter shingles form the first shingle layer and help create the initial seal along the eaves. These components may be easy to overlook once the finished roof is visible, but their placement affects how reliably runoff reaches the gutters.

    At valleys, the installer must maintain a continuous path for water while protecting the junction between roof planes. Shingles, underlayment, and flashing need to work together without blocking the channel or leaving gaps. The same water-shedding principle applies throughout the roof: each layer should overlap the next in the direction of drainage. When these details are handled carefully. The finished roof is better prepared to manage Minnesota weather without allowing routine runoff to reach the deck or interior of the home.

    Which Roofing Materials and Flashing Details Matter Most?

    A roof installation is a system of layers and transitions, not just a field of shingles. Each material has a specific job in moving water away from the deck, fascia, walls, and living space. The roof pitch also influences material selection and installation methods because steeper and lower-slope areas shed water differently. A sound plan accounts for those details before the first shingle is fastened.

    Build the water-shedding layers from the edges inward

    At the eaves and rakes, drip edge flashing directs water away from the fascia. Without that edge detail, water can wick behind the fascia and contribute to wood rot. Starter shingles form the first sealed course along the eaves, giving the main shingle field a proper foundation. Field shingles then follow the specified overlapping and fastening pattern. The overlap is not cosmetic. It helps the courses shed water instead of creating paths for water to move beneath the roof covering.

    Fastening deserves the same attention as material selection. Roofing nails should be driven flush with the shingle surface. Overdriven nails can damage the shingle, while underdriven nails can leave it raised and more vulnerable to wind-driven movement. The goal is consistent placement and pressure across the roof, following the product and roof design requirements.

    ComponentWhat it doesInstallation checkpoint
    Drip edgeMoves water away from the fascia at the eaves and rakes.It should be integrated at roof edges so water does not reach the fascia.
    Starter shinglesCreates the first sealed layer for the main shingle courses.The starter course should be aligned and sealed along the eave.
    Field shinglesProvides the primary roof covering and sheds water through overlapping courses.Check overlap, layout, and nails driven flush with the surface.
    Ridge capsCovers the roof peak and provides a finished protective seal.Caps should be installed securely over the ridge and coordinated with ventilation.
    Penetration flashingSeals vent pipes, skylights, and other openings through the roof.Every penetration needs a watertight transition, not just a surface patch.

    Give penetrations and chimneys their own inspection points

    Roof penetrations are common leak locations because they interrupt the continuous roofing plane. Flashing around vent pipes, skylights, and similar openings helps create a watertight seal. Chimneys require more than a single visible strip of metal. A properly detailed chimney transition often uses stepped flashing and counter-flashing so water is redirected as it moves down the roof and around the masonry.

    Durable flashing may use aluminum, galvanized steel, or copper, depending on the design and compatibility of the surrounding materials. The important question is whether the metal, fasteners, and surrounding layers work together as a water-control detail. Valleys and wall intersections deserve the same close attention because they collect or redirect substantial water.

    These details are part of the broader roofing services conversation. Homeowners reviewing an installation should ask how edges, penetrations, chimney flashing, and fastening will be handled, rather than evaluating shingles by appearance alone.

    How Are Shingles, Ridge Caps, and Ventilation Finished?

    The final stages of roof installation turn a covered roof deck into a complete roofing system. Shingles must shed water in the right direction, ridge caps must protect the roof peak, and ventilation must move air through the attic without creating openings for moisture. In Minnesota, these details matter through summer heat, winter cold, snow, and freeze-thaw cycles.

    How the shingle field and ridge are completed

    After the underlayment, ice and water protection, and flashing are in place, the crew installs starter shingles along the eaves. This first course creates the foundation and helps form the initial seal at the roof edge. The main shingles then follow an overlapping pattern, with each course aligned and fastened according to the product requirements. Correct overlap supports water shedding, while accurate nail placement helps the shingles remain secure in strong wind. Nails should sit flush with the shingle surface. Overdriven nails can damage the shingle, while underdriven nails may leave it vulnerable to lifting.

    The roof’s pitch influences how materials are selected and installed because slope affects how quickly water runs off the surface. Valleys and transitions receive particular attention because they collect and direct substantial amounts of water. At the peak, ridge caps are installed over the ridge line. These specially shaped shingles cover the final exposed joint, add a finished appearance, and help seal the roof’s highest point.

    Why balanced attic ventilation matters

    A durable ventilation system needs both intake and exhaust. Intake vents at the soffits allow replacement air to enter the attic, while exhaust at the ridge allows warm air to leave. Ridge vents are one method of exhausting warm attic air, but they work as part of a balanced system, not as a standalone opening.

    In a Minnesota home, effective attic ventilation helps regulate temperature and limit moisture buildup that can contribute to ice dams. It also helps prevent heat from accumulating beneath the shingles during summer, which can prematurely degrade their materials. The installer should evaluate the existing intake path, confirm that insulation is not blocking airflow. And make sure exhaust openings are continuous and properly integrated with the roof covering.

    Short completion checklist

    • Starter shingles and field shingles follow the required overlap and fastening pattern.
    • Nails are driven flush without damaging the shingle surface.
    • Ridge caps cover the peak and are sealed into the surrounding shingle courses.
    • Soffit intake and ridge exhaust work together as a balanced ventilation path.
    • Valleys, eaves, and roof penetrations remain protected by their designated water-shedding details.

    A careful final review should confirm that the visible shingle field, ridge line, and attic airflow all function as one system. That attention to finishing details supports dependable water shedding without relying on unsupported performance guarantees.

    What Should Homeowners Check After Roof Installation?

    The final inspection is not just a quick look at the new shingles. It is the point when you confirm that the roof installation is complete, the property is safe, and you understand how to care for the system. A careful walkthrough also gives the contractor an opportunity to address small concerns before they become harder to investigate.

    Inspect the roof and exterior details

    From the ground, look for consistent shingle lines, secure-looking ridge caps, and finished edges around the eaves and rakes. You should also ask the roofing professional to review the areas that are easiest to overlook, including valleys, roof penetrations, skylights, vent pipes, and the chimney. These locations depend on correctly installed flashing to direct water away from openings and joints.

    Ask how the shingles were fastened and whether the nails were driven flush with the shingle surface. Overdriven or underdriven nails can allow shingles to lift in high winds. It is also reasonable to confirm that the roof deck was checked during the project. Plywood or OSB with rot or soft spots should be addressed before new roofing is applied, because the roof system depends on a sound surface.

    Inside the attic, if it is safely accessible, check for visible daylight, damp insulation, staining, or unusual moisture. Balanced ventilation uses intake at the soffits and exhaust at the ridge. That airflow helps control attic temperature and moisture, which is particularly important through Minnesota’s cold winters and warm summers. Do not climb onto the roof or enter an unsafe attic space for an inspection. Have a professional examine anything that is difficult to reach.

    Confirm cleanup and the homeowner handoff

    A professional closeout should include a thorough cleanup of the work area. Walk the driveway, walkways, landscaping edges, and areas beneath the eaves with the contractor. Ask specifically about old nails, shingle fragments, underlayment scraps, packaging, and other debris. Removing old nails is an important safety step for household members, visitors, pets, and vehicles.

    Before the crew leaves, collect the project information you will need later. That should include the roofing material and color, care instructions, documentation provided by the manufacturer or contractor, and the recommended process for reporting a concern. Ask whether any items remain for a follow-up visit, such as a final inspection, permit closeout, or adjustment to a gutter connection. If the new roof installation involved changes near gutters, confirm that water is flowing into the gutter system rather than behind the fascia.

    Use a simple final-walkthrough checklist

    • Review shingles, ridge caps, valleys, eaves, rakes, and visible flashing.
    • Confirm that roof penetrations and chimney details are sealed and finished.
    • Check the attic, when safely possible, for moisture, stains, or blocked ventilation.
    • Walk the property to confirm that debris and loose nails have been removed.
    • Verify that gutters and downspouts are clear and properly connected.
    • Save the material details, project records, and contact instructions.

    Know when to call a roofing professional

    Contact the contractor promptly if you notice water inside the home, dampness, staining, loose-looking shingles, exposed fasteners, incomplete flashing, or debris that was not removed. Damp conditions associated with roof leaks can contribute to mold growth and may affect indoor health, so do not ignore an attic or ceiling stain. Routine maintenance also matters after the handoff. Clear gutters and remove roof debris periodically, following safe access practices or hiring a professional. Asphalt shingles commonly provide 20 to 30 years of protection, depending on their quality and environmental exposure, but regular observation helps identify problems earlier.

    For a broader review of the complete asphalt shingle roof replacement process, use the related guide, or contact Referred Restoration if a post-installation concern needs professional attention.

    Contact Referred Restoration online before the final walkthrough if you need help planning a Minnesota roof installation.

    Frequently Asked Questions

    How long does a professional roof installation take?

    Most roof replacements take one to three days, depending on the size and complexity of the home, material selection, crew, and weather. Minnesota rain, wind, or unsafe temperatures can change the schedule. Your contractor should explain the planned sequence, likely work dates, and how the site will be protected if conditions shift. Referred Restoration notes that typical replacements take one to three days.

    What should I expect before the old roofing is removed?

    The process should begin with an inspection of the roof structure and deck. The crew identifies soft or rotted plywood or OSB, checks the roof pitch, reviews ventilation, and confirms the material plan. A permit may also be required to meet local building codes. Once the scope is clear, the old roofing is removed so the deck can be examined and prepared for the new system.

    Which details help prevent leaks during installation?

    Water control depends on more than the shingles. Underlayment provides a secondary moisture barrier, while ice and water shield adds protection at vulnerable Minnesota locations such as eaves and valleys. The crew should also install drip edge at the eaves and rakes, and carefully flash penetrations such as chimneys, skylights, and vent pipes. Correct shingle overlap and flush nail placement complete the water-shedding system.

    How can I tell whether the job site is ready for closeout?

    Walk the property with the contractor after installation. Confirm that shingles, ridge caps, flashing, and ventilation are complete, then check the roof and surrounding ground for visible debris or loose nails. Gutters should be clear, and any discovered deck or flashing repairs should be explained. Keep the installation documentation and ask when routine gutter and roof maintenance should be scheduled.

    Ready to Plan Your Roof Installation?

    A clear conversation can help you understand the next steps for your Minnesota home and the details that deserve attention before work begins. Contact Referred Restoration online to talk through your roof installation questions and next steps.

  • Roofing Installation: A Minnesota Homeowner Guide

    Roofing Installation: A Minnesota Homeowner Guide

    A Minnesota roof has to handle hail, high winds, heavy snow, and fast weather changes. That makes the installation process just as important as the shingles or metal panels selected for the home.

    Professional roofing installation on a Minnesota home

    For a broader overview, see the complete residential roofing systems guide.

    Professional roofing installation includes a roof inspection, a solution designed for the home’s condition and Minnesota weather, careful installation of the complete roof system, and a final quality check. Homeowners should be able to ask what will be done, which materials will be used, and how the contractor will protect the property during the work.

    Referred Restoration follows a straightforward process: inspection, custom solution, and professional installation. A typical replacement takes one to three days depending on the home’s size and the weather, but the visible timeline is only part of the story. The details beneath the finished surface often determine how well the roof performs.

    Contact Referred Restoration online or call (763) 726-4245 to discuss your roof.

    What Does Professional Roofing Installation Include?

    Professional roofing installation is more than placing new shingles over an existing roof. It is a coordinated process that begins with understanding the home, the condition of the roof system, and the weather demands in the local area. For Minnesota homeowners, that preparation helps the finished roof address the problems that led to the project in the first place.

    Referred Restoration follows a three-step process: a free inspection, a custom solution, and professional installation. The inspection gives the contractor an opportunity to assess visible damage, aging materials, roof surfaces, flashing, ventilation, and areas where water may be entering. It also helps distinguish between a repairable issue and a roof that needs more extensive work.

    Planning the right solution

    After the inspection, the plan should reflect the home’s layout, existing roof conditions, and the selected roofing system. A professional discussion should explain what work is recommended, which areas need attention, and how the installation will be organized. This is the point where homeowners can ask practical questions about material choices, ventilation, flashing, edge details, and how the crew will protect landscaping and other parts of the property.

    A sound design matters because a roof is a system, not a single surface. The roof deck, underlayment, shingles or panels, flashing, ventilation, and drainage details all need to work together. If the underlying structure or supporting surfaces require attention, those conditions should be identified before the new exterior materials are installed.

    Protecting the property during installation

    Preparation should continue beyond the roof itself. Before work begins, the crew should establish a safe work area, protect nearby siding and landscaping, and plan how removed materials will be handled. During installation, careful staging and cleanup reduce the risk of loose debris affecting the driveway, yard, pets, or family members.

    • Inspect the roof and identify damage, aging, and vulnerable details.
    • Develop a solution that fits the home’s structure and weather exposure.
    • Install the roofing system with attention to underlayment, flashing, ventilation, and edge conditions.
    • Protect surrounding property and maintain an orderly work area.
    • Complete a final cleanup and review the finished work with the homeowner.

    That final review is an important part of the experience. Homeowners should know what was completed, what was observed during installation, and whether any follow-up recommendations remain. Clear communication at each stage makes it easier to understand the work and recognize a thorough, professionally managed installation.

    What Are the Main Steps in Roofing Installation?

    A dependable roof replacement is a sequence of connected decisions, not simply a matter of placing new shingles over an old surface. The crew must confirm that the roof is suitable for the planned system, protect the home during the work, and install each layer in the correct order. A sound design and structure are fundamental to a roofing system, as noted in the NRCS conservation standard for roofs and covers.

    1. Inspect the existing roof and plan the work. The process begins with an inspection of the shingles, flashing, vents, gutters, roof edges, and visible areas around the attic. The contractor also considers the roof’s slope, layout, existing layers, access points, and weather conditions. This information guides the material selection, scheduling, ventilation plan, and protection needed for landscaping and exterior surfaces. For storm-related damage, photographs and inspection notes can also help organize the next steps with the homeowner and insurance carrier.
    2. Prepare the property and work area. Before tear-off begins, the crew protects doors, windows, siding, plants, walkways, and other areas near the roof. Materials, equipment, and debris containers are positioned so the crew can work safely and keep the site organized. Homeowners should receive clear information about access, noise, pets, vehicles, and any items that need to be moved away from the house.
    3. Remove the old roofing materials. The tear-off exposes the roof deck and reveals conditions that cannot always be evaluated from the surface. Workers remove shingles, underlayment, loose fasteners, and damaged flashing as specified in the project plan. They should control debris throughout this stage rather than allowing loose materials to collect around the property.
    4. Check and repair the roof deck. Once the old covering is removed, the exposed deck is examined for rot, water damage, weakened panels, gaps, and unsuitable fasteners. Any necessary repairs should be addressed before the new roof system is covered. Skipping this step can leave a structural problem beneath an attractive new surface. The deck must provide a stable base for the underlayment and shingles.
    5. Install underlayment and flashing. The crew installs the specified underlayment across the prepared deck, along with ice and water protection where the roof design and local conditions call for it. Flashing is placed or replaced around chimneys, walls, valleys, skylights, vents, and other transitions where water could collect or move beneath the shingles. Careful overlaps and secure fastening help these layers work as a system.
    6. Install the shingles or other roof covering. Shingles are laid in the manufacturer’s required pattern and fastened in the correct locations. Courses must remain aligned, and details at valleys, eaves, rakes, penetrations, and roof edges need special attention. The installation technique matters because research has found that roofing assembly performance is strongly influenced by design, installation methods, and environmental conditions. Material guidance should be followed rather than improvised in the field.
    7. Complete ventilation, ridge, and edge details. The crew finishes ridge caps, vents, drip edges, pipe boots, and other roof accessories. Ventilation should be coordinated with intake openings so the attic can exchange air appropriately without creating unintended paths for moisture. The EPA’s ventilation guidance connects effective ventilation with acceptable indoor air quality, while proper roof ventilation also supports the long-term condition of the roof structure.
    8. Inspect the finished work and clean the property. A final review checks exposed fasteners, flashing, alignment, roof penetrations, ridge details, gutters, and visible areas around the home. The crew should use magnetic tools or comparable methods to collect stray fasteners and remove roofing debris from the ground. Before the project is considered complete, the homeowner should receive an explanation of the finished system, maintenance considerations, and any items that require follow-up. A typical professional roof replacement takes one to three days, depending on the home’s size and prevailing weather conditions, according to Referred Restoration’s customer guidance: roof replacements typically take 1-3 days depending on size and weather.

    Which Quality Details Matter Most in Minnesota?

    Minnesota roofing has to handle snow, ice, wind, freeze-thaw cycles, and fast weather changes. A quality installation is not just a finished layer of shingles. It is a coordinated roof system in which the deck, underlayment, flashing, ventilation, and fastening all work together to move water away from the home and protect the structure below.

    Start with the roof deck

    Before new roofing materials go down, the installer should inspect the roof deck for rot, soft areas, moisture damage, or other conditions that could compromise the finished system. Shingles cannot correct a weak surface underneath them. The design should account for structural integrity and the way the entire roof system will perform, not simply cover visible damage. The NRCS guidance on roofs and covers emphasizes sound design as a fundamental part of a dependable roofing system.

    Control water at vulnerable transitions

    Underlayment provides an additional layer of protection beneath the shingles, while flashing helps direct water around valleys, roof edges, chimneys, vents, and wall intersections. These transition points deserve careful attention because water can enter where two surfaces meet, even when the larger field of shingles appears intact. Ask how the contractor will handle existing flashing and whether damaged materials will be replaced rather than covered. For more detail on how installation quality connects to leak prevention, read about proper roof installation techniques.

    Balance ventilation and fastening

    Attic ventilation helps manage moisture and heat within the roof assembly. It should be planned as part of the system, with intake and exhaust working together instead of relying on a single vent type. The EPA identifies ventilation as important for acceptable indoor air quality, and the roof assembly also benefits from thoughtful moisture management. You can review the EPA ventilation guidance for the broader principles behind effective ventilation.

    Fastening is another detail homeowners can ask about. Correct nail placement, adequate penetration, and a pattern suited to the selected material help shingles remain secure during Minnesota wind. Research on roofing assemblies likewise finds that performance depends heavily on design, installation technique, and environmental conditions, rather than material choice alone. See the published research on roofing assembly performance for that technical context.

    Plan around Minnesota weather

    Weather planning matters before and during the work. A professional crew should account for precipitation, wind, temperature, and the need to keep the roof protected if conditions change. Ask how materials will be staged, how exposed areas will be covered at the end of each workday, and how cleanup will be handled. These practical details reveal whether the installation plan is built for Minnesota conditions instead of treated as a one-size-fits-all job.

    How Do You Choose Roofing Materials for Minnesota Weather?

    Minnesota roofing materials need to match more than a home’s appearance. Seasonal temperature swings, heavy snow, hail, wind, and summer sun all affect how a roof performs. During a roofing installation, the right choice depends on the roof’s slope, existing structure, ventilation, exposure, and the homeowner’s long-term plans. A material that works well on one Rogers home may not be the best fit for another.

    Asphalt shingles remain a practical choice for many Minnesota homes. They offer a familiar appearance, broad color selection, and a proven installation process. According to Referred Restoration’s service guidance, asphalt shingles typically last 20 to 30 years when properly selected and installed. Explore this guide to professional roofing installation standards for more detail on what a quality shingle project should include.

    Metal roofing is another option to discuss, especially when durability and a longer service life are priorities. Metal systems can remain functional for 40 years or longer, but the material still requires careful detailing around penetrations, edges, valleys, and flashing. A professional should evaluate how the system will handle snow shedding and water movement on the specific roof rather than treating metal as a universal solution.

    Roofing material considerations for Minnesota homes
    MaterialPotential strengthsQuestions to discuss
    Asphalt shinglesVersatile appearance, established installation methods, and a typical service life of 20 to 30 yearsWhich shingle grade, ventilation plan, and flashing details suit the roof?
    Metal roofingLong service life, with many systems remaining functional for 40 years or longerHow will the design address snow, fasteners, transitions, and water drainage?
    Cool-roof shinglesDesigned to reflect more solar energy than some conventional roofing productsWill the product’s performance fit the home’s orientation, insulation, and ventilation?

    Cool-roof shingles can also be worth considering when summer heat management is part of the home’s goals. Learn more about quality roofing installation materials before choosing a product. For a direct comparison of the two most common approaches, review this resource on roofing installation expertise.

    The best decision is usually the one supported by a roof-specific inspection and a clear explanation of tradeoffs. Ask how the material fits the structure, ventilation, weather exposure, and expected service life. That conversation helps keep roofing installation focused on sound performance rather than a product label alone.

    What Should Homeowners Expect on Installation Day?

    Installation day should feel organized, not mysterious. Before work begins, the crew should confirm the day’s plan, identify access points, and explain how materials, equipment, and debris will move around your property. Ask who your primary contact is if weather or an unexpected condition changes the schedule. A typical roof replacement takes one to three days, depending on the home’s size and prevailing weather conditions, so the crew should communicate whether the current forecast supports starting and how they will handle a delay.

    Communication and protection come first

    A professional crew protects more than the roof. Workers should use designated paths for carrying materials and take reasonable steps to protect landscaping, siding, windows, driveways, and nearby outdoor items. You may see tarps, ground protection, magnetic sweeps, and carefully placed staging areas. These measures do not eliminate every piece of debris during active work, but they show that the crew is managing the site rather than treating cleanup as an afterthought.

    Material handling should also be deliberate. Shingles, underlayment, flashing, and other components need to arrive in good condition and be stored where they will not block entrances or damage the property. If the crew discovers damaged decking, inadequate ventilation, or another condition that affects the installation, the contractor should document it and explain the available next step before proceeding. A sound roofing system depends on sound design and structure, not just the visible roof covering.

    Weather awareness matters in Minnesota

    Roofing work is exposed to wind, rain, temperature changes, and rapidly shifting Minnesota conditions. The crew should monitor the forecast and keep vulnerable areas protected if work is interrupted. Homeowners should not feel pressured to continue simply because materials are already on site. A careful contractor explains what can be completed safely, what must wait, and how the home will be secured overnight when necessary.

    Storm damage may add documentation and inspection steps to the process. Referred Restoration provides assistance with insurance claims related to weather damage, but homeowners should still review coverage decisions directly with their insurance company. For a broader look at coordinating repairs after a storm, see this guide to an expert roof installation contractor.

    Cleanup should be part of the plan

    At the end of each workday, the crew should remove loose materials, secure the site, and leave walkways reasonably clear. Final cleanup should include a ground inspection for nails and scraps, removal of protective coverings, and a walkthrough of the completed work. If you notice debris, damaged property, or an unanswered question, raise it before the crew leaves so it can be documented and addressed promptly.

    How Can You Check a Finished Roofing Installation?

    A final walkthrough should help you understand what was installed and how the roof was left. You do not need to climb onto the roof to evaluate the work. In fact, staying on the ground is safer. Ask the contractor to show you key details from a safe location and explain anything that is not visible from the yard.

    Use this checklist during the review:

    • Look at the roof lines from the ground. Shingle courses should appear straight and consistent. Uneven lines, lifted edges, or visibly damaged materials deserve a question before the crew leaves.
    • Check visible flashing and penetrations. Areas around chimneys, plumbing vents, walls, and valleys should look finished and integrated with the roof covering. Ask what was replaced, repaired, or retained.
    • Ask about ventilation. A roofing system needs appropriate airflow for the home and roof design. The contractor should be able to explain the ventilation approach without dismissing the question.
    • Review the attic when it is safe to do so. Look for new dampness, daylight where it should not be visible, or signs that airflow was blocked. A professional can help distinguish an installation issue from an older condition.
    • Walk the property for cleanup. Check garden beds, driveways, walkways, and areas below the eaves for loose debris or fasteners. Crews should use reasonable protection during the work and leave the site orderly.
    • Collect the project information. Keep the material details, care guidance, inspection notes, and contact information together. Ask who to call if you notice a concern after the first rain or strong wind.

    It is also reasonable to ask how the contractor handled unexpected conditions. If damaged decking, hidden moisture, or a flashing concern changed the plan, the explanation should be specific. Clear communication is part of a professional roofing installation because homeowners need to understand what changed and why.

    Contact Referred Restoration online to discuss your roofing installation questions before the next weather event.

    For local homeowners, Referred Restoration provides roofing services through a process built around inspection, a custom solution, and professional installation. The right next step depends on the roof’s condition, the home’s design, and the weather exposure. A conversation should clarify those factors rather than pressure you into a decision.

    Frequently Asked Questions

    What are the main steps in installing a roof?

    A professional project typically starts with an inspection and plan, followed by preparation of the work area, removal of unsuitable materials, deck and structure checks, underlayment and flashing installation, and careful placement of the roofing material. The final stage includes ventilation details, cleanup, and a quality review.

    How long does a roof replacement take?

    Many residential roof replacements take one to three days, but the schedule depends on the home’s size and weather conditions. Rain, wind, concealed damage, complex roof sections, or additional ventilation work can extend the timeline. Your contractor should explain the expected sequence before work begins. (Source: Referred Restoration.)

    What should I look for in a quality roofing installation?

    Look for straight, consistent material placement, properly finished edges and penetrations, secure flashing around roof openings, clear ventilation planning, and a clean site after completion. Ask how the contractor inspected the roof deck and how the finished work will be checked, rather than judging quality by appearance alone.

    Can shingles be installed over an existing roof?

    Sometimes, but the answer depends on the existing roof’s condition, the number of layers, local requirements, and whether the deck and flashing can be properly evaluated. A professional inspection should determine whether an overlay is appropriate or whether removal is needed for a sound installation.

    How does roof ventilation affect the finished system?

    Ventilation helps manage moisture and heat in the roof assembly and supports indoor air quality. It should be planned with the attic layout, insulation, intake openings, and exhaust system in mind. A contractor should explain how those components work together, not treat ventilation as an afterthought. (Source: EPA guidance.)

    Ready to Discuss Your Roofing Installation?

    A professional inspection can help you understand your roof’s current condition, the work it may need, and the next practical step for your Minnesota home. Referred Restoration can review your roofing installation needs and explain the process in clear terms.

    Contact Referred Restoration online to ask about an inspection and next steps, or call (763) 726-4245.

  • How to Find a Roof Leak From the Inside Safely

    How to Find a Roof Leak From the Inside Safely

    A ceiling stain can make a roof problem feel mysterious, but the visible mark is often only the end of the water’s journey. Start inside the house, where you can look for patterns without climbing onto a wet or steep roof.

    Homeowner inspecting roof leak clues from a safe attic access point

    To learn how to find a roof leak from the inside, note the location of stains or damp drywall. Then inspect the attic with a flashlight for wet insulation, dark or glistening wood, water trails, or daylight. Trace moisture along rafters and roof decking, because the entry point may be uphill from the ceiling mark. If water is active, near electrical components, or accompanied by a bulging ceiling, protect people and belongings and arrange professional help rather than taking roof-level risks.

    Contact Referred Restoration online if you need help evaluating the warning signs. Call (763) 726-4245 to discuss what you found.

    A careful interior check can narrow the likely source, but it cannot always confirm which roof feature failed. The first clues are usually found in the rooms below, where changes in the ceiling and walls reveal whether the problem needs immediate attention.

    What Are the First Signs of a Roof Leak Inside the House?

    The earliest clue is often a change in a ceiling or wall, not a visible hole in the roof. Watch for a brown, yellow, or otherwise discolored ceiling stain, especially after rain or melting snow. A stain may remain after the surface dries, but it still indicates that moisture has reached the interior at some point. Take a photo and note when you noticed it and whether weather conditions changed.

    Look beyond a single water stain

    Damp drywall may feel soft, swollen, or cool compared with the surrounding surface. Paint can bubble, blister, crack, or peel as moisture collects behind it. You may also see a small sag or bulge in the ceiling. These changes can grow even when no water is actively dripping, so a dry surface does not necessarily mean the leak has stopped.

    Active drips are easier to recognize, but they should be treated as an immediate problem. Place a container under the drip if you can do so safely, and move furniture, electronics, and other belongings away from the area. Do not press on a bulging ceiling or puncture it yourself. A water-filled section of drywall can release suddenly and spread debris or water.

    Pay attention to odor and hidden moisture

    A musty smell, darkened drywall, or moldy-looking area can point to ongoing or previous moisture. Mold-like growth is not proof of the leak’s location, because water can move through building materials before it becomes visible. Check nearby ceilings, walls, trim, and insulation from a safe position. Avoid disturbing a questionable area unnecessarily. If possible mold is present, use appropriate protective measures and arrange a professional assessment rather than relying on appearance alone.

    Use extra caution around electrical fixtures

    Water near a ceiling light, fan, outlet, switch, or visible wiring creates an electrical safety concern. Do not touch wet fixtures, wiring, or switches with wet hands. If you can reach the correct circuit breaker without stepping through water or entering an unsafe area. Turn off power to the affected circuit and contact a qualified electrician. Keep people away from the area until it has been assessed.

    These signs can help you document a problem and begin how to find a roof leak from the inside, but they cannot always identify the roof entry point. Water may appear far from where it first entered, and an unclear or active leak warrants a qualified inspection.

    How to Find a Roof Leak From the Inside in the Attic

    An attic inspection can help you narrow down a leak without removing shingles or stepping onto the roof. The safest approach is to inspect from a stable attic access point, particularly during or shortly after rain, when fresh moisture is easier to identify. Use this process to gather useful evidence, not to replace a professional roof inspection.

    1. Choose a safe time and prepare your equipment. Inspect during or just after rainfall if the attic can be reached safely. Bring a bright flashlight, your phone or camera, and a marker. Wear shoes with good traction and clothing that protects your skin. Do not enter if the attic floor is incomplete or unstable, the space is too tight to move safely, or water is near electrical wiring, fixtures, or equipment. Never climb onto a wet, icy, steep, or otherwise unsafe roof to continue the investigation.
    2. Use the flashlight to scan the underside of the roof deck. Start at the area above the ceiling stain or drip, then widen your view. Shine the light across the underside of the roof deck, rafters, and framing rather than looking only straight ahead. Water damage may appear as dark stains, glossy or glistening wood, white mineral deposits, or an active drip. A leak may be small or intermittent, so a dry surface does not prove that the roof is sound.
    3. Check the insulation without disturbing it unnecessarily. Look across the top of the insulation for wet, matted, compressed, or discolored patches. Damp insulation can point to a leak even when the roof decking looks dry. Avoid pulling apart large areas or handling material that may contain mold. If you see visible mold or extensive moisture, leave the area and arrange a professional assessment rather than spreading debris or exposing yourself to contaminants.
    4. Turn off the attic light and look for daylight. With your flashlight briefly off, inspect the roof deck for pinpoints of daylight. Daylight can indicate a gap or opening, but not every visible point means rain is entering there. Ventilation openings and designed roof features may also allow light. Note the location and compare it with stains, damp insulation, or water trails before drawing a conclusion.
    5. Trace wet marks toward the highest visible point. Follow stained wood, damp framing, or the path of a drip upward along the roof slope. Water can move along rafters, joists, or sheathing before it reaches the ceiling, so the wettest spot may not sit directly above the interior stain. Stop when the trail becomes dry and note whether the area lines up with a vent, chimney, skylight, valley, or pipe penetration. The attic can identify a general area, but it may not prove the exterior entry point.
    6. Mark and photograph what you find. Take clear photos of stains, wet insulation, dark or glistening wood, daylight, and active drips. Include a wider photo showing the location within the attic, then mark the suspected area only if doing so does not require reaching across an unsafe surface. Record whether the evidence appeared during rain, after rain, or when the attic was dry. These details help a roofer compare the interior findings with the roof surface and determine the next step.

    If you cannot move through the attic safely or the source remains unclear, stop there. An interior inspection is useful for documenting symptoms, but forcing access or testing the roof yourself can increase the risk of injury and additional damage.

    How Do You Trace Water From a Ceiling Stain to the Roof?

    The visible stain is a clue, not a map. Water can enter at one point on the roof, then move along rafters, joists, roof sheathing, insulation, or other framing before it reaches the ceiling. That is why learning how to find a roof leak from the inside often requires tracing the moisture uphill instead of inspecting only the area directly above the stain.

    Start by documenting what you can see from inside the home. Photograph the stain from several angles, and note whether it is discolored, damp, bubbling, or actively dripping. If the area is growing, mark the outer edge lightly with a pencil and add the date. This gives you a simple way to tell whether the damage is spreading after the next storm.

    Follow the trail uphill

    If attic access is safe, use a flashlight and inspect the ceiling area above the stain. Look for damp insulation, darkened wood, water droplets, staining, or a glossy trail on the underside of the roof deck. Then follow each visible mark upward toward the roof peak. Check both sides of nearby rafters and the top edges of joists, because water may change direction when it meets a framing member.

    Do not assume the first damp spot is the entry point. A dry trail also does not prove that the roof is sound. Water may have entered during an earlier rainfall and dried before you inspected it. Or the leak may occur only when wind-driven rain reaches a particular flashing, penetration, or shingle area. The Virginia Cooperative Extension explains that identifying a leak can require following how water moves through the roof system, rather than looking only directly above the interior damage: see its roof maintenance guidance.

    Mark and photograph each clue

    As you trace the path, photograph the suspected route and mark the approximate location of damp or stained framing. Record the distance from a fixed reference, such as an attic access opening, vent, chimney, or exterior wall. These notes help a roofing professional compare the interior evidence with roof features above it.

    Keep the inspection limited to areas you can reach safely from a stable attic surface. Do not step on drywall or ceiling surfaces, and do not climb onto a wet, icy, steep, or otherwise unsafe roof. If the trail is unclear, the ceiling is bulging, water is near electrical equipment, or active leaking continues, stop the inspection and arrange a qualified assessment.

    Which Roof Features Should You Check From Inside?

    Once you find a ceiling stain or damp area in the attic, look for the roof feature that lines up with the water path. The visible mark may be several feet away from the actual entry point because water can travel along sheathing, rafters, and other framing before it reaches the interior. That is why learning how to find a roof leak from the inside is useful for narrowing the search, but not for proving the repair.

    Many roof leaks are flashing leaks rather than failures in the roofing material itself, according to Virginia Tech Extension guidance. Use the comparison below as a set of clues. Inspect only from a stable, safe interior location, and do not climb onto a wet or steep roof to confirm what you see.

    Inside clueLikely exterior featureWhat to consider
    Darkened wood, damp insulation, or staining near a roof intersectionFlashing around a wall, dormer, or roof penetrationFailed or displaced flashing can let water enter even when shingles look intact.
    Moisture or staining near a small pipe opening through the roofPlumbing vent boot or vent flashingThe rubber boot, metal flashing, or seal around the pipe may have deteriorated.
    Water marks near the chimney side or framing around the chimneyChimney flashing, counterflashing, or masonry jointWater may enter along the uphill side and travel before becoming visible.
    Staining or dampness beneath a roof windowSkylight flashing, seal, or surrounding roof materialCheck the corners and the framing around the opening, not just the center of the stain.
    Wet insulation or streaks below a roof slope junction, especially after winter weatherRoof valley or ice dam areaSnow and ice can redirect meltwater beneath roofing materials. Review ice dam prevention for Minnesota-specific context.
    Staining along the upper edge of an interior wall or near a sloped ceilingRoof-to-wall transition or step flashingWater can move sideways along framing, so the wall location does not identify the exact entry point.

    Record the location, direction of any streaks, and whether the area is wet, discolored, or actively dripping. Take photos before the area dries, then compare the timing with rain, snowmelt, or wind-driven weather. These observations help a roofer test the right exterior features instead of assuming the stain marks the source.

    Treat the table as diagnostic guidance, not a definitive diagnosis. Condensation, plumbing leaks, and ice-related moisture can resemble roof leaks. If the source remains unclear, damage is spreading, or water is near electrical fixtures, stop the inspection and arrange a qualified assessment.

    What Can You Do Safely Before a Roofer Arrives?

    Once you see signs of a leak, focus on limiting damage and gathering useful information. Interior steps can help you understand how to find a roof leak from the inside. But they should not put you near live electrical components, unstable ceilings, mold-contaminated materials, or a dangerous roof surface.

    1. Contain water without putting yourself in danger. Place a bucket or other stable container beneath an active drip, and use towels to control splashes on finished surfaces. If the ceiling is bulging, do not stand directly underneath it or puncture it. A water-filled ceiling may release suddenly, and the drywall could be heavier or less stable than it appears.
    2. Move furniture and protect belongings. Relocate furniture, electronics, rugs, and other vulnerable items away from the affected area. Cover items that cannot be moved with plastic, while leaving enough space for a professional to inspect the ceiling and surrounding surfaces. Do not seal damp materials so tightly that trapped moisture cannot escape.
    3. Stay away from electrical hazards. If water is near a light fixture, outlet, switch, appliance, or visible wiring, do not touch the wet area or electrical equipment. Keep children and pets away. If it is safe to do so from a dry location, shut off power to the affected circuit. Otherwise, contact a qualified electrician or emergency service rather than attempting to investigate.
    4. Photograph and record what you find. Take wide photos showing the room and close photos of stains, peeling or bubbling paint, damp drywall, drips, and any attic observations. Note when you first noticed the problem, whether it worsens during rain or snowmelt, and where water appears. A visible stain may not sit directly below the roof entry point because water can travel along framing before reaching the interior. As the Virginia Cooperative Extension explains in its guidance on roof leaks: water may follow a path before appearing inside.
    5. Use care around possible mold. Avoid disturbing or brushing mold-like growth, saturated insulation, or crumbling drywall. If you choose to inspect a small, accessible area, use appropriate safety gear recommended for possible mold exposure. The University of Georgia checklist, which incorporates EPA safety guidance, recommends appropriate protective equipment when investigating possible mold: review the mold and moisture inspection safety guidance. Stop if the area is extensive, strongly odorous, or causing irritation.
    6. Do not climb onto the roof. Wet shingles, ice, steep slopes, and storm debris can make a roof unsafe. Do not use a ladder to reach a suspected leak area during active weather. Keep your inspection to dry, accessible interior spaces, and tell the roofer what you observed, including any suspected location near a vent, chimney, skylight, or wall intersection.

    Contact Referred Restoration online or call (763) 726-4245 to discuss what you found.

    When Is a Roof Leak an Emergency?

    A roof leak needs prompt attention when water is actively entering the home, damage is spreading, or the leak creates a safety risk. You can often observe conditions from a dry, stable area inside the house. But you should not climb onto a wet roof or enter an unsafe attic to investigate. Interior observations can help document the problem, but they cannot make exterior repairs safe.

    Signs that call for immediate caution

    • Water is near electricity. If water is dripping from a light fixture, ceiling fan, outlet, or electrical panel, keep clear of the area. Do not touch wet switches or fixtures. If you can safely reach the appropriate breaker without stepping through water, turn off power to the affected circuit and contact a qualified professional.
    • The ceiling is bulging. A sagging or swollen section of drywall may be holding water. Keep people and furnishings away from it, and do not puncture the bubble. The ceiling can fail without much warning.
    • Damage is spreading. Fast-growing stains, active dripping, damp insulation, or water moving down a wall indicate that the problem is not limited to an old cosmetic mark. Use containers to catch drips only when you can do so without standing beneath an unstable ceiling.
    • A storm has damaged the roof. Missing shingles, fallen branches, hail impact, or other visible storm damage can allow more water in during the next rain. Observe from the ground or through a window. Do not climb up to confirm the damage.
    • The attic is unsafe. Stop investigating if the space has standing water, unstable flooring, exposed wiring, heavy mold growth, poor visibility, or signs of structural damage. Wear appropriate protective equipment around suspected mold, but protective equipment does not make an unstable area safe.

    Know when to stop looking

    Stop an interior inspection if you must walk on ceiling drywall, move across questionable framing. Work near live electrical components, or reach into an area you cannot see clearly. Leave exterior inspection and repair to a qualified roofing professional, especially during rain, wind, ice, or other hazardous conditions. If the source is unclear, photographs of the stain, ceiling bulge, attic conditions, and visible exterior damage can help with the assessment.

    Keep a record of when the leak began and what was affected. The roof insurance claim process article explains why organized documentation can be useful when discussing storm damage with your insurer. For repair-focused next steps after the immediate hazard is controlled, see the guide to roof shingles leak repair.

    Frequently Asked Questions

    How do I find a roof leak from the inside without removing shingles?

    Start with the attic if it is safe to enter. Use a flashlight to inspect the underside of the roof deck, rafters, insulation, and areas around vents or other penetrations. Look for damp or dark wood, wet insulation, water trails, glistening surfaces, or daylight. If you cannot enter safely, inspect ceiling stains and other interior signs from below and arrange a professional assessment.

    Can I trace a roof leak to its source from the attic?

    Often, but not always. Water can travel along roof sheathing, rafters, or other framing before it reaches the ceiling, so the entry point may be uphill or offset from the visible stain. Trace the damp path upward, then compare it with nearby flashing, vents, valleys, chimneys, and pipe penetrations. Water travel can make an interior stain misleading, as described by Virginia Cooperative Extension: roof leak tracing guidance.

    What should I look for in an attic during a rainstorm?

    Watch for active drips, wet or glistening wood, fresh water trails, damp insulation, and areas where water collects around a penetration. Use a flashlight and stay on stable attic flooring or framing designed for foot traffic. Do not touch wet electrical components, and leave the area if conditions become unsafe.

    Is it safe to inspect a roof leak from the inside by myself?

    A limited interior inspection may be reasonable when the attic is dry, accessible, and structurally safe. But do not climb onto the roof, walk on wet surfaces, or investigate near exposed wiring. If you see mold or extensive moisture, use appropriate safety gear; University of Georgia guidance recommends protective equipment when inspecting possible mold growth: mold and moisture inspection checklist. Stop and call a qualified professional if the source is unclear or damage is active.

    Contact Referred Restoration for the Next Safe Step

    If the leak source remains unclear, or water is still entering the home, an experienced evaluation can help clarify what to do next without unsafe roof access. Contact Referred Restoration online to discuss the signs you found and plan a safe response. You can also call (763) 726-4245 if speaking with the team is more convenient.