Author: Miguel Beltra

  • How Many Shingles in a Bundle? A Homeowner Guide

    How Many Shingles in a Bundle? A Homeowner Guide

    Counting shingles by the piece can be misleading because a bundle is packaged by coverage, not by one universal number of shingles. Different products vary in size, thickness, design, exposure, and manufacturer packaging, so two bundles may contain different counts while covering similar areas.
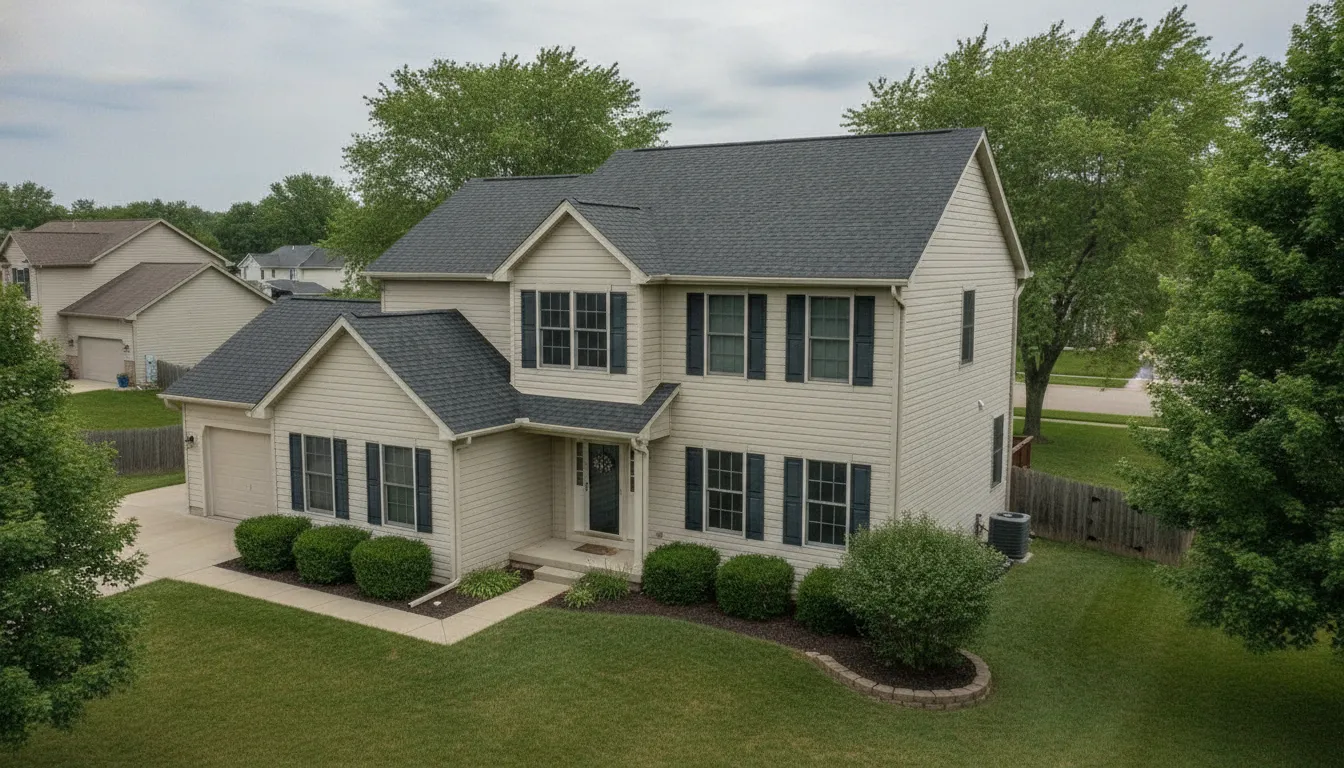
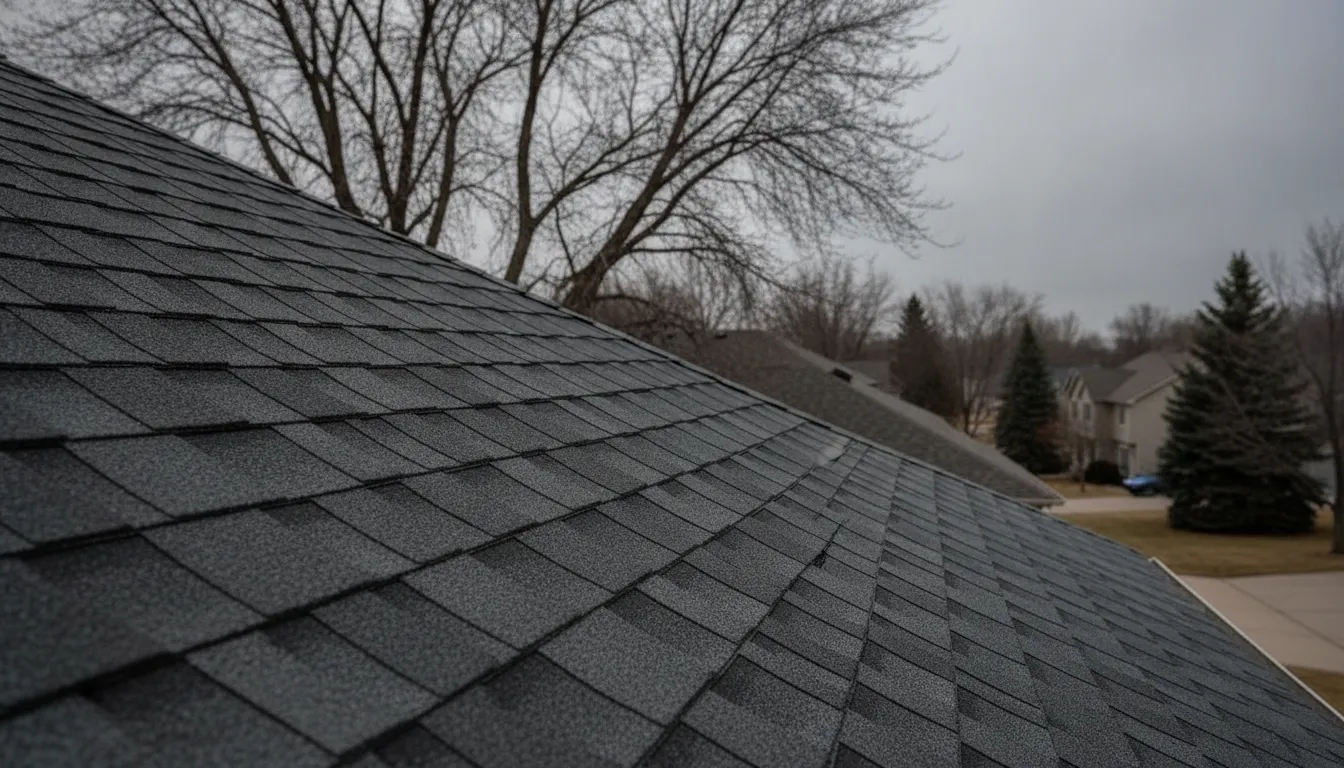
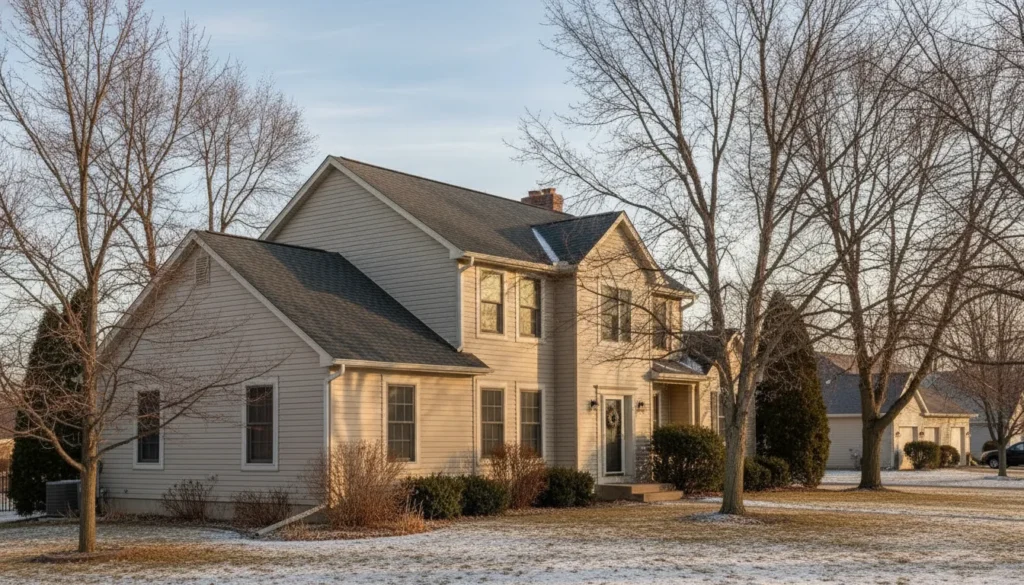
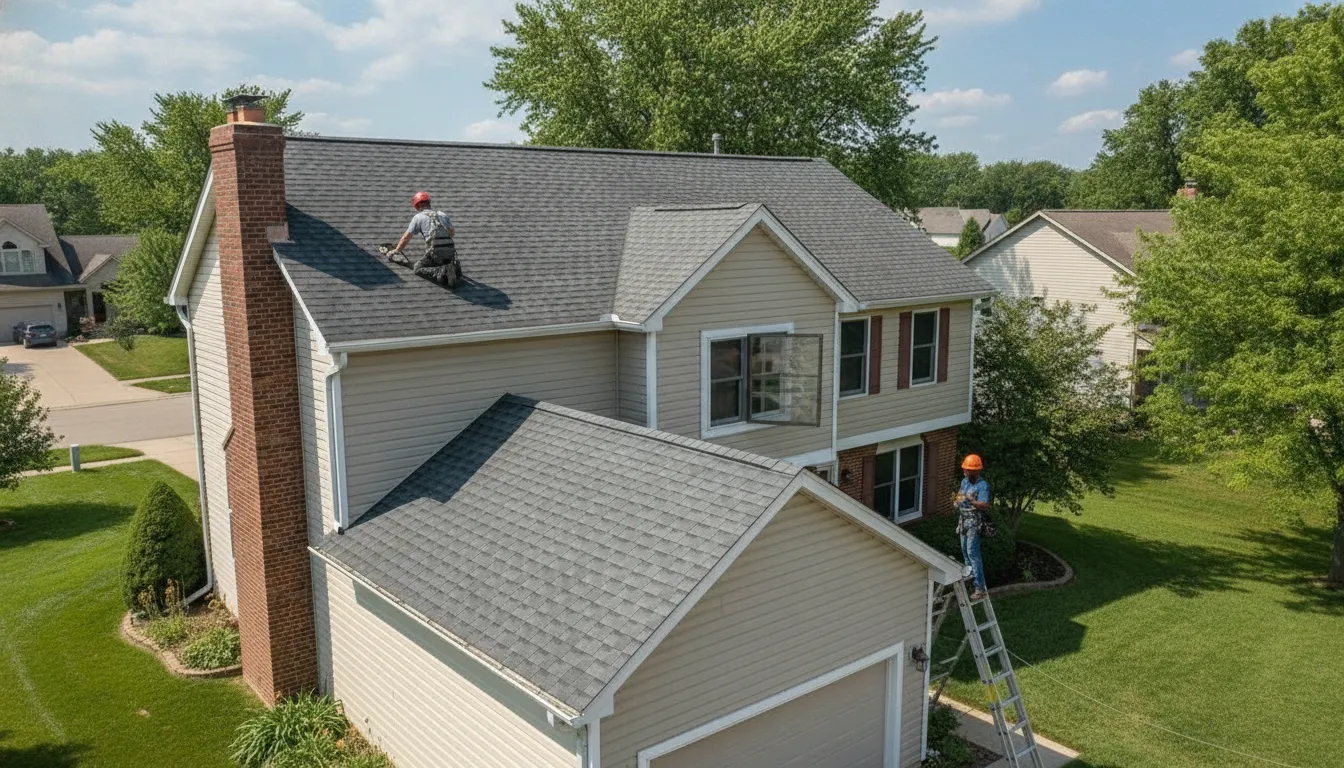
    Minnesota home with asphalt shingle roof

    In general, how many shingles in a bundle depends on the product line. Many standard asphalt shingle bundles cover about 33 square feet, or roughly one-third of a roofing square, but specialty products may cover less. Check the bundle label and manufacturer specifications instead of relying on piece count alone.

    That distinction matters when you are planning materials for a repair or replacement. Roof pitch, valleys, hips, ridges, starter materials, cuts, and waste can all change the total needed. The first step is understanding what the bundle actually covers and how that coverage applies to your roof.

    Contact Referred Restoration online for a roof inspection or honest assessment.

    How Many Shingles Are in a Bundle?

    There is no universal answer to how many shingles are in a bundle. As a practical estimate, a bundle of 3-tab shingles often contains about 26 to 29 pieces, while an architectural bundle commonly contains about 20 to 22. Luxury shingles may contain only 10 to 16 pieces, and wood or cedar shingles may contain roughly 200 to 400 pieces. Those ranges vary by manufacturer, product dimensions, thickness, and exposure, so the count on its own is not a reliable way to compare products.

    Three-tab shingles usually have a more uniform shape and a relatively high piece count. Architectural shingles are thicker and heavier, so fewer pieces may fit within a package. Luxury products use even more material per piece and may be packaged with fewer shingles. Wood and cedar products are a separate category altogether. Their smaller individual pieces and different installation exposure explain why one bundle can contain hundreds of pieces while covering only about 25 to 35 square feet. These typical ranges are summarized in roofing guides from Quality Exteriors and Clear Choice Roofing.

    Coverage matters more than piece count

    When planning materials, check the bundle’s stated coverage before counting individual shingles. A roofing square represents 100 square feet, and many standard asphalt or architectural products cover approximately one-third of a square per bundle, or about 33 square feet. IKO notes that its listed coverage values are approximate and that specialty shingles can cover less area per bundle because their heavier construction affects packaging. For example, some specialty products are listed at 25 or 20 square feet per bundle, which changes how many bundles are needed for the same roof area.

    This is why two packages with different piece counts can still cover similar areas, or why a package with more pieces may cover less. Manufacturer packaging is designed around the product’s dimensions, usable exposure, weight, and installation pattern. The bundle label and the manufacturer’s installation specifications are more useful than a general online range. IKO’s explanation of bundle counts and coverage provides the relevant comparison: shingle coverage depends on the specific product.

    For a Minnesota roof, the final material estimate also needs to account for the roof’s shape, pitch, valleys, hips, ridges, starter courses, and cutting waste. A piece count can answer a general question, but it cannot replace the product label or a measurement of the actual roof surface.

    Why Does the Number of Shingles in a Bundle Vary?

    There is no universal answer to how many shingles in a bundle because manufacturers package products according to more than piece count. The bundle has to represent a practical amount of material to handle, transport, and install, while also matching the coverage promised for that product line. As a result, two bundles can contain different numbers of shingles and still cover similar areas. In other cases, a specialty product may contain fewer pieces and cover less area.

    Shingle dimensions are one reason. A longer or wider shingle can cover more roof surface with each piece. Thickness matters, too. Heavier, thicker products occupy more space and weight within the package, so the manufacturer may include fewer pieces. IKO notes that specialty shingles with heavier construction can be packaged for approximately 20 square feet of coverage per bundle, compared with product lines listed at approximately 33.3 square feet per bundle. Those figures are approximate and apply to the listed products, not every shingle on the market.

    Style changes the calculation as well. Three-tab, architectural, and specialty shingles do not necessarily have the same dimensions, profile, or installation exposure. Exposure is the portion of a shingle that remains visible after the courses above it overlap. A larger exposure can allow each installed piece to contribute more visible coverage, while a smaller exposure uses more material over the same roof area. Roof design, starter courses, cuts, and other installation details can also affect the material required, even when the bundle label looks straightforward.

    Bundle factors
    FactorEffect
    DimensionsLarger pieces may cover more area
    Thickness and weightHeavier products may contain fewer pieces
    Style and exposureInstallation coverage varies
    Product lineLabel coverage beats piece count

    That is why comparing bundles by counting pieces can produce a misleading result. IKO gives the example that one brand might package 20 shingles while another packages 26, yet the first bundle could cover more area. Before choosing materials, check the exact coverage listed on the package and follow the manufacturer’s installation instructions. For a closer look at shingle options for Minnesota homes, review the product-selection factors that go beyond bundle count.

    How Much Roof Area Does a Bundle Cover?

    Roofing coverage is usually discussed in terms of a square. One roofing square equals 100 square feet of actual roof area, not 100 square feet of the home’s horizontal footprint. For many standard asphalt shingle products, a bundle covers approximately 33 square feet, so about three bundles typically cover one square. That is a useful industry reference point, but it is not a universal rule for every product. IKO identifies its coverage values as approximate, and the package label for the specific shingle should take priority.

    The phrase “how many shingles in a bundle” can be misleading when you are trying to estimate coverage. Two packages may contain different numbers of individual shingles while covering a similar area, or one may cover less. Shingle dimensions, thickness, exposure, style, roof design, and manufacturer packaging all affect the result. Coverage area is therefore more useful than piece count when comparing products or planning materials.

    Standard architectural and performance shingle lines may cover about one-third of a square per bundle. For example, IKO lists several products at approximately 33.3 square feet per bundle, or three bundles per square, and describes its Cambridge, Dynasty, and Nordic lines as covering a full third of a square per bundle. See the manufacturer’s coverage information for the product you are considering: IKO’s shingle bundle and coverage guide.

    Specialty products can require more bundles for the same roof area. Heavier construction may reduce the coverage packed into each bundle. IKO lists Crowne Slate at approximately 25 square feet per bundle, or four bundles per square, and Armourshake at approximately 20 square feet per bundle, or five bundles per square. These examples show why simply multiplying a roof’s estimated squares by three can be wrong for specialty materials. Wood and cedar products can also have different coverage ranges based on their size and thickness.

    Roof shape adds another important limitation. A 1,000-square-foot horizontal footprint does not necessarily represent 1,000 square feet of shingles. Roof pitch increases the sloped surface area, so a steep roof over the same footprint needs more material than a low-slope roof. Valleys, hips, ridges, dormers, starter courses, and cuts also affect the final quantity. Waste and extra material should be considered, but a fixed allowance should not be assumed without reviewing the roof design and installation requirements.

    Use bundle coverage as a way to understand the terminology, not as a precise homeowner calculator. The most reliable estimate comes from measuring the actual roof planes, applying the correct pitch and design considerations, and checking the manufacturer’s specifications for the selected product.

    Can You Estimate Bundles From Roof Size Alone?

    Not reliably. A rough measurement of the home’s footprint can provide a starting point, but it does not show the complete surface that shingles must cover. Roof pitch increases the actual area compared with the horizontal footprint. A steep roof over a given floor plan needs more material than a lower-slope roof over the same footprint. Shingle bundle counts also vary by product dimensions, exposure, roof design, and manufacturer packaging, so a piece count is not a dependable substitute for coverage information.

    The roof’s shape matters just as much. Valleys and hips create additional cuts, while dormers, ridges, and changes in roof plane add details that are easy to miss from ground-level measurements. Starter courses and ridge materials may be packaged separately from the field shingles. Some pieces will also be trimmed around penetrations, walls, and edges. Those offcuts are part of a realistic material plan, not an error in the estimate.

    A high-level estimating process looks like this:

    1. Measure the roof planes. Start with each section’s length and width, then account for the slope rather than treating the horizontal footprint as the final roof area. Pitch conversion factors can be used as an estimating aid, but the result remains an approximation.
    2. Convert the adjusted area into roofing squares. One roofing square represents 100 square feet of roof area. This gives a useful common measurement, but it does not yet tell you how many bundles to order because coverage varies between products.
    3. Check the exact product specifications. Read the bundle label or manufacturer’s installation information for coverage per bundle, required exposure, and accessory requirements. Two packages with different piece counts may cover similar areas, or a package with more pieces may cover less.
    4. Account for roof details and waste. Add material for valleys, hips, ridges, starter courses, cuts, and unavoidable waste. Complex designs with dormers or multiple valleys generally require more planning than a simple gable roof. Do not apply a generic waste percentage without considering the actual design.
    5. Compare the estimate with the roof’s condition. A measurement cannot identify damaged decking, concealed moisture, flashing concerns, or an underlying repair need. If the roof is aging, leaking, or storm-damaged, an inspection is more useful than ordering bundles from a rough calculation.

    For a clearer view of how shingles, underlayment, flashing, ventilation, and other components work together, review this guide to residential roofing system layers. It helps put the bundle estimate in context: shingles are one part of a complete roofing system, and accurate material planning should account for all of them.

    When Should a Homeowner Get a Professional Roof Assessment?

    A professional assessment is worthwhile when a homeowner sees a leak, missing or damaged shingles, visible storm damage, aging roofing materials, or simply cannot tell whether the roof is still performing as it should. A bundle count can help explain material coverage, but it cannot show whether water has reached the underlayment, decking, insulation, or interior of the home.

    After hail or high winds, look for displaced, cracked, bruised, or missing shingles, but do not climb onto the roof to investigate. Damage is not always obvious from the ground, and a safe inspection can also review flashing, valleys, roof edges, and other areas where water may enter. Minnesota roofs face freezing winters, heavy precipitation, snow, ice, and hail. The University of Minnesota Extension identifies snow, ice, wind, and hail among the conditions homeowners should plan for.

    When a repair may be enough

    A repair can be appropriate when the damage is limited and the surrounding roofing system remains sound. Examples may include a small area of missing shingles, a localized leak, or visible storm damage that has not affected broad sections of the roof. The right repair depends on the source of the problem, the condition of adjacent materials, and whether water has traveled beyond the visible spot. Prompt attention matters because a small opening can expose the roof system to additional moisture.

    When replacement deserves consideration

    Replacement becomes more likely when the roof is aged, severely damaged, repeatedly failing, or no longer has enough sound material for dependable repairs. Asphalt shingle roofs are often described as lasting 20 to 30 years, but that is a general material statement, not a guarantee for every home. Installation quality, ventilation, weather exposure, maintenance, and the condition of the underlying roof system all affect service life.

    An assessment should explain what was observed and why the recommendation is repair or replacement. Referred Restoration offers free roof inspections, honest assessments, and expert recommendations for homeowners who need that clarity. For more detail on urgent issues, review when roof repairs are needed. A measured evaluation is more useful than choosing materials or estimating bundles before the roof’s actual condition is understood.

    What Should You Check on the Shingle Bundle Label?

    The bundle label is more useful than counting pieces when you are trying to understand how much roofing material you have. Shingle counts vary by product type, dimensions, exposure, roof design, and manufacturer packaging. Before comparing bundles or planning materials, use this checklist.

    1. Product name and style

    Confirm the manufacturer, product line, and style. A three-tab shingle, architectural shingle, and specialty product may have very different piece counts and coverage. The product name also helps you find the correct installation instructions and warranty information. Do not assume that two bundles with similar-looking shingles are interchangeable.

    2. Coverage per bundle

    Look for the coverage area, usually shown in square feet or as a fraction of a roofing square. A roofing square equals 100 square feet of roof area. Some listed architectural products cover approximately 33.3 square feet per bundle, or one-third of a square, while specialty products can cover less. IKO notes that its coverage values are approximate, so treat the label for your specific product as the controlling reference. You can review the manufacturer-backed explanation of shingle bundles and coverage for additional context.

    3. Bundles per square

    Check whether the label states three, four, or another number of bundles per square. Three bundles per square may be common for some asphalt products, but it is not a universal rule. If you are searching for how many shingles in a bundle, remember that the piece count does not tell you the coverage by itself. One brand may include more pieces in a bundle that covers less area than another bundle with fewer pieces.

    4. Installation instructions and accessories

    Find the manufacturer installation instructions or the reference to them on the packaging. Specifications control details such as fastening, exposure, underlayment, ventilation, starter shingles, hip and ridge materials, and flashing. Ask whether those accessories are included or packaged separately. Starter courses and specialty ridge products are often not counted as standard field-shingle bundles.

    5. Lot, color, and consistency

    Compare the lot or batch information and color name across bundles. Keeping the same product, color, and lot together helps reduce visible variation on the roof. If labels do not match, pause before installation and confirm compatibility with the manufacturer or roofing professional.

    For a broader overview of sequencing, materials, and installation decisions, see this guide to professional roof installation. When the label and the roof conditions seem difficult to reconcile, manufacturer specifications and a measured roof assessment should guide the final material plan.

    Contact Referred Restoration online if you want help assessing your roof and planning the next step.

    Frequently Asked Questions

    How many shingles are in a bundle of 3-tab shingles?

    A 3-tab bundle commonly contains about 26 to 29 shingles, depending on the manufacturer. That count is only a starting point because shingle dimensions, exposure, and package coverage can differ. Check the product label and installation instructions rather than comparing piece counts alone. IKO explains how bundle counts relate to coverage.

    How many bundles of shingles are in a roofing square?

    For many standard asphalt and architectural products, three bundles cover approximately one roofing square, or 100 square feet. Some specialty products cover less per bundle, so they may require four or five bundles per square. Coverage values are approximate and should be confirmed for the exact product.

    How many shingles are in a bundle of architectural shingles?

    Architectural bundles are often listed at about 20 to 22 shingles, but the exact number varies by product line and manufacturer. Architectural shingles are shaped and built differently from 3-tab shingles, so the bundle count does not by itself show how much roof area the package covers.

    Why does the number of shingles in a bundle vary?

    Manufacturers package shingles according to the product’s size, thickness, design, weight, and intended exposure. A heavier or larger shingle may have fewer pieces in a bundle while still covering a useful amount of roof area. Use the stated square-foot coverage and bundles-per-square information for estimating materials.

    Can I calculate bundles from my home’s footprint?

    Not reliably. The sloped roof surface is larger than the home’s horizontal footprint, and valleys, hips, ridges, dormers, starter courses, and cutting waste affect the final quantity. A professional assessment can measure the roof geometry and identify whether repair or replacement is the more appropriate next step.

    Ready to Get a Clearer Picture of Your Roof?

    A professional assessment can help you move beyond a rough bundle estimate and understand whether your roof needs repair, replacement planning, or no immediate action. Referred Restoration provides a practical, honest evaluation for homeowners who want informed next steps. To request a roof inspection or assessment, contact Referred Restoration online or call (763) 726-4245.
  • How to Replace a Window: A Safe Process Guide

    How to Replace a Window: A Safe Process Guide

    Replacing a window is more than removing an old unit and setting a new one in its place. The opening condition, window type, and water-management plan all affect the result. These details matter through Minnesota’s freezing winters and heavy precipitation.

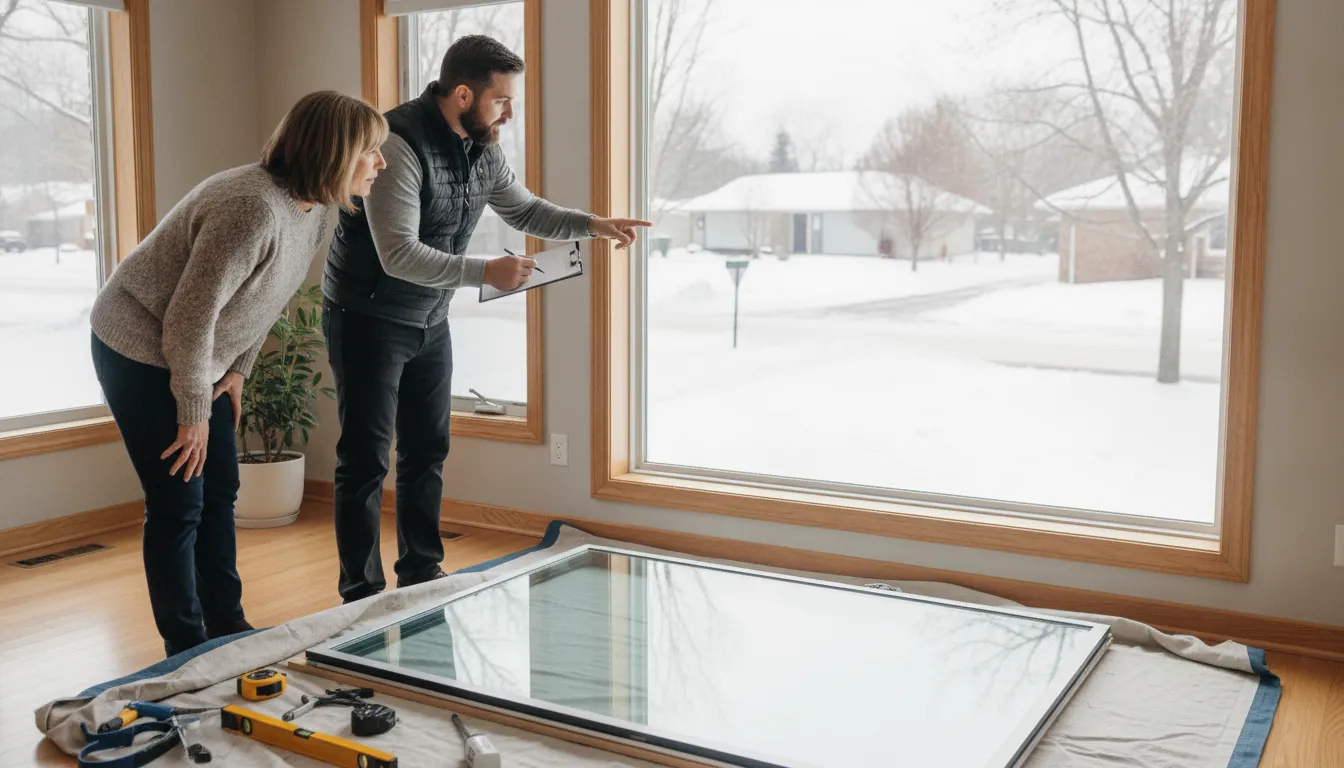
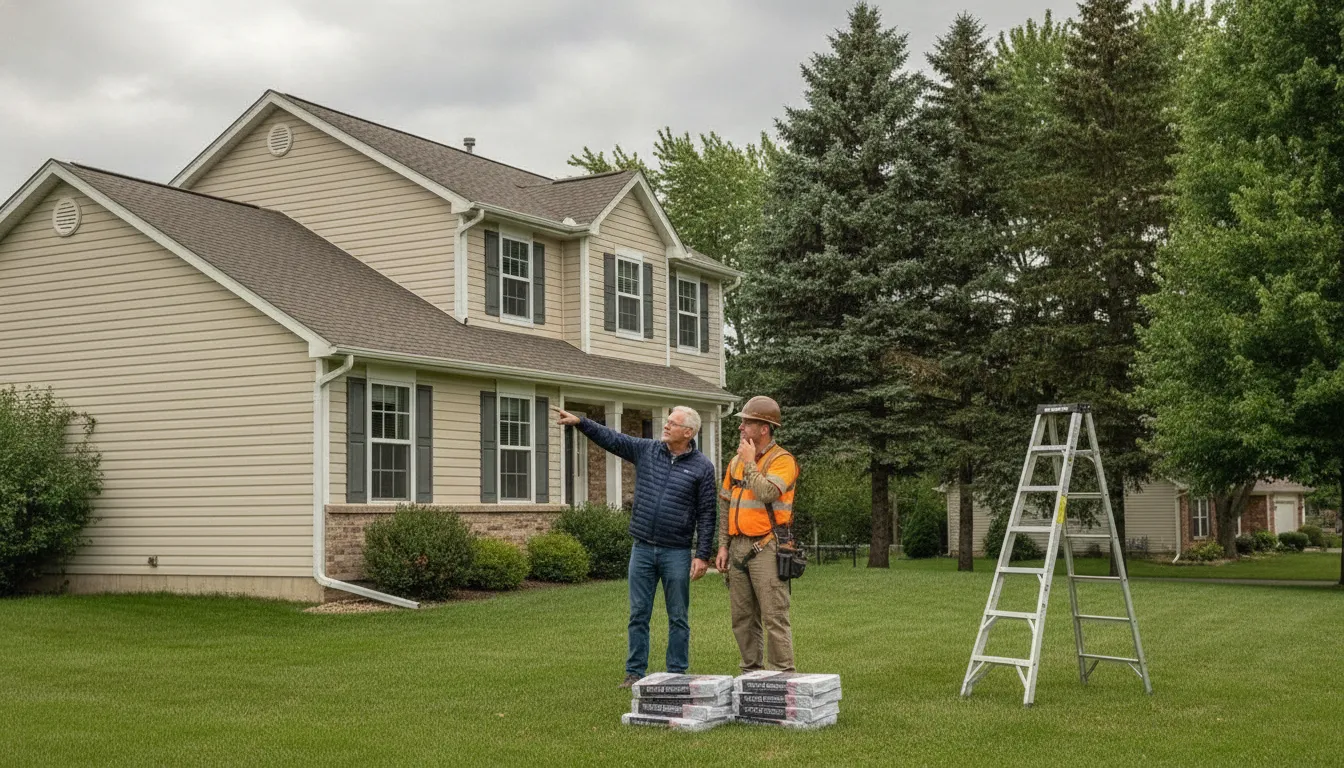
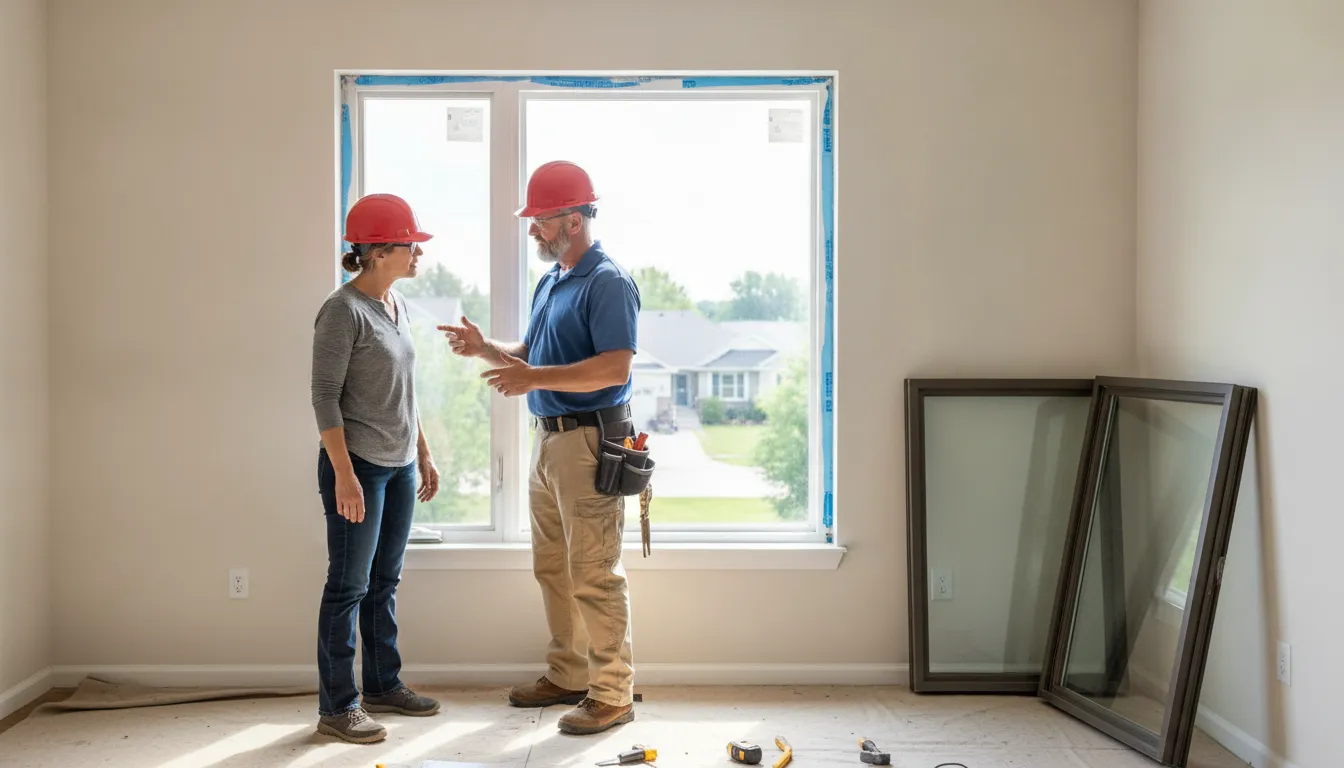
    Homeowner and window installer inspecting a replacement window opening

    Learning how to replace a window means understanding the full sequence. First, assess the opening, remove the existing unit safely, and prepare flashing and drainage. Next, set the new window level and square, insulate and seal the gaps, then test its operation and inspect the finish. A simple insert may leave the existing frame in place. Damaged framing or hidden leakage can call for a broader replacement approach. The appropriate method depends on the home’s conditions, project scope, and local requirements.

    Before picking up tools, look closely at what the old window and surrounding wall are telling you. A careful assessment helps separate manageable preparation from work involving concealed water damage, elevated access, hazardous materials, or building-envelope details that deserve professional judgment.

    Contact Referred Restoration online or call (763) 726-4245 to request a free window inspection.

    How to replace a window safely in the right sequence

    Window replacement is not always a simple matter of taking out one unit and putting another in its place. The correct method depends on the existing window, the condition of the opening, the surrounding trim, and the way the wall manages water. A careful process starts with an assessment, then moves through removal, opening preparation, flashing, installation, insulation, sealing, and operation checks.

    One of the first decisions is whether the existing frame can remain or whether the project should expose the rough opening. Typical replacement work may leave the existing frame in place to reduce disruption, but that approach can limit access to concealed air-sealing or water-management problems. The U.S. Department of Energy’s Building America Solution Center notes that homeowners should weigh leaving the frame against addressing potential air and water leakage through full-frame replacement: window replacement guidance.

    How insert and full-frame replacement differ
    ConsiderationInsert replacementFull-frame replacement
    What remainsThe existing frame commonly remains in place, with the replacement fitted into it.The existing window and frame are removed so the opening can be examined and prepared.
    Opening accessAccess is more limited because the surrounding frame and finishes remain.The rough opening is accessible for cleaning, sealing, inspection, and correction of damage.
    Flashing and inspection scopeSealing focuses on the replacement unit and the existing frame. Concealed conditions may remain outside the work area.Exterior trim or cladding may need removal so head, jamb, and sill flashing can be installed or corrected.
    When assessment is importantUse an assessment to confirm the frame is sound and that this method suits the opening.Assessment is especially important when there are signs of moisture, damaged materials, leakage, or uncertain prior installation.

    After the method is selected, the installer should verify measurements and inspect the opening before permanently setting the window. Removal should be controlled so surrounding finishes are not damaged unnecessarily. If the rough opening is exposed, it should be cleaned and sealed as needed before the new unit is installed. The flashing plan should account for the sill, sides, and head, and should connect with the wall’s drainage-plane layer. Openings interrupt that drainage plane and can be vulnerable to leakage if water is not directed outward.

    The window is then set according to the manufacturer’s instructions, checked for position and operation, and secured with the specified materials. Insulation and sealant should be compatible with the assembly and applied where they belong, rather than used to conceal an unresolved opening problem. In Minnesota, freezing winters and heavy precipitation make careful water management particularly relevant. A professional assessment can help determine whether the project is a straightforward insert replacement or requires broader opening work.

    What should you assess before removing the old window?

    Before learning how to replace a window, identify what is actually being replaced. The window type may be double-hung, casement, sliding, bay, bow, picture, or another configuration, and each can affect the removal method and replacement unit. Record how the sash or panel operates, where the frame meets the wall, and whether the interior or exterior trim appears to be part of the existing installation. If you are still comparing designs, you can compare window styles and glass before finalizing the project scope.

    Next, measure the existing unit and inspect the rough opening. Measurements should account for width, height, and the space available after stops, sashes, or other components are removed. The rough opening is the structural space around the window, not simply the visible glass or trim. It needs to be clean, sound, and suitable for the selected installation method. A replacement insert may leave the existing frame in place, while a full-frame project can expose more of the opening and may require exterior trim or cladding to be removed. Existing conditions, window type, opening condition, flashing, and local requirements all influence that decision.

    Look for moisture and frame damage

    Do not treat a draft or fogged pane as proof that a simple cosmetic swap is appropriate. Check the sill, jambs, head, frame, surrounding drywall, and nearby siding for staining, softness, swelling, peeling finishes, or evidence of previous leakage. Water intrusion around windows can remain hidden until considerable damage has developed inside the wall, according to the U.S. Department of Energy’s Building America Solution Center: windows and doors are vulnerable points for water leakage. The assessment should also consider whether the opening has an effective sill pan, air seal, and connection to the wall’s drainage plane. These details matter for drafts, comfort, and long-term protection, especially through Minnesota’s freezing winters and heavy precipitation.

    Plan access and staging

    Measure the path for bringing the new unit into the home, protect floors and furnishings, and decide where removed sash, glass, trim, and debris will go. Confirm that the work area can be secured if weather changes or the opening must remain exposed. Upper-story access, exterior obstacles, fall protection, and the condition of old paint also belong in the plan. In a pre-1978 home, lead-safe requirements may apply, so do not begin disturbing painted components without addressing that risk.

    A careful inspection is more useful than assuming every project follows one standard sequence. Referred Restoration’s process is built around inspection, a custom solution, and professional installation. That approach helps separate a manageable replacement from work involving hidden water damage, compromised framing, difficult access, or envelope details that need specialized judgment.

    Why flashing and water management matter

    A replacement window is part of the home’s exterior water-management system, not simply a glass unit set into a hole. The wall’s drainage plane, often made from housewrap, taped weather-resistant sheathing, or another approved weather-resistant barrier, is designed to guide incidental water downward and outward. A window opening interrupts that plane, which makes the perimeter especially vulnerable if the layers are not connected correctly. The U.S. Department of Energy’s Building Science Education guidance describes window and door openings as vulnerable interruptions in the wall drainage plane: window flashing helps manage water at these openings.

    That is why a sound installation begins by considering where water could enter and where it should go next. The sill is the lowest horizontal part of the opening and needs a pan or sill flashing approach suited to the window, wall assembly, and installation instructions. A sill pan creates a path for incidental water to move toward the exterior rather than collect against the rough opening. Some systems also use a back dam at the interior edge of the sill. Its purpose is to help keep water from moving inward if moisture reaches the pan. The exact material and configuration are not universal, so the window manufacturer’s directions and the existing wall details matter.

    How the flashing layers work together

    After the sill is prepared, the window is set according to the selected installation method. Jamb, or side, flashing then extends over the sill flashing. Head flashing at the top extends over the jamb flashing. This lapping order matters because the upper layer should shed water over the layer below it, rather than directing water behind it. Federal building-science guidance summarizes the sequence as sill pan flashing, window installation, side flashing over the pan, and top flashing over the side flashing. See the fully flashed window and door opening details for the concept.

    Flashing also has to connect with the housewrap or weather-resistant barrier around the opening. A strip that looks sealed by itself can still fail if it is not integrated with the drainage plane. It can also fail if an upper layer is tucked behind a lower layer in a way that traps water. This is especially important when full-frame work requires removing exterior trim or cladding to reach the opening. The surrounding materials may need to be opened carefully, integrated with the new flashing, and replaced after the water-management work is complete.

    Why small errors can become hidden damage

    Water intrusion is often difficult to diagnose from indoors. Moisture may travel along framing or sheathing before a stain, soft trim, peeling finish, or draft becomes visible. Building-science guidance warns that leakage around windows can remain undiscovered until considerable damage has occurred inside the wall. In Minnesota, freezing winters and heavy precipitation add practical reasons to take these details seriously. But the right method still depends on the home’s construction and the window type.

    When learning how to replace a window, focus on continuity: the sill should drain outward. Jamb and head layers should lap in a shingle-like sequence, and the flashing should connect to the wall’s weather barrier. If the opening has rot, uncertain housewrap, damaged cladding, or signs of prior leakage, an assessment is more useful than applying caulk over visible gaps. The goal is not a cosmetic seal. It is a coordinated path that limits water entry and gives incidental moisture a way back out.

    How do you set, insulate, seal, and finish the window?

    Once the opening and water-management layers are ready, the replacement window must be positioned carefully. The exact sequence depends on the window type, existing frame, installation instructions, and condition of the opening. An insert replacement and a full-frame installation will not use identical details, so the manufacturer’s instructions and applicable local requirements should control the work.

    1. Dry fit the window. Place the unit in the prepared opening without final fastening. Confirm that the dimensions, sill, stops, and surrounding surfaces allow the window to sit correctly. This is the time to identify an obstruction or an opening that needs additional preparation, before the window is committed to the installation.
    2. Set it level and plumb. Position the window so the sill is level and the side jambs are plumb. Check that the frame is square and that the spacing around the unit is appropriate for the specified installation method. A window that is twisted or uneven can create problems with sash movement, locking, and weather seals.
    3. Shim at the required points. Use durable shims where the installation instructions call for support. Shims should hold the frame in its intended position without bowing or distorting the jambs. Recheck level, plumb, square, and diagonal measurements after shimming because tightening the unit can change its position.
    4. Fasten according to the manufacturer’s instructions. Use the specified fasteners and fastening locations for that window and frame condition. Do not substitute a convenient screw or assume that one fastening pattern fits every product. Work should follow the manufacturer’s instructions and relevant codes and standards, as the U.S. Department of Energy guidance explains in its window installation guide.
    5. Insulate the perimeter without overfilling it. After the frame is secured, fill the installation gap with an appropriate low-expansion window-and-door foam where the product instructions permit it. In some assemblies, backer rod and sealant are the better solution. The goal is a continuous air seal that does not bow the frame or interfere with moving parts.
    6. Seal the exterior and restore the trim. Apply compatible exterior caulk at the specified joints, stops, and transitions. Sealant should be selected for the surfaces and weather exposure, then applied according to its instructions. Replace removed trim or cladding after the flashing and perimeter seals are complete, taking care not to block intended drainage paths.
    7. Test operation and clean the work area. Open, close, lock, and unlock the window several times. Check that the sash or panels move smoothly, remain aligned, and contact the weather seals properly. Inspect the interior and exterior for gaps, disturbed finishes, excess foam, and missed sealant. Remove debris and protect the finished surfaces before the installation is considered complete.

    These checks matter because a replacement is more than a cosmetic swap. Correct positioning, insulation, sealing, and trim work help the window perform as intended while protecting the surrounding opening. In a Minnesota home, careful workmanship is especially important where drafts, precipitation, and seasonal movement can expose small installation weaknesses.

    Can you replace a window yourself?

    Yes, some homeowners can replace an accessible insert window themselves, especially when the existing frame is sound. The opening should be dry, and the replacement unit should be designed to fit inside that frame. That is different from removing the entire window assembly and rebuilding the opening. If you are asking, “Can I replace a broken window myself?” the answer depends on whether you are replacing a sash or glass component, installing an insert, or exposing the rough opening. A broken pane may still involve sharp glass, difficult handling, and a failed frame or seal that is not visible at first.

    Know the difference between insert and full-frame work

    An insert replacement leaves the existing frame in place. The work still requires accurate measurements, removal of stops and sashes as needed, a clean and sealed frame, compatible sealants, careful positioning, and an operating check. Government window-replacement guidance notes that existing frames may not have been air sealed behind the trim or protected by pan flashing. So an insert can preserve a hidden weakness if those conditions are ignored. Follow the window manufacturer’s instructions rather than assuming every replacement uses the same method. See the guidance on how to choose a Minnesota window company when the installation method or scope is unclear.

    Full-frame work is more demanding. It can require removing interior or exterior trim, siding, or cladding. The installer may need to inspect the rough opening for rot or moisture damage, install sill, jamb, and head flashing, integrate the flashing with the drainage plane, and restore the exterior finish. Openings interrupt the wall’s water-management layer and can allow hidden leakage or wall damage when the sequence is wrong. Structural damage, soft framing, persistent moisture, or an opening that is out of square are strong reasons to pause instead of covering the problem with a new unit.

    When DIY stops being a safe project

    Ask whether you can work from stable ground without a ladder or lift and safely carry and support the window. Plan to protect the interior from weather and use the required tools without damaging the frame or surrounding finishes. Elevated windows add fall and material-handling risks. Older homes add another concern: federal guidance says lead-based paint should be presumed in homes built before 1978 unless testing shows otherwise. Applicable lead-safe renovation requirements must be followed.

    Local requirements may also affect egress openings, safety glazing, permits, and inspection. Applicable codes, standards, and manufacturer instructions need to be checked before work begins. If you are unsure whether the project is a simple insert, a full-frame replacement, or a repair hiding moisture damage, an inspection is the practical next step. Is it hard to replace a window? The visible swap may be manageable, but reliable flashing, air sealing, insulation, access, and water management require judgment that goes beyond fitting the unit into the opening.

    What should the final inspection include in a Minnesota home?

    A final inspection should confirm more than a clean-looking window. Open and close the sash several times, check that locks engage, and look for rubbing, binding, or uneven gaps. If the unit is operable, it should move smoothly without forcing the frame. Confirm that screens, stops, trim, and hardware are secure, and ask whether any adjustment is needed after the window settles.

    Air and water checks are equally important. On a windy day, look and feel around the interior perimeter for drafts. Inspect the exterior sealant for continuous coverage and clean transitions at the sill, jambs, and head. A contractor should also look for signs that water could collect at the opening or migrate behind the surrounding finish. Windows interrupt the wall drainage plane, making them vulnerable points for leakage. Proper flashing should direct incidental water outward rather than trapping it in the wall. See the ways to manage water around your home when reviewing the broader exterior drainage system.

    Trim and cleanup belong on the inspection list too. Interior and exterior trim should sit securely, align with adjacent finishes, and avoid gaps that expose the opening. Remove protective film, fastener debris, packaging, and excess sealant without damaging the glass or surrounding materials. If existing cladding or trim was removed for full-frame work, verify that it has been replaced and that the repair blends with the home’s exterior.

    Minnesota weather makes timing and follow-up worth discussing. Freezing winters, heavy precipitation, snowfall, and hail can put ongoing demands on exterior openings. Before the crew leaves, ask what to watch for during the first significant rain, freeze, or temperature swing. A draft, moisture mark, difficult operation, or separated seal should be reported rather than covered with additional caulk. Local requirements may also affect the work, so confirm that the selected approach fits the home’s condition and applicable requirements.

    The right next step is an assessment, not a one-size-fits-all recommendation. Referred Restoration’s process is a free inspection, a custom solution, and professional installation based on the opening, window type, and surrounding materials. The company provides window repair and replacement in Rogers, serving homeowners in Rogers, Cottage Grove, St. Francis, Monticello, and nearby communities. If you are deciding how to replace a window or whether repair is more appropriate, request a free inspection through the contact page and discuss the condition of the opening before work begins.

    Contact Referred Restoration online or call (763) 726-4245 before you begin work.

    Frequently Asked Questions

    Can I replace a window by myself?

    Some homeowners can manage limited preparation or a straightforward insert replacement, but full-frame work requires careful measurement, flashing, insulation, sealing, and safe access. Existing damage, difficult openings, elevated work, or uncertainty about water management are strong reasons to hire a professional. Work should also follow applicable local requirements and manufacturer instructions, as outlined by the U.S. Department of Energy Building America Solution Center.

    Can I replace a broken window myself?

    A small, accessible repair may be manageable if the frame and opening are sound. Before replacing only the glass or sash, check for concealed moisture, frame damage, or a failed seal. If the opening is distorted, water has entered the wall, or the work requires exterior access, an inspection can help determine whether repair or complete replacement is appropriate.

    Is it hard to replace a window?

    The difficulty depends on the window type, existing frame, rough opening, exterior finish, and condition of the surrounding wall. An insert may involve less disruption, while full-frame replacement can require removing trim or cladding to install and integrate sill, jamb, and head flashing. The correct method is based on the home’s conditions rather than one universal process.

    What should you check after installing a replacement window?

    Confirm that the sash opens, closes, locks, and latches smoothly. Inspect the interior and exterior seals, trim, and flashing transitions, then look for drafts or signs of water entry after weather exposure. In a Minnesota home, a final review should also confirm that the opening is protected for freezing temperatures and heavy precipitation.

    Ready to Plan Your Window Replacement

    An inspection can help clarify the condition of the opening, the water-management details, and the installation approach that fits your Minnesota home. Contact Referred Restoration online to discuss a custom replacement solution and request a free window inspection.

    Contact Referred Restoration online or call (763) 726-4245.
  • Rain Gutters for Minnesota Homes: Types, Benefits, Care

    Rain Gutters for Minnesota Homes: Types, Benefits, Care

    Rain gutters do a simple but important job: they collect runoff from your roof and guide it toward downspouts instead of letting it fall beside the house. For homeowners in Rogers and nearby Minnesota communities, the right system also needs to handle spring rain, summer storms, falling leaves, snow, and repeated freeze-thaw cycles. Understanding the options makes it easier to protect your home’s siding, fascia, foundation, and landscaping.

    Contact Referred Restoration online to schedule a free gutter inspection or discuss a custom solution. You can also call (763) 726-4245.

    Rain gutters protect a Minnesota home by collecting roof runoff and sending it through downspouts to a controlled discharge area. The best system depends on the roof’s size and shape, the home’s exposure to snow and debris, the gutter profile and material, and whether the existing drainage path works correctly.

    What Are Rain Gutters and Why Do They Matter?

    Rain gutters are channels installed along the lower edge of a roof. They intercept water as it leaves the shingles, carry it to an outlet, and connect that outlet to a downspout. The downspout then moves water down the side of the home and toward a suitable discharge point. This creates a more predictable path than allowing roof runoff to fall in a continuous sheet around the foundation.

    That path matters because water that collects beside the house can saturate nearby soil. The U.S. Department of Energy’s Building America guidance explains that gutters and downspouts help reduce the chance of saturating soil around the foundation. The University of Minnesota Extension also identifies poor grading and a missing or nonfunctioning gutter and downspout system as common contributors to basement moisture problems. Read the University of Minnesota Extension guidance on basement moisture.

    Gutters are one part of a larger water-management system. They work best when the roof edge, fascia, flashing, downspouts, extensions, soil grade, and nearby landscaping all support the same drainage direction. A gutter cannot compensate for a blocked downspout, a discharge point that sends water back toward the house, or soil that slopes toward the foundation.

    Which Gutter Types and Materials Are Common?

    The main gutter choices are defined by their profile, how they are joined, and what they are made from. K-style and half-round are common profiles for residential work. Sectional gutters are assembled from shorter pieces, while seamless gutters are formed to the required length on site. Aluminum is widely used, but steel, copper, and vinyl may also be considered when their characteristics fit the property.

    K-style gutters

    K-style gutters have a flat back and a shaped front that resembles a simple decorative molding. Their profile fits many modern homes and can work well with common fascia and roof-edge details. The flat back can create a clean transition against the fascia when the system is installed correctly. K-style channels are available in several sizes and materials.

    Half-round gutters

    Half-round gutters have a rounded interior and a curved appearance. They are often selected when a homeowner wants a more traditional look or when the profile complements an older architectural style. The hangers and outlets need to be matched to the profile, roof edge, and downspout layout rather than mixed with unrelated components.

    Sectional and seamless gutters

    Sectional gutters arrive in shorter lengths that are connected during installation. Each connection is another location that needs a sound seal and secure attachment. Seamless gutters are formed from a continuous piece for each straight run, which reduces joints along those runs. Seamless does not mean joint-free: corners, outlets, and end caps still require careful installation. Learn how seamless and sectional gutters differ in Minnesota.

    OptionWhat it offersWhat to consider
    K-styleVersatile profile that suits many residential exteriorsCorrect size, slope, hangers, and outlets still matter
    Half-roundRounded appearance that can suit traditional homesRequires compatible hangers and connections
    AluminumLightweight and commonly used for residential systemsCan be dented by impact and should be supported well
    SteelRigid material with strong impact resistanceWeight and corrosion protection deserve attention
    CopperDistinctive appearance that develops a changing surface finishBest evaluated as part of the home’s overall exterior design
    VinylLightweight option used on some residential projectsCold-weather exposure and attachment details should be reviewed

    There is no universal best gutter for every Minnesota home. A material that works on a sheltered, simple roof may not be the right choice for a steep roof edge, a large roof plane, or a property exposed to falling branches. The system should be selected as a complete assembly, not by comparing the channel alone.

    How Do You Choose Gutter Size and Downspout Layout?

    Gutter sizing and downspout layout should follow the amount of water a roof section can deliver. A professional evaluates the roof area that drains to each run, roof pitch, valleys, roofline length, local rainfall patterns, and where water can be discharged safely. Many homes use a standard residential channel, while larger or steeper roof sections may need a larger channel or additional outlets.

    Downspouts should be placed where they can receive water from the gutter run without creating long, heavily loaded channels. They also need a clear route to an extension, splash block, underground drainage feature, or another approved discharge method. Discharging directly against the foundation defeats the purpose of the gutter. City of Duluth homeowner guidance recommends extensions that direct roof runoff away from the structure and notes that site grading should move water away from the foundation. Review Minnesota homeowner drainage guidance from the City of Duluth.

    Roof valleys, dormers, inside corners, and low sections deserve extra attention because they can concentrate runoff. If water regularly spills over one area while the rest of the system remains clear, the issue may involve capacity, slope, an outlet location, or a roof drainage pattern rather than ordinary debris. See the detailed downspout placement guide for a closer look at drainage locations and discharge paths.

    What Benefits Can Rain Gutters Provide?

    Well-designed rain gutters help control where roof water goes. They do not make a home waterproof by themselves, but they reduce several common sources of exterior moisture when the channels, downspouts, and discharge points are kept open and correctly directed.

    • Foundation protection: Moving roof runoff away from the home can reduce repeated saturation beside foundation walls.
    • Less soil erosion: Controlled discharge helps limit channels and bare spots forming beneath roof edges.
    • Fascia and soffit protection: Sound attachment and clear flow reduce the chance of persistent overflow at the roof edge.
    • Siding and window protection: Directing runoff away from walls can help limit staining and repeated wetting around exterior openings.
    • Better landscape control: Extensions and planned outlets can keep roof water from washing across planting beds, walkways, and entry areas.
    • Easier maintenance: A properly laid-out system makes it simpler to identify where water should flow and where a blockage may be located.

    The result depends on the whole path, from the roof edge to the final discharge point. Building America recommends directing water to sloping grade away from the foundation or using an appropriately designed underground drainage or collection system. Explore Referred Restoration’s gutter services in Rogers if you are unsure whether your current system is controlling runoff properly.

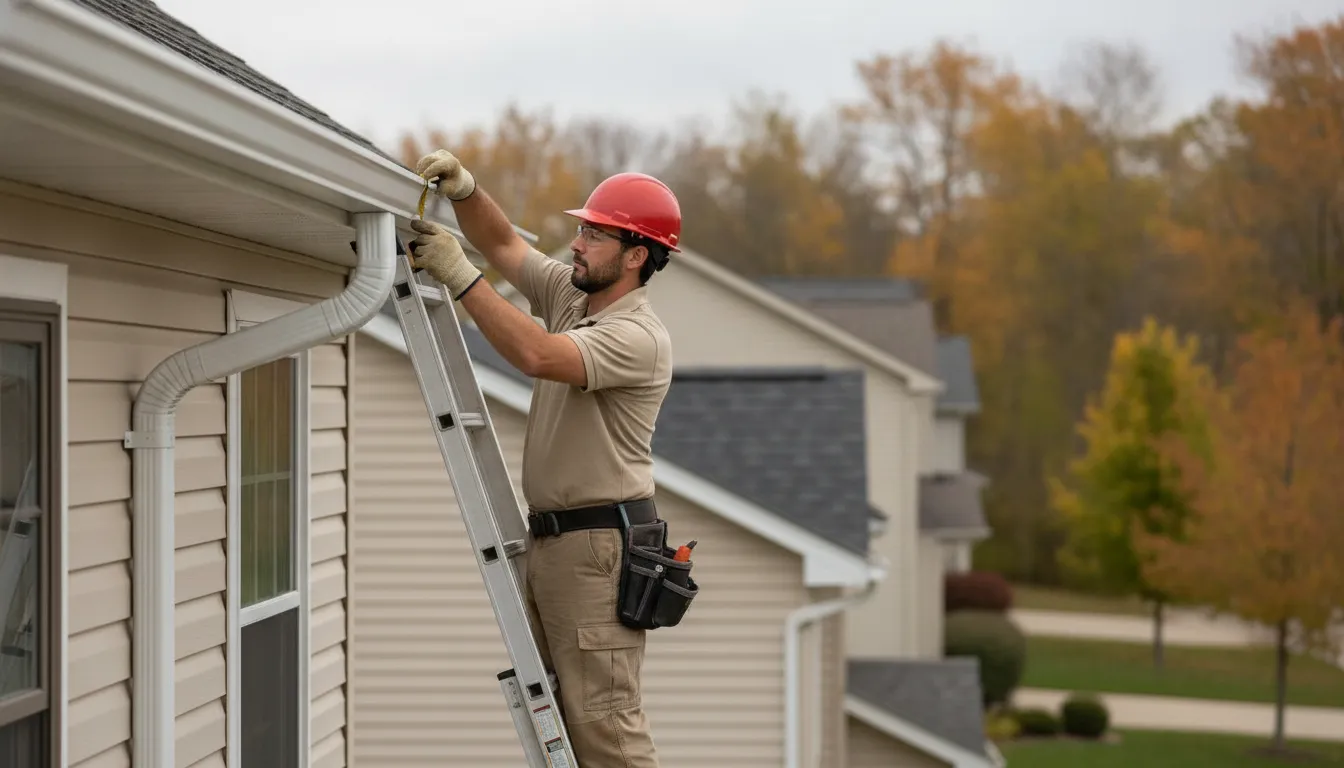
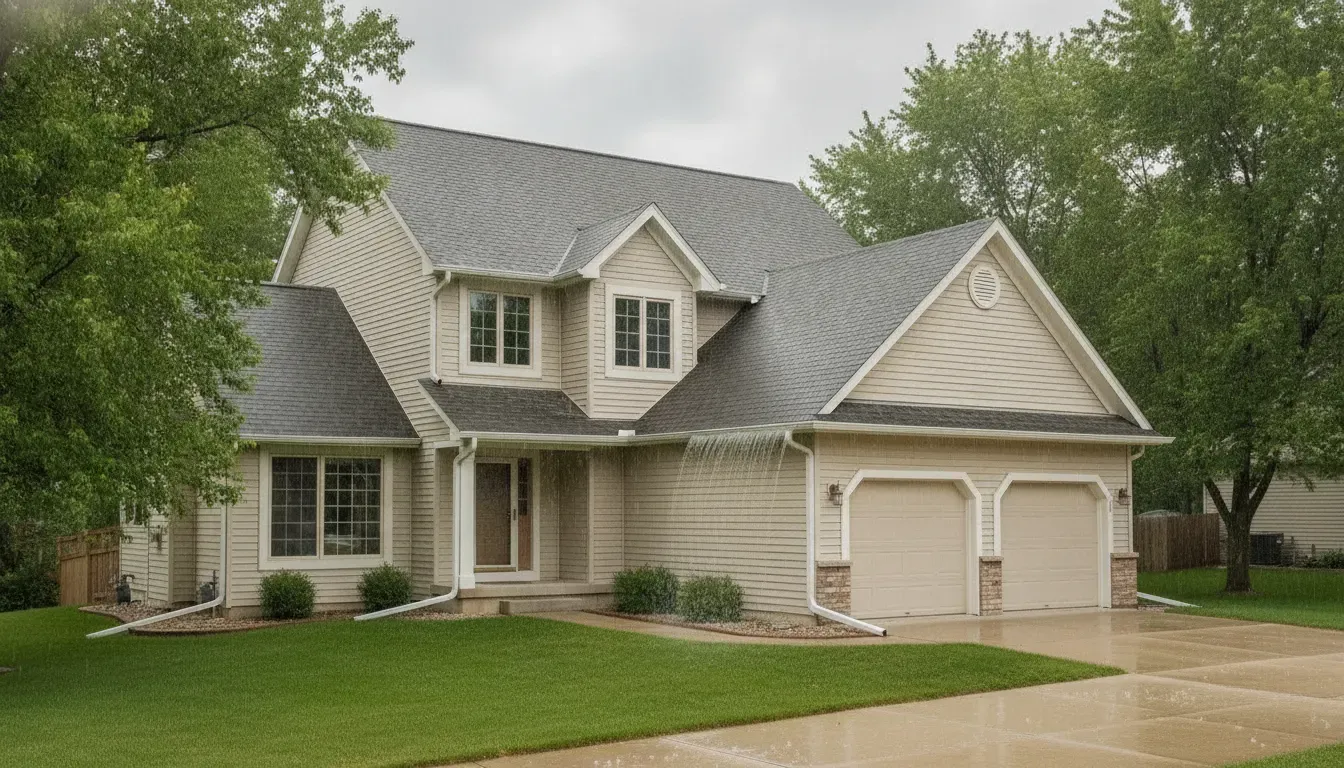
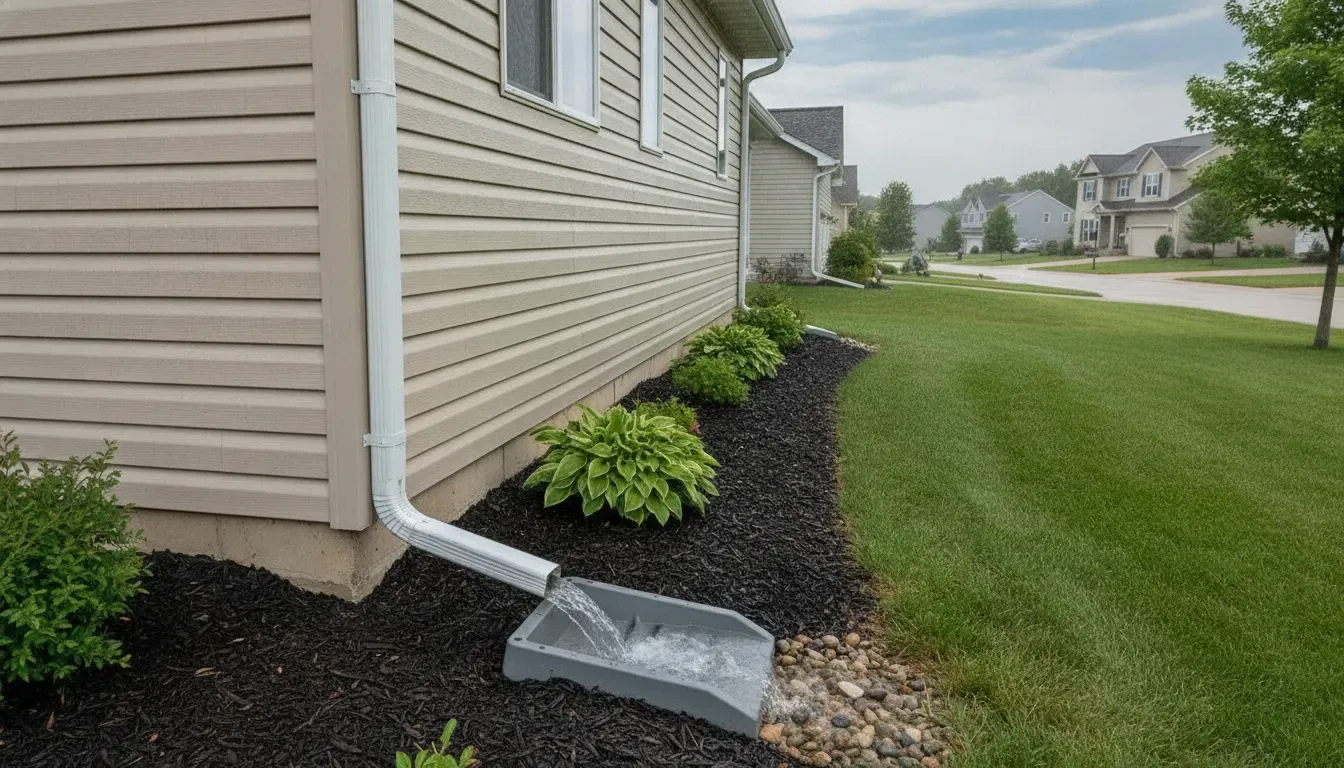
    Rain gutter downspout directing water away from a Minnesota home's foundation

    Contact Referred Restoration online for a free inspection of gutter channels, downspouts, and discharge paths. You can also call (763) 726-4245.

    How Should Minnesota Homeowners Care for Gutters?

    Gutter care starts with keeping the drainage path open and checking the system after weather that can move debris or loosen attachments. Look into the channels, inspect the downspout outlets, and watch where water lands during a normal rain. If water spills over a clear channel, the issue may be slope, capacity, attachment, or an obstruction farther down the path.

    • Remove leaves, twigs, roof grit, and other debris from the channel and outlet.
    • Flush downspouts with water when conditions are safe and check for slow or blocked flow.
    • Look for sagging runs, separated seams, loose hangers, cracks, rust, and pulled-away sections.
    • Check that extensions and splash blocks still direct water away from the foundation.
    • Inspect around corners, valleys, fascia, and roof edges for stains or repeated overflow.
    • Keep ladders on stable ground and avoid working on icy, wet, or steep surfaces.
    • After major storms, check for impact damage and debris before the next heavy rain.

    In Minnesota, spring cleanup should address debris and damage left by winter. Summer inspections should focus on storm runoff and fast-growing vegetation. Fall care should account for leaves and roof grit. Winter checks should be approached from the ground because ice and snow make ladder work especially hazardous. Use the Minnesota gutter maintenance calendar for a more detailed seasonal routine.

    Gutter guards can reduce the amount of loose debris entering a channel, but they do not eliminate inspection. Guards need to fit the roof and gutter design, remain clear, and still allow water to reach the channel during heavy weather. Compare gutter guard options for a Minnesota home and learn what gutter guard installation involves.

    Can Gutters Prevent Ice Dams?

    Rain gutters can help carry meltwater away when the roof edge is clear, but they cannot prevent every ice dam. The University of Minnesota Extension explains that ice dams form when different parts of a snow-covered roof remain at different temperatures. Snow melts on a warmer upper roof surface, then refreezes at a colder roof edge and blocks drainage. Read the University of Minnesota Extension guide to ice dams.

    A clogged or damaged gutter can make winter drainage worse, and ice can add weight to a weak or poorly attached channel. However, removing an ice dam usually requires a safe, condition-appropriate response, and preventing recurring dams often involves attic insulation, air sealing, and roof ventilation. Do not chip at ice from a ladder or use a method that could damage shingles, flashing, or the gutter system.

    For a Minnesota home that has repeated winter overflow, review both the gutter system and the roof and attic conditions. Treating only the visible ice at the eave may leave the underlying heat-loss pattern unchanged.

    When Do Gutters Need Repair or Replacement?

    Repair may be appropriate when damage is isolated and the rest of the system remains straight, secure, and able to carry water. Replacement deserves consideration when multiple sections sag, cracks or rust are widespread, seams repeatedly leak, the channels have pulled away from the fascia, or the layout no longer handles the roof’s runoff. Repeated overflow after cleaning is another reason to inspect the full system.

    Look for water stains beneath the roof edge, soil washout near downspouts, pooling beside the house, damp areas near the foundation, and visible damage to fascia or siding. These signs do not identify one guaranteed solution, but they show that the water path needs attention. Review the warning signs for gutter replacement in Minnesota before deciding whether a local repair or a new system is the better fit.

    During an inspection, a professional can evaluate the roof drainage pattern, gutter profile, attachment points, downspouts, outlets, extensions, and surrounding grade together. That broader view helps avoid replacing a channel while leaving a blocked outlet, poor discharge route, or roof-edge issue unresolved.

    How Can Rogers Homeowners Choose the Right Gutter Plan?

    The right plan starts with the home rather than a one-size-fits-all product. A Rogers homeowner should consider the roof shape, the number of roof sections, tree exposure, snow and ice history, current overflow locations, exterior appearance, and the safest route for water after it leaves the downspout. A clear inspection can show whether the next step is maintenance, repair, or a custom replacement.

    1. Inspect the roof edge, channels, outlets, downspouts, and discharge areas.
    2. Match the profile, material, capacity, and attachment method to the home.
    3. Confirm that water will drain away from the foundation and surrounding structures.

    Referred Restoration provides gutter inspection, repair, replacement, seamless gutter installation, and downspout services for Rogers-area homeowners. The company describes a simple process: schedule an inspection, review a custom solution, and move forward with professional installation when appropriate. Visit the Rogers gutter service page to learn more about the available service path.

    Contact Referred Restoration online to request a free inspection and discuss rain gutters for your home. You can also call (763) 726-4245.

    Frequently Asked Questions About Rain Gutters

    What type of rain gutters are best for a Minnesota home?

    The best choice depends on the roof drainage pattern, desired appearance, weather exposure, and maintenance needs. K-style or half-round profiles may both work, while aluminum, steel, copper, or vinyl each have different characteristics. A professional should match the complete system to the home.

    How often should rain gutters be cleaned in Minnesota?

    Cleaning frequency depends on tree cover, roof debris, gutter guards, and storm exposure. Many homeowners inspect in spring and after autumn leaf drop, then check again after major storms. A gutter that overflows while clear needs a broader inspection rather than repeated cleaning alone.

    Do seamless gutters work better than sectional gutters?

    Seamless gutters have fewer joints along straight runs, which can reduce potential leak locations. Sectional gutters can still work when they are correctly sized, joined, sloped, and secured. The installation details, corners, outlets, and downspouts matter as much as the channel type.

    Where should a gutter downspout discharge?

    A downspout should carry water to a stable discharge area that directs it away from the home’s foundation and does not create a problem for a neighboring property or walkway. The correct location depends on grade, soil, landscaping, and whether an underground drainage or collection system is present.

    Can gutter guards replace gutter maintenance?

    No. Gutter guards can reduce the debris entering a channel, but they still need inspection and may need cleaning. Leaves, roof grit, seeds, ice, and poor water flow can affect guarded systems. The guard must also be compatible with the gutter and roof edge.

    What are signs that rain gutters are failing?

    Common signs include sagging, pulled-away sections, cracks, rust, recurring leaks, overflow during ordinary rain, water stains below the roof edge, soil erosion, and pooling beside the foundation. A professional inspection can determine whether the issue calls for cleaning, repair, or replacement.

    Contact Referred Restoration online for help evaluating rain gutters, downspouts, and water drainage at your Rogers-area home. You can also call (763) 726-4245.

  • How to Choose a Window Company in Minnesota

    How to Choose a Window Company in Minnesota

    Cold winters, heavy snow, and repeated freeze-thaw cycles can expose weak seals, drafts, and installation problems that are easy to overlook from inside the house. Choosing the right local installer means evaluating more than window style. You also want clear measurements, an honest look at the existing opening, a written installation scope, and a plan that fits your home’s condition and Minnesota weather.

    Contact Referred Restoration online

    Professional reviewing a replacement window with a Minnesota homeowner

    A dependable window company should explain its recommendations in plain language and document the materials and installation work. It should answer questions about permits and warranty coverage, then provide a clear point of contact after the project. Compare those details alongside local experience, insurance, references, and communication, rather than choosing based only on a sales presentation.

    To discuss a free inspection in Rogers, St. Francis, Monticello, Cottage Grove, or a nearby Minnesota community, use the following checklist to assess a contractor before requesting an installation plan.

    What Should You Look for in a Minnesota Window Company?

    A good local installer should be able to explain what your home needs, how the work will be completed, and who will be accountable after installation. Start by confirming that the company actually serves your community. For homeowners in Rogers, St. Francis, Monticello, Cottage Grove, and nearby areas, a nearby service area can make site visits and follow-up communication more practical. Geographic availability is also a useful comparison factor when evaluating window installers.

    Ask about experience and completed work

    Ask how long the company has installed windows and which homes it serves. Then ask who will handle the project, its crew or subcontractors. Experience alone does not prove quality, but it gives you useful context. A company should be comfortable describing its process without relying on vague claims or pressure to sign.

    Look for recent, relevant references and reviews. Reviews can reveal patterns in communication, preparation, cleanup, and response to concerns. Give more weight to feedback about projects like yours and read the details rather than relying only on a star rating. You can also ask whether the company can provide references for comparable replacement work.

    Verify the business before work begins

    Ask for the company’s legal business name and confirm what licenses or registrations apply to the work in your location. Request current certificates of general liability and workers’ compensation insurance, then ask whether the coverage applies to everyone who will be on the project. If permits may be required, ask who is responsible for determining that and obtaining them. A reputable contractor should answer these questions clearly and provide documentation for your records.

    Pay attention to written communication

    Before choosing a contractor, request a written scope that identifies the windows, measurements, installation method. Trim or finish work, removal and disposal, cleanup, and any work needed around the opening. Ask how changes will be documented and who you should contact with questions. Comparing written scopes helps you evaluate the actual work instead of comparing sales presentations.

    Minnesota knowledge matters because freezing winters, heavy precipitation, and snowfall place practical demands on exterior work. The company should discuss how the home’s condition, drafts, air leakage, wall transitions, and weather exposure affect the recommendation. That does not mean every Minnesota home needs the same product. It means the advice should be connected to your home, climate, and goals. A local window company should provide an honest assessment and a custom solution, while a product-only seller may focus mainly on choosing a unit without taking responsibility for the full installation.

    For broader planning, review this guide to plan a Minnesota home window replacement before comparing proposals.

    How Should a Window Company Assess Your Home?

    A reliable assessment should explain what is happening at the opening, not simply recommend replacing every window. The inspection should connect visible conditions, measurements, comfort concerns, and the home’s exposure to Minnesota weather. Ask the window company to document what it finds and explain which work is essential, which work is optional, and whether a repair could reasonably address the problem.

    1. Inspect the window, wall, and surrounding finishes

      The assessment should begin indoors and outdoors. The inspector can look for damaged trim, staining, soft wood, cracked caulk, gaps, moisture marks, and signs that water is entering around the opening. The condition of nearby siding and wall transitions matters too. A window problem may involve the surrounding assembly rather than the glass or frame alone. Ask what the inspector sees, where the concern begins, and whether photographs will be included in the written scope.

    2. Measure each opening instead of assuming one size fits all

      Measurements should be taken at the individual opening, with attention to width, height, depth, squareness, and the existing frame or rough opening. The number, shape, and location of windows, along with the home’s current condition, can change the appropriate project scope. A careful window company should identify unusual openings and explain whether the proposed approach is an insert, full-frame replacement, or another method. For broader guidance on frame, glass, and style choices, you can compare Minnesota house windows.

    3. Test for drafts, leaks, and operating problems

      Tell the inspector where you feel cold air, see condensation, hear outside noise, or have trouble opening and locking a window. The U.S. Department of Energy recommends checking existing windows for air leaks and lists caulking and weatherstripping as possible ways to improve them. See the Department of Energy guidance on updating or replacing windows for that distinction. Fog or condensation between panes may point to a failed seal, so review these window seal failure signs before making a decision.

    4. Separate repair needs from replacement needs

      Replacement may make sense when a frame or opening has extensive deterioration, repeated leaks, difficult operation, or performance problems that a targeted repair will not solve. Repair may be appropriate when the issue is limited to worn weatherstripping, failing caulk, hardware, or another localized defect. The recommendation should state why one option fits the condition and what risks remain if you postpone replacement. The Department of Energy notes that windows can account for a substantial share of residential heating and cooling energy use, but that does not make replacement the right answer for every opening.

    5. Ask for a second opinion when the explanation is unclear

      Get another assessment if measurements are missing, the scope changes without explanation, or the company cannot separate window defects from wall or moisture issues. Compare written findings rather than sales pressure. A second opinion is especially useful when only one window is affected, the proposed work is unusually broad, or repair and replacement recommendations differ substantially.

    Which Window Materials and Features Fit Minnesota Homes?

    Minnesota homes face cold winters, summer heat, wind, and repeated temperature swings. The best window package depends on the home’s existing openings, exterior design, maintenance preferences, ventilation needs, and performance goals. A thoughtful window company should explain the tradeoffs instead of treating one frame material or glass package as the right answer for every property.

    ENERGY STAR identifies wood, vinyl, and fiberglass as common frame choices. Each can work well when it is correctly specified and installed. Vinyl is often selected for straightforward maintenance, while wood may suit homeowners who value a traditional interior appearance and are prepared for more upkeep. Fiberglass can be worth discussing when durability and frame stability are important considerations. The right question is not simply which material is best, but which material fits the opening, the home’s design, and the owner’s long-term plans.

    Window materials and features to discuss with your installer
    ChoiceWhat it may offerQuestions to ask
    Vinyl frameLow maintenance and common stylesHow will it fit the opening and exterior finish?
    Wood frameWarm interior character and a traditional appearanceWhich surfaces need maintenance, and how are exterior areas protected?
    Fiberglass frameA durable option to evaluate for demanding conditionsHow does this frame suit the home’s exposure and installation details?
    Double-pane glassTwo layers of glass with an insulating space between themWhat performance labels apply, and is the configuration suited to the climate?
    Low-E and performance labelsCoatings and ratings that help compare heat, light, and air-performance characteristicsWhat do the U-factor, solar heat gain, visible transmittance, and air-leakage ratings mean here?
    Argon-filled glassGas between panes that can improve insulating powerHow does argon fit the selected glass package, and what happens if the seal fails?
    Operation styleDifferent balances of ventilation, cleaning access, sightlines, and weather exposureWould a single-hung, double-hung, casement, slider, or awning style work best in this room?

    Most modern energy-efficient windows have at least two glass layers, and ENERGY STAR notes that argon is commonly used between panes because it improves insulating power. You can review those material and glass basics in the ENERGY STAR replacement-window guidance. Performance labels still need context: a number is useful only when you understand how it relates to the room’s sun exposure, orientation, and heating and cooling priorities.

    Operation style deserves equal attention. A window that opens easily for airflow may be valuable in one room, while easy cleaning, child safety, or resistance to wind-driven weather may matter more elsewhere. Ask the installer to connect each recommendation to a specific opening and document the selected frame, glass, hardware, and operation style in writing.

    What Does Professional Window Installation Include?

    A professional installation is more than placing a new unit into an existing opening. The exact scope depends on the window style, the shape and purpose of the project, the number of openings, and the condition of the home. A clear written plan helps you understand what the window company will do, what may require a separate decision, and how the work will be handled around Minnesota weather.

    1. Confirm permits and project responsibilities. Ask whether a permit is required and which party will apply for it, coordinate inspections, and provide any needed documentation. These responsibilities should be clear before work begins, rather than assumed during the project.
    2. Protect the work area and remove the existing window. The crew should establish a reasonable work area, protect nearby interior and exterior surfaces as appropriate, and remove the old window carefully. Ask how debris, damaged trim, and materials scheduled for disposal will be handled.
    3. Inspect the rough opening. Once the old unit is out, the installer can check the opening, surrounding materials, and visible signs of moisture or deterioration. A damaged opening may affect the installation method or require repair. A careful installer should explain unexpected conditions before proceeding with additional work.
    4. Prepare flashing and water-management details. Flashing helps direct water away from vulnerable wall and window transitions. The correct approach can vary with the existing wall assembly and whether siding or other exterior materials meet the opening. For related guidance, see how siding and window flashing work together.
    5. Set, fasten, and seal the window. The window should be positioned according to the manufacturer’s requirements, checked for alignment, and secured with an appropriate installation method. Sealing around the unit helps limit unwanted air and moisture movement, but the materials and details should match the opening and product instructions.
    6. Test operation and inspect the seal. Before trim is replaced, open and close the sash or panels, check locks and hardware, and look for visible gaps or binding. This is also a useful time to ask questions about drafts, drainage, or any condition that differs from the written scope.
    7. Complete trim and exterior transitions. Interior and exterior trim may be reinstalled, repaired, or replaced depending on the project. The final appearance should be reviewed at the window and at adjacent wall materials, especially where siding and other cladding meet the opening.
    8. Plan cleanup and weather protection. Confirm what cleanup is included and how the crew will protect an open or partially completed area if conditions change. Freezing temperatures, precipitation, and snowfall can affect exterior work in Minnesota, so ask the window company how weather decisions will be communicated and documented.

    If you are comparing options in the Rogers area, you can review the residential window installation process and learn more about window repair and replacement in Rogers. The goal is not to demand one universal method. It is to make sure the proposed work addresses your home’s condition and is explained clearly before installation starts.

    How Can You Compare Window Warranties and Project Communication?

    A written warranty and a clear project plan give you something practical to review after the sales conversation ends. Ask the window company to separate product coverage from labor or workmanship coverage. Product coverage may address the window unit or specific components, while labor coverage may address installation-related concerns. Coverage can vary by product, so compare the actual documents for the windows being proposed rather than relying on a general statement about warranties. Warranty coverage can vary by product, which makes written details especially important.

    What should the warranty document answer?

    • Which products, parts, glass, finishes, and installation work are covered?
    • What exclusions apply, including conditions related to misuse, alterations, maintenance, or circumstances outside the installer’s control?
    • How do you start a claim, and what information or photos will you need to provide?
    • Who receives the service request first, the window manufacturer, the installing contractor, or another contact?
    • What happens if an issue requires an inspection, adjustment, replacement component, or follow-up visit?

    Ask for the warranty documents before signing, and keep them with your contract and product information. A reputable window company should be willing to explain unfamiliar terms without turning the conversation into a pressure tactic. If the written paperwork differs from what was discussed, pause and ask for the scope to be clarified.

    How should project communication be documented?

    Your agreement should describe more than the selected windows. Look for the expected start window, the work sequence, and how you will be notified if conditions affect scheduling. It should also explain what happens when the installer finds an unexpected issue after removal. Any change order should identify the reason for the change, the added or reduced work, and the updated agreement before that work proceeds.

    Use the same written standard for closeout. Confirm who handles questions during the project, how updates will be shared, and what cleanup is included. Before the crew leaves, schedule a final walkthrough to review operation, locks, screens, trim, visible sealing, and the condition of the work area. This is a useful time to note remaining adjustments and confirm how they will be resolved.

    A low-pressure inspection can help you compare the proposed scope, warranty paperwork, and communication process with your home’s needs. Take the time to ask questions and choose the window company that gives you clear answers in writing.

    A Minnesota Window Company Checklist Before You Sign

    Before signing with a local window company, compare the written plan, not just the presentation. A clear scope should identify which openings are included, what work is excluded, how existing trim or surrounding materials will be handled, and what happens if concealed damage appears after removal. The project should reflect the home’s condition and goals rather than rely on a generic package.

    Use this checklist during your final comparison

    • Scope: Confirm the rooms, openings, removal work, trim, disposal, and finish work included in the agreement.
    • Measurements: Ask who measured each opening and how unusual sizes, out-of-square frames, or prior alterations will be documented.
    • Materials: Make sure the proposal names the selected frame, glass configuration, operation style, and performance details. If you are still comparing options, use this guide to plan a Minnesota home window replacement, then return to the company comparison.
    • Permits: Ask whether a permit is required and which party is responsible for confirming requirements and handling the paperwork.
    • Installation method: Have the company explain how the opening will be prepared, flashed, sealed, and integrated with the surrounding wall. The explanation should account for Minnesota’s freezing temperatures, precipitation, and snow.
    • Weather plan: Ask how the installation will be scheduled around unsuitable conditions and how exposed openings will be protected if weather changes.
    • Warranty: Request product and labor coverage in writing, including exclusions, claim instructions, and the service contact. Coverage can vary by product, so avoid relying on a verbal summary.
    • Cleanup: Confirm who removes old windows and construction debris, protects work areas, and completes the final cleanup.
    • Payment schedule: Verify when payments are due, what triggers each stage, and how approved changes to the scope will be documented. You should not need to rely on unclear verbal commitments.
    • Post-install contact: Identify who to contact with questions after completion and ask what the final walkthrough will cover, including window operation, seals, trim, and unresolved items.

    A dependable local process should make these answers easy to find. Referred Restoration serves homeowners in Rogers and nearby communities with an honest assessment, a custom solution, and professional installation. Comparing documentation this way helps you choose a company that understands both the project and the Minnesota home it is working on.

    Contact Referred Restoration online

    Before you choose a contractor, discuss your project and schedule a free inspection.

    Frequently Asked Questions

    How should I compare local window companies?

    Compare more than product photos or a sales presentation. Ask each company for a written scope that explains measurements, window materials, installation method, permits, weather planning, cleanup, warranty coverage, and post-installation service. Confirm the company serves your area, carries appropriate insurance, and can provide references or reviews relevant to similar work.

    What happens during a window consultation?

    A useful consultation starts with an inspection of the existing windows and surrounding openings. The installer should discuss drafts, leaks, operation, visible damage, measurements, and your goals for the home. Ask whether repair, maintenance, or replacement is the most practical path, and request clear documentation of the recommended work before you approve it.

    Should I repair or replace a damaged window?

    That depends on the location and cause of the problem. Air leaks, failed caulking, or worn weatherstripping may be repair considerations, while persistent moisture, damaged frames, failed seals, or poor operation may call for a broader evaluation. A careful contractor should explain the condition they found and why the proposed solution fits, rather than assuming every issue requires replacement. You can also review these window seal failure signs.

    What should I ask about a window warranty?

    Request the warranty in writing and ask what applies to the product, glass, labor, and installation. Confirm exclusions, the claim process, the service contact, and whether coverage changes by product. Before the crew leaves, review window operation, seals, trim, and cleanup, then keep the final paperwork with your home records.

    How does Minnesota weather affect window installation timing?

    Ask how the company plans for cold temperatures, precipitation, wind, and unexpected changes in weather. The written plan should explain how openings will be protected during the work and how scheduling will be handled if conditions are unsuitable. Local experience can help the installer plan the project around your home’s exposure and seasonal conditions.

    Ready to Choose the Right Window Company?

    A thoughtful inspection can help you understand your home’s condition, compare installation options, and clarify the project scope before you decide. Referred Restoration offers a free inspection and honest assessment for Minnesota window projects in Rogers and nearby communities. To discuss your plans, call (763) 726-4245 or use the link below to contact the team online.

    Contact Referred Restoration online

  • Roofing Materials for Minnesota Homes

    Roofing Materials for Minnesota Homes

    Roofing materials are the visible cover on a house, and Minnesota homeowners usually compare them when a roof is worn, storm-marked, or due for replacement. The useful comparison is not a brand list. It is how asphalt, metal, tile, slate, and a few less common covers handle snow, wind, hail, routine upkeep, and the skill of the crew that installs them. Architectural shingles are one asphalt option inside that choice, not a separate roofing family.

    Contact Referred Restoration online to schedule a free roof inspection. Call (763) 726-4245.

    How to Compare Roofing Materials

    Start with the roof you already have. Slope, deck condition, and attic moisture decide which roofing materials are even eligible. A steep main roof can carry shingles, metal, tile, or slate if the structure can hold the weight. A low porch or addition usually needs a membrane, not the same cover as the field.

    Then judge four things that show up on every serious bid:

    • Weather fit. Snow shedding, wind uplift, and hail marks are separate problems. One material can do well at one and poorly at another.
    • Upkeep. Ask what a homeowner actually inspects each year, not what the brochure calls maintenance-free.
    • Service life. Year counts on a label assume correct fastening, flashing, and ventilation. Minnesota freeze-thaw weather shortens a roof that misses those details.
    • Install quality. The National Roofing Contractors Association materials guide treats weight, fire rating, and skilled application as part of the material choice. A premium cover fastened the wrong way will not earn its rating.

    The live roof material types comparison is the page for a head-to-head asphalt-versus-metal decision. This guide stays on the wider set of roofing materials and the checks that apply before anyone picks a bundle or a panel.

    Roofing Materials at a Glance

    Use this table as a first pass. It is qualitative on purpose. A real bid depends on tear-off, deck repair, and access, so this page does not quote figures.

    MaterialWeather behaviorUpkeep focusWhat install quality decides
    Asphalt, including architectural shinglesSheds rain on steep slopes. Hail can bruise granules. Wind lifts a poorly sealed edge.Look for missing tabs, granule loss, and open flashing after storms.Nail zone, starter strips, ice membrane, and attic airflow.
    Metal panels or metal shinglesSheds snow well. Can dent in hail. Wind performance depends on the clip or fastener pattern.Check fasteners, seams, and finish wear. Do not assume zero upkeep.Panel layout, underlayment, and flashing at walls and penetrations.
    Clay or concrete tileDurable in sun and wind when fastened. Heavy snow load plus tile weight needs a structural check.Replace cracked tiles and keep valleys clear. Walking the roof can break tiles.Deck strength, underlayment, and a crew that knows tile fastening.
    SlateVery long service when the slate grade matches the climate. Individual slates can crack.Replace broken slates. Avoid casual foot traffic.Specialized installers, copper or compatible flashing, and deck condition.
    Wood shakes or shinglesCan dry between storms in the right assembly. Fire rating varies, and some codes restrict them.Clear debris so the wood can dry. Watch for moss and split pieces.Spacing, fasteners, and any required fire treatment.
    Low-slope membraneHandles slow-moving water that shingles cannot. Ponding is the failure mode.Keep drains open and watch seams after winter.Slope to drain, seam work, and compatible edge metal.

    Asphalt Roofing Materials, Including Architectural Shingles

    Asphalt shingles are the most common steep-slope roofing materials in the country. The NRCA describes a fiberglass shingle as a glass mat with asphalt on both faces and mineral granules on top. Most fiberglass shingles carry a Class A fire rating, the highest of the common A, B, and C classes. NRCA also recommends shingles that comply with ASTM D3462, which is a standard for glass-felt asphalt shingles surfaced with mineral granules. If a product complies, that note usually appears on the wrapper or in the product sheet.

    Architectural shingles, also called dimensional or laminate shingles, are still asphalt. A second asphalt layer is bonded over the base so the piece looks thicker and less like a flat grid. A 3-tab shingle is one flat layer cut into three even tabs. The laminate does not turn the product into tile, slate, or metal. It changes texture, weight, and often the published wind rating.

    Takeaway: choose architectural shingles when the roof is steep, the deck is sound, and you want a textured asphalt look with a fastening plan that matches the wind rating. Do not choose them to fix a low-slope section, a soft deck, or an ice-dam problem.

    A thicker shingle can carry a higher wind rating than a basic 3-tab product, but the rating is a lab result for that shingle installed to the maker’s pattern. Nail placement, starter courses, and sealed edges decide whether a roof in Rogers or Cottage Grove performs like the sample. The guide to asphalt shingles for Minnesota weather covers impact class, algae resistance, and cold-weather flexibility in more depth. Full replacement sequencing lives in the asphalt shingle roof replacement guide.

    Metal, Tile, and Slate

    Metal roofing materials come as panels or as metal shingles. The NRCA notes that residential metal is a fast-growing part of home improvement and that some products can earn a Class A fire rating. Panels shed snow more readily than a textured shingle, which is why metal shows up on Minnesota homes with long winters. Hail can still dent a panel, and a scratched finish needs attention. Standing-seam and exposed-fastener systems are different installs. The metal roofing guide, the metal roof panels guide, and the standing seam metal roof guide cover those product choices. This page only places metal among the other roofing materials.

    Clay and concrete tile are durable and heavy. NRCA’s guidance is direct: if you are replacing a lighter cover with tile, verify the home can support the added load. Snow adds more weight on top of that. Tile also needs an underlayment system, because the tiles themselves are not a single waterproof sheet. Cracked tiles are a maintenance item, not a reason to dismiss the whole system.

    Slate is quarried, long-lasting, and dependent on installer skill. NRCA calls it more expensive than other roofing materials and notes that application takes special experience. In Minnesota, the practical questions are slate grade, fastener compatibility, and whether the deck and framing can carry it. A slate roof that fails early is often a flashing or fastening problem, not proof that slate cannot survive a cold climate.

    Wood shakes and synthetic covers sit at the edge of this comparison. Many wood products have a Class C fire rating or none, and some local codes limit them, though certain treated products can reach Class A. Synthetic products can imitate slate or wood without matching every property of the original. Read the test data for the product in front of you instead of assuming the look equals the performance.

    Weather, Upkeep, and Lifespan

    National Weather Service thunderstorm guidance treats hail and damaging wind as hazards that arrive together. That pairing is the right test for Minnesota roofing materials. Ask how the cover handles impact, how an edge stays sealed in wind, and what happens when snowmelt refreezes at a cold eave.

    Ice dams are an attic and drainage problem first. Warm air leaks into the attic, melts roof snow, and the water refreezes at the eave. No field shingle, panel, or tile stops that cycle by itself. Ice-and-water membrane at eaves and valleys, plus balanced ventilation, does the local work. The ice dam prevention guide stays on that problem so this page does not repeat it.

    Upkeep follows the material:

    1. After a hail or wind event, look from the ground for bruises, lifted edges, and debris in valleys.
    2. Each spring, confirm gutters and downspouts are clear so meltwater leaves the roof.
    3. On asphalt, watch for bald spots where granules have worn off.
    4. On metal, look at fasteners, seams, and any scratched finish.
    5. On tile or slate, replace cracked pieces and keep foot traffic off the field.

    Lifespan claims should stay tied to conditions. A published year count assumes the deck was solid, the underlayment matched the instructions, and ventilation kept the deck dry. The Department of Energy consumer guide to cool roofs is about reflective covers and cooling energy, not about how many years a Minnesota roof will last. Reflective surfaces can matter on cooling load. They do not replace attic airflow in a heating-season climate. The cool roof shingles guide is the place for that narrower question.

    What Installation Quality Changes

    Two roofs with the same roofing materials can age differently because the hidden work differs. Before you accept a material, walk through this sequence with the contractor.

    1. Separate the slopes. Mark steep-slope areas and any low-slope porch or addition. Do not force one cover onto both.
    2. Repair the deck. Soft, delaminated, or uneven plywood and OSB get replaced before new roofing materials go down.
    3. Set the water layers. Field underlayment, ice-and-water membrane, and edge metal have to match the cover. The roof underlayment guide explains felt versus synthetic sheets.
    4. Flash every opening. Chimneys, sidewalls, skylights, and pipes leak when metal is short, backwards, or added after the field is finished.
    5. Fasten to the rating. Nail or clip placement has to match the pattern that earned the wind rating. A higher rating on the bundle does not transfer to a roof that misses that pattern.
    6. Plan for cold weather. Asphalt is stiffer in low temperatures, and factory sealant may not bond until the roof warms. Late-fall work needs the hand-sealing plan the instructions require.

    The Minnesota roof installation guide covers tear-off and dry-in order. The residential roofing systems guide covers the deck, flashing, ventilation, and drainage as one assembly. Use those pages when the question moves past material selection.

    Referred Restoration installs Malarkey roofing products and treats the cover as one part of the exterior. This article does not rank brands. If a bid names a product, ask for the standard it meets, the slope range, and the fastening pattern, then compare those facts with the roof in front of you.

    When to Keep the Current Roofing Materials

    A comparison of roofing materials does not mean every worn roof needs a new cover. Keep the current material when the deck is solid, the flashing is intact, and the damage is limited to a few pieces you can still match. Architectural shingles from the same product line can repair a small wind scar. A few cracked tiles or slates can be replaced without converting the whole roof. Metal with a sound seam layout may only need fastener or finish attention.

    Takeaway: change roofing materials when the slope is wrong for the current cover, the deck is failing, or the same leak returns after a proper repair. Do not change them only because a neighbor chose a different look.

    Three checks keep that decision honest:

    • Matching pieces are still made, so a repair will not leave a one-off patch.
    • The leak path is visible, such as a lifted edge, a short flashing leg, or a clogged valley, rather than a soft deck across several courses.
    • Attic ventilation is working. A new cover on a wet deck repeats the same failure.

    If those checks fail, the next step is an inspection that names the assembly, not a material picked from a photo. Bring the slope, the age of the cover, and any storm date. That is enough for a contractor to say whether the current roofing materials can stay or whether the roof needs a different system.

    Contact Referred Restoration online for a free inspection before you choose roofing materials. Call (763) 726-4245.

    Frequently Asked Questions

    What roofing materials work on a Minnesota house?

    Steep-slope homes commonly use asphalt shingles, including architectural shingles, or metal panels and metal shingles. Tile and slate can work when the structure can carry the weight and the installer knows the system. Low-slope sections need a membrane, not the same cover as the main roof.

    Are architectural shingles a different kind of roofing material?

    No. Architectural shingles are laminated asphalt shingles. They are thicker and more textured than 3-tab shingles, but they are still asphalt. Metal, tile, and slate are different roofing materials.

    Which roofing materials need the least upkeep?

    None are upkeep-free. Metal often needs fewer surface repairs than asphalt, but fasteners, seams, and finish still need a look. Tile and slate last a long time when cracked pieces are replaced. Asphalt needs storm checks for lifted edges and granule loss.

    Do roofing materials stop ice dams?

    No. Ice dams come from attic heat and a cold eave, not from the brand of cover. Ice-and-water membrane, airflow, and clear drainage address that problem. The field material still has to be installed so meltwater has a path off the roof.

    How should a homeowner judge install quality?

    Ask to see the deck repairs, the ice membrane at eaves and valleys, the starter and edge metal, and the fastening pattern for the product. A wind or impact rating applies only when the roof matches the instructions for that product.

    Contact Referred Restoration online to review your roof before the next storm season. Call (763) 726-4245.

  • Siding for Minnesota Homes: Care, Materials and Storms

    Siding for Minnesota Homes: Care, Materials and Storms

    Cracked panels, loose trim, staining, or recurring peeling are more than appearance concerns. In Minnesota, freezing winters, heavy precipitation, and frequent hail can expose weak points in an exterior and make small maintenance issues harder to ignore. Looking closely at the cladding, seams, flashing, and nearby drainage can help you spot trouble before moisture reaches the wall system.

    Contact Referred Restoration online to schedule a free siding inspection or discuss a custom solution. You can also call (763) 726-4245.

    Well-maintained siding on a Minnesota home

    The right siding for a Minnesota home depends on the home’s exposure, moisture-management details, maintenance preferences, and desired appearance. Vinyl, fiber cement, LP SmartSide, and wood each offer different strengths, so the best choice should follow an inspection and a clear understanding of the home’s needs.

    A sound decision starts with more than comparing colors or materials. It means considering how water moves around the exterior, how the surface will be maintained through the seasons, and whether isolated damage calls for repair or broader replacement planning. Those priorities provide a practical way to evaluate the protection your home needs.

    What Should Minnesota Homeowners Look For in Siding?

    Siding is more than an exterior finish. It is part of the home’s weather-resistance system, helping shield wall assemblies from rain, wind, snow, and everyday exposure. In Minnesota, that role deserves close attention. Freezing winters, heavy precipitation, frequent hail, approximately 43 inches of annual snowfall, and approximately 32 inches of annual precipitation can all test an exterior over time.

    Start an inspection by looking for visible damage and changes in how the siding sits on the wall. Cracked, split, loose, warped, or missing sections can allow water to reach areas that should remain protected. Pay particular attention around windows, doors, corners, roof lines, and wall penetrations. These transitions have more joints and trim details, so they need careful installation and periodic observation. Staining, soft areas, rot, peeling finishes, or interior signs of dampness also warrant a closer assessment rather than a cosmetic patch alone.

    Look beyond the siding surface

    Water management behind the cladding is just as important as the visible material. Exterior wall systems can admit small amounts of water through joints, cracks, and gaps, especially when wind drives rain against the home. A properly designed drainage plane gives that water a controlled path down and away from the wall instead of allowing it to collect inside the assembly. The U.S. Department of Energy’s Building America Solution Center explains that a continuous drainage plane should be sealed and coordinated with flashing. This includes flashing around doors, windows, penetrations, and the bases or tops of walls. Learn more about drainage planes behind exterior cladding.

    That makes flashing, trim, clearances, and visible sealant conditions important inspection priorities. Sealants can require periodic attention, and a new bead of caulk should not be used to conceal a larger drainage or substrate problem. If siding damage is concentrated near a gutter, downspout, or roof edge, inspect the water path as well. Leaks, clogs, and damaged gutters can redirect water onto the roof, siding, or foundation. Reviewing gutter and drainage protection can help homeowners consider the exterior as one connected system.

    Hail and wind deserve a separate look after severe weather. Check for dents, fractures, displaced panels, and damaged trim from the ground, but avoid climbing or disturbing questionable areas. An inspection can help distinguish surface damage from conditions that affect the wall beneath it. Addressing cracked or damaged sections early may help restore protection from water intrusion, mold, energy loss, and appearance problems.

    Once these exposure and water-management questions are clear, the right material choice becomes easier to evaluate. Vinyl, fiber cement, engineered wood, and wood each bring different maintenance, appearance, and performance considerations to the home.

    Which Siding Material Fits Your Home?

    There is no single siding material that suits every Minnesota home. The right choice depends on the appearance you want and how much maintenance you are comfortable with. It also depends on the condition of the exterior and the home’s exposure to freezing winters, heavy precipitation, and hail. A careful inspection helps connect those priorities to a practical recommendation.

    Referred Restoration works with vinyl, fiber cement, LP SmartSide, and wood siding. Each option can be a good fit in the right situation, but the material is only one part of performance. Proper preparation, moisture management, flashing, and professional installation matter just as much.

    MaterialMaintenance and appearanceDurability and moisture considerationsMay fit homeowners who want
    VinylLow-maintenance siding available in a range of profiles, colors, textures, and finishes.Resists routine upkeep, but cracked, loose, or displaced panels should be inspected so water does not reach vulnerable areas behind the cladding.A practical exterior with less ongoing maintenance and broad style flexibility.
    Fiber cementStrong, durable material with a substantial appearance that can complement many home styles.Its performance still depends on sound installation, protected joints, appropriate clearances, and attention to moisture at openings and transitions.Durability and a more solid, traditional look.
    LP SmartSideEngineered wood siding designed to provide a natural wood look with a durable exterior option.Like any wood-based siding, it should be kept properly detailed and maintained at joints, edges, and areas exposed to recurring moisture.Wood-style character with an engineered-wood material choice.
    WoodNatural texture and character that can suit traditional, rustic, or custom architectural designs.Requires closer attention to paint or finish condition, water exposure, trim, and signs of rot or surface damage.A classic appearance and willingness to stay engaged with maintenance.

    Look beyond the sample color

    Appearance is important, but evaluate how the material will work with your roof, windows, doors, trim, and surrounding landscape. Profiles and installation patterns can change the visual scale of a home. A low-maintenance choice may be more suitable for one homeowner, while another may place greater value on natural texture or a specific architectural style.

    Moisture protection is part of the material decision

    Siding is the visible outer layer, not a substitute for a complete wall-protection system. Water can enter through joints, cracks, and small gaps, so the assembly behind the siding needs appropriate drainage and flashing. Pay particular attention around windows, doors, wall bases, and roof-to-wall transitions. Gutters and downspouts also affect how much water reaches the siding. For a local evaluation of materials and installation needs, review the siding inspection and replacement services from Rogers siding contractors.

    An inspection can identify damaged sections, rot, or inefficiencies before you commit to a material. That makes the decision more useful than choosing by color alone, and helps ensure the final siding system fits both your home and your maintenance expectations.

    How Can You Prevent Moisture Problems Behind Siding?

    Siding is the visible layer of your exterior, but it is not the only layer managing rain and melting snow. A well-built wall gives water a controlled path away from the home instead of allowing it to collect behind the siding. This matters in Minnesota, where freezing winters, heavy precipitation, and frequent hail can test every joint, seam, and transition.

    Build in a drainage path

    Behind the siding, a water-resistant barrier or drainage plane helps direct water down the wall and back outside. The U.S. Department of Energy’s Building America Solution Center explains that a continuous drainage plane helps keep water out of wall cavities and should be designed to channel water away from the building. In practical terms, the layers should work together rather than create pockets where moisture can sit.

    House wrap, building paper, or another approved weather-resistant barrier must be installed and sealed according to the product and project requirements. Seams, overlaps, and transitions deserve particular attention. A barrier that is cut, loose, or poorly sealed may not perform as intended. You can review the technical guidance on drainage planes behind exterior wall cladding for more detail.

    Pay attention to flashing and openings

    Windows, doors, corners, roof lines, utility penetrations, and wall bases are common transition points. Flashing helps move water away from these vulnerable areas. The drainage-plane layer should lap over the flashing so water continues downward and outward. The exact materials and installation details vary with the wall assembly, siding product, and local requirements. A qualified contractor should follow applicable manufacturer instructions and building codes rather than rely on a one-size-fits-all detail.

    Trim and penetrations also need a careful inspection. Look for cracked or missing sealant, gaps around pipes and vents, loose trim, or siding pulled away from the wall. Sealants can require periodic reapplication because they may wear before the surrounding cladding does. These observations do not prove hidden damage, but they are good reasons to arrange an inspection before a small opening becomes a larger moisture problem.

    Keep roof water away from the wall

    Moisture management does not stop at the siding. Gutters and downspouts should collect roof runoff and discharge it away from the exterior and foundation. Leaks, clogs, or damaged sections can send concentrated water down the siding, into trim joints, or against the base of the wall. Maintaining clear, properly directed drainage supports the work of the wall assembly. For help evaluating gutter and drainage protection, an inspection can identify where water is escaping and what needs attention.

    When you see recurring staining, soft trim, rot, bubbling, or dampness indoors, do not assume replacing the visible siding alone will solve it. An inspection can trace the water path, assess the surrounding materials, and determine whether targeted repairs or broader work is appropriate.

    What Maintenance Does Siding Need Through the Seasons?

    Minnesota weather puts siding through freezing winters, heavy precipitation, snow, and hail. A simple seasonal check can help you notice small problems before water reaches the wall beneath the cladding. Walk the exterior from a safe position, use the checklist below, and leave repairs that require ladders, removal of panels, or work near electrical fixtures to a qualified professional.

    1. Look over the siding after winter. In spring, inspect for cracked, split, warped, or visibly displaced panels. Pay particular attention to corners, lower wall sections, and areas below windows where melting snow or runoff may collect. Damaged or cracked sections can reduce the exterior’s protection from water and should be assessed rather than covered up.
    2. Clean safely when the surface needs it. Remove ordinary dirt with a soft brush or a gentle garden-hose rinse, following the material manufacturer’s care guidance. Avoid abrasive tools, harsh chemicals, and directing high-pressure spray behind laps, seams, or trim. If algae, staining, or buildup does not come away with gentle cleaning, ask for advice instead of increasing the pressure.
    3. Check for loose panels and open joints. From the ground, look for siding that no longer sits evenly, panels that move, or gaps at seams and corners. Do not force a panel back into place. A loose section may have damage behind it or may need proper fastening to preserve the intended water-shedding design.
    4. Observe trim, caulk, and transitions. Inspect the visible sealant around windows, doors, corner posts, and other trim for cracking, separation, or missing sections. Sealants can need periodic reapplication because they may not last as long as the surrounding cladding. Avoid applying new caulk over wet, damaged, or deteriorated material without understanding the cause.
    5. Keep vegetation from rubbing the wall. Trim branches, vines, and dense growth so they do not scrape siding or hold moisture against it. Do not attach supports or hardware through siding without a plan for keeping the penetration watertight. Keep mulch and soil from being piled against the lower edge of the wall.
    6. Inspect gutters and downspouts with the siding. Clear leaves and other visible debris when conditions are safe, then check whether water flows away from the house. Look for leaks, clogs, sagging, or discharge that leaves splash marks on the wall. Proper gutter maintenance helps protect the roof, siding, and foundation. See our guide to gutter and drainage protection for related guidance.
    7. Schedule an inspection when warning signs persist. Seek professional help if you see recurring moisture marks, rot, mold, widespread cracking, storm damage, or damage that returns after cleaning. An inspection can assess the siding, trim, drainage, and areas behind visible defects so you can make an informed repair or replacement decision.

    Freeze-thaw movement deserves attention at the transitions where siding meets trim, corners, windows, doors, and roof-to-wall details. Repeated expansion and contraction may open small gaps or loosen a connection without creating an obvious failure from the yard. Look for changes after winter and ask an inspector to assess any separation, cracking, or movement before sealing over it.

    After snow or ice accumulation, check lower wall areas, sheltered corners, and locations below roof edges from a safe position. Melting snow can follow trim or collect where siding meets a deck, porch, or other projection. Keep gutters and downspouts clear and directed away from the wall so runoff does not repeatedly wet one section of cladding.

    As spring thaw begins, look for staining, soft trim, bubbling, or dampness near openings and at the base of the wall. In summer and fall, inspect after strong wind or hail for dents, fractured panels, displaced pieces, and damaged flashing. Wind-driven rain can enter at a small opening, while hail can damage both the siding face and nearby trim. These observations may warrant further evaluation even when indoor signs are not present.

    A practical seasonal routine is to compare the same elevations over time, keep dated photos, and note changes after severe weather. Do not remove panels or climb to inspect difficult areas unless the work is safe and appropriate. A qualified professional can assess the visible cladding, drainage path, and surrounding transitions together.

    Keep a few dated photos after major storms and at the start of each season. They make changes easier to spot and give an inspector useful context about when a problem appeared.

    Should You Repair Siding or Plan a Full Replacement?

    Not every siding problem calls for a full replacement. A cracked panel, loose section, or small area of storm damage may be a practical repair when the surrounding siding remains secure, dry, and in good condition. The right decision depends on what is happening behind the visible surface as well as what you can see from the yard.

    Start with an inspection rather than choosing a solution based only on appearance. A siding inspection can assess visible damage, rot, and areas where the exterior may be less efficient than it should be. It can also help determine whether water has moved beyond one damaged section. This inspection-first approach keeps an isolated issue from being overlooked while avoiding replacement work that the home does not need.

    A useful decision framework is to compare the location, pattern, and cause of the damage rather than treating every defect alike. The following signs can help organize a conversation with an inspector:

    • A focused repair may fit when damage is isolated, the surrounding panels and trim remain secure, and there is no evidence of continuing moisture.
    • Matching-material repair deserves planning when replacement panels or trim can be matched and the underlying wall, flashing, and drainage details are sound.
    • Broader replacement planning may be appropriate when warping, rot, staining, or moisture evidence appears across multiple elevations or transitions.
    • A larger evaluation is warranted when the same failure returns, matching materials are unavailable, or repairs would leave weak connections and unresolved water paths.

    This framework is not a substitute for a site assessment. An inspection can separate surface damage from problems in trim, flashing, sheathing, or the wall assembly and can help define a practical scope without assuming that the most extensive option is necessary.

    When a siding repair may be enough

    Repair is often worth considering when the damage is clearly localized. Examples include a few cracked panels after an impact, a loose section, or trim that has separated from an otherwise sound wall. Replacing the affected materials can restore the exterior’s appearance and help maintain protection from water intrusion, mold, and energy loss. The repair should also address the reason the damage occurred, such as impact, movement, or water directed toward the wall.

    Matching the existing profile and color matters, but a visual match is not the only test. The surrounding siding should be checked for softness, staining, movement, and signs that water is collecting behind it. If the substrate and moisture-management details are sound, a targeted repair may provide the appropriate scope for the problem.

    When replacement deserves closer consideration

    Full replacement becomes more relevant when damage is widespread, moisture has affected multiple areas, or repairs keep recurring. Rot, persistent discoloration, soft wall areas, and repeated panel failures can indicate that the issue extends beyond one piece of siding. Replacement may also make sense when the existing exterior has broad appearance problems or no longer supports the home’s insulation and comfort goals. New siding can improve insulation, indoor temperature regulation, comfort, and energy efficiency, although the results depend on the home’s existing construction and the selected materials.

    Replacement also provides an opportunity to review the entire exterior system. During planning, the team can consider material fit, exposure, trim, openings, and water management together instead of treating each symptom separately. Referred Restoration offers siding inspection and replacement services from Rogers siding contractors for homeowners evaluating those choices.

    A sound process is straightforward: inspect the condition, identify the source of the damage, compare repair and replacement scopes, then select a custom solution. Whether the answer is a focused repair or professionally installed new siding, the goal is to restore a secure, well-managed exterior that fits the home’s needs.

    What Should You Do After Wind or Hail Damages Siding?

    Wind and hail can leave siding cracked, loosened, dented, or partly detached. After a storm, focus first on safety and documentation rather than climbing ladders or trying to make a quick repair. Minnesota weather can change quickly, and damage that looks cosmetic from the yard may still deserve a closer inspection.

    When storm damage is visible on one elevation, compare nearby corners, openings, trim, gutters, and downspouts before deciding that only the marked panel needs attention. Wind and hail can affect connected details, and a displaced piece may point to a fastening or moisture issue that is not obvious from the ground.

    If the siding is wet, loose, or open to the wall, keep the area protected and arrange an inspection rather than sealing it permanently. The inspection should consider the exterior surface, the drainage path, and any related transitions. That evidence helps distinguish a limited repair from a broader restoration plan.

    Stay safe and document what you can see

    Keep people away from loose panels, exposed fasteners, fallen branches, and any area where electrical lines may be down. Do not climb onto the roof or use a ladder to inspect upper siding unless you are trained and the conditions are clearly safe. From the ground or another secure location, take well-lit photos and video of each affected elevation. Capture close views of cracked or missing sections, along with wider images that show where the damage is located on the home.

    Record the date of the storm and note other visible exterior damage, such as damaged gutters, windows, or roofing. Keep copies of your photos and any related communications. This information can help a contractor understand what happened and gives you organized records for a conversation with your insurance company.

    Use temporary protection only when it is safe

    If a small section is loose and can be secured safely from the ground, keep the area protected from people and further disturbance. Avoid forcing panels back into place, sealing over wet materials, or covering a large damaged area without understanding what is behind it. Improper temporary work can conceal moisture or create additional problems. If water is entering the home, use a safe interior container or other temporary measure while arranging professional help, and treat active leaks as a priority.

    Arrange an inspection before deciding on repairs

    A professional inspection can distinguish isolated siding damage from problems involving trim, flashing, sheathing, or moisture behind the exterior. It can also help determine whether damaged or cracked sections are suitable for repair or whether broader work should be considered. The right next step depends on the location, extent, and condition of the damage, not just how the siding looks from a distance.

    Referred Restoration can also evaluate related exterior storm damage as part of an exterior inspection. Insurance coverage and claim outcomes depend on your policy, the cause of the damage, and the facts documented for the event. A contractor may assist with inspection and insurance coordination, but no one can promise that a claim will be covered. Review your policy and communicate directly with your insurer while you arrange an independent, detailed assessment.

    What Happens During a Siding Replacement?

    A siding replacement should begin with an assessment, not a material catalog. The inspection looks at visible damage, rot, moisture concerns, inefficient areas, trim, and conditions around windows, doors, and rooflines. In Minnesota, freezing winters, heavy precipitation, and hail can expose weaknesses that are easy to miss from the ground. A careful review helps determine whether the home needs isolated repairs or a broader replacement plan.

    From there, the homeowner and contractor can discuss a custom solution. Referred Restoration offers vinyl, fiber cement, LP SmartSide, and wood siding options. The right choice depends on the home’s exposure, desired appearance, maintenance preferences, and the condition of the existing exterior. Styles and colors can be selected to complement the home rather than treating one material as the best fit for every project.

    Preparing the home for installation

    Before new siding goes up, the crew prepares the work area and removes the existing material where replacement is planned. This stage provides an opportunity to inspect the underlying wall for damage or areas that need attention. The team also works around windows, doors, corners, vents, and other transitions. Proper preparation matters because siding is part of a larger exterior system, and water management depends on how those components meet.

    Homeowners can help by clearing objects near the walls, moving vehicles away from the work area, and identifying exterior features that need special care. If landscaping, outdoor furniture, or other items could interfere with access, discussing them before work begins can reduce delays.

    Custom fitting and installation

    Siding is custom-fitted to the home. Installers measure and cut panels or boards to follow the home’s dimensions, rooflines, openings, and architectural details. They install the selected material with the appropriate trim and finishing pieces, paying attention to alignment and clean transitions. This is also when the planned color, profile, and layout become visible across the exterior.

    Installation generally takes a few days to a week, but that is only a typical range. The actual schedule depends on the home’s size, the materials selected, the scope of preparation, weather, and details such as gables, dormers, and multiple levels. A clear inspection and project plan provides a more useful expectation than a one-size-fits-all promise.

    Cleanup and completion checks

    After installation, the crew should clean the work area and review the finished exterior. Completion checks include looking for consistent lines, secure panels or boards, finished trim around openings, and details that could allow water to enter. The homeowner should walk the property with the project team, ask questions, and confirm that agreed-upon work has been addressed.

    Homeowners in the area can learn more about exterior restoration in Cottage Grove or contact Referred Restoration online to discuss an inspection and next steps.

    Contact Referred Restoration online to arrange a free siding inspection before choosing repair or replacement. You can also call (763) 726-4245.

    Frequently Asked Questions

    What type of siding is best for a Minnesota home?

    There is no single best choice for every home. Vinyl can be a low-maintenance option, fiber cement is known for strength and durability, LP SmartSide offers an engineered-wood appearance, and wood provides a natural look. The right fit depends on your home’s exposure, moisture conditions, maintenance preferences, architectural style, and project goals. An inspection and material discussion can help narrow the options.

    How can I prevent moisture problems behind siding?

    Start by keeping water moving away from the walls. Make sure gutters and downspouts are clear and directing runoff away from the foundation. During an installation or repair, the contractor should also evaluate flashing, wall penetrations, trim, and the drainage layer behind the siding. These details help water that gets past the exterior move safely back outdoors instead of collecting in the wall.

    How often should siding be inspected or maintained?

    Check the exterior at least seasonally and after severe weather. Look for cracked or loose sections, damaged trim, failed caulk, staining, soft areas, and vegetation touching the wall. Clean siding using a method appropriate for its material, and avoid forcing water behind panels or openings. If you notice rot, recurring moisture, or damage you cannot safely assess, arrange a professional inspection before the problem spreads.

    Should I repair damaged siding or replace it?

    Repair may make sense when damage is limited to a few cracked or damaged sections and the surrounding siding remains sound. Replacement deserves consideration when moisture, rot, repeated storm damage, widespread deterioration, or insulation and comfort concerns affect larger areas. An inspection can identify the source of the problem and help determine whether a targeted repair or a coordinated replacement will better protect the home.

    Ready to Plan the Right Siding Solution?

    Every home has different exposure, moisture conditions, and maintenance needs. A professional inspection can help clarify whether a focused repair or broader replacement plan makes sense for your property.

    Contact Referred Restoration online to schedule a free siding inspection or discuss a custom solution. You can also call (763) 726-4245.

  • Exterior Vinyl Siding for Minnesota Homes

    Exterior Vinyl Siding for Minnesota Homes

    Exterior siding does more than shape your home’s curb appeal. In Minnesota, it also has to handle freezing temperatures, strong sun, wind, and storm exposure while helping keep moisture out of the wall assembly. That makes the material, installation details, and condition of the existing siding worth considering together.

    Contact Referred Restoration online to discuss your siding options or schedule a free inspection. Call (763) 726-4245.

    Blue vinyl-sided Minnesota home with white trim and a gable roof

    For Minnesota homeowners, exterior vinyl siding can be a practical choice because it offers varied styles and finishes with relatively simple maintenance. The right decision still depends on the home’s exposure, the siding’s condition, and whether water-resistive barriers, flashing, and the underlying sheathing are sound.

    Start by looking beyond color and profile. Understanding how vinyl siding works in a Minnesota climate will help you compare maintenance needs. Inspect damage more thoughtfully, and decide whether a targeted repair or a larger project makes sense.

    What Makes Exterior Vinyl Siding Practical for Minnesota Homes?

    For many Minnesota homeowners, the appeal of vinyl siding is the balance between a finished exterior and a manageable maintenance routine. Quality vinyl siding does not require the same regular painting cycle as wood, and common profiles can provide a consistent appearance across large wall surfaces. That can make it a practical option for a home exposed to long winters, summer sun, wind, and occasional hail.

    Low maintenance does not mean maintenance-free. Panels, seams, corners, and trim still deserve periodic attention. Look for loose or cracked pieces, gaps around openings, unusual bulges, and areas where water may be collecting. A gentle cleaning can remove ordinary dirt, but aggressive pressure washing or harsh chemicals may damage the finish or force water behind the siding. Follow the product manufacturer’s care guidance.

    Choose for Minnesota’s changing weather

    Weather-aware selection starts with the home’s exposure. A wall that receives strong afternoon sun may place more emphasis on color and finish selection. Areas below roof edges, near decks, or beside sprinklers may need closer attention to drainage and recurring moisture. After a storm, inspect vulnerable elevations and trim rather than assuming the siding is unaffected because the panels still look intact.

    Installation details matter just as much as the visible product. The Minnesota Department of Labor and Industry explains that exterior siding, water-resistive barriers, and flashing at doors and windows are addressed by the Minnesota Residential Code. Vinyl siding must also be installed according to the manufacturer’s instructions. The barrier behind the siding helps manage water that gets past the outer layer, while flashing directs water away from openings. These components should be evaluated as part of the exterior system, not treated as optional add-ons. Minnesota’s siding guidance provides the applicable technical context.

    Seasonal preparation can help you spot small concerns before freezing weather and wind make them harder to address. Review these practical steps to winterize your home exterior, including checks around drainage and exposed exterior surfaces.

    If you find isolated damage, repair may be appropriate. If cracking, moisture evidence, rot, or installation concerns extend across multiple elevations, an inspection can clarify whether repair or replacement makes more sense. Referred Restoration provides siding inspections, repairs, installation, and replacement for homeowners in Rogers and nearby communities. The right choice depends on the siding’s condition and the details behind it, not on a blanket promise about one material.

    Which Exterior Vinyl Siding Styles and Finishes Fit Your Home?

    Choosing a siding profile is about more than selecting a color. The lines, texture, and direction of the panels can change how tall, wide, traditional, or modern your home appears. Start by looking at the architecture, rooflines, windows, trim, and neighboring homes. Then consider how much visual texture you want and whether the siding will cover the entire exterior or highlight selected areas.

    Lap siding is the familiar horizontal profile found on many Minnesota homes. Its even lines create a balanced appearance and work well with traditional, ranch, split-level, and transitional designs. Lap vinyl siding is commonly selected for its low-maintenance qualities and straightforward appearance. It can also provide a neutral backdrop for contrasting trim, shutters, doors, or stone accents.

    Shake siding brings a more textured, cottage-inspired look. It can suggest cedar shakes without requiring the same ongoing maintenance associated with real wood. Use it across a gable or upper story when you want added character, or combine it with lap siding to create visual separation between floors. Because shake has a stronger pattern, applying it selectively can keep the exterior from looking busy.

    Board-and-batten siding runs vertically and gives a home a bold architectural accent. It can suit modern farmhouse designs, garages, entry areas, dormers, and gables. On a full exterior, the vertical direction may make a one-story wall feel taller. On an accent area, it can draw attention to a specific part of the facade without changing the whole home’s visual character.

    Style or finishVisual characterBest fit
    LapHorizontal linesTraditional exteriors
    ShakeTextured, cedar-inspiredGables and cottage accents
    Board-and-battenBold vertical linesGables and modern accents
    WoodgrainNatural-looking textureTraditional designs
    SmoothClean, sleek surfaceModern designs

    Finish affects the result even when the profile stays the same. Woodgrain texture mimics the look of natural wood and adds visual warmth. A smooth finish has a cleaner, more contemporary appearance and can make a design feel less rustic. Both finish types are available in multiple colors, so evaluate samples outdoors if possible. Daylight, roof color, masonry, and existing trim can make the same siding color look noticeably different.

    Also consider how the profile will meet corners, windows, doors, soffits, and roof edges. Trim is not just decorative. It helps define transitions and gives the installation a finished appearance. If you’re weighing vinyl against other exterior materials, review these engineered siding alternatives alongside your home’s condition, design, and maintenance expectations. The best choice is the one that fits the structure and remains practical after an inspection.

    How Durable Is Exterior Vinyl Siding and What Maintenance Does It Need?

    Exterior vinyl siding is designed to be a practical, low-maintenance wall covering, but it is not maintenance-free. Its condition depends on the quality of the material, the installation, exposure to weather, and how quickly small problems are addressed. In Minnesota, seasonal temperature changes, wind, snow, ice, hail, and sunlight can all reveal weaknesses over time.

    A routine inspection does not need to be complicated. Walk around the home at least once a year, and look more closely after a major storm. Check for panels that are cracked, loose, bowed, or pulling away from the wall. A panel that has shifted may allow water to reach areas that should remain dry. Look at the seams between panels, especially where siding meets corners, windows, doors, rooflines, and other exterior materials.

    Pay attention to trim and moisture entry

    Trim is more than a decorative border. It helps finish transitions and protect vulnerable edges around openings and corners. Inspect trim for gaps, movement, splitting, or signs that water is getting behind it. Also check caulked joints where appropriate, but do not assume that adding more caulk is a complete repair. The underlying flashing and water-resistive barrier, or WRB, must work as part of the home’s moisture-management system.

    Inside the home, stains, soft drywall, musty odors, or damp insulation near an exterior wall can justify a closer investigation. These signs do not automatically mean the siding must be replaced. They do mean the source of the moisture should be identified before the visible symptom is covered. Referred Restoration offers siding inspections to look for damage, rot, or inefficiencies and can help determine whether a repair or larger project fits the home’s condition.

    For a closer look at corners, window areas, and other finishing details, review this vinyl siding trim guide.

    Clean gently and respond to impact damage

    Cleaning usually calls for a soft brush or cloth, mild household soap, and water. Work from the top down, rinse thoroughly, and test any cleaning solution on an inconspicuous area first. Avoid harsh solvents, abrasive tools, and excessive pressure that could damage the finish or force water behind the panels. Keep ladders, snow equipment, grills, and landscaping tools from striking the siding.

    After hail, wind, or an accidental impact, document cracked or displaced panels and have the area assessed. An isolated damaged panel may be repairable, while widespread damage, recurring moisture, or deterioration behind the siding may call for a broader evaluation. The right maintenance plan is condition-based, not a guarantee tied to a fixed lifespan.

    When Should You Repair Siding Instead of Replacing It?

    A damaged panel does not automatically mean your entire exterior vinyl siding system needs to be replaced. In many cases, a targeted repair can restore the appearance and protective function of a limited area. The right choice depends on what caused the damage, how far it extends, whether moisture reached the layers beneath the siding, and whether a suitable match is available.

    Use this decision framework as a starting point, then have the affected area inspected before work begins:

    1. Start with isolated damage. A single cracked, punctured, or loose panel may be a repair candidate when the surrounding panels remain straight, secure, and free from related moisture signs. The repair should address the underlying cause as well as the visible panel. For example, impact damage, an improperly secured piece, or movement around trim may need different solutions. Replacing one section can be practical, although older siding may be difficult to match in color, profile, or texture.
    2. Look for a pattern rather than one symptom. Repeated cracks, panels that keep coming loose, or damage across several elevations suggest that more than one panel is involved. The issue could relate to installation, movement, storm exposure, or deterioration of adjacent components. That does not make replacement automatic, but it does make a broader inspection more useful than repeated spot repairs.
    3. Investigate moisture and rot before deciding. Soft areas, staining, swelling, musty odors, or visible deterioration around windows, doors, corners, and lower walls deserve prompt attention. Siding is only the outer layer of the wall assembly. If water has affected sheathing, framing, insulation, or other materials behind it, repairing the surface alone may leave the real problem in place. Minnesota guidance states that rotted or damaged sheathing, framing, and insulation found after siding removal must be replaced. See the Minnesota siding and re-siding guidance for the related code and inspection considerations.
    4. Consider widespread fading, warping, or brittleness. A large area of uneven fading may make a replacement section stand out, even when the new panel is technically compatible. Warped, brittle, or severely weathered panels can also indicate that the siding is nearing the end of its useful service life. If the problems are confined to one wall, a partial project may still be reasonable. If they appear throughout the exterior, compare the long-term practicality of coordinated replacement with a series of isolated repairs.
    5. Let inspection findings guide the scope. An inspection should examine panels, seams, trim, openings, and the wall materials that can be reached or safely evaluated. Referred Restoration offers siding inspections for damage, rot, or inefficiencies, along with siding repair, installation, and replacement services. Its recommendations are intended to follow an honest assessment rather than assume replacement. That approach can help homeowners in Rogers, St. Francis, Monticello, and Cottage Grove choose a repair when the damage is limited, or plan a larger project when the evidence supports it. Learn more from Rogers siding contractors.

    The goal is not to choose the biggest project. It is to restore a sound exterior with a scope that matches the home’s actual condition. Ask what was found, what remains unknown, and how the proposed repair or replacement addresses moisture protection before approving the work.

    What Should Minnesota Homeowners Check Before Siding Replacement?

    Before new exterior vinyl siding goes on, make sure the project addresses more than the visible panels. A thorough plan should account for permits, moisture protection, the condition of the wall assembly, ventilation, manufacturer requirements, and the inspections that happen during and after the work. These checks help prevent a new exterior from covering an unresolved problem.

    Confirm the permit and inspection requirements

    Minnesota requires a building permit for re-siding existing dwellings and structures. The Minnesota Department of Labor and Industry also explains that the state residential code includes requirements for exterior siding, water-resistive barriers (WRB), and flashing around exterior doors and windows. Before work begins, ask which municipality will issue the permit, who will schedule inspections, and what must remain visible for the inspector. The department recommends understanding inspection and code-compliance requirements before starting the project. Review Minnesota’s re-siding guidance from the Department of Labor and Industry for the official requirements.

    Inspect the wall behind the old siding

    Removal is an important point in the project because it reveals conditions that cannot be evaluated from the outside. Look for water staining, soft or rotted sheathing, damaged framing, and compromised insulation. If rotted or damaged sheathing, framing, or insulation is found after the siding comes off, it must be replaced before the exterior is closed again. Ask how those repairs will be documented and whether the municipality needs to inspect them before work continues. A replacement plan should identify this possibility rather than assuming the substrate is sound.

    Verify the WRB and flashing plan

    The WRB, often called house wrap, helps manage water that gets behind the siding. Flashing directs water away from vulnerable areas such as windows, doors, corners, and other transitions. Both systems need to be installed according to applicable code and the relevant manufacturer’s instructions. They also require inspection before the siding conceals them. Ask to see how seams, openings, and penetrations will be handled. WRB seam tape is not automatically flashing. It counts as flashing only when the WRB manufacturer and building official approve it for that use.

    Protect vents and plan the final walkthrough

    Before installation, identify every intake and exhaust vent, exterior light, outlet, hose connection, and house number that must be removed and reinstalled. Existing mechanical intake and exhaust vents may not be altered or replaced during re-siding, while any new vents must meet code requirements.

    At completion, check that trim is secure, openings are sealed, vents remain functional, and house numbers are visible and compliant with local requirements. Minnesota requires a final re-siding inspection when the project is complete. A careful walkthrough with the contractor and the inspector gives you a clearer record of what was repaired, how the new siding was installed, and whether the finished exterior is ready for the next Minnesota season. For a broader planning reference, see this house siding replacement guide.

    How Do You Choose a Siding Contractor and Plan the Project?

    The right contractor should make the project easier to understand before any material is ordered. Start with an inspection-led conversation about the home’s condition, moisture exposure, age, and the reason for the work. A cracked panel may call for a focused repair, while concealed rot or widespread deterioration may change the recommendation. The goal is not to assume replacement is necessary. It is to match the work to what the exterior actually needs.

    For homeowners in Rogers, St. Francis, Monticello, Cottage Grove, and nearby communities, a local team can assess the siding in the context of the rest of the exterior. Referred Restoration provides siding inspections, repairs, installation, and replacement. Learn more about Rogers siding contractors and the questions an inspection should answer.

    What should the written scope include?

    Ask for a written scope that identifies the siding profile, finish, color, trim, affected elevations, removal work, cleanup, and any areas that may need further inspection after the existing siding comes off. It should also explain how the contractor will address house wrap, or water-resistive barrier (WRB), flashing, sheathing, vents, windows, doors, and transitions between materials. A clear scope gives you something specific to review. That is better than relying on a broad description such as “replace the siding.”

    Ask how changes will be documented if damaged sheathing, framing, or insulation is discovered during removal. Minnesota guidance states that rotted or damaged materials found after removal must be replaced, and those repairs may require municipal inspection before work continues. Re-siding existing dwellings and structures also requires a building permit, with a final re-siding inspection after completion. The Minnesota Department of Labor and Industry siding guidance explains these requirements.

    Which installation details should you discuss?

    Confirm that the contractor will follow both the Minnesota Residential Code and the siding manufacturer’s instructions. Ask how WRB seams, window and door flashing, wall penetrations, corners, and bottom edges will be handled. WRB protects the wall assembly from water that gets behind the siding, while flashing directs water away from vulnerable openings. These are not details to leave implied. Minnesota guidance specifically calls for inspection of WRB and flashing installation.

    Finally, discuss coordination with the roof, gutters, and windows. Siding, roof edges, drainage components, and window trim meet at several important transitions. A contractor should explain whether existing gutters, roof-wall flashing, vents, or window conditions affect the siding plan. Ask who will handle permits and inspections, what product documentation will be available, how weather delays will be communicated, and who your point of contact will be. Clear answers, a defined scope, and recommendations tied to observed conditions are stronger signs of a sound project plan than pressure to choose the largest possible scope.

    Contact Referred Restoration online to schedule a free siding inspection before you choose repair or replacement. Call (763) 726-4245.

    Frequently Asked Questions

    How often should I inspect my vinyl siding?

    Inspect it at least once a year and after major hail, wind, or other severe weather. Look for cracked or loose panels, open seams, damaged trim, staining, and areas where water may collect. Check around windows, doors, roof edges, and penetrations because small failures in those transitions can allow moisture behind the siding.

    Can damaged vinyl siding be repaired without replacing the whole exterior?

    Often, yes. A repair may make sense when damage is limited to a few panels or trim pieces and the underlying wall remains sound. Replacement deserves consideration when damage is widespread, moisture or rot is present, matching older panels is difficult, or the siding no longer provides reliable protection. An inspection can help separate an isolated repair from a larger moisture problem.

    Does Minnesota require a permit to replace siding?

    Yes. Minnesota requires a building permit for re-siding existing dwellings and structures. The Minnesota Department of Labor and Industry also states that siding must follow the Minnesota Residential Code and the manufacturer’s instructions. A final re-siding inspection is required when the project is complete. Minnesota DLI re-siding guidance

    What should be checked behind the siding before installation?

    The wall should be checked for damaged sheathing, framing, or insulation, along with the water-resistive barrier, or WRB, and flashing around windows and doors. Minnesota guidance requires damaged materials found after removal to be replaced, and WRB and flashing installation must be inspected. These details help address moisture protection before new panels cover the wall. Minnesota Residential Code guidance

    Ready to choose the right siding for your home?

    A closer look at your existing panels, trim, and moisture details can help you decide whether a targeted repair or full replacement makes sense. Referred Restoration can discuss exterior vinyl siding options and help you plan the next step with your home’s condition in mind.

    Contact Referred Restoration online

    You can also call (763) 726-4245 to talk through your siding questions.

  • How Are Seamless Gutters Installed in Minnesota?

    How Are Seamless Gutters Installed in Minnesota?

    New gutters affect more than the roof edge. They influence where rainwater lands, how the exterior looks, and how easily a homeowner can manage runoff through Minnesota’s wet seasons, snow, and freeze-thaw cycles. That is why a good project starts with a clear plan, not simply a ladder and a length of gutter.

    Seamless gutter installation on a Minnesota home

    For homeowners asking how are seamless gutters installed, the professional process includes an inspection, roofline planning, on-site fabrication, secure attachment, downspout connection, and a final water-flow check. The detailed mechanics should be tailored to the home’s fascia, roof shape, drainage needs, and weather exposure. Homeowners can add value by preparing access, sharing known drainage concerns, and confirming that the finished system is secure and sends water away from the foundation.

    This guide focuses on the homeowner’s side of the project: what to do before the crew arrives, what to expect during the visit, how to review the completed work, and when to ask for help. For the technical installation sequence, including fabrication, pitch, hangers, and drainage design, see our detailed seamless gutter installation guide rather than treating this article as a second process manual.

    Contact Referred Restoration online to discuss a free gutter inspection for your Minnesota home.

    How Should You Prepare Before Seamless Gutter Installation?

    The most useful preparation happens before the installation crew begins. A homeowner does not need to calculate gutter pitch or choose attachment spacing. Those decisions belong in the professional assessment. Instead, focus on giving the crew safe access and useful information about how water behaves around the property.

    1. Observe from the ground: Note overflow, sagging, staining, erosion, and discharge concerns without climbing onto the roof.
    2. Clear the work area: Move loose items, secure pets, and identify fragile landscaping or concealed utilities.
    3. Share project history: Tell the installer about leaks, clogs, prior repairs, storm damage, and planned exterior work.
    4. Confirm the visit plan: Ask which elevations are included and how the final water-flow review will happen.
    5. Plan follow-up: Know who to contact if the first heavy rain or snowmelt reveals a drainage concern.

    Walk the roofline from the ground

    Before the appointment, look at the roof edges from several sides of the home. Note places where water pours heavily, where an existing gutter sags, or where runoff has created bare soil, mulch channels, staining, or erosion. You may also see water marks on siding or splash marks near the foundation. These observations can help the installer understand what you have experienced during rain or snowmelt.

    Do not climb onto the roof to perform this review. A ground-level walkaround is enough to identify concerns. Take a few photos from a safe position if they will help explain a recurring overflow or a downspout that appears to discharge too close to the house. Mention whether the concern appears only during intense storms, during spring thaw, or whenever leaves collect in the system.

    Identify access and property constraints

    Seamless gutter work often requires access along the perimeter of the home. Before the visit, move portable furniture, toys, tools, hoses, and other loose items away from the walls. Trim or tie back branches only when it is safe to do so. Do not remove established landscaping simply to create access. Point out fragile plantings, irrigation components, outdoor outlets, gates, pets, and areas where equipment should not be placed.

    Tell the installer about additions, porches, decks, sunrooms, fences, and other features that change the roofline or restrict access. A detached garage, shed, or lower roof may also affect how water moves across the property. The goal is not to prescribe the solution. It is to make sure the assessment includes every area that could affect the finished drainage plan.

    Share the home’s maintenance history

    Useful background includes the age of the current gutters, prior repairs, known leaks, recurring clogs, and any fascia or trim work. If the gutters were replaced after a storm or if one elevation has always overflowed, say so. A history of repeated repairs may indicate that the problem is not limited to one loose connection.

    Also mention planned exterior work. Roof replacement, siding replacement, soffit work, and fascia repairs can affect the order of operations. Coordinating projects can help avoid installing a new gutter system before adjacent exterior work is complete. The installer can explain whether the projects should be sequenced together or handled separately.

    What Happens During a Seamless Gutter Installation Visit?

    An installation visit should feel organized from assessment through cleanup. The exact sequence varies by home, but the crew should first confirm the scope and site conditions, then complete the work planned for the roofline, and finally review the result. A homeowner should be able to ask questions without directing technical work from the ground.

    Visit phaseWhat the homeowner can expect
    Assessment and planningThe crew reviews the roofline, fascia, existing drainage, access, and known water concerns.
    Installation workGutter runs and related components are fabricated or prepared, attached, connected, and adjusted for the home.
    Completion reviewThe crew checks appearance, attachment, connections, water movement, discharge, and cleanup.

    The crew confirms the plan at the home

    Even when measurements or project discussions happened earlier, the property should be reviewed in person. Conditions can be easier to understand from the ground and at the roof edge. The installer may confirm which elevations receive gutters, where outlets and downspouts will be placed, and whether fascia or trim needs attention before attachment.

    This is the right time to raise practical questions. Ask which areas will be worked on, where water will be discharged, and whether any existing damage needs to be addressed first. If the proposed layout differs from what you expected, ask for an explanation before work proceeds. Clear agreement at this stage reduces confusion later.

    Fabrication and installation are matched to the home

    One advantage of seamless gutters is that long runs can be formed to the measured roofline rather than assembled from many short pieces. The crew still has to account for corners, end points, outlets, and transitions. Homeowners do not need to monitor the forming equipment or evaluate the metal profile. The useful question is whether the finished run is being shaped and positioned for this home instead of treated as a generic length.

    During the work, expect normal construction sounds and activity near the exterior walls. Keep children and pets away from the work zone. Do not stand beneath a ladder or ask a crew member to pass materials while the person is elevated. If you need to leave, tell the crew how to reach you and confirm how the final review will happen.

    Cleanup is part of a complete visit

    Gutter work creates packaging, cutoffs, fasteners, and other small debris. A professional crew should review the work area before leaving and remove installation-related materials. Walk the perimeter after the crew says the job is complete, but use caution around ladders, tools, and recently moved equipment.

    Cleanup also provides a practical opportunity to look at the roof edge from normal viewing positions. The gutter should follow the home cleanly, corners should look intentional, and downspouts should align with the planned route. A visual review will not replace the crew’s technical checks, but it can identify a question while the team is still present.

    How Are Seamless Gutters Installed Without Disrupting Your Home?

    Good installation protects more than the gutter itself. It should fit into the homeowner’s routine, preserve the surrounding property as much as practical, and leave a clear plan for handling runoff. The crew controls the technical work. The homeowner helps by keeping communication, access, and safety organized.

    Protect people, pets, and exterior features

    Roof-edge work involves ladders, long materials, hand tools, and movement around the home. Keep pets indoors or in a separate area and explain any gate or access instructions before work begins. Children should not enter the work zone to watch fabrication or installation. If a neighbor shares a driveway or access path, discuss the timing in advance when appropriate.

    Mark delicate features that may not be obvious, such as buried irrigation heads, invisible fencing, low-voltage lighting, or newly planted beds. Do not assume that a crew can identify every underground or concealed item. A short conversation before setup can prevent avoidable property damage and help the crew choose a safer staging area.

    Keep the scope focused on drainage outcomes

    A homeowner may notice color, profile, and appearance first, but the system’s job is to control water. Ask how the proposed work addresses the overflow or discharge concern that led you to seek an inspection. If the issue involves a low roof, a valley, a porch, or an area where water has been pooling, make sure that location is part of the discussion.

    This does not mean every visible water mark requires a new gutter. The cause could involve roof runoff, a blocked section, damaged fascia, grading, or another exterior condition. An honest assessment should distinguish what the gutter system can address from what needs a different repair. Referred Restoration’s gutter services include inspections, repairs, replacement, seamless gutter installation, and downspout work, so the appropriate outcome may be repair rather than full replacement.

    Ask questions before changes are made

    Unexpected field conditions can change a plan. A soft fascia board, hidden obstruction, or drainage limitation may require a conversation before the crew continues. Ask what was found, why it matters, and what options are available. Request that any change in scope be explained clearly rather than relying on a quick verbal assumption while someone is working at height.

    It is also reasonable to ask how the crew will protect the area and how the final water-flow check will be performed. These questions are about workmanship and communication, not about telling a professional how to build the system.

    How Can You Check the Finished Gutter System?

    A final review should confirm that the new system is secure, connected, clean, and directing water toward an appropriate discharge point. The crew should perform its own inspection and water test. Homeowners can then review the visible result and ask for clarification about anything that does not match the agreed plan.

    Review the roof edge and attachment

    From the ground, look for a consistent line along the fascia. The gutter should not show obvious sagging, pulling away, or sections that sit noticeably lower than adjacent runs. Corners and end points should appear finished rather than open or loosely fitted. If you see a concern, point to the exact location while the crew is available.

    Do not press, pull, or climb to inspect the gutter yourself. A system can look secure from below while still requiring a closer professional review. The purpose of a homeowner check is to notice visible issues and confirm understanding, not to replace an installer inspection.

    Confirm that water has a clear route

    Ask the crew to explain where each roof section sends water and where each downspout releases it. The discharge should not be aimed directly at the foundation, basement entrance, walkway, or a low spot where water can collect. The best solution depends on the property, grade, hard surfaces, and available drainage area.

    Our downspout placement guide provides additional context for reviewing discharge locations. The important final question is whether water leaves the building in a controlled direction. A downspout connected to the gutter is not automatically a safe discharge plan if its outlet ends beside the wall.

    Check connections and the surrounding ground

    Look for visible gaps or leaks around end points, corners, outlets, and downspout connections during the crew’s water test. The ground below the discharge should remain free of packaging and installation debris. If an extension or other discharge component was part of the plan, confirm that it is present and positioned as discussed.

    After the first substantial rain, walk the property from the ground and observe whether water is moving as expected. Do not wait for a problem to become severe. A new overflow, loose component, or discharge issue is easier to evaluate when you can identify the exact elevation and weather conditions. For older systems, our guide to signs you may need gutter replacement can help distinguish routine maintenance from a larger concern.

    How Does Minnesota Weather Affect Installation Timing and Follow-Up?

    Minnesota weather changes how exterior work is planned and reviewed. Rain can affect access and water testing. Snow and ice can make roof-edge work unsafe. Freeze-thaw cycles can expose drainage problems after installation, especially when water remains in low areas or collects near the foundation. The right schedule depends on the forecast, site conditions, and the specific work required.

    Weather can change the work window

    A dry, stable work period generally makes it easier to move materials, maintain safe footing, and evaluate water flow. Severe weather may require the crew to delay or adjust the visit. A schedule change is not automatically a quality problem. It may be the safer choice when conditions make roof-edge work hazardous or prevent a meaningful final check.

    Ask how a weather delay affects the next step and whether the crew will return for a completion review. Keep the access path clear if a follow-up visit is planned. If snow, ice, or saturated ground changes the property after the installation, tell the contractor what you observed instead of attempting a roof inspection yourself.

    Spring thaw is a useful time to observe drainage

    Snowmelt can reveal where water is traveling across the property. Watch for runoff beside the foundation, erosion below a downspout, overflow at a roof valley, or water that backs up near a walkway. These observations are useful for maintenance and future inspections. They do not necessarily mean the gutter installation failed, because soil, frozen ground, roof runoff, and blocked discharge routes can all affect what happens during thaw.

    Keep the system clear of leaves and debris as part of normal maintenance. Referred Restoration notes that many homes need gutter cleaning in spring and fall, while gutter guards may reduce maintenance needs. A guard cannot correct a poor slope, blocked outlet, loose connection, or unsafe discharge, so the full system still deserves periodic attention.

    When Should You Ask a Professional About Seamless Gutters?

    An inspection is worthwhile when the existing system repeatedly overflows, leaks, sags, separates from the fascia, or sends water against the home. It is also useful when you are planning roof, siding, fascia, or exterior remodeling work that may change the way the roof edge is finished.

    Repair may be enough for a localized problem

    A single loose connection, blocked outlet, or damaged section may not require replacing every gutter. A professional can evaluate whether the system can be repaired and whether the supporting fascia remains sound. This matters because attaching new components to damaged wood or leaving a drainage obstruction unresolved can create a short-lived result.

    Repair is not always the best long-term option. Repeated leaks, widespread sagging, extensive corrosion, or a layout that does not match the home’s runoff may point toward replacement. The decision should follow an inspection and a clear explanation of what is failing.

    Replacement may improve the overall drainage plan

    Replacement is more than removing an old channel and attaching a new one. It is an opportunity to reconsider roofline coverage, outlet locations, downspout routes, fascia condition, and discharge. Seamless gutters can provide continuous runs with fewer regular seams, but the result still depends on correct planning. Secure support, sound connections, and a safe place for water to go.

    Homeowners in Rogers, Cottage Grove, St. Francis, Monticello, and nearby Minnesota communities can use a professional inspection to understand the condition of the current system before choosing a path. Referred Restoration follows a three-step service model: schedule an inspection, receive a custom solution, and move forward with professional installation when appropriate. The inspection is the place to ask questions and compare repair and replacement options without guessing from the ground.

    Contact Referred Restoration online to request a free gutter inspection and review your home’s drainage concerns.

    Frequently Asked Questions

    How are seamless gutters installed?

    Professionals begin by evaluating the roofline, fascia, runoff, access, and downspout needs. They then form or prepare gutter runs for the home, attach and connect the system, and complete a final inspection and water-flow check. The exact fabrication, pitch, support, and discharge decisions depend on the property. See the technical installation guide for the detailed process.

    What should I do before a gutter installation visit?

    Clear loose items from the home’s perimeter, secure pets, identify fragile landscaping or concealed utilities, and make a list of recurring leaks, overflow areas, and discharge concerns. Share any upcoming roof, siding, fascia, or soffit work so the project can be coordinated safely.

    How do I know whether my gutters need repair or replacement?

    Localized leaks or blockages may be repairable, while repeated failures, widespread sagging, corrosion, damaged fascia, or an unsuitable layout may support replacement. An inspection can separate a gutter problem from a roof, grading, or discharge problem before you choose a solution.

    How often should Minnesota homeowners check their gutters?

    Review the system in spring and fall, after major storms, and after the first substantial snowmelt. Look for clogs, leaks, sagging, loose connections, and discharge near the foundation. Use safe ground-level observation and request professional help for roof-edge concerns.

    Ready to Plan Your Seamless Gutter Installation?

    A well-planned gutter project begins with a property-specific inspection and ends with a system that looks secure, manages runoff, and has a clear maintenance plan. Referred Restoration provides gutter inspections, repairs, replacements, seamless gutter installation, and downspout services for homeowners in Rogers and surrounding Minnesota communities.

    Contact Referred Restoration online to get started with a free inspection.

  • House Windows: A Minnesota Homeowner’s Selection Guide

    House Windows: A Minnesota Homeowner’s Selection Guide

    Choosing house windows for a Minnesota home is about more than appearance. Cold winters, heavy precipitation, and seasonal temperature swings affect the frame, glass package, operating style, and installation details.

    Contact Referred Restoration online

    Homeowner comparing window options in a Minnesota living room

    The best house windows for your home balance insulation, air sealing, daylight, ventilation, and maintenance with the conditions around each opening. Look for clear performance information, including U-factor, low-E glass, and the Solar Heat Gain Coefficient (SHGC). Match those features to the window’s orientation and the room’s purpose. ENERGY STAR notes that double- and triple-pane windows with improved insulation can limit heat transfer. A lower U-factor generally indicates stronger insulating performance. Learn more from the U.S. Department of Energy.

    Before comparing brands or styles, consider the home’s existing insulation and air sealing, then weigh the practical tradeoffs of materials and glass. A careful selection process starts with the climate demands at your home and the performance priorities that matter most to your family.

    What Should You Look for When Choosing House Windows in Minnesota?

    Start with the conditions each window must handle, not just the style you like from the street. Minnesota homes face cold winters, heavy precipitation, and repeated wetting and drying cycles. A good selection considers the home’s exposure, the room’s comfort needs, and the condition of the surrounding wall before you compare glass or frame options.

    Begin with the home’s insulation and air sealing

    Replacement windows should not be the first response to every draft or cold room. The U.S. Department of Energy recommends properly insulating and air sealing the home before replacing windows. An energy audit or careful assessment can help identify whether heat is escaping through the attic, walls, rim joists, or gaps around the existing window. Addressing those priorities first helps you understand what the new units can realistically improve.

    Also inspect the area around each opening. Water staining, soft trim, deteriorated siding, or recurring drafts may indicate a wall or flashing issue rather than a glass problem alone. A replacement window needs a sound, properly sealed opening so it can protect comfort and durability over time.

    Match the window to orientation and room use

    North-, south-, east-, and west-facing windows experience different patterns of sunlight and heat gain. Note which rooms overheat in summer, feel cold in winter, or receive strong afternoon sun. Orientation can influence the glass features that make sense, including low-emissivity coatings and the Solar Heat Gain Coefficient, which describes how much solar heat passes through the window. The best specification may vary from one side of the house to another.

    Then define the room’s practical goals. A bedroom may need steadier temperatures and less outside noise. A kitchen may benefit from convenient ventilation and easy cleaning. A living room may prioritize a broad view, while a frequently used opening may need an operating style that is simple for everyone in the home. Think about how far the window is from furniture, whether screens must be removed for cleaning, and how much airflow you actually want.

    Evaluate comfort, weather protection, and long-term fit

    Look beyond the number of panes. Ask how the complete unit is insulated, how the sash seals, and how the window will integrate with the home’s exterior drainage layers. Windows are part of that outer drainage plane, so flashing and weather-resistive barriers must overlap in a way that directs water outward. This matters during Minnesota’s rain, snow, and freeze-thaw conditions.

    Finally, set a clear project goal: repair a sound unit, improve comfort in selected rooms, update the home’s appearance, or replace aging windows throughout the property. A local assessment can compare those options honestly. Referred Restoration provides window repair and replacement services in Rogers, including help evaluating the home’s existing insulation, air leaks, and water-management needs before you choose.

    Compare Window Frame Materials by Performance and Maintenance

    The frame supports the glass, affects how the window feels to operate, and influences how much upkeep your home will need. For Minnesota homeowners, the best choice depends on more than appearance. Consider winter temperature swings, moisture exposure, the home’s architectural style, and how much maintenance you are realistically willing to handle.

    Vinyl, wood, and fiberglass can all be suitable for house windows when they are correctly sized, glazed, and installed. Their differences become clearer when you compare insulation, durability, and long-term care rather than looking for one material that is right for every room.

    Frame materialInsulation and comfortMaintenanceAppearance and fit
    VinylProvides good thermal efficiency when the frame and glass package are well designed.Generally low maintenance and does not require routine painting.Clean, versatile appearance that suits many homes, though it may offer fewer traditional details than wood.
    WoodOffers strong insulating performance and a naturally warm interior surface.Needs regular inspection and maintenance to help prevent rot, moisture damage, and finish deterioration.Classic character and broad design appeal, especially in traditional or historic-looking homes.
    FiberglassKnown for thermal stability and efficient performance across changing temperatures.Durable and typically requires less upkeep than painted wood.Works well in contemporary and traditional settings, with a rigid frame that can support a range of designs.

    Match the material to the home’s exposure

    Vinyl is often a practical fit for homeowners who want straightforward care and dependable insulation without making the frame a central design feature. It can be a sensible choice for frequently used rooms, rental properties, or elevations where simple cleaning matters most. Review the complete unit, however, because frame material alone does not determine energy performance.

    Wood brings warmth and detail that can complement older homes or rooms where the window is part of the interior design. That benefit comes with responsibility. Check exposed finishes, joints, and areas near sills for moisture-related deterioration. In a wet climate, neglected maintenance can undermine an otherwise well-insulated frame.

    Fiberglass is a strong option when durability and dimensional stability are priorities. Its performance can remain consistent as outdoor conditions change, but the final result still depends on the glass, seals, installation, and drainage around the opening. Ask how each proposed material will fit the home’s existing trim, exterior finish, and maintenance plan. A careful comparison helps you choose a frame that supports comfort without creating upkeep you will not maintain.

    Which Glass Features Matter Most for Cold Minnesota Winters?

    Glass performance is one of the clearest differences between basic replacement units and house windows designed for a demanding climate. In Minnesota, look beyond the number of panes. The combination of pane count, coatings, gas fill, spacers, and energy ratings determines how well a window limits heat transfer while still managing winter sunlight.

    Double panes or triple panes?

    Double-pane windows are a standard energy-efficiency choice in modern homes and provide substantially better insulation than older single-pane windows. Two panes create an insulating space that slows heat movement through the glass. ENERGY STAR-qualified windows commonly use double or triple panes with improved insulation to help prevent excessive heat transfer.

    Triple-pane windows add another pane and insulating space, which can provide superior insulating performance. That can be useful in exposed rooms, homes with noticeable cold spots, or locations where winter comfort is a priority. Triple glazing is not automatically the best fit for every opening, however. The right selection depends on the home’s orientation, existing construction, frame, installation, and the performance ratings of the complete window unit.

    Ask whether the spaces between panes use an inert gas fill, such as argon or krypton. These gases improve thermal resistance compared with air-filled spaces. Warm-edge spacers can also help reduce heat loss around the edges of the glass, where the center-of-glass rating does not tell the whole story.

    Low-E coatings and the most useful ratings

    A low-emissivity, or low-E, coating is a very thin layer applied to glass that reduces heat transfer. It is especially relevant in cold climates like Minnesota because it can help limit indoor heat loss during winter. ENERGY STAR-qualified glass can also filter damaging ultraviolet light, which may help protect interior furnishings from fading.

    The U-factor measures the rate of heat loss through a window. A lower U-factor indicates better insulating performance, so it is an important rating when comparing house windows for cold weather. Compare the whole-window rating rather than focusing only on the glass center, since the frame and edge components affect real-world performance.

    The Solar Heat Gain Coefficient, or SHGC, measures how much solar heat a window allows into the home. A higher SHGC can be beneficial in a cold climate when a window’s orientation allows it to capture useful winter sun. That does not mean the highest number belongs everywhere. South-facing glass, shading, room use, and summer overheating concerns all matter, so a qualified recommendation should consider each opening.

    What ENERGY STAR qualification tells you

    ENERGY STAR qualification provides a useful starting point for comparing tested energy performance, but it does not replace choosing ratings suited to Minnesota and the home’s specific conditions. The U.S. Department of Energy’s window guidance estimates that ENERGY STAR-qualified replacements may reduce annual household energy bills by 7% to 15% or more. This is an estimate that depends on geographic location and the type of window being replaced, not a promise of savings for every home.

    Before selecting glass, confirm the home’s insulation and air sealing are in good condition. The Department of Energy recommends addressing those improvements before replacing windows so the overall efficiency investment is better supported. Then compare the complete window’s U-factor and SHGC, pane construction, low-E coating, gas fill, and spacer design rather than choosing on pane count alone.

    Choose a Window Style That Fits the Room and the Home

    Window style affects more than curb appeal. The way a unit opens, the direction it faces, and the amount of glass it provides all shape ventilation, daylight, views, cleaning, and long-term maintenance. Start with how the room is used, then choose the shape and operation that support it.

    Match operation to ventilation and daily use

    Double-hung windows have two movable sashes, so homeowners can open the top, bottom, or both. That flexibility makes them a practical choice for bedrooms, living spaces, and other rooms where controlled airflow matters. Many double-hung designs tilt inward, which can make exterior glass easier to clean from inside the home. Consider how often the window will be opened and whether furniture, counters, or window treatments will interfere with the sashes.

    Casement windows are hinged on one side and open outward with a crank. They can provide a broad opening for ventilation and may be useful where reaching a sliding sash would be awkward. Their hardware should be kept clean and operated carefully, especially in locations exposed to wind, rain, or snow. Sliding windows move horizontally and do not project into walkways or landscaping. They can work well in wider openings, rooms near patios, and areas where a simple operation is preferred. Check that the track is accessible for cleaning and that the moving panel will not conflict with screens or furniture.

    Use specialty shapes to control light and views

    Picture windows are fixed, meaning they do not open for ventilation. Their strength is a clear, uninterrupted view and generous daylight, making them a natural fit for living rooms, stairwells, or rooms facing a desirable landscape. Pairing a picture window with an operable unit nearby can balance the view with fresh-air needs.

    Bay and bow windows project outward from the wall and create a wider visual field. A bay window typically uses a more angular arrangement, while a bow window forms a gentler curve with multiple window units. Either can add daylight and usable interior space, but the projection deserves careful planning around exterior drainage, landscaping, furniture, and seasonal maintenance. The surrounding wall and roof details also need to be evaluated as part of the window assembly, not treated as an afterthought.

    There is no single best style for every room. Think through which openings need regular ventilation, which glass areas are primarily for daylight or views, and how each unit will be reached for cleaning. Referred Restoration offers window repair and replacement services in Rogers for double-hung, casement, sliding, bay, bow, and picture windows. A careful review of the room, existing opening, and home’s exterior can help narrow the choices without forcing a style that does not suit the space.

    How Do Installation and Water Management Affect Window Performance?

    Even well-built house windows can underperform when the opening is measured poorly or the surrounding wall layers are assembled incorrectly. A professional installation starts with accurate measurements of the rough opening, the framed space where the window will sit. The replacement unit should fit that opening with the right allowances for shimming, fastening, insulation, and movement. A window that is forced into place, left too loose, or installed out of square may be difficult to operate and more vulnerable to drafts or water entry.

    Fit and air sealing come first

    Before the window is set, the installer should inspect the opening for damage, uneven framing, and conditions that could affect the fit. Shims help keep the frame level, plumb, and square while fasteners secure it without distorting the unit. After installation, the gap around the frame needs an appropriate air seal. This helps limit uncontrolled outdoor air movement and keeps conditioned air inside. The seal should complement, not replace, the window’s own weatherstripping and operating seals.

    It is also worth looking beyond the window itself. The U.S. Department of Energy recommends addressing insulation and air sealing elsewhere in the home before replacing windows so the improvement is not undermined by larger envelope problems. If a room remains cold after installation, the cause may involve wall insulation, ductwork, or air leakage around another part of the building.

    Flashing must work with the drainage plane

    Water management is the other major part of installation quality. Windows sit within the home’s outer drainage plane, the layered surface that directs rain and meltwater away from the wall. The weather-resistive barrier, often housewrap, should connect with the window flashing so water has a continuous path to the exterior. A sill pan or sill flashing beneath the unit helps collect water that reaches the frame and directs it back outside.

    These layers must overlap in the correct direction. The University of Minnesota Extension explains that drainage-plane components should shed water outward in the same general way that shingles overlap on a roof: proper overlap keeps water out of the wall. Reversed or incomplete overlaps can send water into the wall cavity, where concealed moisture may contribute to deterioration.

    Ask about Minnesota exposure

    A qualified installer should account for the home’s exposure, including wind-driven rain, snow, freeze-thaw conditions, and the direction each opening faces. Ask how the team will handle the sill, side flashing, head flashing, housewrap, and final exterior seal. You can also review the residential window installation process before the project so you know which questions to raise during an estimate. The goal is not simply to place a new unit in an old opening. It is to make the window, wall, and drainage layers function as one weather-resistant assembly.

    A Practical House Windows Checklist Before You Decide

    A clear checklist keeps window selection tied to how your home actually works. Before choosing a product, walk through these questions and note where your priorities differ from room to room.

    1. Start with the room’s purpose. Decide whether the main need is daylight, ventilation, a broad view, easier cleaning, or a combination. A bedroom, kitchen, living room, and basement may each call for a different operating style. Consider how often you will open the window and whether furniture, counters, or window treatments could interfere.
    2. Assess climate exposure. Note which openings receive strong sun, prevailing wind, blowing snow, or heavy rain. Minnesota homes face harsh winters and heavy precipitation, so the right combination of frame, glass, air sealing, and water management matters. Also check whether insulation and air sealing elsewhere in the room should be addressed before replacement, since a window cannot solve every source of heat loss.
    3. Compare frame materials. Ask how each frame option fits your home’s durability, appearance, upkeep, and insulation goals. Vinyl, wood, and fiberglass have different performance and maintenance considerations. Look beyond the sample display and consider trim, exterior exposure, cleaning access, and how the material will coordinate with the rest of the home’s exterior.
    4. Review glass ratings and features. Ask about pane construction, low-emissivity coatings, U-factor, and solar heat gain coefficient. Lower U-factor generally indicates better insulating performance, while SHGC helps describe how much solar heat enters through the glass. For a deeper look at low-E coatings and other energy efficient windows features, review the related guide rather than judging glass by appearance alone.
    5. Match style to operation and maintenance. Confirm whether double-hung, casement, sliding, bay, bow, or picture windows best fit the room’s ventilation and view needs. Ask how both sides of the glass will be cleaned, how hardware will be serviced, and whether the opening needs to support a particular escape or access plan. Referred Restoration provides repair and replacement for these common styles.
    6. Ask installation questions before ordering. Request clear details about measurement, fit, flashing, drainage, air sealing, water sealing, trim, and cleanup. Windows are part of the home’s outer water-management system, so installation quality affects long-term performance. If you are comparing contractors, start with the residential window installation process and ask what will happen at each stage.
    7. Separate selection from failure diagnosis. This checklist is for choosing and planning, not for deciding whether an existing unit has failed. If you are first investigating drafts, fogging, cracked glass, or other symptoms, read signs you need new windows as a separate follow-up. Then bring your observations to a contractor who can recommend repair, replacement, or no immediate action.

    Contact Referred Restoration online

    Frequently Asked Questions

    Which window materials work well in Minnesota homes?

    Vinyl, wood, and fiberglass can all be practical choices. Compare insulation, moisture resistance, maintenance, durability, and how each material fits the home’s exterior. The best choice depends on the room, exposure, existing trim, and your long-term maintenance preferences.

    Are casement or double-hung windows more energy efficient?

    Either style can perform well when it is correctly sized, sealed, and installed. Casement windows typically close against a compression seal, while double-hung windows slide vertically and offer flexible ventilation. Focus on the complete window’s U-factor, air leakage performance, and installation quality rather than style alone.

    What window ratings should homeowners compare?

    Start with U-factor, which indicates how well the window resists heat flow. Review SHGC as well, because it describes how much solar heat enters through the glass. Low-E coatings and double- or triple-pane construction can improve insulation, while ENERGY STAR qualification provides a useful efficiency benchmark. Source: U.S. Department of Energy.

    Should insulation and air sealing come before replacing windows?

    Often, yes. If a home has larger insulation or air-sealing weaknesses, addressing those areas first can clarify whether window replacement is the right next step. A professional assessment can separate window performance issues from problems elsewhere in the building envelope.

    How does installation affect a window’s performance?

    Installation controls fit, air sealing, flashing, and water drainage around the opening. Windows are part of the home’s drainage plane, so their weather-resistive layers must overlap correctly to direct water outward. Proper measurement and installation matter as much as selecting the frame and glass. Source: University of Minnesota Extension.

    Get started with a practical window recommendation

    Choosing house windows involves balancing frame material, glass performance, room use, and Minnesota weather. An honest review can help you compare repair and replacement options based on your home’s condition and priorities. Contact Referred Restoration online to discuss the next step, or call (763) 726-4245.

    Contact Referred Restoration online

  • Home Window Replacement: Minnesota Homeowner Guide

    Home Window Replacement: Minnesota Homeowner Guide

    Drafty rooms, fogged glass, sticking sashes, and rising comfort concerns can all point to a window problem. But they do not always mean every window needs to be replaced. In Minnesota homes, the right decision starts with looking at the condition of the frame, glass, seals, and surrounding opening. For homeowners in Rogers, Cottage Grove, St. Francis, Monticello, and nearby communities, an inspection can separate a repairable issue from a broader replacement need.

    Contact Referred Restoration online to request a free window inspection

    Home window replacement planning for a Minnesota home

    For many homeowners, home window replacement can improve comfort and energy efficiency when older windows no longer close, seal, or perform reliably. The best result depends on choosing a window suited to the home and climate, then having it measured, flashed, and sealed correctly.

    Before comparing window styles or energy labels, identify whether the issue is isolated and repairable or part of a larger pattern. A closer look at the warning signs can help you make that distinction and plan the next step with confidence.

    When Is It Time for Home Window Replacement?

    Not every troublesome window needs to be replaced immediately. A failed lock, worn weatherstripping, damaged screen, or limited hardware problem may be repairable. The decision becomes more serious when the window itself is no longer keeping out Minnesota’s cold, moisture, and seasonal weather. Replacement may also make sense when several repairs have not solved the underlying issue.

    Signs the window may be reaching the end of its service life

    • Persistent drafts: If cold air still moves around the sash or frame after basic sealing, the assembly may have gaps. Deterioration or poor fit can also be responsible.
    • Fog between panes: Condensation trapped between insulated glass panes usually indicates a failed seal. Cleaning the surfaces will not remove moisture inside the unit, so replacement of the glass or the full window may be needed.
    • Difficult operation: Windows that stick, will not stay open, or are hard to lock can create comfort and safety concerns. Hardware may be repairable, but a warped sash or deteriorated frame points toward broader replacement.
    • Frame deterioration: Rot, soft wood, cracking, swelling, or visible water damage can compromise the opening. Painting over damaged material does not restore its structure.
    • Moisture around the opening: Water stains, peeling finishes, or recurring dampness near the sill deserve prompt evaluation. The source may be a failed seal, exterior caulking, flashing, or drainage issue rather than the glass alone.
    • Repeated repairs: When the same window needs service again and again, compare the condition of the entire unit with the age and condition of the surrounding opening. This is better than treating each symptom separately.

    Older Minnesota homes can be durable while still having windows that contribute to drafts and comfort concerns. The University of Minnesota Extension explains that older homes may bring energy and comfort challenges. This makes the condition of windows worth evaluating as part of the home’s exterior protection. A professional should inspect the frame, sash, glass, trim, seals, and opening before recommending a path.

    Repair can make sense when the frame is sound and the issue is limited to hardware, weatherstripping, exterior caulk, or a replaceable glass unit. Replacement deserves consideration when deterioration is widespread, moisture keeps returning, operation remains unreliable, or the window no longer fits the home’s comfort and weather-resistance needs. For more detail, review these signs you need new windows, then explore local window repair and replacement services for an inspection in Rogers and nearby Minnesota communities.

    Which Replacement Window Types Fit Your Home?

    Window style affects more than curb appeal. It determines how you ventilate a room and how much natural light enters. It also affects cleaning and how the unit fits the wall, furniture, and exterior design. During home window replacement, compare the way each window operates with the room’s purpose and the opening’s condition.

    Window typeOperation and ventilationWhere it may fit
    Double-hungTop and bottom sashes move vertically, allowing adjustable airflow.Traditional rooms, bedrooms, and areas where vertical clearance is available.
    CasementHinged sash opens outward, often providing broad ventilation across the opening.Rooms that benefit from directed airflow, provided the exterior clearance is safe.
    SlidingOne or more sashes move horizontally for simple operation.Wider openings, rooms with limited exterior clearance, and layouts where outward swing is impractical.
    PictureFixed glass does not open, so it provides light and views without ventilation.Living areas or other spaces where daylight and an unobstructed view are priorities.
    Bay or bowA projecting combination of windows can include fixed and operating sections.Exterior walls where added depth, light, and a broader view suit the home’s design.

    The table is a starting point, not a universal ranking. A double-hung window may be convenient in one room, while a casement or sliding unit may make more sense in another. Think about reach, cleaning, egress needs, nearby walkways, screens, and whether furniture or landscaping will interfere with operation. A picture window can brighten a space, but pair it with an operating window if ventilation matters.

    Match the frame material to the home

    Frame material affects appearance, maintenance, durability, and how the replacement unit relates to the existing opening. ENERGY STAR notes that certified windows are available in a variety of framing materials to suit different needs. Review the frame options alongside the home’s exterior materials, interior trim, moisture exposure, and desired maintenance routine rather than choosing from appearance alone. ENERGY STAR also advises homeowners to look for the ENERGY STAR label for the appropriate climate zone next to the NFRC label when evaluating off-the-shelf products.

    Inspect the opening before selecting a style

    The condition of the opening can narrow the practical choices. Check the frame, sill, trim, surrounding wall, signs of moisture, and whether the existing opening is square and sound. In older Minnesota homes, careful inspection matters because window replacement must work with the surrounding wall assembly, not just the visible glass. The selected unit also needs a proper fit and weather-resistant integration with the home’s drainage components. The University of Minnesota Extension explains that windows are part of the outer building surface and must be carefully integrated with drainage-plane components: learn more about protecting windows from water intrusion.

    A professional assessment can connect the room’s ventilation and light goals with the opening’s actual condition. That inspection-first approach helps ensure the style, frame, and installation plan work together for the home.

    How Can Energy-Efficient Windows Improve Minnesota Home Comfort?

    In a Minnesota home, window performance affects more than the monthly energy bill. Cold glass, drafts around the frame, and uneven room temperatures can make a living space uncomfortable even when the heating system is working normally. A well-selected replacement window combines several features to help create a steadier indoor environment.

    Look beyond the glass package

    Glazing describes the layers of glass in a window. Insulated glass units use two or more panes separated by a sealed space, which helps slow heat transfer compared with older single-pane glass. Low-emissivity, or low-E, coatings add another layer of control. The coating is designed to manage radiant heat while allowing useful daylight into the room. Together, insulated glass and low-E technology can help reduce the cold-radiation effect near a window during winter.

    Glass is only part of the assembly. A frame that fits the opening properly, along with continuous perimeter sealing, helps limit air leakage. Even an advanced window can underperform if the opening is out of square, the frame is poorly supported, or gaps remain between the replacement unit and the wall. During a window energy efficiency ratings review, consider the complete window and installation, not one label or feature in isolation.

    Use Minnesota climate guidance when comparing products

    ENERGY STAR recommends determining the applicable climate zone before choosing replacement windows and provides a Product Finder for identifying certified product lines. Climate-zone guidance helps narrow the performance characteristics that make sense for a cold-weather home rather than relying on a generic national recommendation. ENERGY STAR windows are independently certified and verified to meet or exceed energy-efficiency guidelines set by the U.S. Environmental Protection Agency. Look for the ENERGY STAR label alongside the NFRC label on off-the-shelf products. The NFRC label helps you compare measured performance ratings across products, including how well a window insulates and limits air movement.

    ENERGY STAR reports that replacing old single-pane windows with certified windows can lower household energy bills by an average of up to 13 percent nationwide. That figure is a national average for single-pane replacement, not a promise for every Minnesota home. Actual savings vary with local climate conditions, utility rates, the home’s construction and orientation, existing insulation, window area, and installation quality. The practical goal is improved comfort and better control of heat loss, supported by a product and installation plan suited to the home.

    For guidance, compare the NFRC ratings, confirm the ENERGY STAR climate-zone designation, and have the existing openings evaluated before ordering. That inspection can reveal whether frame fit, sealing, or surrounding wall conditions need attention as part of the replacement.

    Contact Referred Restoration online to discuss your Minnesota window options

    What Happens During Professional Window Installation?

    A careful installation does more than place a new frame into an opening. It connects the window to the surrounding wall so the assembly can manage water, air, and seasonal movement. That connection matters in Minnesota, where wind-driven rain, snow, ice, and repeated freeze-thaw cycles test exterior materials. The process may vary by home and product, but a professional crew generally works through these stages:

    1. Inspect and measure the opening. The installer checks the existing frame, sill, trim, surrounding wall, and signs of moisture or deterioration. Precise measurements confirm the replacement unit fits the opening and reveal conditions that may require additional preparation. The crew also reviews how the window should operate and how its exterior will meet the siding or other cladding.
    2. Remove the existing window carefully. The old unit and necessary trim are removed with care to limit damage to the wall opening. A controlled removal exposes the sill, jambs, and head so the installer can assess the condition of the materials behind the visible window. Any damaged or unsuitable components should be addressed before the new unit is set.
    3. Prepare and protect the opening. The opening is cleaned, squared, and prepared for the new window and its sealing materials. This is also the point to preserve a continuous path for water to move away from the wall assembly. The University of Minnesota describes a drainage plane as a protective layer that shields materials from repeated water exposure. Its components can include a weather-resistive barrier, such as housewrap or building paper, along with flashing and other drainage elements. Learn more about drainage-plane protection from the University of Minnesota.
    4. Integrate flashing and the drainage plane. Flashing is installed and layered with the surrounding weather barrier so water is directed out and over the layer below, rather than trapped behind the window. The window is part of the home’s outer surface, so it must be carefully integrated with the drainage-plane components. This water-management step is one reason installation quality can affect long-term performance, not just appearance.
    5. Set and seal the new unit. The installer positions the window, checks that it is level and square, and secures it according to the product requirements. Appropriate insulation and sealant help limit unwanted air movement around the frame. ENERGY STAR emphasizes that installation quality is important when maximizing the energy savings available from a qualifying window. Review ENERGY STAR window guidance.
    6. Complete trim and operation checks. Interior and exterior trim are finished, joints are sealed, and the crew checks each sash, lock, hinge, and screen. The final review should confirm that the window opens, closes, latches, and drains as intended. For a closer look at this sequence, see the residential window installation process.

    Good home window replacement therefore depends on both the product and the connection between that product and the house. A neat finish is valuable, but the underlying flashing, drainage, fit, and seals are what help protect comfort and the wall assembly.

    How Should Minnesota Homeowners Plan the Replacement Project?

    A well-planned window project starts with the home, not a product brochure. Before selecting styles or scheduling installation, identify which rooms need attention and document what you are experiencing. Note drafts, condensation, sticking sashes, damaged trim, moisture, visible deterioration, and rooms that feel unusually hot or cold. Photos can help you explain symptoms during an inspection.

    Start with an inspection and clear priorities

    Walk through the home and rank rooms by comfort, moisture risk, safety, and daily use. Bedrooms, nurseries, and living areas may deserve early attention if poor operation or drafts affect everyday comfort. Windows near bathrooms, kitchens, or other humid spaces should be checked carefully for moisture and trim damage. An inspection should evaluate the frame, glass, opening, trim, operation, and surrounding wall condition. It should also confirm whether the existing opening can support the selected replacement and whether repair is more appropriate than full replacement.

    Ask the contractor to explain what the inspection found in plain language. You should understand which symptoms come from the window itself and which may involve surrounding materials. Referred Restoration provides a free inspection and custom recommendations for homeowners in Rogers and nearby Minnesota communities. You can also review its window repair and replacement services when comparing possible next steps.

    Discuss measurements, style, and energy goals

    Accurate measurements and a careful review of the opening help prevent surprises during installation. Share how each room is used, how much ventilation you want, and whether easy cleaning, natural light, privacy, or emergency egress matters. Discuss frame materials, glass options, appearance, and how the new windows should complement the home’s exterior. If energy performance is a priority, ask how the proposed product fits Minnesota’s climate and how the frame, glass, flashing, and seals work together. A high-performing window still depends on a sound opening and careful installation.

    Plan the work around your household

    Seasonal scheduling should account for weather, contractor availability, and your household’s needs. Minnesota conditions can change quickly, so ask how the crew protects an open window area if temperatures or precipitation shift. Before work begins, confirm who will move furniture, cover floors, control dust, and protect landscaping. Ask how long each room may be affected and how the crew will handle unexpected opening damage.

    At the final walkthrough, operate every window, inspect trim and screens, look for gaps or damaged finishes, and confirm that the work area is clean. Ask about maintenance, warranty documentation, and whom to contact if a concern appears after installation.

    Contact Referred Restoration online to request a free window inspection

    Frequently Asked Questions

    Should I replace my 20-year-old windows?

    Age alone does not decide the project. Have the windows inspected for drafts, moisture between panes, difficult operation, deteriorated frames, and failed seals. If several rooms have the same problems, replacement may be more practical than continuing isolated repairs. A professional can evaluate the openings and the surrounding trim before recommending a path.

    What are the signs that a home window needs replacement?

    Common signs include persistent drafts, condensation or fogging between glass panes, water intrusion, sticking sashes, soft or damaged frames, and noticeable discomfort near the window. Rising utility bills can also prompt an inspection, but they may have several causes. Look at the window condition together with the home’s insulation, air sealing, and ventilation.

    How do I choose the right type of replacement windows for my home?

    Start with the room’s ventilation, access, view, cleaning needs, and existing opening. Double-hung windows offer movable upper and lower sashes, casements open outward, sliding windows move horizontally, and picture windows prioritize an unobstructed view. Bay and bow configurations can change the feel of a room. Frame material and the home’s design matter too, so there is no single best type for every Minnesota home.

    What are the benefits of choosing energy-efficient replacement windows?

    Certified products can improve comfort by reducing drafts and unwanted heat transfer when they are correctly selected and installed. ENERGY STAR says replacing old single-pane windows with certified windows lowers household energy bills by an average of up to 13 percent nationwide. But actual results vary by climate, utility rates, and home characteristics. See the ENERGY STAR and NFRC labels when comparing products. ENERGY STAR guidance explains the certification and climate-zone approach.

    What is the typical home window replacement installation process?

    The work typically begins with inspection and measurements, followed by careful removal and preparation of the opening. The installer then sets the unit, integrates flashing and weather-resistant materials with the home’s drainage plane, seals the assembly, and checks operation and trim. In Minnesota, that water-management connection is especially important. The University of Minnesota Extension explains how windows should integrate with drainage-plane components: window and wall water-management guidance.

    How Can Referred Restoration Help With Your Window Replacement Plan?

    A professional inspection can help clarify whether your Minnesota home’s windows need repair, replacement, or a more tailored approach. Referred Restoration can review the condition of your windows and discuss options suited to your home and goals in the Rogers area. Call (763) 726-4245 or reach out online to take the next step.

    Contact Referred Restoration online to request a free window inspection

  • Roofers Companies: How Minnesota Homeowners Can Compare

    Roofers Companies: How Minnesota Homeowners Can Compare

    A roof replacement is a major decision, but the lowest estimate is rarely enough to identify the right contractor. In Minnesota, the company you choose should explain how it handles snow, wind, hail, ventilation, insurance documentation, and the details that protect your home after installation.

    Contact Referred Restoration online

    Roofers comparing a Minnesota home roof during an inspection

    When comparing roofers companies, look beyond online ratings. Confirm licensing and insurance, ask about local climate experience, read both workmanship and manufacturer warranty terms, and compare written estimates line by line. A trustworthy contractor should make the scope, materials, schedule, payment terms, and follow-up support easy to understand.

    That framework helps you compare professional businesses on accountability and service quality, not just sales promises. Start by checking the credentials and basic documentation that should be in place before you invite a roofing company to inspect your home.

    What Should You Check Before Comparing Roofers Companies?

    Before comparing roofers companies, verify licensing, insurance, business identity, and accountability. Those checks help you evaluate the contractor behind each proposal before you compare the recommended work or sign a contract.

    A polished estimate or friendly introduction does not tell you whether a roofing company is properly licensed, insured, established in Minnesota, or accountable after the crew leaves. Those details help separate a professional operation from a short-term sales presence, especially after a storm when homeowners may feel pressure to act quickly.

    Verify the license and insurance

    Minnesota requires residential building contractors and roofers to be licensed when they contract to construct or improve a dwelling by offering more than one special skill. The Minnesota Department of Labor and Industry explains that licensing includes requirements such as having a company principal pass an exam and maintaining liability and property damage insurance. Licensed contractors must also complete continuing education each year. You can verify a contractor’s license through the Minnesota DLI and check whether the state lists disciplinary history or enforcement actions.

    Do not treat a license as a substitute for asking practical questions. Request the company’s current license number and ask what insurance coverage applies to the work at your home. A credible company should answer clearly and provide documentation without becoming defensive. Hiring a licensed contractor also gives homeowners access to Minnesota’s Contractor Recovery Fund, an additional consumer protection that is not visible from an online advertisement.

    Confirm the business identity and local accountability

    Ask for a physical Minnesota business address rather than a post office box, along with a local phone number. Then confirm that the name on the estimate, contract, insurance documents, and payment instructions is consistent. This basic check can reveal whether you are dealing with the established roofing company you researched or an unrelated salesperson collecting leads.

    References and time in business can add useful context. Ask for recent customers with projects similar to yours, and listen for specifics about communication, cleanup, warranty follow-through, and how unexpected conditions were handled. You can also check a contractor’s litigation history through the state court system. Reviews may help you identify patterns, but they should support, not replace, official verification.

    Watch how the company asks you to decide

    High-pressure sales tactics, an unmarked vehicle, or a demand for a full or substantial payment before work begins are reasons to slow down. Be especially cautious if a contractor offers to absorb or rebate your insurance deductible. Minnesota prohibits insurance deductible rebates for roof repairs. If an insurance claim is involved, ask what happens if the carrier denies it. Under certain restrictions, Minnesota homeowners may cancel a roofing contract after an insurance denial, and the contractor should explain the relevant contract language rather than rush your signature.

    Before signing anything, ask who will supervise the project and who will be your point of contact if conditions change. A company that can explain its inspection, communication, and documentation process is easier to evaluate than one that makes broad promises. Put important answers in writing, including the work scope, materials, schedule, payment timing, and how changes will be approved. This gives you a consistent basis for comparing companies instead of relying on sales language alone.

    This is more than a basic checklist. You are comparing accountability, documentation, and service structure. For homeowners in the area, reviewing Rogers roofing services can help you see what a local inspection-led process looks like before requesting proposals.

    How Does Minnesota Climate Experience Affect a Roofing Company Choice?

    Choose a roofing company that can explain how Minnesota snow, wind, hail, freeze-thaw changes, and seasonal moisture affect inspection, materials, installation, and follow-up service. Local climate experience should be visible in the questions the contractor asks and the details documented in the proposal.

    A roofing company that works in Minnesota should understand more than basic installation. Heavy snow, strong wind, hail, freeze-thaw changes, and seasonal moisture all place different demands on a home’s exterior. When comparing roofers companies, ask how experience with these conditions affects inspection, material selection, installation, and follow-up service.

    Start by asking for examples of similar homes and storm conditions the company has handled in your area. A contractor serving the Rogers, Cottage Grove, and surrounding corridor should be able to explain how local weather influences roof inspections and repair decisions. If the work follows hail or wind damage, ask whether the company regularly handles storm repair and can document the condition of the roof before recommending work. The Minnesota Department of Labor and Industry specifically advises homeowners to evaluate a contractor’s storm-repair experience when that is the purpose of the project: Minnesota storm-repair guidance.

    Questions about snow, wind, and hail?

    Good questions reveal whether a company is evaluating your roof or simply presenting a standard sales pitch:

    1. Snow and freeze-thaw exposure – Ask how the inspection accounts for snow accumulation, wind-driven rain, and repeated freeze-thaw conditions.
    2. Hail and wind documentation – Ask what damage the contractor will document and whether you will receive inspection photos.
    3. Ventilation and moisture – Ask how the company evaluates attic ventilation and moisture concerns, not just visible shingle damage.
    4. Flashing and transitions – Ask how the crew inspects penetrations, chimneys, walls, and other transition points.
    5. Material fit – Ask which materials are recommended and why they are appropriate for Minnesota weather.

    These questions do not require the contractor to promise a particular product or performance rating. They help you see whether the inspection accounts for the full roofing system, including materials, flashing, ventilation, and the way water and snow move across your specific home. Referred Restoration uses an inspection-led process that begins with a free inspection, continues with a custom solution, and ends with professional installation. The company also emphasizes premium materials, including Malarkey roofing products, while matching recommendations to the home’s needs.

    Look for documentation and coordinated support

    Storm work often involves more than shingles. Ask whether the company will record related damage to siding, gutters, windows, or other exterior components and whether it can help you understand the documentation needed for an insurance claim. Insurance assistance should mean clear observations and organized communication, not promises about what an insurer will approve. A company that can coordinate the broader project may also reduce confusion when several exterior systems need attention. Learn more about coordinated roof and exterior repair after a storm.

    Finally, pay attention to how the contractor explains uncertainty. A trustworthy company will identify what the inspection shows, separate storm damage from normal wear, and explain which questions require further review. That local accountability is more valuable than a vague claim of climate expertise. Before choosing, compare the quality of each company’s answers, inspection records, material explanation, and plan for follow-up after Minnesota weather tests the completed work.

    How to Compare Roofing Estimates Without Chasing the Lowest Bid

    Compare roofing estimates by matching scope, materials, preparation, schedule, payment terms, and change-order procedures rather than choosing the lowest total. A detailed proposal makes it easier to identify what each company will actually do.

    A roofing estimate is useful only when it lets you compare the same work across different roofers companies. A short proposal may look attractive because it leaves out details that another contractor has included. Before comparing totals, compare the work itself. Ask whether each estimate describes the roof areas involved, the preparation required, the materials selected, and the responsibilities of both parties.

    Minnesota’s Department of Labor and Industry recommends that a contract include a detailed work summary, materials, payment schedule, timelines, and written change-order provisions. Those details create a clearer basis for comparing proposals and help prevent disagreements after the project starts. You can review the state’s homeowner guidance at the Minnesota DLI contractor hiring guide.

    Estimate itemWhat to confirm
    Project scopeWhich roof sections, penetrations, vents, and related repairs are included?
    RemovalDoes the proposal explain tear-off, disposal, and cleanup of old roofing materials?
    UnderlaymentWhat underlayment is specified, and where will it be installed?
    ShinglesWhat manufacturer, product line, color, and installation requirements apply?
    FlashingWill flashing be inspected, repaired, or replaced around walls, chimneys, skylights, and other transitions?
    LaborWho will perform the work, and what supervision and site protection are provided?
    ScheduleWhat are the expected start conditions, project sequence, and completion timeline?
    Payment scheduleWhen are payments due, and does the schedule avoid a substantial payment before work begins?
    Written change ordersDoes every change require a written description and your approval before the work proceeds?

    Materials deserve more than a product name. Confirm the exact shingle line, underlayment, flashing approach, ventilation work, and accessories included. If one estimate lists a complete installation system while another simply says “new roof,” the proposals are not yet comparable. Ask each contractor to explain what happens if concealed damage appears after removal, and how that possibility will be documented.

    Removal and cleanup are especially easy to overlook. Clarify how many existing layers are included, how debris will be protected from damaging the property, and whether the final cleanup includes a site inspection. The estimate should also identify labor expectations, crew supervision, material delivery, and schedule assumptions. A professional proposal makes those responsibilities visible instead of leaving them to verbal promises.

    Payment terms can also reveal how a company operates. The Minnesota DLI advises homeowners to be cautious about contractors who require full or substantial payment before work begins. A reasonable payment schedule should be written clearly, tied to the contract, and understandable before you sign. Be careful with any document presented as “just an estimate.” DLI warns that signing an estimate or authorization can sometimes create a binding contract before you have decided to hire the contractor.

    Finally, ask how changes will be handled. Hidden deterioration may require an adjustment, but that does not justify an unclear process. Every change should identify the added or removed work, materials, schedule effect, and revised terms in writing. You should have an opportunity to review and approve it before the work moves forward.

    The lowest bid may simply reflect a narrower scope, less complete preparation, or unresolved assumptions. Choose the proposal you can understand and compare, not merely the one with the smallest number. A careful estimate gives you a clearer view of the contractor’s service model, communication habits, and accountability before materials arrive.

    Contact Referred Restoration online to discuss your roofing inspection and receive a clear, project-specific assessment.

    What Roofing Warranty Terms Should You Read Closely?

    Read the contractor’s workmanship coverage and the manufacturer’s material coverage separately. Confirm who handles a claim, what exclusions apply, how long each commitment lasts, and what maintenance or documentation you must keep.

    A roofing warranty is only useful when you understand what it covers, who stands behind it, and what responsibilities remain yours. Do not treat the word “warranty” as a single promise. Roofing coverage commonly involves at least two separate commitments: the roofing contractor’s workmanship coverage and the manufacturer’s material coverage. These commitments may have different conditions, exclusions, claim procedures, and parties responsible for responding.

    Separate workmanship coverage from material coverage

    Workmanship coverage addresses the installation itself. Ask what happens if a problem results from how the roof was installed, such as an issue with detailing, flashing, or another part of the agreed scope. Material coverage comes from the product manufacturer and addresses defects in the roofing products under that manufacturer’s terms. A material warranty does not automatically mean the contractor will correct every installation-related problem, and a workmanship commitment does not replace the manufacturer’s product terms.

    The written contract should identify the materials being installed and describe the work in enough detail to connect the warranty to the actual project. The Minnesota Department of Labor and Industry advises homeowners to require a detailed work summary and a description of materials in the contract. Review the state’s contractor guidance before signing so you can compare warranty language alongside the rest of the agreement.

    Ask about exclusions and homeowner responsibilities

    A warranty does not cover every event that can affect a roof. Ask whether the terms exclude storm damage, wind or hail events, ice-related conditions, poor maintenance, alterations by another contractor, improper ventilation, or damage from objects and animals. The specific exclusions depend on the contract and product documents, so do not rely on a verbal summary.

    Also ask what could void or limit coverage. The answer may involve keeping records of inspections, reporting problems within a stated period, avoiding unauthorized repairs, or following manufacturer installation and maintenance requirements. If the contractor recommends a repair outside the original scope, ask whether it affects either warranty and request the answer in writing.

    Clarify transferability and claims handling

    If you may sell your home, ask whether the workmanship or material coverage can transfer to a future owner. Transferability may require notice, documentation, or action within a specific period. Never assume that coverage follows the home automatically.

    Find out who receives the first call when something goes wrong. A responsive roofing company should explain how to report a concern, what documentation is needed, who evaluates the issue, and whether the contractor communicates with the manufacturer. Referred Restoration’s process begins with a free inspection, moves to a custom solution, and then proceeds to professional installation. That inspection-led approach gives homeowners a clear opportunity to discuss warranty documents and project records before work begins. For storm-related work, the team also assists homeowners with insurance claims, but insurance coverage and warranty coverage remain separate matters.

    Get the paperwork before installation

    Before approving the project, request the complete warranty documents, not only a brochure or a salesperson’s description. Confirm the contractor’s legal business name, the products specified, installation scope, exclusions, maintenance expectations, claim contact, and any transfer rules. Ask these practical questions:

    • Responsibility – Which problems are handled by the installer, and which are handled by the manufacturer?
    • Exclusions – What conditions are excluded from each type of coverage?
    • Records – What records should I keep after installation?
    • Claims – How do I start a claim, and who coordinates the response?
    • Future work – What happens if the roof is affected by a future storm or repaired by someone else?

    High-quality materials and careful installation matter, but clear terms matter too. Compare the actual documents, keep them with your project records, and make sure every promised change is included in the written agreement. A warranty should make responsibilities easier to understand, not harder to find.

    Should You Choose Residential Roofers Companies or General Contractors?

    Choose a residential roofing specialist when the primary need is a roof replacement, repair, inspection, or storm response. A general contractor may be a better fit for a larger renovation that requires several trades, but the right choice depends on the work your home actually needs.

    A general contractor may coordinate several trades for a large renovation, while a residential roofing company focuses on the roof system, the exterior details around it, and the conditions that affect performance over time. For a straightforward replacement or a storm-damage repair, that specialized attention can make the process easier to evaluate.

    Where residential specialization helps

    A residential roofer works with the features that make homes different from commercial buildings, including sloped roof designs. Attic ventilation, flashing around penetrations, gutters, siding transitions, and the way water moves away from the structure. The company should also understand the residential requirements that apply to the project. Minnesota’s Department of Labor and Industry explains that residential contractors and roofers must follow the Minnesota State Building Code. State licensing requirements are also part of the consumer-protection framework for qualifying residential work. You can review the state’s guidance on residential contractors, remodelers, and roofers.

    Specialization is especially useful when the cause of the work is wind, hail, or another storm event. Ask whether the company regularly documents storm damage, communicates with insurance carriers, and explains what the inspection found before recommending repairs. Referred Restoration provides storm-damage assistance as part of its residential exterior services, using an inspection-led process that moves from a free inspection to a custom solution and professional installation. Homeowners seeking Rogers roofing services can use that process to keep the scope focused and understandable.

    When a general contractor may be the better fit

    A general contractor can be a practical choice when the roof is only one part of a broader project. For example, a major renovation may require coordinated work on framing, insulation, windows, siding, electrical systems, or interior finishes. One project manager may simplify scheduling when several unrelated trades must work in sequence. The key is to confirm who is actually performing the roofing work, who is responsible for permits and inspections, and how roof-related changes will be documented.

    For exterior storm restoration, the distinction can be less important than the contractor’s ability to coordinate connected repairs. A residential exterior company that handles roofing, siding, gutters, and window replacement may be able to keep related exterior decisions under one conversation. A general contractor may provide that coordination through subcontractors. In either case, request a written scope that identifies the roof work, materials, removal, flashing, cleanup, and any adjoining exterior repairs. Choose the company that can explain those responsibilities clearly, demonstrate relevant residential experience, and remain accountable from inspection through completion.

    Which Warning Signs Mean You Should Keep Comparing?

    Keep comparing when a contractor pressures you to sign, avoids specific answers, cannot provide clear documentation, or demands a substantial payment before work begins. These signals warrant a slower review of the company’s credentials, scope, and contract.

    A professional comparison should leave you feeling informed, not hurried. Minnesota’s Department of Labor and Industry advises homeowners to be cautious when a contractor arrives in an unmarked vehicle, uses high-pressure sales tactics, or requires full or substantial payment before work begins. Those behaviors do not prove that a company cannot perform quality work, but they are reasonable signals to slow down and verify the business before signing.

    Be careful with pressure and vague promises

    A roofing company should be able to explain what it observed, what work it recommends, and how the recommendation appears in the written estimate. Be cautious if a representative says you must decide immediately, refuses to explain materials, or presents an estimate that leaves major parts of the project undefined. An estimate or authorization may sometimes be treated as a binding contract. So do not sign simply to receive a second opinion or reserve a place on a calendar.

    Insurance-related promises deserve the same care. Minnesota does not allow contractors to rebate or absorb an insurance deductible for roof repair. A company that promises to cover your deductible is not offering a helpful shortcut. It is describing conduct that the state prohibits. Ask the company to explain the claim process honestly, then keep your insurance decisions separate from the contractor’s sales pitch.

    Review the paperwork before you commit

    Read the contract for a detailed scope, materials, timeline, payment schedule, and change-order process. The Minnesota DLI recommends that changes be put in writing and signed. That simple step helps prevent a verbal promise from disappearing when the crew arrives or when the project encounters an unexpected condition.

    If storm damage is involved, read the cancellation language carefully. Minnesota homeowners may have rights to cancel a roofing contract when their insurance company denies the claim, subject to the law’s restrictions. A reputable company should be comfortable giving you time to understand the contract and ask questions. If a representative discourages review, avoids written answers, or asks for an unusually large upfront payment, keep comparing roofers companies.

    Use verification, not fear, to make the decision

    There is no need to choose a contractor based on the most urgent sales message. Verify licensing, insurance, references, and business identity. Compare complete scopes and warranty responsibilities. Then select the company that communicates clearly and can explain how it will protect your home through the work.

    For homeowners who want a direct conversation about inspection-led roofing service in the Rogers area, Rogers roofing services can be a useful starting point before requesting a written plan.

    Contact Referred Restoration online

    Frequently Asked Questions About Comparing Roofing Companies

    How do I choose the best roofing companies in my area?

    Start by confirming that each company is properly licensed for the work, carries appropriate insurance, and can provide a physical business address and references. Then compare how each company inspects the roof, documents the recommended scope, explains materials, handles warranties, and communicates about scheduling. The best fit is not necessarily the company with the most polished advertisement. It is the company that gives you clear information and a written plan you can understand.

    What should I look for when comparing roofers companies?

    Compare the business behind the estimate as well as the estimate itself. Look at licensing, insurance, residential experience, local weather knowledge, communication, warranty responsibilities, and the detail included in the written scope. Ask what is included in removal, preparation, flashing, ventilation, cleanup, and follow-up. A meaningful comparison makes it possible to see whether two recommendations are actually offering the same work.

    How can I get reliable estimates from roofing companies?

    Request an on-site inspection and ask for a written estimate that identifies the work, materials, schedule, payment timing, and process for changes. Avoid comparing a single total alone. If an estimate uses broad phrases such as “complete replacement” without describing the work, ask for clarification before signing. You should have enough information to compare scope and responsibilities without feeling pressured to decide immediately.

    How do I know if a roofing company understands Minnesota’s climate?

    Ask how the company approaches roofs exposed to Minnesota snow, wind, hail, freeze-thaw conditions, and heavy precipitation. Ask how it documents storm damage, evaluates flashing and ventilation, and recommends materials for the home. Local experience should show up in the inspection conversation and the written plan, not just in a service-area list. A company that regularly serves the Rogers, St. Francis, Cottage Grove, or Monticello corridor should be able to explain how local conditions affect the work.

    What warranty terms should I expect from roofers companies?

    Ask the company to separate workmanship coverage from manufacturer or material coverage. Confirm who handles a claim, what exclusions apply, whether coverage can transfer to a future homeowner, and what maintenance or documentation is required. Ask for the warranty terms in writing and keep them with the contract and final project records. Do not rely on a broad promise that the roof is “covered” without learning which party is responsible for each type of problem.

    Choose a Roofing Company With Confidence

    Comparing roofers companies is easier when you focus on accountability, local experience, a complete written scope, and warranty terms you can explain back in your own words. A careful inspection and a clear conversation should help you understand the next step without pressure.

    Referred Restoration serves homeowners in Rogers and nearby Minnesota communities with an inspection-led process for roofing and other exterior restoration needs. Contact Referred Restoration online to discuss your home and request the right next step. You can also reach the team at (763) 726-4245.

    Contact Referred Restoration online

  • New Roof in Minnesota: A Homeowner’s Guide

    New Roof in Minnesota: A Homeowner’s Guide

    Minnesota weather asks a lot of a roof. Snow, hail, freeze-thaw cycles, and summer heat can make an aging system less dependable long before a problem is obvious from the ground. Planning early gives you time to evaluate the roof, compare materials, and schedule work around weather rather than reacting to an active leak.

    Contact Referred Restoration online for a free inspection, or call (763) 726-4245.

    New roof on a Minnesota home

    For homeowners in Rogers, Cottage Grove, St. Francis, Monticello, and nearby communities, the right plan starts with an honest assessment. From there, timing, material choice, installation details, and routine care all shape how well the roof serves your home.

    When should you start planning for a new roof?

    Answer: Referred Restoration recommends starting with a professional inspection when a roof is aging, showing visible wear, or has experienced severe weather. Widespread damage or an aging system may call for a new roof, but an inspection should determine whether repair, monitoring, or replacement is the right next step.

    Start with two questions: How old is the roof, and what can you observe from the ground or attic? Planning early gives you time to arrange an inspection, compare materials, and choose a contractor without making a rushed decision. It also gives you room to address ventilation, flashing, drainage, and roof-deck concerns before installation begins.

    Age is an important planning signal. Asphalt shingle roofs are commonly described as lasting about 20 to 30 years, while many metal roofing systems can last 40 years or more. Those ranges are not guarantees. Installation quality, ventilation, weather exposure, roof slope, product selection, and maintenance all affect performance. Treat age as a reason to evaluate the roof, not as proof that replacement is automatically required.

    What signs should you look for?

    Visible changes can help you decide when to request a professional assessment. Look for:

    • Curling or lifting shingles: Distortion can signal aging or weather exposure.
    • Missing or displaced shingles: Open areas can leave the roof assembly more vulnerable to water.
    • Missing granules: Bare or thinning areas can indicate surface wear.
    • Leaks or ceiling stains: Water entering the home deserves prompt attention.
    • Damaged flashing: Problems around chimneys, vents, skylights, and roof transitions can create entry points.
    • Sagging or uneven areas: Changes in the roof line should be evaluated rather than covered up.

    These signs indicate that replacement should be evaluated, but one symptom alone does not establish the right solution. A roofing professional should examine the roof system, identify the source and extent of damage, and explain whether repair, monitoring, or a full replacement makes sense. After a major weather event, an inspection can also help document the roof’s condition before you make decisions.

    Homeowners in Rogers and nearby communities can begin by reviewing Rogers roofing services and requesting an inspection-focused conversation. Ask what the inspection covers, which findings support the recommendation, and what work would be completed first. A clear explanation is more useful than pressure to sign immediately.

    It is also worth doing contractor research before an urgent problem develops. When comparing companies, confirm licensing and insurance details, ask for a written scope, and look for a communication process that answers your questions. This guide on how to choose a qualified Minnesota roofer can help you organize those questions. The goal is a well-supported plan that protects your home and fits the roof’s actual condition.

    How do you choose materials for a Minnesota new roof?

    Answer: The best material for a Minnesota new roof depends on the home’s design, roof slope, weather exposure, desired service life, maintenance expectations, and appearance. Referred Restoration works with asphalt shingles and metal roofing, including premium Malarkey products, so homeowners can compare a suitable roofing system rather than choose by appearance alone.

    Material selection should begin with how your home handles Minnesota weather, how long you want the roof to serve you, and how the finished exterior should look. Asphalt shingles and metal roofing can both be sound choices, but they create different maintenance expectations and visual results. A roofing professional can also evaluate the roof design, ventilation, flashing, and other details that affect how well either material performs.

    ConsiderationAsphalt shinglesMetal roofing
    Expected service lifeOften described as a 20 to 30 year product, depending on the product and installation conditions.Many options can last 40 years or more when properly installed and maintained.
    Minnesota climate fitA practical, familiar choice for homes exposed to snow, hail, freezing temperatures, and seasonal weather changes. Product quality and installation details matter.A durable option for homeowners seeking a long-lasting roof system. The panel profile, protective finish, and fastening details should match the home and local conditions.
    AppearanceAvailable in many colors and profiles, including premium Malarkey products used by Referred Restoration.Offers clean lines and a distinct architectural appearance. It can complement modern, traditional, and agricultural-inspired homes.
    Maintenance focusPlan for periodic checks for damaged, displaced, or aging shingles, along with attention to penetrations and flashing.Inspect panels, fasteners, seams, flashing, and areas where different materials meet. Coatings and finish condition also deserve attention over time.
    Installation detailsRequires a properly prepared roof deck, underlayment, flashing, and ventilation strategy.Also requires careful detailing around penetrations, edges, valleys, and ventilation. The system must be installed for the specific panel design.

    Color and energy performance deserve a closer look when you are planning a roof replacement. The U.S. Department of Energy explains that white or specially designed cool-color roofs absorb less sunlight, stay cooler in the sun, and transmit less heat into a building. Its guidance also notes that cool roofing can reduce annual air-conditioning energy use in warm or hot climates. That figure is not a promise for a Minnesota home, where heating needs and seasonal conditions are different. But reflectance can still be one factor in a thoughtful material and color decision.

    The Department of Energy recommends considering cool roofing when construction, an energy retrofit, or a roof replacement is planned. Read more about selecting energy-efficient roof shingles before choosing a color or shingle design. The best decision balances durability, roof slope, ventilation, appearance, and the way your home manages water and temperature throughout the year.

    How long does a new roof replacement take?

    Answer: Referred Restoration states that most roof replacements take about 1 to 3 days once the crew is ready and weather cooperates. The complete project timeline is longer because it includes inspection, material selection, scope confirmation, scheduling, property preparation, installation, cleanup, and a final review. Roof size, complexity, and weather can change the schedule.

    A roof replacement has two different timelines: the planning period before work begins and the active installation period at your home. Separating them helps you set realistic expectations. Choosing materials, confirming the scope, reviewing ventilation and flashing details, and selecting an installation date all happen before the first shingle is removed.

    Once the crew is ready and the weather cooperates, the installation itself is often much shorter. A typical replacement takes about 1 to 3 days, depending on the roof size and weather conditions. A complicated roof with multiple sections, difficult access, extensive deck work, or many penetrations may require additional planning. Rain, strong wind, snow, ice, and unsuitable temperatures can also delay the start or pause work for safety and installation quality.

    1. Inspection and scope review: Start with an inspection to understand the roof’s condition and identify details that may affect the work. Multiple roof sections, penetrations, ventilation, and areas that need closer evaluation should be documented. This is also the time to discuss material options and the overall project scope.
    2. Material and schedule confirmation: Confirm the selected roofing system, colors, accessory details, and installation plan. The contractor can then coordinate delivery and choose a suitable work window. Planning earlier can provide more flexibility during Minnesota’s busiest weather-friendly seasons.
    3. Weather-ready installation: Minnesota weather is a major scheduling factor. Rain, strong wind, snow, ice, and unsuitable temperatures can delay the start or pause work. A short period of bad weather does not necessarily indicate a problem, but it can move the completion date.
    4. Homeowner preparation: Before work begins, clear vehicles and movable items from the work area. Secure fragile items inside the home, and arrange for pets and children to stay away from the active site. Ask where materials will be placed and how the driveway, landscaping, and entry areas will be protected.
    5. Installation and final review: The crew completes the planned roofing work, protects the property, and cleans the site. A final walkthrough gives you an opportunity to review the finished roof, care instructions, and any documentation before the project is closed.

    For Minnesota homeowners, the best time to begin is before a leak or storm concern becomes urgent. An inspection can clarify whether you need immediate work or simply a well-organized plan for a future new roof. Build flexibility into the schedule for weather, and judge the project by thorough preparation and workmanship rather than speed alone.

    What happens during the roof replacement process?

    Answer: A roof replacement typically moves from inspection and scope confirmation to property protection, tear-off. Roof-deck review, underlayment and flashing work, installation of the new covering, cleanup, and a final walkthrough. Referred Restoration’s process emphasizes a clear scope and professional installation so homeowners understand what is being done before work begins.

    A well-managed roof replacement follows a clear sequence. The work should begin with an inspection, not an assumption that every visible issue requires a complete replacement. The contractor evaluates the roof’s condition, identifies areas that need attention, and discusses the scope with you. Confirm the roofing material, color, ventilation approach, flashing details, and access or landscaping concerns before installation begins.

    Once the plan is confirmed, the crew prepares the property. Protection may be placed around landscaping, siding, windows, doors, and other areas near the work zone. The crew then removes the existing roofing materials in a controlled tear-off. This exposes the roof deck so its condition can be reviewed instead of covering a problem that needs to be addressed first.

    During that review, the contractor checks the deck, edges, valleys, penetrations, and flashing locations. Water management is a connected system, not just the visible shingle surface. The University of Minnesota Extension explains that a home’s drainage plane includes flashings and roofing components. Its elements begin at the foundation and continue upward, directing water away from the structure. That is why details around walls, chimneys, vents, skylights, and roof transitions deserve careful attention during replacement.

    After the deck and water-management details are ready, the crew installs the underlayment and the new roofing system according to the selected product requirements. Shingles or other roof coverings are installed in planned courses, with attention to edges, valleys, ridges, and penetrations. Ventilation components are addressed as part of the system rather than treated as an afterthought. The goal is a roof assembly that sheds water reliably and fits the home’s existing exterior details.

    Weather can affect the active installation schedule, and the crew may adjust the sequence to keep exposed areas protected. The installation commonly takes 1 to 3 days, depending on roof size and weather. Homeowners can get a more detailed overview in this guide to what to expect during roof installation.

    Cleanup is part of the job, not a separate favor. The crew removes tear-off debris, checks the work area, and looks for stray materials around the property. A final walkthrough gives you an opportunity to review the finished roof, ask questions about care, and confirm remaining documentation. For homeowners in Rogers and nearby communities, Referred Restoration provides Rogers roofing services with a local, consultative approach to the replacement process.

    How should you care for a new roof after installation?

    Answer: Protect a new roof by saving warranty and product records, checking it from the ground after severe weather, and keeping gutters and downspouts clear. Preserve attic airflow, trim risky branches, and report leaks or damage promptly. Referred Restoration can help evaluate concerns without encouraging unsafe roof access or do-it-yourself repairs.

    Good follow-up care helps you protect the work and notice small issues before they become disruptive. Before the crew leaves, keep the final paperwork in a safe place. Save the material and workmanship warranty details, product information, permit records if provided, color and shingle details, and the contractor’s contact information. Ask what maintenance the roof system requires and where flashing, vents, and other penetrations were checked.

    Make visual checks from the ground after major weather, but do not climb onto the roof. Look for loose or displaced material, visible debris, damaged flashing, or branches resting against the roof. If you see anything unusual, take a photo from a safe location and contact the installer. A new roof should not be treated as something to inspect by walking across it, especially when surfaces are wet, icy, or steep.

    Keep water and airflow moving

    Clean leaves and other debris from gutters and make sure downspouts discharge water away from the foundation. Roofing and drainage components work together as part of the home’s water-management system. The University of Minnesota Extension explains that drainage-plane elements extend from the foundation to the roof and should direct water away from the structure. Use these tips for choosing the right gutter system when evaluating gutter improvements or replacements.

    Stay aware of attic ventilation, too. Do not cover or block vents during storage or insulation projects, and ask the contractor to explain how intake and exhaust ventilation function together. Watch for persistent condensation, damp insulation, musty odors, or unusual temperature changes in the attic. These observations do not automatically prove a roof defect, but they deserve timely evaluation.

    Respond carefully to Minnesota weather

    Trim back limbs that can scrape the roof, and arrange debris removal without dragging tools or equipment across the shingles. After snow, avoid using a shovel, rake, or other tool directly on the roof unless a qualified professional recommends a safe method. Do not chip at ice dams or attempt hazardous roof access. If winter buildup or storm debris concerns you, request an assessment instead.

    Report stains, drips, damp attic areas, or suspected storm damage promptly. Do not assume a small leak will resolve on its own. These regular roof maintenance tips can help you recognize common warning signs, while a professional can trace the source and recommend the appropriate next step. Schedule a periodic professional inspection, particularly after severe weather, and keep a simple record of inspections and repairs. That documentation supports warranty questions and gives future technicians useful context.

    Contact Referred Restoration online for a free inspection, or call (763) 726-4245 to discuss your new roof.

    Frequently Asked Questions

    Should a 20-year-old roof be replaced?

    Not automatically. A roof around 20 years old deserves a professional evaluation, especially if it has visible wear, repeated repairs, or storm exposure. The condition of the shingles, underlayment, flashing, ventilation, and roof deck should guide the decision. An inspection can separate normal aging from problems that require replacement.

    What are the signs you need a new roof?

    Common warning signs include curling shingles, missing granules, leaks, damaged flashing, sagging areas, and significant age. These symptoms do not all mean replacement is immediately necessary, but they justify an inspection. A roofing professional can determine whether a targeted repair or a complete replacement is the more appropriate solution.

    What materials are best for a new roof in Minnesota?

    There is no single best material for every home. Asphalt shingles are a practical choice for many Minnesota homeowners, while metal roofing can offer a longer service life and a different appearance. Consider weather exposure, roof design, ventilation, maintenance expectations, and the look of the home before choosing. A qualified roofer can compare suitable options for your property.

    How long does a new roof replacement take?

    Active installation commonly takes 1 to 3 days, depending on roof size and weather conditions. Scheduling, material confirmation, inspections, and weather delays can extend the overall project timeline beyond the installation itself. Ask the contractor which parts of the schedule are confirmed and which depend on weather or conditions found after tear-off.

    When should you schedule a roof inspection?

    Schedule an inspection when you notice leaks, missing or curling shingles, storm damage, attic moisture, or unexplained ceiling stains. It is also sensible to arrange an evaluation before a major renovation or when the roof is approaching the end of its expected service life. Prompt assessment helps you plan calmly instead of waiting for a more disruptive problem.

    Ready to Plan Your New Roof?

    A professional inspection can help you understand your roof’s condition, clarify the next steps, and plan work around your home’s needs and Minnesota weather. Referred Restoration offers a practical, customer-first approach for homeowners who want clear guidance before making a roofing decision.

    Contact Referred Restoration online to request a free roof inspection

    You can also call (763) 726-4245 to talk with the team.