Author: Miguel Beltra

  • Rogers Home Exterior Damage Repair: Coordinating Roof, Siding, and Gutters

    Rogers Home Exterior Damage Repair: Coordinating Roof, Siding, and Gutters

    When harsh weather leaves several parts of your home looking different, rogers home exterior damage repair starts with careful observation, not climbing onto the roof or guessing at the scope. Roof edges, siding, gutters, windows, and interior finishes can be affected together. A clear record helps you discuss the right next steps. Start from a safe place and note what you can see.

    Schedule a free exterior inspection
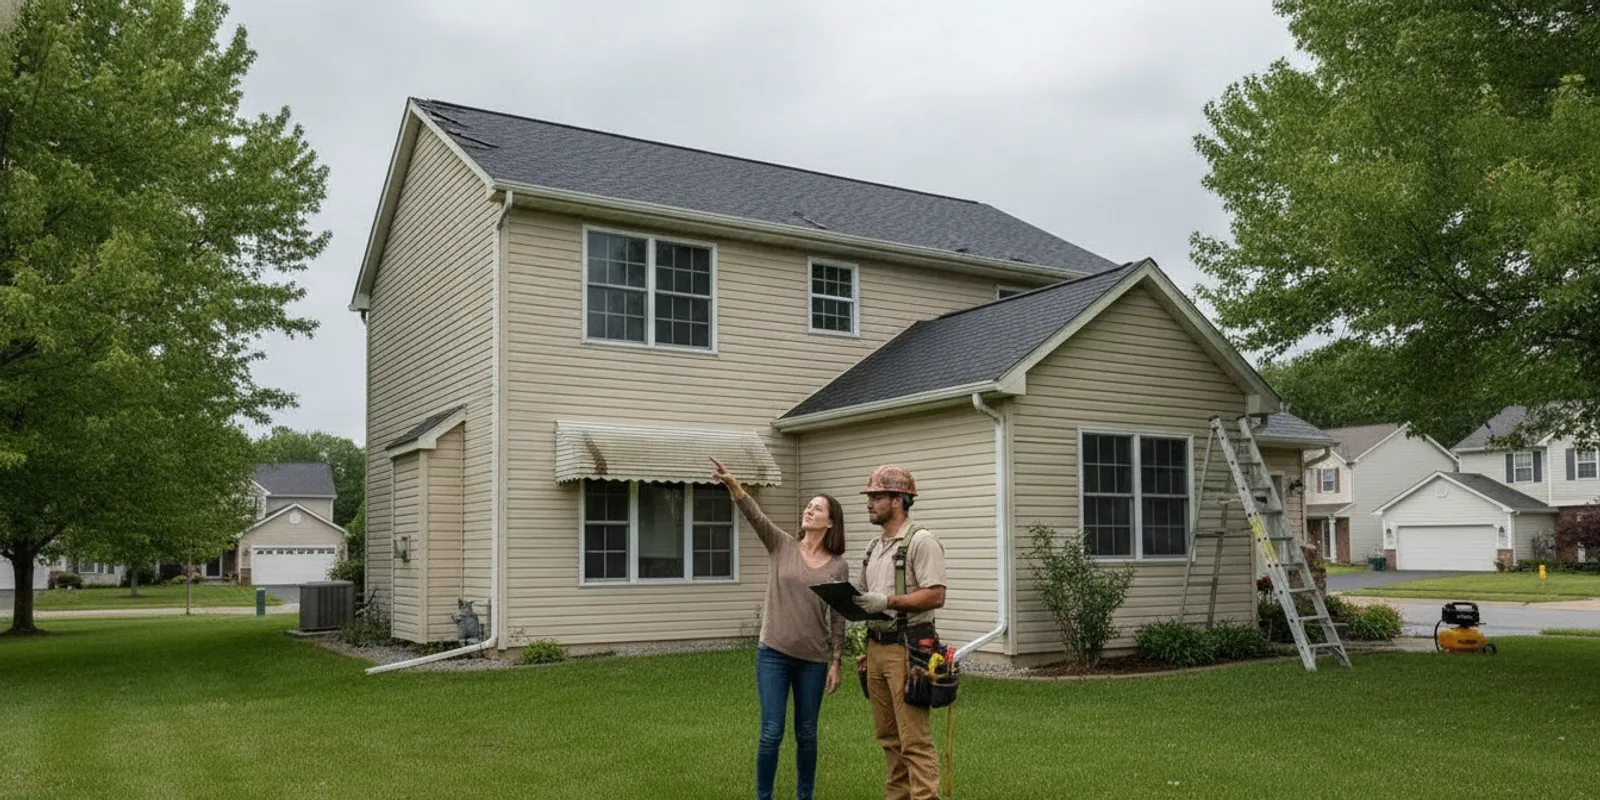
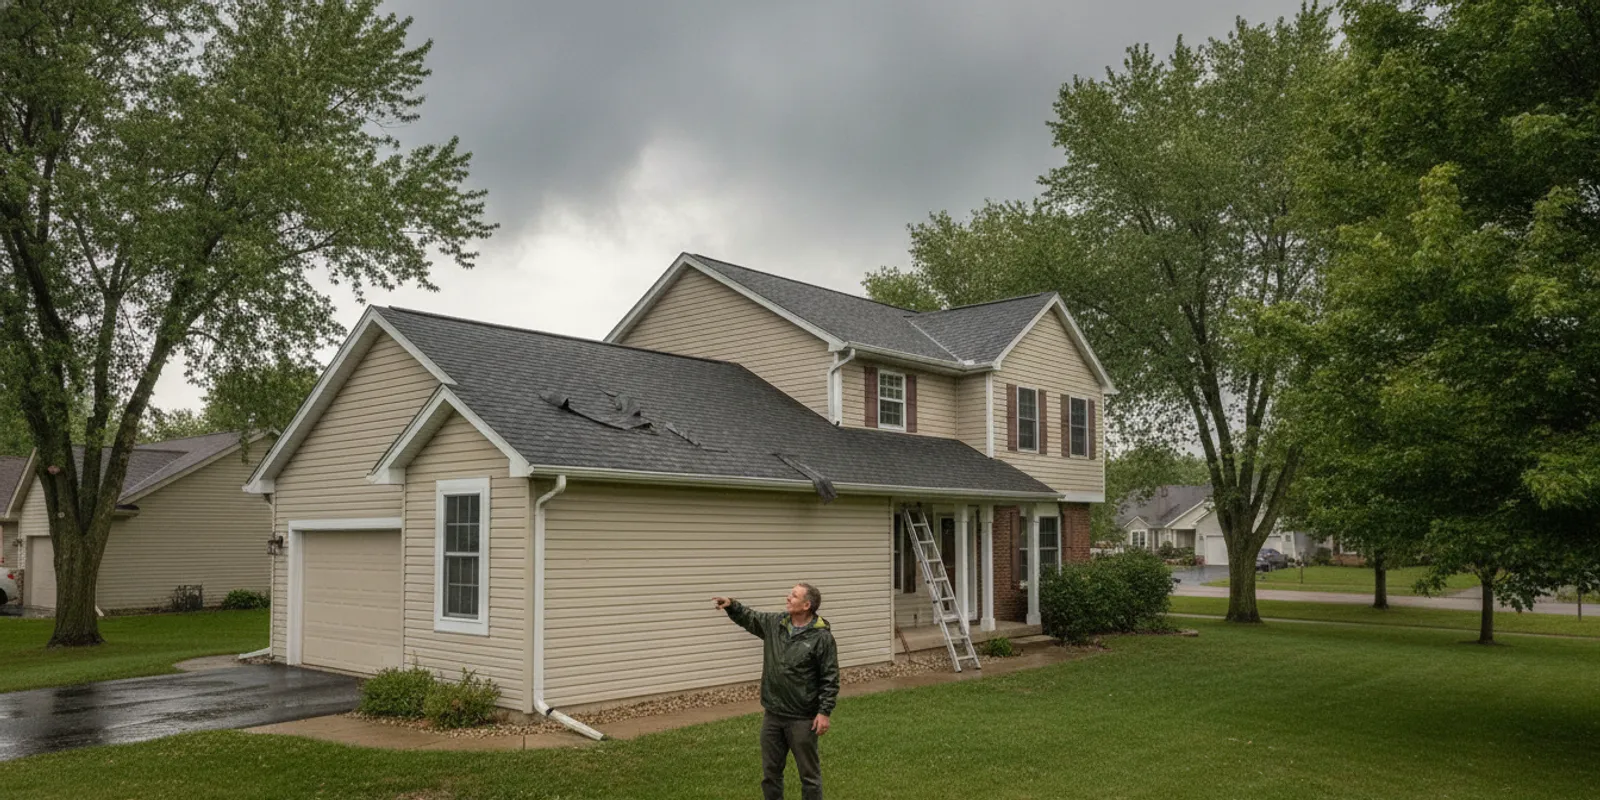
    Homeowner reviewing roof, siding, and gutter damage with a restoration professional in Minnesota

    What should you check first for rogers home exterior damage repair?

    Begin with safety. Stay off a wet, icy, or visibly damaged roof. Do not handle loose wires, broken glass, or unstable materials. If there is an immediate hazard, keep people away and contact the appropriate emergency service. From the ground or a secure indoor vantage point, note visible conditions without trying to prove their cause.

    • Look for missing, lifted, curled, or displaced roofing materials visible from the ground.
    • Check siding for cracks, holes, loosened sections, or panels that no longer lie flat.
    • Observe gutters and downspouts for sections that appear detached, bent, blocked, or out of alignment.
    • Look at window glass, frames, and nearby trim for visible damage or water marks.
    • Inside, note new ceiling or wall stains and the room and time you noticed them.

    These observations do not establish the cause or extent of damage. A stain may appear some distance from where water enters, and a small visible defect can have a larger area behind it. Record facts without making a repair diagnosis.

    How do roof, siding, and gutters affect one another?

    Exterior components meet at edges and transitions. Roof runoff reaches gutters, gutters direct water to downspouts, and siding and trim protect wall surfaces around openings. Damage or a loose connection in one place may make it useful to inspect adjacent areas as well. That does not mean every nearby component needs replacement. It means the assessment should consider how the parts meet and where water may travel.

    After wind, you might notice a gutter has pulled away at one corner while a siding panel below looks loose. Photograph both from a safe distance and note whether the concerns appeared at the same time. An inspector can assess the connection and determine whether the visible concerns are related or separate. Referred Restoration provides roofing, siding, gutter, and window services. Homeowners can review its exterior restoration services, Rogers roofing information, and window repair information.

    How can you document damage without taking risks?

    Good documentation is clear, dated, and taken from safe locations. Do not walk on a roof, climb a ladder to reach a gutter, or move debris that could be unstable. Use your phone camera from the yard, driveway, or inside the home. Include a wider view to show where the issue is, then take a closer view only if you can do so safely.

    1. Make a location list. Note the side of the home and a simple landmark, such as the garage corner or a bedroom ceiling.
    2. Take a wide photo first. This gives context and helps distinguish one elevation from another.
    3. Capture visible details. Photograph a loose panel, bent gutter, or stain without touching it.
    4. Write down timing. Record when you noticed the issue and any weather event you associate with it, without assuming that event caused it.
    5. Keep documents together. Save photographs, inspection notes, and correspondence in one folder.

    Use consistent file names if you take many photographs. A label identifying the wall, area, and date is easier to follow than a camera sequence. Keep original files and make a separate copy before sending anything to an insurer or contractor. Written notes should distinguish what you observed from what someone later suggested.

    If you contact an insurer, ask what documentation and reporting steps apply to your policy. Keep your own records and avoid authorizing work based on an unverified assumption about coverage. A Better Business Bureau business profile is an example of background information that should supplement, not replace, an on-site assessment and your policy documents.

    Which issue should be addressed first?

    Priorities depend on safety, active water entry, and the condition of affected areas. This table organizes observations for an assessment. It is not a substitute for a professional inspection or diagnosis.

    What you observeWhat to do nowWhat to ask during assessment
    Loose material or a potentially unsafe areaKeep people clear; do not climb or handle it.Is temporary stabilization needed, and what safety steps apply?
    Active water appearing indoorsMove belongings if safe, place a container if appropriate, and document the location.Where may water be entering, and which exterior areas need review?
    Visible roof or flashing concernPhotograph from the ground and note the nearest room or wall.Should the roof and adjoining edges be inspected together?
    Loose siding or damaged trimRecord the elevation and take a safe contextual photo.Are nearby openings or transitions affected?
    Gutter or downspout out of placeDo not attempt ladder work; note where water appears to discharge.Does the connection or drainage path need attention?

    How can you tell whether the concern is limited or connected?

    Map each observation to an exterior elevation and an interior room. A roof concern above a stained ceiling deserves attention to the roof surface, flashing, penetrations, and the path water may take before it becomes visible. A detached gutter below a roof edge deserves a look at the attachment points and discharge route. A loose siding panel near a window may call for review of the panel, trim, and opening rather than an automatic decision about the entire wall.

    Ask the inspector to separate three things: what is visibly damaged, what may be contributing to the issue, and what work is recommended. This distinction prevents a broad list of possible concerns from becoming an unclear work scope. It also gives you a better basis for comparing proposals. If the source cannot be determined without opening or removing material, ask what evidence would resolve the uncertainty and how that step would be documented.

    For drainage questions, review gutter installation in Rogers and seamless gutter information. Those resources can help you prepare questions, but they do not replace a property-specific inspection.

    How can you prepare for a coordinated inspection?

    Gather photos and notes before the visit. Make a short list of questions, including which areas will be inspected and whether connected exterior components should be considered together.

    • Point out each visible concern and the date you first noticed it.
    • Share indoor signs such as stains, dampness, or changes in a room without guessing where they began.
    • Identify areas that are difficult to access or where you have noticed recurring trouble.
    • Ask what the inspection found, what remains uncertain, and what the recommended next step is.
    • Request a written scope that identifies affected components and items not included.
    • Ask whether photos, measurements, or additional inspection steps will be included.

    For a roof concern, see roof repair in Rogers. For a siding issue, review siding services in Rogers. Homeowners in nearby areas can also consult the Cottage Grove service page.

    What should you clarify before work begins?

    Before approving a repair, make sure you understand what was observed and how the proposed work addresses it. Ask for a written description of the work, the materials or components involved, the order of work, and any preparation expected from you. If more than one exterior area is involved, ask how transitions and adjacent parts will be checked.

    Clarify what happens if concealed damage is discovered after work starts, how changes will be documented, and who to contact with questions. If the concern may involve an insurance claim, coordinate with your insurer. Referred Restoration describes assistance with storm-damage claims, but the insurer determines coverage under the policy. Keep contractor observations, insurer communications, and your own photos distinct and organized.

    Ask whether the crew will protect landscaping, outdoor equipment, and walkways. Confirm how removed materials will be handled and whether you need to move items away from the walls. Discussing these practical details early can reduce confusion on installation day.

    How do you compare exterior repair proposals?

    Compare the scope rather than relying on a single line item. A useful proposal should identify the affected elevation, components included, sequence of work, and exclusions. If one document is broad and another is specific, ask questions before assuming they describe the same repair.

    • Does the proposal identify repair, replacement, or inspection work for each component?
    • Does it explain how roof edges, wall transitions, windows, and drainage connections will be handled?
    • Does it list preparation, cleanup, and follow-up responsibilities?
    • Does it describe how an unexpected condition or requested change will be approved?
    • Does it give you a clear contact for questions during the project?

    For a broader service pathway, visit the Rogers storm damage restoration page. A clear conversation about scope is more useful than making a decision from a short description alone.

    How do you check the work afterward?

    When work is complete, review the agreed scope with the contractor. From safe locations, check that the identified areas have been addressed and that the surrounding area is orderly. Ask about any item that differs from the original plan. Do not climb to inspect roof work; request photos or a ground-level walkthrough instead.

    After the next rainfall, observe from indoors and from the ground for signs that prompted the repair, such as water appearing in the same area or runoff behaving unexpectedly. If a concern continues, document when and where it occurs and contact the contractor. Avoid assuming that one observation proves the source.

    When comparing the written scope with the completed work, review the same landmarks you used in your original notes. If the proposal listed a specific elevation, roof edge, or window, confirm that the closeout discussion addresses that location. Ask which items were completed, whether any planned item changed, and what prompted the change. Keep the final scope and any completion photos with your original record; doing so makes a later question easier to explain without relying on memory.

    It can help to distinguish an appearance check from a performance observation. A ground-level view may show that a panel sits flat or that debris has been removed, but it cannot confirm every concealed detail. For roof areas, ask for documentation rather than attempting a ladder inspection. For a gutter, observe the system from the ground during ordinary rain only if conditions are safe; do not stand near overflow or climb to adjust a component. If water appears where it did not before, note the time, weather, and location and request guidance.

    What details are useful when water appears indoors?

    Water marks, dampness, or drips can be worrying, but location alone does not identify the entry point. Water may travel along framing or other surfaces before it becomes visible. Describe the symptom precisely: which room, which wall or ceiling area, whether the mark is new or changed, and whether it appears during or after precipitation. A dated photo taken from a safe position can show whether the mark grows or changes over time.

    If water is actively entering, protect people first. Move electronics, furniture, and other belongings only when it is safe. A container can catch a drip if it can be placed without entering a hazardous area. Avoid touching wet electrical fixtures or standing water near electrical equipment; keep clear and contact the appropriate qualified help. Do not cut into a ceiling or remove wet materials simply to trace the path. Share the observations with the contractor and insurer, and ask what immediate steps are appropriate for the particular situation.

    Keep a simple event log rather than trying to interpret each mark. For example: “Oct. 22, upstairs hallway, small ceiling mark near the closet, first noticed after evening rain.” Add a second entry if the mark grows or another area becomes damp. This precise description is more useful than labeling the condition as a roof leak before it has been assessed.

    How does Minnesota weather shape the inspection conversation?

    In Rogers and nearby communities, a home may face rain, wind, snow, ice, and temperature swings over a year. Different conditions can expose different weaknesses, but a weather event by itself does not prove the cause of a particular defect. Use the timing as context: note when you noticed a change and what conditions preceded it, then let the inspection determine what can be established.

    After wind, look for displaced material, loose trim, or a changed gutter position from the ground. After heavy rain, note where water collects or discharges and whether an indoor stain changes. In winter, do not chip ice from roof edges or attempt to clear a high gutter from a ladder. If snow or ice makes access unsafe, postpone non-urgent observations and ask a qualified professional how to proceed. Seasonal context helps focus questions; it should not substitute for examination.

    For a home with several visible concerns, give the inspector a simple map or a list organized by side: front, rear, and each side elevation. Include nearby landmarks such as a porch, garage, or downspout. A short record lets the assessment move systematically instead of relying on memory while walking around the property. It can also reveal that two observations are on separate sides and may not share a source.

    What should a written work scope make clear?

    A written scope is easier to review when it describes locations and tasks in plain language. “Repair exterior damage” may be too broad to show what is included. Ask for the affected area, component, intended repair or replacement, and any related work that is specifically excluded. If the work includes more than one trade or part of the exterior, ask how the sequence will be coordinated and who will explain changes.

    Before signing or approving, check that the document reflects what you discussed. Confirm any access arrangements, preparation, protection of outdoor items, cleanup, and how questions will be handled during the work. If hidden conditions may change the plan, ask how you will be notified and how an added task will be described before it proceeds. Keep a copy of the agreed version so both sides can refer to the same scope.

    For insurance-related work, ask the insurer which documents it needs and who should receive them. A contractor’s observations can inform the conversation, but they do not determine policy coverage. Keep dates, photos, written findings, and messages organized by topic. Avoid treating a preliminary observation or an estimate as a guarantee of what an insurer will approve.

    How can you keep the repair process organized?

    Use one folder, digital or paper, for the full sequence. Start with your location list and original photographs. Add inspection notes, written recommendations, insurer correspondence, the accepted scope, and completion records. Naming files by date and location helps you find the relevant item later. If several people are involved in decisions, share the same current documents so each person refers to the same information.

    A compact tracking list can include the question, who will answer it, and whether the answer is written down. For example, if the proposal mentions checking a window perimeter, record whether that check is included in the work or merely an observation. If a gutter is listed for adjustment, note which section and what outcome is expected. This does not need to be elaborate; the goal is to prevent an important detail from disappearing among calls and photographs.

    Keep observations separate from conclusions. “Panel is lifted near the back door” is an observation. “The roof failure caused it” is a conclusion that requires evidence. This distinction is especially useful when discussing multiple components or speaking with an insurer. Ask questions whenever a recommendation is unclear, and request plain-language explanations of what is known, what is uncertain, and what would happen next.

    Frequently asked questions

    Can I inspect roof damage myself?

    You can make ground-level observations and take photographs from a safe location, but do not walk on the roof or climb to inspect damage. An inspection can assess areas that are not safely visible from the ground.

    Should roof, siding, and gutter concerns be assessed together?

    When several nearby components show concerns, ask whether they should be reviewed during the same inspection. The assessment can determine whether issues are related and which, if any, need work.

    Does storm damage mean my insurance will cover repairs?

    Not necessarily. Coverage depends on your policy and the insurer review. Contact your insurer for claim requirements and keep photographs and records.

    What information should I provide when requesting an inspection?

    Share the property location, areas where you noticed concerns, when you first saw them, and whether there are indoor signs such as water marks. Safe photographs can help.

    What if I see damage on only one part of the exterior?

    Describe the visible issue and ask whether nearby transitions or connected components should also be checked. A focused inspection can confirm whether the concern is isolated.

    Contact Referred Restoration online to discuss an inspection

    Careful notes and a coordinated inspection can help Rogers homeowners understand which exterior areas need attention and plan the next steps without taking unnecessary risks.

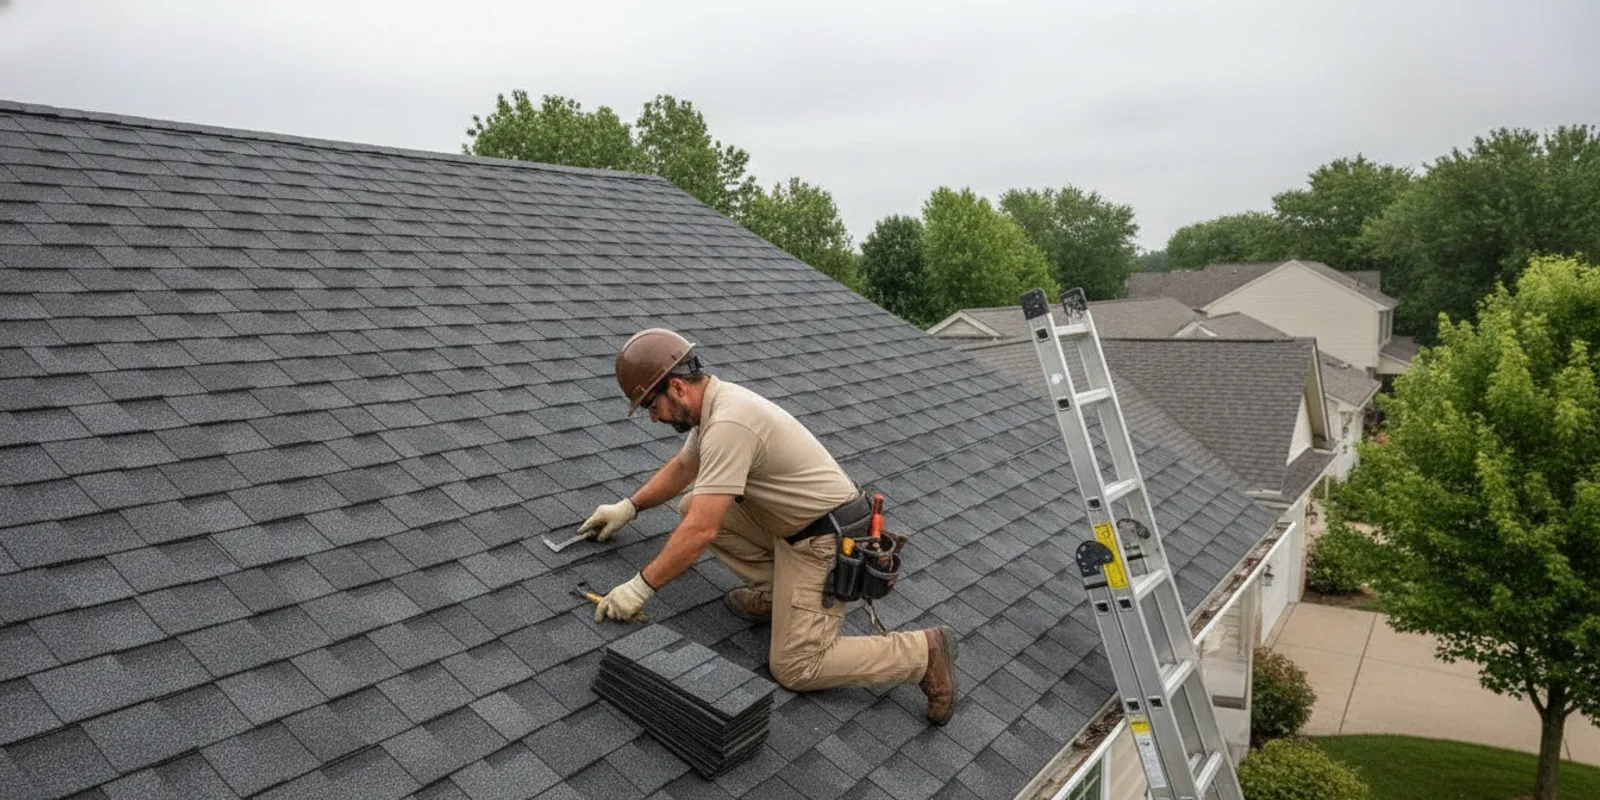
  • Gutter Repair Rogers: Signs Your System Needs Attention

    Gutter Repair Rogers: Signs Your System Needs Attention

    Gutter repair Rogers homeowners can trust starts with identifying where water is going wrong. A sagging section, loose fastener, blocked outlet, or leaking joint can send water toward siding, windows, doors, and the foundation. The right response is not always a full replacement. A careful inspection can separate a focused repair from a larger drainage problem and help you prepare for the next step.

    Schedule a gutter inspection with Referred Restoration

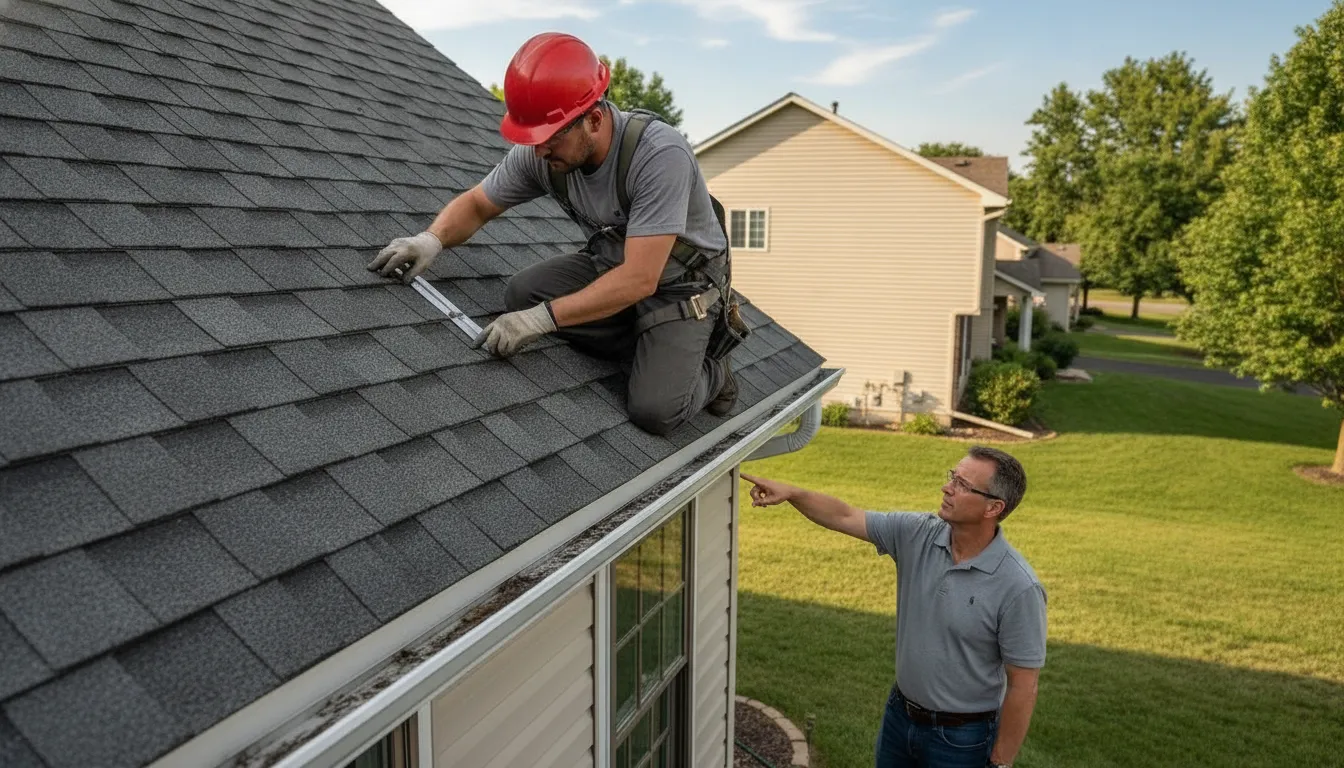
    Technician inspecting a residential gutter during repair in Rogers, Minnesota

    What signs suggest gutter repair Rogers homeowners should consider?

    Gutters often show trouble through water behavior before a homeowner sees a clear break. Walk around the home during or shortly after rain, but stay on the ground and keep away from slippery areas. Look for water spilling over the front edge, standing water, sagging sections, gaps at the fascia, leaks at seams and end caps, rust, holes, splits, water marks on siding or trim, and erosion near the foundation.

    One symptom does not identify the exact source. Overflow at one corner may begin with a blocked downspout, while overflow along a long run may involve alignment or capacity. Record where the water appears and whether the issue occurs at one location or around the house. The Rogers seamless gutter service page can help you identify the appropriate local service pathway.

    Observe what happens both during and after rainfall. A short burst of overflow at one corner is different from water that continues to drip at a seam once the storm has passed. Persistent water inside the trough may indicate a low area or obstruction, while water marks on the fascia can suggest that water repeatedly travels behind the gutter. These patterns are useful clues, but they do not confirm a cause on their own.

    How can you check gutters safely before an inspection?

    A homeowner can gather useful information without climbing onto the roof or leaning a ladder against the gutter. Use a ground-level walk-around and take photos from a stable position. Avoid touching a loose section, standing beneath an unstable ladder, or reaching near electrical lines.

    1. Start at the corners. Corners, outlets, and downspout connections receive concentrated water and are common places to find leaks or separation.
    2. Follow each downspout. Note whether it is attached, dented, blocked, or discharging toward a low area beside the home.
    3. Look along the fascia. A tilted or detached gutter may reveal movement in the supporting area. Do not pull on it to test the connection.
    4. Check nearby surfaces. Look for damp marks, peeling finish, loose trim, or soil washed away below a discharge point.
    5. Photograph the problem. Include a wide image showing the location and a closer image of the leak, gap, or visible damage.
    6. Write down timing. Note whether the issue appears during light rain, heavy rain, snowmelt, or after leaves collect.

    These notes help a contractor focus the visit. They also make it easier to compare observations after the system has been cleared or repaired. If the home has active interior water intrusion, treat that as urgent and explain it when requesting service.

    How can you make useful photos and notes?

    Begin with a view that shows the whole side or corner of the home. That wider frame helps locate the affected run relative to a roof edge, window, door, or downspout. Then take one or two closer images from a safe place on the ground. Use daylight if possible, and avoid standing under the section that appears loose. If the symptom is visible only while it rains, capture it from a sheltered, stable location rather than moving into a hazardous area.

    Give each image a simple note, such as “northwest corner, overflow during heavy rain” or “rear downspout, soil washed out after snowmelt.” Add the date and approximate weather. If the issue happens more than once, note whether it starts at the same point. This small record can distinguish a recurring pattern from an isolated event and gives the inspector a practical starting point.

    What can cause a gutter problem in Rogers?

    Rogers homes experience rain, snow, ice, freezing temperatures, and spring thaw. Those changing conditions can expose weak connections and drainage problems. Debris buildup can obstruct water flow or block a downspout opening. Repeated freezing and thawing can stress joints, hangers, and fasteners. Falling branches, ladders, and storm debris can dent or separate a section. Hangers can loosen or pull from weakened fascia. Seams and end caps can leak when sealant wears away or components shift.

    A sound gutter can still create a drainage concern if a downspout directs water beside the foundation. Roof additions, valleys, or remodeling changes can also send more runoff toward a section than it previously handled. Do not assume that cleaning alone resolves every issue. If water returns after debris is removed, the system may need a closer look at its alignment, supports, connections, or discharge path.

    How do seasonal conditions reveal different problems?

    Each season can make a different weakness easier to notice. In spring, snowmelt and rain can reveal low spots where water remains after a storm. During summer thunderstorms, sudden runoff may expose a blocked outlet or a section that spills over. In autumn, leaves and small branches can collect at corners and downspouts. Winter freeze-thaw cycles may make existing gaps or loose attachments more apparent, although frozen components should not be handled.

    Use seasonal observations as clues, not as a diagnosis. A drip that appears only during heavy rain may point to a capacity, alignment, or outlet issue; a leak in steady rain may be more localized. Note the weather and duration when the symptom occurs. Those details help distinguish a recurring defect from a one-time blockage or storm impact.

    Look at the surrounding area as well as the gutter itself. Mulch displaced beneath a downspout, a channel in the soil, or repeated splashing on lower siding can show where runoff is landing. Water may leave the gutter correctly and still create a concern if it discharges at an unsuitable spot. Record where the water ends up, not just where it begins to overflow.

    When is gutter repair Rogers more appropriate than replacement?

    A focused repair may make sense when the problem is limited to a small number of components and the surrounding system remains stable. Examples include a loose hanger, separated end cap, leaking joint, or damaged downspout connection. The repair should address the reason water is escaping, not just cover the visible drip.

    Replacement may deserve discussion when damage is widespread, long sections are pulling away, multiple seams leak, or the material has repeated holes and deterioration. A repair that leaves adjacent weak sections untouched may not resolve the broader drainage issue. The inspection should consider the whole run, fascia, downspouts, and areas receiving runoff.

    What you observeWhat it may indicateUseful next step
    One leaking seamFailed connection or sealDocument the location and request a focused inspection
    One loose or sagging sectionFastener, hanger, or support problemCheck nearby fascia from the ground and avoid pulling on the gutter
    Overflow at one outletDebris or blocked downspout pathNote the outlet and downspout condition for service review
    Several sections pulling awayWidespread support or material concernAsk for an assessment of the complete system
    Erosion below a downspoutDischarge path directing water too close to the homePhotograph the area and discuss drainage options

    This table is a starting point, not a diagnosis. A contractor needs to see how the sections connect and how water moves around the home before recommending work.

    What does a useful repair-versus-replacement assessment cover?

    Ask the inspector to identify the affected run and explain whether the trouble is isolated or repeated. A single loose support beside sound sections is different from several lengths that sag or separate. Likewise, a damaged downspout connection may be a limited issue, while repeated overflow at multiple outlets calls for a broader review of water movement.

    Ask whether the underlying attachment area is sound and whether nearby fascia shows signs of moisture or deterioration. A new fastener cannot solve a support problem if the material it enters is compromised. Also ask how the proposed work addresses the outlet and discharge path. The goal is to understand the sequence: what failed, what needs attention, and what observations would show the repair worked.

    A recommendation should explain the relationship between the visible symptom and the proposed scope. For example, if one joint leaks but the nearby gutter remains level and securely attached, the discussion may focus on that connection. If the same run has several leaks, a sagging area, and deteriorated support, the contractor may explain why one isolated patch would not address the repeated conditions. Ask what was observed and what remains uncertain.

    What should you ask during a gutter repair inspection?

    A useful inspection should leave you with a clear explanation of the observed problem and the work being considered. Ask where water is leaving the intended path, whether the issue is limited to one section, and whether the hangers, fasteners, fascia, and connections support the system properly. Ask whether the downspout carries water away from the home, which work is a repair, which work involves new sections, and what should be checked after completion.

    Ask for the recommendation in writing when possible. A clear description of affected locations helps you understand the scope and compare proposals on the same basis. Referred Restoration provides gutter service in Rogers for homeowners reviewing local options.

    How can you compare recommendations clearly?

    When reviewing more than one recommendation, compare the same elements rather than relying on a general label such as repair or replacement. Look for the specific run or outlet, the symptom being addressed, the proposed components, and any related fascia or drainage concern. Ask whether debris removal is included or is separate from correcting a leak, alignment issue, or loose support.

    Keep photos and notes with the written recommendation. If two assessments differ, ask each provider to explain the observation behind the proposed scope. A clear explanation should connect the visible symptom to a likely cause while acknowledging what cannot be confirmed from a ground-level view. This process helps you make an informed choice without treating a single drip as proof that every section needs work.

    It can help to compare proposals line by line. For each one, record the location, the component to be repaired or replaced, the reason for the work, and what happens to nearby sections. Ask whether the contractor expects to correct the water path as well as the visible leak. If one proposal mentions only a patch and another includes support or outlet work, ask what evidence supports each scope before deciding. Different recommendations may reflect different observations, so request clarification rather than assuming one is automatically right.

    How should you prepare for gutter service?

    Preparation can make an inspection safer and more useful. Keep vehicles, toys, patio furniture, and other items away from the work area. Secure pets indoors. Identify exterior outlets, gates, and access points before the appointment. Share photos of the problem and mention when it appears.

    Review related exterior concerns. Water that reaches siding, trim, or windows may involve more than the gutter itself. If you see damaged siding, review siding services in Rogers. If water is entering near a window, note the location and ask whether the surrounding trim or opening should be evaluated. Referred Restoration also lists window repair in Rogers.

    For roof runoff questions, an assessment may include the roof edge, flashing, or nearby damage. You can review Rogers roofing service information or the Rogers roof repair pathway. These links do not replace an inspection; they help you identify which exterior area to mention.

    What information should you have ready?

    Before requesting service, gather a short, practical record. Note the address area of concern, which side of the home is affected, when you first noticed the symptom, and whether it changes with rainfall or snowmelt. Mention any recent storm, nearby branch fall, exterior work, or gutter cleaning that may help explain a change. If water has reached an interior room, say so clearly rather than describing only the outside drip.

    Choose a safe place to meet and point out the visible issue from the ground. Share the photos in sequence: a wide shot for context, then closer views of the gutter and the area below it. This makes the location easier to discuss and can keep the inspection focused on the actual water path. Do not remove guards, climb to clear a blockage, or attempt to reattach a loose length before the visit.

    Also mention any repairs or changes made previously, if you know about them. A replaced downspout, recently added roof section, or earlier patch may affect how water moves or where a recurring symptom appears. You do not need to diagnose the issue; simply share what you observed and what has changed. If you are unsure of a detail, say so rather than guessing.

    What should you check after gutter work is complete?

    Before the crew leaves, walk around the completed area with the project contact. Confirm that repaired or replaced sections are attached, connections are closed, and downspouts are connected as planned. Look for disturbed landscaping or items that need to be returned.

    After the next meaningful rainfall, observe the system from the ground. Check the repaired location, corners, downspout outlets, and areas where water previously collected. During freezing weather, avoid standing beneath icicles or touching frozen components. If the original symptom returns, record the date, weather, and location, then contact the contractor promptly.

    Consumer Reports advises homeowners to check a gutter system seasonally for pitch, clogs, corrosion, broken fasteners, and separation between connections in its guide to repairs homeowners should not ignore: seasonal gutter inspection guidance. A regular visual check can help you notice changes before water damage spreads.

    What if a symptom comes back?

    Do not assume that a small recurrence means the new work has failed or that a larger replacement is automatically necessary. Record exactly where water appears, when it starts, and how long it lasts. Compare the location with the original photos and note whether the symptom is the same or has shifted to another seam, corner, or downspout.

    Contact the contractor with this specific information and ask what follow-up observation is appropriate. If water is entering the home, describe the interior location and take steps to protect belongings without reaching into wet electrical areas. Keep clear of loose gutters, unstable ground, and ice. A clear record makes the next assessment more useful.

    When you check after rain, make the observation from the same safe locations used for your original photos where possible. This makes it easier to compare the flow and identify whether water is still escaping at the same point. Avoid interpreting a single brief drip as proof of a continuing failure, but do not ignore persistent overflow, repeated wet marks, or water entering the building. Share the facts and images with the contractor so the follow-up can address the specific pattern.

    Regular visual checks do not require taking the system apart. From the ground, look for new sagging, visible separation, debris at the outlets, and soil erosion beneath discharge points. If you see a change after a storm, take a photo and note the date. Do not climb to clear a blockage or handle ice; these observations are enough to explain why you are requesting a closer look.

    Contact Referred Restoration online about gutter repair

    Frequently asked questions

    Can I inspect my gutters without climbing a ladder?

    Yes. A ground-level walk-around, photos, and notes about water flow can provide useful information. Leave climbing, unstable sections, and roof access to trained professionals.

    Does a leak always mean the entire gutter system needs replacement?

    No. A single failed connection or damaged section may be suitable for focused repair. The surrounding supports, material, and drainage path should be evaluated first.

    Why does water overflow even when the gutter looks clean?

    Overflow can result from a blocked downspout, shifted alignment, a drainage path that cannot carry runoff, or water entering quickly at a valley or corner. The visible gutter may not be the only issue.

    What should I do if water collects beside my foundation?

    Photograph the area, keep clear of unstable soil, and have the downspout discharge path reviewed. Mention interior dampness or repeated erosion when requesting an assessment.

    How often should I check gutters in Minnesota?

    Check them seasonally and after significant storms, heavy leaf fall, and snowmelt. Also look after any event that may have moved branches or damaged exterior components.

    With careful observation and a professional assessment when needed, Rogers homeowners can address gutter problems before they become a larger exterior concern.

  • Roofer in Cottage Grove: Questions to Ask Before Hiring

    Roofer in Cottage Grove: Questions to Ask Before Hiring

    When you are looking for a roofer in Cottage Grove, a useful conversation should leave you with more than a broad recommendation. Ask how the contractor inspected the roof, what work is included, how weather and scheduling affect the plan, and what happens after the crew finishes. Clear answers help you compare proposals on the same basis and choose a service path that fits your home.

    Schedule a free inspection

    What should a roofer in Cottage Grove explain during an inspection?

    Start by asking what the inspection covers. A roofer should explain which roof areas were reviewed and show you the observations that support the recommendation. Ask whether the visit included visible shingles, flashing, roof edges, penetrations, gutters, and signs of water entry inside the home when accessible. Do not assume every inspection has the same scope.

    Ask for specific observations rather than a conclusion alone. For example: Where is the concern? What did the inspector see? Is it an active leak, a suspected storm impact, or wear that should be monitored? If the issue cannot be confirmed from the ground, ask what further access or inspection is needed. A responsible assessment distinguishes visible evidence from assumptions.

    • Request dated photos of the areas discussed.
    • Ask which findings need prompt attention and why.
    • Find out whether the inspection covers the full roof or only a reported area.
    • Ask what could not be inspected and how that affects the recommendation.

    Keep your own notes, including when you first noticed a leak, which rooms are affected, and whether the problem changes during rain or thaw. If water is entering, protect belongings and avoid climbing onto a wet or icy roof. A professional assessment is safer than trying to investigate a steep or damaged surface yourself.

    How can you tell whether the recommended work is clearly defined?

    Ask for a written scope that names the work area and describes the planned tasks. For a repair, clarify what material or component is being addressed, whether nearby flashing or roof details are included, and what is outside the scope. For replacement, ask what layers will be removed, what underlayment and edge details are planned, and how the contractor will handle any concealed damage found after work begins.

    Make sure the document separates confirmed conditions from possible additional work. Ask how the contractor will contact you if crews uncover a condition that changes the original plan, and whether you will approve the revised work before it proceeds. A written explanation reduces the chance that you and the crew have different expectations.

    Which questions help you compare roofing proposals?

    Compare the details, not just the final recommendation. Ask each contractor to describe the inspection basis, materials, work boundaries, cleanup, schedule assumptions, and follow-up. If one proposal is much broader or narrower, ask what observation explains the difference. Use the table to organize the conversation and note answers from each company in the same format.

    TopicQuestion to askWhat a clear answer includes
    InspectionWhat did you inspect, and what did you find?Areas reviewed, observations, photos, and limitations
    Work scopeWhat is included and excluded?Specific tasks, locations, and process for changes
    MaterialsWhich products and components are planned?Product details and where each will be used
    ScheduleWhat could affect the start or duration?Weather, material availability, and communication plan
    CompletionWhat happens when the work is finished?Cleanup, walkthrough, documentation, and contact for concerns

    Ask for product names and written documentation rather than relying on general terms such as “quality materials.” If two contractors describe different systems, ask them to explain the practical difference for your roof and the maintenance or care each may require. Referred Restoration offers roofing services in the area; homeowners can review its Cottage Grove service information and roofing inspection and service pathway.

    What should you ask about permits, insurance, and documentation?

    Ask who is responsible for determining whether a permit is needed and who will obtain it. Requirements can depend on the work and local rules, so confirm the answer for your specific project rather than relying on a general statement. You can also ask what documents you will receive before work starts and at completion.

    Ask the contractor to explain what insurance documentation is available and how the company handles jobsite safety. Make sure you understand who will perform the work and who your contact is if questions come up. These are practical checks for any significant home project, not a substitute for reviewing the actual agreement.

    The available BBB directory is for roofing contractors near Cottage Grove, Wisconsin, not Minnesota. Do not treat it as a list of Minnesota contractors; it is geographically relevant only if you are researching the Wisconsin community: BBB directory listing.

    How should you handle a roof concern after a storm?

    Record the date of the storm and any visible changes, such as displaced shingles, a damaged gutter, or a ceiling stain. Take photos from the ground where it is safe, and keep notes about interior water entry. Avoid making a conclusion about the cause based only on a quick visual check; an inspection can help distinguish storm-related damage from existing wear or another issue.

    If you plan to contact your insurer, ask what documentation the roofer can provide and keep copies of your own records. A contractor can explain observed conditions and the work they recommend, but coverage decisions belong to the insurer and depend on your policy. Referred Restoration describes assistance with storm-damage claims as part of its roofing service information; see its storm restoration page for the service pathway.

    What should you confirm about timing and the workday?

    Minnesota weather can affect outdoor work. Ask how rain, snow, ice, or unsafe conditions could change the schedule, and how the contractor will notify you. Confirm when materials may arrive, whether vehicles need access to the driveway, and whether anything should be moved away from the home before the crew arrives.

    Ask how the crew will protect landscaping and outdoor items, manage debris, and keep you informed during the work. Clarify whether you need to be home, how workers will access the site, and whom to contact if plans change. For larger work, agree on a practical check-in point before the job begins.

    How should you prepare before the crew arrives?

    Use the days before work to resolve practical questions that are easy to overlook. Confirm the expected arrival window, the best way to reach the site lead, where materials or equipment may be staged, and whether the driveway or a gate must remain accessible. Move vehicles, patio furniture, grills, planters, and other items away from the work zone if the contractor requests it. Ask before relocating anything fragile or difficult to move.

    Inside, remove or secure items that could be disturbed by vibration, especially on upper floors directly below the work area. If you have pets, children, or a home office, ask what noise and access conditions to expect and plan accordingly. Do not assume that the house must be vacant; confirm whether anyone needs to be home and how the crew will communicate during the day.

    Agree in advance on how unexpected conditions will be documented. If work cannot proceed safely because of weather, ask how the crew will leave the site protected and when you will receive an update. A simple preparation list can prevent avoidable delays and help everyone understand which decisions still need your approval.

    What should happen after roofing work is complete?

    Ask whether there will be a walkthrough and what completion documents you should expect. Confirm how debris and leftover materials will be handled, and ask how to report a concern if you notice one later. Review the work area from the ground and compare the completed work with the written scope. Avoid walking on the roof to inspect it yourself.

    Keep the proposal, change approvals, product information, photos, and completion notes together. If an issue appears after the work, record when it occurred and share the details with the contractor. Ask about any workmanship or manufacturer documentation in writing; do not assume terms that are not stated in your agreement.

    It is useful to ask the crew or project contact to identify any areas that need later observation, such as a repair near a roof transition or a location where the original condition could not be fully confirmed. Ask what signs should prompt a follow-up call and whom to contact. Keep that guidance with your project records rather than relying on memory.

    How can you choose the right service path?

    A focused repair may fit a limited, identifiable problem. Replacement may be worth discussing when inspection findings show broader deterioration or recurring issues, but the decision should follow a clear assessment of your roof rather than a generic rule. Ask the contractor to explain why the recommended option fits the evidence and what alternatives are reasonable.

    For repair questions, review the roof repair service page. If the inspection points toward a full project, the roof replacement information can help you prepare questions. For another nearby service location, see roofing service information for Otsego.

    Use the inspection and written scope to decide what to do next. Referred Restoration describes a process of inspection, a custom solution, and professional installation. Homeowners can also review its home page or request a visit to discuss their home’s specific condition.

    Use these additional checks to make the recommendation easier to evaluate before committing. Ask the contractor to explain what signs would change the recommendation, what maintenance the roof may need after the work, and which parts of the home could be affected during the project. If the proposal includes several separate tasks, have each listed in sequence so you can see how the work fits together.

    How can you keep the project conversation organized?

    Good notes make follow-up easier, especially when you speak with more than one contractor or revisit a proposal later. Keep a single folder for the inspection summary, photographs, written scope, product information, schedule updates, and any approvals. Label photos with the date and the location they show. If a contractor refers to a roof section by a name you do not recognize, ask them to point it out on a simple sketch or photograph.

    After each conversation, write down what remains uncertain and who will provide the answer. For example, note whether you are waiting for confirmation about permit responsibility, material selection, start timing, or how a newly discovered condition will be handled. Send a concise follow-up message that repeats the agreed point. This creates a shared record and reduces the chance that an important detail is lost between the inspection and the start of work.

    Before approving a proposal, read it from the perspective of someone who was not part of the discussion. Could that person tell which areas will be worked on, what is excluded, how changes are approved, and who to contact? If not, ask for a clearer written explanation. A short clarification before work begins is easier to address than a disagreement after crews are on site.

    How can you assess the quality of the inspection evidence?

    A useful inspection record connects each recommendation to a location and an observation. When you review photos, ask the contractor to identify the roof plane or detail shown, explain what condition is visible, and note whether the image captures the whole issue or only one close-up. A close photograph can reveal a detail but may not show how extensive the condition is. A wider view gives context, while a close view can clarify a specific component. Ask for both when the distinction matters.

    Look for consistency between the verbal explanation, the images, and the written scope. If the recommendation refers to several areas but the documentation shows only one, ask whether other areas were inspected and whether additional records are available. If a photo is difficult to interpret, ask for a plain-language explanation rather than trying to diagnose the roof yourself. The point is not to challenge every technical judgment; it is to understand the basis well enough to make an informed decision.

    Record any uncertainty as a question to resolve, not as a confirmed defect. For example, a mark on a ceiling might be related to a roof leak, plumbing, condensation, or an earlier event. Explain when it appears and whether it changes after rainfall. Let the inspection determine what can and cannot be concluded from accessible evidence. Keeping observation separate from interpretation makes later conversations more precise.

    What details should a written scope spell out?

    Read the scope line by line and check that it describes the specific parts of the roof and sequence of work. For repairs, ask whether the scope names the affected slope, edge, valley, flashing, vent, or other component as applicable. For a larger replacement, ask what tear-off and preparation are included, how underlayment and roof-edge components are addressed, and how materials will be staged. The contractor can explain which details apply to your roof; not every project requires the same items.

    Clarify how the crew will address adjacent components that may be disturbed during the work. Ask whether the scope includes cleanup of the work zone and how debris will be collected. If gutters, siding, windows, or landscaping could be near the work area, ask how the crew plans to protect them and what you should move. A clear boundary helps you distinguish work that is part of the roofing task from separate repairs that may need another decision.

    Ask for a written process for changes. It should be clear who contacts you, what information you will receive, and how you can approve or decline the proposed change. A helpful explanation identifies the newly observed condition, why it matters, what alternatives exist, and whether the schedule will shift. Keep any revised scope or approval with the original proposal so you can see the complete project record.

    How do materials and roof details affect the questions you ask?

    Material names are only one part of a roofing proposal. Ask how the selected products fit the roof design, what components are included alongside the visible covering, and whether the product documentation identifies care or installation requirements. A shingle, metal panel, underlayment, flashing detail, and ventilation component each serve a different role. A contractor should be able to explain the planned system in terms you can understand without promising that any material eliminates every maintenance need.

    If proposals list different products, place the names side by side and ask what differs in appearance, installation, and product documentation. Ask whether one proposal includes components that another leaves unspecified. Avoid comparing a broad label with a detailed product list as though they were equivalent; request the same level of detail from each contractor. If a specific product is important to you, ask where it will be installed and whether the written scope matches the discussion.

    Also ask how roof ventilation, flashing, and transitions are considered when relevant. These details may influence how the roof assembly works as a whole, but the answer depends on the home’s design and observed conditions. A sound conversation explains the role of each relevant component and avoids turning a general rule into a diagnosis for your property. Record any proposed change to existing details in the written scope.

    How should you compare repair and replacement recommendations?

    Ask each contractor to explain the evidence for the recommended path and what a narrower option would address. A repair discussion should identify the localized concern, the nearby details that may be involved, and what signs could suggest the problem returns. A replacement discussion should explain why addressing a wider area is being considered and which observations support that view. Neither label alone tells you whether a recommendation fits the roof.

    Consider the limits of the inspection. If a roof area could not be accessed or a condition is concealed, ask how that uncertainty affects the recommendation. You can ask whether a limited repair is reasonable while you gather more information, or whether delaying action could leave an active water-entry issue unresolved. The contractor should explain the reasoning and any assumptions, while you decide how to proceed based on the written facts and your priorities.

    When recommendations differ, create a short comparison: observation, proposed work, excluded work, expected sequence, and what follow-up is suggested. Ask each contractor to respond to the same set of questions. This makes differences easier to understand and can reveal whether the disagreement is about the observed condition, the repair approach, or the amount of work included. Seek clarification before treating either proposal as directly comparable.

    What should you ask about communication and site safety?

    Before work starts, identify the person who will answer day-to-day questions and the best way to reach them. Ask when you should expect updates, how schedule changes are shared, and whether urgent questions go to the same contact. If a crew finds something unexpected, clarify whether the site lead will pause and contact you before moving beyond the agreed scope. Having one agreed communication route can prevent repeated calls and contradictory instructions.

    Ask what areas around the house should remain clear while work is underway. Roofing work can involve people, equipment, and falling debris in the active work zone, so follow the contractor’s directions about access and keep children and pets away from that area. Ask whether you should use a different entrance or avoid a particular side of the house during the workday. Do not enter a marked or active work area to inspect progress without checking with the site contact.

    Discuss practical needs such as driveway access, deliveries, outdoor outlets, and temporary placement of equipment. If you work from home or need predictable quiet periods, mention that early and ask what can reasonably be planned. These conversations do not guarantee an exact schedule, but they help set realistic expectations and allow the contractor to explain which parts of the work may change with weather or site conditions.

    What can you do if a leak appears before the appointment?

    Start with safety and damage control inside the home. Move belongings away from dripping water, use a container if it is safe to do so, and note which room and ceiling area are affected. If water is near electrical fixtures or the ceiling appears swollen or unstable, keep clear and contact an appropriate qualified professional for immediate guidance. Do not climb onto the roof, especially in rain, snow, ice, or wind.

    Take photos from a safe indoor position and record when the leak occurs, how long it lasts, and whether it follows rain, snow melt, or another event. A stain may remain visible after the active water entry stops, so note whether it is growing or changing rather than assuming the roof is still leaking at that moment. Share those details with the contractor when scheduling or during the inspection.

    If a temporary measure is proposed, ask who will perform it, what it is intended to address, and what work remains afterward. A temporary response should not be confused with a complete repair unless the written scope says so. Keep copies of any photos and notes, and ask when the condition should be reassessed if the permanent work must wait for weather or materials.

    How can you plan for weather and seasonal changes?

    In Minnesota, the work window can depend on conditions at the home, not simply the date on a calendar. Ask what weather conditions affect safe installation, how the contractor evaluates a forecast, and what happens if conditions change after materials arrive. A postponed start is frustrating, but working in unsafe conditions or without a suitable installation window can create different concerns. Ask for updates and a revised expectation rather than assuming the original date remains firm.

    Discuss how the home will be protected if work begins and then pauses. Ask what areas will be opened at each stage, how the crew plans to protect exposed sections, and whom to contact if precipitation is forecast. The exact approach depends on the scope and weather, so request an explanation for your project rather than relying on a generic promise. Before the crew leaves for the day, ask what areas remain incomplete and what protection is in place.

    Plan around deliveries and household routines as well. If snow or ice affects access, ask whether you need to clear a path or whether the contractor will reschedule. Keep a note of the updated schedule and any preparation changes. Clear communication about weather, access, and work sequencing can help you distinguish a planned delay from a missed update.

    How can you prepare a fair comparison between contractors?

    Give each contractor the same basic information: where you noticed a problem, when it started, whether it changes with weather, and any earlier repair history you know. Avoid presenting an unverified diagnosis as fact. Ask each person to inspect the same reported area and to state whether the review covers other accessible roof sections. This creates a more consistent starting point for comparing observations.

    Use a notebook or simple worksheet with one row per topic: inspection coverage, evidence, recommended work, materials, exclusions, change process, schedule, cleanup, and follow-up. Write down exact product names and terms rather than relying on memory. When a contractor uses a phrase you do not understand, ask for a short explanation and add it to your notes. The goal is a record you can revisit without needing to reconstruct a conversation.

    Do not treat a proposal with more words as automatically more complete or one with fewer lines as automatically inadequate. Check whether it answers the practical questions relevant to your roof. If a detail is missing, ask for clarification in writing. If two plans remain different, ask each contractor to identify the observation that leads to that difference. You can then compare the reasoning, scope, and assumptions rather than focusing on presentation alone.

    What should you verify before approving the work?

    Before you approve, confirm the property address, work area, project contact, anticipated sequence, and any responsibilities assigned to you. Make sure the written scope matches what you understood from the inspection. Check that exclusions and possible follow-on work are stated, and that the process for handling a discovery is clear. Keep a copy of the current proposal and any revisions.

    Read any authorization language carefully and ask about points that are unclear. Confirm what documentation is provided, how updates will arrive, and what happens if you need to ask a question after hours or on a non-workday. If there are separate documents for products, permits, insurance, or completion, note when you should receive each one. Do not rely on a verbal assurance to replace an important written term.

    Finally, make sure you know what would count as completion for the agreed work. Ask how the contractor will confirm the listed tasks are finished, whether there will be a walkthrough, and where to report a concern. Having these points settled before work starts gives both you and the contractor a shared reference if questions arise later.

    How can you make the next conversation productive?

    Prepare a short list of the three or four questions that matter most to your situation. A homeowner with an active leak may prioritize the immediate response, the area that can be inspected, and how the home will be protected. Someone planning replacement may focus on the full scope, material documentation, sequencing, and completion records. A list tailored to the concern makes the appointment more useful than a long, generic checklist.

    During the conversation, ask one question at a time and request an example when an answer is abstract. If the contractor says a detail is included, ask where it appears in the written scope. If they describe a schedule as flexible, ask what events would cause a change and how you will hear about it. Summarize the response in your own words and invite correction so both sides know what was agreed.

    At the end, identify what remains undecided and who will follow up. You might need an additional photo, a product document, a permit answer, or a revised scope. Set a reasonable check-in point and keep the result with your project notes. A conversation that ends with clear next actions is easier to continue than one that leaves every question open.

    How should you choose a practical next step in Cottage Grove?

    Start with the condition you can describe, not the solution you assume you need. Gather safe observations, request an inspection, and ask for findings that connect to a written plan. If the issue is limited, ask whether a focused repair addresses it and what should be monitored. If there are broader concerns, ask what evidence supports considering replacement and what details would be included. Your decision can follow a clear explanation rather than pressure or guesswork.

    Referred Restoration describes its service process as an inspection, a custom solution, and professional installation. Homeowners can review the Cottage Grove roofing information or contact the company to discuss an inspection. Keep the conversation centered on your home: what was observed, what remains uncertain, and what practical choices are available.

    Frequently Asked Questions

    Should I get more than one roofing proposal?

    Comparing proposals can help you see whether contractors agree on the condition and scope. Give each contractor the same information and compare written details, not only broad recommendations.

    Can a roofer tell me whether my insurance will cover storm damage?

    A roofer can document observed conditions and explain recommended work. Your insurer determines coverage under your policy, so direct coverage questions to the insurer.

    Should I inspect the roof myself before hiring someone?

    You can note visible concerns from the ground and take safe photos, but do not climb onto a wet, icy, steep, or damaged roof. Ask a qualified professional to inspect areas that are not safely visible.

    What should I do if the written scope changes during the project?

    Ask the contractor to explain the newly discovered condition, the proposed change, and its effect on the work. Review and approve any revised scope in writing before additional work proceeds.

    Request a roof inspection

    A clear inspection, written scope, and direct answers make it easier to choose a roofing plan that suits your Cottage Grove home.

  • Gutter Company Cottage Grove MN: Services Homeowners Should Expect

    Gutter Company Cottage Grove MN: Services Homeowners Should Expect

    If you are looking for a gutter company Cottage Grove MN homeowners can turn to, start by matching the service to the problem: a blockage, a leak, a loose section, or a system that no longer moves water away from the home. A clear inspection and written scope can help you understand what needs attention before work begins.

    Schedule a gutter inspection

    Gutter professional inspecting a residential home's roofline and downspout in Cottage Grove, Minnesota

    What services should a gutter company provide?

    Gutter work is not limited to installing new troughs. A contractor may inspect the full drainage path, identify the source of overflow, repair a joint or attachment, or discuss replacement when the existing system is damaged or no longer suited to the roofline. Referred Restoration offers gutter installation and repair, with service information for Cottage Grove homeowners and dedicated gutter installation in Rogers.

    Ask the company to explain what it observed and why it recommends a specific service. Water spilling over one spot does not always mean the entire system needs replacement. The cause could be debris, a disconnected downspout, a loose joint, or water arriving faster than the outlet can carry it away.

    Which gutter problem are you seeing?

    Before you call, note where and when the issue appears. Observe from the ground during or after rain, and avoid climbing a ladder to inspect an unstable or high roofline. These details can help a professional focus the assessment.

    • Overflow during rain: Note whether it happens along a long stretch or at one corner. Debris, a restricted outlet, or a drainage issue may be involved.
    • Drips at a seam: Record the location and whether the leak continues after rainfall. A joint or section may need attention.
    • A sagging or detached section: Keep people clear of the area below it and mention whether the separation is near a corner, fascia, or downspout.
    • Water pooling near the foundation: Check whether the downspout is connected and where its outlet releases water. The drainage path beyond the gutter matters too.
    • Visible wear or repeated trouble: Note previous repairs and whether problems recur in the same area. This can help compare a targeted repair with a broader replacement recommendation.

    For background on drainage layout, see this downspout placement guide. A professional can also check whether the outlet and surrounding grade work together to move water away from the house.

    What should an inspection cover?

    A useful inspection considers the whole route that rainwater takes: roof edge, gutter channel, corners, outlets, downspouts, connections, and discharge point. The contractor should identify the observed condition, explain any limitation in what can be seen safely, and distinguish urgent concerns from routine maintenance.

    Homeowners can prepare by making a short record:

    1. Write down the location of each concern, using a simple front, back, or side description.
    2. Note the weather or conditions when it appears, such as heavy rain, melting snow, or wind.
    3. Take ground-level photographs if they can be made safely and clearly.
    4. List any past repairs and when the problem returned.
    5. Move patio furniture or stored items away from the work area when practical.

    Do not attempt to clear a gutter from an unsafe ladder or walk on a roof. If you see a loose section, keep clear of the area beneath it until it can be assessed.

    How do repair and replacement differ?

    A repair may be appropriate when the issue is confined to a sound section or connection and the rest of the system remains serviceable. Replacement may be worth discussing when damage is widespread, sections repeatedly fail, or the arrangement does not handle water effectively. The right option depends on what an inspection finds; a single symptom does not establish that the full system must be replaced.

    Service pathWhen it may fitWhat to clarify
    Cleaning or clearingDebris appears to restrict flow and the system is otherwise intactWhich sections and outlets will be addressed, and how will debris be handled?
    Targeted repairA leak, loose attachment, or damaged area appears limitedWhat is the suspected cause, and will nearby sections also be checked?
    New installation or replacementDamage or recurring problems affect more of the systemWhat sections are included, how will downspouts connect, and what is excluded?

    Ask for the scope in writing. It should describe the areas involved, the proposed work, the materials or system details being considered, and how the contractor will protect the work area. If two recommendations differ, ask each company to point to the evidence behind its proposed approach rather than comparing only broad labels.

    What questions help you evaluate a gutter company?

    A helpful conversation gives you room to understand the recommendation and decide what makes sense for your home. Consider asking:

    • What did you observe, and where?
    • Could the issue be addressed with a repair, or is there a reason to consider replacement?
    • Will you inspect the downspouts and discharge points as well as the gutter channel?
    • What work is included, and what is not included?
    • How will you keep the entry, landscaping, and nearby surfaces clear during the work?
    • What should I check once the work is complete?

    Look for direct answers that connect the proposed work to observed conditions. A company should be able to explain its recommendation without pressuring you to approve work before you understand the scope. For broader exterior needs, you can review Referred Restoration’s home exterior services and its seamless gutter service information.

    What should you consider through Minnesota seasons?

    Gutters face changing conditions across the year. Leaves and other debris can restrict flow in fall. Snow and freeze-thaw weather can expose drainage or attachment problems. In spring and summer, heavy rain makes overflow and discharge issues easier to notice. Check the system from the ground after major weather, and arrange an inspection if you see damage or recurring trouble.

    Do not chip ice from a gutter or apply heat without knowing the risks to the roof and system. If a section is pulling away or water is entering the home, describe the condition when requesting help. You can also read about rain gutter considerations for Minnesota homes and ways to keep gutters clear of debris.

    How can you check completed gutter work?

    Before the crew leaves, review the work area and ask the contractor to walk you through what was completed. From a safe position on the ground, look for a consistent line along the roof edge, connected downspouts, and debris removed from the surrounding area. Ask which parts were repaired or replaced and whether any conditions remain to monitor.

    During the next rainfall, observe whether water moves through the system and exits where expected. Do not climb up to test it. If you still see overflow, a leak, or water collecting near the home, take a ground-level note or photo and contact the contractor to discuss what you observed.

    How should you compare written recommendations?

    Two inspections may describe the same symptom in different ways. Compare the evidence and proposed scope rather than relying on a broad label such as repair or replacement. A useful written recommendation should identify the location, describe the condition, and explain how the work is expected to address it.

    Use a simple side-by-side checklist. Confirm that each document covers the same areas and that exclusions are clear. If one proposal includes downspouts and another does not, they are not describing the same work. Ask follow-up questions before making a decision.

    • Location: Are the affected runs, corners, outlets, and downspouts identified?
    • Scope: Does the proposal explain which components will be cleaned, repaired, or replaced?
    • Connections: Does it say how the gutter joins corners and how outlets connect to downspouts?
    • Work area: Is cleanup or protection of nearby surfaces addressed?
    • Open questions: Are limits, additional observations, or conditions requiring approval stated plainly?

    When a recommendation is unclear, ask the contractor to explain it in everyday language. You should be able to tell what the crew plans to do, what condition it addresses, and what remains outside the agreed scope. Keep the written details with your home records so you can refer to them if the issue returns.

    What can you observe safely after rain?

    A short ground-level check can help you notice whether water is moving as intended without turning routine observation into a risky roof inspection. Look at the gutter line from several places around the house. Notice whether water spills at a particular joint, corner, or stretch, and whether a downspout appears to discharge where expected.

    Also note what happens near the foundation and along the path water takes after leaving the downspout. A gutter can carry water to its outlet while the final discharge area still allows pooling near the home. Record the weather and approximate time, because a brief observation during a light shower may not show what happens in a heavier rain.

    Do not touch hanging components, reach over a railing, or stand below a loose section. Avoid placing a ladder on wet or uneven ground. If you cannot safely see the area, leave it for an inspection and describe what you can observe from a stable position.

    What should you expect during installation or repair?

    Before work begins, confirm the areas included and ask where equipment and removed materials will be placed. Move vehicles, planters, or outdoor items if the contractor requests access. Keep children and pets away from the active work zone. The exact sequence varies with the work, but a clear plan should make it easier to understand which parts of the home and yard may be affected.

    For a repair, ask whether nearby sections will be checked while the crew is working and whether the original symptom may have more than one cause. For replacement or a new installation, clarify the planned run, corners, outlets, downspout connections, and discharge direction. These practical details help you verify that the finished system addresses the concern you raised.

    At the end, request a brief walkthrough. Ask what was completed, whether anything unexpected was found, and whether there are remaining items to monitor. Keep any written scope and completion notes together. That gives you a clear record if you need to ask a follow-up question later.

    Frequently Asked Questions

    Can one overflowing section mean the whole gutter system needs replacement?

    Not necessarily. Overflow can result from a localized blockage, outlet issue, or other condition. An inspection can help determine whether a focused service or a wider replacement discussion is appropriate.

    Should I inspect gutters from a ladder?

    No. Do not use an unsafe ladder or walk on a roof to investigate. Record what you can see safely from the ground and share that information with a professional.

    What should I do before a gutter inspection?

    Note the location and timing of the problem, collect safe ground-level photos, and list previous repairs. Keep the likely work area accessible where practical.

    What does a gutter contractor need to check besides the gutter itself?

    The inspection should consider corners, outlets, downspouts, connections, and where water is discharged. These parts work together to carry water away from the roof and home.

    Request a gutter inspection

    A clear inspection and a specific written scope give you a practical basis for deciding whether your Cottage Grove home needs maintenance, repair, or a new gutter system.

    For general consumer guidance, the Better Business Bureau directory of gutter businesses near Cottage Grove can be one reference point when researching providers; compare the actual scope and communication as well.

  • Gutter Services in Cottage Grove MN: Maintenance, Repair, and Replacement

    Gutter Services in Cottage Grove MN: Maintenance, Repair, and Replacement

    Gutter services in Cottage Grove MN can help homeowners address clogs, leaks, loose sections, and worn systems before water begins affecting the exterior of a home. Knowing what to look for makes it easier to describe a concern and choose a sensible next step.

    Contact Referred Restoration online to request an inspection

    Gutter and downspout on a Minnesota home after rainfall

    Gutters collect roof runoff and carry it to downspouts. When water spills over, drains slowly, or escapes at a joint, it may pool near the foundation or leave marks on siding and trim. The right response depends on the cause: a simple blockage is different from a sagging run or widespread deterioration. This guide explains how to observe the system safely, what a professional assessment can clarify, and how to compare maintenance, repair, and replacement.

    What gutter services in Cottage Grove MN address first?

    Start with visible signs from the ground during or after rain. Do not climb a ladder or reach onto a roof to inspect gutters. Look for water pouring over the edge, a downspout that is not discharging, or water running behind the gutter. These observations can help narrow down what needs attention.

    • Overflow during rain: Leaves or other debris may be blocking the channel or downspout. A gutter that is undersized for the roof area or has a drainage problem may also overflow.
    • Drips at seams: A leak may come from a joint, end cap, or connection. Note where it appears and whether it occurs during steady rain.
    • Sagging or pulling away: Sections that dip or separate from the fascia may have loose or damaged supports. A persistent low point can interfere with water flow.
    • Stains on siding or fascia: Runoff in the wrong place may leave streaks, especially around corners and connections.
    • Water collecting at the base of a downspout: Check from a safe distance whether the outlet is blocked or whether water is being discharged close to the house.

    One symptom can have several possible causes. For example, overflow at one corner could point to a clog, a poor connection, or a slope issue. Make a note of the location and weather conditions rather than assuming the entire system needs replacement. If the gutter looks intact but water repeatedly marks the wall, also note whether it happens during heavy rain, wind-driven rain, or every rainfall. The pattern can help a professional check the relevant corner, outlet, and adjacent roof edge rather than focus only on the visible stain.

    How do Minnesota seasons affect gutter maintenance?

    In Minnesota, seasonal changes bring different demands. Leaves can collect in gutters in autumn. Snow and freeze-thaw conditions may reveal loose sections or drainage issues in colder months. Spring rain provides a useful opportunity to observe whether water moves through the system and exits the downspouts as expected.

    After storms, look for new debris, displaced downspout extensions, or visible damage from the ground. Keep branches and stored items away from access paths, and avoid walking on icy or wet surfaces to examine the roofline. If you see a concern that is difficult to assess safely, arrange a professional inspection rather than taking risks on a ladder.

    Regular attention does not mean every home needs the same schedule. Trees near the roof, the layout of the roof, and past clogging can affect how often debris builds up. Keep a simple record of when overflow or leaks happen. That history can help a contractor distinguish an occasional blockage from a recurring drainage concern. Leaves and grass clippings can add phosphorus to runoff. The City of Cottage Grove, Minnesota explains neighborhood ponds and street drainage. That page is not a home gutter repair guide.

    As leaves fall, homeowners can note which roof edges sit beneath trees and whether debris collects at a particular corner. During winter, do not chip at ice or pull on frozen gutters; these actions can damage the system or create a fall hazard. When the weather allows, observe where snowmelt drains and whether the same overflow pattern returns. A brief seasonal log is more useful than a vague impression that the gutters “always” have trouble, because it records timing, location, and conditions.

    When are gutter services in Cottage Grove MN just maintenance?

    If water spills over only in one area and the gutter otherwise appears straight and intact, a blockage may be the first thing to investigate. Cleaning removes accumulated debris, while a check of downspouts can identify a restricted outlet. Homeowners should only do work they can perform safely; gutter cleaning often involves ladder and roof-edge hazards.

    Maintenance is less likely to resolve recurring problems if water continues to overflow after debris is cleared, a run has a pronounced dip, or the gutter repeatedly leaks at the same joint. In those cases, ask for an assessment of the full water path: gutter channel, corners, outlets, downspouts, and discharge location. For additional homeowner guidance, see Referred Restoration’s article on keeping gutters clear of debris and its overview of seamless gutter benefits.

    When should you consider gutter repair?

    Repair may be appropriate when a problem is limited to a section or connection and the surrounding system remains sound. Examples include a loose support, a leaking joint, a damaged end cap, or a downspout connection that needs attention. A contractor can inspect how the affected area is attached and whether the problem has affected adjacent sections.

    Before work begins, ask the contractor to explain what they found, which parts need attention, and how they will confirm water can flow through the repaired area. If water has been running behind a gutter, ask whether the fascia or nearby trim should also be examined. Gutter work and related exterior conditions may overlap, but repairs should be based on what is actually observed.

    Ask whether the repair includes checking the route water takes after it leaves the gutter. A repaired seam will not resolve a separate blockage farther down the downspout, and a stable-looking channel may still discharge too close to the home. Clarify which components the work covers, what conditions are outside the scope, and what signs should prompt a follow-up. This keeps expectations specific and helps you assess the result after rainfall.

    When does replacement make more sense?

    Replacement is worth discussing when several sections are damaged, the system repeatedly fails, or visible wear is widespread. A professional can compare the condition of the existing gutters with the work needed to restore reliable drainage. The evaluation should consider the roofline, corners, downspout locations, and how water leaves the home.

    Ask whether the proposal addresses the whole drainage path rather than just the most visible leak. It should identify the areas included, the type of system being installed, and any connections or downspouts that are part of the work. Referred Restoration offers gutter installation service and seamless gutter installation. Contact the company to confirm Cottage Grove availability and the right next step.

    When comparing an existing system with replacement, look beyond the material name. Consider how many corners and roof sections feed into the gutters, where downspouts can be placed, and whether the discharge route can be maintained. Ask what will happen to the old system, how the crew will access the roofline, and whether nearby trim or fascia concerns were observed. A good explanation should connect each recommendation to a visible condition or to the layout of the home.

    Option.Often considered when.What to confirm.
    Maintenance.Debris or a restricted outlet may be affecting flow.Whether the channel and downspout are clear and water exits properly.
    Repair.A localized leak, loose support, or damaged connection is visible.Which section is affected and whether surrounding parts are sound.
    Replacement.Wear or damage is widespread, or recurring issues persist.Scope, system components, discharge path, and completion checks.

    What should you ask before gutter work begins?

    A clear conversation helps you understand the recommended work without guessing. Consider asking:

    • What did you observe, and where is the source of the problem?
    • Is the issue limited to one section or part of a broader drainage concern?
    • What work is included, and which areas are not included?
    • Will the downspouts and discharge points be checked along with the gutters?
    • How will you protect nearby landscaping and clean up debris?
    • What should I watch for after the next rainfall?

    For a repair, make sure the recommended work matches the observed issue. For replacement, ask how the new layout will handle corners and downspout connections. Referred Restoration describes its process as a free inspection, custom solution, and professional installation. You can review the company’s home exterior services and its Cottage Grove service information, then ask questions before deciding on a service path.

    It can also help to request a written description of the proposed work. Check that it names the affected sides or sections of the home, the components included, and any related work that is not part of the plan. If two recommendations differ, compare the observations behind them rather than relying only on the proposed scope. Ask each contractor to explain how the proposed work addresses the same symptoms and how the finished drainage path will be checked.

    How can you prepare for a gutter inspection?

    Prepare a short description of the issue and note when it occurs. Photos taken safely from the ground can help show a stain, loose section, or overflow pattern. Include the side of the home and approximate location, such as the rear corner above a patio. Do not take photos from a roof or unstable ladder.

    Move vehicles or outdoor items away from the work area if practical, and let the inspector know about gates, pets, or access limitations. If you have noticed water pooling, explain where it gathers and whether it happens during ordinary rain or only heavier weather. These details make the inspection more focused.

    Before the visit, gather any notes about earlier cleaning or repairs and point out locations where the problem has returned. If you have photos from different seasons, arrange them by date and weather so the sequence is clear. Mention related exterior observations, such as water marks on siding or trim, but avoid diagnosing the cause yourself. The inspector can then consider whether the gutter, downspout, or another nearby component needs attention.

    What should you check after service?

    Once work is complete, ask the contractor to review the areas addressed and explain any follow-up recommendations. From the ground, look for straight runs, secure visible connections, and downspouts that direct water away from the immediate wall area. After rain, observe whether water moves through the gutters and discharges where expected.

    Keep an eye on the original problem area through the next rainfall. If overflow or dripping returns, record where and when it happens and contact the contractor to discuss the observation. A timely follow-up can help determine whether a remaining blockage, connection, or larger drainage issue needs attention.

    Check the work from several safe viewpoints around the home. Look for obvious gaps at corners, loose extensions, or debris left near the work area, and note anything that does not match the explanation you received. Do not climb up to test a connection by hand. After the first rain, compare the flow with your earlier notes: whether water still spills at the same spot, whether a downspout discharges, and whether pooling changes. Specific observations give the contractor a useful basis for follow-up.

    Contact Referred Restoration online to discuss gutter service

    Frequently Asked Questions

    Can I tell from the ground whether my gutters need replacement?

    You may notice warning signs such as sagging, repeated leaks, or multiple damaged sections, but a ground-level view cannot confirm the condition of every connection. A professional inspection can help determine whether repair or replacement is more suitable.

    Should downspouts be part of a gutter inspection?

    Yes. Gutters and downspouts work as one drainage path. A blockage or poor connection in the downspout can contribute to overflow even when the visible gutter channel appears clear.

    How often should gutters be cleaned?

    There is no single schedule for every home. Nearby trees, roof shape, and the amount of debris all affect how quickly buildup occurs. Observe the system during rain and adjust maintenance based on what you find.

    Does Referred Restoration serve Cottage Grove?

    The company has a Cottage Grove service page and describes exterior restoration services in the area. Contact Referred Restoration to confirm current availability for your specific gutter concern.

    When you track symptoms, prioritize safe observations, and ask for a clear explanation of the recommended work, you can make a more informed decision about maintaining, repairing, or replacing your gutters.

  • Window Repair Cottage Grove MN: What to Check First

    Window Repair Cottage Grove MN: What to Check First

    If you are searching for window repair Cottage Grove MN homeowners can trust, start by identifying what is actually failing. A crack in the glass, fog between panes, a loose sash, damaged trim, and water around the opening can look similar from across the room but call for different next questions. This guide gives you a practical first check for the glass, seal, frame, and installation area before you request an assessment.

    Contact Referred Restoration online to share what you have found and ask about the next step. You can also call (763) 726-4245.

    Homeowner checking the frame and weather seal of a residential window in Cottage Grove

    Start with safety, location, and timing

    Before testing a window, make the area safe. Keep children and pets away from cracked or shattered glass. Do not press on a damaged pane, force a stuck sash, or climb onto a roof or exterior ledge to inspect a window. From the ground, a driveway, or inside the room, take notes about what you can see without putting yourself at risk.

    Record three simple details:

    1. Where is the symptom? Note whether it is on the glass, at the edge of the sash, on the frame, or on the wall and trim around the opening.
    2. When does it appear? Write down whether it follows rain, a cold night, strong wind, indoor humidity, or a change in season.
    3. What changed? A new crack, a window that suddenly will not latch, and a stain that has slowly grown each point to a different starting question.

    Photograph the whole window first, then take closer images of the symptom. Include a familiar object for scale when it is safe to do so. These photos can help a professional understand the issue before an in-person look, but they do not replace an assessment of hidden damage or the installation opening.

    1. Check the glass without touching a damaged pane

    Look at the glass from an angle and in changing light. A crack that begins at an edge, a star-shaped impact mark, a chip, or a long line across a pane should be documented. If the glass is broken, keep the sash closed if it can close safely and avoid trying to remove fragments. Temporary coverings should not put pressure on the pane or hide the damage from someone who needs to inspect it.

    Also note whether the problem affects one pane or several. A single damaged pane may lead to a glass-focused question, while cracks in multiple windows after a storm may call for a wider review of the exterior and the surrounding openings. Do not assume that a visible crack is the only issue. The frame, sash, glazing, and adjacent trim may need to be checked as well.

    If the glass is intact but the window looks cloudy, determine where the haze is located. Wipe the room-side surface with a clean, dry cloth. If the haze remains between the panes of insulated glass, it may indicate a failed seal rather than ordinary room condensation. If it disappears when the surface is wiped, the next question is why moisture is forming on that surface.

    Referred Restoration’s window repair service page describes glass and frame repair, replacement, and storm-related window work. The page is a useful starting point for understanding the types of window concerns a professional may review, while this guide focuses on what to document first in Cottage Grove.

    2. Check the seal and separate condensation from a failed seal

    Moisture on a window does not automatically mean the window needs to be replaced. First identify the surface. Condensation on the room-side glass can be related to indoor humidity, cold outdoor temperatures, airflow, curtains, or furniture blocking circulation. Moisture between insulated panes is a different symptom because it is inside the sealed glass unit. Water at the lower corner, sash edge, or trim can point to a drainage, seal, or installation question.

    Check the pattern at different times, but do not create unsafe conditions just to test it. On a cold morning, look for water on the interior surface and note whether it is on one window or several. After rain, look at the sill and adjacent trim from inside. If the stain returns after precipitation, record the weather and the location rather than simply applying a new bead of caulk.

    The U.S. Department of Energy’s Building Science Education guidance on fenestration explains that windows are part of the building envelope and that properly selected and installed systems affect comfort and energy performance. That is why a moisture symptom should be traced to the glass, seal, frame, drainage path, or installation instead of being treated as a surface-only problem.

    Useful observations include:

    • Fog or haze that remains between panes after the room-side surface is cleaned.
    • Water that appears on the same sill or trim after rain.
    • Peeling paint, soft wood, staining, or a musty area around the opening.
    • A draft that is strongest at the sash edge, lock, trim, or wall joint.
    • Condensation that occurs only during very cold weather and clears when indoor humidity or airflow changes.

    Do not diagnose hidden mold, structural damage, or a failed flashing detail from a photograph alone. Note the evidence and ask for the source to be checked.

    3. Check the frame, sash, and operating hardware

    Open and close the window only if it moves without unusual force. A sash that sticks, drops, will not stay open, or no longer latches can have an issue with hardware, alignment, the frame, or the opening around it. Record the exact action that fails: does the lock not meet, does the lower sash rub at one corner, or does the window close but leave a visible gap?

    Inspect the frame and sash edges from inside the room. Look for swelling, splitting, soft spots, peeling finishes, loose joints, or a frame that appears out of square. Around the exterior, inspect only from a safe standing position. Check for separated trim, gaps, damaged cladding, or missing sealant, but do not cover a suspected water path before it is understood.

    Hardware symptoms can be easy to overlook. A loose handle, worn balance, damaged hinge, or latch that does not pull the sash tight can create drafts and make a sound window feel like a larger failure. Ask whether the hardware can be serviced separately and whether the frame remains square and sound. The answer may affect whether a focused repair is reasonable.

    For a broader look at the repair-versus-replacement question, read Window Repair Rogers: Repair or Replace?. That guide covers glass, sash, frame, moisture, storm damage, and repeated problems. The Cottage Grove checklist here is narrower: it helps you collect the observations needed before that decision is made.

    4. Check the installation area, trim, and wall around the window

    A window is not only the glass and the moving sash. The opening, sill, trim, flashing, sealant, and adjacent wall all influence whether water and air stay outside. Look for a stain that extends into drywall, cracked caulk at a corner, or a draft that seems to come from the wall joint rather than the sash. A line that follows the top or side trim is useful to document.

    Compare the affected opening with another window in the same room or on the same side of the home. Similar symptoms on several windows may point to a shared exposure, indoor humidity pattern, or installation age. A single opening with localized staining may call for a more targeted inspection. This comparison does not identify the cause by itself, but it creates useful context.

    Do not rely on a fresh layer of caulk as a complete repair. Caulk can conceal a symptom while water continues behind trim, and it cannot correct a damaged frame or a window that is out of alignment. Photograph the area before making changes. If you already made a temporary repair, record what material was used and when.

    For Cottage Grove homeowners, the local service page for roofing and exterior restoration in Cottage Grove includes a window repair and replacement section. It can help you confirm the local service context before you contact the company, while your notes and photographs help keep the conversation focused on the window issue you actually see.

    Use this first-check table to organize your notes

    What you notice.What to check first.Question to ask next.
    Cracked, chipped, or shattered glass.Photograph the pane from a safe position and note whether the frame or sash is also damaged.Can the glass be addressed separately, or does the surrounding unit need review?
    Fog or haze between insulated panes.Clean the room-side surface and confirm whether the haze remains between the panes.Is the sealed glass unit the issue, or is there another moisture source?
    Water on the sill or trim after rain.Record the weather, exact location, stain pattern, and whether the symptom returns.Could the water be coming through the window, trim, flashing, or nearby exterior?
    Draft near the sash or lock.Check whether the window closes and latches evenly without forcing it.Is the gap related to hardware, alignment, weatherstripping, or the frame?
    Sticking, rubbing, or a sash that will not stay open.Note which corner rubs and whether the problem changes when the lock is engaged.Can the hardware or balance be serviced, or is the frame no longer square?
    Soft trim, peeling finish, or a growing stain.Photograph the area and avoid covering it before the source is checked.Is there hidden moisture or deterioration that extends beyond the visible trim?

    How Window Repair in Cottage Grove, MN Can Become Replacement Work

    The first check should not force a decision. A repair conversation may make sense when the problem is limited to a component and the frame and opening remain sound. A replacement conversation may deserve attention when the same opening has recurring moisture, widespread deterioration, poor fit, or several symptoms that point to a larger failure. The right path depends on the condition of the whole assembly, not on one symptom in isolation.

    It is also reasonable to compare the affected window with the rest of the home. Count how many openings have drafts, fog, operation problems, or visible deterioration. Note whether the windows are the same age and type. If only one unit is affected, a focused inspection may be the clearest next step. If many openings show similar performance concerns, ask how a broader plan would differ from a single-window repair.

    For background on Minnesota window replacement decisions, see the guide to signs you may need new windows and the Minnesota home window replacement planning guide. Those resources cover broader replacement signals. This article is meant to help you gather evidence before deciding which resource or service conversation fits.

    Prepare for a window repair assessment in Cottage Grove

    Bring a short symptom timeline rather than trying to remember every detail during the visit. Include the room, window location, approximate age if known, dates of visible changes, recent storms or precipitation, and any temporary work. Add the photos in an order that starts with the whole wall and ends with close-ups.

    Measure only what you can measure safely and consistently. A rough visible opening measurement can be useful for notes, but do not remove trim or take apart the window to obtain a dimension. The guide on how to measure for replacement windows explains the difference between visible measurements and the information a professional may need for planning.

    Before the assessment, clear objects from the sill and the floor near the window. Keep curtains or blinds accessible, and identify any rooms below or beside the opening that have stains. If the issue followed storm damage, document the date and the visible exterior impact without climbing or entering a hazardous area.

    Questions to ask before work begins

    • What part of the window or opening appears to be failing?
    • Is the recommended work limited to glass, hardware, sealant, frame components, or the full unit?
    • What evidence supports that scope, and what conditions would change it?
    • How will the surrounding trim, wall, and installation area be checked?
    • What temporary steps are safe while the work is being planned?
    • How will the replacement or repair be tested for operation, drafts, water management, and cleanup?
    • Which product, workmanship, and installation details should be kept with the home records?

    For practical preparation, you can also review the window replacement process guide and the Minnesota window screen guide. They address different projects, but both can help you separate a small component question from a larger window project.

    Contact Referred Restoration online with your photos, location, and symptom timeline, or call (763) 726-4245 to ask what information will help with the next step.

    Frequently asked questions

    What should I check first when a window is leaking?

    Start by noting where water appears and when it returns. Check the sill, lower corners, trim, and adjacent wall from inside after rain, then document the exterior only from a safe position. Do not assume the visible stain identifies the entry point, and do not seal over the area before the source is evaluated.

    Can foggy window glass be repaired?

    First determine whether the fog is on the room-side surface, the exterior surface, or between insulated panes. Surface condensation can have different causes from moisture inside a sealed glass unit. A professional can assess whether the issue is limited to the glass unit or connected to the sash, frame, or opening.

    Is a stuck window always a replacement problem?

    No. A stuck sash can relate to hardware, alignment, swelling, a balance, or the frame. Note where it rubs, whether the lock engages, and whether the window moved differently in the past. Avoid forcing it because that can create additional glass or hardware damage.

    Should I replace one window or several?

    That depends on the condition and pattern of the symptoms. Count the affected openings, compare their age and type, and note whether they share drafts, fog, moisture, or operating problems. A focused inspection can help distinguish an isolated repair from a broader project.

    What should I bring to a Cottage Grove window assessment?

    Bring whole-window and close-up photos, a symptom timeline, safe measurements if available, notes about rain or cold-weather patterns, and questions about the proposed scope. Mention any temporary caulk, coverings, or hardware adjustments so the person assessing the window has an accurate history.

    Contact Referred Restoration online to discuss what you found and request the appropriate next step for your Cottage Grove home. Call (763) 726-4245 if you prefer to speak with the team.

  • Gutter Contractor in Cottage Grove MN: What Homeowners Should Check

    Gutter Contractor in Cottage Grove MN: What Homeowners Should Check

    Choosing a gutter contractor in Cottage Grove MN starts with understanding what your home needs, not with choosing a product or signing a proposal. A careful inspection should help you identify where water is going, what may be damaged, and whether a repair or broader replacement deserves consideration.

    Schedule a free gutter inspection

    A contractor inspecting a home's exterior gutters in a Minnesota neighborhood

    Gutters and downspouts are part of the home’s exterior water-management system. They collect runoff at the roof edge and carry it away from the building. When a section is loose, leaking, blocked, or poorly matched to the roofline, water may spill where you do not want it. The right contractor should explain the observed issue in plain language, show you the affected areas, and describe realistic next steps.

    What should a gutter contractor inspect at your Cottage Grove home?

    A useful visit begins with the whole system, not just the spot where you noticed a drip. Ask the contractor to look at the gutters, connections, end caps, outlets, downspouts, and the points where the system meets the roof edge. They should also note visible sagging, separation, corrosion, dents, clogs, and signs that water has been escaping or backing up.

    What can be checked safely from the ground should be discussed with you. If the contractor needs to work from a ladder or access the roof edge, ask how they will inspect it safely. You do not need to climb a ladder to prove that a problem exists. Photographs taken during the inspection can make it easier to understand the condition and consider the recommended work.

    Look for a description of the issue’s location and extent. “The gutters need work” is not enough detail to guide a decision. A clear explanation might identify a loose section above a particular side of the house, a leaking joint near a corner, or a downspout that is disconnected. Ask whether the concern appears limited to one part or repeated throughout the system.

    Before the appointment, make a short list of what you have noticed. Helpful observations include where water spills during rain, whether a drip appears at a seam or near a corner, whether a section looks out of line, and whether you see leaves or other debris collecting in a particular place. Note whether the issue happens repeatedly or only under certain conditions. These observations are clues for the inspection, not a diagnosis, so let the contractor assess the cause.

    Also mention changes to the home’s exterior that may help explain the timing, such as recent roof work or a newly observed problem after a storm. You do not need technical terminology. A clear description of what you saw, where you saw it, and when it happens gives the contractor a practical starting point and helps keep the conversation focused on your concern.

    It is also reasonable to ask what the inspection cannot establish. A visual check may reveal a symptom without proving its cause. For example, water near the foundation can have more than one source, so a contractor should distinguish what they observed from what would require further investigation. Avoid treating a gutter proposal as a promise to solve unrelated drainage or foundation concerns that were not evaluated.

    How can you tell whether you need a repair or replacement?

    A repair may be suitable when the issue is isolated and the surrounding parts remain serviceable. A loose connection, a small area of separation, or a localized leak may call for attention to only that section. The contractor should explain what will be repaired and whether nearby parts were checked for similar wear.

    Replacement may be worth discussing if multiple areas show damage, the system repeatedly separates or leaks, or the existing gutters are not functioning reliably across the home. The decision should reflect the system’s overall condition, not just the age of the house or the presence of one visible problem. Ask the contractor to explain why a repair would or would not address the trouble you reported.

    When you are unsure, ask for both pathways if each is reasonable. A contractor can explain the limited repair option, what it would address, and what it would leave unchanged. They can also outline a replacement scope for comparison. This lets you consider the immediate concern alongside the system’s wider condition without assuming that the largest project is automatically necessary.

    Keep the intended outcome specific. Are you trying to stop a leak at one joint, restore a loose run, replace a damaged section, or renew the system around the whole house? Agreeing on that goal before reviewing a proposal helps you see whether the recommended work matches the problem.

    Repeated symptoms deserve a closer look before choosing between repair and replacement. If the same area has needed attention more than once, tell the contractor what was done previously and when the problem returned. Ask whether the current issue appears to be a failure of that repair, a nearby weak point, or a separate concern. A contractor should be clear when the available inspection cannot establish the reason.

    Think about your plans for the home as well. If you expect roof or siding work soon, ask whether the gutter decision should be coordinated with that project. This does not mean you must combine the work; it simply gives you a chance to understand sequencing and avoid making assumptions about what another contractor will handle.

    What should you ask before hiring a gutter contractor?

    Ask who will perform the work, who will supervise the project, and whom you should contact if a question comes up. A contractor should be able to explain the expected work sequence and how the crew will access the areas involved. If more than one trade or service is included, confirm which tasks are covered by the same proposal and who is responsible for coordinating them.

    • What did you find during the inspection, and where can I see it?
    • Which parts will be repaired or replaced, and which parts will remain?
    • What materials and system components are included in the written scope?
    • How will you protect landscaping and nearby exterior surfaces while working?
    • How should I prepare the area, and do you need access to a particular part of the property?
    • What is the expected sequence and timing, and how will weather affect the schedule?
    • Who should I contact if I notice a concern during or after the work?

    Ask about applicable licensing, insurance, and any local requirements that may apply to the planned work. Do not rely on a verbal assurance alone; request the relevant details and verify them with the appropriate source when needed. The requirements can depend on the kind of work and the place where it is performed, so avoid assuming that one general statement answers every question.

    You can also review a directory listing as one starting point for learning about local contractors. The Better Business Bureau’s Cottage Grove contractor directory includes roofing and gutter contractor listings. A directory is not a substitute for checking a specific company’s credentials, scope, references, or fit for your project, and a listing alone should not decide whom you hire.

    Referred Restoration serves homeowners with exterior restoration services, including gutter installation in Rogers and seamless gutter services. For Cottage Grove homeowners, the Cottage Grove service page offers another way to review the company’s local service pathway. Confirm that the service and project scope you need are available for your property when you make an inquiry.

    How should you compare gutter proposals?

    Compare the work described, not merely the total at the bottom of a page. Ask each contractor to identify the same areas and state whether the proposal covers repair, partial replacement, or a complete system. If one proposal addresses only a short section and another covers the full perimeter, they are not describing equivalent work.

    Use the written scope to check what is included and what is excluded. It should be clear which existing components will be removed, what new parts are included, how debris will be handled, and whether downspout work is part of the plan. If an item is not mentioned, ask whether it is included rather than relying on an assumption.

    Proposal detailWhat to confirmWhy it matters
    Inspection findingsLocations, visible condition, and supporting photos or explanationConnects the planned work to a documented concern
    Work areaWhich runs, corners, outlets, and downspouts are includedPrevents gaps between the problem and the project scope
    Materials and componentsWhat type of gutter and associated parts will be suppliedClarifies what is being installed or repaired
    Removal and cleanupWhether old material and job debris will be removedSets expectations for the property after the work
    Schedule and accessExpected timing, weather considerations, and homeowner preparationHelps you plan around the work and communicate access needs
    Changes and follow-upHow extra work is approved and whom to contact with a concernCreates a clear process if conditions differ from the inspection

    When two proposals appear different, ask each contractor to clarify the same points rather than filling in missing details yourself. Look for a written description that is specific enough for you to understand what the crew plans to do. Keep the proposal, inspection notes, and any approved changes together so you can refer to the agreed scope later.

    Pay attention to how the contractor handles uncertainty. If an area is hidden or cannot be confirmed until work begins, the proposal should make clear how you will be notified if the condition changes the work. Ask whether work outside the original scope requires your approval first and how that approval will be documented. This gives you a chance to understand any proposed change before the crew proceeds.

    Communication is part of comparing proposals, too. Notice whether your questions receive direct answers and whether the contractor distinguishes confirmed findings from assumptions. You should not have to guess what is included or feel rushed into a decision. A straightforward conversation before the project can make coordination easier if weather, access, or an unexpected condition affects the schedule.

    Finally, compare the project documents as a set. The inspection notes, proposal, schedule, and any product details should be consistent with each other. If a verbal conversation changes the plan, ask for the revised scope in writing. This simple record helps both sides refer to the same agreed work.

    What gutter options should you discuss for a Minnesota home?

    Gutter type and material should suit the house, the roof edge, and the planned scope. Ask the contractor to explain why a proposed option fits your particular home and what trade-offs it involves. A useful conversation covers appearance, durability expectations, maintenance, available components, and how the system will be cared for—not just the product name.

    Sectional and seamless systems are different options, but the best fit depends on the specific project. If a contractor recommends a particular system, ask what makes it appropriate for your roofline and how the proposed scope deals with joints, corners, and transitions. For more background on one option, read about the benefits of seamless gutters. That overview can help you prepare questions; it does not replace an evaluation of your own house.

    Material selection is another point to review. Ask what material is being proposed, how it may respond to the home’s surroundings, and what routine care it requires. A contractor should explain any limits or maintenance expectations rather than implying that one choice is right for every house. If your project involves other exterior work, consider whether the gutter plan needs to coordinate with the roof or siding scope.

    Homeowners planning several exterior updates may also want to understand how gutter work relates to roof replacement or siding work. Timing and access can matter when multiple parts of an exterior are being addressed. Ask the contractor to state what their proposal covers and whether separate work needs to be arranged independently.

    How can you prepare for gutter work?

    Before the scheduled work, confirm the arrival window, access points, and any preparation requested by the contractor. Move vehicles away from the work area if asked, and relocate patio furniture, planters, or other items near the home’s perimeter. Keep children and pets away from areas where ladders, tools, or removed materials may be present.

    Point out any areas that concern you, including locations where you have noticed drips, overflow, or loose sections. If the problem appears only during certain weather, explain when and where you observed it. A brief note or a photograph taken safely from the ground can help you and the contractor refer to the same location.

    Ask how the crew will handle landscaping and collect debris. You can also confirm whether the crew needs anyone to be home, whether gates should be unlocked, and how changes to the work will be communicated. These practical questions reduce confusion on the day and give you a clear contact if the plan needs adjustment.

    In Minnesota, scheduling can be affected by changing weather. Ask how the contractor will confirm a workday and what happens if conditions make the planned work unsafe or unsuitable. Do not assume that a date is fixed regardless of weather. A clear update plan, including who will contact you and how a new date will be arranged, helps you plan without putting pressure on the crew to work in poor conditions.

    If your home has several exterior projects underway, tell the contractor about related roof or siding work before the gutter visit. Work areas and access may overlap, and you will want to understand which crew is responsible for each part. Agree on where materials may be staged and how you will be notified if the sequence needs to change. Keep the area around the home accessible on the agreed day, but do not attempt to move equipment or materials yourself.

    What should you check when the project is complete?

    Walk around the home with the contractor, if practical, and compare the finished work with the written scope. Ask which sections were repaired or replaced and whether anything changed from the original plan. If the contractor took inspection photos, compare them with the completed areas so you understand what was addressed.

    Look for visible gaps between the agreed scope and what you can see, loose material, leftover debris, or damage to nearby surfaces. You do not need to climb up to inspect the roof edge. If an area cannot be viewed safely from the ground, ask the contractor to show you a photograph or explain how it was checked.

    Confirm how to report a concern and what documentation you should keep. Save the proposal, any approved change, product information provided, and the contractor’s contact details. If the system later shows a leak or another problem, note the location and conditions when you saw it, then contact the contractor rather than attempting an unsafe ladder inspection.

    Regular observation can help you spot changes. After a storm or during routine exterior checks, look for visible sagging, displaced sections, overflow, or debris around the outlets from a safe position. For related care ideas, see this guide on keeping gutters clear of debris and the overview of downspout placement around a home. When a concern cannot be assessed safely from the ground, arrange a professional inspection.

    Request a gutter inspection for your home

    Frequently Asked Questions

    How often should I have my gutters inspected?

    There is no single interval that fits every home. The right frequency depends on the property’s surroundings, visible debris, system condition, and any recurring problems. Ask a contractor to suggest a practical check schedule based on what they see, and look over the system from the ground after significant weather or when you notice a change.

    Can I tell from the ground if a gutter needs repair?

    You may notice visible sagging, a separated section, debris spilling over, or water marks near the roof edge. These signs can point to a concern, but they do not always reveal its cause or full extent. Do not climb a ladder to investigate; ask a qualified contractor to inspect the area safely and explain the findings.

    Should I replace all my gutters if one section leaks?

    Not necessarily. A leak may be isolated, while repeated problems or widespread deterioration may justify considering a larger scope. Ask the contractor to inspect the entire system and explain both a focused repair and a broader replacement option when both are reasonable.

    What information should I have ready when requesting an inspection?

    Share your address, the areas where you have noticed a concern, when it occurs, and whether you have seen visible damage from the ground. Mention any recent exterior work that could be relevant. You can ask what information or access the contractor needs before the appointment.

    A well-matched gutter contractor should make the condition, recommended scope, and next steps understandable before work begins. Take time to ask questions, compare written details, and choose a plan that addresses the needs of your Cottage Grove home.

  • Roof Repair Preparation Rogers MN Checklist

    Roof Repair Preparation Rogers MN Checklist

    A useful roof repair visit in Rogers starts before anyone climbs a ladder. If you have a stain, a lifted shingle, or a drip that is not an active emergency, roof repair preparation Rogers MN homeowners can do from the ground gives the inspector a clearer starting point. Gather photos, a short timeline, and access notes, then let a professional decide what the roof actually needs.

    Contact Referred Restoration online to schedule a roof inspection, or call (763) 726-4245.

    Homeowner photographing a shingle roof from the driveway before a Rogers roof repair visit

    What does roof repair preparation in Rogers, MN include?

    Preparation is a record, not a diagnosis. You are collecting what you can see safely so the person on the roof does not have to guess when the problem started or which room is involved. Referred Restoration’s roof repair in Rogers begins with an inspection of leaks, missing shingles, flashing, and storm damage. Your notes help that inspection focus on the right area.

    Stay off the roof. Wet shingles, ice, and steep pitches are not a homeowner checkpoint. If water is pouring in, a tree is on the roof, or the ceiling is sagging, skip the checklist and ask for emergency help. The separate guide to emergency roof tarping covers temporary protection. This article is for a planned visit.

    Use this order so nothing important is left in a camera roll:

    1. Take ground-level photos of the roof slopes you can see, plus close photos of interior stains.
    2. Write a dated timeline of weather, drips, and rooms affected.
    3. Note attic access, pets, gates, and where to park.
    4. List questions about scope, materials, and local permits.
    5. Wait for the inspection before you approve a repair or a replacement.

    Which photos help a Rogers roof repair inspection?

    Take photos in daylight from the driveway, the sidewalk, and a neighbor’s side of the street if you have permission. Include the whole slope, then a closer shot of anything that looks displaced. Do not zoom so far that the location on the house disappears. A wide shot and a tight shot of the same spot are more useful than one dramatic crop.

    Outside, from the ground

    • Each roof slope you can see, including the front, back, and any lower roof over a porch or garage.
    • Missing, cracked, or lifted shingles, and any debris that landed on the roof.
    • Metal flashing at chimneys, sidewalls, skylights, and roof valleys, if you can see it without climbing.
    • Gutters that are bent, full of granules, or pulling away from the fascia.
    • Downspouts that dump water against the foundation.

    Inside the house

    • Ceiling stains, bubbled paint, and any active drip, with a coin or tape measure in the frame for scale.
    • The room name and the floor. A second-floor bedroom stain and a first-floor stain can have different paths.
    • Attic photos only if you already have a safe walkway and lighting. Look for dark decking, damp insulation, and daylight at penetrations. Do not step off the joists.

    If the stain is the main clue, use the guide on finding a roof leak from the inside before the visit. Water often travels along framing before it shows up on drywall, so the stain and the roof opening may not line up.

    Name the files in the order you took them. “West slope wide,” “west slope missing tab,” and “bedroom stain May 12” are easier to follow than a camera roll. If a shingle tab is lying in the yard, photograph it next to the slope it fell from, then set it aside. Do not carry it up a ladder to press it back into place. A loose tab is evidence. A homeowner patch made with roof cement can hide the spot the inspector needed to see, and it can trap water under the shingle.

    Granules in the gutter are worth a photo too, but they are not a diagnosis by themselves. Asphalt shingles shed some mineral surface as they age. A sudden pile after a hailstorm is a different clue from a light dusting on an older roof. Say what you found and when. Let the inspection decide whether the surface is worn, bruised, or both.

    What should you write down before the visit?

    A short timeline beats a long guess. Write dates, not impressions. “The guest room ceiling spotted after the July windstorm” is useful. “It has leaked for a while” is not.

    What to record.Why the inspector needs it.Example note.
    First date you noticed a problem.Separates a new opening from an older stain.Brown ring appeared on May 12.
    Weather that day and since.Connects wind, hail, snow, or heavy rain to the symptom.Drip only during hard north-wind rain.
    Rooms and floors involved.Narrows which slope and penetration to check.Primary bedroom, second floor, near the chimney wall.
    What you already did.Avoids mistaking a towel or bucket for the repair.Moved the bed and set a bucket. Did not patch the roof.
    Past roof work.Shows age, prior patches, and whether papers exist.Shingles replaced about 12 years ago. No paperwork on hand.
    Other exterior damage.Flags a storm that also hit siding or gutters.Dented downspout on the west side the same week.

    The National Weather Service Twin Cities office climatology shows a long severe-weather season across the region, with hail and damaging wind both common in the warm months. That history is a reason to date your notes, not a prediction for your block. If you remember hail, say so, and point the inspector to the separate hail damage roof repair steps instead of trying to score bruises from the lawn.

    Keep the file simple. A notes app page plus a photo album labeled “Rogers roof, October” is enough. Bring the same set to the door so you are not scrolling through vacation pictures on the driveway.

    How should you prepare the house for a roof repair visit?

    The inspector needs a safe path around the house and a way to see the slopes. Clear vehicles off the driveway if a ladder will go up. Unlock side gates. Tell the crew about dogs, invisible fences, and which door to use. If a neighbor’s tree overhangs the roof, mention it. You do not need to trim it before the visit.

    Inside, move furniture away from an active stain if you can do it without strain, and put a bucket under a drip. Skip attic storage cleanouts unless something is blocking the hatch. A 20-minute visit goes faster when the hatch is reachable and the light works.

    Rogers winters add a practical constraint. Ice, deep snow, and freeze-thaw cycles can hide shingle edges and make a roof unsafe to walk. If the roof is iced over, say that when you book. A ground review and an interior check may be all that is responsible until the surface is clear. Do not chip ice off shingles or pour hot water on the roof.

    What to have ready at the door

    • The photo album and the one-page timeline, already open on your phone or printed.
    • Any prior roof paperwork you can find, even if it is only a year and a product name.
    • A clear path to the attic hatch if you want that space included.
    • Pets secured, and a note about gates, alarms, or a locked electrical panel the crew does not need.
    • One decision-maker present. A visit that ends with “I have to ask my spouse, who has the photos” usually means a second trip.

    You do not need to wash the roof, blow off leaves, or stage the yard to look undamaged. Debris on a slope can be part of the story, especially after wind. If a branch is small and clearly loose on the ground, move it so nobody trips. Leave anything still caught on the roof alone.

    If the same storm marked the walls or the gutters, note that too. Referred Restoration also handles siding in Rogers and gutters in Rogers. Mentioning those clues does not mean every mark needs work. It keeps related damage from being discovered only after the roof scope is already written.

    Which local questions should you ask before roof repair work starts?

    Ask questions that change the scope, not questions that score the company. You want to know what was seen, what will be touched, and who is allowed to do the work in Rogers.

    Permit and license

    The City of Rogers lists re-roofing under its residential minor-work permit. That is a city requirement for re-roofing, not a suggestion, and it is separate from a small shingle repair. Ask whether the work being proposed is a repair or a re-roof, and who will confirm the permit if one is required. The city’s building department is the authority for that answer. The permit page is on the City of Rogers residential minor work permit site.

    Minnesota also licenses residential building contractors. The city’s building department tells homeowners they can verify a license with the Minnesota Department of Labor and Industry. Use the state’s license and registration lookup and ask which company name is on the license. A verbal “we’re licensed” is weaker than a name you can check.

    Scope and materials

    • Which slopes and details were inspected, and which could not be reached that day?
    • Is the recommendation a localized repair, or is the roof aged or damaged widely enough that replacement should be discussed?
    • What material will be used, and will it match the existing shingles as closely as the product line allows?
    • Will flashing, pipe boots, or valley metal be part of the repair, or only the shingles?
    • Who pulls any required permit, and will you get a copy?

    If the answer is that repairs no longer fit the roof, read roof repair or replacement for Minnesota homes and the Rogers roof replacement page before you decide. Preparation does not lock you into a patch.

    Storm and insurance boundaries

    If you plan to file a claim, keep your photos and dates, then follow the Rogers storm-damage roof inspection guide. Do not treat a contractor visit as the insurance inspection. The Minnesota Department of Labor and Industry warns that contractors may not pay or rebate an insurance deductible for roof repair. A homeowner may also cancel a roofing contract if the insurer denies the claim. That rule is on the DLI homeowner page. A promise to cover your deductible is a reason to stop, not a benefit.

    For a storm that hit more than the roof, the storm damage restoration in Rogers page is the right next stop. This checklist does not replace that assessment.

    What should you expect on inspection day in Rogers?

    Have one person home who knows the timeline. Meet at the door, hand over the photo set, and walk the interior stains first so the crew sees the symptom before they see only the shingles. Then give them the yard. You do not need to stand under the ladder.

    Ask for findings in plain language: what is damaged, what is worn but still working, and what was not visible. A clear recommendation names the repair area. A vague “we should just replace it” without saying what failed is a prompt for another question, not an automatic yes.

    When the visit is a true repair rather than a replacement, confirm the practical details before anyone schedules a crew:

    • The date window and what weather would postpone the work.
    • Where materials and a dump trailer would sit.
    • Whether nails, granules, or old shingles will be cleaned up the same day.
    • How you will be told if the opened area is larger than the original scope.

    After the work, look from the ground again. Compare the repaired slope with your earlier photos. Inside, watch the same ceiling during the next hard rain. A repair that was aimed at the right opening should stop the drip you recorded. If a new stain shows up in a different room, save a new photo and call back with the date. That is a new clue, not a reason to climb up and add sealant.

    A simple way to judge the visit

    Before the truck leaves, repeat three things in your own words. Name what failed or looks worn. Name what the proposed work will touch. Name what would make the crew stop and call you. If you cannot repeat those points, ask again. Preparation is wasted when the findings stay vague.

    Keep your original photos even after the repair. They are the before record if a stain returns or if you later talk with your insurer. Store them with the invoice and any permit copy. You are not building a legal file. You are saving the same facts you already gathered so you do not have to reconstruct them from memory next spring.

    Neighborhood context belongs in the notes only when you saw it yourself. A hailstorm that marked a neighbor’s gutter is fair to mention. A rumor about everyone on the block getting a new roof is not something to repeat as fact, and it should not push you toward a bigger project than the inspection supports. The recommendation should match what was found on your house.

    Contact Referred Restoration online when your photos and notes are ready, or call (763) 726-4245.

    Frequently Asked Questions

    Can I prepare for roof repair without getting on the roof?

    Yes. Ground-level photos, interior stain photos, and a dated note are the preparation that matters. Climbing a Rogers roof to “get a better look” adds fall risk and can scuff shingles. Leave the surface inspection to the crew.

    Does every roof repair in Rogers need a city permit?

    The City of Rogers requires a residential minor-work permit for re-roofing. A small repair is not the same scope. Ask the contractor and, if you are unsure, the city building department whether your specific project needs a permit. Do not assume a patch and a full re-roof follow the same rule.

    What if I only have a ceiling stain and no missing shingles I can see?

    Photograph the stain, name the room, and note when it appeared or grew. Many leaks start at flashing or a penetration you cannot see from the lawn. An inspection can trace the path. Painting the ceiling before that visit hides the clue.

    Should I hire anyone who offers to cover my insurance deductible?

    No. Minnesota’s Department of Labor and Industry says contractors may not pay or rebate an insurance deductible for roof repair. Keep your own photos, and separate a contractor’s inspection from your insurer’s process.

    How is this different from calling for an emergency roof repair?

    This checklist is for a planned inspection when the house is stable. Active pouring water, a sagging ceiling, or a tree on the roof needs faster protection, including tarping when that is the right temporary step. Call (763) 726-4245 and describe what is happening now.

  • What to Do First After a Roof Leak in Minnesota: How to Repair Roof Leak Damage Safely

    What to Do First After a Roof Leak in Minnesota: How to Repair Roof Leak Damage Safely

    A roof leak can be unsettling, especially when water is already reaching a ceiling or wall. If you are searching for how to repair roof leak damage, start with safe first-response steps—not a climb onto a wet or icy roof. Contain water indoors, protect people and belongings, document what is happening, and arrange an appropriate inspection. The visible drip may be far from the opening that lets water in, so a quick patch is not always a lasting repair.

    Contact Referred Restoration to discuss a roof leak

    Minnesota homeowner placing a bucket beneath a ceiling leak while checking the room from a safe distance

    What should you do first when you notice a roof leak?

    Begin by checking for immediate hazards and limiting damage inside the home. Do not assume the leak is harmless because the drip is small. Water can spread above a ceiling, soak insulation, affect finishes, and reach electrical equipment before it becomes obvious in the room.

    1. Keep people clear of danger. If a ceiling is bulging, sagging, cracking, or shedding material, move everyone out of that area. Do not stand under it or poke it. If water is near a light fixture, outlet, appliance, or electrical panel, keep away and contact a qualified electrician or emergency services as appropriate. Do not touch wet electrical equipment.
    2. Move belongings. Relocate furniture, electronics, rugs, and valuables if you can do so without entering an unsafe area. Use a plastic sheet or other barrier to protect items that cannot be moved.
    3. Catch water safely. Place a bucket or waterproof container under a steady drip. Put towels around it to catch splashes. Empty the container before it overflows, and avoid putting a container beneath a ceiling that appears unstable.
    4. Reduce further indoor damage. If water is coming through a ceiling, do not cut or puncture the ceiling yourself. A water-filled area can release suddenly, and hidden wiring or framing may be present. If the leak is active, focus on keeping the area clear and getting professional guidance.
    5. Record what you see. Take photos or video of the water, stains, affected belongings, and the room. Make a note of when you first noticed it and whether rain, melting snow, or another event was occurring.

    These steps are temporary protection, not a roof repair. They help you keep the situation organized while a qualified professional works to identify the entry point and determine what repair is appropriate.

    Should you go onto the roof to stop the leak?

    Usually, no. A wet roof can be slippery, and Minnesota conditions can add snow, ice, wind, or cold surfaces. Even a roof that looks dry from the ground may have slick areas or unstable materials. A fall can cause serious injury. Do not climb onto the roof during a storm, in the dark, when it is wet or icy, or if you lack the right equipment and experience.

    Instead, observe the roof from the ground or from a safe window. Use binoculars or a phone camera with zoom if useful, but do not lean out of a window or climb a ladder to get a better view. Note visible changes such as displaced shingles, damaged flashing, debris, or a branch resting on the roof. A ground-level view cannot confirm the cause, but it can provide useful context for an inspection.

    Do not try to cover a roof opening with a tarp yourself if reaching it requires climbing. Temporary coverings can catch wind, shift, or create another hazard when installed improperly. A professional can decide whether temporary protection is appropriate and how to place it safely. For roof concerns in the area, see roof repair information for Rogers homeowners or the company’s Rogers roofing service page.

    How can you limit water damage inside the home?

    Once everyone is safe, focus on containing water and protecting the affected room. A simple, repeatable approach can prevent a small drip from spreading unnoticed.

    • Place a container beneath an active drip, and check it regularly.
    • Move items away from the wet area, including items on nearby shelves or directly below the ceiling.
    • Blot small amounts of water from a hard surface when it is safe, but do not use electrical devices around standing water.
    • Keep children and pets out of the affected area.
    • Watch for changes: a growing stain, new drips, a soft ceiling, or water appearing in another room.
    • Tell the professional if water is near electrical fixtures or if the ceiling is sagging.

    Do not assume that a bucket and towels have solved the problem. A roof leak may follow framing or other surfaces before it becomes visible indoors. The location of the drip is a clue, not proof of where water entered. If water continues after the weather clears, appears in more than one place, or returns during the next rainfall, report that pattern during the inspection.

    If the leak follows a period of snow or a freeze-thaw cycle, an ice dam may be one possible factor. Ice dams can trap water at the roof edge, but other roof and flashing issues can also cause interior leaks. The University of Minnesota Extension’s guidance on dealing with and preventing ice dams discusses safe response and longer-term prevention. Do not use a hose, chemicals, or tools on a roof as a do-it-yourself remedy.

    What should you document before a roof inspection?

    Clear notes help you explain the situation and compare what you observe over time. You do not need to diagnose the roof or identify the exact entry point. Record facts that a professional can use to guide an inspection.

    • When it began: Write down the date and approximate time you first noticed the leak.
    • Weather conditions: Note whether it was raining, snowing, windy, or warming after a freeze. Mention if the water started during the event or later.
    • Where water appears indoors: Identify the room, ceiling or wall location, and whether there are multiple affected spots. A simple room sketch can help.
    • How it changes: Record whether the drip is steady, intermittent, or has stopped, and whether the stain or damp area is growing.
    • Visible exterior clues: From a safe place, note any apparent debris or displaced material without climbing or touching the roof.
    • Damage to belongings or finishes: Photograph affected items and surfaces before moving or cleaning them when practical.

    Take wide photos that show the room and close photos that show the stain or drip. Include more than one angle where possible. Keep the original images and avoid editing them in a way that hides details. If you are documenting a possible weather-related event, keep your notes factual. A contractor can inspect the roof and explain observed conditions, while your insurer can explain policy requirements and claim decisions.

    For leaks after a major weather event, use a safe first-response approach similar to the guidance in this storm damage restoration overview. If you are trying to understand how a shingle-related opening might be evaluated, the existing roof shingles leak repair guide offers related information. Neither a photo nor a symptom list replaces an on-site assessment.

    What might be causing the leak?

    Water can enter through a roof opening and travel before it reaches a ceiling. Possible sources include damaged or missing roofing materials, a problem around flashing, an issue at a roof penetration, or an ice-related condition. A roof’s age, past repairs, and exposure to severe weather may also matter. These are possibilities to investigate, not conclusions to draw from an indoor stain alone.

    Keep the distinction between the symptom and the source in mind. A damp spot near a wall does not automatically mean the wall or the nearest roof edge is the entry point. Water may move along roof decking, framing, or other building materials before it drips. A proper inspection considers the roof surface and relevant transitions, then relates what is found to the indoor evidence.

    For example, a stain that appears after wind-driven rain may prompt an inspector to look carefully at exposed roof transitions, but the timing by itself does not prove a flashing failure. A leak that appears after snow and then a thaw may raise a different set of questions, but it does not establish an ice dam as the cause. Share observations; let the inspection determine what they mean.

    How can you assess the next step without guessing?

    Before approving a repair, make sure you understand how the proposed work connects to the leak you reported. You do not need to identify a roofing component yourself. Instead, ask the inspector to explain what was observed, where it is located, and why that condition could allow water inside. If the visible stain sits in one room but the suspected opening is elsewhere, ask the professional to describe the route that may connect the two.

    It can also help to separate three questions:

    • Is there an immediate safety concern? A sagging ceiling, wet electrical area, or rapidly spreading water may need attention before routine repair planning.
    • What exterior condition was actually found? Ask whether the inspection identified damaged material, a vulnerable transition, or another observable issue, rather than relying only on a symptom.
    • What will the proposed work address? Ask which area will be repaired, whether related materials will be checked, and what signs should prompt a follow-up if moisture returns.

    For example, if the leak has stopped by the time of the visit, provide your notes about the weather and timing. That history may help direct attention, but it should be treated as a clue rather than proof. If an inspection cannot confirm the source, ask what further observation or evaluation is recommended instead of assuming that a surface patch will settle the question.

    How do temporary steps differ from a lasting repair?

    First-response actions reduce immediate exposure and preserve useful information. A lasting repair addresses the verified entry point and any related damage that needs attention. The right work depends on what an inspection finds, so avoid choosing a repair based only on the location of the indoor stain.

    SituationSafe homeowner responseWhat an inspection can clarify
    Active drip, no obvious hazardUse a stable container, move belongings, and record the location and timing.Where water may be entering and what roof area needs closer review.
    Bulging ceiling or water near electrical equipmentKeep people away; do not touch equipment or puncture the ceiling.What specialist response is needed before roof work proceeds.
    Leak after wind or heavy rainDocument the weather and visible indoor effects; observe outside only from a safe place.Whether roofing materials, transitions, or another area show damage.
    Leak after snow or thawKeep off icy roof surfaces and note when the leak appears.Whether ice-related conditions or another roof issue may be involved.
    Leak has stopped but stain remainsPhotograph it and watch for new moisture; do not assume the cause is gone.Whether the roof needs repair and whether the opening is still vulnerable.

    Use this comparison to organize your response, not to diagnose the roof on your own. If water is active or the damage is changing quickly, tell the contractor when you request an inspection. When the roof may need broader work, a professional can explain whether repair or replacement should be considered; the roof replacement information is a starting point for understanding that separate option.

    How should you prepare to speak with a roofing professional?

    When you request an inspection, explain what you have observed in plain terms. You can use a short checklist so that important details are not lost during a stressful moment.

    1. Describe the room and the exact area where water appears.
    2. Say when you first noticed the leak and what the weather was doing.
    3. Explain whether the leak is still active, stopped, or has returned more than once.
    4. Mention any ceiling bulge, wet electrical area, or other safety concern before anyone enters the home.
    5. Share photos and notes, and point out any visible roof changes observed from the ground.
    6. Ask what the inspection will cover, what access is needed, and how findings will be explained.

    A useful inspection discussion should distinguish observed conditions from assumptions. Ask the professional to show or describe the area of concern, explain why it may be related to the leak, and outline what repair is being considered. If more than one possible source exists, ask what evidence supports the recommended approach. You can also ask what should happen if water returns after the work.

    Written findings can make it easier to understand the work being proposed and keep your records organized. Review the scope carefully and ask questions before authorizing work. If the leak followed a weather event and you may contact your insurer, ask your insurance representative about documentation and claim procedures. Contractors can share observations about the roof, but coverage decisions belong to the insurer.

    Referred Restoration describes its process as a free inspection, a custom solution, and professional installation. To arrange a conversation, use the contact page for an inspection request. You can also review the company’s Cottage Grove service information if that is your community.

    When should you request professional help?

    Arrange an inspection when you find active water, a new ceiling stain, a leak that returns, or exterior roof damage visible from a safe place. Prompt attention matters even if the water stops: a dry room does not prove that the roof opening is sealed or that materials have dried. If the ceiling is sagging, water is near electrical equipment, or the leak is spreading rapidly, treat safety as the first priority and keep clear while you seek appropriate help.

    Some situations require more than a roofing visit. Electrical hazards should be handled by a qualified electrician. Significant indoor water may require a water-damage professional to assess affected materials. If you are unsure whether an area is safe, do not enter it to take photographs or retrieve belongings. Explain the concern when you call so the right next step can be discussed.

    Do not wait for a dramatic stream of water before taking action. Small leaks can recur during later rain or snowmelt, and water can travel out of sight. A safe indoor response, useful documentation, and a professional assessment provide a clearer path than guessing at a patch from the ground.

    Request a roof leak inspection conversation

    Frequently Asked Questions

    Can I repair a roof leak from inside the attic?

    Do not enter an attic if access is unsafe, the area is wet, visibility is poor, or electrical hazards may be present. Avoid stepping on ceiling joists or insulation, and do not disturb wiring or roofing materials. Indoor observations and photos from a safe location are useful, but an attic visit is not required for a homeowner to report a leak. Ask a professional to assess the source.

    Does a ceiling stain mean the roof is still leaking?

    Not always. A stain can remain after water has stopped, but it can also darken or grow if moisture returns. Photograph the area, note whether it changes, and watch for new drips or soft, sagging material. The stain alone cannot show whether the roof is dry or where water entered.

    Should I use sealant on the roof or ceiling?

    A surface patch may hide a symptom without addressing the actual entry point, and reaching the roof can be dangerous. Applying a product to an indoor ceiling also does not repair the roof. Keep the area safe, contain drips when appropriate, and have the roof assessed before selecting a repair.

    What if the leak appears only during certain weather?

    Record the conditions each time it appears, including rain direction if you can observe it safely, wind, snow, or thaw. Intermittent leaks can still indicate a roof problem, and timing helps an inspector understand the pattern. Do not wait for the next storm if the ceiling is changing or water is active.

    What is the safest way to check the roof outside?

    Look from the ground or through a window without climbing a ladder or leaning out. Binoculars or a zoomed photo may help you note visible concerns. Leave roof access, close inspection, and temporary covering to someone equipped to do that work safely.

    A calm, careful first response can limit indoor disruption and make the next decision clearer. Keep people away from hazards, document what you observe, and have a qualified professional assess the roof rather than relying on a risky temporary patch.

  • Roof Repair Rogers MN: What to Do After Damage

    Roof Repair Rogers MN: What to Do After Damage

    If you have noticed a leak, lifted shingles, or debris after severe weather, start with safe observations and a clear record of what you see. If you are looking for roof repair Rogers MN, this guide explains what to do first, what a professional assessment should cover, and how to think through repair versus replacement without climbing onto the roof.

    Schedule a roof inspection with Referred Restoration

    Minnesota homeowner examining roof shingles from the ground after a storm

    What should roof repair Rogers MN homeowners do first?

    Begin inside and around the home, not on the roof. A wet ceiling, water stain, or drip can signal that water has reached the interior, but the visible spot may not be directly below the roof opening. Water can travel along framing or other surfaces before it appears. Note the room, approximate location, and whether the area changes during rain.

    If water is actively entering, move belongings away and use a container to catch drips if it is safe. Avoid touching wet electrical fixtures or standing water near electrical equipment. If you see sagging ceiling material, keep people clear of the area rather than pressing on it. For immediate danger, contact the appropriate emergency service.

    From the ground, look for visible signs such as shingles that appear out of line, missing material, loose flashing, or debris. Use binoculars or a phone camera with zoom if helpful. Do not use a ladder or walk on a roof to get a closer look. Wet, icy, steep, or damaged surfaces can be dangerous, and an untrained person may worsen the damage. For general guidance on fall hazards and safety, consult the U.S. Occupational Safety and Health Administration.

    Take photos of visible conditions and interior effects, and write down when you first noticed them. If the issue followed a storm, note the approximate date and any related observations, such as fallen branches. Keep the record factual; a professional inspection can help determine the likely source and extent of damage. For a leaking shingle area, see the homeowner guide to finding and addressing roof shingle leaks.

    Which roof problems call for prompt attention?

    Some roof concerns are obvious, while others develop gradually. A visible drip is not the only reason to seek an assessment. Changes in the attic, ceiling, or roof surface can point to a problem that should be examined before it spreads. The signs below are useful observations, not a diagnosis.

    • Interior moisture: New stains, damp insulation, peeling paint, or a musty smell near the ceiling deserve attention. Record where and when you find them.
    • Missing or displaced shingles: Gaps, uneven rows, or pieces on the ground may leave roof layers more exposed to weather.
    • Flashing concerns: Metal or other transition materials around a chimney, vent, or roof edge may appear bent, loose, or separated. These areas need a close professional review.
    • Granules in drainage areas: Some granule loss is part of shingle aging, but a notable new accumulation combined with other signs may warrant inspection.
    • Repeated trouble in one location: If a leak returns after temporary attention, the original water entry point may not have been found or the issue may involve more than one component.
    • Changes after wind, hail, or falling debris: A ground-level view may reveal scattered material or impact marks, but a roof assessment is needed to understand what was affected.

    Age and appearance alone do not tell the whole story. Ventilation, past repairs, roof design, the condition of the underlying materials, and the location of the issue can all affect the right next step. A professional can inspect these factors without relying on a homeowner’s view from the yard.

    How should you document a roof concern over time?

    A simple record can make it easier to explain a changing problem and compare what you observe before and after an assessment. Keep notes focused on facts: where you saw moisture, when it appeared, what the weather was like, and whether the affected area changed. A dated photo of an interior stain can help show whether its outline or color is changing. Do not put yourself at risk to take a photo of the roof.

    It may help to keep a short log with these details:

    • Date and conditions: Note when you saw the symptom and whether it was during rain, after a thaw, or at another time.
    • Location: Identify the room and approximate position, such as near an exterior wall, a ceiling corner, or below an attic space.
    • What changed: Record whether a stain grew, a drip stopped, or another sign appeared. Avoid guessing at the cause.
    • Actions taken: Note that belongings were moved or a container was placed, if applicable, and whether a contractor has already inspected the home.
    • Documents: Keep inspection notes, written scopes, and relevant photos together so you can refer to them during follow-up.

    This record is especially useful when a symptom is intermittent. A ceiling may appear dry between weather events, but a dry interval does not prove that the original issue has been resolved. Give the inspector the sequence of events, not just the most recent photo. If there has been prior repair work, mention what was done and when, even if you do not have complete records.

    Do not cut into a ceiling, remove roof material, or apply a patch simply to find the source. Unplanned work can create additional damage, obscure evidence, or expose you to a fall or electrical hazard. If you need to limit exposure to belongings while waiting for professional guidance, keep people clear of any sagging materials and do only what is safe from the floor. The contractor can advise what temporary precautions are appropriate for the conditions observed.

    How can you prepare for a roof inspection?

    A little preparation helps make the visit more useful. Gather the details you already have without trying to access an unsafe area. You do not need to identify the technical cause before requesting an inspection.

    1. Describe the symptom. Explain whether you saw a leak, a ceiling mark, loose material, or another change. Say whether the issue is active or has appeared more than once.
    2. Share when it began. Give the approximate date, weather context if known, and any later changes. Separate what you observed from what you suspect.
    3. Show your photos. Include ground-level roof views and interior locations. Keep original images if you may need to refer to when they were taken.
    4. Mention prior work. If you know about earlier repairs or roof replacement, share the timing and any records you have. This can help the inspector understand the roof’s history.
    5. Ask what the assessment includes. Clarify which roof areas and related details will be reviewed, how findings will be explained, and whether the next step is a repair recommendation or further evaluation.

    Referred Restoration describes a three-step service process: a free inspection, a custom solution, and professional installation. Its Rogers roofing service page explains the local roofing pathway. Use the inspection to understand the observed condition and ask for a clear explanation of the proposed work.

    Should you repair the roof or consider replacement?

    A repair may be appropriate when the issue is limited and the surrounding roof remains serviceable. Replacement may deserve consideration when damage is widespread, similar problems recur, or the roof’s overall condition makes isolated work less suitable. Neither decision should be based on one symptom alone. An inspection should connect the visible issue to the condition of the surrounding roof and the relevant layers or components.

    The table below is a discussion guide, not a substitute for an on-site assessment. The scope of work depends on what is actually found.

    Path to discussWhen it may fitWhat to clarify
    Targeted repairA localized issue is identified and nearby roof areas appear suitable to retain.What caused the problem, which materials or details will be addressed, and how the repair will be checked.
    Further evaluationThe visible symptom has an unclear source, the roof has multiple layers or details to examine, or the first inspection raises questions.What additional review is needed, what areas remain uncertain, and what information will resolve the uncertainty.
    Roof replacementCondition or damage appears broader, repeated repairs have not resolved the concern, or the overall roof is nearing the point where a larger scope should be considered.What portions are included, how underlying conditions will be handled, which materials are proposed, and how the work will be sequenced.

    Ask the contractor to explain why the recommendation fits your roof rather than presenting a generic answer. If a limited repair is proposed, ask what nearby areas were inspected and what signs should prompt a follow-up. If replacement is proposed, ask what evidence points to a broader need and whether a repair remains a reasonable alternative. Review the separate information about roof replacement in Rogers when you are weighing a larger project.

    For any proposed work, request a written scope that identifies the area involved, the work steps, the materials or components, and any exclusions or assumptions. Ask how concealed conditions will be communicated if they are discovered after work begins. You should understand what the contractor has observed and what the proposed work is intended to address before deciding how to proceed.

    What should you ask about materials and roof details?

    Repairs should account for more than the visible surface. Shingles, underlayment, flashing, ventilation, roof penetrations, and drainage interact. A repair that addresses only the easiest-to-see part may not resolve the actual source of a leak. Ask the inspector to point out the relevant details and explain their role in the recommendation.

    • Which roof material is installed, and what condition is it in around the affected area?
    • Does the concern involve shingles, flashing, underlayment, a roof opening, or another transition?
    • Could water be entering at a nearby detail and traveling before it becomes visible indoors?
    • Are there signs that drainage, ventilation, or previous work may be contributing?
    • What can be confirmed during the inspection, and what remains uncertain until work is underway?

    Homeowners who want to understand the protective layer beneath many roof coverings can read the guide to what roof underlayment does. If a roof has metal panels, the material and fastening system differ from an asphalt-shingle roof; the overview of metal roofs and shingles can help frame questions about the existing assembly. These guides are background reading, not a way to diagnose damage from indoors.

    How can you compare roof repair Rogers MN recommendations?

    When you request more than one opinion, compare the reasoning and scope instead of looking only at the headline recommendation. Contractors may describe different work because they saw different conditions, use different terminology, or assume different project boundaries. A useful comparison makes those differences visible.

    1. Match the inspected area. Check whether each assessment addresses the same roof sections and symptoms. A recommendation limited to one slope is not directly comparable to one covering the whole roof.
    2. Look for a cause-and-response explanation. The proposal should connect observed conditions to the work. Ask for clarification when it names a repair without explaining the reason.
    3. Compare inclusions and exclusions. Identify whether flashing, debris removal, protection of the work area, or related details are included, if relevant to the proposed scope.
    4. Ask how changes will be handled. Find out how the contractor will notify you if concealed damage or a different condition appears during work.
    5. Review materials and work sequence. Understand what will be installed and what steps are planned, including how the affected area will be left at the end of each work period.
    6. Clarify communication and completion checks. Ask who will explain progress, how questions will be handled, and what you will be able to review when the work is done.

    A clear recommendation should leave room for questions. Be cautious about agreeing to a scope you do not understand, especially if the explanation does not identify the observed issue or how the work addresses it. You can also review the company’s roof repair service information for Rogers and ask how the service process applies to your home’s specific condition.

    What should Minnesota homeowners consider through the seasons?

    Minnesota roofs face changing conditions, from rain and wind to snow, freezing temperatures, and thaw cycles. A roof repair plan should reflect the actual season and the condition on site. Homeowners should not attempt roof work in wet, icy, or unstable conditions. Safe access, appropriate materials, and the details of the repair are matters for the contractor to assess.

    After winter, look from the ground for new stains, displaced material, or changes around roof edges. Snow and ice can make roof access hazardous, so leave close inspection to trained professionals. If you are concerned about ice buildup or recurring winter water entry, the homeowner guide to ice dam prevention in Minnesota offers general context; a site-specific inspection is still needed to identify the cause of a particular leak.

    During periods of heavy rain, observe whether water appears in the same interior location each time or only under certain conditions. Note the timing rather than assuming that a gutter, roof opening, or shingle is responsible. If drainage concerns are part of the picture, the guide to downspout placement around a home can help explain how roof runoff moves away from the building, while a contractor can assess roof-related drainage details.

    Plan ahead when you can. Exterior work is affected by weather and seasonal demand, and an inspection can help distinguish an urgent issue from a project that can be scheduled with more flexibility. If you are unsure which category your situation falls into, explain the current symptoms and ask what needs attention first.

    What should you expect on repair day?

    The exact sequence depends on the work, roof design, and weather, so ask the contractor to explain the plan for your home before work begins. Confirm the expected work area, where materials and equipment may be placed, and whether anyone needs access to the home or yard. If you have pets, outdoor furniture, or vehicles near the work area, ask whether you should move them.

    Before the crew starts, make sure you understand the agreed scope and the main steps. Ask who will answer questions during the visit and how you will be told if the crew finds a condition that changes the work. It is reasonable to ask that any proposed change be explained before you agree to it. This helps prevent misunderstandings about what the repair is intended to address.

    Roof work can involve noise and activity around the home. Keep children, visitors, and pets away from the work zone, and do not enter a marked-off area to inspect progress. If the contractor needs to pause because conditions are unsafe, ask how the roof will be left and when the work can resume. Weather and site conditions may affect timing; the appropriate plan depends on the roof and the work underway.

    At the end of the visit, ask what was completed, whether anything differed from the original scope, and what follow-up, if any, is recommended. A brief explanation and a record of the completed work will make it easier to monitor the area later. You should not need to climb onto the roof to verify the repair; ask for a safe way to review the work, such as a description or photographs where available.

    What should you check when the repair is complete?

    Before the crew leaves or soon after the work, ask for a walkthrough or a clear explanation of what was completed. The goal is to understand the finished scope and know what to monitor, not to climb onto the roof yourself. Ask the contractor to show photos or describe the repaired area if direct access is unsafe.

    • Confirm that the completed work matches the written scope or that any changes were explained.
    • Ask whether the work area was cleared of leftover materials and whether any nearby surfaces need attention.
    • Request an explanation of any remaining concerns or conditions that were outside the repair scope.
    • Find out what signs should lead you to contact the contractor again and how to reach the appropriate service contact.
    • Keep the inspection notes, work description, and photographs with your home records.

    Continue checking the interior area that first showed a problem during later rain, but avoid making assumptions from a brief dry period. If moisture returns, document when it occurs and contact the contractor to explain what changed. A useful follow-up starts with the original observation and the work that was completed.

    How can Rogers homeowners choose a practical next step?

    Referred Restoration’s roof-repair service for Rogers homeowners begins with an inspection of the reported concern and related roof details. The assessment can help identify visible damage, likely entry points, flashing or ventilation concerns, and whether the situation appears suited to a focused repair, further evaluation, or a broader project. The right scope depends on observed conditions, so this guide does not promise a specific repair before the inspection.

    Before you request an inspection, gather the property address, the room or exterior area where you noticed the issue, when it began, whether it is active or recurring, safe indoor or ground-level photos, and any records of prior roof work. Do not climb on the roof or remove materials to prepare. At the appointment, ask what was observed, what work is included, which areas are not included, and how follow-up will be handled.

    To take the next step, contact Referred Restoration online about your Rogers roof concern and share those observations. The team can explain how to arrange an inspection and what information is needed before discussing the work.

    Contact Referred Restoration online about a Rogers roof inspection

    Frequently Asked Questions

    Can I inspect my roof myself?

    Do not walk on the roof or climb a ladder to examine suspected damage. Look from the ground, use photos or binoculars if helpful, and arrange a professional assessment for close inspection. Wet, icy, steep, or damaged surfaces can be hazardous.

    Does a ceiling stain always mean the roof needs replacement?

    No. A stain indicates moisture has reached that area, but it does not by itself establish the source or the scope of work. A professional should inspect the roof and related details to determine whether a repair, further evaluation, or a broader project is appropriate.

    What information should I have ready when I request an inspection?

    Share where you noticed the issue, when it began, whether it is active or recurring, and any relevant photos or history of prior work. You do not need to diagnose the cause before you call.

    Should I wait until the next rain to confirm a leak?

    Do not delay an inspection just to watch for another leak if you have already seen active water entry, new damage, or other concerning signs. Record what you observed and ask a professional how promptly it should be assessed.

    Careful observations and a clear inspection give you a sound basis for deciding what your roof needs next.

  • Roofing Contractor Rogers MN: Local Expertise

    Roofing Contractor Rogers MN: Local Expertise

    A roof can look acceptable from the driveway while weather exposure, missing shingles, or aging materials create questions that only a careful inspection can answer. For Rogers homeowners, choosing a contractor is less about a polished slogan and more about finding clear evidence of local service coverage. Minnesota roofing knowledge, and a practical plan for the home’s actual condition.

    Contact Referred Restoration online or call (763) 726-4245 to discuss a Rogers roofing inspection.

    Homeowner evaluating a roofing contractor in Rogers MN beside a Minnesota home

    A roofing contractor rogers mn homeowner can trust should explain what was observed, identify the limits of the inspection, document recommended next steps. And connect the work to the right pathway, whether that means inspection, repair, replacement, new installation, or storm-damage restoration.

    Referred Restoration is based in Rogers and serves nearby communities along the Rogers-to-St. Francis-to-Monticello corridor. Before you compare service options, start by identifying the concrete proof a locally experienced contractor should be able to provide.

    What Local Roofing Expertise Should a Rogers Homeowner Be Able to Demonstrate?

    Local expertise should be something a homeowner can verify during a conversation, not just a slogan on a truck or website. A qualified team should be able to explain how its service area fits your property. How Minnesota weather affects roofing decisions, what evidence supports its recommendations, and who will communicate with you throughout the work.

    Service-area fit should be specific

    Start by asking whether the contractor regularly serves your part of the Rogers area and understands the practical needs of nearby communities. Referred Restoration is based in Rogers and serves Rogers and surrounding communities along the Rogers-to-St. Francis-to-Monticello corridor. Its documented roofing pathway includes inspections, repairs, replacements, new installations, and storm-damage restoration. You can review the available Rogers roofing services before contacting a contractor and identify whether the offered pathway matches your situation.

    That range matters because local expertise is not limited to one type of project. A contractor should be able to explain whether the next step is an inspection. Targeted repair, replacement planning, or storm-damage assessment without forcing every homeowner into the same recommendation.

    Minnesota context should shape the explanation

    Snow, hail, and seasonal storms are relevant conditions for Minnesota roofs. Ask how the contractor will look for weather-related wear, moisture entry, vulnerable flashing, or other visible concerns during an inspection. The answer should connect observations to your roof rather than rely on broad claims about local weather. It should also distinguish what can be confirmed from the ground, what requires closer examination, and what remains uncertain until the roof system is assessed.

    Evidence and communication should be easy to follow

    A useful inspection conversation should identify the visible evidence, explain why it matters, and outline practical next steps in plain language. Referred Restoration describes a process built around a free inspection, an honest assessment, expert recommendations, a custom solution, and professional installation. Homeowners should leave with enough information to understand the recommendation, record unanswered questions, and decide what follow-up is appropriate. Clear communication is part of workmanship because it helps prevent surprises before work begins.

    How Can You Evaluate a Roofing Contractor Rogers MN Homeowners Are Considering?

    Before inviting a roofing contractor Rogers MN homeowners are considering to inspect the property, create a short verification record. The goal is not to collect impressive-sounding claims. It is to confirm that the business understands the service requested. Can explain who is responsible for the work, and gives you enough information to make a documented decision.

    Use this sequence before the inspection or initial consultation:

    1. Define the request and the property. Write down the address, the reason for calling, and what you have observed. Note whether the concern is a leak, missing shingles, visible damage, age-related wear, or possible storm damage. Ask the contractor to confirm that the appointment and proposed scope are tied to the correct property. This keeps a general conversation from becoming an unclear recommendation.
    2. Request the legal business details. Ask for the company name that will appear on the paperwork, the contact person, and the name of the business responsible for the work. Request the applicable Minnesota license information and ask whether any subcontractors will be involved. The Minnesota Department of Labor and Industry says residential contractors performing roofing work must hold an eligible state license. Relevant categories include residential roofer, residential building contractor, and residential remodeler. Review the DLI roofing-license guidance rather than relying on an informal credential claim.
    3. Check the license path and qualifying person. Compare the details you receive with the state information. Each licensed company designates a qualifying person, who is responsible for the required examination and continuing-education requirements. If the proposed roofer is a subcontractor, ask how that company is registered. Because Minnesota uses the Contractor Registration Program for roofing subcontractors rather than the same license path. These distinctions help you ask a precise follow-up instead of assuming every worker has identical credentials.
    4. Ask for current coverage documents. Request documentation for general liability and property-damage insurance, along with evidence of workers compensation compliance where applicable. Minnesota DLI application materials identify both types of documentation. Do not treat a verbal assurance as a substitute for reviewing the document, and ask which business entity and work scope the coverage applies to.
    5. Check the local permitting pathway. Use the City of Rogers Licenses and Permits page and Building Department page to understand which city process may apply. Ask who will identify required permits, submit them, and arrange inspections. The contractor should explain what is known and what still needs confirmation, rather than promising a result before the scope is reviewed.
    6. Ask who supervises the work. Identify the person who will oversee installation, who handles questions in the field, and how changes or newly discovered conditions will be documented. If subcontractors are expected, ask when their names and responsibilities will be shared. Clear ownership matters as much as the initial sales conversation.
    7. Record open questions before scheduling. Keep copies of license and coverage information, links you checked, unanswered questions, and any statements that need verification. If a contractor cannot answer something immediately, note who will follow up and when. A careful record gives you a useful basis for comparing scope and communication after the inspection.

    What Evidence Should a Local Roofing Inspection and Conversation Provide?

    A useful inspection should leave you with more than a general statement about your roof. Referred Restoration describes its process as a free inspection, an honest assessment, a custom solution, and professional installation. The conversation should help you understand what was observed, what could not be confirmed, and what the next decision requires.

    Ask for evidence you can review

    Request clear photographs or written notes tied to specific roof areas. A photo of a missing shingle, flashing detail, exposed material. Or visible storm impact is more useful when the inspector explains where it was taken and why it matters. Ask whether the image shows active damage, ordinary wear, or a condition that needs monitoring. The goal is not to collect pictures for their own sake. It is to connect observations to a recommendation you can follow.

    The notes should also identify access limits. Weather, roof height, slope, unsafe surfaces, or blocked areas may prevent a complete visual review. A careful inspector should say which areas were not reached or could not be evaluated rather than implying that every part of the roof was confirmed. If a concealed condition cannot be established without additional work, ask how that uncertainty will be documented and discussed before the scope changes.

    Expect plain-language answers

    You should be able to ask, “What did you find, and how do you know?” without needing specialized roofing knowledge. Ask the inspector to distinguish the visible symptom from the suspected source and to explain why the recommended pathway fits the evidence. If you noticed an interior stain or recurring leak, share when it appears and what weather seems to affect it. Those details provide context, but they do not replace an on-site assessment.

    Also ask who will perform and supervise the work, who will answer questions, and how discoveries will be recorded. A written summary should make clear the areas reviewed, findings, exclusions, proposed next step, and any follow-up needed. If the discussion points toward a limited repair, you can review the roof repair in Rogers pathway as a starting point for questions. Keep the focus on evidence specific to your home, not a generic conclusion based only on age or appearance.

    How Should You Compare Contractor Scope and Communication?

    A useful proposal should help you understand what will happen at your home, how the work will be managed, and what evidence you will receive afterward. When comparing a roofing contractor in Rogers, MN, look beyond a short list of materials. Ask whether each contractor has documented the same conditions and is describing the same work.

    What to compareQuestions to askWhat a clear response includes
    Inspection evidenceWhat did you observe, and where?Photos or notes identifying affected roof areas, visible damage, and the reasoning behind the recommendation.
    Included areasWhich roof sections and related details are covered?A defined work area, with attention to penetrations, flashing, ventilation, edging, and cleanup where relevant.
    Site protectionHow will the home and property be protected?A practical plan for protecting landscaping, siding, windows, walkways, and other surfaces during the work.
    Change handlingWhat happens if concealed conditions appear?A pause for explanation, updated documentation, and homeowner approval before the added work proceeds.
    CommunicationWho answers questions and how will updates be shared?A clear contact person, understandable updates, and a process for discussing concerns without pressure.
    Completion recordsWhat will be reviewed when the work is finished?A final walkthrough or written record showing completed areas, cleanup, and any recommended follow-up.

    This comparison also helps you distinguish a repair conversation from a replacement conversation without assuming the answer in advance. Referred Restoration documents a process built around a free inspection, an honest assessment, a custom solution, and professional installation. Ask for the findings in plain language and keep the records with your home documents.

    Contact Referred Restoration online or call (763) 726-4245 to discuss an inspection or roofing service question.

    Which Minnesota License and Rogers Permit Checks Matter?

    A trustworthy hiring process includes checking the contractor’s business information against current public sources. Minnesota Department of Labor and Industry (DLI) says residential contractors who perform roofing work must hold an eligible state license. The state identifies residential roofer, residential building contractor, and residential remodeler as relevant categories. You can review those distinctions on the Minnesota DLI roofing license guidance.

    That check should match the work being discussed. If a company plans to use roofing subcontractors, ask who will perform the work and how that team is registered. DLI explains that roofing subcontractors follow the state’s Contractor Registration Program rather than the same license path. This does not tell you whether a particular contractor is suitable, but it gives you a useful question to ask before work begins.

    Ask who is responsible for the license

    Minnesota’s roofer license page explains that each licensed company designates a qualifying person. That person is responsible for the required examination and continuing-education requirements. Ask the company to identify the legal business name associated with its license and who will supervise the roofing work. If the name on a proposal, certificate, or contract differs from the name you are checking, ask for an explanation before moving forward.

    Request current insurance documents

    It is reasonable to ask for documentation rather than relying on a verbal assurance. Minnesota’s roofer-license application materials reference a certificate of insurance covering general liability and property damage, along with a certificate of compliance with Minnesota workers’ compensation law. Ask whether the documents are current, which business entity they cover, and whether the people performing the work are included under the stated arrangement. You do not need to interpret the documents as a legal professional. If anything is unclear, ask your insurance adviser or another qualified professional what the document means for your situation.

    Check the Rogers permit process

    License verification and local permit questions are separate checks. Rogers maintains official Licenses & Permits information and a Building Department page. Review those pages for current instructions, then ask the contractor whether the planned scope requires a city permit. Who will apply for it, and how approval will be documented. Permit requirements can depend on the work and local rules. So avoid relying on an old proposal or a general statement that every roofing project follows the same process.

    Keep copies of the license details, insurance questions, permit correspondence, and the written scope together. This simple record makes it easier to resolve unanswered questions before an inspection or installation is scheduled.

    How Do You Match the Right Roofing Service Pathway to Your Rogers Home?

    The right next step depends on what you have observed, not on a remote diagnosis. Referred Restoration’s documented roofing pathway includes inspection, repair, replacement, new installation, and storm-damage restoration for Rogers and nearby communities. That range makes an inspection a useful starting point when the situation is unclear.

    When an inspection is the best first step

    Choose an inspection when you notice a change but cannot tell what caused it. A ceiling mark, loose-looking shingle, exposed area, or aging roof may require different responses. Before the appointment, note when you first noticed the issue, take exterior photos from ground level, and gather any recent repair or installation records. Do not climb onto the roof or disturb damaged materials to investigate.

    Minnesota roofs must handle changing conditions, including snow, hail, wind, and seasonal storms. Tell the inspector about any recent weather event and point out areas where water enters or debris collects. A documented inspection should help separate observed conditions from assumptions and explain what should be reviewed next.

    When repair, replacement, or new installation may fit

    A repair conversation may be appropriate when the concern involves a leak, missing shingles, or visible localized damage. You can review the roof repair in Rogers pathway for context, but the inspection should determine the practical scope.

    Replacement is a separate pathway for an aged or severely damaged roofing system. If you are comparing that direction, the roof replacement information page can help you prepare questions about system condition, materials, site protection, and installation. New installation applies to a new build or an addition where roofing has not yet been installed. In each case, ask what was observed, what remains uncertain, and how the recommended work addresses the home’s condition.

    When storm assessment needs its own path

    After suspected hail or wind damage, preserve photos, note the date of the weather event. And avoid making temporary changes that could obscure evidence unless needed to protect the home. A storm assessment can document visible conditions and identify whether restoration support is appropriate. The storm-damage restoration in Rogers pathway covers that service direction without assuming an insurance outcome.

    Related exterior signs can matter too. Damaged gutters or siding may deserve a separate look, so review Rogers gutter services or Rogers siding services when those systems show possible weather impact. Referred Restoration is based in Rogers and serves surrounding communities along the Rogers-to-St. Francis-to-Monticello corridor. Its stated process is a free inspection, a custom solution, and professional installation, giving homeowners a clear way to move from observed concern to an appropriate service pathway.

    Frequently Asked Questions

    How can I verify a roofing contractor’s license and insurance in Minnesota?

    Ask for the company’s legal business name and license details, then check the Minnesota Department of Labor and Industry guidance on roofer licensing and the license application requirements. Minnesota residential contractors performing roofing work must hold an eligible state license. Request current proof of general liability and property-damage insurance, along with workers’ compensation compliance documentation, and confirm who will supervise the work.

    What should I ask a roofing contractor before hiring them?

    Ask whether the contractor has evaluated the specific roof issue, what evidence supports the recommendation. Who will perform and supervise the work, and how changes or unexpected conditions will be documented. Also ask how the crew will protect the property, communicate updates, and record completion details. Clear answers help you compare the quality and completeness of each contractor’s proposed process.

    What should a roofing estimate include?

    A useful written estimate should explain the observed scope, areas included, proposed materials, site-protection steps, cleanup, completion records, and how any changes will be handled. It should also identify the contractor, describe the next steps, and distinguish an inspection finding from an item that still requires confirmation. If important details are vague or only discussed verbally, ask for clarification before approving the work.

    What should I do if my roof has storm damage?

    Document visible damage from a safe location, avoid climbing onto the roof, and arrange an inspection before deciding on repairs. Hail, wind, and seasonal storms can affect roofing and other exterior components, so note related concerns around siding, gutters, or windows. A storm-damage assessment can help determine the appropriate restoration pathway and organize the information needed for your next conversation.

    Ready to Choose Your Rogers Roofing Service Pathway?

    Contact Referred Restoration online or call (763) 726-4245 to discuss a Rogers roofing inspection or service pathway.

  • Roofing Company in North Oaks MN: What to Check

    Roofing Company in North Oaks MN: What to Check

    Choosing a roofing company in North Oaks MN is about more than finding someone who can install shingles. The right contractor should explain what the roof needs, show how the proposed work addresses those needs, and communicate clearly from inspection through cleanup. Use this guide to compare your options and decide what to verify before work begins.

    Schedule a free roof inspection with Referred Restoration

    Roofer inspecting flashing on a Minnesota home

    What should a roofing company in North Oaks MN help you evaluate?

    A roof inspection should help you understand the condition of the whole roofing system, not just the visible shingles. Ask the contractor to explain what they observed and distinguish urgent concerns from items that can be monitored. You should leave the conversation with a clear account of the recommended work and why it fits the roof.

    Useful inspection questions include:

    • Which areas of the roof show wear, damage, or signs of moisture?
    • Are the concerns limited to a small area, or do they affect multiple roof sections?
    • What evidence supports repair, replacement, or continued monitoring?
    • Were flashing, roof edges, valleys, vents, and other transitions reviewed?
    • What could not be inspected safely or observed from the available access?

    Ask for photographs or another clear way to review the findings. A good explanation connects each recommendation to an observed condition. Be cautious if you are urged to approve broad work without a description of the problem, or if the inspection leaves you unsure about what is included.

    To make the inspection useful, prepare a short list of what you have noticed before the appointment. Include the room or exterior location, when the problem first appeared, and whether it changes after rain, snow, or a thaw. If a ceiling mark grows or a drip appears only during certain conditions, that timing may help the contractor focus the assessment. Keep your notes factual; a stain indoors can indicate moisture, but it does not by itself identify the entry point or prove that the roof needs replacement.

    Ask how the contractor assessed areas that are hard to see, such as roof-to-wall intersections or surfaces blocked from ground view. If access is limited, request that the report say so instead of treating an unseen area as confirmed damage or as confirmed sound. This helps you understand both the evidence and its limits. You can then decide whether to request a closer assessment or seek another opinion.

    Referred Restoration offers roof inspections and roofing services in its Minnesota service area. Its Rogers roofing service information describes the inspection and restoration process. Since service coverage can vary by location, North Oaks homeowners should confirm availability directly rather than assume a contractor serves every nearby community.

    How can you tell whether you need a repair or replacement?

    A single symptom does not automatically mean the entire roof needs replacement. Missing or lifted shingles, a leak near a roof opening, damaged flashing, or a small area affected by a branch may call for a focused repair. Widespread aging, recurring leaks in different locations, or deterioration across several sections may lead a contractor to discuss replacement. The roof’s age is only one piece of the assessment.

    Ask the contractor to compare the realistic options. A repair recommendation should identify the affected area, the work needed to address it, and any related conditions that could limit the repair. A replacement recommendation should explain why localized work would not adequately address the roof’s condition. If the evidence is not clear, ask for photos and an explanation before making a decision.

    When the recommendation is for repair, ask how the contractor will locate the likely entry point and assess nearby components. The visible indoor stain may be some distance from where water entered, so ask what observations support the proposed repair location. Clarify whether the work includes only the damaged material or also the flashing, seal, or adjacent surface connected to the issue. Find out what signs should prompt a follow-up call if moisture returns.

    When replacement is proposed, ask the contractor to walk through the roof sections and conditions that make a small repair unsuitable. Ask whether the recommendation applies to the entire roof or only certain planes, and what practical limits would apply to a partial replacement. The answer should connect the scope to observed conditions rather than rely on age alone. If the distinction is still unclear, use the inspection notes to get a second written assessment that addresses the same locations.

    Use the table below as a starting point for that conversation. It is not a diagnosis: the inspection findings and the roof’s construction determine which option makes sense.

    OptionWhen it may fitWhat to clarifyWhat to document
    MonitorNo active leak or major damage is found, and the observed condition can be checked over time.Which areas need attention, and when should they be reviewed again?Inspection notes, photos, and any recommended follow-up.
    RepairA defined area or component is damaged while the rest of the roof remains serviceable.What materials and locations are included? How will the repaired area be checked?The affected area, agreed scope, and completion notes.
    ReplaceWear or damage is widespread, or a repair would not adequately address the conditions found.What layers and components are included, and how will unexpected findings be handled?Written scope, material selections, schedule, and completion records.

    If you want another perspective focused on a specific roof concern, Referred Restoration also provides roof repair information and details about roof replacement in Rogers. Those pages can help you understand the types of service offered, but an inspection is needed to determine what applies to your home.

    How should you compare roofing proposals fairly?

    Do not compare proposals by looking only at the total or the shingle brand. The documents may describe different work. One might include removal of existing materials, new flashing, ventilation details, and cleanup, while another covers a narrower scope. Ask every contractor to describe the same roof areas and work so that you can make a useful comparison.

    Look for these details in writing:

    • Work area: Which roof sections are included, and are any excluded?
    • Removal and preparation: Does the plan explain what happens to existing roofing materials and how the surface is prepared?
    • Materials: Are the product type, relevant components, and selected colors recorded?
    • Water-shedding details: How will valleys, edges, penetrations, and flashing transitions be addressed?
    • Ventilation: Does the contractor describe any ventilation work, or explain why changes are not proposed?
    • Site protection: What precautions will protect landscaping, driveways, and areas around the home?
    • Cleanup: How will debris be collected, and what will the final walkthrough cover?
    • Schedule and communication: Who will provide updates, and how will weather or an unexpected condition affect the plan?

    Ask what is not included as well as what is. Written exclusions and assumptions help you understand where additional decisions could arise. If two proposals use different terms, request plain-language explanations rather than guessing. Keep copies of the versions you considered and the final agreed scope.

    A practical way to compare proposals is to make a side-by-side checklist before choosing. Start with the same roof sketch or list of roof sections for each contractor. Mark whether each document addresses removal, underlayment, flashing, ventilation, disposal, protection, and closeout. Then note any item that is missing or described as an allowance, assumption, or possible extra. A blank entry does not necessarily mean the work is excluded, but it is a reason to ask for clarification in writing.

    Also compare how changes are handled. Ask who can approve an adjustment, how the contractor will explain a newly discovered condition, and whether you will receive the revised scope before the work proceeds. For example, if concealed decking damage is found after old material is removed, you should know how the location will be shown. How the proposed response will be documented, and how the change affects the work plan. This is more useful than relying on a verbal summary after the crew has moved on.

    Material selection deserves a separate discussion. Ask how the proposed roofing product is suited to your home’s design and local weather exposure. What compatible components are part of the system, and what care or limitations the manufacturer describes. Referred Restoration notes its use of Malarkey roofing products in its company information; homeowners can ask which specific product and components are being considered for their roof.

    What should you ask about materials and installation?

    Roof performance depends on more than the visible shingle. Underlayment, flashing, ventilation details, fastening, and installation all matter. Have the contractor explain the planned assembly and how the parts work together. Ask for the product documentation and installation details relevant to the selected system.

    For example, find out how the crew will handle roof openings, valleys, wall intersections, and the roof edge. These are places where materials meet and where careful installation is important. Ask how the crew will address any damaged decking discovered after removal, whether that work requires your approval, and how changes will be recorded before proceeding.

    It is also reasonable to ask who will supervise the work, how questions will be answered during the project, and what workmanship or manufacturer documentation will be provided. Do not assume that every warranty or product term is identical. Read the actual documents, understand their stated limits, and keep them with your home records.

    Before selecting a product, gather the names of the proposed shingle and related components and review their written product information. Ask whether the proposal identifies the same system throughout, including any starter, ridge, or underlayment products that are part of the planned installation. If options are offered, ask what changes between them and why one is recommended for your roof. Keep the final selection in the signed scope so there is a record of what the crew is expected to install.

    Ask the contractor to explain the installation sequence in ordinary language. A homeowner does not need to direct the crew, but understanding the sequence can make progress updates easier to follow: preparation and removal. Inspection of the exposed surface, any agreed repair, installation of the roofing components, and cleanup. Ask what may not be visible once the work is complete and what records or photographs can document those portions. This is especially helpful if you will not be home during the work.

    Homeowners researching different systems can also review Referred Restoration’s overview of metal roofing versus shingles and its guide to roof underlayment. The best choice depends on the home, the roof design, and the scope under consideration.

    How should you handle storm damage and insurance questions?

    After hail, strong wind, or falling debris, first focus on immediate safety. Do not climb onto a wet, damaged, or steep roof. From the ground, note visible damage and any water entering the home. If there is active interior water, protect belongings where it is safe to do so and arrange appropriate help to limit further exposure.

    Record what you can without putting yourself at risk. Take dated photos from safe locations, note when the storm occurred, and keep a list of affected rooms or exterior areas. Save any correspondence and inspection notes. Avoid discarding relevant records before you understand what documentation may be needed.

    If you plan to contact your insurer, review your policy and ask the insurer about its process, deadlines, documentation, and next steps. A contractor can describe observed roof conditions and provide information about proposed work, but the insurer determines coverage under the policy. For consumer information about insurance in Minnesota, homeowners can also consult the Minnesota Department of Commerce. Do not treat a contractor’s inspection as a guarantee that a claim will be approved. And do not agree to work based on a promise about the outcome of a claim.

    When you contact the insurer, organize the information in a simple order: the date you noticed the damage. The areas affected, any immediate steps taken to protect the home, and the records you have collected. Ask what the insurer wants you to submit and how it will arrange any inspection. Keep a copy of what you send and note the date of each conversation. This makes it easier to distinguish the insurer’s instructions from the contractor’s observations and proposed work.

    If a contractor and insurer describe the damage differently, ask each to explain the basis for their assessment and the next step available to you. Keep the discussion factual and preserve photos, written reports, and correspondence. You remain responsible for decisions about authorization and work at your home. Ask your insurer how to proceed if there is an urgent leak while a coverage question is still being reviewed.

    Referred Restoration describes assistance with storm-damage claims as part of its roofing services. Its storm damage restoration information is a starting point for questions about the contractor’s process. Keep the insurance conversation direct with your insurer, and ask the contractor to separate observations, proposed work, and claim-related assumptions.

    What should happen during a roofing project?

    Before work begins, confirm the agreed scope, selected materials, expected start window, access needs, and the best way to contact the project lead. Ask what conditions could change the schedule. Weather can interrupt exterior work, so it helps to understand how updates will be shared and how the crew will protect the home if work pauses.

    On installation day, move vehicles away from the work area if requested, secure outdoor items, and keep children and pets clear of the active site. Ask whether the crew needs access to power or specific parts of the property. If you work from home or have sensitive outdoor spaces, discuss that ahead of time rather than during active work.

    During the project, raise questions promptly with the designated contact. If the crew finds an unexpected condition, ask for an explanation and a written description of any proposed change before approving it. That record should make clear what changed, why it changed, and how it affects the agreed work or schedule.

    For major work, ask how materials will be delivered and staged, how the crew will protect landscaping, and how debris will be handled. Roofing work can produce noise and temporary disruption. A clear plan helps you prepare household members and reduces confusion about where people can safely walk or park.

    Before the scheduled start, do a brief walk around the property and note fragile plants, outdoor furniture, lights, gates, or areas where access is difficult. Ask the contractor whether these should be moved or protected and who will handle that preparation. Take a few reference photos of nearby landscaping or hard surfaces if you want a record of their condition before work. Do not place yourself beneath active roof work to check progress.

    Agree on a simple update routine. You might ask for a message when the crew arrives, when removal reveals the roof surface, and when the work is complete. The exact schedule depends on the project, but knowing when to expect information prevents you from interpreting a quiet period as a problem. If the weather changes, ask whether the roof is secured and what condition should be expected until work resumes.

    What should you check before the roofing project is complete?

    Walk through the completed work with the contractor or project contact, where it is safe to do so. Do not climb onto the roof to inspect it yourself. Ask the contractor to point out the work completed and explain any areas that could not be seen from the ground.

    Use a simple closeout checklist:

    • Confirm that the agreed roof sections and related work were addressed.
    • Ask whether any conditions discovered during installation changed the scope, and collect the written record.
    • Review cleanup around the home, including the paths used for access and material handling.
    • Ask what documentation is available for products, installation, and any applicable warranty terms.
    • Find out whom to contact if you notice a concern after the crew leaves.
    • Keep the proposal, change records, photos, inspection notes, and closeout documents together.

    Ask the project contact to describe any limits on the ground-level review. A roof surface may not be fully visible from the driveway, and a homeowner should not be encouraged to climb up for a closer look. Instead, request available completion photos or a walkthrough that points out key details. Confirm that any agreed follow-up item has an owner and a next step, rather than leaving it as an informal promise.

    If you notice a concern later, document it and contact the contractor rather than attempting a roof-level inspection or repair. A clear record of the location and what you observed can help the contractor understand what follow-up may be appropriate.

    What should you confirm before hiring a contractor?

    Before signing, make sure the contractor has explained the proposed scope and answered your questions in language you understand. Confirm who is responsible for communication, how changes are approved, how the site will be protected, and what documents you will receive. Ask for the company’s current information about applicable licensing, insurance, and project terms, and verify details with the relevant sources where appropriate.

    Talk with more than one contractor if you need a clearer view of the options. Use the same questions and request comparable written scopes. Pay attention to how each person responds when you ask for evidence or clarification. A careful explanation is more useful than pressure to decide before you understand the work.

    Before committing, review the agreement slowly and check that it matches the proposal you evaluated. Confirm the property address, roof sections, selected materials, work sequence, communication contact, and process for recording changes. Make sure you know what happens if the start date shifts or if work cannot continue because of weather. Keep a complete copy of the signed documents and any later amendments in one place. If a clause or technical term is unclear, ask for a plain-language explanation before you sign.

    You can also use the first conversation to assess communication. Notice whether the representative answers the question asked, separates known facts from assumptions, and is willing to identify what needs further inspection. A respectful contractor should give you time to compare options and understand the scope. You do not need to decide while a representative is still at your home; ask for the written information and a clear way to follow up with questions.

    Referred Restoration serves homeowners from its Rogers-area base and describes a process built around inspection, a custom solution, and installation. You can review its Rogers-area roofing and exterior services, check its Cottage Grove service information, and contact the company to ask whether your North Oaks property is within its current service area. Its other exterior offerings include gutter installation and siding services, which may be useful to discuss if an inspection identifies related exterior concerns.

    Ask Referred Restoration about a roof inspection

    Frequently Asked Questions

    Does Referred Restoration serve North Oaks?

    The company serves the Rogers area and surrounding communities, but service availability should be confirmed for your address. Contact the company before scheduling to verify whether it can inspect your North Oaks home.

    Should I replace a roof as soon as I find a leak?

    Not necessarily. A leak needs prompt attention, but the right scope depends on its source and the condition of the rest of the roof. Ask for an inspection that identifies the entry point and explains whether a repair can address it.

    What should I compare in roofing proposals?

    Compare the written work areas, material details, preparation, flashing and ventilation plans, cleanup, schedule, exclusions, and process for approving changes. Similar scopes make proposals easier to understand side by side.

    Can a roofing contractor guarantee an insurance claim will be approved?

    No contractor can determine coverage on behalf of your insurer. Ask your insurer about the policy and claim process, and ask the contractor to document roof observations and proposed work separately from any coverage decision.

    How can I prepare my home for roof work?

    Confirm access and communication plans, move vehicles or outdoor items as requested, and keep people and pets away from active work areas. Ask the contractor what else is needed for your property before the scheduled start.

    A careful inspection, a clear written scope, and a documented closeout give you a practical basis for making a roofing decision and understanding the work on your home.