Author: Miguel Beltra

  • Roofing Company Saint Michael MN: Local Expertise

    Roofing Company Saint Michael MN: Local Expertise

    When you search for a roofing company Saint Michael MN homeowners can trust, the most useful question is not simply who appears first. It is whether the contractor understands local weather exposure, explains what an inspection found, offers a practical repair or replacement path, and communicates clearly before work begins. This guide outlines the signs of meaningful local expertise so you can compare roofing help with more confidence.
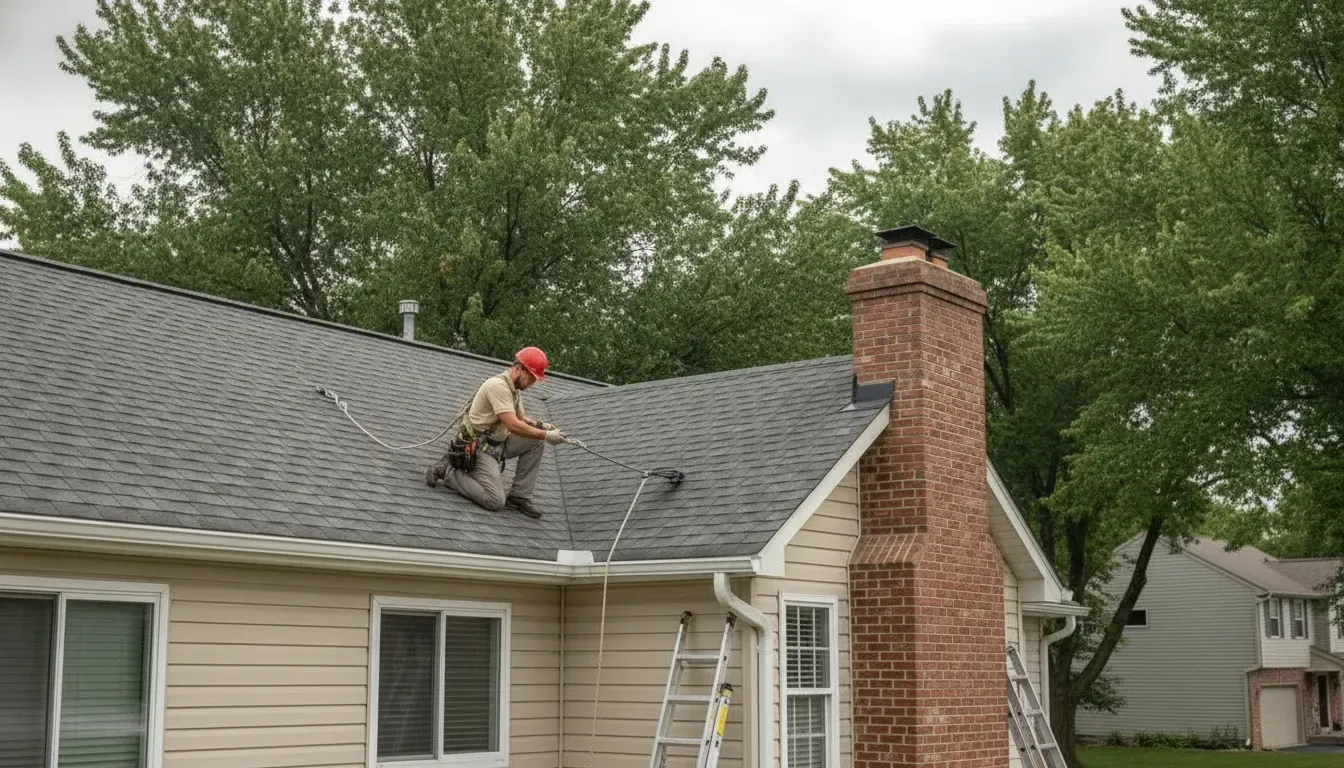
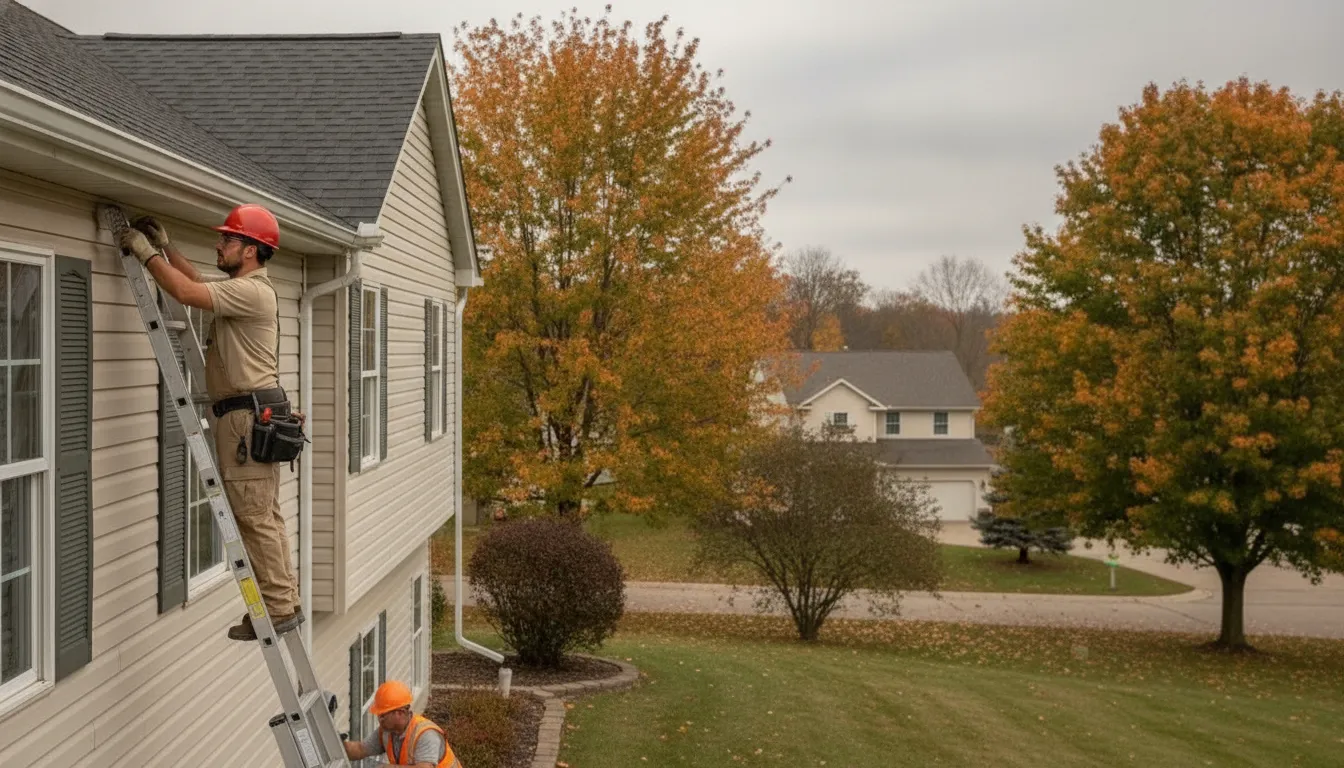
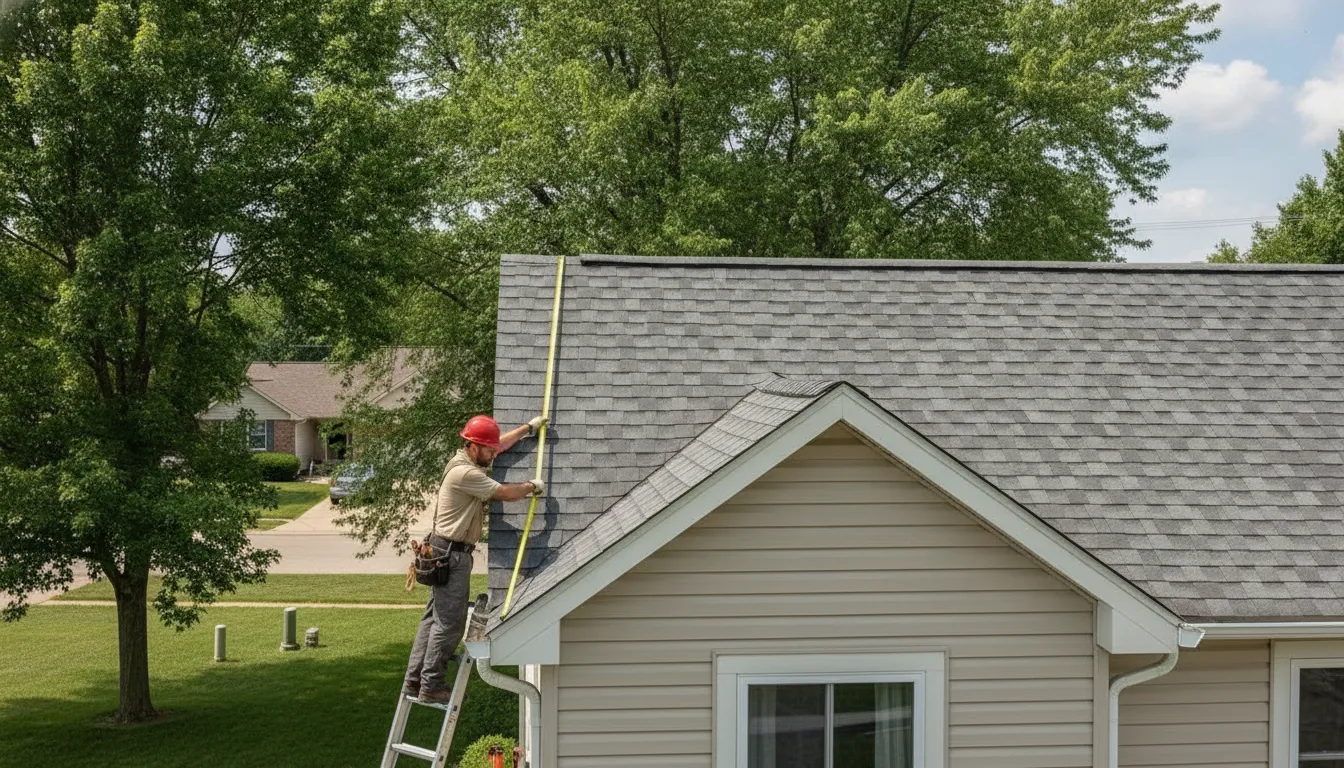
    Roofing professional inspecting a Minnesota home near Saint Michael

    Contact Referred Restoration online to request a roof inspection for your Saint Michael home.

    What local roofing expertise should include

    Local expertise is more than having a service-area page or recognizing the name of a nearby city. A capable roofing contractor should be able to connect the condition of your roof with the way Minnesota homes experience wind, hail, snow, ice, freeze-thaw cycles, and changing temperatures.

    That does not mean every roof needs the same solution. Two homes on the same block may have different roof ages, ventilation conditions, slopes, past repairs, and storm exposure. A useful evaluation starts with the property in front of the contractor rather than a generic recommendation.

    Look for a company that can:

    • Confirm that Saint Michael is within its service area and explain how local appointments are handled.
    • Inspect visible roofing, flashing, penetrations, edges, and areas where water may collect.
    • Separate urgent concerns from maintenance items that can be planned.
    • Explain whether the next step appears to be a repair, more detailed assessment, or replacement discussion.
    • Recommend materials and installation details that fit the home and Minnesota conditions.
    • Provide a written scope so you can understand what is being proposed.

    Why Saint Michael homeowners should evaluate the roof as a system

    A roof is not just a layer of shingles. It works with flashing, ventilation, underlayment, drainage, siding, windows, and gutters to keep water away from the home’s interior and foundation. When one part is damaged or poorly coordinated, the visible symptom may appear somewhere else.

    For example, a ceiling mark may be related to roof damage, flashing, or a drainage issue. Missing shingles may point to wind exposure, while granules in a gutter may be one sign that roofing materials are wearing. These observations do not diagnose the problem by themselves. They show why a careful inspection is more useful than choosing a contractor based only on a quick visual estimate.

    Related exterior systems matter, too. If roof runoff is not moving through the gutter and downspout system properly, water can affect siding or the area around the foundation. Referred Restoration also provides gutter inspections and gutter services, which can be part of a broader exterior assessment when drainage is part of the concern.

    How to tell whether a roofing inspection is thorough

    A thorough inspection should leave you with a clearer understanding of the roof’s current condition and the decisions that may follow. Ask the contractor what the inspection includes before the appointment. You can also ask how findings will be explained and whether you will receive photographs or a written summary.

    Questions to ask during the inspection

    • Which areas of the roof did you inspect, and were any areas inaccessible?
    • Did you find active leaks, storm-related damage, worn materials, or installation concerns?
    • Which findings need prompt attention, and which can be monitored?
    • Is the issue limited to the roof, or should flashing, gutters, siding, or attic conditions be evaluated?
    • What repair options are reasonable for the observed condition?
    • If replacement is being considered, what parts of the roof system are included in the written scope?

    Clear answers are a trust signal. A contractor should be willing to explain uncertainty instead of presenting every observation as an emergency. If additional access, testing, or documentation is needed, that should be stated plainly.

    Repair or replacement: what should the contractor explain?

    A Saint Michael roofing company should not force every homeowner into the same project category. Repairs may be appropriate when damage is limited and the remaining roof system is in suitable condition. Replacement may be discussed when damage, age, repeated problems, or the overall condition makes isolated repairs less dependable.

    The right decision depends on the roof’s actual condition. A few damaged shingles do not automatically mean the entire roof needs replacement. At the same time, a small visible leak does not prove that the underlying issue is small. Water can travel below the surface before it becomes visible indoors.

    Ask for the reasoning behind the recommendation. A useful written plan should identify the affected area, describe the proposed work, and explain any limitations. If replacement is recommended, ask what will happen with existing layers, flashing, ventilation, underlayment, and cleanup. If repair is recommended, ask what signs would indicate that a broader evaluation is needed later.

    Referred Restoration offers roof inspections, repairs, and replacement services. The inspection-first approach gives homeowners a way to discuss the condition of the roof before deciding what work, if any, is appropriate.

    What materials and installation questions matter in Minnesota?

    Materials should be discussed in relation to the home, roof design, appearance, weather exposure, and installation requirements. Asphalt shingles and metal roofing are among the options Referred Restoration works with. The important comparison is not simply the product name. It is how the proposed material fits the roof system and how the contractor plans to install it.

    Questions about roofing materials

    • Which material options are suitable for this roof design?
    • How will the selected material affect appearance, maintenance, and future service?
    • What underlayment, flashing, ventilation, and edge details are included?
    • Which manufacturer and product line are being proposed?
    • Who will install the materials, and how will the work be supervised?
    • What cleanup and final inspection steps are included?

    Referred Restoration uses Malarkey roofing products among its material offerings. A homeowner should still receive a project-specific explanation rather than assuming that one product is best for every house. Good recommendations account for the existing roof and the goals of the homeowner.

    Installation quality also deserves attention. Ask how the crew will protect landscaping and exterior surfaces, manage debris, handle weather interruptions, and confirm that the completed work matches the written scope. These practical details can make the process easier to evaluate than a broad promise of quality.

    How should a roofing company handle storm damage?

    After hail or high winds, homeowners may notice missing shingles, dents, exposed underlayment, damaged flashing, or water entering the home. Some damage is difficult to see from the ground. If you suspect storm damage, document what you can safely observe and arrange an inspection rather than climbing onto the roof yourself.

    A helpful storm-damage conversation should cover immediate protection, inspection findings, repair or replacement options, and documentation. Referred Restoration works with homeowners and insurance companies on storm-damage restoration. The contractor can explain what was observed and what work is being proposed, while the homeowner remains responsible for reviewing policy requirements and communicating with the insurer.

    Saint Michael’s building department provides local information about building permits and requirements. Permit needs can depend on the project and local rules, so ask who will confirm the applicable requirements for your work and how that step will be handled.

    Do not let a storm create pressure to sign an unclear agreement. Before authorizing work, make sure the scope, materials, responsibilities, and next steps are understandable. If emergency protection is needed, ask what temporary action is being taken and what permanent work would still need to be evaluated.

    How to compare a roofing company in Saint Michael, MN

    Once you have two or more possible contractors, compare the substance of their process rather than relying on a single badge, slogan, or online rating. The following checklist can help organize conversations.

    What to compareQuestions to ask
    Local fitDoes the company serve Saint Michael, and can it explain the local service process?
    Inspection qualityWhat areas are inspected, and how are findings documented?
    Scope clarityDoes the written plan explain the work, materials, exclusions, and cleanup?
    Repair judgmentDoes the contractor explain why repair or replacement is being recommended?
    CommunicationWho answers questions before, during, and after the project?
    Exterior coordinationAre gutters, siding, windows, or drainage relevant to the observed issue?
    Storm processCan the company explain inspection documentation and insurance coordination without pressure?

    Use the same questions with every contractor so the answers are easier to compare. A lower or higher proposal alone does not tell you whether the scope is complete. Pay attention to what is included, how clearly it is described, and whether the contractor responds directly to your questions.

    Contact Referred Restoration online to discuss an inspection, repair concern, or roofing project in Saint Michael.

    Red flags when choosing a local roofing contractor

    Homeowners should take a closer look when a contractor:

    • Promises a definitive diagnosis without inspecting the roof.
    • Uses urgency or pressure instead of explaining the condition.
    • Cannot provide a clear written scope of work.
    • Will not identify the proposed materials or installation approach.
    • Dismisses questions about flashing, ventilation, drainage, or cleanup.
    • Requests authorization before the homeowner understands the plan.
    • Offers broad assurances but avoids explaining who will perform and supervise the work.

    One awkward conversation is not proof that a contractor is unqualified. The point is to identify gaps that could make a project difficult to understand or manage. A professional company should be able to discuss the work in plain language and give you time to review the next step.

    Frequently asked questions about roofing companies in Saint Michael

    What should I look for in a roofing company Saint Michael MN homeowners can rely on?

    Look for local service availability, a careful inspection process, clear repair-versus-replacement reasoning, a written scope, identifiable materials, and direct communication. The company should explain what it observed rather than making unsupported promises.

    Does a roof inspection mean I need to replace my roof?

    No. An inspection is intended to identify the roof’s condition and help determine appropriate next steps. Depending on the findings, the next step may be monitoring, a focused repair, additional evaluation, or a replacement discussion.

    Can a roofing contractor help after hail or wind damage?

    Yes. A roofing contractor can inspect for visible and less obvious damage, document findings, discuss temporary protection when needed, and explain repair or replacement options. Homeowners should also review their insurance requirements and local permit information.

    Should gutters be checked during a roofing evaluation?

    They may be relevant when drainage, overflow, sagging, leaks, or water marks are part of the concern. Roof runoff and gutters work together, so discussing both systems can help clarify where water is moving and whether additional service is needed.

    What is the best next step if I am unsure which roofing contractor to call?

    Start with an inspection and ask each contractor the same questions about findings, scope, materials, schedule, cleanup, and communication. A written explanation can help you compare the options without relying on a quick sales pitch.

    Contact Referred Restoration online to request a local roofing inspection and discuss your Saint Michael home.
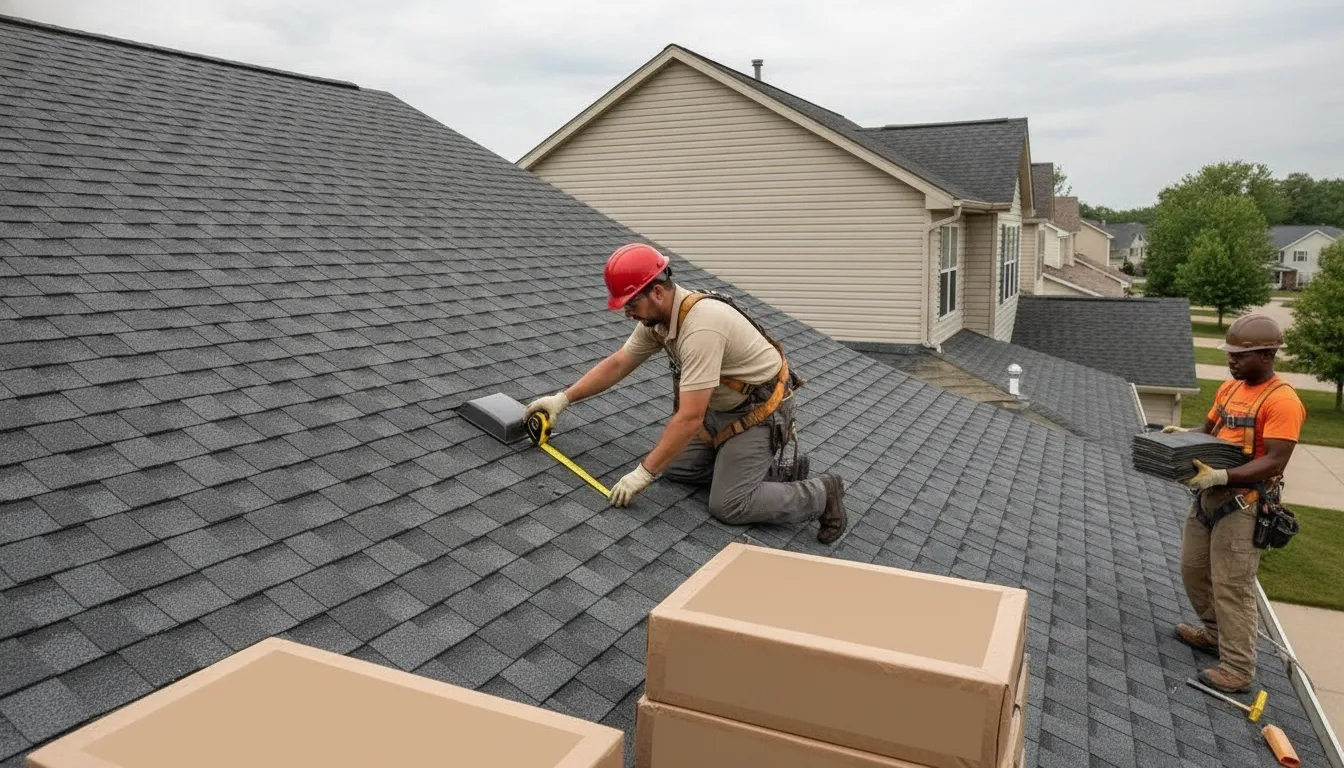
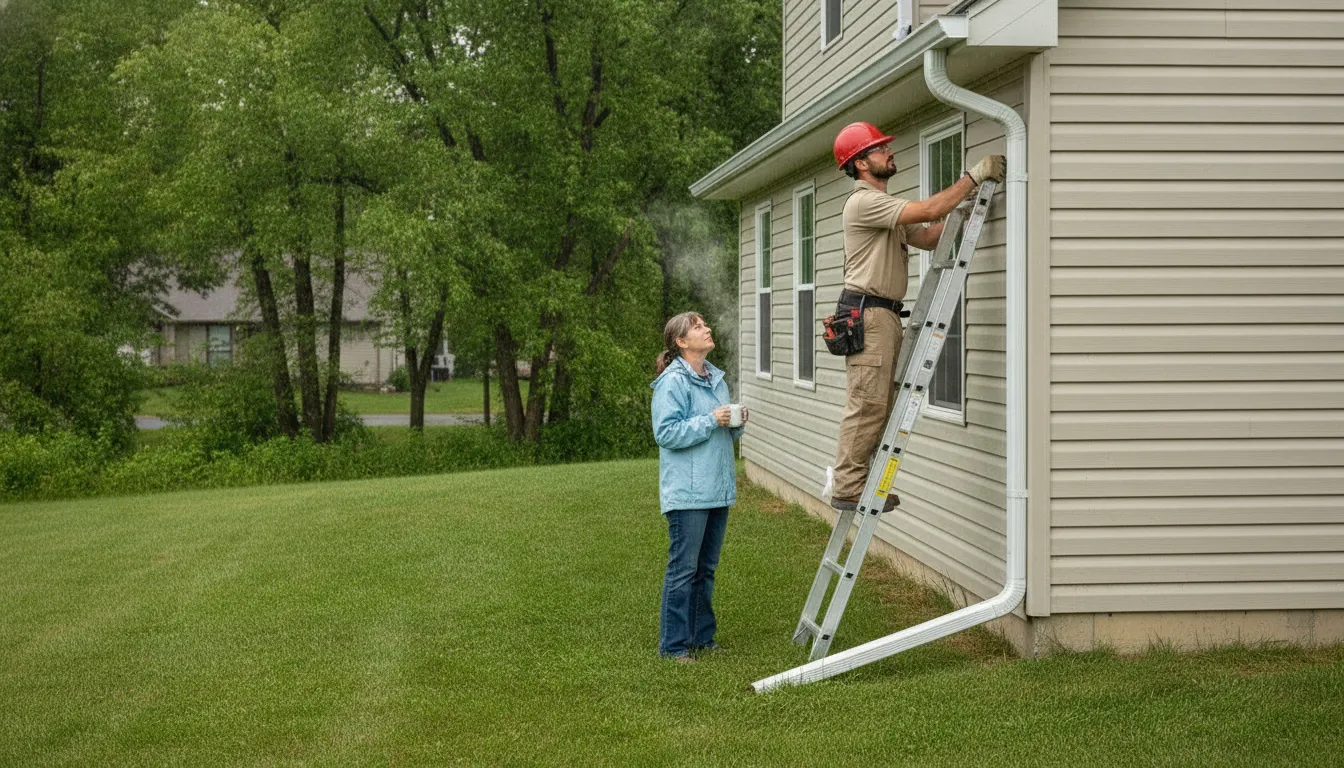
  • How Many Bundles of Shingles in a Square?

    How Many Bundles of Shingles in a Square?

    Roofing material is usually measured in squares, while shingles are packaged in bundles. That difference can make a replacement estimate seem simpler than it is. The calculation becomes more involved when a roof has multiple slopes, valleys, dormers, or penetrations.

    For many standard asphalt products, how many bundles of shingles in a square starts with a common planning baseline of three bundles. The package coverage listed by the manufacturer is the deciding factor. A roofing square represents 100 square feet of roof area. Overlap, product design, roof geometry, and planned waste can all change the quantity needed.

    Individual shingle counts are a separate measurement from bundles per square. NIST notes that a typical square may use about 80 standard shingles or 65 metric shingles after recommended overlap. That shows why package labels matter. Before ordering materials for a Minnesota home, start with the measurement itself. Then connect it to the product specifications and the actual roof surface.

    Contact Referred Restoration online for a free roof inspection and project-specific guidance, or call (763) 726-4245.

    What Does a Roofing Square Mean?

    A roofing square is an industry measurement for roof covering. One square represents 100 square feet of actual roof surface, or about 9.29 square meters. It does not mean the roof is shaped like a square. Homeowners, contractors, and manufacturers use it to describe the amount of roofing material needed.

    That distinction matters because the roof surface is not always the same as the home’s floor footprint. A roof’s pitch, overhangs, dormers, valleys, and other sections can add surface area beyond the dimensions you see from the ground. A reliable material estimate starts with measuring the roof planes. The total area is then converted into squares.

    Squares measure coverage, not packages

    A square describes the area to be covered. Bundles describe how a particular shingle product is packaged. The number of bundles needed for one square depends on the coverage stated on the product packaging and the manufacturer’s installation instructions. A common planning assumption for some asphalt shingles is three bundles per square. That is not a universal rule. Thicker or specialty products may cover a different area per bundle.

    In other words, a square is not automatically equal to three bundles. It is not a fixed number of packages for every roof. The package label should control the calculation for the exact product being installed. In Minnesota, roofing materials should also follow the manufacturer’s written instructions and applicable residential code requirements.

    Bundles and individual shingles are different measurements

    It is also important to separate the number of bundles from the number of individual shingles. Shingles are installed with overlap, so the exposed area of each piece is smaller than its full physical dimensions. A NIST product summary gives a typical estimate of about 80 standard shingles or 65 metric shingles to cover one square after allowing for overlap. Those figures describe individual pieces. They do not describe the number of bundles in the package.

    The same source notes that laminated asphalt shingles are commonly available in dimensions around 12 by 36 inches. Even when two products appear similar, their exposure, thickness, design, and package coverage can differ. The practical question is not only how many shingles make a square. It is also how the selected product is packaged and installed.

    Use the roofing-square measurement to understand the size of the roof. Then use the product label to determine package coverage. This two-part approach gives homeowners a clearer starting point before an inspection confirms the roof geometry and material plan.

    Sources: NIST asphalt shingle product summary and Minnesota roofing guidance.

    How Many Bundles of Shingles in a Square?

    For many standard asphalt shingle products, three bundles is a common planning baseline for one roofing square. The package coverage listed by the manufacturer controls the actual count. A roofing square represents 100 square feet of roof area. Bundles are the packages used to deliver the shingles. Because products differ in size, design, exposure, and packaging, verify the coverage statement on the exact product before ordering materials.

    The basic calculation is straightforward. Divide the total roof area, measured in roofing squares, by the coverage represented by one bundle. Then account for the cuts and fitting required by the roof design. That calculation is only an estimate until the product specification and roof measurements are confirmed. A simple roof with broad, uninterrupted planes may use materials differently from a roof with several hips, valleys, dormers, or penetrations.

    Bundles per square is not shingles per bundle

    These two questions sound similar but describe different measurements. Bundles per square asks how many packages are needed to cover 100 square feet of roof area. Shingles per bundle asks how many individual pieces are inside one package. The piece count does not automatically tell you the bundle count. Individual shingles can have different dimensions, profiles, and installed exposure.

    For example, a NIST product summary describes a typical square as requiring about 80 standard shingles or about 65 metric shingles after allowing for overlap. Those figures show why individual-piece counts and package coverage should be kept separate. They are product examples, not a universal rule for every asphalt shingle. Learn more about how shingle bundle coverage varies when comparing package contents and installed coverage.

    What to check on the package

    Look for the manufacturer’s stated coverage per bundle and the number of bundles per square, if provided. Confirm that the label applies to the specific shingle style and installation pattern being used. Product instructions can also identify required overlap, exposure, starter materials, and hip-and-ridge components, which may be packaged separately from the field shingles.

    For a Minnesota roof replacement, a contractor should use the measured roof surfaces and the selected product documentation together. That approach avoids treating three bundles as a guaranteed answer and helps account for roof geometry before materials are ordered.

    Why Does Shingle Coverage Vary by Product?

    The answer depends on more than the roof area. Shingle products can differ in dimensions, profile, exposure, overlap, and the amount of material in each package. A general rule about how many bundles of shingles in a square should be treated as a planning starting point. It is not a universal order quantity.

    A roofing square is 100 square feet of roof surface, but installed coverage is shaped by how each course is laid. Overlap protects the roof while reducing the exposed portion of each shingle. The NIST summary notes that laminated asphalt shingles are commonly around 12 by 36 inches. It also distinguishes between standard and metric shingle formats. Its piece-count examples show why individual-piece counts and bundle counts are separate questions. Review the NIST shingle summary for that technical context.

    How product characteristics can affect shingle coverage
    Product categoryWhat may change coverageVerify package coverage
    Standard or three-tabRegular dimensions and a defined exposure, with overlap set by the installation instructions.Read the manufacturer package label and installation guide.
    Architectural or dimensionalLaminated layers and a shaped profile can change exposure, layout, and the number of pieces used across a square.Confirm the stated squares or square footage covered by each bundle.
    Heavyweight or specialtyThicker, heavier, or more complex profiles may contain different piece counts and may cover differently than a standard product.Use the exact product documentation, not a generic bundle assumption.
    Metric-format shinglesMetric dimensions and layout conventions can produce different individual-shingle counts than standard-format products.Check whether the package is identified as standard or metric.

    Package labeling matters because a bundle is a packaging unit, not a fixed measurement shared by every product. A manufacturer may state coverage by square footage, squares, or another product-specific measure. Exposure also matters. A larger exposed section can change how many pieces are needed across the roof, while the required overlap affects the portion that protects the deck.

    For Minnesota projects, materials should be installed according to the manufacturer’s written instructions and applicable Minnesota Residential Code requirements. A municipal Minnesota roofing handout also states that roof-covering materials should arrive in packages bearing manufacturer identifying marks. Those details make it important to keep the product name, format, and package information together during planning. See the Minnesota roofing material guidance.

    When comparing shingle options for Minnesota homes, start with the exact product label, then account for the roof’s measured area and layout. This approach is more reliable than applying a fixed bundle count to every shingle style.

    How Do Roof Shape, Pitch, and Waste Change the Estimate?

    A roof measurement is more than multiplying a house’s length by its width. A roofing square represents 100 square feet of actual roof surface, so the estimate must follow each roof plane rather than the home’s footprint. Pitch changes the surface area, and the roof’s layout determines how efficiently full shingles can be placed.

    A simple gable roof may have long, uninterrupted planes with relatively few cuts. A more detailed roof can include hips, valleys, dormers, intersecting planes, wide eaves, rakes, skylights, vents, chimneys, and other penetrations. Each feature changes the layout. Shingles may need to be trimmed around it, and some cut pieces may not be reusable elsewhere on the roof.

    Why roof geometry matters

    Hips and valleys are especially important because they create angled transitions between roof planes. Dormers add additional walls, eaves, and smaller roof sections that must be measured separately. Rakes and eaves also require careful edge planning. At penetrations and roof-wall intersections, flashing must be installed and integrated with the surrounding roofing layers, as described in the cold-climate roofing guidance from PNNL.

    Pitch affects both measurement and installation planning. The NIST asphalt-shingle summary describes products for roof pitches ranging from 2:12 to 21:12, but the applicable product instructions and local requirements control the installation. A steeper plane has more surface area than the same horizontal footprint, and it may require different handling and safety planning. Accurate field measurements should account for each plane’s dimensions and slope rather than relying on a rough footprint calculation.

    Why there is no universal waste percentage

    Some material loss is expected when shingles are cut at eaves, rakes, hips, valleys, dormers, and penetrations. However, no single waste percentage applies to every roof. A compact roof with few angles may require fewer cuts than a roof with multiple planes and several intersecting details. The amount needed also depends on the shingle design, the layout, and how the installer sequences the work.

    That is why the answer to how many bundles of shingles in a square should be treated as a planning starting point, not a complete order. The package coverage for the selected product controls the bundle calculation, while the roof’s geometry determines how much material must be planned beyond the net measured area. A roof inspection can identify details that are easy to miss from the ground and help connect the material estimate to how a residential roofing system works.

    For a Minnesota replacement, the final plan should also follow the manufacturer’s written instructions and applicable Minnesota Residential Code requirements. Measuring each plane, documenting roof details, identifying penetrations, and reviewing the installation sequence creates a more dependable material plan than applying a fixed allowance to every home.

    How Can Minnesota Homeowners Plan a Shingle Replacement?

    Planning a replacement involves more than converting roof area into bundles. The right material quantity depends on the measured roof surface, the product’s package coverage, the roof’s shape, and the installation requirements for the property. A practical review can help a homeowner in Rogers or a nearby community prepare useful questions without treating an online estimate as an order.

    1. Inspect the existing roof and attic. Start by checking the roof covering, flashing, penetrations, ventilation, and visible signs of moisture. An attic review can also reveal whether air sealing, insulation, or ventilation needs attention. Cold-climate guidance from the U.S. Department of Energy’s Pacific Northwest National Laboratory connects those parts of the roof assembly with reducing the risk of ice-dam formation and related damage. Review the guidance on asphalt shingle roofs as a planning reference, then have site-specific concerns evaluated.
    2. Measure the actual roof surface. Estimate each roof plane rather than relying only on the home’s floor area. A roofing square represents 100 square feet of roof area, but pitch changes the surface area and must be accounted for. The final measurement should include the planes that will receive new material, not just the footprint visible from above. This is also where an inspection can identify areas that need deck repair or additional flashing work before shingles are installed.
    3. Identify the exact shingle product. Confirm the manufacturer, product line, shingle dimensions, exposure, and package coverage before translating squares into bundles. The package label and current manufacturer instructions control the result. A common planning baseline is three bundles per square for many standard asphalt products, but that is not universal. Individual pieces per bundle are a separate question from bundles per square, because overlap and product design affect coverage. If that distinction is unclear, review how shingle bundle coverage varies before ordering.
    4. Account for geometry and Minnesota weather. Count the cuts created by eaves, rakes, hips, valleys, dormers, and roof penetrations. A simple roof generally requires less cutting than one with multiple planes, but no single allowance applies to every design. PNNL guidance also identifies severe winter weather as a potential source of shingle damage or blow-off risk and recommends details such as appropriate eave protection and properly integrated flashing. Do not assume a local rule or installation detail applies to every Minnesota municipality. The roof’s design and the selected product both matter.
    5. Confirm the installation plan and local requirements. Ask which underlayment, flashing, ventilation, fasteners, and manufacturer-specific methods will be used, and confirm how the contractor will handle cleanup and final inspection. A Minnesota municipal roofing handout states that materials should follow the manufacturer’s written instructions and the Minnesota Residential Code, but permit procedures can vary by jurisdiction. Confirm requirements with the authority having jurisdiction rather than applying one city’s process statewide. For a broader overview of what Minnesota roof installation involves, review the installation guide. Homeowners considering planning an asphalt shingle replacement can use the same checklist when comparing project plans.

    For homeowners near Rogers, an inspection from a local restoration contractor can connect these checks to the roof’s actual condition and layout. That produces a more dependable material plan than applying a universal bundles-per-square assumption.

    Contact Referred Restoration online to discuss a roof inspection and next steps, or call (763) 726-4245.

    Frequently Asked Questions

    How many bundles of shingles are in a square?

    Three bundles is a common planning baseline for many standard asphalt shingle products, but it is not a universal rule. Check the coverage printed on the specific package, then account for cuts and roof complexity before ordering. A roofing square represents 100 square feet of roof area, not necessarily 100 square feet of flat floor space. NIST defines one square as 100 square feet.

    How do you determine the number of bundles needed for a roof?

    Measure the roof’s actual sloped surfaces, convert the total area into squares, and use the manufacturer’s stated coverage per bundle. Add an allowance for cuts at eaves, rakes, hips, valleys, dormers, and penetrations. A simple gable roof usually has fewer cuts than a roof with several planes. So the final order should be based on the measured design rather than a basic area calculation alone.

    How many bundles do I need for a 20×20 roof?

    A 20 by 20 rectangle has 400 square feet before considering slope, which equals four roofing squares as a flat-area starting point. That does not automatically determine the bundle count. Roof pitch, overhangs, multiple planes, and the product’s package coverage can all change the material plan, so use the measured roof surface and package instructions.

    Why can two shingle products require different bundle counts?

    Shingle dimensions, exposure, overlap, and package coverage vary by product. Individual shingle counts also differ from bundles per square. NIST cites about 80 standard shingles or 65 metric shingles for a typical square in its summary. Illustrating why piece counts should not be substituted for the package coverage of the selected product. Review the NIST product summary for that distinction.

    What should Minnesota homeowners confirm before ordering?

    Confirm the measured roof area, selected product, package coverage, roof geometry, waste allowance, flashing details, and installation requirements. Minnesota guidance calls for roofing materials to follow the manufacturer’s written instructions and the Minnesota Residential Code. For cold-weather planning, also discuss attic air sealing, insulation, and ventilation because these measures help reduce ice-dam risk. PNNL cold-climate guidance provides additional context.

    Need Help Confirming Your Roofing Materials?

    Shingle coverage depends on the product, roof layout, and installation details, so an inspection can help turn a general estimate into a project-specific plan. Referred Restoration can review your roof, clarify the material quantities to discuss, and help you plan the next step for your Minnesota home.

    Contact Referred Restoration online or call (763) 726-4245 to get started.

  • Gutters Solutions in Elk River MN: A Homeowner Guide

    Gutters Solutions in Elk River MN: A Homeowner Guide

    Gutters do more than catch rain at the roof edge: the system needs to move runoff safely away from the house. If water spills over, drains poorly, or collects beside the foundation, the right next step is to understand where the flow is failing before choosing a fix.

    A practical plan for gutters solutions in elk river mn starts with checking the roofline, gutter condition, downspout route, and where water ends up around the home. Those details help distinguish a repair from a broader system change; confirm service availability for your address before arranging an assessment.

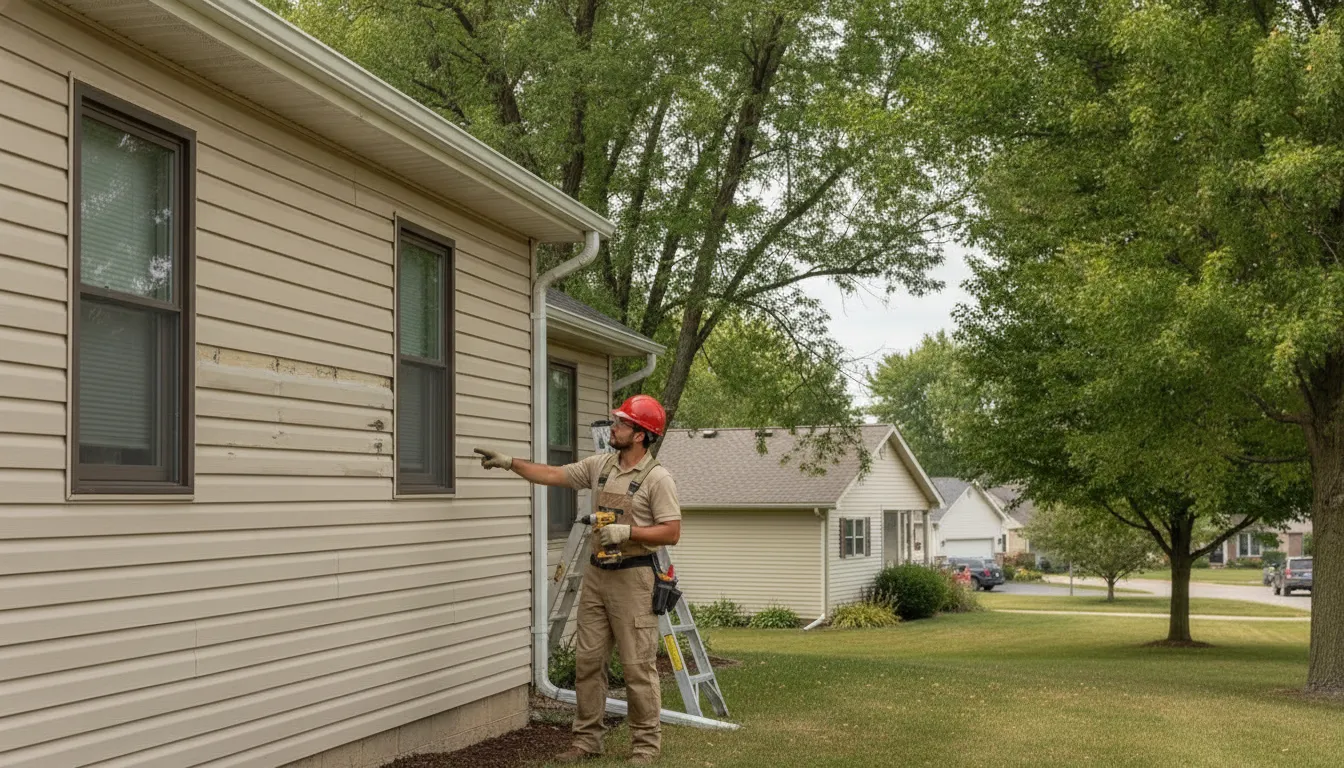
    Gutter professional inspecting the roofline of a Minnesota home

    Building America guidance likewise emphasizes directing roof water away from the foundation with gutters and downspouts (source). A careful assessment begins by tracing the water’s path and looking for the points where it backs up, leaks, or discharges too close to the house.

    Contact Referred Restoration online to ask whether your address is within the service area.

    How Gutter Solutions in Elk River MN Start With an Assessment

    A useful assessment follows water from the roof edge to the point where it leaves the property. Looking at the gutter alone can miss the source of a recurring leak or overflow. The goal is to understand how the parts work together. Then decide whether a focused repair or a broader change makes sense.

    Start at the roofline. Check whether the gutters are firmly attached and appear to follow a consistent slope toward their outlets. Look for separated joints, visible gaps, dents, or sections pulling away from the fascia. Staining on siding or trim, peeling paint, or damp areas below the eaves can help identify where water may be escaping. Assess those signs in context rather than treating them as a diagnosis.

    Next, look for debris or blockages that could restrict water flow, and note whether water spills over during rain. Pay attention to sagging sections, standing water after rainfall, and loose or disconnected downspouts. An inspection should also trace where each downspout releases water. A clear gutter cannot manage runoff well if its outlet is blocked or discharges beside the foundation. Guidance from the U.S. Department of Energy’s Building America Solution Center recommends directing roof runoff away from the home and reducing soil saturation around the foundation (gutter and downspout guidance).

    Finally, consider the roof edge and nearby materials as part of the same system. If the fascia looks soft, damaged, or persistently damp, that may need attention alongside the gutter rather than a patch to the channel alone. Referred Restoration describes its gutter inspection and repair services for identifying leaks, clogs, and damage. The company also lists repairs for leaks, sagging sections, and blockages. For related roof concerns, see Referred Restoration’s Rogers roofing services. That page covers Rogers. Confirm directly whether service is available for your Elk River address before arranging an inspection.

    A clear assessment should explain what was observed, where water is being held or released, and which parts need attention. That gives a homeowner a practical basis for comparing next steps without assuming every symptom calls for the same solution.

    When Is Gutter Repair Enough?

    A repair may be a reasonable next step when the problem is limited to one section. The rest of the system should still carry water as intended. Examples include a localized leak, a sagging section, or a blockage that can be cleared without uncovering wider damage. These are among the issues Referred Restoration lists for gutter repair, alongside inspections to identify leaks, clogs, and damage. That does not mean every instance can be resolved with a repair. The underlying cause and condition of the surrounding gutter still matter.

    For example, water spilling over one area may be connected to a blockage, while a section that pulls away or sags may need closer evaluation. Clearing visible debris or addressing one weak point may help. It is important to see whether water then flows through the full run and reaches a suitable discharge point. A repair that treats only the visible symptom may not address a continuing drainage problem.

    Look for a pattern, not just one symptom

    Repeated leaks in the same place, sagging that returns, or blockages that keep causing overflow are reasons to have the system assessed. Do not assume another small repair will be enough. Recurrence does not automatically mean the whole gutter system needs replacement. It does mean the inspection should consider the section’s condition and how water moves through the system. The recommendation should address the cause, not just the latest sign.

    If water continues to spill over after a blockage is removed, or drainage problems appear in several areas, ask for a broader look. The gutter may need a focused repair, attention to another part of the drainage path, or a different scope of work. An inspection can distinguish those possibilities. Referred Restoration describes its gutter inspections as a way to identify leaks, clogs, and damage, followed by a recommendation based on the home’s needs.

    For more context on when a wider change may be appropriate, see this guide to gutter replacement signs for Minnesota homes. It covers replacement indicators in more detail. It should not be read as a conclusion that every leak or sagging section requires replacement. Referred Restoration’s gutter inspection and repair services page describes the company’s Rogers-area offerings. Homeowners in Elk River should confirm service availability for their address before making an enquiry.

    When Should You Consider Gutter Replacement?

    Replacement is worth assessing when the gutter system no longer reliably carries roof runoff away from the home, or when the same trouble returns after repairs. A single loose section or isolated leak may have a limited fix. Recurring problems can point to a broader issue with the system’s condition, layout, or ability to handle runoff from the roof. An inspection can help distinguish a repairable defect from a system that needs more extensive work.

    Look at how the gutters function as a whole, not just at one visible spot. During rain, note whether water is spilling over, escaping at joints, or reaching the ground near the foundation instead of moving through the downspouts. Also pay attention to sagging or sections that seem difficult to keep secure. These observations are useful clues, not a diagnosis. A blockage, loose connection, or discharge issue may contribute, so identify the cause before deciding on replacement.

    Replacement may also be a sensible option to discuss if repairs have become repetitive, several areas need attention, or the existing setup does not suit the roof and drainage pattern. The right recommendation depends on the home’s conditions. An assessment should consider the roofline, existing gutters and downspouts, and where water is directed after it leaves the system. Federal building guidance emphasizes appropriately sized gutters and downspouts, rather than treating one configuration as right for every home: guidance on foundation drainage.

    If a broader replacement is being considered, ask what type of system is appropriate for the home’s layout. Referred Restoration’s Rogers service page describes seamless gutter installation. Its Minnesota gutter system planning guide explains the planning side without requiring a homeowner to choose based on appearance alone. The available information does not establish that one gutter style is best for every home. Confirm the options during an assessment. Verify whether service is available for your Elk River address before arranging work.

    A clear recommendation should explain what is failing, whether targeted repair remains practical, and how the proposed system will direct water away from the home. That gives you a useful basis to decide without treating every leak or overflow as proof that the entire system must be replaced.

    How Do Downspouts and Site Drainage Protect a Home?

    Gutters collect runoff from the roof, but the drainage system only works when downspouts carry that water to a suitable discharge point. If roof water spills beside the house or repeatedly saturates the same patch of soil, moisture can move toward the foundation. The U.S. Department of Energy’s Building America guidance explains that roof runoff can saturate surrounding soil and enter the home through the foundation when it is not drained away (foundation drainage guidance).

    Capacity matters, too. Gutters and downspouts should be appropriately sized for the roof and the water they need to manage, rather than selected by appearance alone. Roof shape, the amount of runoff each section collects, and how water moves through the property all affect whether a system can direct water reliably. The Building America Solution Center describes gutters and downspouts as a way to direct rainwater away from the foundation and reduce soil saturation (gutter and downspout guidance).

    The discharge route needs to suit the actual site. A downspout extension, a route toward a sloping area, or another drainage method may be appropriate, but not every option fits every property. Nearby walkways, neighboring lots, landscaping, soil conditions, and existing drains can affect where water can go. Sending runoff toward a low spot beside the house, across a path, or onto a neighbor’s property can shift the problem rather than solve it.

    That is why grading and drainage should be assessed together with the gutter system. The ground’s slope, soil, and surrounding landscape influence how water flows and soaks in. University of Maryland Extension’s downspout redirection guidance offers ways to manage discharge. Homeowners should consider property conditions before choosing a route. Avoid assuming one extension length or layout is right for every home; local conditions and applicable requirements may differ.

    Notice whether water spills over the gutter during rain, a downspout empties beside the foundation, or the ground stays wet or collects water after runoff. These clues do not identify a cause on their own: a blockage, undersized section, poor discharge route, or site grading may produce similar symptoms. Note where water appears and how it moves. Then have the full path assessed from roof edge to discharge area. A site-specific assessment can help determine whether the issue involves capacity, downspout placement, grading, or a combination.

    What Should Homeowners Check Through Minnesota Seasons?

    Gutter checks are most useful when they follow what is happening around the roof and yard. Look from the ground for sections that appear loose or out of line, visible debris at the edges, and water marks or damp areas below the eaves. During a safe rain, notice whether water spills over the gutter or whether downspouts carry it away from the house. Do not climb onto a roof or reach into a gutter unless you have the right equipment and experience.

    Spring: look for winter and thaw-season changes

    After snow and ice have cleared, check for displaced sections, loose fasteners, bent downspouts, and debris left in the channels. Look at the ground near the foundation for places where runoff has collected or washed soil away. Ice dams form through a combination of snow cover, outdoor temperatures, and uneven roof-surface temperatures, not simply because a gutter is dirty. The University of Minnesota Extension explains that water backing up behind an ice dam can enter the home and damage interior materials. If you see staining, dampness, or signs of a leak, investigate the source rather than assuming the gutter alone is responsible (UMN Extension’s guidance on ice dams).

    Fall: watch leaves and keep water moving

    As leaves accumulate, check whether they are covering the gutter opening or blocking the downspout inlet. Clear debris safely, or arrange help if the roofline is difficult to reach. After cleanup, observe water flow during rain and confirm that discharge does not pool beside the foundation. Minnesota’s homeowner flooding checklist also recommends cleaning gutters and positioning downspouts so water flows away from the foundation (UMN’s homeowner checklist).

    Gutter guards can reduce the amount of leaves and other debris that enters a system, but they do not remove the need to inspect gutters and downspouts. The roofline, guard surface, and outlets still need periodic attention, especially after nearby trees shed leaves or a storm moves debris. Compare the Minnesota gutter guard options if you are considering a barrier, and use the Minnesota gutter maintenance calendar for a broader seasonal schedule. These checks help identify when routine clearing is enough and when drainage needs a closer look.

    How Do You Choose a Gutter Solution for Your Home?

    Start with what happens during and after rain, rather than choosing a product first. Note where water spills over the gutter and whether it reaches the ground near the foundation. Look for pooling or erosion, too. These observations can point to different parts of the drainage system, but they do not establish the cause on their own.

    Check the route from roof edge to discharge point. Look for visible debris or damage from the ground, and observe whether downspouts carry water away from the house. The U.S. Department of Energy’s Building America guidance recommends appropriately sized gutters and downspouts. PNNL explains that they help direct roof runoff away from the foundation and reduce soil saturation (Building America guidance; PNNL resource guide).

    What you noticeWhat to checkPossible next step
    Overflow or slow flow.Debris. Blocked outlets.Clear debris safely. Arrange inspection.
    Loose or leaking section.Connections. Nearby gutter condition.Ask about a focused repair.
    Water near the home.Downspout route. Ground slope.Assess a suitable drainage route.
    Several recurring failures.Overall system condition.Compare repair and replacement.

    For water beside the foundation, federal guidance describes discharge to sloping grade more than five feet away or a separate underground catchment more than ten feet away. Those are guidance examples, not one-size-fits-all directions. Site conditions should be considered before choosing a route (guidance on foundation drainage).

    A useful evaluation should connect what you observe with a practical recommendation. Next steps might include maintenance, targeted repair, improved downspout routing, or considering a new system. Gutters and downspouts should be sized for the home, not selected by appearance alone. Consider roof layout, discharge locations, and the home’s grading together.

    Referred Restoration’s gutter inspection and repair services are described on its Rogers-area page. That page does not confirm service availability in Elk River. Ask whether your address is within the service area and whether an inspection can evaluate the drainage issue before arranging work.

    Contact Referred Restoration online or call (763) 726-4245 to confirm whether your Elk River address is served.

    Frequently Asked Questions

    How often should I inspect my gutters?

    Check them at least in spring and fall, and after a major storm if you notice water spilling over or debris collecting. Look for loose or sagging sections, leaks, blocked outlets, and water pooling near the home. The right cleaning schedule depends on nearby trees and what you observe, so reassess if clogs return between checks.

    How can I tell whether a gutter needs repair or replacement?

    A localized leak, loose hanger, or isolated blockage may be repairable when the surrounding system remains secure and drains properly. Widespread deterioration, repeated failures, or several sections that sag or leak call for a full assessment. Have the condition and water flow checked before deciding; a symptom alone does not establish that the whole system needs replacement.

    Where should downspouts release roof water?

    They should carry water away from the foundation to a route that drains safely across your property, rather than leaving it beside the house. Building America guidance describes discharge to sloping ground at least five feet from the foundation, or to a separate underground catchment at least ten feet away. Site slope and drainage conditions matter (PNNL Building America guidance).

    Do gutter guards mean I will never need to clean gutters?

    No. Guards can help limit leaves and other debris entering the gutter, but they do not guarantee that water will flow freely in every condition. Debris can collect on top of a guard or block an outlet. Inspect the system periodically and confirm that water moves through the gutter and downspouts after rain.

    Does Referred Restoration provide gutter service in Elk River?

    The available company information confirms gutter services in Rogers, but does not confirm coverage in Elk River. Service availability can depend on the property’s address, so contact the company and ask them to verify your location before arranging an inspection. Do not assume that a nearby service page means your home is within the service area.

    Contact us to check coverage for your address

    Gutter concerns can have different causes, so an address-specific conversation can help clarify whether an assessment or repair is available. It can also help identify next steps that may fit your home. Service availability in Elk River should be confirmed for your address.

    Contact Referred Restoration online to ask about coverage and discuss your gutter concerns. You can also call (763) 726-4245.

  • Expert Gutter Inspections MN: What to Expect

    Expert Gutter Inspections MN: What to Expect

    Water spilling over a gutter or a damp mark beneath the eaves can be easy to dismiss as a nuisance. Minnesota freeze-thaw cycles, snow, and summer storms make it useful to check whether the gutter system directs water as intended. One symptom alone does not mean the whole system needs replacing.

    Contractor inspecting gutters on a Minnesota home

    Expert gutter inspections mn help homeowners understand the visible condition of gutters and downspouts, assess concerns such as leaks, sagging or overflow, and identify sensible next steps. An inspection is an assessment, not routine cleaning or an automatic recommendation to replace the system.

    The right scope depends on what can be safely observed and what you have noticed at home. Knowing which parts may be reviewed and what questions to ask can help turn an inspection into a practical plan.

    Contact Referred Restoration online to ask about gutter inspection options in your area.

    What Expert Gutter Inspections in MN Can Cover

    A useful inspection looks beyond whether the gutter appears clean from the ground. It can consider the visible condition of the system and how its parts work together to move roof runoff toward the downspouts and away from the home. The scope depends on the property and what can be viewed safely. This is general guidance, not a guaranteed contractor checklist.

    Typical areas to discuss may include whether gutter runs appear straight and securely attached, whether joints or end caps show gaps, and whether there are visible signs of overflow or leaking. An inspector may also look at outlets and downspouts for apparent blockage, disconnection, damage, or a discharge direction that sends water toward the foundation. Water marks near the eaves, fascia, soffit, or siding can provide useful context, though they do not by themselves identify the cause. Ask what was observed directly and what may need a closer evaluation.

    These observations help connect a symptom to a practical next step. A damp mark, loose section, or overflow pattern may point to a localized issue, but it does not automatically mean the entire system needs replacement. If the inspection cannot establish the source from visible conditions, ask whether further assessment is appropriate. Access, roof design, debris, and weather may affect what is visible.

    Referred Restoration confirms gutter-system inspections and services that include repair of leaks, sagging, and damage; downspout installation and repair; seamless gutter installation; and gutter-guard installation. These are service capabilities, not items promised on every inspection. Findings should guide which, if any, work fits the home’s condition.

    For homeowners in Rogers and nearby communities, these visible clues can frame a focused inspection conversation without assuming every property has the same drainage needs. Rogers gutter services describes the company’s gutter offerings. When arranging an assessment, mention where water appears, what happens during rain, and whether a gutter or downspout has shifted. Those details give the conversation a starting point without assuming the problem or solution.

    What Signs Suggest a Professional Gutter Check Is Worthwhile?

    Water showing up where it should not, or a gutter section that looks different than before, can be a good reason to arrange an assessment. These observations do not identify the cause on their own. A leak, for example, may call for a closer look at a seam or another part of the system, but the visible drip alone cannot show what repair is needed.

    Pay attention during or after rain, but observe from the ground rather than climbing a ladder or walking on the roof. Signs worth noting include:

    • Drips or leaks: Water escaping from a joint or gutter section, or damp marks beneath the roof edge, may warrant follow-up. Note where it appears and whether it happens during particular weather.
    • Sagging or uneven alignment: A section that visibly dips, pulls away, or no longer follows a consistent line should be assessed. Appearance can point to a concern, but it does not establish whether the attachment, gutter, or another component needs attention.
    • Visible damage: Cracks, bent sections, separated joints, or impact marks are useful details to report. The extent and location matter. A visible defect does not automatically mean the whole system needs replacement.
    • Overflow or runoff in unexpected places: Water spilling over an edge, collecting below the eaves, or flowing close to the home during rain may prompt a check of the gutter and downspout arrangement. Debris, flow restrictions, and weather may matter. Avoid assuming a single cause.

    It can help to record which side of the home is affected, when you noticed the issue, and whether it followed a storm or another change. Photos taken safely from the ground can also help explain what you saw. Share observations rather than trying to diagnose the system yourself.

    This is different from deciding that gutters need to be replaced. A professional check can clarify whether a concern appears isolated, needs repair, or calls for further evaluation. Replacement is not automatic, and one symptom is not enough to settle that decision. For more about replacement warning signs, see gutter replacement warning signs.

    When Should Minnesota Homeowners Schedule a Gutter Inspection?

    There is no single inspection date that fits every Minnesota home. Tree cover, roof layout, past drainage problems, and recent weather all affect when a closer look may be useful. Two practical checkpoints are after winter, once a safe assessment is possible, and in fall before freezing weather. These are general windows, not a fixed schedule for every property.

    A spring review can identify changes that became visible through winter, such as a shifted section, loose connection, or water marks near the eaves. It can also help assess whether runoff moves through the gutters and downspouts as intended before spring and summer rain. Wait until snow and ice have cleared enough for a safe assessment.

    Fall is a useful time to look ahead to colder weather and check for visible debris, drainage concerns, or damage that could affect how the system handles rain. Nearby trees and changing leaf conditions may influence when attention is needed, but you do not have to wait for a calendar date if an issue is already apparent. A seasonal routine for basic upkeep is covered in this Minnesota gutter maintenance calendar.

    Do not wait for spring or fall if a storm is followed by new sagging, a leak, water spilling over an edge, or a downspout that no longer appears to discharge properly. A visible change can prompt an assessment when weather and access are safe. If the concern appears only during rain, note where and when water escapes. That context helps an inspector understand what to look at.

    Gutters are only one part of exterior water management. They are not the sole cause of winter ice dams and cannot prevent them by themselves. University of Minnesota Extension explains that uneven roof temperatures can melt snow, then cause water to refreeze at colder roof edges. An ice dam or indoor moisture calls for attention to roof and building-envelope conditions as well as nearby drainage. A gutter inspection can inform that discussion, but it cannot diagnose the roof conditions behind an ice dam. For broader roof concerns in Rogers, see the local roofing service information.

    How Are Gutter Flow and Downspouts Assessed?

    A gutter system must collect roof runoff and carry it through outlets and downspouts toward the ground. When discussing flow, a professional may consider visible signs along that route, including seams, outlet openings, downspout connections, and the discharge point. The assessment depends on access and the homeowner’s observations. Do not assume every home follows one fixed test.

    At the gutter run, visible gaps, separated joints, sagging sections, or water marks can help identify places that may deserve a closer look. At an outlet, debris or damage may interfere with the path into the downspout. The discharge point matters because the system should direct roof runoff away from the home. The U.S. Department of Energy’s Building America Solution Center explains that gutters and downspouts help direct rainwater away from the foundation in its guidance on gutters and downspouts.

    Downspout outlets and discharge direction matter too. Note whether a downspout appears disconnected, damaged, or blocked, and whether water flows toward an area where it pools or erodes soil. Snohomish County advises against directing drainage toward the uphill side of a structure. Where safe, it recommends directing water away from hard surfaces and toward vegetation. Site grading and other features affect what suits a home, so discuss the layout rather than treating one arrangement as universal.

    Joints are also relevant when comparing system designs. Referred Restoration offers seamless gutters, which have fewer joints along a run and can reduce potential leak points. That design does not remove the need to assess outlets, corners, connections, or downspouts. For a closer look at seamless and sectional gutters, see the related guide.

    What you noticeWhat to askPossible next step
    Drip or gap at a joint.Where is water escaping?Discuss a closer check or targeted repair.
    Sagging or loose section.What appears to be shifting?Ask whether attachment or alignment needs attention.
    Overflow near an outlet.Is the path into the downspout clear?Discuss maintenance or further assessment.
    Water collects near the home.Where does the downspout discharge?Review drainage direction for this site.

    Use the table as a prompt for discussion, not as a diagnosis. A clear assessment connects a flow concern to its location and explains whether follow-up is appropriate. One symptom alone does not prove the whole system needs replacement.

    How Should You Use the Inspection Findings?

    An inspection should help you decide what to do next, not turn every observation into a replacement recommendation. Ask what the inspector saw, where it is, and how it affects the gutter system. Distinguishing an active issue from a condition to monitor can help you choose a sensible response.

    Some findings may call for routine maintenance. Debris or a localized obstruction may point to cleaning, not gutter repair. For a leak, loose or sagging section, or visible damage, ask whether a targeted repair could help. Referred Restoration provides gutter inspection and repair for leaks, sagging, and damage, along with downspout work. Review its Rogers gutter service options to see the available services.

    Not every observation requires immediate work. If a condition is not clearly causing a problem, ask what changes would make it more urgent and whether to monitor it. If the source of water or extent of damage is uncertain, further evaluation may be more appropriate than guessing at a repair. Ask which areas were accessible and what remains unconfirmed.

    Consider replacement when overall condition or recurring problems make repair unsuitable, not just because one section has a defect. Ask why repair is or is not practical, whether the recommendation covers one section or the full system, and what supports that conclusion. If you want to understand the distinction between repair concerns and broader deterioration, see these gutter replacement warning signs.

    A recommendation should fit the home’s observed condition and leave room for an informed decision. Referred Restoration describes its approach as an honest assessment and a solution tailored to the home. Whether the finding points to maintenance, repair, monitoring, further evaluation, or replacement, ask for the reasoning in plain language. The next step should address the issue actually observed.

    How Can You Prepare for a Gutter Inspection?

    A few observations can make an inspection more useful. Note where water has spilled over, dripped, or collected near the home. Record when it happens, such as during rain, snowmelt, or after a storm. Mention ice or water marks too, but do not inspect the roof or gutters yourself.

    Write down known gutter repairs or changes, such as a reattached section or moved downspout. Photos taken safely from the ground can show where a symptom appeared, even if it is not visible at the visit. Include enough of the home to identify the location. These are preparation tips, not a Referred Restoration protocol. Do not climb a ladder, walk on the roof, or reach into a gutter.

    You do not need to diagnose the cause. A drip may appear in one spot, while overflow may occur only in certain rain. Describe what you saw, where it happened, and whether it has recurred. Your notes can help explain the concern even if it is not visible during the visit.

    Ask the inspector to explain what they observed and where. If there is a concern, ask whether it needs attention now, should be monitored, or calls for closer evaluation. This separates a visible symptom from a confirmed problem and clarifies what to do next.

    Ask how water leaves the gutter system and where the downspout discharges. If a repair is recommended, ask what it addresses and whether alternatives make sense. Replacement should fit the system’s condition, not be an automatic answer to every leak or overflow.

    If debris repeatedly builds up, ask whether a guard is worth considering for your home and what maintenance it would still require. The right choice depends on the situation; this overview of Minnesota gutter guard options can help you prepare questions without assuming a guard is needed.

    Bring your notes and ask for plain-language recommendations. Knowing what was seen, what can wait, and what action is proposed can help you choose a next step for your home.

    Contact Referred Restoration online to discuss gutter inspection options in your area.

    Frequently Asked Questions

    Do gutters need to be inspected?

    A check can help when you notice leaks, sagging, visible damage, overflow, or changed drainage. It assesses the system and possible next steps, but does not automatically mean cleaning or replacement is needed.

    When is a good time to inspect gutters in Minnesota?

    Many homeowners consider a check after winter and before freezing weather. Timing depends on the home and what you observe. Overflow after a storm, a new drip, or a recent repair may also prompt an assessment.

    Can an inspection tell me whether gutters need repair or replacement?

    An inspection can identify visible issues such as leaks, sagging, or damage and help clarify whether repair or further evaluation is appropriate. One symptom does not necessarily mean replacement is needed. Ask why each next step is recommended.

    What should I note before a gutter inspection?

    Note where drips or overflow occur, any recent storm, snow, or ice observations, and past repairs. Share those details and ask what needs attention, what can be monitored, and whether water is directed away from the house.

    Contact us about a gutter assessment

    If you notice overflow, a leak, or sagging, an assessment can clarify whether follow-up may be appropriate. Referred Restoration serves Rogers and nearby communities. To ask about a gutter assessment, contact Referred Restoration online.

  • Roofer Prior Lake MN: A Homeowner’s Guide

    Roofer Prior Lake MN: A Homeowner’s Guide

    When a roof needs attention, the closest contractor is not automatically the right fit. Homeowners searching for a roofer in Prior Lake should first confirm that the company serves their exact address. Then look for clear explanations of what an inspection found and what work is actually recommended.

    Contact Referred Restoration online to confirm availability for your address.

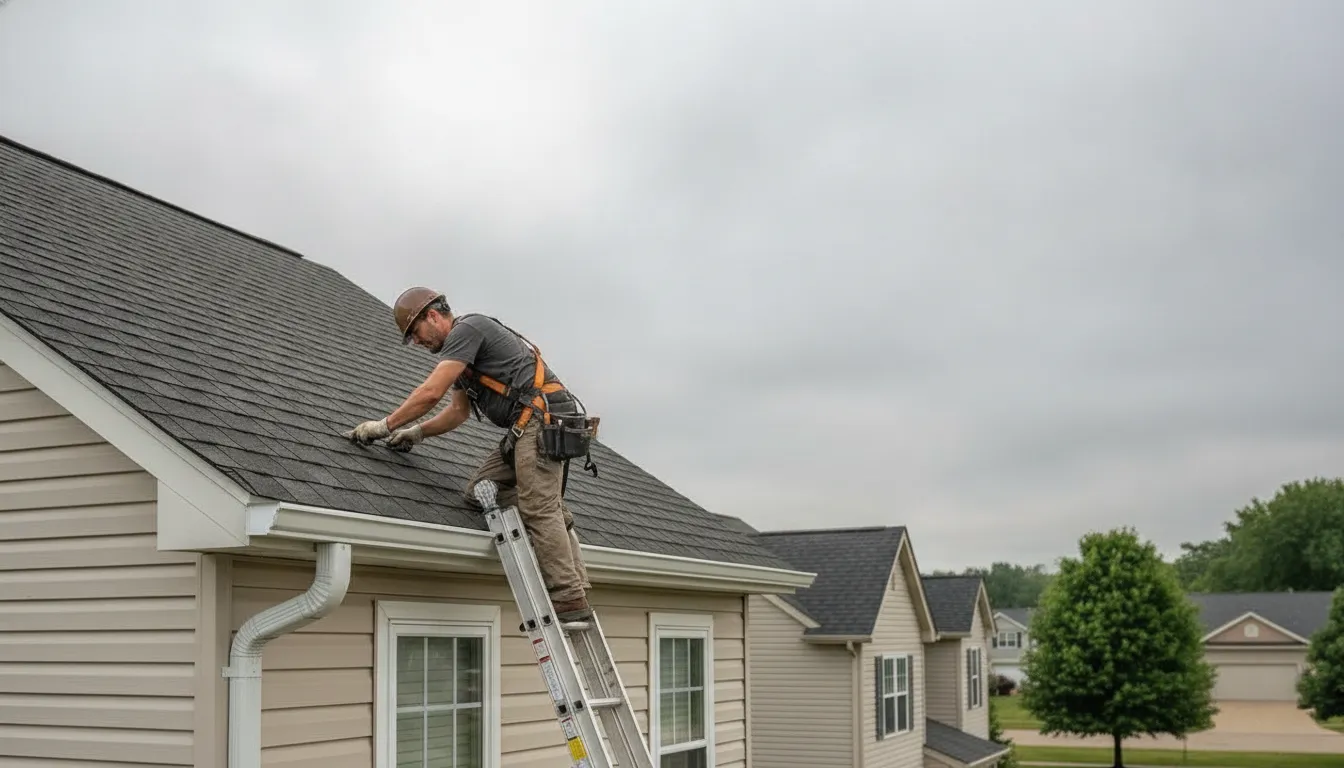
    Roofer inspecting an asphalt-shingle roof at a Minnesota home

    A reliable roofer prior lake mn homeowners consider should confirm service availability, inspect the roof, document its condition, and explain repair or replacement options in writing. Ask about licensing, insurance, materials, and warranty terms, and compare the proposed scope rather than relying on a quick verbal estimate.

    These checks help separate a practical, evidence-based recommendation from a sales pitch. Start by asking what the roofer can show you about the roof and how that evidence supports the proposed next step.

    What Should a Roofer in Prior Lake MN Be Able to Explain?

    When you search for a roofer in Prior Lake, start by checking whether each company actually works at your address. A contractor may serve some nearby communities but not every neighborhood or property type. Ask directly about your street or ZIP code, and confirm that the company can inspect the roof and handle the kind of work you need. Whether that is a repair, replacement, or storm assessment.

    Then listen for explanations tied to what the roofer can observe. A useful inspection discussion should distinguish visible damage from what needs closer examination, describe the evidence behind any recommendation, and explain which next steps are optional or urgent. If a storm prompted the call, ask what signs were found and how they were documented. The date of a storm alone does not establish that your roof was damaged.

    Before agreeing to work, ask for the proposed scope in writing. You should be able to understand what will be repaired or replaced, what materials are being considered. How uncertain conditions will be handled, and who will keep you informed as the project moves forward. If the recommendation is replacement, ask why a repair is not appropriate; if it is a repair, ask what it is expected to address.

    These questions make the conversation specific to your home rather than a general sales pitch. For a broader look at comparing contractors across the state, see this Minnesota roofing-company comparison guide. Use it as background, then verify local availability and the inspection findings for your own property.

    How Do You Check a Minnesota Roofer’s License and Insurance?

    Start with the Minnesota Department of Labor and Industry (DLI) roofer license lookup. Search the business name shown on the proposal, not just the salesperson’s name, and compare the result with the contracting entity you would hire. DLI explains that roofing companies are required to obtain a license; for an individual proprietorship, the license is issued to the individual. Each company must also designate a qualifying person. That person is responsible for required examinations and continuing education. Review DLI’s Minnesota roofer license information and ask the contractor to clarify any mismatch between the listing and its business paperwork.

    Before signing, request current proof of insurance. DLI lists documentation for general liability and property damage insurance among roofer-license materials. Ask for a certificate that identifies the business you are hiring, and check the dates and named insured. If anything is unclear, confirm the document with the insurance agent using contact information you obtain independently.

    Also ask for proof of compliance with Minnesota workers’ compensation law. DLI includes a certificate of compliance with workers’ compensation requirements in its roofer-license materials. Make sure the paperwork is current and applies to the contractor handling your project. If the company uses subcontractors, ask who is responsible for confirming their coverage as well.

    Keep copies of the license lookup and insurance documents with your proposal. A valid license and insurance are basic screening steps, not a guarantee of workmanship or a substitute for reviewing the written scope, schedule, and warranty terms. If a contractor will not provide clear documentation, pause before authorizing work and ask for an explanation.

    What Should a Roof Inspection Cover After Hail or Wind?

    After a storm, start with what you can see safely from the ground. From the ground, look for lifted, missing, curled, or displaced shingles, damaged flashing, and debris. Check gutters, vents, and other exterior surfaces for dents or damage. If the attic is safely accessible, look for new stains or signs of moisture. Do not climb onto a wet or damaged roof. A qualified roofer can check areas you cannot view safely.

    Take clear photos of visible conditions from several angles, including the roof slope if you can capture it from the ground. Note when you noticed the issue, which areas appear affected, and any interior staining or leaks. Share the photos and notes during the inspection. Ask for the findings and next steps in writing, including whether any damage needs prompt attention or further review.

    Weather records can help explain why a storm inspection may be timely, but they do not establish damage at a particular home. The National Weather Service documented hail and wind reports during storms that crossed parts of Minnesota on July 13-14. 2024, and reported another Minnesota event with hail and sporadic wind damage on August 3, 2024. Those reports describe regional events, not damage in Prior Lake or at your address (NWS report for July 13-14, 2024; NWS report for August 3, 2024).

    Do not treat the timing of a storm, a neighbor’s roof condition, or a general weather report as proof of damage to your roof. Ask the inspector to show you specific findings and explain how they relate to the roof’s condition. For examples of issues an inspection may uncover, see our guide to common Minnesota roof damage.

    Compare the Scope, Materials, and Warranty in Writing

    A proposal is easier to evaluate when each contractor describes the same work in enough detail to compare it. Look beyond the total and check whether the documents specify the shingle product, underlayment, ice-and-water protection, ridge cap, flashing, and any allowance or contingency for roof-deck repairs. Ask each roofer to clarify what is included, rather than relying on a verbal summary.

    Ask each roofer to put the work sequence and closeout details in writing, too. Who removes and hauls away the old material? How will the crew protect landscaping and the property? What ventilation work is included, if any? How are concealed decking issues handled, and will you be asked to approve a change before extra work begins? A clear answer makes it easier to compare proposals on equivalent scope rather than assumptions.

    • Confirm the specific roofing materials and components, not just a broad product category.
    • Check what is included for flashing, ventilation, tear-off, cleanup, and deck conditions.
    • Ask for the expected start window, work duration, and how schedule changes will be communicated.
    • Request the complete warranty documents and identify who provides each warranty.
    ItemConfirm in writing
    MaterialsShingles, underlayment, flashing, and ventilation
    Scope changesHow hidden deck issues are reviewed and approved
    CloseoutCleanup, property protection, and completion review
    WarrantyProvider, coverage, exclusions, and claim process

    Read warranty terms instead of relying on phrases such as “lifetime” or “full coverage.” Ask about coverage, duration, exclusions, transfer rules, and the claim process. Product and workmanship warranties may address different issues, so have the contractor explain each document. Warranty eligibility and terms can vary by system and product. Verify the actual documents for the work proposed. A manufacturer credential does not by itself establish a contractor’s quality or service fit.

    For broader context on evaluating contractors across Minnesota, see the Minnesota roofing-company comparison guide. Keep this review grounded in the written scope and documents for the roof at your address.

    Questions to Ask Before You Hire a Local Roofer

    A clear conversation before work begins can reveal whether a roofer has a workable plan for your home, not just a broad promise. Ask each contractor the same core questions, then compare the answers with the written proposal. A roofer prior lake mn search can turn up companies with different service areas, so first confirm that the contractor serves your exact address.

    • Who will supervise the work on site? Ask for the supervisor’s name, how often they will check progress, and who to contact if a concern comes up.
    • Who will perform the installation? If subcontractors are involved, ask who hires and coordinates them, and who remains responsible for the work.
    • What safety and property-protection steps will you use? Discuss how the crew will protect landscaping, outdoor equipment, and access areas, and how you will be told about any issue.
    • Are permits applicable to this project, and who will confirm that? Ask the roofer to explain what applies to your address and scope, and who will arrange any required approvals. Do not rely on a general answer for a different city or project.
    • How is the payment schedule set out? Review when payments are due and what work milestones they correspond to. Make sure the written terms match what you discussed.
    • How are changes handled? Ask how unexpected conditions will be documented, approved, and reflected in a revised scope before additional work proceeds.
    • Can I speak with recent customers about similar work? Ask for references you can contact and, where possible, examples of comparable projects nearby.
    • What cleanup and communication should I expect? Clarify how debris will be collected, how completion will be confirmed, and how often you will receive updates if the schedule changes.

    Look for specific, consistent answers and a written record of the agreed plan. If a response is vague, ask for clarification before signing. The goal is to understand who is accountable and what to expect at each stage, not to rush into a decision.

    How Can You Tell Whether Repair or Replacement Fits?

    The decision should follow what an inspection documents, not a guess based on a few shingles seen from the ground or a remote opinion. Ask the roofer to show you the affected areas, describe what was observed, and explain how the condition supports the recommendation.

    A repair may be a reasonable option when the inspection identifies a limited, clearly defined problem and the surrounding roof can continue doing its job. Ask what will be repaired, whether nearby materials or roof details also need attention. And how the contractor will check that the source of a leak or other issue has been addressed. If the evidence is uncertain, ask what additional inspection would clarify it.

    Replacement may warrant consideration when documented concerns extend across multiple areas or involve broader parts of the roof system, rather than one isolated defect. The roofer should explain which findings point to that scope, what could remain unresolved with a repair, and whether any sections can be retained. A recommendation should connect each proposed action to a condition the inspection actually found.

    For storm-related concerns, request photographs or notes that identify the location and type of observed damage. Storm timing alone does not establish that the roof needs a particular repair or replacement. If an insurance claim is involved, keep the inspection findings separate from any decision by your insurer. A contractor can explain observed conditions, but should not guarantee coverage or claim approval.

    Before deciding, compare the written options: the work included, areas that are not included, any assumptions about concealed conditions, and what would prompt a change in scope. You can also use this Minnesota roof replacement guide to understand the broader replacement-planning questions. The goal is a recommendation you can trace back to evidence and evaluate without pressure.

    A Clear Next Step for Prior Lake Homeowners

    Referred Restoration is based in Rogers, Minnesota, and its documented service footprint centers on Rogers and surrounding communities. The Rogers roofing service page provides local context for the company’s roofing services. Prior Lake is not confirmed in the company’s service-area information, so homeowners should check whether their exact address is covered before scheduling. Confirming availability first helps set clear expectations before discussing the roof itself.

    For homes within its service area, Referred Restoration offers free roof inspections and recommendations based on the findings. Depending on the roof’s condition, the next step may be a repair, replacement, or storm-damage restoration. An inspection is an opportunity to understand what was observed and which options may address it. Rather than assuming a particular project is needed before the roof is assessed.

    If a storm has affected the roof, the team can also assist with the insurance-claim process. Homeowners can explain what they noticed and when, then ask what information or next steps may be useful. Claim assistance is not a promise that an insurer will approve a claim or cover particular work; coverage decisions depend on the insurer and policy.

    When you contact the company, share your address, what prompted the inspection, and any visible concerns or recent storm activity. Ask what the inspection can cover and how the findings and available options will be explained. You can then decide whether to move forward based on the documented condition and recommendations.

    Contact Referred Restoration online to confirm availability for your address and ask about a free inspection.

    For questions, call (763) 726-4245.

    Frequently Asked Questions

    How can you spot a roofing contractor who may not be a good fit?

    Be cautious if a contractor pressures you to decide immediately, will not explain inspection findings. Avoids putting the work scope in writing, or cannot provide current licensing and insurance documents. Ask who will supervise the work, how changes are approved, and how you will receive progress updates. Clear, specific answers make it easier to compare your options.

    How do you check whether a Minnesota roofer is licensed?

    Ask for the contracting business’s exact legal name and license details, then verify them through the Minnesota Department of Labor and Industry’s roofer license information. DLI says a licensed company designates a qualifying person. Request current liability and property-damage insurance documentation and workers’ compensation compliance information as well.

    What should a roofing proposal and warranty explain?

    Look for a written scope that identifies the materials and roof components, flashing and underlayment work, how concealed deck damage will be handled, cleanup, timing, and change-order approval. Ask for the actual warranty terms, including what is covered, exclusions, duration, and any eligibility requirements. Warranty coverage varies, so do not rely on a verbal summary.

    Does storm damage mean an insurance claim will be approved?

    No. A storm or a contractor’s inspection does not establish that a particular roof is covered. Ask the roofer to document observed conditions and explain any assistance they offer, then contact your insurer to understand your policy and claim process. Referred Restoration says it can assist homeowners with storm-related claims, but coverage and claim decisions are not guaranteed.

    Contact Us to Confirm Prior Lake Availability

    Choosing a roofer starts with confirming that the company can serve your exact address. Prior Lake is not confirmed in Referred Restoration’s documented service area, so availability should be checked directly before planning an inspection.

    Contact Referred Restoration online to confirm availability for your Prior Lake address and request a free roof inspection.

  • Siding Repair in Elk River MN: Homeowner Guide

    Siding Repair in Elk River MN: Homeowner Guide

    Cracked panels, loose edges, soft spots, and storm marks can look minor from the yard, but siding damage often deserves a closer look. Water can enter through openings, while trapped moisture may affect the layers behind the siding. An inspection helps separate a localized repair from damage that calls for broader work.

    Contractor inspecting damaged siding on a Minnesota home

    For siding repair in elk river mn, start with a careful assessment of the panels, seams, trim, and nearby drainage. Do not choose repair or replacement from appearance alone. The right next step depends on the damage, moisture exposure, material condition, and how well the existing siding can be matched.

    Minnesota wind, hail, snow, and changing temperatures can put repeated stress on an exterior. Before discussing materials or a service plan, it is useful to document what you can see and check the areas most likely to let water in. That inspection-led process begins with the conditions around your home.

    Contact Referred Restoration online

    What Should Elk River Homeowners Know About Siding Repair in Elk River MN?

    Before deciding on siding repair in Elk River MN, walk around the home and document what you can see from the ground. The goal is not to diagnose the assembly yourself. It is to give an inspector a clear starting point and to notice whether one damaged area may be connected to a larger moisture or drainage issue.

    Start with the location and extent of the damage

    Note which elevations are affected, such as the north wall, garage, gable, or an area beneath a window. Look for cracked, split, loose, buckled, or missing siding, and record whether the problem appears limited to one panel or continues across a wider section. Take a few dated photographs from several angles. A close-up shows the visible defect, while a wider photograph helps connect it to nearby trim, rooflines, doors, and windows.

    Also look for changes that may be easy to miss from the street. Soft or discolored areas, exposed underlayment, peeling paint on adjacent trim, and panels that no longer sit flat can all help identify where a closer inspection is needed. Siding inspections are intended to identify damage, rot, and inefficiencies before they become more serious. Prompt home maintenance is also less likely to develop into a larger repair problem, according to North Carolina State University Extension.

    Trace possible water paths

    Look above and below the damaged area. Water can enter near a roof edge, corner, window, door, hose bib, or utility penetration, then affect materials farther down the wall. Check for staining, moss or persistent discoloration, swollen trim, or dampness inside the home near the same location. Do not remove siding or probe deeply into the wall without guidance. The visible panel may be the symptom rather than the source.

    Inspect trim, openings, and drainage details

    Pay particular attention to the seals and flashing around windows and doors, corner posts, J-channels, vent openings, and where siding meets the foundation. Gaps or loose trim can allow water behind the cladding. Check whether downspouts discharge beside the affected wall or whether overflowing gutters have left splash marks. Include these observations when you request an assessment so the repair plan considers the whole exterior rather than replacing an isolated piece without addressing the water path.

    For broader maintenance guidance, review this guide to siding care for Minnesota homes. A documented inspection can then determine whether the practical next step is a localized repair, additional moisture investigation, or a larger siding conversation.

    What Are the Signs Your Siding Needs Repair?

    Siding damage is not always dramatic. A careful walk around your home can reveal small changes that deserve attention before water moves behind the exterior. Look for these warning signs, especially after strong wind, hail, heavy rain, or a season of temperature changes.

    Visible damage and movement

    • Cracks or splits: Cracked siding panels can allow water to reach the layers beneath them. Note whether the damage is isolated or appears across several areas.
    • Loose, lifted, or buckled sections: Panels that no longer sit flat may have been affected by impact, movement, or installation problems. Do not force them back into place, because that can worsen the damage.
    • Storm marks: Dents, chips, punctures, missing pieces, or fresh discoloration may point to wind or hail impact. Photograph the area from several angles and record when you noticed it.

    Moisture and deterioration

    • Soft or rotting areas: Press lightly around suspicious spots without puncturing the siding. A soft feel can indicate that moisture has affected the material or the surface beneath it.
    • Staining, streaks, or mold-like growth: Dark marks and persistent discoloration may reflect runoff or trapped moisture. They should be evaluated rather than covered with paint or cleaning solution alone.
    • Openings around trim and windows: Gaps, failed sealant, separated joints, or loose trim create pathways for water and air. Check corners, windows, doors, utility penetrations, and the lower edge of the siding.

    Moisture deserves prompt attention because the U.S. Environmental Protection Agency identifies moisture control as the key to mold control. The EPA also recommends drying water-damaged areas within 24 to 48 hours when possible to help prevent mold growth. See the EPA guide to mold, moisture, and your home for the underlying guidance. Siding repair can address damaged or cracked sections and help protect against water damage, mold, and energy loss. But the right scope depends on what an inspection finds behind and around the visible panel.

    A quick homeowner checklist

    Before seeking an assessment, walk the perimeter in daylight and check each wall, corner, window, door, and hose or vent opening. Mark the location of cracks, movement, softness, staining, and storm impacts. Look for interior clues as well, such as damp smells or staining near an exterior wall. Avoid removing panels or sealing over suspicious damage until the area has been evaluated. A documented checklist and a few clear photos can help an inspector understand what changed and where to begin.

    When Does Siding Repair Make More Sense Than Replacement?

    Localized siding repair may be the sensible path when the damage is limited, the surrounding siding remains stable, and the underlying wall assembly is dry and sound. A cracked panel, a loose section, or isolated storm damage can sometimes be addressed without disturbing unaffected areas. The goal is not to choose repair automatically. It is to confirm what is actually damaged and correct the source before the same area fails again.

    Matching material availability is an important practical consideration. If the existing siding is still produced or a close match can be found, a targeted repair may preserve the home’s appearance. If the profile, color, or finish is no longer available, a small patch may stand out. That does not automatically require full replacement, but it belongs in the conversation so the homeowner can weigh appearance alongside protection and scope.

    When broader replacement deserves discussion

    Replacement deserves a closer look when deterioration is widespread rather than isolated. Repeated cracking, widespread fading or warping, soft areas, recurring moisture, or damage across multiple elevations can indicate that the issue extends beyond one removable section. An inspection should also consider what is behind the siding. Siding inspections can identify damage, rot, and inefficiencies before problems become more serious, but an online photo or short description cannot establish the full scope.

    Replacement can also make sense when a homeowner has broader goals for the exterior. New siding may support improved insulation, indoor temperature regulation, appearance, and longer-term protection when the existing system no longer meets the home’s needs. The right material depends on the wall condition, exposure, maintenance preferences, and design goals. When comparing vinyl and fiber cement, consider more than appearance: weigh maintenance needs, how well each material can match the existing exterior, and whether it suits the home’s exposure and repair scope.

    Water deserves special attention in either decision. The EPA explains that moisture control is central to mold control, so replacing visible siding without addressing recurring moisture may leave the underlying problem unresolved. A professional assessment should look for the likely entry point, damaged substrate, openings around trim, and drainage conditions before recommending a repair or replacement scope. That inspection-led approach helps keep the decision grounded in the home’s actual condition rather than pressure or guesswork.

    In short, repair is more appropriate when damage is contained and a sound match is practical. Replacement deserves discussion when deterioration is widespread, moisture keeps returning, matching material is unavailable, or the homeowner wants to improve the exterior system as a whole. The final recommendation should follow an on-site evaluation and an honest explanation of the available options.

    Which Siding Material Fits a Minnesota Repair or Replacement?

    Material selection should follow the condition of the existing siding, the area being repaired, and the home’s exposure to Minnesota weather. A small replacement section may need to blend with the current profile and color, while a larger project gives you more flexibility to reconsider maintenance, appearance, and protection. An inspection can also identify whether the visible siding is the only concern or whether moisture has affected the layers behind it.

    Four documented options commonly considered for this type of project are vinyl, fiber cement, LP SmartSide, and traditional wood. Each creates a different balance of upkeep, appearance, and material characteristics. The right choice is not simply the most popular product. It is the option that fits the home’s existing construction, the repair scope, and the homeowner’s priorities.

    Siding material considerations for Minnesota homes
    MaterialNotable characteristicsQuestions to ask during an inspection
    VinylLow-maintenance option with a range of profiles and colors.Can the replacement section match the existing siding, and are the surrounding panels still sound?
    Fiber cementStrong, durable material with a more substantial appearance.Is the structure prepared for the material, and how will joints and trim be handled?
    LP SmartSideNatural-wood look paired with a durable siding approach.Will the profile and finish work with the home’s current design and repair area?
    Traditional woodNatural material that can suit homes where authentic texture and character matter.What maintenance, matching, and moisture-management needs should be planned?

    For a closer look at two engineered options, read this James Hardie and LP SmartSide comparison. The comparison should support a conversation, not replace an evaluation of the specific wall assembly. If a localized repair is possible, matching the existing material may be more practical than changing one section to a different system. If replacement is appropriate, the installer can help coordinate siding, trim, flashing, and drainage details so the finished exterior works as a complete assembly.

    How Can Elk River Weather Affect Siding and Drainage?

    Elk River homes experience several weather patterns that can stress an exterior over time. Strong wind can loosen siding panels, trim, or flashing. Hail can leave dents, cracks, or impact marks that are easy to miss from the ground. Minnesota’s repeated freeze-thaw cycles can also place pressure on small openings and existing damage as moisture freezes, expands, and thaws. Snow and wind-driven rain add another reason to pay attention to how water moves across the exterior.

    Storm damage deserves a closer look even when the siding still appears serviceable. The National Weather Service documented widespread wind and hail damage across parts of Minnesota and Wisconsin from July 13 into July 14, 2024. It also reported large hail in east-central Minnesota, including hail up to 4 inches near Monticello and Big Lake. Those reports do not diagnose damage at any particular Elk River home, but they show why a post-storm inspection should look beyond obvious breakage. Check for displaced panels, chipped finishes, loose accessories, and marks around windows, corners, and doors.

    Why drainage matters to siding protection

    Gutters and downspouts are part of the siding system’s moisture-management picture. When roof runoff is not collected or discharged properly, water can repeatedly wet siding, trim, foundation-adjacent areas, and soil near the home. Blocked or poorly directed drainage can also send water back toward exterior walls during heavy rain or snowmelt. A siding evaluation should therefore include the nearby gutters, downspouts, outlets, and grade, not just the visible panels.

    Look for overflowing gutters, separated seams, downspouts that end too close to the wall, staining below rooflines, or siding that stays damp after precipitation. These signs do not identify the exact cause by themselves, but they are useful prompts for inspection. The Environmental Protection Agency explains that moisture control is central to mold control and recommends addressing water problems promptly: EPA moisture guidance.

    For a broader drainage assessment, see this guide on how to protect siding with proper drainage. Keeping runoff moving away from the exterior can support the repair work, while an inspection can determine whether the siding damage is isolated or connected to a larger moisture pathway.

    What Happens During a Professional Siding Inspection?

    A professional inspection gives you a clearer starting point than trying to diagnose siding damage from the ground. The goal is to understand the condition of the exterior, identify areas that need attention, and choose a practical next step based on what the home actually needs. For homeowners researching siding repair in Elk River, MN, Referred Restoration’s documented process follows three stages. Because Elk River service availability is not confirmed in the available company information, contact the team directly to ask whether an inspection is available for your address.

    1. Free inspection. The process begins with an evaluation of the siding and the areas around it. Before the visit, make a short list of what you have noticed, such as cracked panels, loose or buckled sections, soft spots, staining, visible gaps, or damage after a storm. If possible, note when the problem appeared and whether it changes after rain, snow, or strong wind. You can also gather photos of hard-to-reach areas and make sure the inspector can access the exterior, including gates, side yards, and sections near decks or additions. The inspection is intended to assess the current condition, not to assume that every visible issue requires full replacement.
    2. Custom solution. Recommendations should follow the findings. Localized damage may call for repair to specific sections, while widespread deterioration, aging materials, or concerns across several elevations may support a broader replacement discussion. The condition of the siding, the extent of moisture exposure, the surrounding trim and penetrations, and the home’s exterior goals all affect the appropriate scope. An honest recommendation may be to repair what is sound and address only the areas that are no longer performing properly. Ask what was observed, which areas require action, and which items can be monitored. For more detail on siding inspections and repair options, review the company’s service information.
    3. Professional installation. Once the scope and materials are understood, the work can move into installation. A professional crew should explain what will be removed, repaired, protected, and installed, along with how the finished work will connect to trim, windows, doors, and drainage details. If you are contacting Referred Restoration from Elk River, confirm service availability and discuss the inspection findings before selecting a path. This inspection-led sequence helps keep the recommendation tied to the home’s actual condition rather than a generic package.

    Frequently Asked Questions

    How do I know whether siding damage needs immediate attention?

    Cracked, loose, buckled, soft, or missing siding deserves an inspection, especially when you notice moisture, staining, openings, or damage after wind or hail. Addressing a problem promptly can reduce the chance that a small repair becomes a larger issue. If water has entered the wall assembly, document the affected area and arrange an evaluation rather than covering it without understanding the source.

    Can damaged siding be repaired, or does the whole exterior need replacement?

    Repair is often the appropriate starting point when damage is limited to identifiable sections and the surrounding siding remains sound. Replacement may be worth discussing when damage is widespread, materials are deteriorating in multiple areas, or the existing system no longer supports the home’s protection and appearance goals. An inspection should determine the scope instead of relying on a remote diagnosis.

    What should I do if I suspect moisture behind my siding?

    Look for recurring stains, soft spots, musty odors, or areas where water collects near seams and openings. Moisture control is central to mold control, according to the EPA’s mold guidance. Do not delay drying water-damaged areas; the EPA recommends drying them within 24 to 48 hours to help prevent mold growth.

    What happens during a professional siding inspection?

    The process typically starts with reviewing visible concerns and examining siding, trim, seams, and areas near roof and gutter drainage. The contractor then explains whether the findings support a targeted repair or a broader replacement plan. Referred Restoration describes its pathway as an inspection, a custom solution, and professional installation, giving homeowners a clearer basis for the next decision.

    Contact Referred Restoration online

    Contact us about your siding next steps

    An inspection can help clarify whether your Elk River home needs a targeted repair or a broader replacement assessment. Referred Restoration can review the siding’s condition, discuss practical options, and help you understand the next step based on what the home actually needs. To ask about an inspection-led assessment and confirm availability, contact Referred Restoration online or call (763) 726-4245.

  • Window Repair Rogers: Repair or Replace?

    Window Repair Rogers: Repair or Replace?

    A cracked pane, a draft, or moisture around a window can make a small problem feel urgent, especially through a Rogers winter. Visible damage does not always mean the entire window needs replacement. The right choice depends on what failed, how far the damage extends, and whether the window still fits and protects the home.

    Minnesota homeowner inspecting a damaged residential window

    If you are researching window repair rogers, begin with an inspection rather than a guess. Glass, hardware, trim, or limited frame damage may have a repair path, while widespread deterioration, repeated failures, or a poor-fitting opening may point toward replacement. A qualified assessment can help identify the condition of the window and recommend a custom solution for the home.

    In Rogers, freezing temperatures, precipitation, temperature swings, and hail can all affect windows over time. Understanding which problems can be addressed without full replacement is the first step toward making a practical decision for your home. The signs and service options below provide a clearer place to start.

    Contact Referred Restoration online to request a window assessment for your Rogers home.

    Repair may fit whenReplacement may fit when
    Damage appears limited to glass, hardware, trim, or one localized component.Damage affects the frame, sash, sill, casing, or surrounding opening.
    The window still fits, operates, and protects the home after the affected part is addressed.Problems repeat, the opening no longer fits well, or the unit remains difficult to operate.
    An inspection finds the surrounding materials sound and the repair pathway clear.Widespread deterioration or hidden moisture requires a broader solution.

    What Window Repair in Rogers Can Address

    Window problems do not all call for the same response. A cracked pane, a damaged frame, and storm debris may look related from inside the home, but each can require a different repair pathway. An inspection helps separate the visible symptom from the condition of the full window assembly, including the glass, sash, frame, sill, hardware, and surrounding opening.

    For Rogers homeowners, the practical options may include glass repair or replacement, frame repair, complete window replacement, or repair related to storm damage. Referred Restoration lists each of these residential window services as part of its offering. The appropriate recommendation depends on the type of window, the extent of the damage, and whether the surrounding materials remain sound. A damaged component may be serviceable on its own, while deterioration across several parts may point toward a broader solution.

    Glass and sash concerns

    Glass damage is one of the clearest reasons to request an assessment. A cracked or broken pane can affect safety and reduce the window’s ability to protect the interior from outdoor conditions. In some situations, the glass or insulated glass unit may be the primary issue, while the frame and opening remain in usable condition. In others, failed seals, movement in the sash, or related damage can change the scope of the work. A professional can evaluate what is affected rather than assuming that replacing one visible pane will address every concern.

    Homeowners should also note whether the window still opens, closes, and latches properly. These details help identify whether the problem is limited to glass or involves the sash, operating hardware, or frame. Avoid handling broken glass unnecessarily, especially after storm damage, and keep the area clear until it can be evaluated safely.

    Frame repair and storm-related damage

    Frame repair may be appropriate when the supporting material has localized damage but the overall window remains in suitable condition. The inspection should consider the sill and surrounding trim as well as the frame itself. Moisture, impact, or prolonged exposure can affect more than the first damaged surface, so the visible mark is not always the full extent of the problem.

    Rogers windows also face seasonal exposure to freezing winters, heavy precipitation, temperature swings, and hail. After a storm, the repair pathway may include glass, frame, or related exterior work. Referred Restoration provides window glass and frame services in Rogers, with recommendations shaped around the home’s condition rather than a one-size-fits-all answer.

    Common residential window types

    The same damage can behave differently depending on the window design. Referred Restoration services double-hung, casement, sliding, bay, bow, and picture windows. Double-hung windows operate vertically, casement windows use a hinged sash, and sliding windows move horizontally. Bay, bow, and picture windows can involve larger assemblies or multiple sections, making the condition of the frame and surrounding opening especially important to review.

    Whether the concern is broken glass, a difficult-to-operate sash, a damaged frame, or storm impact, window repair in Rogers should begin with an honest assessment. That approach keeps the focus on protection, durability, comfort, and fit for the home instead of assuming that every issue requires replacement or that every component can be repaired.

    Which Window Problems May Be Repairable?

    Some window damage is limited to one component rather than the entire window assembly. Cracked glass, a failed latch, worn operating hardware, or damaged trim may have a repair pathway. The right answer depends on the window type, the location of the damage, and what an inspection finds around the opening. A visible symptom can point to a repairable problem, but it should not be treated as a diagnosis.

    Glass and operating hardware

    A crack or broken pane may be addressed through glass repair or replacement, particularly when the surrounding sash and frame remain sound. The U.S. Department of Energy provides guidance for evaluating whether cracked or broken window glass should be repaired or replaced in its window-glass replacement job aid. Broken glass is a safety concern, so avoid handling loose shards and arrange an assessment before deciding whether a pane, sash, or larger assembly needs attention.

    Hardware symptoms can include a handle that no longer turns correctly, a latch that does not engage, or a sash that becomes difficult to open and close. These issues may be related to the operator, lock, balance, track, or another replaceable component. If the sash is distorted or the frame has shifted, however, hardware work alone may not resolve the underlying problem. An inspection can separate a component issue from damage affecting the window itself.

    Frame, trim, and moisture signs

    Painted or decorative trim that is soft, swollen, peeling, or deteriorated can be an early sign that moisture has reached the area. DOE Building America guidance notes that trim deterioration is often an aesthetic problem, but it can also indicate water damage that deserves further review. A damaged sill requires particular care because it helps direct water away from the home. Replacing trim without addressing the source of moisture may leave the larger concern unresolved.

    Look for staining, dampness, recurring condensation near the frame, or deterioration at the sill and casing. Windows are among the building components most likely to allow water entry, and water can move through or around an assembly into the wall cavity before the damage is obvious. That is why a moisture symptom should be evaluated rather than covered with caulk or new trim alone. The DOE decision guidance recommends checking early for water intrusion and other conditions that may require remediation.

    Storm damage and insulated glass

    Hail, windborne debris, and other storm events may leave a cracked pane, damaged screen, bent frame, or broken operating component. Storm damage may be repairable when the affected part is limited, but the entire opening should be checked for hidden damage and water entry. Referred Restoration provides window glass repair and replacement, frame repair, and storm-damage window repair for residential homeowners in Rogers.

    For homeowners weighing a glass-only solution, the guide on how to replace glass in an insulated window explains why sealed units require careful identification, handling, and measurement. If the sash, frame, or casing is damaged or deteriorating, DOE guidance says the window itself may need replacement depending on the extent of the damage. An honest inspection should consider the glass, hardware, frame, sill, moisture path, and surrounding wall before recommending repair or replacement.

    When Is Replacement the Better Option?

    Repair can be the right response when the underlying window unit remains sound. Replacement becomes more reasonable when the damage reaches several parts of the assembly, keeps returning after repairs, or prevents the window from doing its basic jobs. That decision should come from an inspection rather than a blanket rule. The condition of the opening, the extent of deterioration, the window’s fit, and the home’s comfort needs all matter.

    Repeated problems may point to a larger issue

    A single broken pane, worn latch, or isolated piece of trim does not automatically mean the entire window needs to come out. However, repeated failure can change the picture. If the same window continues to admit drafts, moisture, or difficult operation after appropriate repairs. The problem may involve the sash, frame, casing, or the surrounding opening rather than one replaceable component. The U.S. Department of Energy’s window rehabilitation guidance notes that damaged or deteriorating sashes, frames, and casings may indicate that the window itself needs replacement, depending on the extent of the damage. Review the DOE window rehabilitation guidance for the broader repair-versus-replacement decision framework.

    Widespread deterioration deserves careful attention

    Look beyond the glass. Soft or deteriorated wood, a distorted frame, failing casing, or a damaged sill can affect how water moves away from the home. The sill is especially important because it helps direct water outward. Water intrusion around a window can also remain hidden in the wall cavity, so visible interior staining may not show the full extent of the concern. Trim deterioration can sometimes be mainly cosmetic, but it can also be a clue that the surrounding assembly needs closer evaluation. These distinctions are difficult to make reliably from the room side of the window alone.

    Comfort and fit can make replacement worth evaluating

    In Rogers, freezing winters, temperature swings, heavy precipitation, and hail exposure place practical demands on the home’s exterior. A window that is persistently uncomfortable, poorly sealed, hard to operate or no longer suited to its opening may not deliver the protection, durability, comfort, and energy efficiency the home needs. At the same time, total replacement is only one of several ways to improve an existing window’s efficiency. The best recommendation depends on the home’s condition and the specific window, not on a universal upgrade formula.

    Replacement planning also involves more than selecting a new unit. Opening condition, access, finishing, the selected window, and the installation method can affect the work and the final fit. A careful installer should assess those details before recommending a path. For more on opening assessment, flashing, insulation, sealing, and final checks, read this guide to the safe window replacement process. Referred Restoration can evaluate whether repair, partial replacement, or full replacement best fits the window’s condition and the home’s needs.

    How Does a Window Assessment Work in Rogers?

    A professional assessment should give you a clear picture of what is happening at the window and what options fit the home’s condition. Referred Restoration describes its process as a free inspection, a custom solution, and professional installation. The goal is an honest evaluation that identifies problems before they become larger issues, not an automatic recommendation for full replacement.

    1. Inspect the glass, frame, and surrounding opening. The assessment starts with the visible window and the area around it. The technician may look for cracked or broken glass, failed seals, damaged hardware, drafts, moisture, deteriorated trim, and signs of storm impact. The window type matters because a double-hung, casement, sliding, bay, bow, or picture window can have different components and repair considerations. The surrounding sill, casing, and wall area also deserve attention. Water can enter through or around a window assembly and remain hidden in the wall cavity, so staining or soft materials should not be treated as a purely cosmetic concern. A damaged sill is especially important because it helps direct water away from the house.
    2. Confirm measurements and opening condition. If the inspection points toward a replacement or a new glass unit, ask how measurements will be taken. Width, height, depth, and the condition of the opening all affect planning. The technician should explain whether the existing frame can remain, whether surrounding materials need attention, and how the selected unit will fit the opening. Ask what installation method is being considered and how the work will address flashing, insulation, sealing, and final checks. For additional background, see this guide on how to choose a Minnesota window company and compare the questions that matter before work begins.
    3. Receive a custom recommendation. The next step is a recommendation based on the inspection, not a one-size-fits-all answer. Depending on the damage, the appropriate path may involve glass repair or replacement, frame repair, storm-damage work, or complete window replacement. The recommendation should explain the condition found, the reason for the proposed work, and any limitations. Ask how the option supports protection, durability, comfort, and the home’s overall condition. A qualified professional should also explain when repair is reasonable and when deterioration in the sash, frame, casing, or opening makes a different solution more appropriate.
    4. Review installation details before approving the work. Before scheduling, ask about the materials, installation method, warranty terms, permits if applicable, and cleanup plan. Confirm who handles removal of damaged materials and how the finished area will be checked for fit, sealing, and operation. In Rogers, freezing winters, temperature swings, precipitation, and hail make careful installation and water management important. But a contractor should avoid promising an outcome that the inspection cannot support.
    5. Complete the professional installation and final walkthrough. Once the plan is clear, professional installation should follow the agreed scope. The final walkthrough is a chance to confirm that the window opens, closes, locks, and seals as expected, and that the work area has been cleaned. Ask questions while the details are fresh. A clear assessment and documented recommendation make it easier to choose window repair in Rogers with confidence.

    How Should Rogers Homeowners Choose a Repair Path?

    The right window decision starts with the condition of the opening and the job the window needs to perform, not with a one-size-fits-all answer. Rogers homes face freezing winters, temperature swings, heavy precipitation, and hail exposure. So a window that looks acceptable in mild weather may still need closer evaluation before the next season changes. Use the checklist below to organize what you are seeing, then have the damage assessed before choosing repair, glass replacement, frame work, or a full replacement.

    • Start with safety. Cracked or broken glass, loose components, sharp edges, or a window that will not stay in position should be addressed promptly. Keep people away from the damaged area and avoid forcing a stuck or unstable sash. The window type matters because double-hung, casement, sliding, bay, bow, and picture windows have different operating and structural features.
    • Look beyond the visible pane. Ask whether the damage is limited to the glass or whether the sash, frame, casing, sill, or surrounding trim is also affected. Deteriorating sashes, frames, and casings can indicate that the window itself needs replacement, depending on the extent of the damage. A damaged sill deserves particular attention because it helps direct water away from the home.
    • Check for moisture and storm-related clues. Water staining, soft materials, peeling finishes, drafts, or recurring moisture around the opening may point to a problem that extends beyond a simple glass repair. Windows are common entry points for water, and moisture can travel through or around the assembly before the full effect is visible. After hail or severe weather, consider whether nearby siding, trim, roofing, or other exterior components should be evaluated as well.
    • Consider comfort and durability. Notice rooms that feel drafty, unusually cold, hot, or uncomfortable near the window. The decision should account for protection, durability, comfort, energy efficiency, and the home’s overall condition. Repair may suit localized damage, while broader deterioration, repeated failure, or an opening that no longer supports reliable operation may call for a different solution.
    • Confirm the replacement details when replacement is recommended. Accurate width, height, and depth measurements are only part of the preparation. The opening’s condition, access, finishing needs, selected window, and installation method also affect the plan. Review how to measure a replacement window, but do not treat homeowner measurements as a substitute for a professional opening assessment.

    Referred Restoration provides window glass and frame services, complete replacement, and storm-damage window repair in Rogers. Its window repair in Rogers service can connect visible symptoms with the condition of the full opening. An honest inspection should explain what can be repaired, what may need replacement, and which related exterior concerns should be handled at the same time.

    Contact Referred Restoration online to discuss window repair or replacement for your Rogers home.

    Frequently Asked Questions

    Can a cracked window be repaired, or does it need replacement?

    It depends on the location and extent of the damage, the condition of the frame, and the type of window. A professional can assess whether glass-only work, frame repair, or complete replacement is the safer and more durable path. The U.S. Department of Energy provides guidance for evaluating cracked or broken glass and choosing between repair and replacement: its window-glass job aid.

    Can you replace only the glass in an insulated window?

    Often, glass replacement may be possible when the frame and surrounding opening remain in suitable condition. The window’s construction, seal condition, and damage must be checked first. If the frame or other components have broader problems, replacing the complete window may provide a more appropriate solution.

    When is full window replacement a better choice?

    Replacement may make sense when damage extends beyond the glass, the frame or opening has deteriorated. The window repeatedly fails, or the unit no longer provides the comfort and protection your home needs. The decision should also consider the window type, installation conditions, and the home’s overall condition rather than one symptom alone.

    Does Referred Restoration serve homeowners outside Rogers?

    Yes. Referred Restoration is based in Rogers and serves nearby communities including St. Francis and Monticello, with Cottage Grove also included in its broader service area. Window services include glass repair and replacement, frame repair, complete replacement, and storm-damage window work.

    What happens during a window assessment?

    The process begins with a free inspection to understand the damage and the condition of the window and opening. Referred Restoration then recommends a custom solution, followed by professional repair or installation when appropriate. An assessment can help you make an informed decision without assuming that every damaged window needs replacement.

    Ready to Assess Your Windows?

    A window assessment can help clarify whether a focused repair or a broader replacement plan better fits your Rogers home. Referred Restoration can review the window’s condition and discuss a practical next step based on the damage, comfort concerns, and overall opening condition.

    Contact Referred Restoration online to request a window assessment for your Rogers home. You can also call (763) 726-4245.

  • Gutter Installation Rogers: A Minnesota Homeowner Guide

    Gutter Installation Rogers: A Minnesota Homeowner Guide

    Gutters do more than carry rainwater away from a roof. In Rogers, they also need to handle heavy precipitation, snow, freezing temperatures, and runoff that can affect siding, fascia, landscaping, and the ground around your home.

    For homeowners researching gutter installation rogers, the right starting point is an inspection of the roof edge, drainage path, and discharge areas. The final system should fit the property’s rooflines and Minnesota weather conditions.

    The right approach depends on your roofline, existing drainage, exterior materials, and signs of leaks, sagging, or storm damage. A thoughtful plan can also identify related roofing or siding concerns before installation begins. Here is what Rogers homeowners should consider when preparing for a gutter project.

    Contact Referred Restoration online to discuss your Rogers gutter project or call (763) 726-4245.

    Why Gutter Planning Matters for Rogers Homes

    Gutters do more than collect water at the roof edge. They help direct runoff away from siding, soil, walkways, and the foundation. In Rogers, that planning needs to account for changing conditions throughout the year. Rain, snow, freezing temperatures, and storm exposure can all add stress to exterior drainage systems.

    A system that appears adequate during a light rain may still struggle when several weather conditions overlap. Heavy precipitation can expose undersized or poorly directed downspouts. Snow and ice can add weight around the roof edge. Repeated freezing and thawing may make existing leaks, loose sections, or sagging more noticeable. These conditions do not mean every home needs the same gutter solution. They do mean that placement, slope, outlets, and discharge areas deserve attention before installation begins.

    Drainage starts with the whole roof edge

    Effective planning looks beyond the gutter itself. Roof valleys can concentrate runoff in specific areas, while landscaping, grading, decks, and walkways may affect where downspouts should release water. Siding and fascia also need to be considered so the installation supports the surrounding exterior rather than creating a new maintenance concern.

    Homeowners should also consider how the system will be accessed and maintained after installation. Clear routes for seasonal inspection can make it easier to notice debris, loose fasteners, overflow, or damage after a storm. If water continues to collect near the home, the issue may involve more than the gutter channel. A site-specific review can help distinguish a gutter problem from a discharge, grading, roofing, or siding concern.

    Why an assessment is useful

    Planning with an inspection allows the proposed system to reflect the home’s rooflines and drainage needs. Referred Restoration provides Rogers gutter services, including inspections, repairs, seamless gutter installation, downspout work, and gutter guard installation. The process centers on reviewing the property, developing a custom solution, and completing professional installation.

    That approach gives Rogers homeowners a clearer basis for deciding what should be repaired, replaced, or improved. It also keeps the focus on directing water safely through every season, rather than choosing a system based only on appearance.

    Gutter and downspout system on a Minnesota home

    What Should a Gutter Inspection Cover?

    A useful gutter inspection looks beyond the visible troughs. It evaluates how water moves from the roof edge, through the gutter system, and away from the home’s foundation. That broader review helps identify whether the right solution is repair, replacement, improved downspout routing, or coordination with other exterior work.

    Roof edges, fascia, and the existing system

    The inspection should begin where runoff enters the system. The roof edge, drip edge, fascia, and gutter attachment points should be checked for visible damage, separation, sagging, or areas where water may bypass the gutter. Fascia concerns may also affect how securely a new system can be installed.

    The existing gutters should be reviewed for leaks, dents, loose sections, poor alignment, heavy debris, and signs of overflow. A professional can also assess whether the current layout is still appropriate for the roof design and the home’s drainage needs. If storm damage or roof-edge deterioration is present, a roofing professional may need to coordinate the next steps with the gutter work.

    Downspouts and water discharge

    Downspouts are as important as the gutters themselves. An inspection should confirm that outlets are positioned to collect water effectively and that downspouts are connected, open, and securely attached. It should also consider where each downspout releases water. Discharge should move water away from the foundation and avoid directing runoff toward walkways, neighboring areas, or places where it can collect.

    Extensions, splash control, and the condition of the surrounding soil may all affect the final drainage plan. If the yard slopes toward the house or landscaping limits the available discharge path, those conditions should be addressed before installation begins.

    Grading, landscaping, and related exterior needs

    Soil grade, planting beds, mulch, patios, and other landscaping can influence how water leaves the property. The inspection should note obstacles that could interfere with safe access, downspout placement, or future maintenance. It should also identify whether siding, trim, or fascia shows moisture-related concerns. When siding needs to be reviewed alongside the gutter system, Rogers siding contractors can help coordinate that portion of the exterior assessment.

    This inspection-first approach keeps gutter installation focused on the home’s full drainage path, not just the replacement of one visible component.

    Gutter Installation Rogers Homeowners Should Plan For

    Choosing a gutter system is not only a material decision. The right approach should fit the home, the roof edge, the drainage plan, and the conditions the system will face through Minnesota seasons. During an assessment, homeowners can discuss how the gutters should work with existing exterior features and whether related repairs should be addressed before installation.

    Aluminum, steel, and seamless systems each offer a different way to approach the project. The table below provides a starting point for the conversation. It is not a substitute for inspecting the property, because the best selection depends on the home’s existing condition and drainage needs.

    Gutter optionKey characteristicPlanning consideration
    AluminumLightweight and rust-resistantA practical material to discuss when keeping system weight and resistance to rust in view.
    SteelHeavy-duty optionMay be considered when a homeowner is evaluating a sturdier material approach for the home.
    Seamless systemsMinimize leak pointsUseful to consider when reducing the number of joints is an important part of the drainage plan.

    Match the system to the whole drainage plan

    Material selection should happen alongside decisions about gutter runs, outlets, and downspouts. A system can look appropriate on paper but still need a closer review if water is directed toward landscaping, siding, walkways, or the home’s foundation. Roof valleys and sections that collect more runoff also deserve attention during planning.

    Rogers homeowners may also want to consider how the system will be accessed for seasonal care. Gutters should be planned around safe access, nearby landscaping, and features that could make inspection or cleaning more difficult. These practical details can be discussed before work begins, along with whether gutter guards or additional downspout work would support the overall plan.

    Homeowners should also mention any history of leaks, sagging, damage, repeated clogs, or water near the basement or foundation. Those details help guide the assessment and may reveal that a repair, downspout adjustment, or related exterior work belongs in the same plan. If the roof edge or siding needs attention, coordinating the work can help avoid overlooking the places where water moves from one exterior surface to another.

    For a local review of material choices, drainage needs, and installation options, explore Rogers gutter services. Referred Restoration’s process centers on an inspection, a custom solution, and professional installation, so the recommendation can reflect the home rather than a one-size-fits-all package.

    How Does Gutter Installation Work From Start to Finish?

    A well-planned installation is more than attaching a channel along the roof edge. The work should account for how water leaves the roof, where it will discharge, and how the crew can protect the home and surrounding property. A practical installation process usually includes these stages:

    1. Confirm the scope and site conditions. The process begins with an inspection and a clear discussion of the work involved. This may include replacing an existing system, adding downspouts, addressing leaks or sagging, or coordinating gutter work with roofing or siding repairs. The roof edges, fascia, landscaping, driveway, walkways, and areas affected by runoff should all be considered before materials and placement are finalized.
    2. Protect the property and establish safe access. Before installation begins, the work area should be prepared to reduce the risk of damage to siding, plants, trim, pavement, and other nearby surfaces. Safe access to the roof edge is also important, particularly where landscaping, uneven ground, or winter conditions can complicate the work. Clear communication about access points and outdoor items helps keep the project organized.
    3. Plan the runs, slopes, and outlets. Gutter runs should follow the roof edges while directing water toward planned outlets. Valleys, roof sections, corners, and the location of downspouts influence the layout. The discharge direction also matters. When the property layout allows, water should be directed away from vulnerable areas rather than toward a foundation, walkway, or low section of the yard.
    4. Install and secure the gutter sections. The installer positions the gutters and secures them to the appropriate roof-edge structure. Connections, corners, end caps, and outlets need careful attention because loose hardware or poorly aligned joints can contribute to leaks and overflow. The final system should fit the home rather than forcing a standard layout onto different rooflines.
    5. Connect and direct the downspouts. Downspouts carry collected water from the gutters toward the selected discharge points. Their placement should work with the roof layout, siding, landscaping, and surrounding grade. Extensions or other drainage components may be appropriate in some situations, but the right approach depends on the property and the observed flow path.
    6. Inspect the completed work and clean the site. Before the crew leaves, the installation should be reviewed for secure sections, open outlets, connected downspouts, visible gaps, and a clean work area. Where practical, the flow path can be checked to identify obvious overflow or discharge concerns. Removed materials, fasteners, and debris should be collected so the homeowner is not left managing installation waste.

    For homeowners researching Rogers gutter services, asking how the layout, downspouts, and site protection will be handled can make the installation plan easier to understand.

    How Can You Check New Gutters After Installation?

    A careful check after installation helps confirm that water is moving through the system as intended and that the gutters fit the home properly. Walk around the property from ground level and look at the gutter runs, joints, end caps, outlets, and downspouts. The channels should appear securely attached, with no visible sagging, separation, or sections pulling away from the fascia.

    Observe the system during rain

    The most useful test happens during a steady rain. Watch water as it enters the gutters from the roof edge. It should move toward the outlets without spilling over the front edge or collecting in low sections. Pay close attention to roof valleys and areas where several roof planes direct water toward one run. These locations may need particular attention because concentrated flow can expose drainage issues that are not obvious on a dry day.

    Follow each downspout to its discharge point. Water should be directed away from the foundation and should not pool beside the home, flow toward a walkway, or wash out nearby landscaping. If an extension or other drainage adjustment is part of the plan, confirm that it remains in position after the first significant rainfall.

    Review connections and surrounding materials

    Check that downspouts remain connected and that joints are not visibly leaking. Look along the fascia, siding, and foundation for new water marks after rainfall. A small issue is easier to address when it is found early, before repeated moisture affects adjacent materials. If gutter work was coordinated with roof or siding repairs, review those transition areas as well.

    Maintain the system through Minnesota seasons

    Seasonal maintenance should include removing leaves and other debris, checking outlets, and looking for movement after major storms. Before and after winter, inspect for conditions that may affect drainage as snow, ice, and freezing temperatures put additional strain on exterior components. Avoid pulling on gutters or breaking ice loose with tools. If snow or ice buildup, repeated overflow, or new sagging appears, arrange an inspection rather than assuming the system will correct itself.

    For related guidance, review these warning signs your Minnesota gutters need replacement. Prompt attention to leaks, damage, or drainage changes can help determine whether a targeted repair or a broader assessment is appropriate.

    When Should You Schedule Gutter Installation in Rogers?

    Schedule an inspection when your gutters stop moving water reliably or when exterior work creates an opportunity to improve the drainage system. Visible leaks, sagging sections, separated joints, or storm damage are clear reasons to request an assessment. You do not have to wait for a major failure. Repeated clogs, overflow during rain, water collecting near the foundation, or staining along the siding can also indicate that the current layout needs attention.

    Rogers homes face precipitation, snow, freezing temperatures, and changing weather conditions that can expose weak points over time. A professional inspection can look beyond the gutter trough itself, including the roof edge, fascia, downspouts, discharge points, and nearby landscaping. The goal is to identify whether a targeted repair, a drainage adjustment, or a new system is the most appropriate response.

    Repair or replacement: what should you consider?

    Repair may make sense when the underlying system is generally sound and the issue is limited to a loose section, damaged outlet, leaking joint, or poorly secured downspout. Replacement deserves consideration when damage is widespread, sections repeatedly fail, the system cannot handle the home’s drainage needs, or the layout consistently directs water toward vulnerable areas. An inspection helps separate an isolated defect from a pattern that will continue to require attention.

    Timing also matters when gutters are part of a larger exterior project. If you are planning roofing work, roof-edge repairs, siding work, or fascia repairs, coordinate the projects before installation begins. That makes it easier to confirm where gutters and downspouts should sit and reduces the chance of disturbing newly completed work. Referred Restoration can assess related exterior needs as part of its inspection, custom-solution, and professional-installation process.

    For homeowners comparing options, Rogers gutter services can include inspections, repairs, seamless gutter installation, downspout work, and gutter guards. Request an assessment after a storm, before planned exterior renovations, or whenever you notice a recurring drainage problem.

    A site-specific inspection can help clarify whether your Rogers home needs repair, replacement, improved downspout planning, or a new seamless system. Referred Restoration can review the current setup and discuss a practical next step based on your home’s drainage needs.

    Contact Referred Restoration online or call (763) 726-4245 to discuss your gutters and schedule an inspection.

    Frequently Asked Questions

    What should a gutter inspection cover?

    A thorough inspection should review the roof edge, fascia, existing gutters, joints, outlets, downspouts, and discharge areas. It should also look for leaks, sagging, damage, repeated clogs, and related roofing or siding concerns before a system is selected.

    Are seamless gutters a good choice for a Rogers home?

    Seamless gutters can be a practical option when minimizing leak points is a priority. The right system still depends on the roof layout, drainage needs, material selection, and the condition of the home’s fascia and exterior.

    How should downspouts be planned during installation?

    Downspouts should be positioned to collect water from the planned gutter runs and direct it away from the foundation. Planning should account for roof valleys, landscaping, grading, siding, walkways, and where discharge can flow safely during rain and snowmelt.

    How do I maintain new gutters after installation?

    Check gutters and downspouts seasonally and after major storms for debris, overflow, loose sections, damaged outlets, or water collecting near the home. Watching the system during rainfall can reveal drainage issues that are not obvious on a dry day.

    Should I repair my gutters or replace them?

    Repair may be appropriate for isolated leaks, loose sections, or limited damage. Replacement is worth discussing when problems are widespread, sagging or clogs keep returning, or the system no longer manages water effectively. An inspection can clarify the practical next step.

    Ready to Plan Your Gutter Project?

    Contact Referred Restoration online or call (763) 726-4245 to discuss your gutters and schedule an inspection.

  • Siding Repair Farmington MN: Signs Your Home Needs Help

    Siding Repair Farmington MN: Signs Your Home Needs Help

    Minnesota home with a damaged siding section

    Cracks, loose panels, buckling, holes, or water-related staining can mean your home needs closer attention. They do not automatically mean full siding replacement. For homeowners researching siding repair farmington mn, the next step is an inspection. It should consider the damage location, its extent, the siding material, and any underlying conditions.

    Contact Referred Restoration online to request a free siding inspection.

    Farmington homes face seasonal temperature swings, precipitation, snow, and occasional hail. These conditions can reveal exterior wear over time. An assessment can separate a localized repair opportunity from a broader replacement question. It can also help protect the home’s appearance and water-shedding function. Start by looking for visible warning signs.

    What Are the Signs You May Need Siding Repair in Farmington, MN?

    Siding damage is not always dramatic. A careful look from the ground can help a Farmington homeowner notice changes before they become a larger exterior concern. Walk around the home and look for cracked, loose, or missing sections. Check corners, wall transitions, and areas exposed to prevailing weather. A panel that has shifted, separated, or pulled away may not provide the same protection from precipitation.

    Also watch for buckling, warping, punctures, and holes. These changes can result from impact, movement, moisture exposure, or other conditions that require closer evaluation. Staining deserves attention as well. Dark marks, persistent discoloration, soft-looking areas, or sections that appear to be deteriorating may indicate water impact. You do not need to identify the cause from the yard. Document what you can see and note where it occurs.

    Look for clues inside the home

    Exterior siding problems can sometimes have indoor clues. Check the rooms directly behind visibly damaged areas for damp smells, discolored drywall, peeling paint, or moisture marks around windows and walls. These signs do not prove that the siding is the source, but they are worth mentioning during an inspection.

    Avoid opening the wall or pulling at damaged siding yourself. Disturbing the area can make the condition harder to assess and may create additional exposure.

    Consider Farmington’s weather exposure

    Minnesota homes experience temperature swings, precipitation, snow, and hail. Repeated exposure can reveal weaknesses or worsen existing wear. This is especially true where water can collect or enter through a damaged section. After a significant weather event, compare new marks with earlier photos if you have them. A changed appearance, a newly loose section, or water-related staining is a reasonable reason to request an assessment.

    A siding inspection is designed to identify damage, rot, or other inefficiencies. It provides an honest assessment. Referred Restoration documents repair services for damaged or cracked siding. The goal is to help restore the home’s appearance and protection. Learn more about its siding inspections and repair services. The recommendation may involve a localized repair or a broader review.

    Can You Repair Damaged Siding Instead of Replacing It?

    Sometimes a siding problem is limited to one damaged or cracked section. A focused repair may be worth assessing. It may help restore the home’s appearance and protection from water when the surrounding siding is stable. The underlying wall condition matters too. Not every visible defect can be handled with a small patch. The right recommendation depends on an inspection of the damaged area and its surroundings.

    Damage extent is the first consideration. A single impact point, isolated crack, or limited section may be approached differently from widespread buckling or multiple broken areas. Repeated problems in the same location also deserve attention. They may indicate that the visible siding is not the only issue. Replacing one section without addressing the underlying condition may not provide a lasting solution.

    Hidden moisture can change the repair decision as well. Water may enter behind damaged siding where openings or loose sections expose the wall assembly. Staining, soft areas, musty odors, or deterioration near the affected location should be reported. These observations do not prove the full scope of damage. They are useful clues that the inspection should look beyond the surface.

    Material matching is another practical factor. Even when a replacement section is available, an exact match may be difficult. Existing siding may have weathered, faded, or been discontinued. Differences in profile, finish, texture, or color can make a localized repair more noticeable. A professional can evaluate whether a suitable match is realistic. They can explain the available paths without treating a full replacement as automatic.

    SituationWhat it may suggestWhat to ask during an assessment
    One defined cracked or punctured sectionA focused repair may be worth evaluatingCan the section be matched and repaired without disturbing sound siding?
    Several loose, buckled, or missing areasThe damage may be broader than one repairAre adjacent sections or underlying conditions involved?
    Recurring moisture or deteriorationThe visible siding may not be the only concernWhat is causing the repeated problem, and what scope addresses it?

    Broader damage or conditions that do not support a localized repair may lead to a replacement assessment. Referred Restoration’s documented siding scope includes repair, complete replacement, and new installation. Review broader Minnesota siding repair decisions for general context. This Farmington-focused article centers on the location, extent, and cause of damage.

    An inspection helps separate a repair candidate from a larger siding concern. The goal is an honest assessment and a custom recommendation, not a predetermined outcome.

    How Does Minnesota Weather Affect Siding Damage?

    Minnesota weather can expose siding wear gradually, then make the problem easier to see after a major change in conditions. In Farmington, homeowners may notice new cracks, loose sections, buckling, or gaps after repeated temperature swings. Materials expand and contract as temperatures change, and existing weaknesses can become more noticeable over time. That does not automatically mean the entire exterior needs replacement, but it is a reason to document what you see and consider an assessment.

    Snow and precipitation create another useful observation point. Pay attention to areas that stay damp, collect runoff, or show discoloration after melting snow or rain. Water marks, soft-looking trim, or deterioration near joints and penetrations may point to more than a surface appearance issue. Siding itself may be affected by nearby drainage conditions, so note whether gutters, downspouts, roof edges, and wall sections appear to be directing water as expected.

    Wind and hail can leave different clues. Wind may loosen panels, disturb trim, or expose gaps, while hail can produce localized marks or damage that is easier to identify from certain angles and in strong daylight. Look from a safe ground-level position, and avoid pulling on loose material or attempting a temporary repair that could hide the original condition. Photos taken before conditions change can help an inspector compare affected areas.

    Seasonal observations are valuable because siding can look different in dry weather than after snowmelt, rain, or a storm. Keep notes about when a change appeared. Note whether it returns after wet or windy conditions. For broader guidance about materials, moisture, and storm exposure, review Minnesota siding repair decisions. This article stays focused on recognizing conditions at a Farmington home. A local inspection may clarify the next step.

    What Should You Do Before a Siding Inspection?

    A little preparation can make a siding inspection more useful without altering the damaged area. Document what you noticed and identify related clues inside and outside the home. This gives the inspector useful context for an honest assessment. Before the appointment, work through these steps:

    1. Photograph the area from ground level. Take clear photos of cracked, loose, missing, buckled, or discolored siding from several angles. Include a wider view showing where the area sits on the home. Do not climb ladders or remove panels to get a closer image.
    2. Write down when you first noticed the issue. Note whether the change appeared after a storm, heavy precipitation, snow, or a temperature swing. If you are unsure, say so. A timeline can help distinguish a recent observation from a longer-standing concern.
    3. Check nearby interior areas. Look for signs on the other side of the exterior wall, such as staining, dampness, peeling paint, or an unusual odor. Do not open walls or attempt to trace moisture. Record what you can safely observe and where it appears.
    4. Keep gutters and downspouts clear of visual obstructions. Move loose items away from the siding. Make sure the inspection area is accessible from the ground. Do not dismantle drainage components or change the exterior before the assessment.
    5. Avoid disturbing damaged material. Do not pull, cut, nail, seal, or patch cracked or loose siding before it is reviewed. Altering the area can remove useful evidence and may create additional damage.
    6. Prepare your questions. Ask what the inspection found and whether the affected area appears localized or broader. Ask what conditions should be monitored. Also ask whether repair, replacement, or additional evaluation is recommended. A professional assessment should lead to a custom solution.

    What Happens During a Siding Repair Assessment?

    A siding assessment gives you a clearer basis for deciding what your Farmington home needs. Referred Restoration begins with a free inspection of the visible siding and nearby areas. The goal is not to assume that every damaged panel needs the same response. The inspection identifies the location and extent of the problem. It also considers whether underlying conditions may affect the repair.

    The inspection typically starts with a review of the sections that prompted your call. The contractor may look for damaged panels, signs of rot-like deterioration, and conditions that could affect exterior protection. You can discuss changes after a storm, recurring moisture, or damage that has gradually become more visible. Sharing when the issue appeared can provide useful context. You do not need to diagnose the cause yourself.

    Looking beyond the visible section

    A localized problem may be a repair candidate. Broader damage or unfavorable underlying conditions may point toward replacement or new installation. The recommendation can depend on the damaged area, the condition beneath it, the extent of wear, and whether a durable repair is practical. A siding repair assessment should be more than a quick glance at one panel. An honest review helps prevent an unnecessary repair when the surrounding system needs more attention. It can also avoid a broader project when a focused repair is appropriate.

    From assessment to a custom solution

    After reviewing the findings, Referred Restoration explains the available path and develops a custom solution. The documented scope includes repairs for damaged or cracked siding, complete replacement, and new siding installation. Professional installation is part of the service pathway when installation work is needed.

    For Farmington homeowners, the next step is to confirm service availability and describe the areas of concern. You can contact Referred Restoration online to request an assessment. A straightforward inspection gives you information to weigh repair, replacement, or installation after the condition is understood.

    When Is Siding Replacement a Better Path?

    A localized repair can make sense when damage is limited to a small, defined area. Replacement deserves a closer look when the visible problem is part of a larger pattern. An inspection can clarify that pattern before anyone recommends a scope of work.

    Look for damage that extends beyond one section

    Widespread cracking, loose or missing panels, buckling, or deterioration around multiple openings may indicate that a small patch will not address broader needs. Extensive rot-like deterioration calls for a careful review of the siding and conditions behind it. These observations are reasons to investigate. They are not automatic proof that the entire exterior must be replaced.

    Recurring water entry deserves a closer assessment

    If water marks, damp areas, or related damage keep returning after a localized repair, the source may extend beyond the visible siding. Review adjacent sections, transitions, and underlying conditions. A professional can help distinguish an isolated repair issue from damage that needs a broader solution. Minnesota’s precipitation, snowfall, hail, and seasonal temperature swings can reveal wear that is easy to miss during a quick visual check.

    Matching and material age can affect the recommendation

    Older siding may be difficult to match when a replacement panel, trim profile, or finish is no longer readily available. A mismatch does not automatically make full replacement necessary, but it should be part of the conversation. The same is true when siding has aged across much of the home and several areas show similar deterioration. The assessment should consider the material, location, extent of damage, and surrounding conditions.

    Storm impact is another signal to document, especially when damage appears across multiple elevations. Referred Restoration’s documented siding scope includes complete replacement and new installation in addition to repairs for damaged or cracked siding. The service pathway is a free inspection, an honest assessment, a custom solution, and professional installation when that scope is appropriate.

    Contact Referred Restoration online to discuss siding damage and request an assessment. Call (763) 726-4245.

    Frequently Asked Questions

    What are the most common signs that siding needs attention?

    Look for cracked, loose, missing, buckled, or punctured sections, along with peeling or deteriorated areas. Water marks or soft spots indoors near exterior walls can also justify an inspection. These signs do not confirm the full scope of damage, so an assessment is the best way to determine what needs attention.

    Can a damaged section be repaired instead of replacing all the siding?

    Sometimes. A localized repair may be appropriate when the damage is limited and a suitable match can be made. Replacement may be considered when damage is widespread, moisture has affected underlying areas, or repeated problems make a small repair less practical. The recommendation should follow an inspection of the material and surrounding conditions.

    Does Referred Restoration provide siding repair in Farmington, MN?

    Referred Restoration is based in Rogers and serves surrounding Minnesota communities. Farmington homeowners should contact the team to confirm current service availability and discuss the home’s location and siding concerns.

    What should I do after a storm damages my siding?

    From a safe ground-level position, document visible damage and note when it appeared. Avoid pulling off loose material or making temporary changes. A siding inspection can help distinguish storm-related damage from older wear. It can also identify whether repair or replacement assessment is appropriate.

    How should I prepare for a siding inspection?

    Take clear photos from the ground and note affected areas. Check nearby interior walls for related marks or moisture. Keep gutters and downspouts clear if they contribute to water contact. Do not disturb damaged siding. Bring your questions so the inspection can lead to an honest assessment and custom solution.

    Ready to Discuss Siding Damage?

    An inspection can clarify whether the visible issue calls for a focused repair or a broader siding plan. Referred Restoration can review your Farmington-area home’s condition. The team can explain the next practical step with an honest assessment and custom solution.

    Contact Referred Restoration online to request a free siding inspection.

  • How to Replace Glass in an Insulated Window Safely

    How to Replace Glass in an Insulated Window Safely

    Learning how to replace glass in an insulated window starts with recognizing that the glass is usually a sealed insulated glass unit, not a loose pane that can be cut and dropped into place. The unit, sash, frame, glazing method, safety-glass requirements, and the condition of the opening all affect whether a glass-only repair is appropriate. Minnesota homeowners should also take extra care around broken glass, cold weather, and moisture that may have reached the frame.

    Contact Referred Restoration online or call (763) 726-4245 to request a window inspection.

    Window professional safely handling an insulated glass unit

    Short answer: To replace glass in an insulated window safely, secure the area, identify the removable sash and sealed unit, measure the replacement assembly precisely, confirm the correct safety-glass and energy specifications, and install it with the right setting and sealing materials. Stop and call a professional if the glass is broken, the frame is damaged, the window is elevated, or the unit cannot be identified with confidence.

    What is glass in an insulated window?

    Glass in an insulated window is commonly part of an insulated glass unit, or IGU. An IGU joins two or more panes around a sealed airspace, often with a spacer and desiccant. The complete assembly is built to fit the sash and support the window’s weather and thermal performance. Replacing only one loose pane is generally not the same job as replacing the sealed unit.

    That distinction matters when a window is foggy, cracked, or no longer comfortable near the glass. A failed seal can allow moisture into the space between panes. A damaged pane can compromise the sealed assembly. In either case, the practical repair may be a replacement IGU that matches the sash rather than a piece of single-pane glass.

    For background on trapped moisture and failed seals, see Referred Restoration’s guide to window seal failure and foggy glass. That guide covers diagnosis. This article focuses on the safe replacement process and the limits of a glass-only repair.

    When is glass-only replacement the right option?

    Glass-only replacement can make sense when the sash and frame are sound, the opening is not showing ongoing moisture damage, and the replacement IGU can be matched to the original assembly. It is less suitable when the frame is warped, rotted, leaking, difficult to operate, or unable to hold the replacement unit securely.

    What you observePossible next stepWhy an inspection matters
    Fog or droplets between panesReplace the failed insulated glass unitThe seal may have failed while the frame remains usable.
    One cracked pane with a sound sashAssess for a matching replacement IGUThe replacement must match thickness, dimensions, coatings, and safety requirements.
    Soft, stained, or deteriorated frameConsider a broader window repair or replacementA new glass unit will not correct damaged framing or a leaking opening.
    Window will not open, close, or lockInspect the sash, hardware, and frame togetherHardware or alignment problems may make a glass-only repair incomplete.
    Breakage after a stormSecure the opening and arrange an assessmentWind, hail, and surrounding exterior damage may affect more than the glass.

    The U.S. Department of Energy’s Window Glass Replacement job aid emphasizes correct sizing, suitable safety glass, durable fastening, a clean surface, and a complete seal. Those checks are useful even when a homeowner is deciding whether to proceed, because they show why this work is more than inserting a new pane.

    How do you replace glass in an insulated window safely?

    Replacing an insulated glass unit safely requires controlled removal, accurate identification, and a stable installation. The exact sequence varies by window manufacturer and glazing system, so use these steps as a planning guide rather than a substitute for the manufacturer’s instructions or a qualified assessment.

    1. Make the area safe. Keep children and pets away. Wear eye protection, sturdy shoes, and cut-resistant gloves. Do not press on cracked glass, pick up fragments with bare hands, or work from a roof, ladder, or upper-story exterior position. If the opening is exposed, use a temporary barrier only if it can be secured without contacting unstable glass.
    2. Identify the sash and glazing system. Determine whether the sash can be removed safely and whether the IGU is held by interior stops, exterior stops, a dry-glaze gasket, or another system. Take photos of the stops, setting blocks, spacer, and orientation before removal. Do not pry aggressively against a frame that may crack or deform.
    3. Inspect the frame before ordering. Look for swelling, soft wood, corrosion, distortion, staining, failed corners, or evidence of water entry. Check whether the sash operates and locks correctly. If the frame cannot support a replacement unit or the opening has hidden damage, a full window solution may be more appropriate.
    4. Measure the existing unit carefully. Record the visible width and height, overall IGU thickness, spacer type, pane count, low-emissivity coating if known, safety-glass markings, and any manufacturer information. Measurements should be checked at multiple points. Do not order from one rough measurement or assume a replacement unit is interchangeable with a different sash.
    5. Order a matched insulated glass unit. The replacement should fit the sash and meet the original or approved performance and safety specifications. Confirm whether the glass must be tempered or laminated for its location. A glass supplier or window professional can verify the specifications before fabrication.
    6. Remove the damaged unit with support. A sealed glass unit can be heavy and awkward even when it is not broken. Support the sash and unit as stops or glazing materials are removed. If the glass is cracked, the seal is failing, or the unit will not release without force, stop rather than turning a controlled repair into a larger breakage event.
    7. Prepare the seat and setting points. Remove loose debris and old material without damaging the sash. The support points need to be clean and correctly positioned. Do not use random shims, excessive force, or expanding foam as a substitute for the window’s intended glazing system.
    8. Set, secure, and seal the replacement. Place the IGU on the correct setting blocks, center it without stressing the edges, reinstall the stops or gasket, and use only compatible glazing or sealant materials. The edge seal should be continuous where the design requires it. The U.S. Department of Energy checklist calls for durable fastening and a seal that limits air and water movement.
    9. Check the finished window. Confirm that the glass is intact, the sash is square enough to operate, locks engage, stops are seated, the perimeter is sealed, and no part of the frame is under abnormal pressure. Look for air movement or water-entry paths without testing an unfinished seal during bad weather.

    A homeowner can learn the sequence without taking on every step. If safe access, accurate measurements, or the correct glazing materials are uncertain, an inspection is the safer next action.

    What should you measure before ordering replacement glass?

    Before ordering an insulated glass unit, record the opening and the assembly details that control fit. A small measurement error can leave the unit too tight, unsupported, or unable to seal correctly. The following checklist helps organize information for a professional or glass supplier:

    • Visible glass width and height, measured at more than one point
    • Overall IGU thickness, measured only when it can be done safely
    • Number of panes and approximate airspace or spacer configuration
    • Frame and sash material, such as vinyl, wood, or metal
    • Glazing method, stops, gaskets, and visible setting blocks
    • Tempered or laminated safety-glass markings, if present
    • Low-emissivity coating, tint, grille, or pattern that must be matched
    • Manufacturer label, sash number, or other identifying information
    • Signs of moisture, rot, corrosion, movement, or prior repairs

    Do not remove trim or an intact unit just to obtain a measurement if the process would expose you to fall risk or unstable glass. Referred Restoration’s guide on measuring replacement windows explains why several measurements and an opening assessment matter. For an insulated glass replacement, the unit thickness and glazing details are just as important as the visible dimensions.

    Should you replace only the glass or the whole window?

    Replace only the insulated glass unit when the frame and sash are sound, the window operates correctly, and the problem is isolated to the sealed glass assembly. Consider a full window replacement when the frame is damaged, the opening leaks, the sash is badly distorted, hardware problems persist, or the window’s design no longer serves the home.

    Glass-only work can preserve a usable frame and reduce disruption. A full replacement can provide access to the opening and surrounding weather-management details that remain hidden when the old frame stays in place. The right choice depends on the condition of the complete window system, not just whether one pane looks damaged.

    Referred Restoration’s Minnesota home window replacement guide covers the broader decision. Its focus is replacement planning, while this guide addresses the narrower question of safely replacing an insulated glass unit.

    When should Minnesota homeowners call a professional?

    Call a qualified window professional before removing the glass when the opening is elevated, the unit is large or heavy, the frame shows moisture damage, the sash is difficult to remove, or the glass has broken into unstable pieces. Professional help is also appropriate when the replacement specification is unclear or when the window is part of a storm-damaged exterior.

    Older homes deserve additional caution. The Department of Energy job aid notes that lead may be present in pre-1978 windows unless testing shows otherwise. Do not sand, scrape, or disturb old painted components casually. Local safety-glass requirements can also depend on the window’s location and configuration, so a replacement should match applicable requirements rather than simply match appearance.

    Minnesota’s freeze-thaw cycles make complete sealing and water management especially important. A replacement that fits the visible opening but leaves a failed perimeter seal can invite drafts or moisture. Referred Restoration serves homeowners in Rogers, Cottage Grove, St. Francis, Monticello, and nearby communities with window repair and replacement pathways. A local inspection can help determine whether the safest answer is glass-only work, frame repair, or a broader installation.

    For a broader look at professional sequencing, see what residential window installation involves. It explains how measurement, opening condition, sealing, and final operation checks fit together.

    Contact Referred Restoration online or call (763) 726-4245 to discuss a window glass repair or replacement assessment.

    Frequently Asked Questions

    How do I know if my window has insulated glass?

    Insulated glass usually has two or more panes separated by a visible spacer and sealed around the edge. Fog, haze, or droplets trapped between panes indicate that the sealed unit may have failed. A professional can confirm the construction and identify the replacement assembly without relying on appearance alone.

    Can you replace glass without replacing the frame?

    Yes, an insulated glass unit can often be replaced without replacing a sound frame. The sash must be able to hold the correctly sized and specified unit, and the glazing system must be intact. Frame damage, leaks, distortion, or persistent operation problems may make a broader window repair more appropriate.

    Can a thermal-pane window be repaired?

    A failed thermal-pane seal is commonly addressed by replacing the insulated glass unit rather than trying to restore the original seal in place. If the frame and sash are sound, glass-only replacement may be practical. If the frame is damaged or the window does not operate properly, the repair scope may need to expand.

    Can I replace insulated window glass myself?

    Some homeowners can safely plan a simple sash repair, but insulated glass replacement can involve heavy units, sharp edges, fragile stops, precise measurements, and safety-glass requirements. Do not attempt it from a roof or ladder, with unstable broken glass, or when the glazing method is unclear. An inspection is the safer choice in those conditions.

    Does Minnesota weather affect insulated glass replacement?

    Yes. Cold temperatures, snow, moisture, and repeated freeze-thaw movement make correct fit and perimeter sealing important. A replacement unit should match the sash and be installed with compatible materials so the window can continue managing air and water through Minnesota’s changing seasons.

    Contact Referred Restoration online or call (763) 726-4245 to request a window inspection in Rogers or a nearby Minnesota community.

  • How Many Bundles of Shingles for 90sq ft?

    How Many Bundles of Shingles for 90sq ft?

    When a roofing project covers only 90 square feet, the first estimate looks simple. That area is just under one roofing square, but the bundle count still depends on the shingles you choose and how the roof is laid out.

    Minnesota roofer measuring a small asphalt shingle roof section

    For how many bundles of shingles for 90sq ft, the usual baseline is about 2.7 standard asphalt-shingle bundle equivalents. That means 3 bundles when the product label supports roughly 33.3 square feet per bundle. Treat that as a starting point, not a final order.

    Contact Referred Restoration online

    Before buying materials, confirm the manufacturer’s coverage information and consider cuts, valleys, hips, penetrations, pitch, and any damaged areas. A small roof section can need more careful planning than the square-foot number suggests. The calculation below shows how to check the baseline, then adjust it responsibly for the roof itself.

    How do you estimate how many bundles of shingles for 90 sq ft?

    For a simple 90-square-foot area, the baseline answer is about 2.7 standard-bundle equivalents. Because shingles are sold in whole bundles, that usually rounds to three bundles. But only when the product label confirms similar coverage and the 90 square feet represents the actual shingle area.

    Here is the calculation:

    90 square feet divided by approximately 33.3 square feet per standard asphalt shingle bundle equals about 2.7 bundles. A roofing square is 100 square feet, so the same calculation can be shown as 90 divided by 100, multiplied by three bundles per square. Both methods produce the same planning figure. The three-bundle result is a baseline, not a universal order quantity.

    Why three bundles may not be the final answer

    Bundle coverage is not identical for every shingle product. Shingle style, dimensions, and the manufacturer’s packaging can change how much roof area one bundle covers. Before purchasing, read the product label or manufacturer specifications and use its stated coverage. If that coverage differs from 33.3 square feet, recalculate rather than relying on the standard shortcut.

    The calculation also assumes that 90 square feet is a flat, measured shingle area. It does not automatically represent the amount of material needed for a sloped roof section. Roof measurement uses length, width, and pitch. A sloped surface can contain more actual roofing area than its footprint, and the shape of the roof can create additional cuts. Valleys, hips, penetrations, and other details may also affect the material allowance.

    That distinction matters even for a small section. If 90 square feet is the footprint of a roof plane rather than its measured surface area, do not treat three bundles as a complete order. Confirm the pitch and measure the plane itself first. For a simple area calculation, three bundles may be a reasonable starting point when the label supports it. For an actual repair or replacement, the complete measurement should account for the roof’s geometry, product coverage, and installation details.

    For a broader explanation of how shingle bundles are measured, see the related guide on this site. This 90-square-foot example is narrower: it shows the arithmetic, then identifies the assumptions that must be checked before turning a baseline into a roofing-material order.

    How do you calculate shingle bundles from roof area?

    A reliable bundle estimate starts with roof area, not the number of shingles visible from the ground. Roofing professionals use a square as a standard area unit. One roofing square equals 100 square feet. From there, convert the measured roof area into squares, check the coverage listed for the specific shingle product, and then account for the roof’s layout.

    Use this repeatable process for a small, simple roof section or as a starting point for a larger estimate:

    1. Measure the roof footprint. Measure each roof plane’s length and width at the base, then multiply length by width to find its footprint area. If the roof has multiple planes, calculate each plane separately and add the results. A roof measurement also needs pitch, which describes how steeply the roof rises. Avoid treating a building’s floor area as the roof area, because overhangs and separate roof planes can change the measurement. The basic length-and-width method is a useful starting point for planning.
    2. Convert square feet to roofing squares. Divide the roof area in square feet by 100. For example, 90 square feet divided by 100 equals 0.9 roofing squares. This conversion keeps the calculation consistent with roofing material terminology. Do not round this result automatically. Keep the decimal until you have checked the product’s coverage and the roof conditions.
    3. Apply the product’s bundle coverage. Use the manufacturer label or product data to confirm how many square feet one bundle covers. A commonly used shortcut is three bundles per roofing square, based on roughly 33.3 square feet per bundle, but coverage is not universal. Three-tab, architectural, and specialty products can use different packaging and coverage. For the 90-square-foot example, the shortcut produces 0.9 x 3 = 2.7 bundles before waste, but the label takes priority. For more background, see our guide to how shingle bundles are measured.
    4. Adjust for pitch, layout, and waste, then round up. Roof pitch changes the sloped surface area, so a steep roof may cover more actual surface than its footprint suggests. Valleys, hips, dormers, penetrations, and cut pieces can also affect the usable coverage. Apply those adjustments only after measuring the roof and reviewing the product instructions. Then round the final bundle quantity up to a whole bundle. Rounding the initial 90-square-foot result to three bundles may be reasonable for a simple section with a product label that supports the shortcut. But it is not a universal order quantity for every roof.

    For a steep, irregular, damaged, or multi-plane roof, a professional measurement is safer and more dependable than relying on a footprint alone. The calculation gives you a useful baseline; the roof’s actual geometry and the selected product determine the final material list.

    Does roof pitch change the number of bundles?

    Yes. A footprint measures the roof’s horizontal outline, but shingles cover the sloped surfaces. As pitch increases, each roof plane covers more actual surface area than the same-length-and-width footprint suggests. That extra surface area can change the number of bundles needed before you account for cuts, valleys, hips, or other details.

    Pitch is commonly written as a ratio such as 4:12. The first number describes how many inches the roof rises for every 12 inches of horizontal run. In a quantity estimate, the pitch becomes a multiplier applied to the footprint. A 4:12 roof uses an illustrative multiplier of about 1.05, while a 12:12 roof uses about 1.42. Those examples show why two roofs with the same footprint can require different amounts of shingle material. Sources differ slightly in how they present rounded multipliers, so treat these as illustrations, not a universal ordering rule.

    For example, suppose a simple footprint is 90 square feet. Applying a 1.05 illustration produces about 94.5 square feet of sloped surface before any waste or rounding. Applying a 1.42 illustration produces about 127.8 square feet. The underlying footprint did not change, but the surface that must receive shingles did. The final bundle count would then depend on the product’s stated coverage and the roof’s layout.

    That is also why a footprint alone is not enough for a reliable answer to how many bundles of shingles for 90sq ft. A useful measurement includes the roof length, width, and pitch. A calculator may accept pitch in the x:12 format and use a pitch multiplier to estimate the sloped area. When the result is converted into roofing squares, remember that one square represents 100 square feet, and partial squares may need to be rounded up.

    Product selection matters too. Bundle coverage is not universal, and the label for the exact shingle should control the calculation. Architectural and specialty products can have different dimensions, thicknesses, and bundle contents. Confirm the manufacturer’s coverage before translating the adjusted area into bundles.

    For more context on how pitch fits into the roof’s layers and drainage design, see our guide to residential roofing systems.

    Do not climb onto a roof to check its pitch or measure a small section. From the ground, you can gather exterior dimensions and look for the roof plan or prior construction records. But a professional can verify the pitch and account for planes, penetrations, and transitions safely. The exact pitch, product label, and roof shape should be confirmed before treating any bundle count as final.

    How much extra should you allow for cuts and roof waste?

    The coverage math for a small roof area is only a starting point. Shingles are installed in courses, cut around edges and roof details, and fitted across separate planes. Some pieces cannot be reused after they are trimmed. That is why the amount needed for a real roof is usually higher than the bare square-foot calculation.

    Published roofing guidance commonly places the waste allowance in a broad range of 5% to 15%, depending on the roof’s complexity. Treat that range as a planning reference, not a universal order quantity. The correct allowance depends on the roof layout, the shingle product, and how the installer handles cuts.

    Simple gable roofs usually create fewer cuts

    A simple gable roof has two primary slopes and relatively straight edges. With fewer changes in direction, there are generally fewer offcuts. One published planning breakdown places simple gable roofs at about 5% to 7% waste. That does not mean every gable roof should receive the same allowance, but it illustrates why a straightforward layout may stay near the lower end of the range.

    Hip roofs require more fitting around the edges

    A hip roof slopes on all sides rather than ending in two gable walls. Shingles must be fitted along more angled edges and brought together at additional ridges and hips. The same planning guidance describes hip roofs in the approximate 7% to 10% range. The actual quantity still needs to follow the measured roof area and the product label, because bundle coverage is not identical for every shingle.

    Valleys, dormers, and penetrations increase the variables

    Roofs with valleys, dormers, unusual shapes, or many penetrations can require more cutting and fitting. A planning range of roughly 10% to 15% is often used for complex layouts. Chimneys, plumbing vents, skylights, sidewalls, and other penetrations also interrupt the shingle pattern. They can create additional offcuts and require careful detailing around flashing. A roof with many valleys, hips, and penetrations may exceed the commonly cited range, so a generic percentage should not replace a measurement.

    Also separate the field-shingle calculation from other roofing materials. Starter shingles and ridge caps are distinct scope items, not simply extra field shingles added to the same number. Underlayment, fasteners, flashing, and sealants may also be needed depending on the work. Confirm each product’s coverage and packaging before ordering. For a damaged, steep, or irregular roof, a professional measurement is the safer way to turn a planning range into a complete material list.

    What else should be included in a shingle-material estimate?

    A bundle calculation covers only the main shingle field. A useful estimate also checks the product packaging and the supporting materials needed to complete the roof. That distinction matters even for a small 90-square-foot area. Coverage is not universal, so confirm the manufacturer data before treating a bundle estimate as an order quantity. A standard asphalt bundle often covers about 33.3 square feet, but the product type and packaging can change the result.

    Estimate areaWhat to verifyWhy it matters
    Shingle field baselineRoof area, pitch, layout, and waste from cutsThe visible field is only the starting point. Valleys, hips, dormers, and penetrations can change the amount needed.
    Product packaging checkCoverage per bundle and shingle typeThree-tab shingles are commonly around 12 by 36 inches, while architectural shingles are often about 14 by 39 inches. Bundle contents and coverage can differ.
    Supporting materialsUnderlayment, fasteners, sealant, starter shingles, and ridge capsThese items protect, secure, and finish the installation. They should be included in the scope rather than treated as optional extras.

    Three-tab and architectural coverage are not interchangeable

    Three-tab shingles are commonly packaged at roughly three bundles per roofing square, or 100 square feet. Architectural shingles may have a different size, thickness, or bundle count. Specialty products can require still more bundles per square. Do not infer coverage from the number of pieces in a bundle alone. Check the product label or technical data for the exact coverage, then apply the roof’s measured area and appropriate waste allowance.

    Include the materials beneath and around the shingles

    Underlayment should be planned for the roof area, while fasteners and sealant support installation details and weather protection. Starter shingles cover the first course, and ridge caps finish the roof’s peak. Their coverage is separate from the field-shingle calculation, so simply multiplying 90 square feet by a bundle shortcut will not produce a complete materials list.

    For a simple calculation, the product label may be enough. If the roof has multiple planes, steep sections, storm damage, or uncertain edges and penetrations, a professional measurement is safer. Referred Restoration provides free inspections and honest assessments for Minnesota homeowners before recommending a scope of work.

    When should a Minnesota homeowner ask a roofer to measure?

    A quick bundle calculation can be useful for a small, simple area. It becomes less reliable when the number is meant to guide an actual repair or replacement. Ask a roofer to measure when the roof has multiple planes, a steep slope, valleys, dormers, or several penetrations for vents, chimneys, or other equipment. Each feature changes the surface area, the cuts, or the materials needed to finish the work properly.

    Visible damage is another reason to move beyond a calculator. Missing shingles, leaks, lifted edges, damaged flashing, or storm-related damage may affect more than the area you can see from the ground. A measurement visit can help identify whether the work is limited to a repair or whether a larger section needs attention. Referred Restoration provides free roof inspections and honest assessments before recommending a solution.

    Get the product and coverage details first

    Do not assume every bundle covers the same area. Three-tab, architectural, and specialty shingles can have different packaging and coverage instructions. If you are unsure which product is already on the roof, or which product is appropriate for a repair, bring the package information to the inspection when possible. The manufacturer label or product data should be the final reference for coverage, not a generic three-bundles-per-square shortcut.

    This is especially important when a small repair must match an existing roof. A roofer can look at the roof layout, identify the affected areas, and account for supporting materials rather than estimating only the visible shingle field.

    Measure before a full replacement

    For a complete replacement, professional measurement is the safer starting point. The estimate should account for roof pitch, waste from cuts, valleys and hips, penetrations, and the scope of the existing roof work. Roof complexity and project scope affect the required work, so a 90-square-foot footprint does not automatically translate into a final order quantity.

    For more context on the larger decision, see this asphalt shingle replacement guide. If installation is next, the Minnesota roof installation guide explains what homeowners can expect from the process.

    Contact Referred Restoration online

    Frequently Asked Questions

    How many square feet do three bundles of shingles cover?

    Three standard asphalt shingle bundles typically cover about 100 square feet, also called one roofing square. For a 90-square-foot area, that makes three bundles a reasonable starting point only when the product label confirms similar coverage and the roof is simple. Check the manufacturer’s stated coverage before relying on the shortcut.

    How do I calculate bundles for a 20-by-20 roof?

    A 20-by-20 roof area is 400 square feet before accounting for pitch, which equals four roofing squares. A common planning shortcut is three bundles per square, but the actual quantity depends on the roof’s measured surface area, shingle type, packaging, and waste. A sloped roof is not measured like a flat rectangle.

    Does roof pitch change the number of bundles I need?

    Yes. A steeper roof has more surface area than its footprint suggests, and complex layouts create more cuts. Valleys, hips, dormers, and roof penetrations can also increase waste. If you are unsure of the pitch or the roof has several planes, a professional measurement is safer than applying a flat-area estimate.

    What should I check before buying shingles?

    Read the product label for coverage per bundle and confirm whether the package is for three-tab or architectural shingles. A complete material plan may also need underlayment, fasteners, sealant, starter materials, and ridge caps. For a damaged or replacement roof, an inspection can identify hidden work that a bundle calculation cannot show.

    Get started with a more accurate roof assessment

    Bundle math gives you a useful starting point, but roof pitch, layout, product coverage, and waste can change the final material needs. A professional measurement can help you move forward with clearer information, especially when the roof is complex or you are unsure what the existing system requires. Referred Restoration offers free roof inspections and honest assessments for Minnesota homeowners.

    Contact Referred Restoration online or call (763) 726-4245 to schedule an inspection or request an assessment.

  • How to Measure for Replacement Windows

    How to Measure for Replacement Windows

    Learning how to measure for replacement windows starts with more than one width and height. Each opening can be slightly different because homes settle, frames shift, and previous work may have changed the trim or jambs. Measure the opening at several points, record the smallest clear dimensions, check the depth and condition, and have the measurements verified before ordering a new window.

    Contact Referred Restoration online or call (763) 726-4245 to discuss a window measurement and inspection.

    Homeowner and window installer measuring a replacement window opening in a Minnesota home

    A careful measurement gives an installer useful information, but it does not replace an assessment of the existing window system. The correct replacement method depends on whether the existing frame stays in place, whether the opening has moisture damage, and how the new unit will connect to the home’s weather barrier. Once the opening is understood, compare frame, glass, and operating-style considerations in this Minnesota house-windows selection guide.

    Short answer: Measure the clear width at the top, middle, and bottom of the opening. Measure the clear height at the left, center, and right. Record the smallest width and smallest height, then measure the jamb depth and compare the two diagonal measurements to check whether the opening is square. Repeat this process for every window. Do not order from one rough measurement alone.

    What Tools Do You Need to Measure a Window?

    Use simple tools that make repeatable measurements easier:

    • A rigid metal tape measure that shows small increments clearly
    • A pencil and a worksheet, notebook, or phone note for each opening
    • A small level to check whether the sill and head are reasonably level
    • A straightedge or framing square when the opening is accessible
    • A flashlight for looking into the jamb, sill, and corners
    • A helper when a window is wide, tall, or difficult to reach safely

    Do not lean out of an upper-story window or climb onto a roof to take an exterior measurement. Record what can be measured safely from inside, then tell the installer which dimensions still need to be confirmed. Safety matters more than completing a worksheet.

    How Do You Measure the Width of a Replacement Window?

    Measure the clear opening from side to side, not just the visible glass or the outside edge of the decorative trim. The exact reference points depend on the replacement method, so note whether you measured between the existing jambs, the frame, or a rough opening that has been exposed.

    Take three width measurements

    1. Place the tape across the opening near the top.
    2. Measure across the middle.
    3. Measure across the bottom, close to the sill.

    Write down all three numbers. Compare them and use the smallest clear width as the cautious planning dimension. A smaller measurement can reveal a bowed jamb or an opening that narrows in one area. Do not average the three numbers and assume the window will fit. The installer may need to identify why the opening changes before selecting a unit or deciding whether the frame needs preparation.

    If interior trim blocks the jamb, do not guess where the framing ends. Note that the trim remains in place and ask whether it should be removed for a final measurement. A pocket or insert replacement may use the existing frame, while a full-frame replacement may require a different set of dimensions after the old unit and trim are removed.

    How Do You Measure the Height of a Replacement Window?

    Height measurements show whether the opening is consistent from one side to the other. Measure from the same bottom reference point each time, such as the top of the sill or the bottom of the clear opening, and use the same top reference point for every reading.

    Take three height measurements

    1. Measure on the left side of the opening.
    2. Measure through the center.
    3. Measure on the right side.

    Record the three readings and identify the smallest clear height. Do not measure only the movable sash, the screen, or the finished glass. Those parts describe the existing window, not necessarily the space available for a replacement unit. If the sill slopes or the top of the opening is uneven, record that condition in your notes instead of hiding it in a rounded number.

    Repeat the height measurement after checking that the tape is straight and fully extended. A tape that bows, catches on a seal, or starts from a different point can make two readings look more consistent than they are. Small differences can affect shimming, leveling, and the way the sash operates after installation.

    How Do You Measure Window Depth?

    Depth describes the space from the exterior side of the existing frame or opening to the interior edge of the jamb. It helps determine whether a replacement unit can sit within the existing frame and whether the available space can accommodate the window, insulation, trim, and sealing materials.

    Measure the depth at more than one location when the opening is accessible. Check the top, side, and sill areas, and record any location where the depth changes. Include notes about interior extensions, old storm-window tracks, drywall returns, exterior casings, or other parts that may limit the replacement.

    There is no single universal depth deduction that fits every window style or installation method. Do not subtract a generic amount and treat the result as an order size. A manufacturer may specify different clearances, and an installer may recommend a pocket, full-frame, or another approach after examining the opening. Your depth notes help that decision, but professional verification should control the final unit specification.

    How Can You Tell Whether a Window Opening Is Square?

    Uneven openings are common in older homes and in openings that have experienced moisture or structural movement. Width and height alone may not show the problem. Compare the two diagonal measurements by measuring from the upper-left corner to the lower-right corner, then from the upper-right corner to the lower-left corner.

    If the diagonal measurements are close, the opening is more likely to be square. If they differ noticeably, record both numbers and do not force a replacement window into the opening. A professional can determine whether the difference is within the installation tolerance for the selected unit or whether the opening needs correction first.

    Also look for:

    • A sill that slopes, flexes, or feels soft under light pressure
    • Gaps, cracks, or daylight around the frame
    • Water staining, peeling finishes, or recurring dampness
    • Rot, swelling, or deteriorated wood near the sill and corners
    • Cracked masonry, damaged siding, or failed exterior sealant
    • A sash that binds even when the opening appears straight

    These observations are part of the measurement record. A window can have accurate dimensions and still need a different repair or preparation plan because the surrounding opening is not sound. If the frame is sound but the issue appears limited to hardware, seals, or a localized opening problem, review the window repair and replacement service options in Rogers before choosing a full replacement.

    Should You Measure a Window from the Inside or Outside?

    For many homeowners, the safest starting point is the interior opening. It provides useful width, height, jamb-depth, and condition information without requiring a ladder or roof access. Exterior measurements can add context, especially when brick, siding, exterior casing, or a storm window affects the opening, but they should not replace an interior inspection or professional field measurement.

    The correct reference points also depend on the type of replacement:

    • Insert or pocket replacement: The existing frame usually remains in place, so the clear space inside that frame is important.
    • Full-frame replacement: The existing window and more of the surrounding assembly may be removed, so the final opening can be different from the visible interior dimension.
    • Basement replacement: The installer may need to consider the window well, emergency escape requirements, and the condition of the masonry or framing.
    • Bay, bow, or specialty window: Several connected openings and supporting details make a professional field check especially important.

    When the installation method has not been decided, label your notes as preliminary. That prevents a rough interior measurement from being mistaken for a final order size.

    Contact Referred Restoration online to have the opening condition and replacement approach reviewed before you order.

    How Should You Record Window Measurements?

    Give every opening its own label, such as living room south, bedroom 2, or kitchen above sink. A simple record makes it easier to compare measurements and prevents one window’s dimensions from being applied to another.

    RecordWhat to write downWhy it matters
    WidthTop, middle, and bottom readings, plus the smallest widthShows whether the opening narrows or bows
    HeightLeft, center, and right readings, plus the smallest heightShows whether the sill or head is uneven
    DepthJamb depth at more than one pointHelps identify fit and trim limitations
    DiagonalsUpper-left to lower-right and upper-right to lower-leftHelps reveal an opening that is out of square
    ConditionMoisture, rot, cracks, soft wood, failed sealant, or damaged sidingSignals preparation or repair needs
    OperationSticking, failed locks, fogged glass, or sash movementConnects the measurement to the window problem

    Photographs can help too, especially when they show the full opening, the sill, the exterior transition, and any visible damage. Keep the opening label in the photo filename or note, but do not rely on a photo to establish a dimension. The tape measure and written record remain the primary evidence.

    Why Does Every Window Need Its Own Measurement?

    Windows in the same room can have different dimensions, and windows on different sides of a home can have different exposure and weathering. An addition may have been framed separately from the original house. One opening may have been repaired, while another still has its original trim. Even paired windows can differ enough to require separate specifications.

    Measure each opening rather than measuring one and copying the result. This is particularly important when the home is older, the exterior has been remodeled, or several window styles are present. A complete record also helps an installer group similar openings without assuming that they are identical.

    What Minnesota Conditions Should You Consider?

    Minnesota windows need to manage cold winters, wind, snow, rain, and freeze-thaw movement. Measurement and installation are connected because the new unit must fit the opening while allowing the installer to create a durable transition to the wall and exterior drainage layers.

    During an inspection, ask how the plan addresses:

    • Air sealing around the frame to limit drafts
    • Flashing and sill protection to direct water away from the opening
    • Insulation that fills the gap without distorting the frame
    • Exterior sealant and trim transitions exposed to precipitation
    • Interior finish details that prevent drafts and moisture from reaching the wall
    • Safe work conditions when snow, ice, or low temperatures affect access

    The U.S. Department of Energy and ENERGY STAR both emphasize that window performance depends on the complete product and its installation, not only on the glass package. Review the ENERGY STAR guidance for buying and installing replacement windows as you prepare questions for an installer.

    For local homeowners, the surrounding opening deserves the same attention as the replacement unit. Water staining near a sill, damaged siding, or a gap around the exterior casing can affect how the installation should be prepared. Identifying those conditions before ordering helps avoid surprises on installation day.

    When Should a Professional Verify the Measurements?

    Professional verification is especially important before ordering when the opening is out of square, the frame is soft or damaged, the depth changes, or the replacement method is not clear. It is also wise to schedule an assessment for upper-story windows, basement openings, bay or bow windows, and homes with recurring water intrusion.

    A professional can compare your notes with the existing assembly, inspect the condition behind the trim, and determine whether a repair, insert, or full-frame replacement is appropriate. That review also creates an opportunity to discuss the installation sequence, weather protection, and final operation before materials are selected. For a step-by-step overview of the next stage, see what residential window installation involves.

    If your measurements disagree, do not choose the smallest number from one reading and place the order. Recheck the opening, preserve all of the readings, and ask an installer to resolve the difference. The goal is not simply to find a number. It is to understand the opening well enough for the new window and its seals to perform together.

    Contact Referred Restoration online or call (763) 726-4245 for a professional window assessment in Rogers, Cottage Grove, and nearby Minnesota communities.

    Frequently Asked Questions

    How many times should I measure a replacement window opening?

    Measure the width at the top, middle, and bottom, and measure the height on the left, center, and right. Repeat any reading that seems inconsistent and keep every number in your record. The smallest clear width and height are useful planning dimensions, but an installer should verify the final specification.

    Do I measure the old window or the opening?

    Measure the opening or the existing frame, depending on the replacement method. The visible glass, sash, and screen do not necessarily describe the space available for the new unit. A professional can identify the correct reference points after determining whether the project uses an insert or full-frame approach.

    What is the rough opening?

    The rough opening is the structural space prepared for a window before the complete window assembly, trim, and finish details are installed. It may not be visible when an existing window and interior trim remain in place. Do not assume that the visible opening is the rough opening.

    Should I subtract a fixed amount from my measurements?

    Do not use a generic subtraction as a final order rule. Required clearance depends on the window product, installation method, opening condition, and the manufacturer’s instructions. Give the full set of measurements and condition notes to the installer so the correct allowance can be determined.

    Can I use one measurement for every window in my home?

    No. Measure each opening separately. Homes settle, additions may be framed differently, and previous repairs can change the dimensions or condition of individual openings. Even matching windows can have different clearances.

    Does window depth really matter?

    Yes. Depth helps show whether the selected window can fit within the existing frame and whether there is room for insulation, trim, and sealing details. A depth that changes around the opening should be documented and reviewed before the replacement is selected.

    Contact Referred Restoration online or call (763) 726-4245 to plan your replacement-window measurement and installation review.